


SwifterSwift is a collection of built-in methods which are much easier to use than the original Swift methods. They extend the functionality of the original methods, as well as properties like buttons, text fields, image views, calendars, and many others. The code to use them is much easier, so it helps to get an app up in less time, as you get built-in components with more functionalities. These methods and functions can be thought of as bootstrap components, which are much faster to use than writing the entire CSS code yourself.
In this post, we're going to build an app with an image view, text fields, and a button using SwifterSwift methods. After that, we're also going to do unit testing on the project.
The Setup
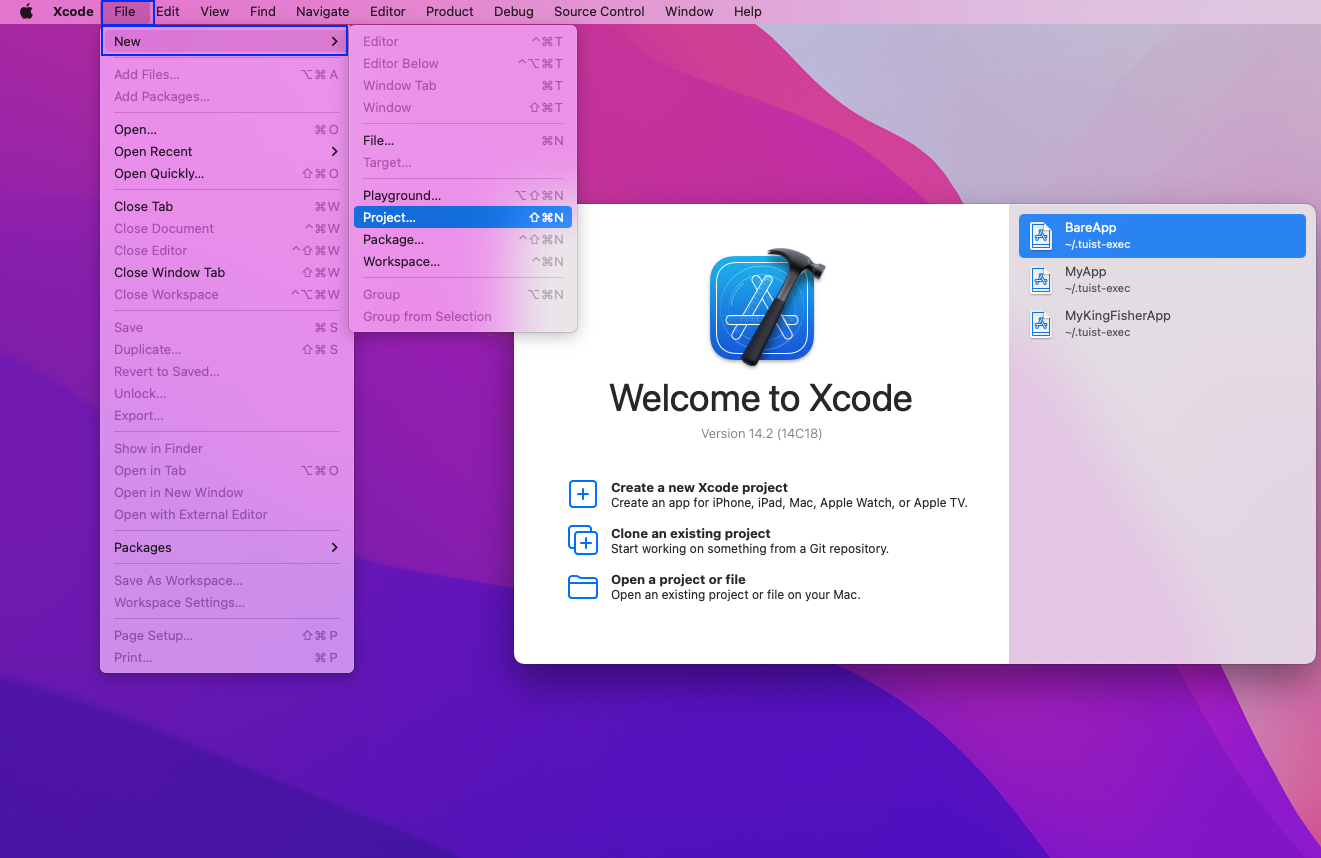
First, open Xcode and create a new project by clicking on New > Project.
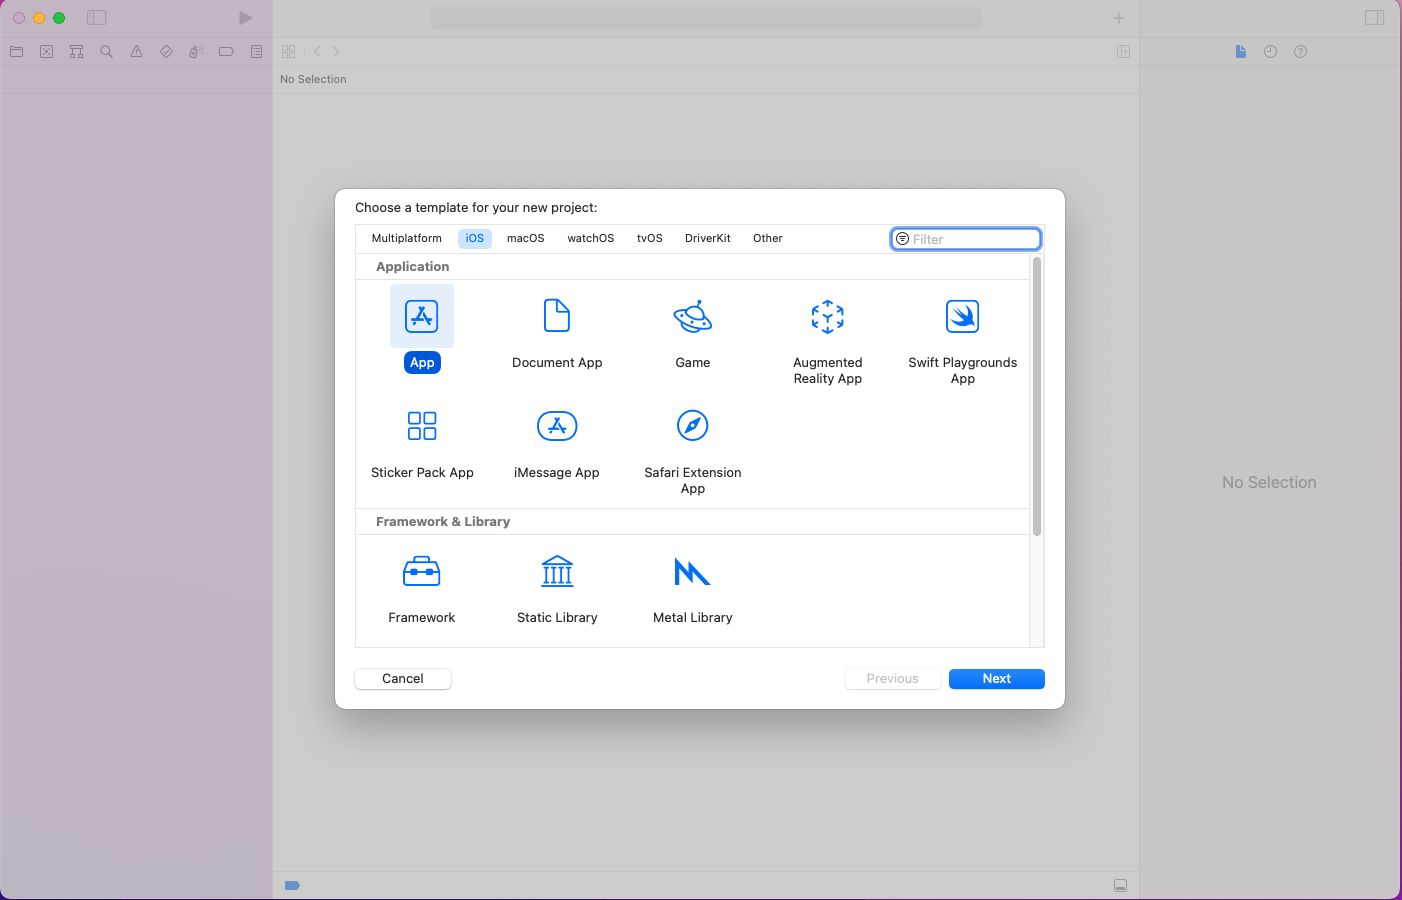
Next, a pop-up will be opened. Click on App and then the Next button.
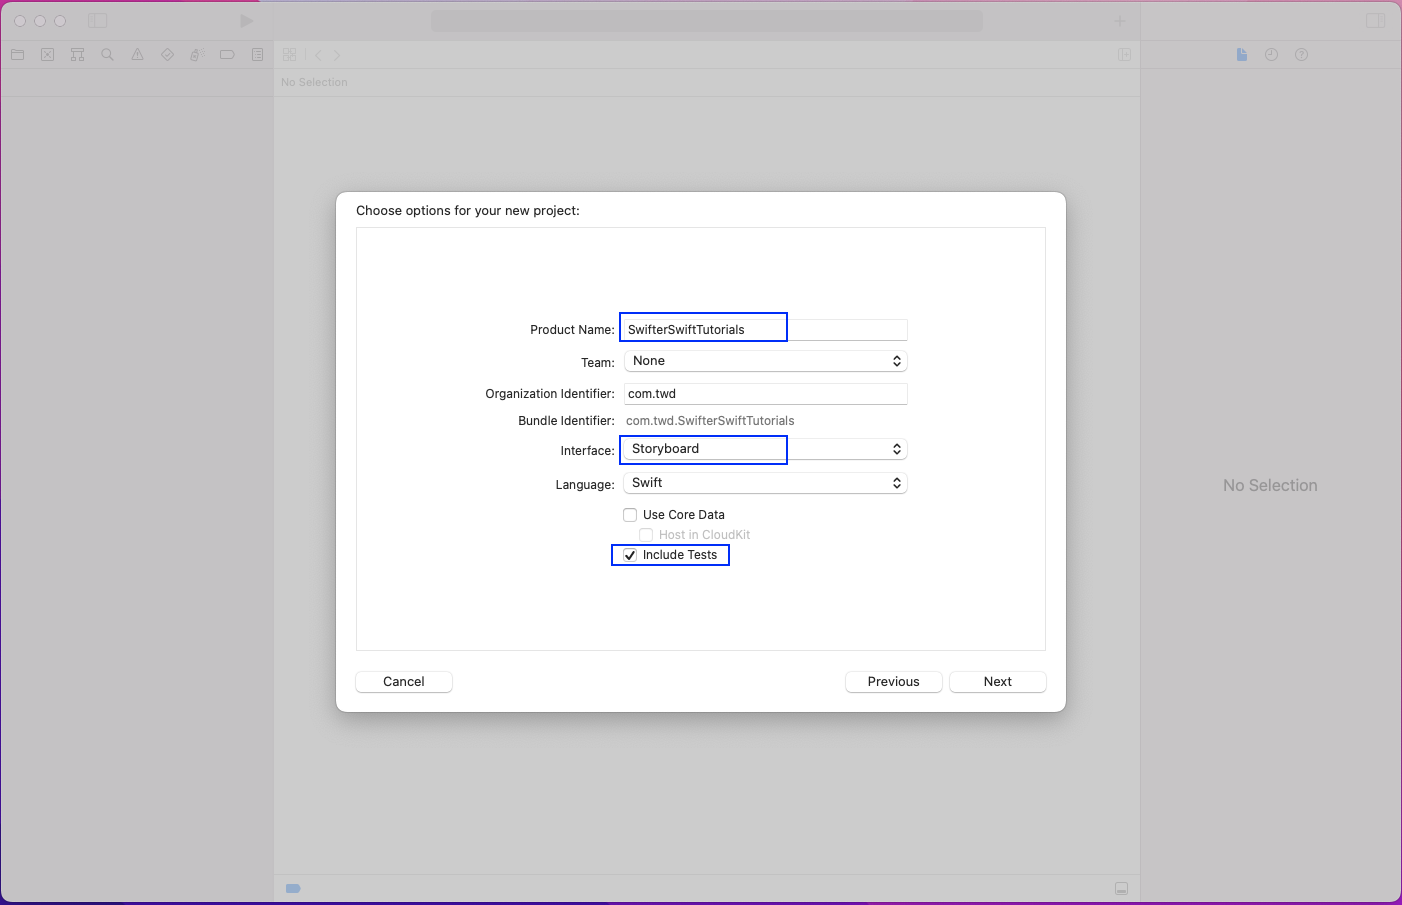
Now, give the product name, which is SwifterSwiftTutorials, in our case. The interface should be Storyboard, and we're also including the tests in our project.
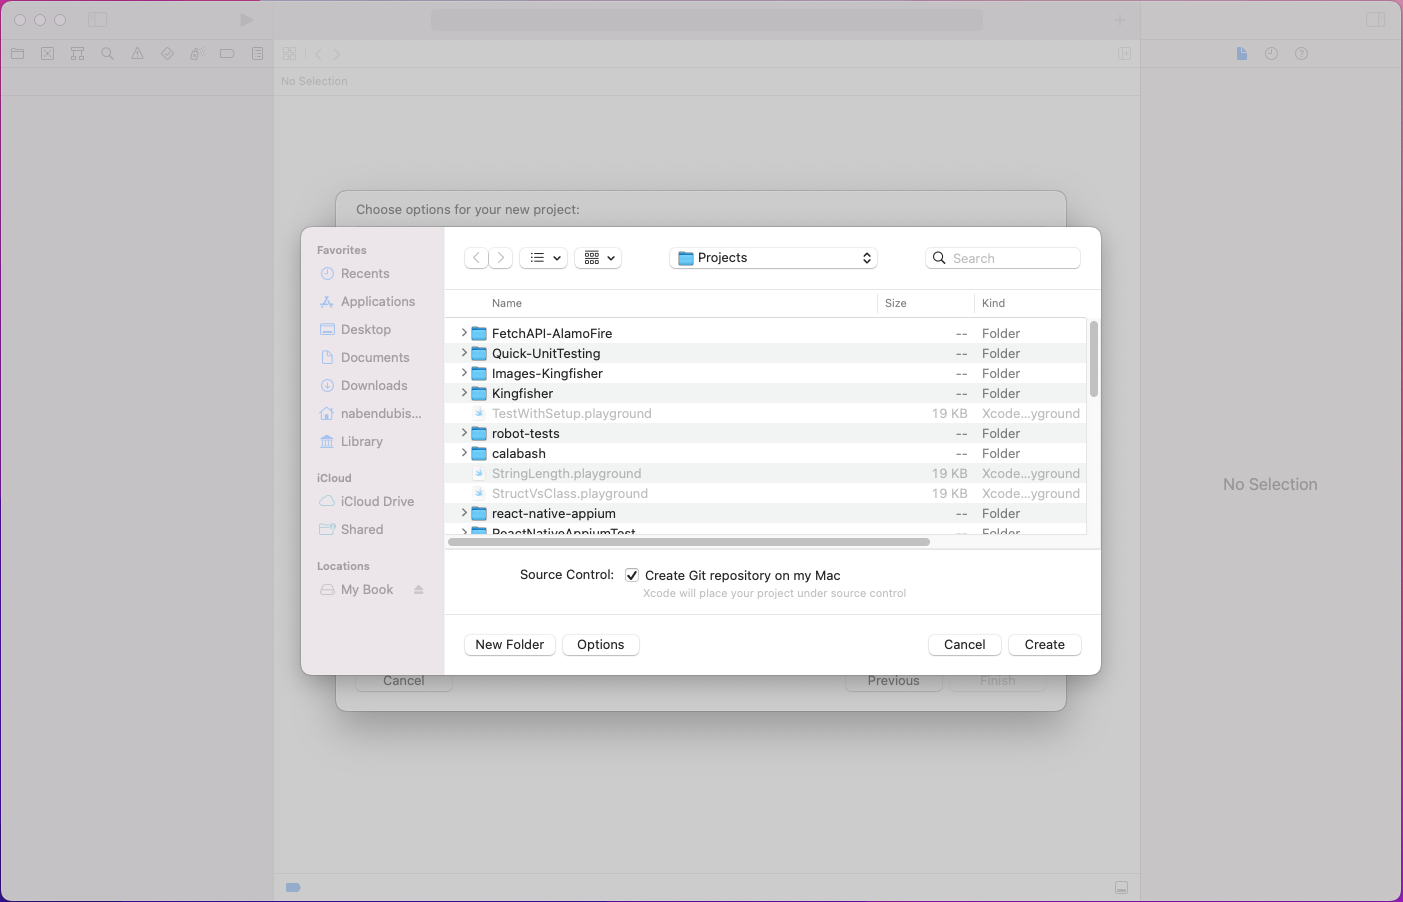
In the next pop-up, just click on the Create button.
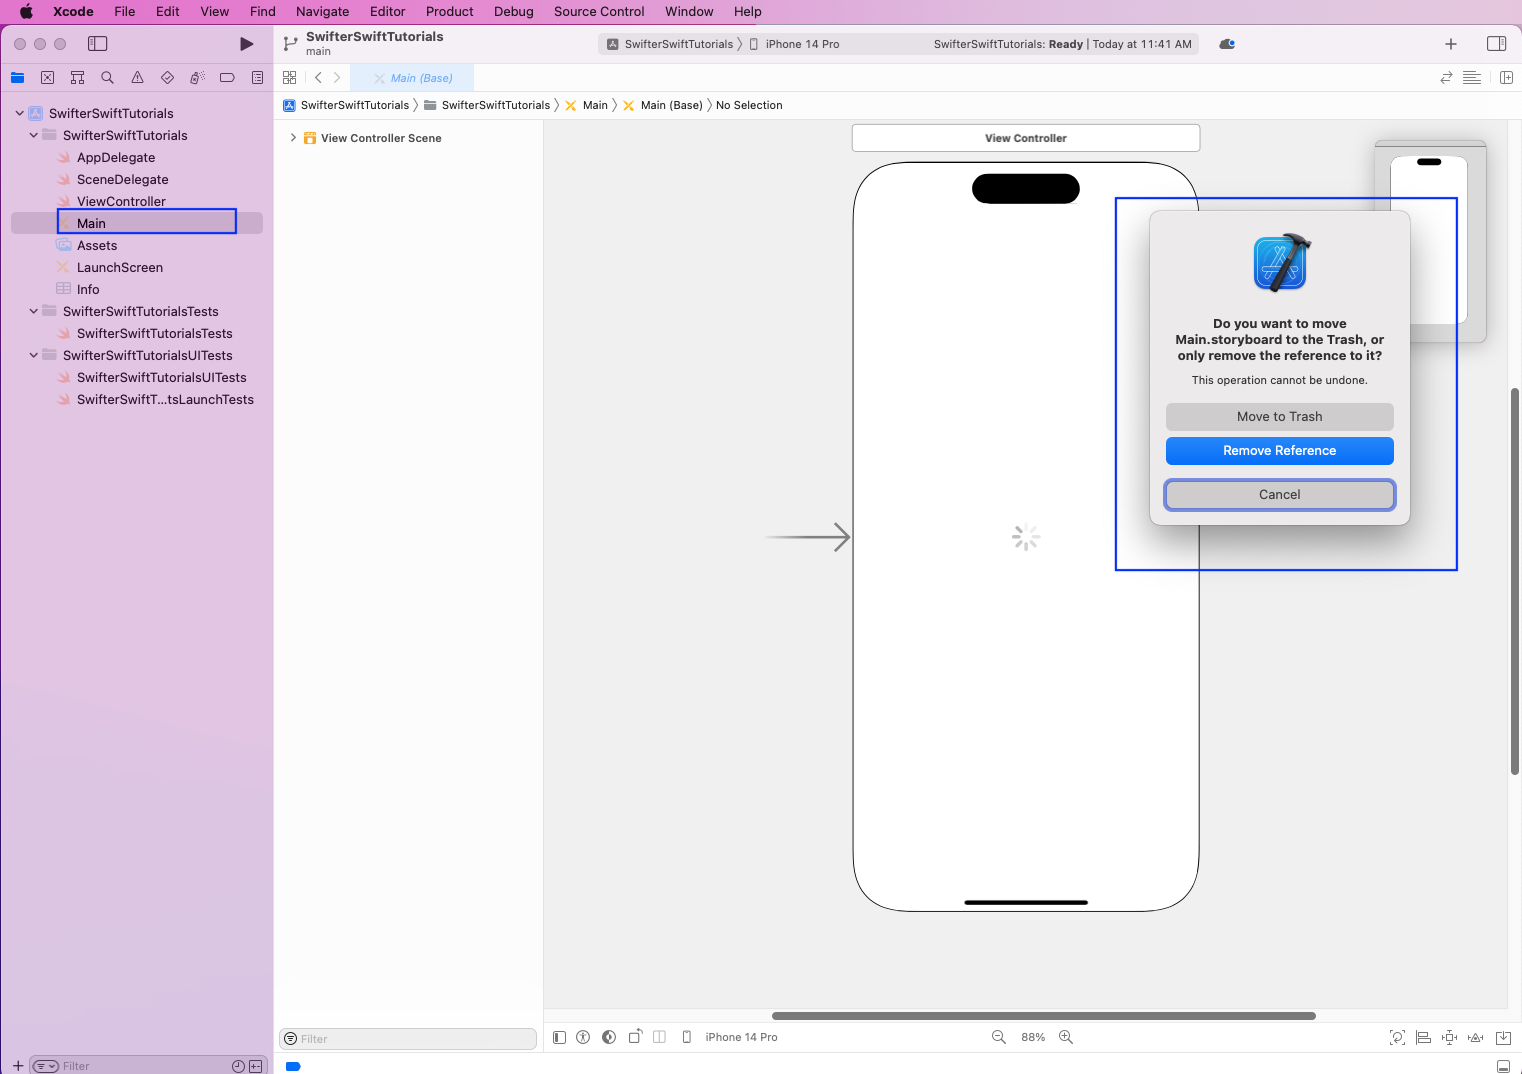
Removing Storyboard from Project
We'll remove Storyboard from the project because we're going to create fields through SwifterSwift. So, we'll remove the Main file from our project. But make sure to click on Move to Trash in the pop-up.
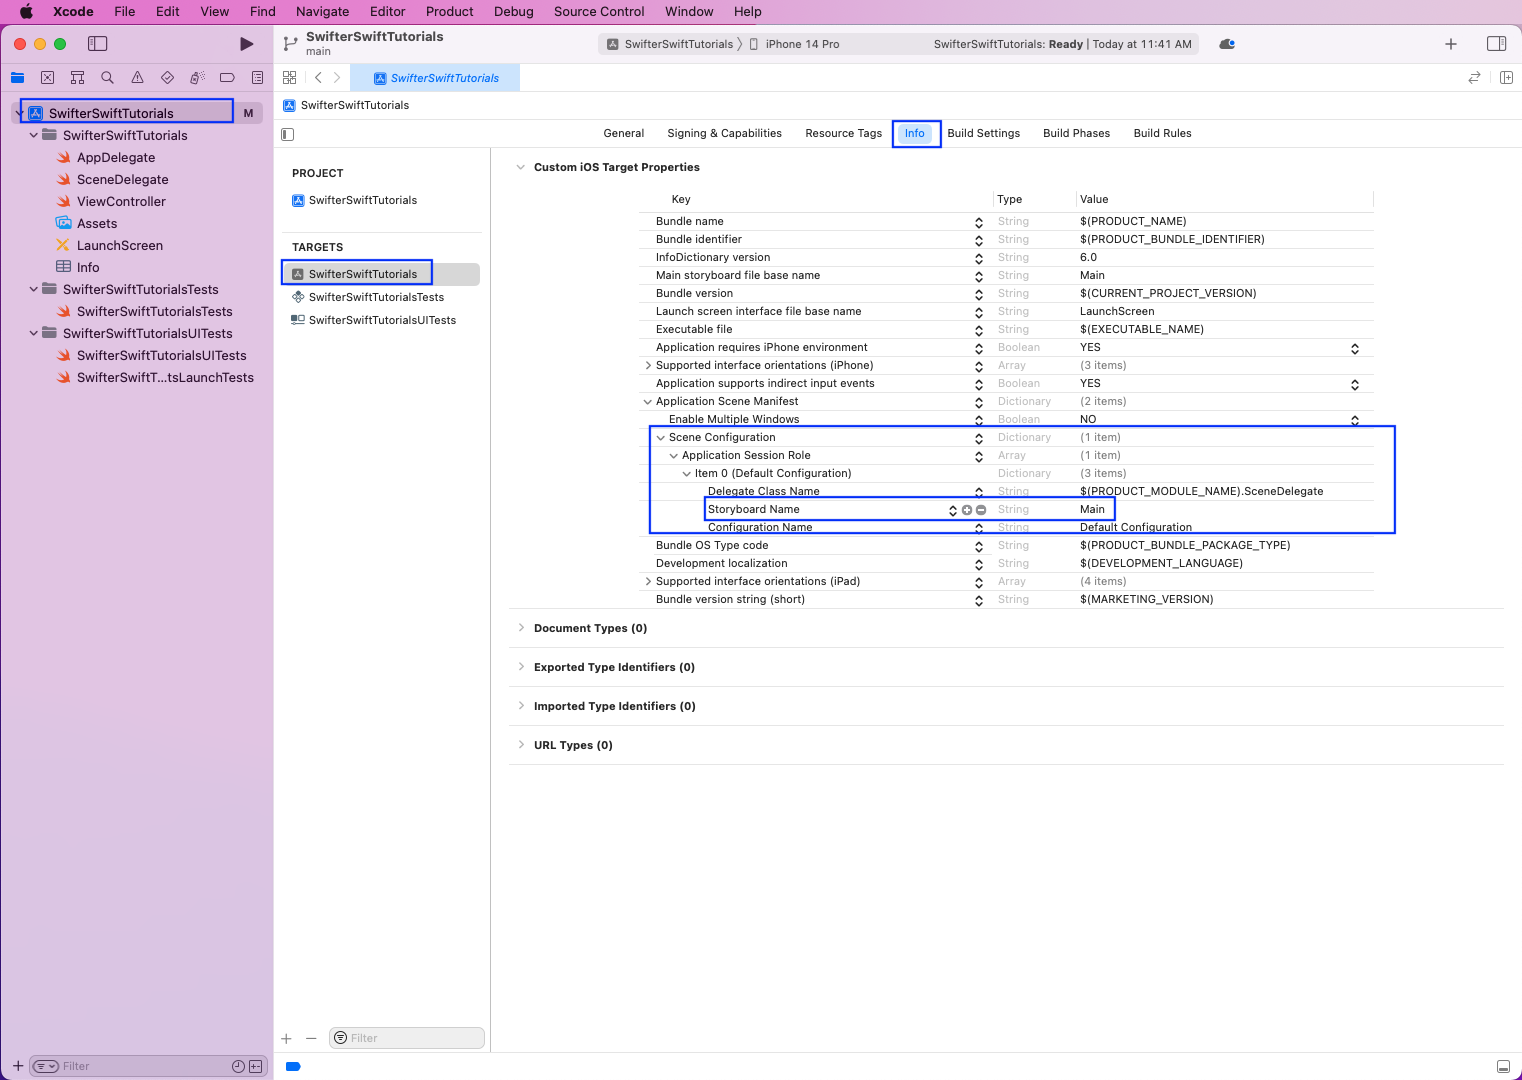
Now, first, click on the root of the project, and after that, click on SwifterSwiftTutorials in TARGETS on the opened screen. Then click on the Info tab, and after that, expand Scene Configuration. Once the Storyboard Name row is shown, click on the minus sign (-) to remove the row.
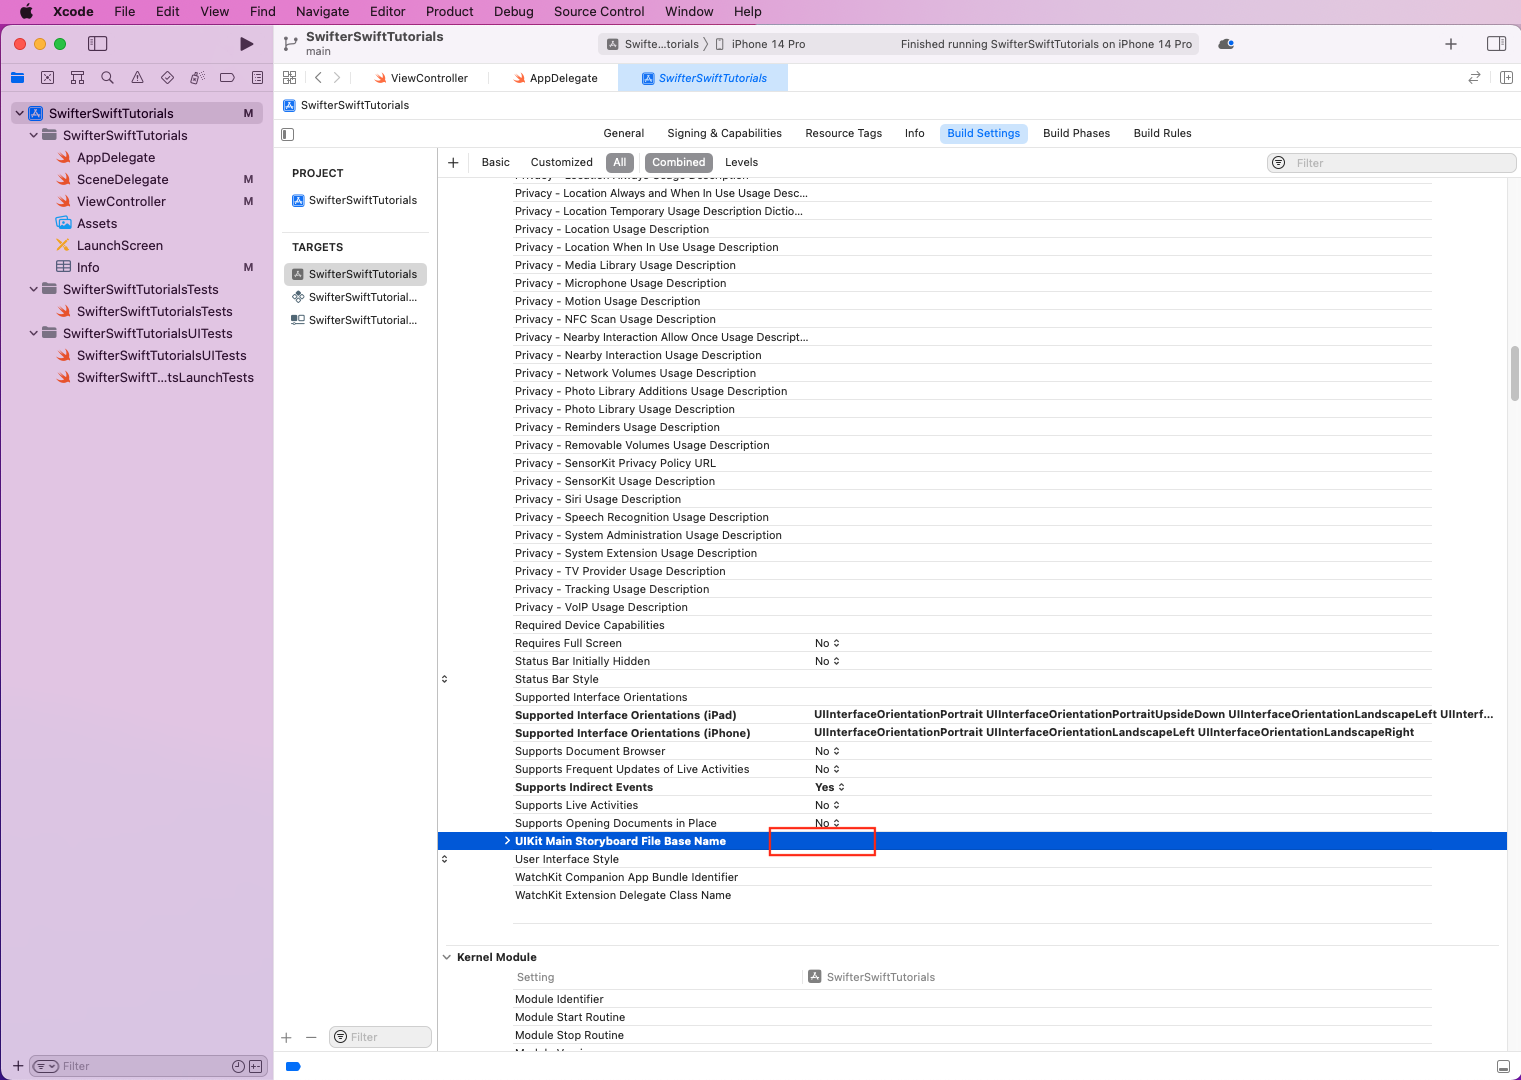
Next, click on the Build Settings tab and make sure the All and Combined sub-tabs are clicked. After that, find Info.plist Values and scroll down.

Upon scrolling down, we'll see the UIKit Main Storyboard File Base Name row with Main as value.

After that, remove the text of Main by double-clicking on it and removing it.
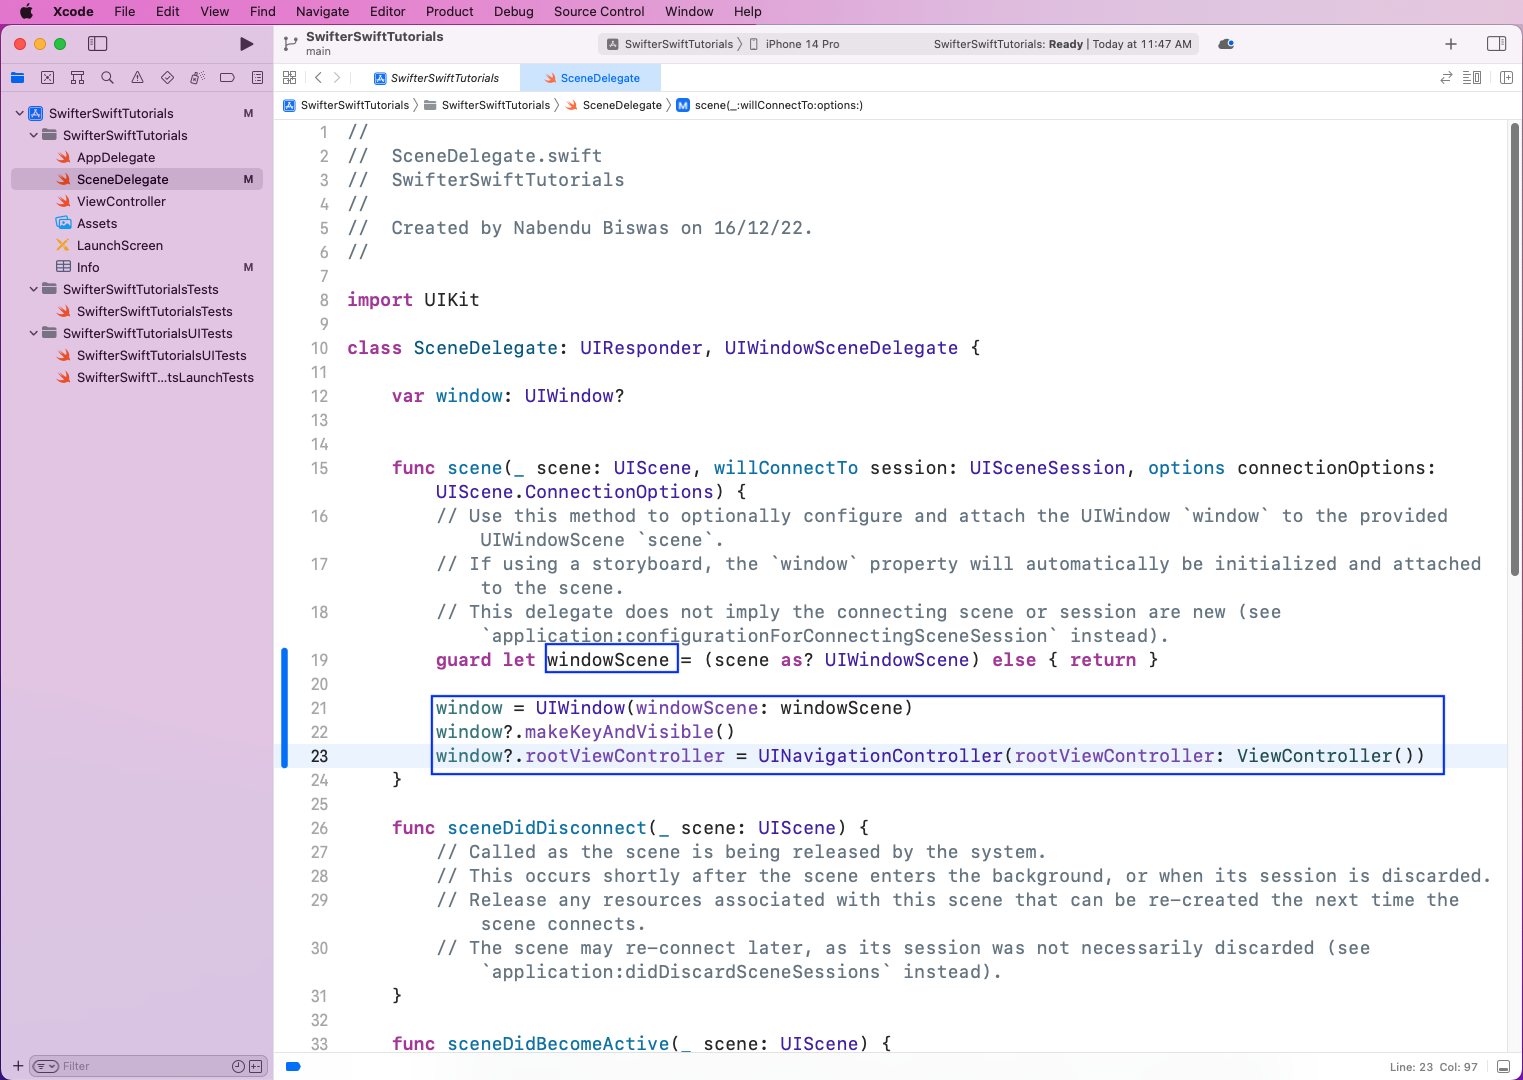
Now, in the SceneDelegate file, add the below code. Here, we've added a new windowScene, which will be used instead of the Main file.
Installing SwifterSwift
We can install SwifterSwift in a lot of ways. It also includes the pod install method. But we can also install external packages through the package manager in Xcode.
For this, we need to first go to the GitHub page of SwifterSwift and get the HTTPS link from the Code dropdown.

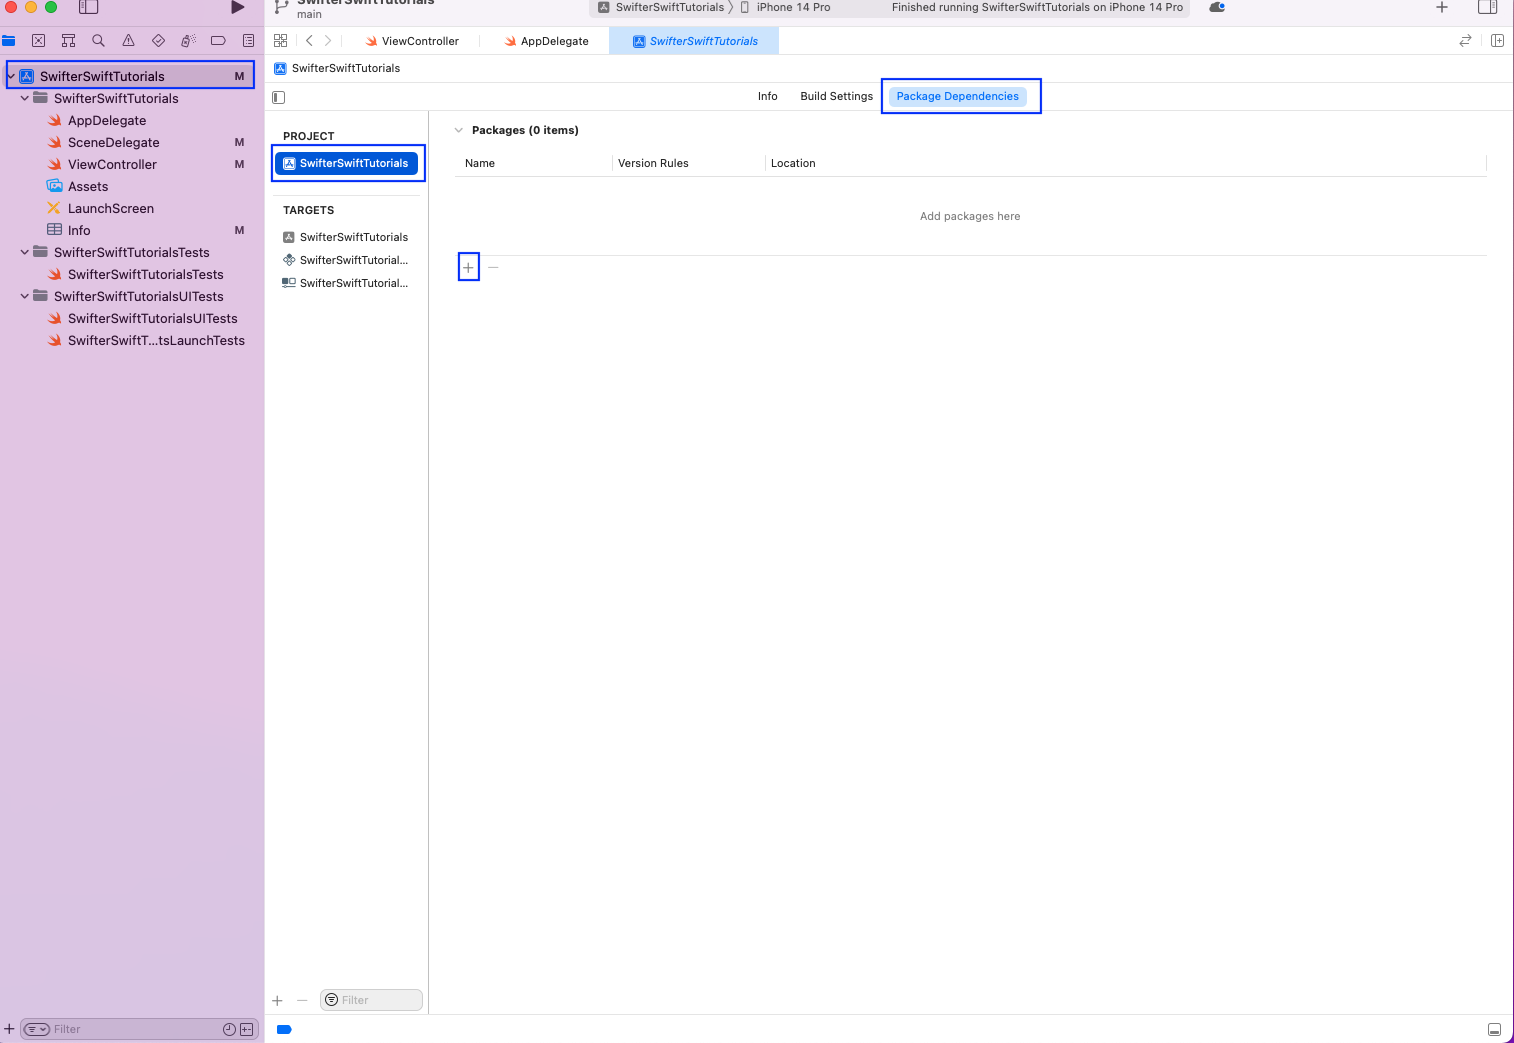
Next, go to the root directory and click on the PROJECT with the name SwifterSwiftTutorials. After that, go to the Package Dependencies tab and click on the plus (+) sign.
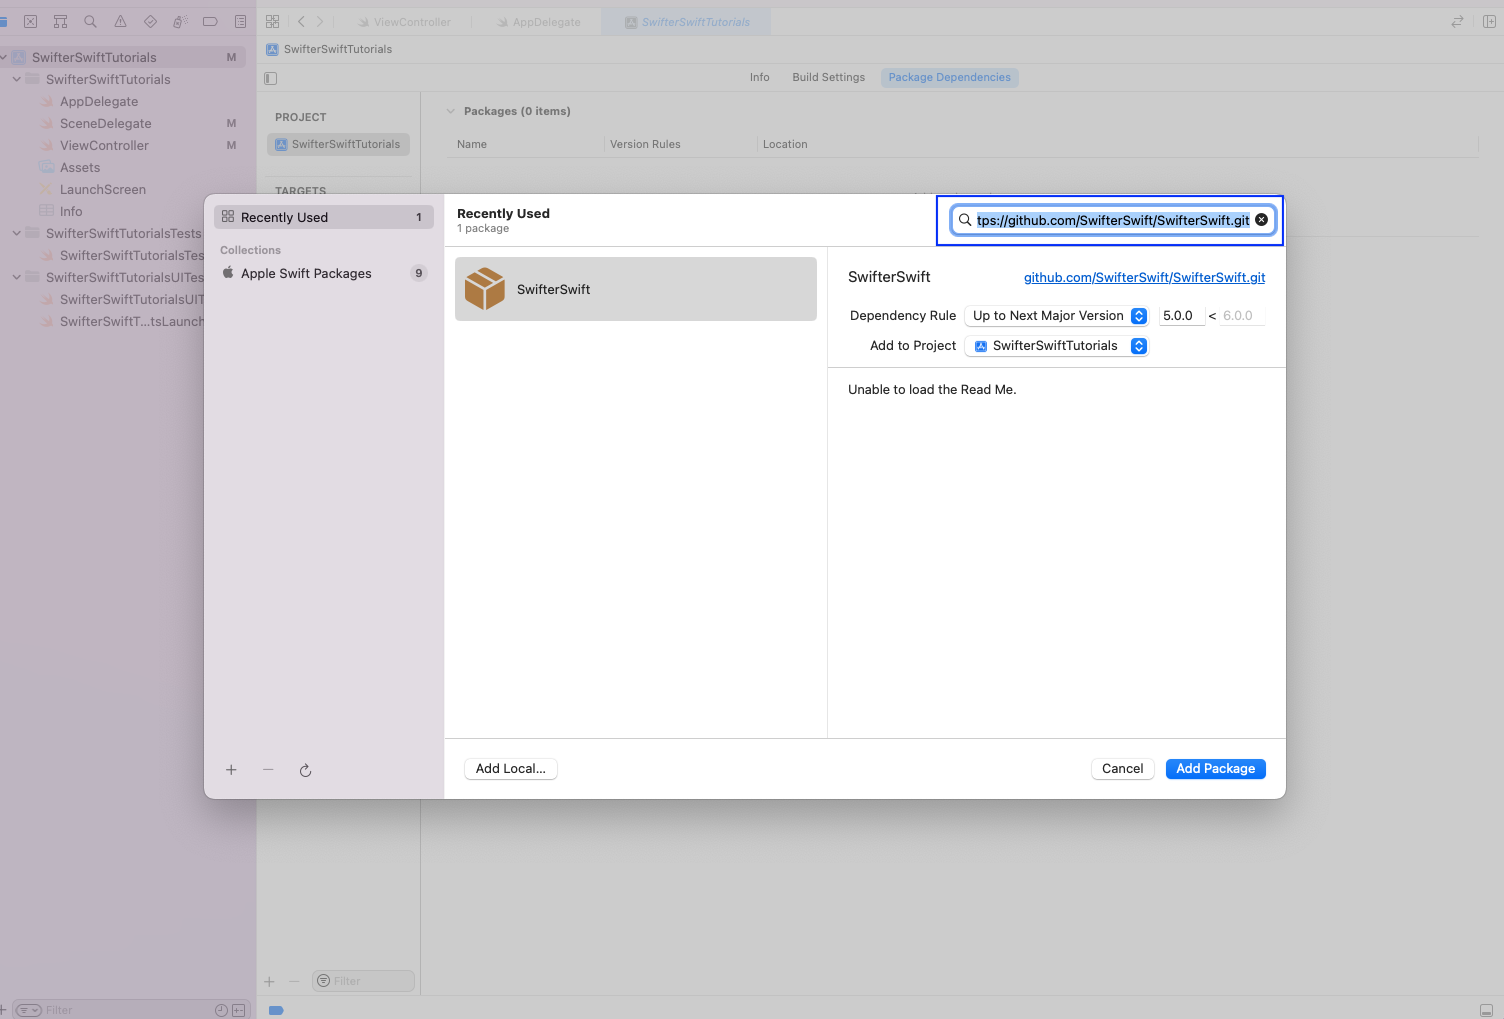
A pop-up will be opened. In the search bar, give the HTTPS link from the GitHub step earlier. Upon pressing enter, we'll get our SwifterSwift package. Now, click on the Add Package button.
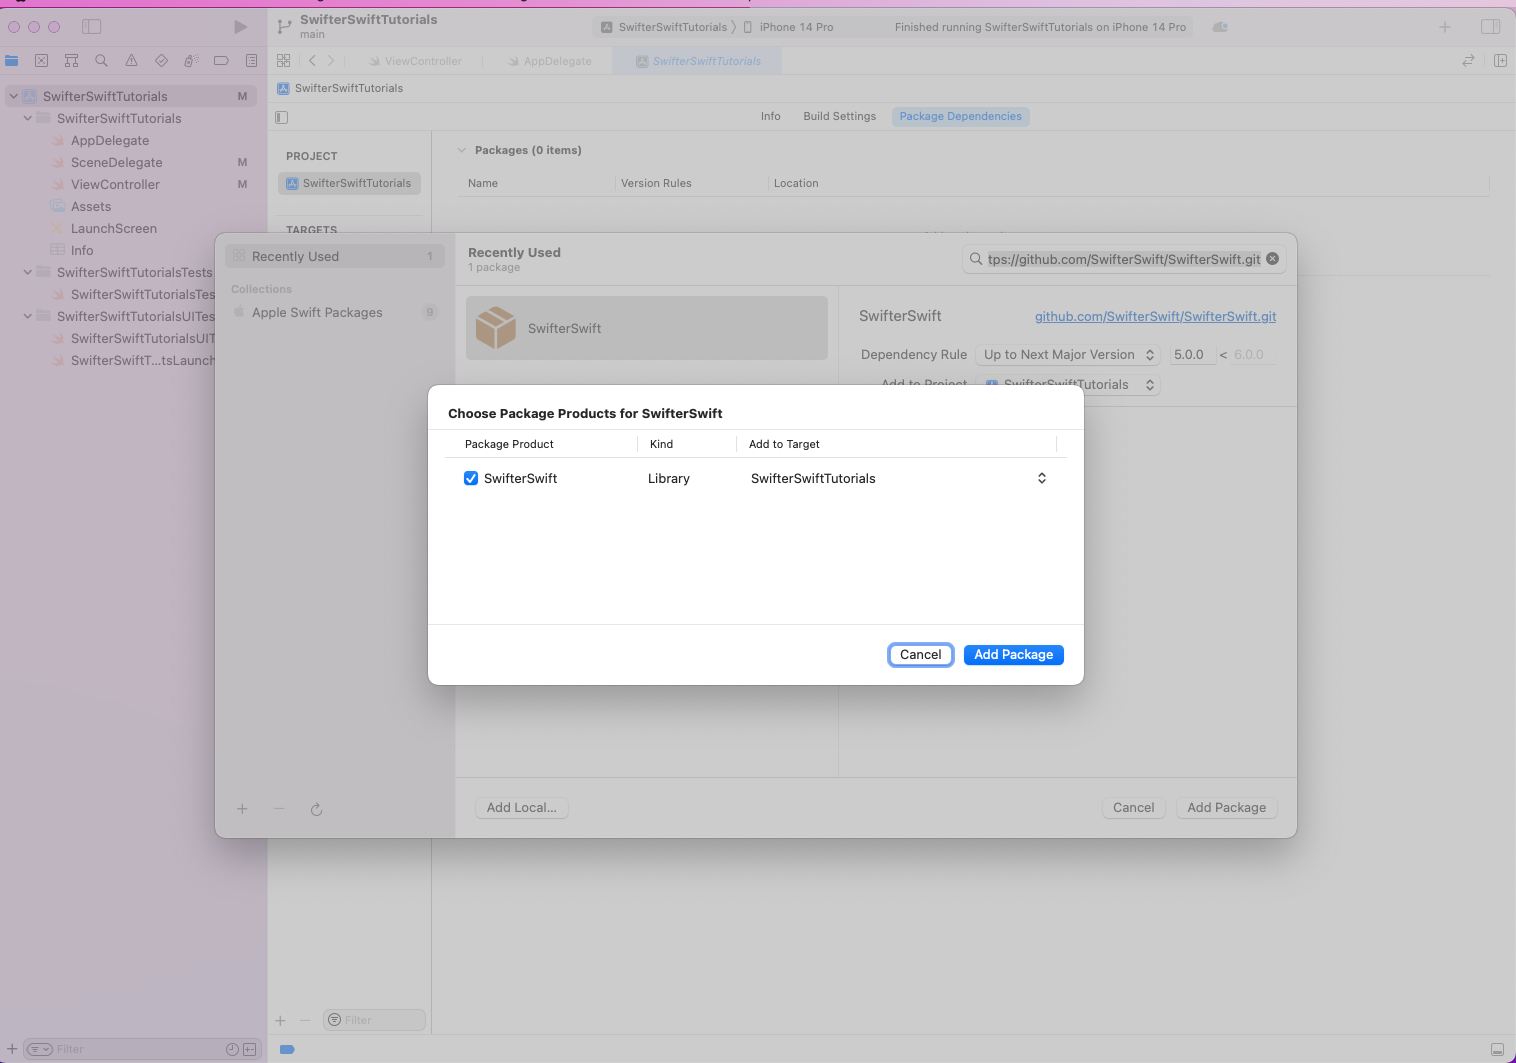
In the next pop-up, just click on the Add Package button.
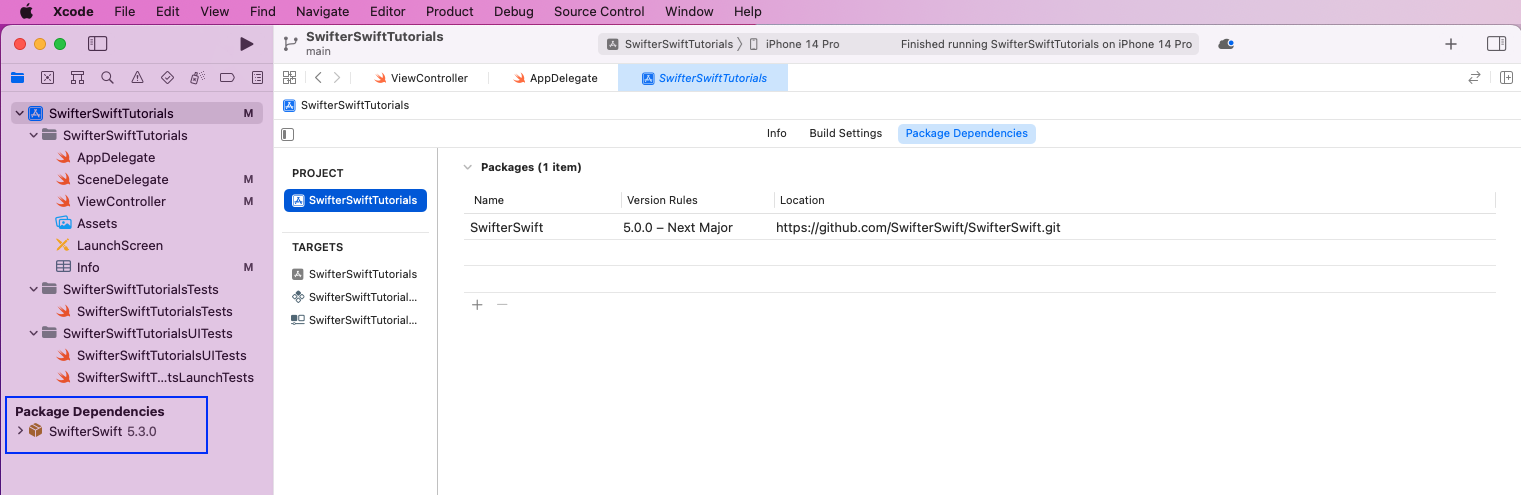
Now, in the project sidebar, we'll see Package Dependencies. And it'll show SwifterSwift along with version 5.3.0.
Project with SwifterSwift Methods
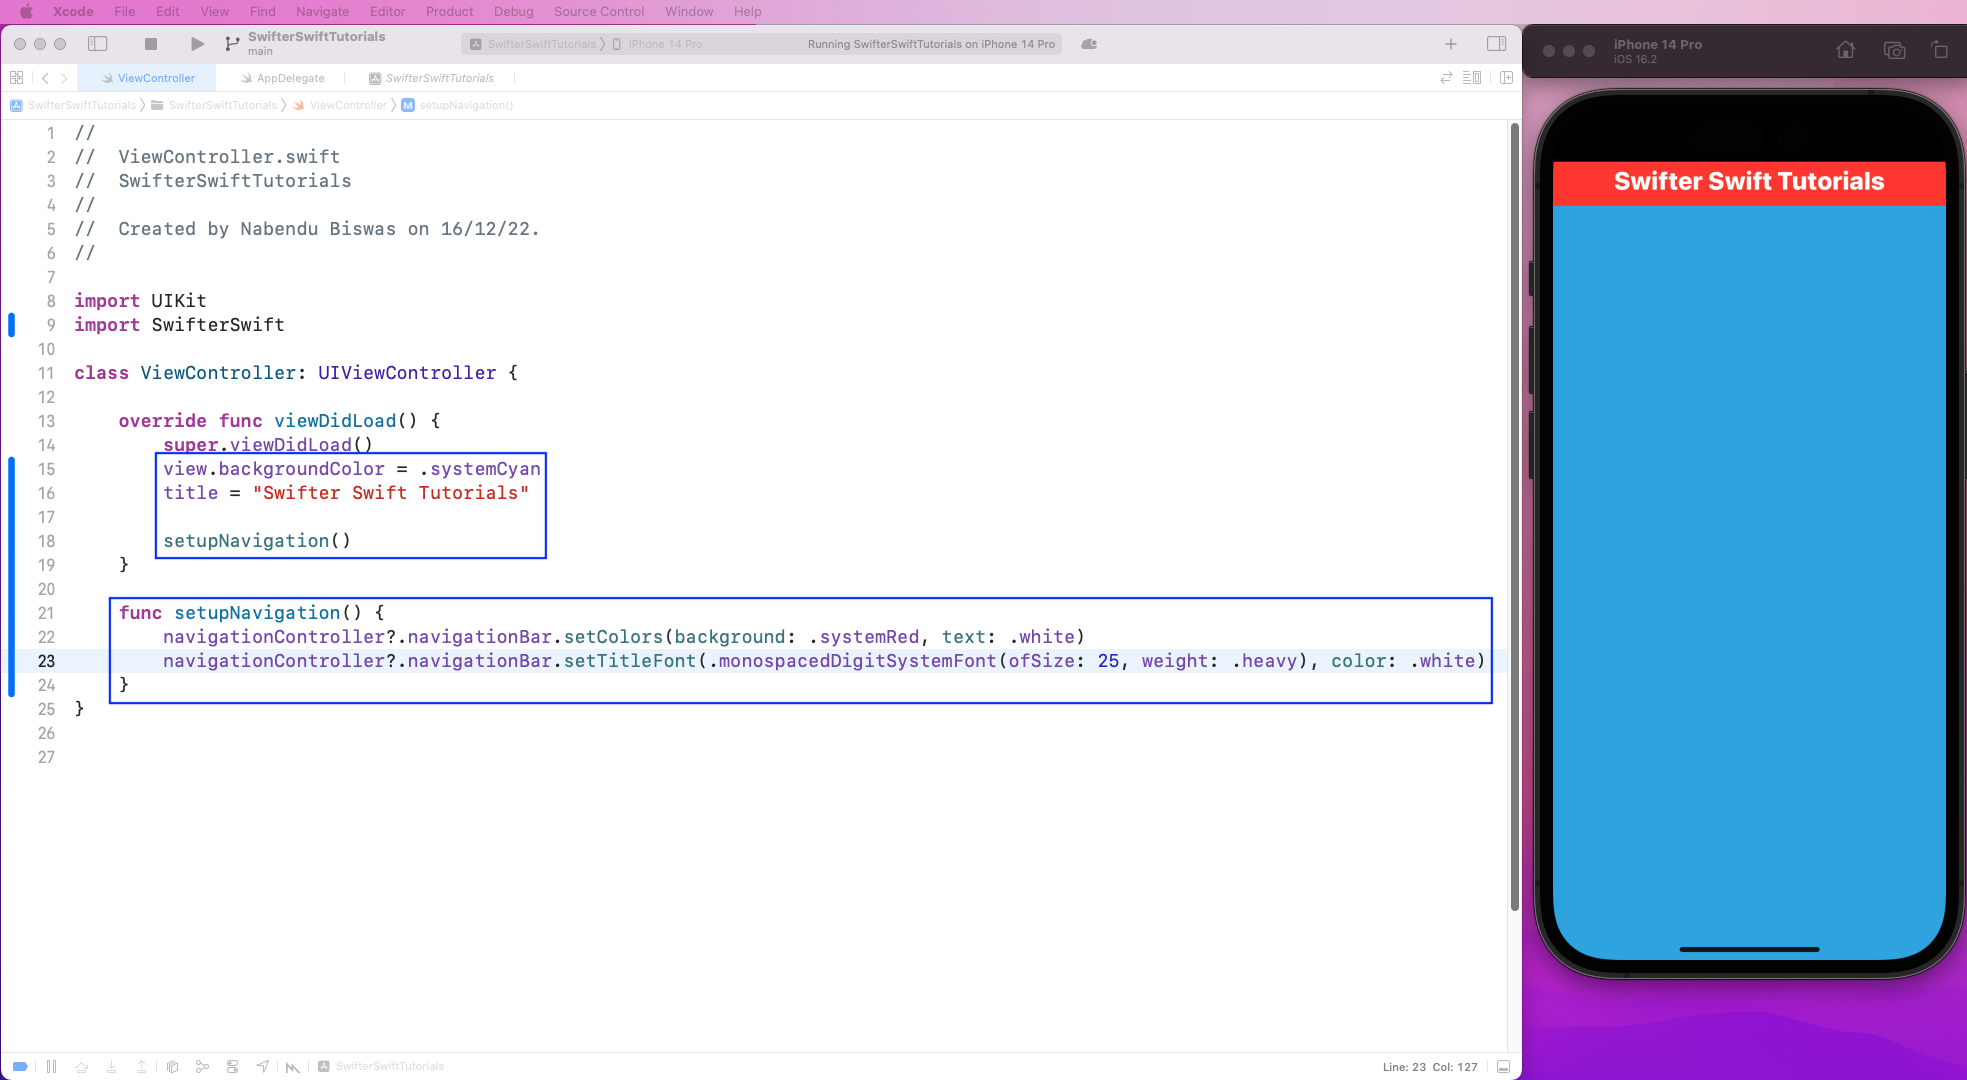
Finally, we'll create our project with SwifterSwift Methods. Here, we've first imported SwifterSwift and then given a background and a title in the viewDidLoad method. We've also called the function setupNavigation from the viewDidLoad method. In the function setupNavigation, we're using the Navigation bar from SwifterSwift. We're using the setColors and setTitleFont functions in the Navigation bar to easily set the Colors and Title font.
On running the project, everything is working fine, and we'll get a navigation bar with the required text shown in the iPhone Simulator.
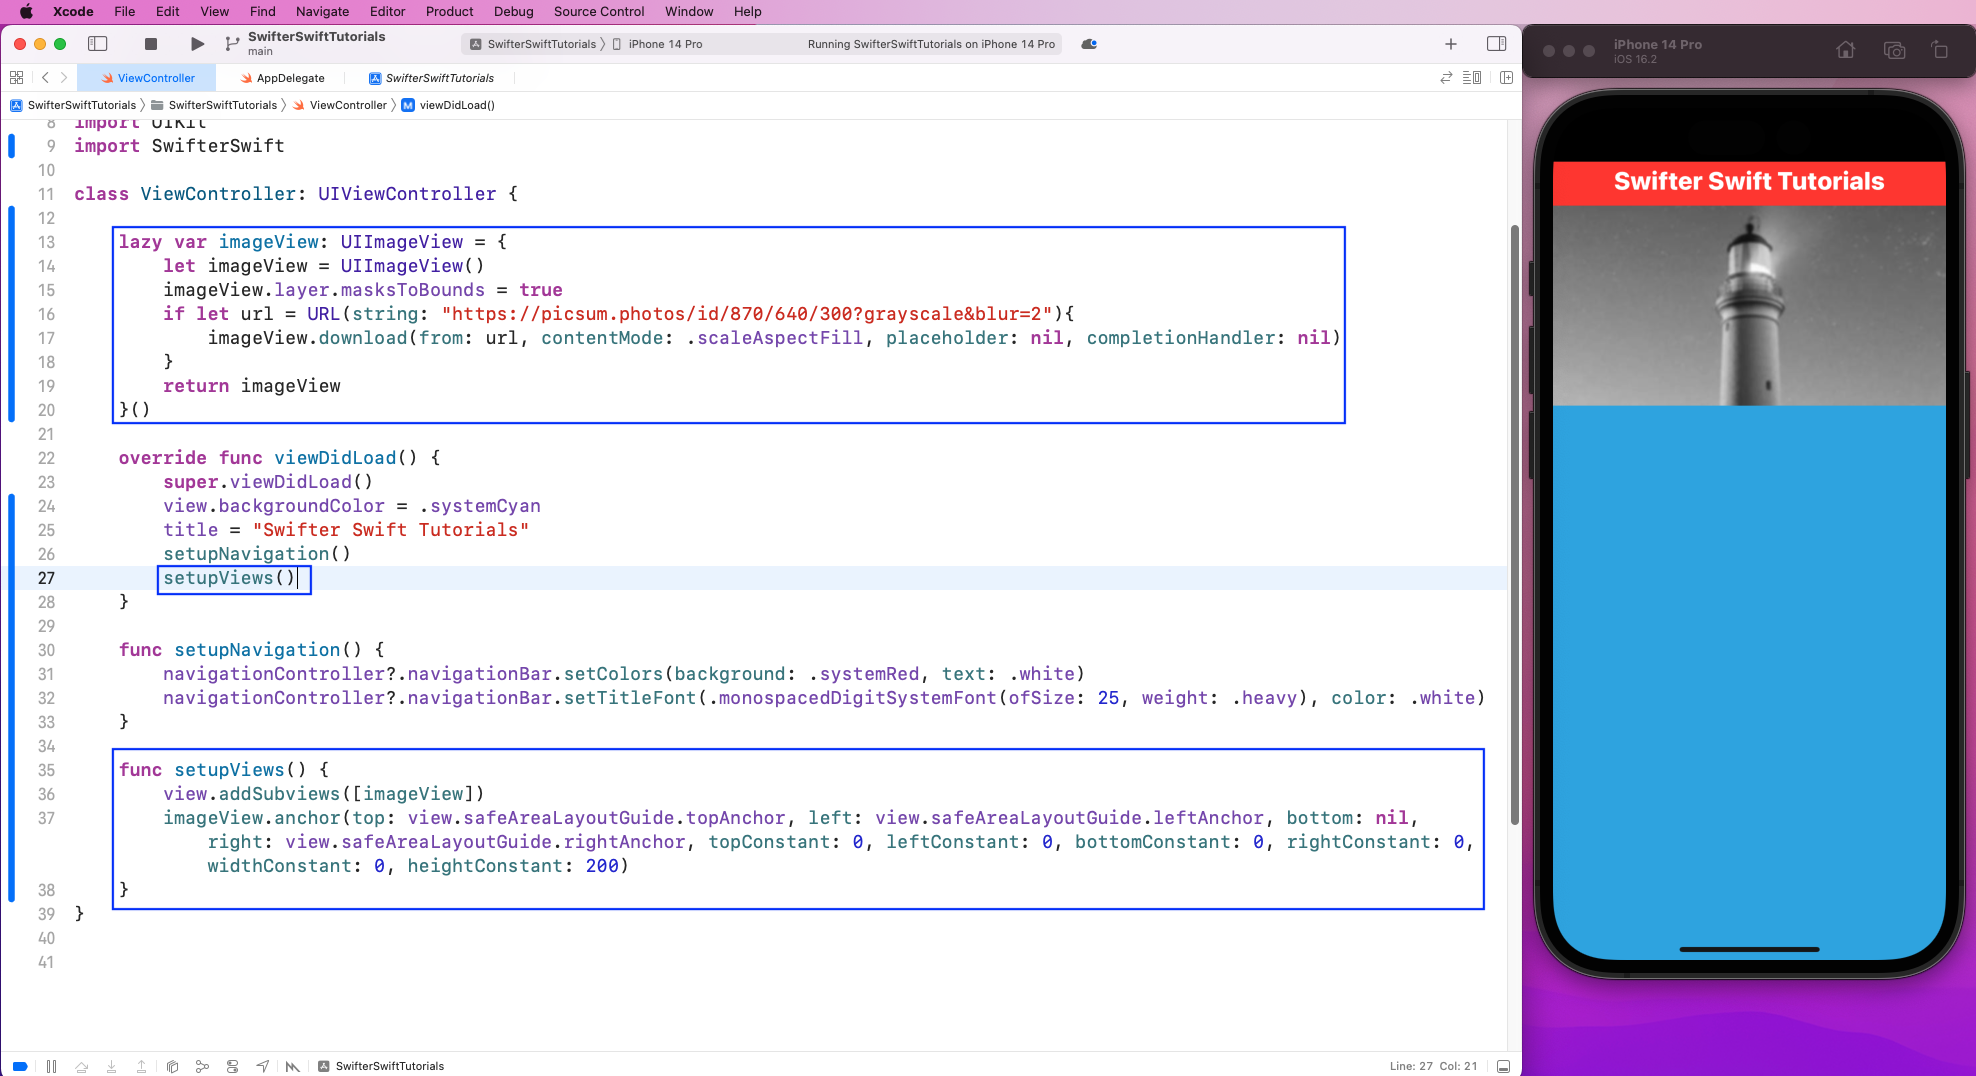
Next, we'll add an image view to our project. Here, we've first created a lazy loading function called imageView in our project. It'll get the image from an image URL and return it.
Now, we're calling a new function setupViews from the viewDidLoad method. Here, we're again using the SwifterSwift Method of addSubviews, through which we're adding the imageView first in our app. After that, we're using the SwifterSwift Method of anchor to set the image in the correct position.
On running the app, the image is being shown perfectly in our iOS Simulator.
More Fields with SwifterSwift Methods
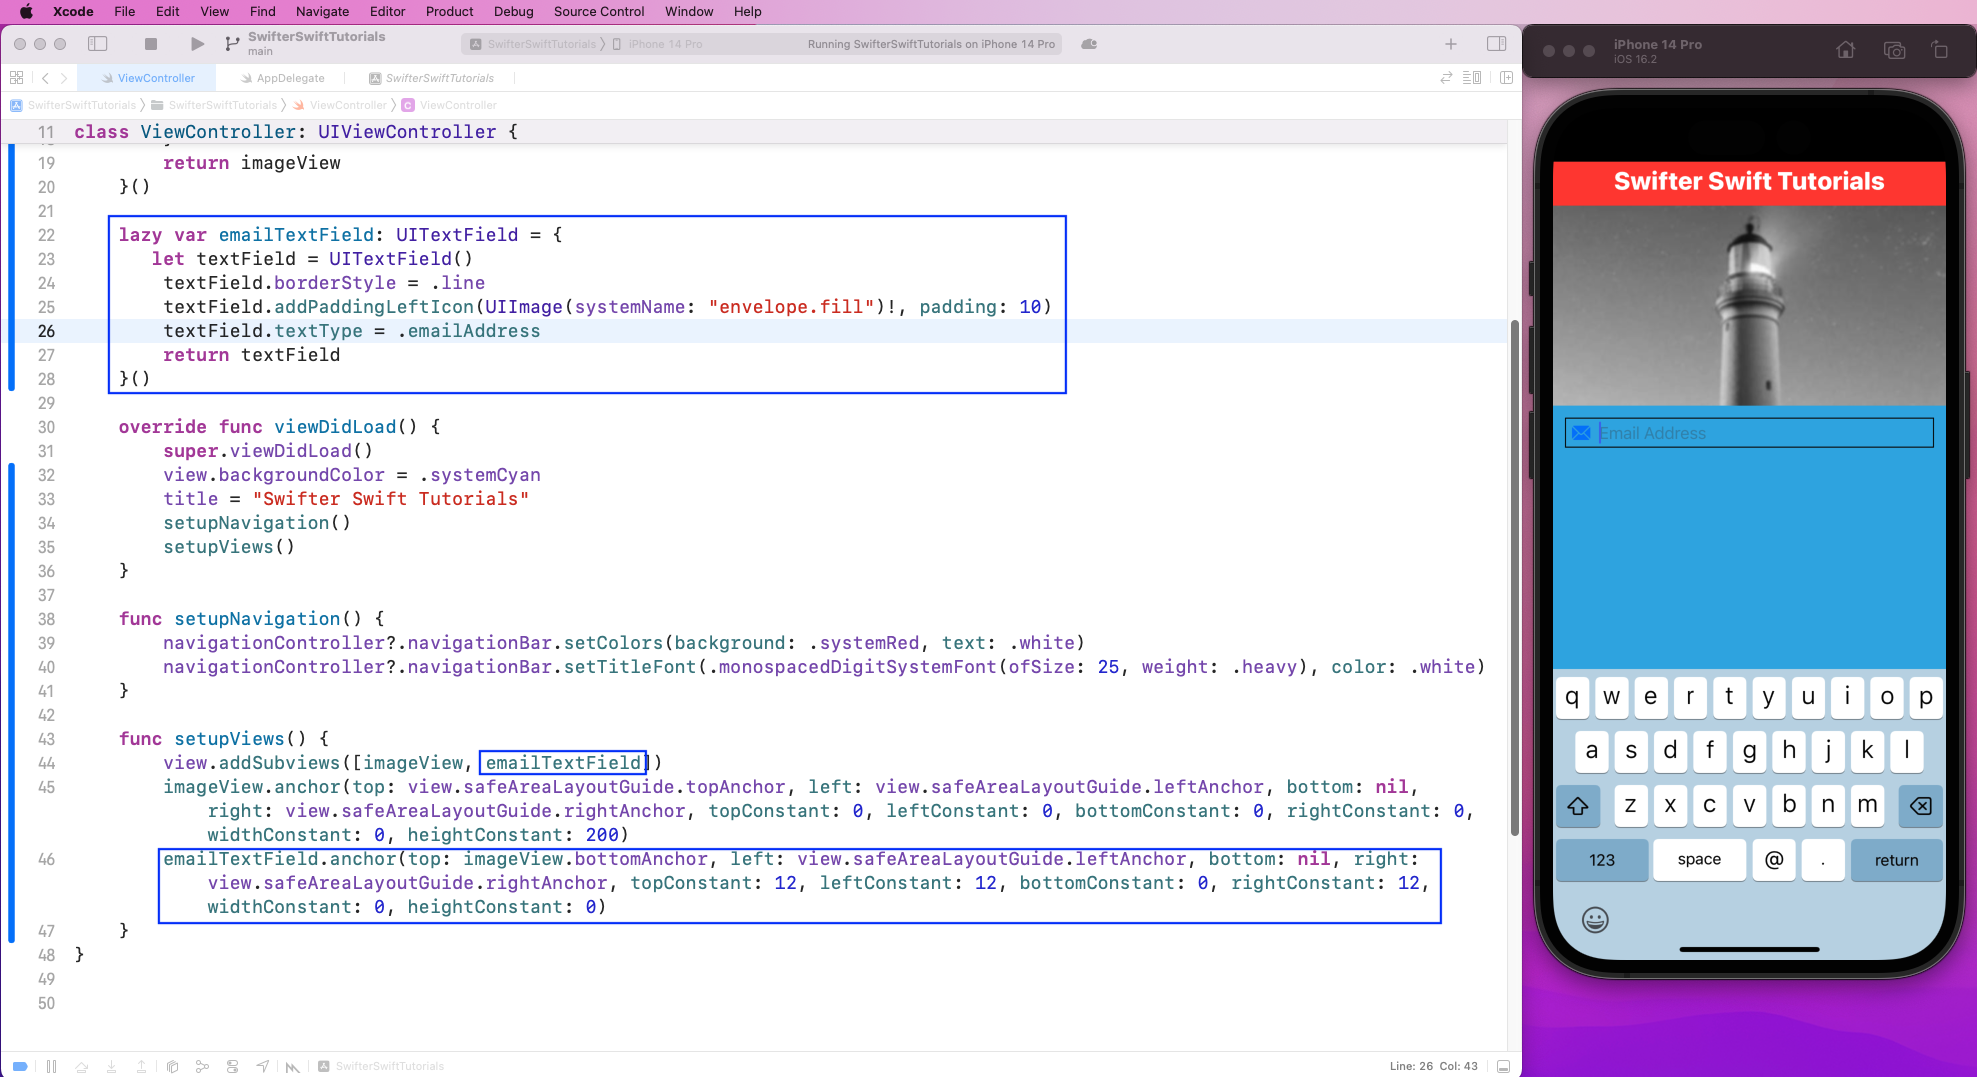
Now, we'll add an email field in our app. For this, we'll once again create a lazy loading function called emailTextField in our project. In this function, we're using a UITextField and giving it some styles, including an envelope icon.
Now, in the addSubviews method, we're adding the emailTextField. After that, we're again using an anchor to set the email field in the correct position.
Upon running the app, the email field is being shown perfectly in our iOS Simulator.
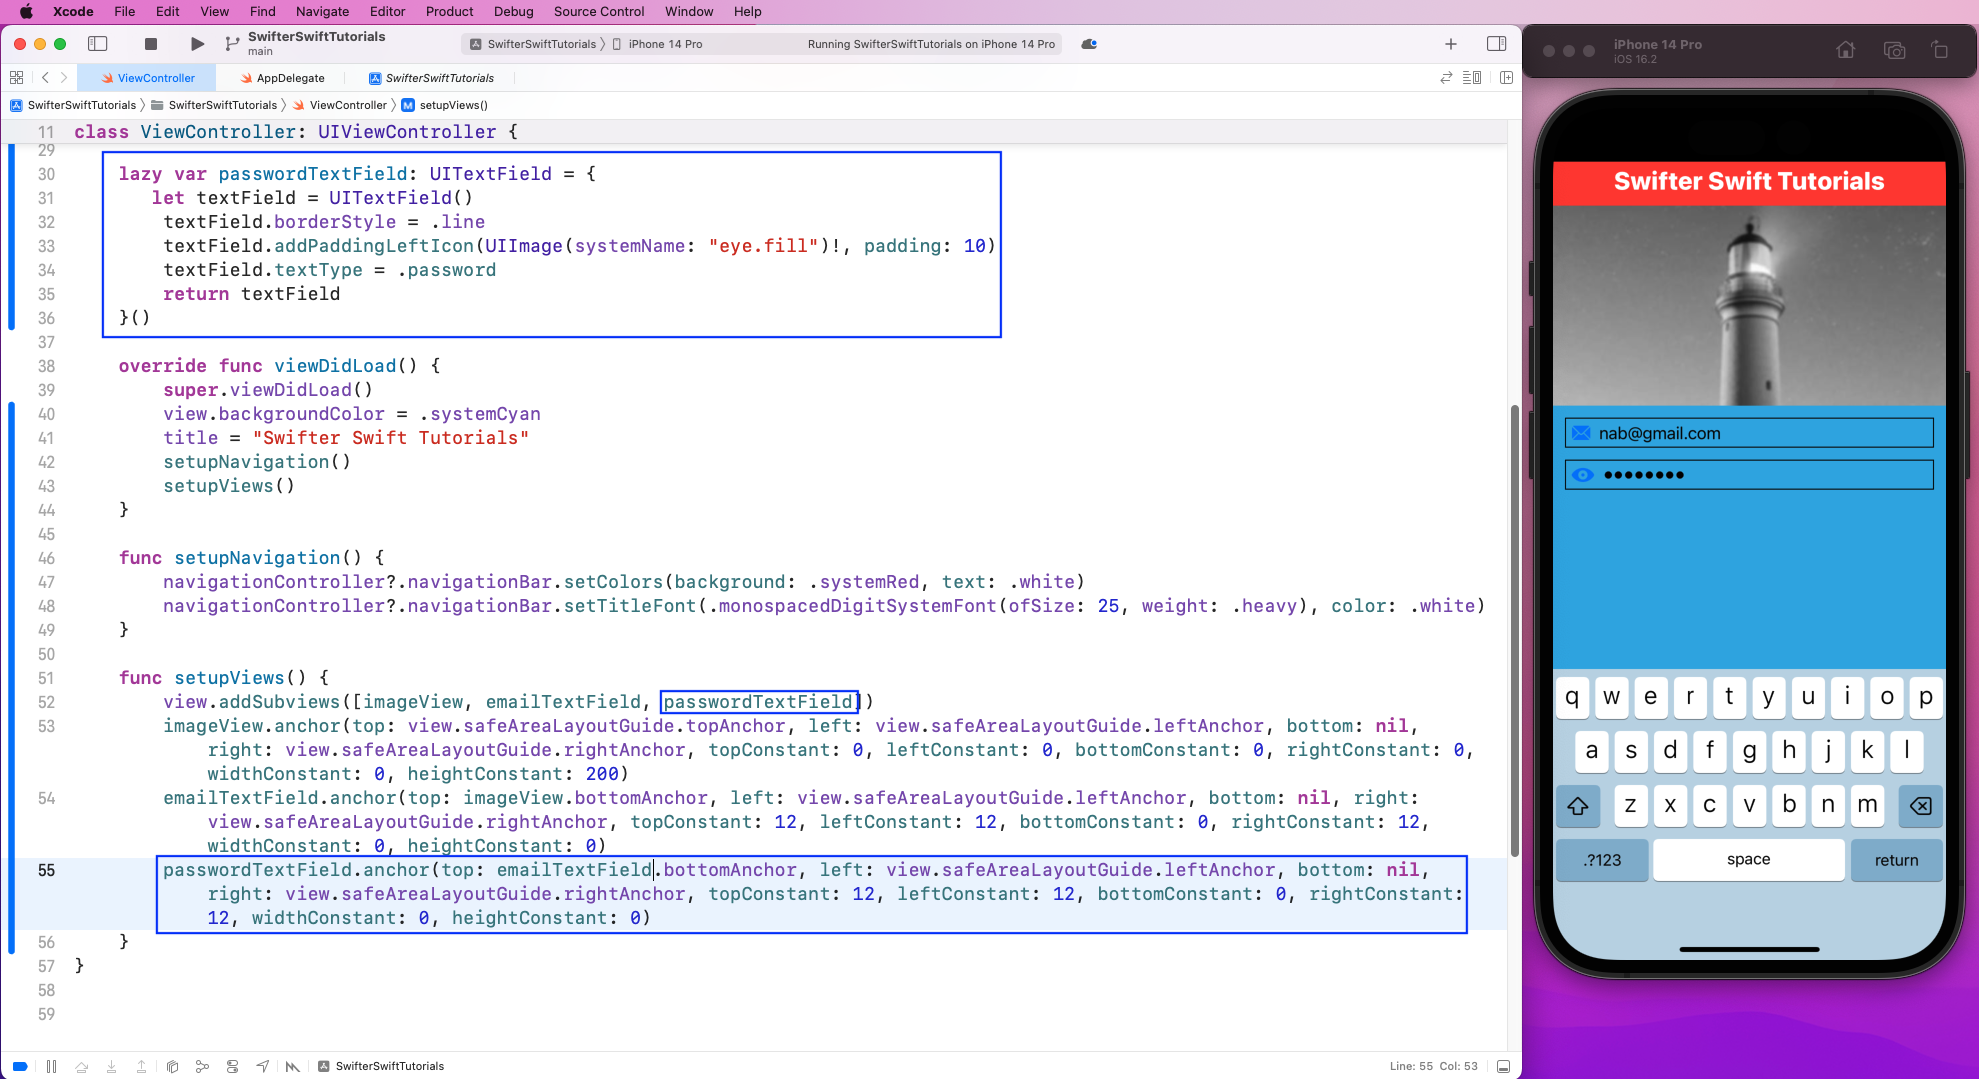
Now, we'll add a password field in our app. For this, we'll again create a lazy loading function called passwordTextField in our project. In this function, we're using an UITextField and giving it some styles, including an eye icon.
Now, in the addSubviews method, we're adding the passwordTextField. After that, we're again using an anchor to set the email field in the correct position.
Upon running the app, the password field is being shown correctly in our iOS Simulator.
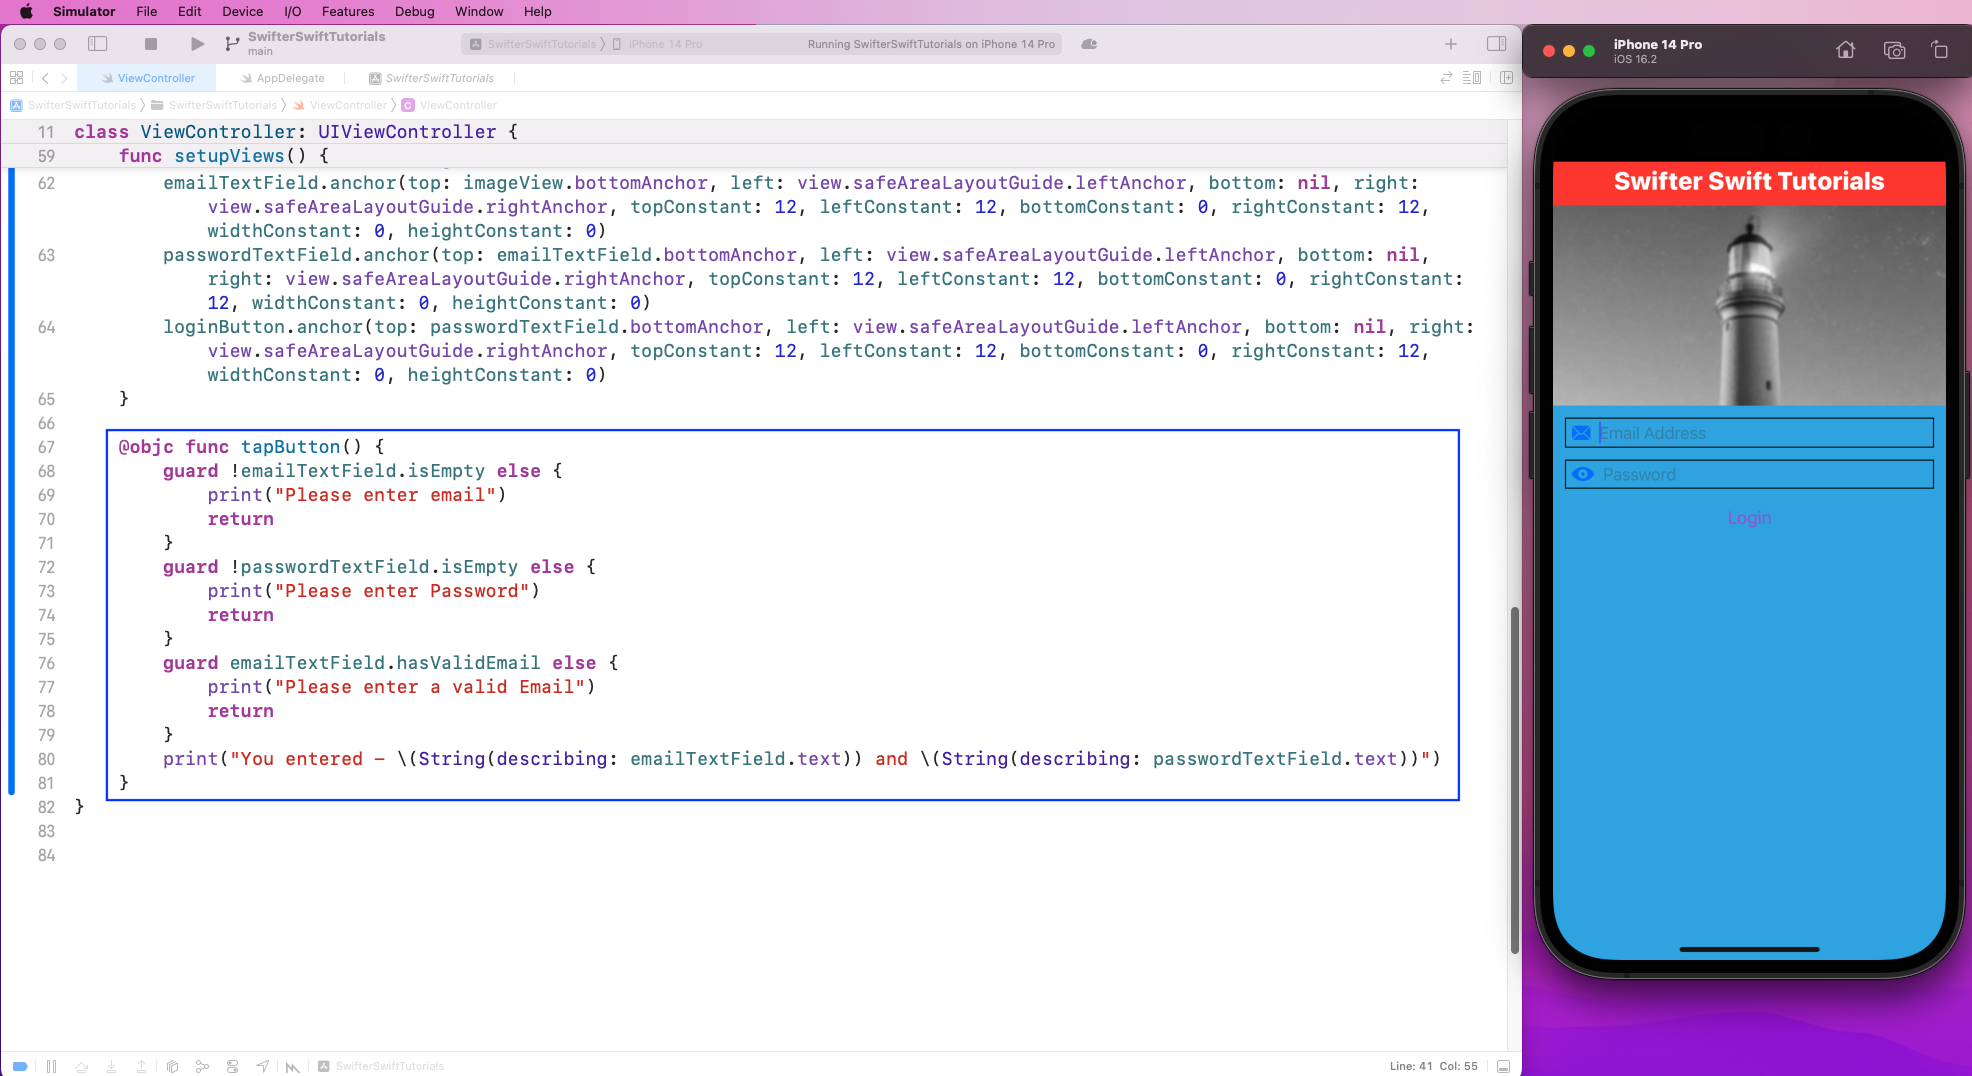
Finally, we'll add a button to our project. For this, again create a lazy loading function called loginButton in our project. Now, this button will have styles, and it'll also be calling a tapButton function through the addTarget function. Again, we're doing the same thing of adding it in addSubviews and setting it up with anchor.
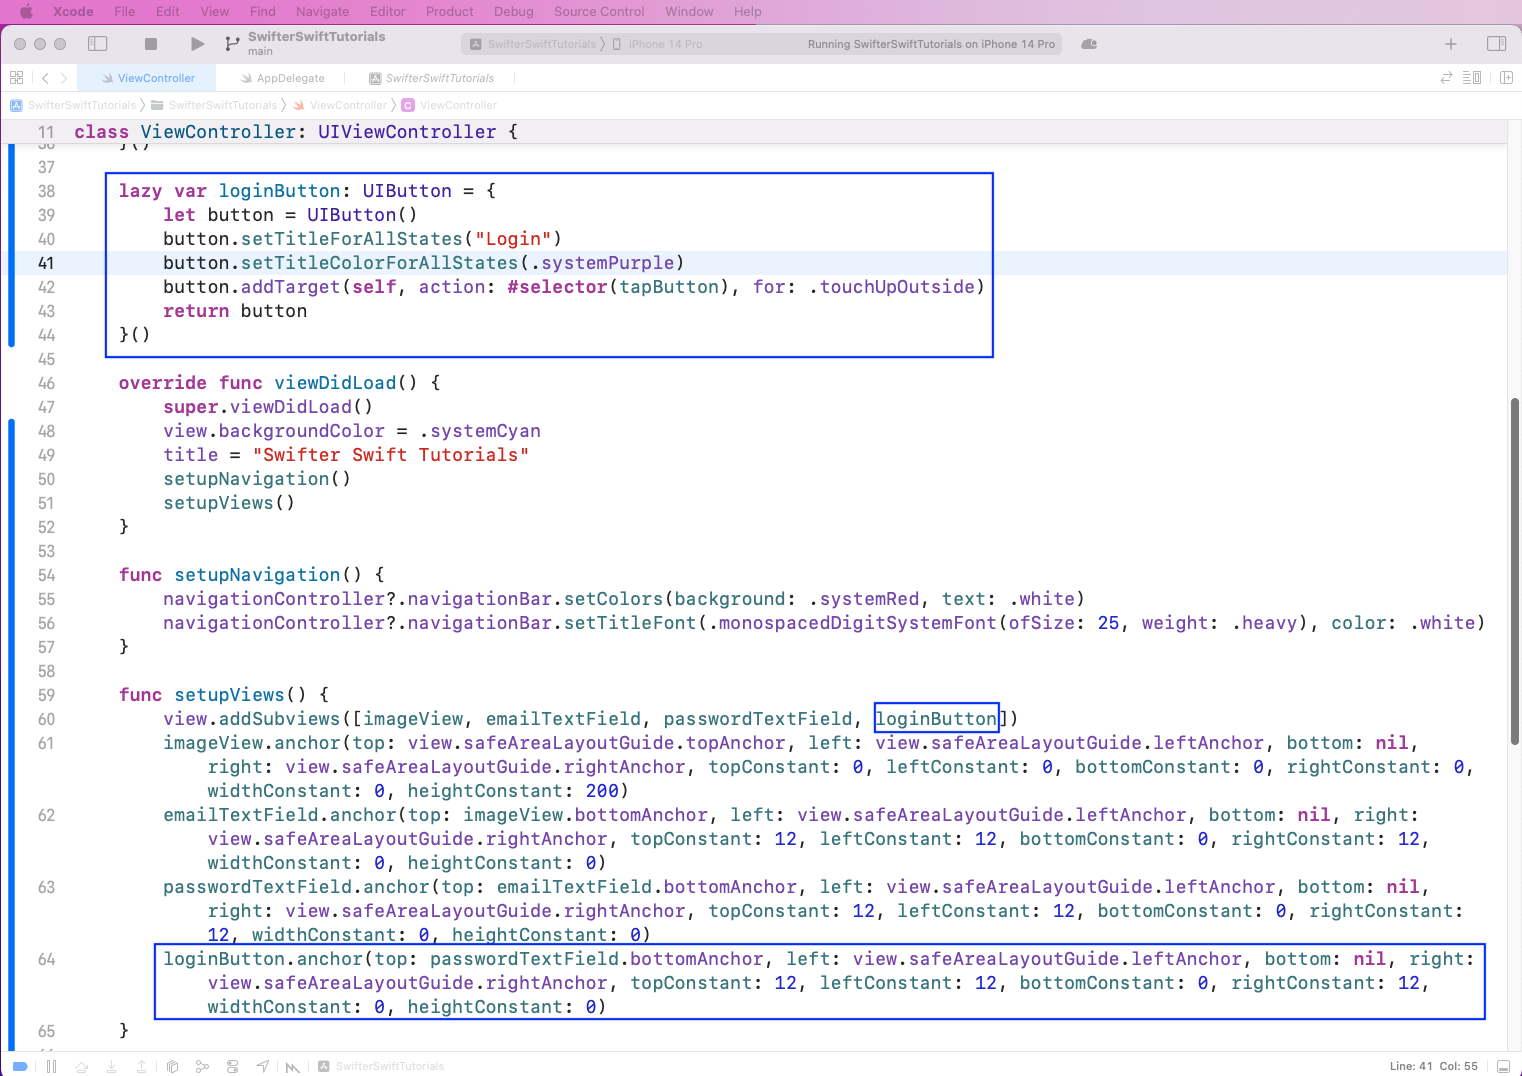
Finally, we'll create the tapButton function, which is an Objective-C function. Here, we're doing some basic validation, and after that, printing the entered fields.
Testing the App
We'll test the app with the built-in XCTest in Xcode. The initial steps to prepare for test cases can be taken from our post on XCUI methods.
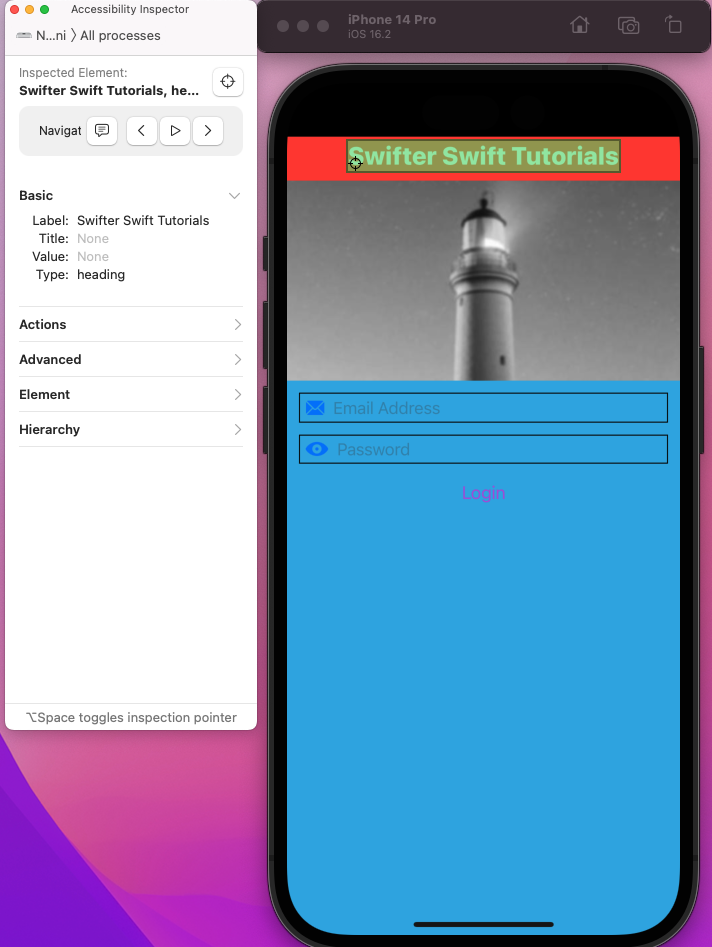
We'll need a unique ID for the element of our app for testing. This project will use the Accessibility Inspector to get the unique IDs. You can open it by clicking on Xcode > Open Developer Tool > Accessibility Inspector.
Also, open the running iOS Simulator on the side, and use the pointer from Accessibility Inspector to click on different elements. Here, we've clicked on Header to get its Label, or unique ID, which is Swifter Swift Tutorials for this element.
Writing and Executing Test Cases
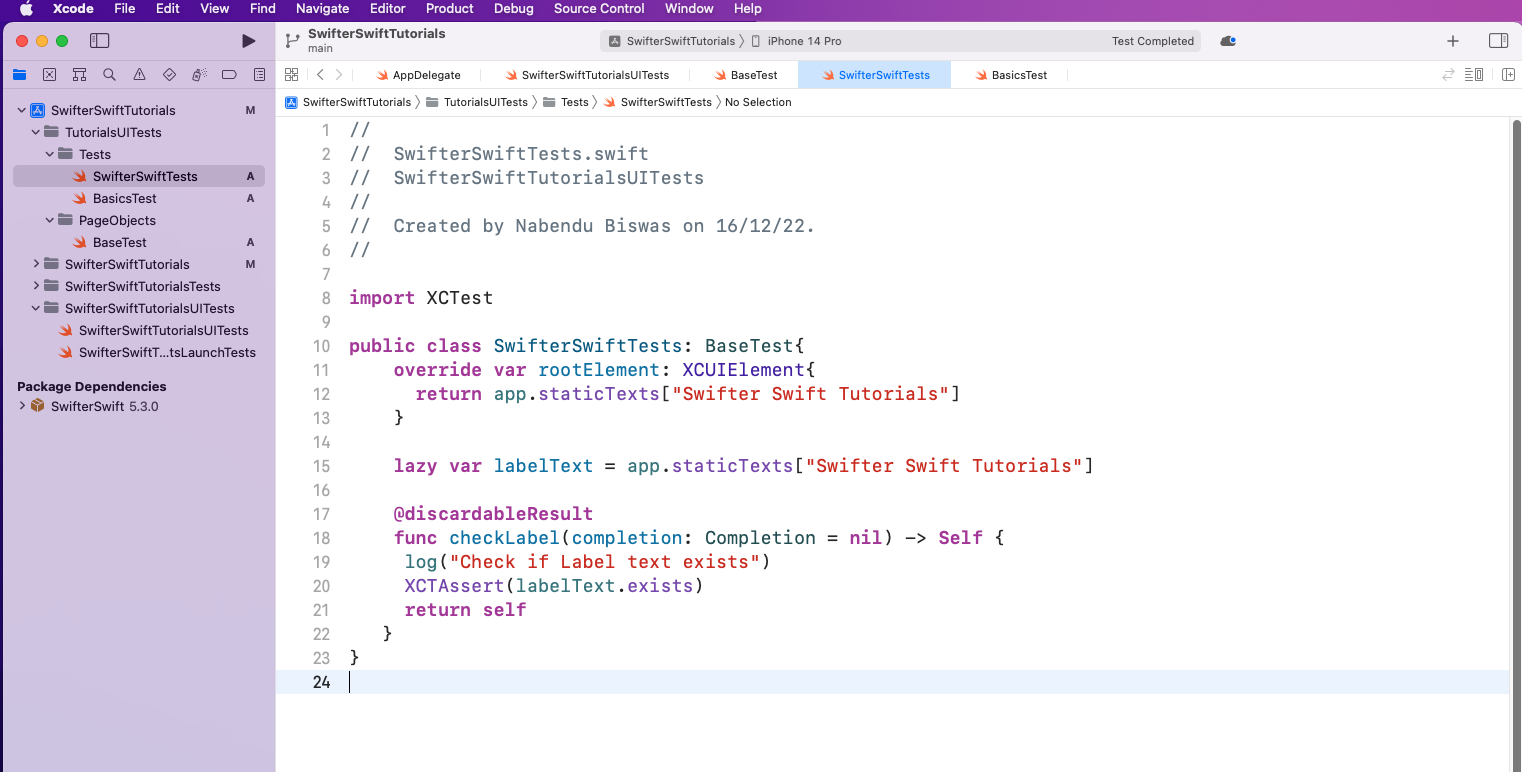
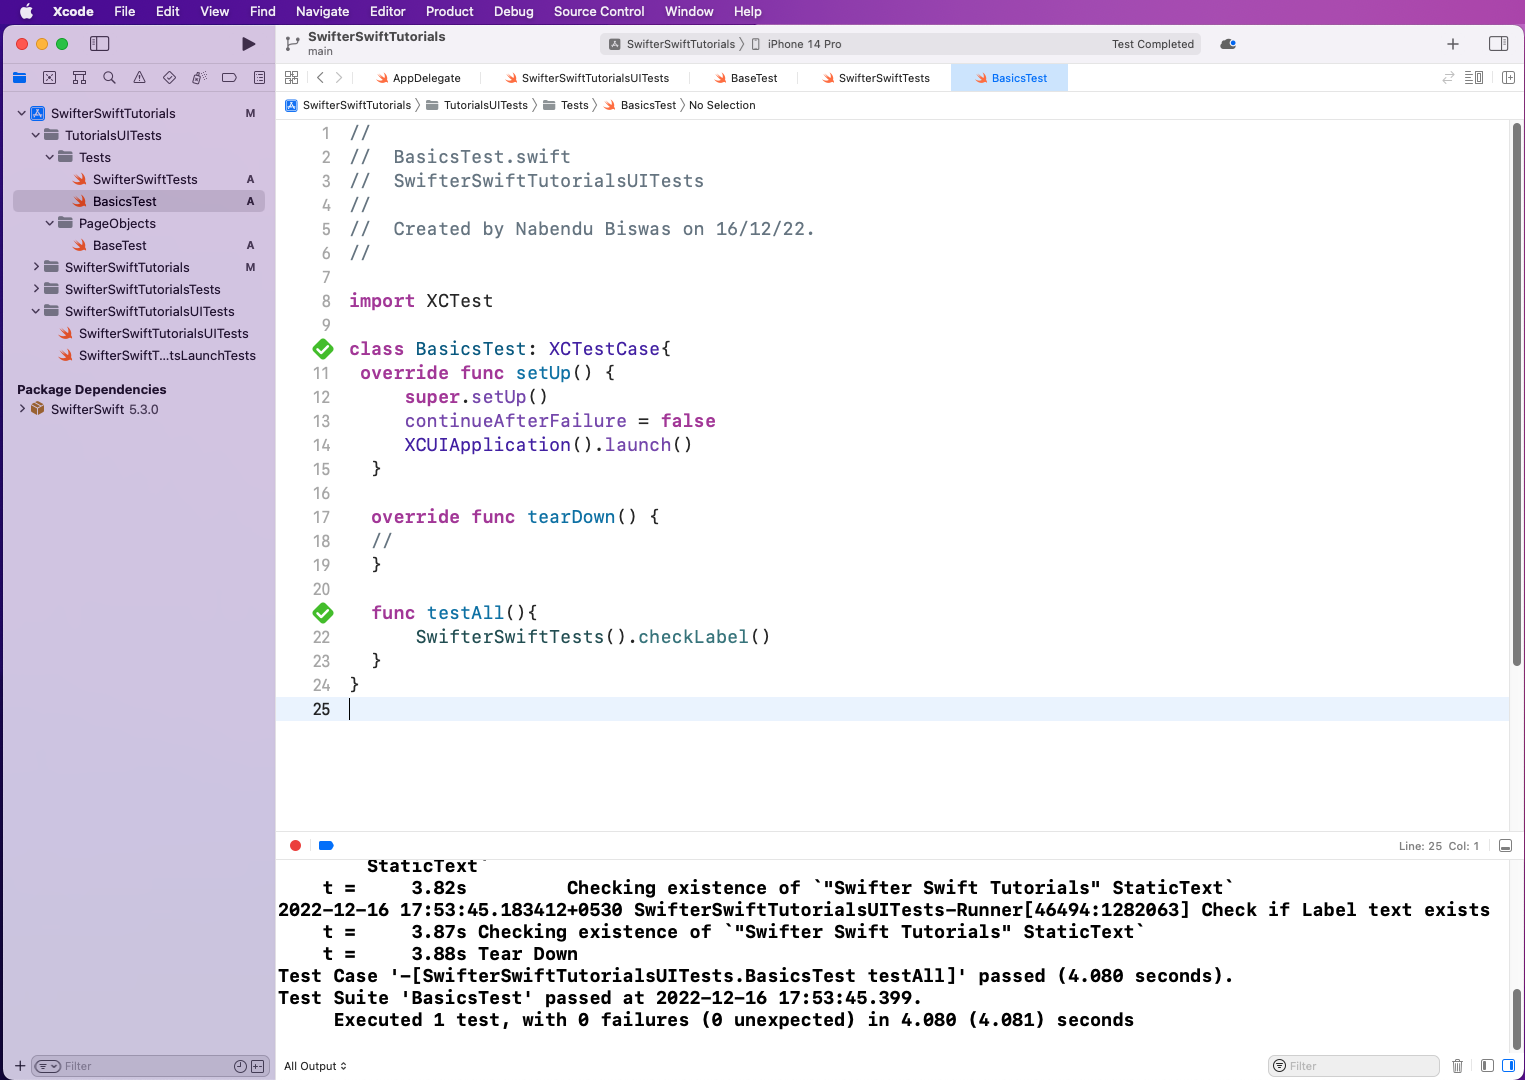
It's time to write our test cases. Create the file SwifterSwiftTests inside the Tests folder. Here, we're overriding the rootElement to have staticTexts of the label.
Next, we'll create the checkLabel function, which will use XCTAssert to check if the label exists.
Next, in the BasicTests file, we'll call the SwifterSwiftTests class and then the checkLabel function. On clicking on the play test button in the project, our test will pass.
What We've Covered
In this post, we talked about using the open-source methods of SwifterSwift in an iOS project. We created a simple project in Xcode without Storyboard, using easy-to-use methods from SwifterSwift. We also wrote simple test cases using XCTest.
But the setup is very complicated. And writing test cases in XCTest is also complex, with knowledge of Swift required.
To test your app without complicated setups or having to write test cases, try Waldo. You're only required to provide the APK or IPA file. Then you get to interact with the mobile app like a real user. Waldo automatically generates test cases and emails you the results.
Automated E2E tests for your mobile app
Get true E2E testing in minutes, not months.


