


In this post, we're going to learn about XCUITest, which is the default automation testing in Apple. We will create test cases for a sample calculator app.
But before learning about XCUITest, let's learn about different types of tests in the Apple ecosystem.
What Is UI Test in XCode?
Apple's default testing framework is XCTest. This framework comes built into Apple's default Integrated Development Environment (IDE) for Mac systems, which is XCode. To test their code, developers write a unit test for their apps in XCTest. But then, what's XCUITest in iOS? We'll learn about it in the next section.
We've done a detailed XCTest in our earlier post on Swift Struct.

What Is XCUITest?
Apple released the automation testing framework of XCUITest in 2015. This test framework is based on XCTest. With XCUITest, you can do automation testing for any iOS app. These tests are quite similar to what we do through Appium, but they're limited to iOS apps written in Swift or Objective-C.
XCode is used to write XCUITest in Swift or Objective-C language. We can't test hybrid apps created using React Native with XCUITest. Furthermore, we also can't test Android apps.
Besides doing automation testing, we can also do performance testing with XCUITest. In this post, we're also going to look into automation testing.
The Setup
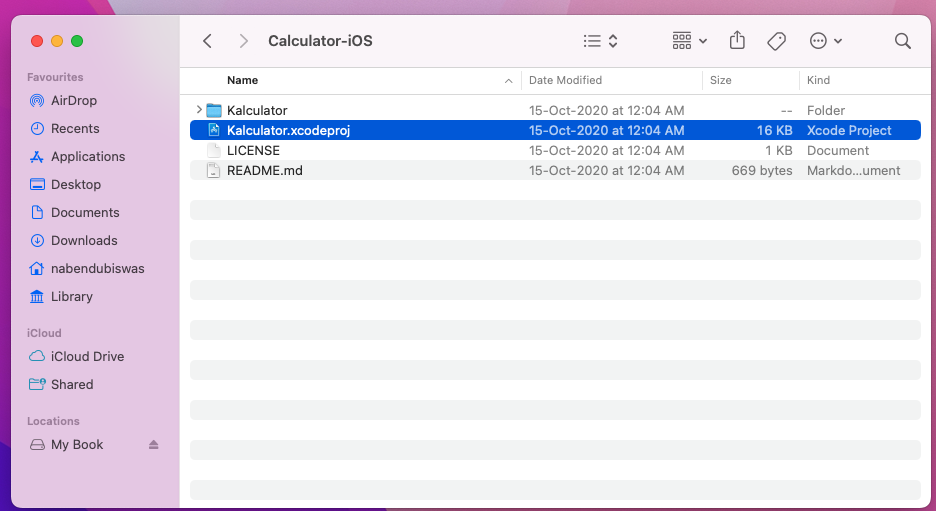
We're using a calculator app, which can be downloaded from this GitHub repo. After extracting the calculator app, click on Kalculator.xcodeproj to open it in XCode.
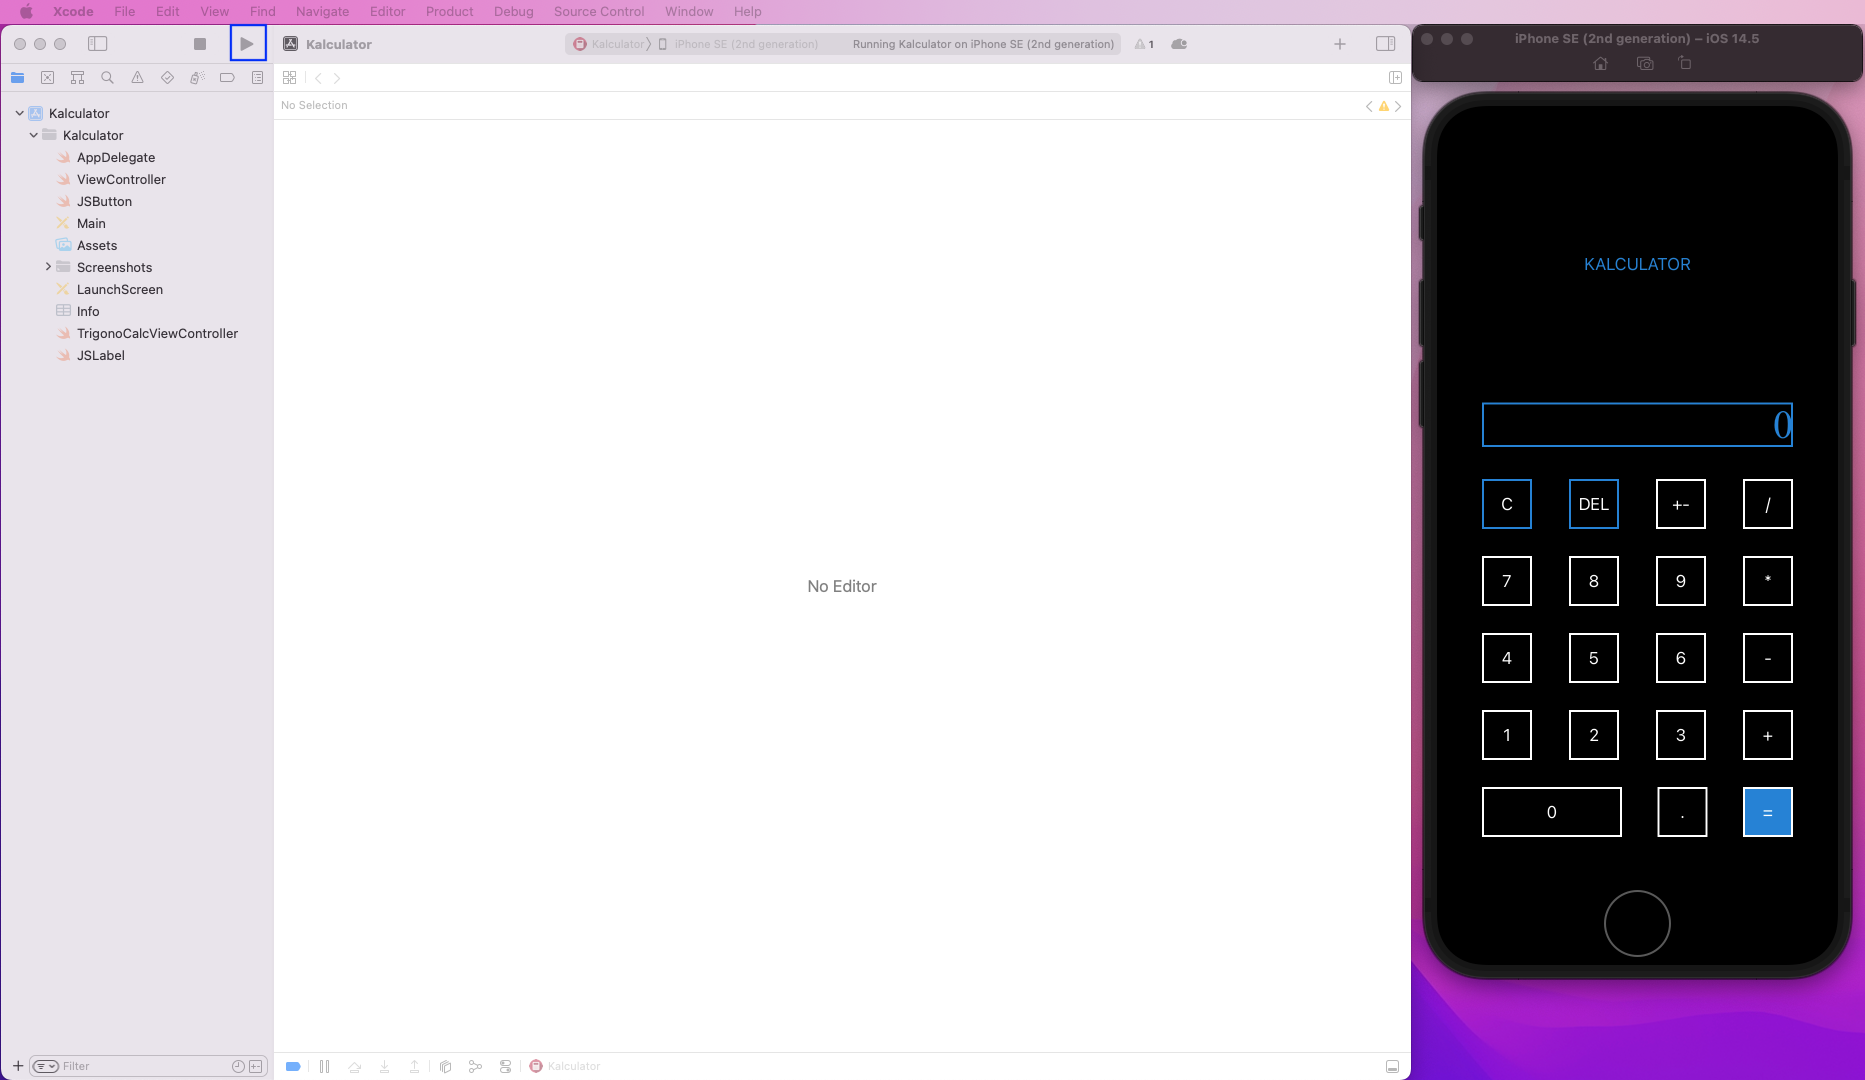
We need to check if the project is working well. So, run the project by clicking on the Run icon on the top left side of XCode. This will open the project on the default simulator, which in our case is iPhone SE (2nd generation).
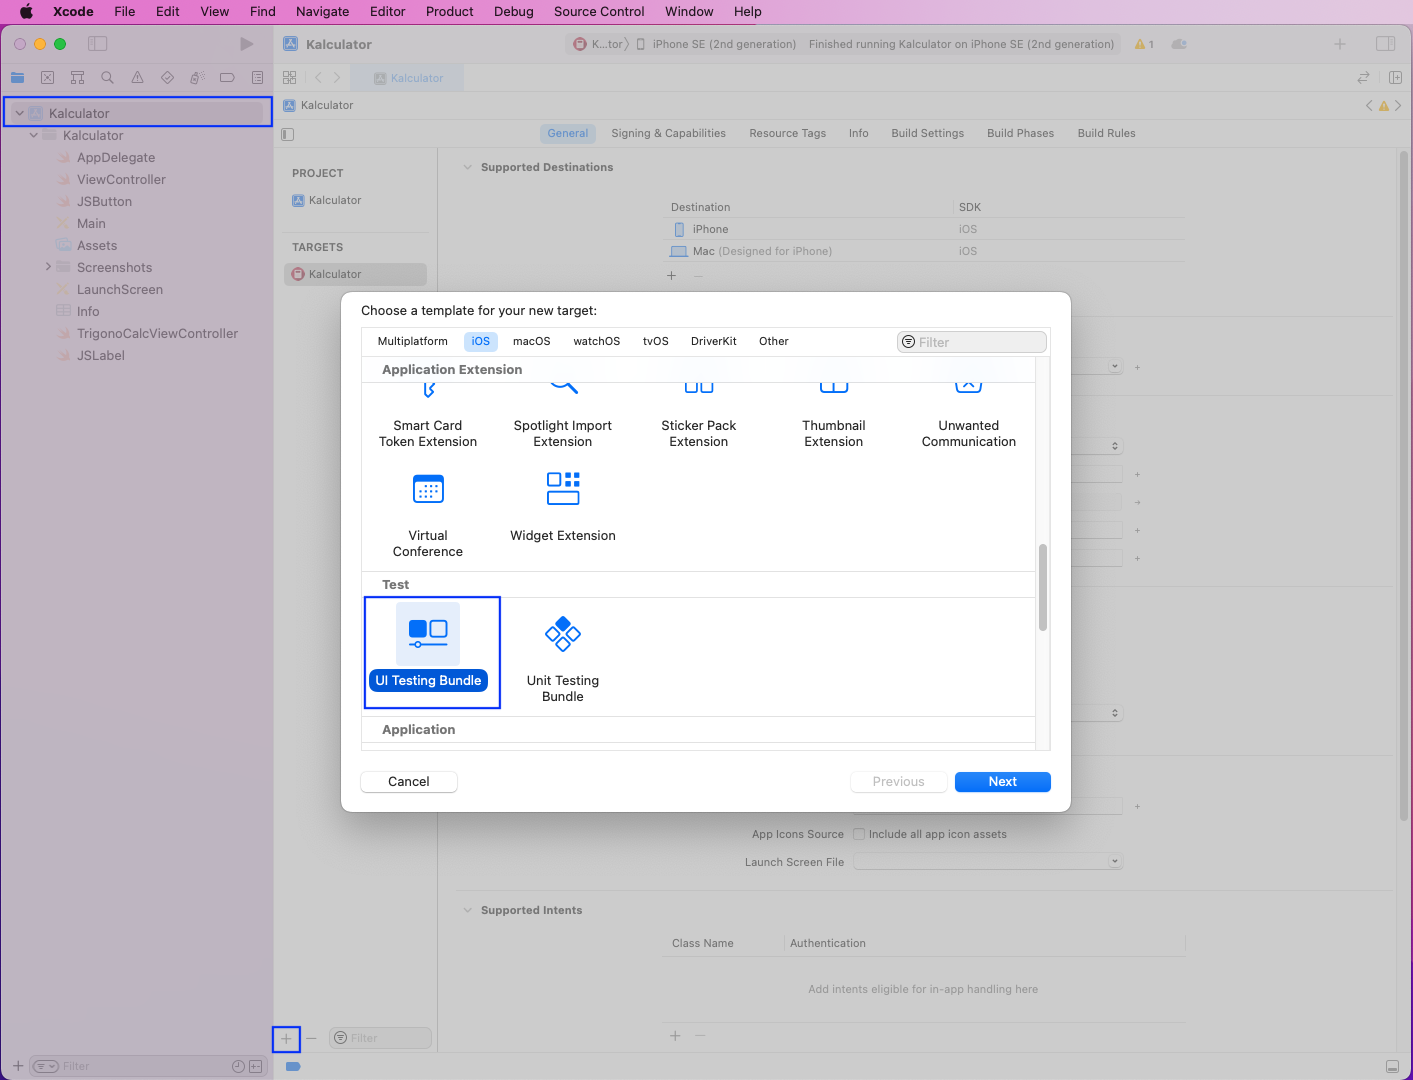
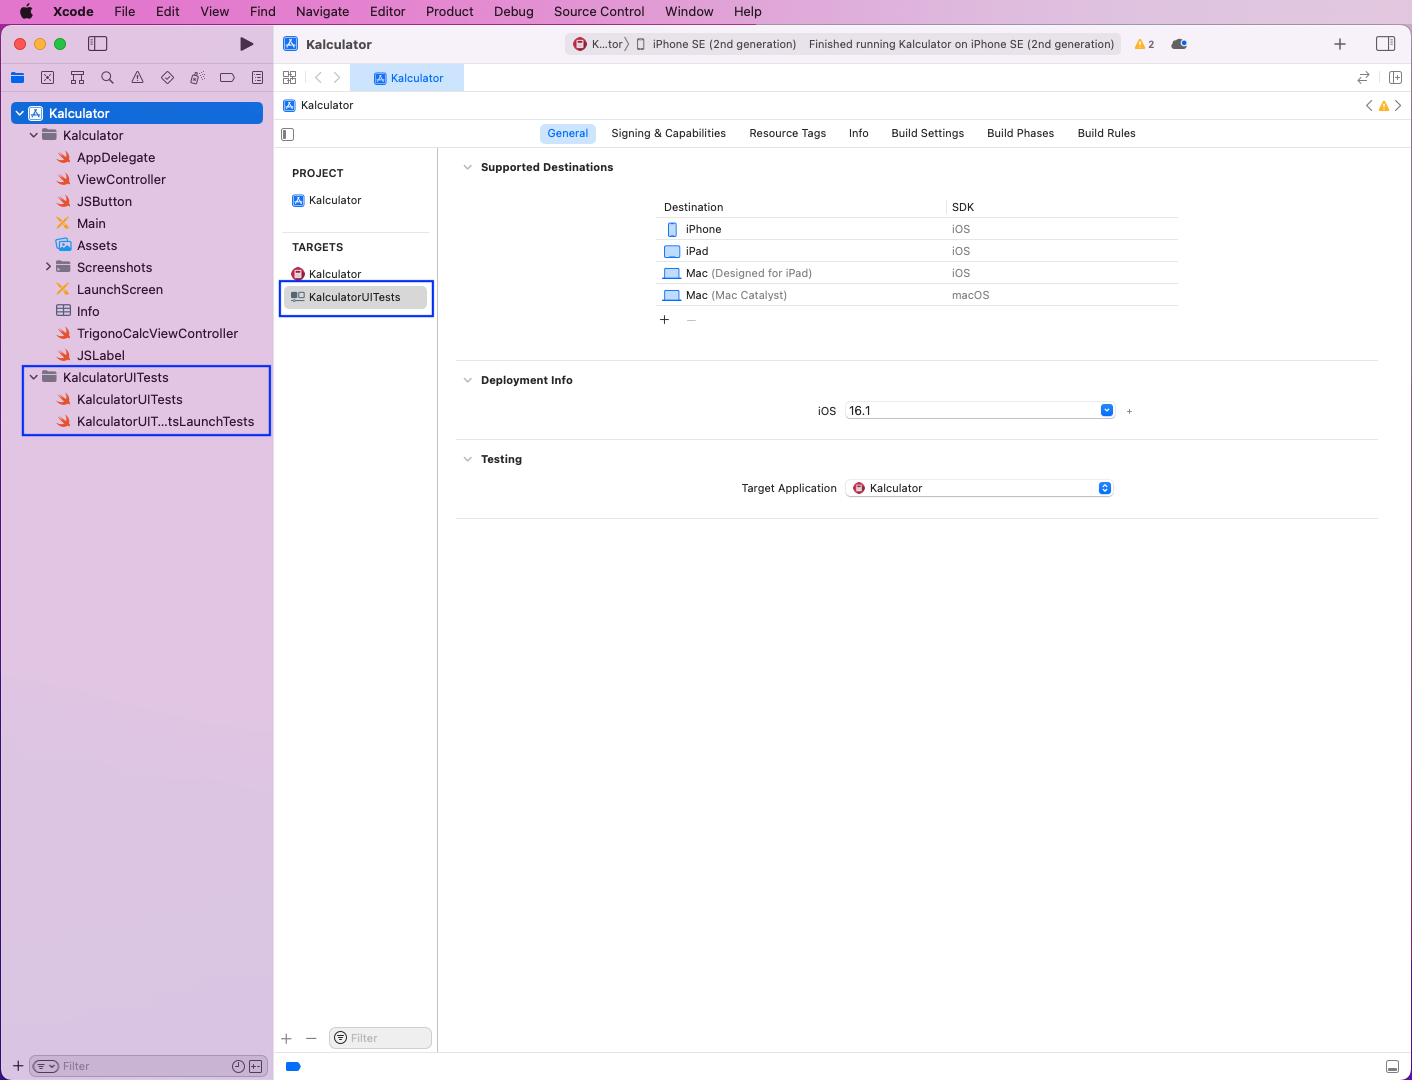
Now we'll do the test setup in our project. Here, first click on the root of the app, which is Kalculator in our case. A new screen will open. Click on the + icon at the bottom left. This will open a pop-up window, where you'll click on UI Testing Bundle. After that, press the Next button.
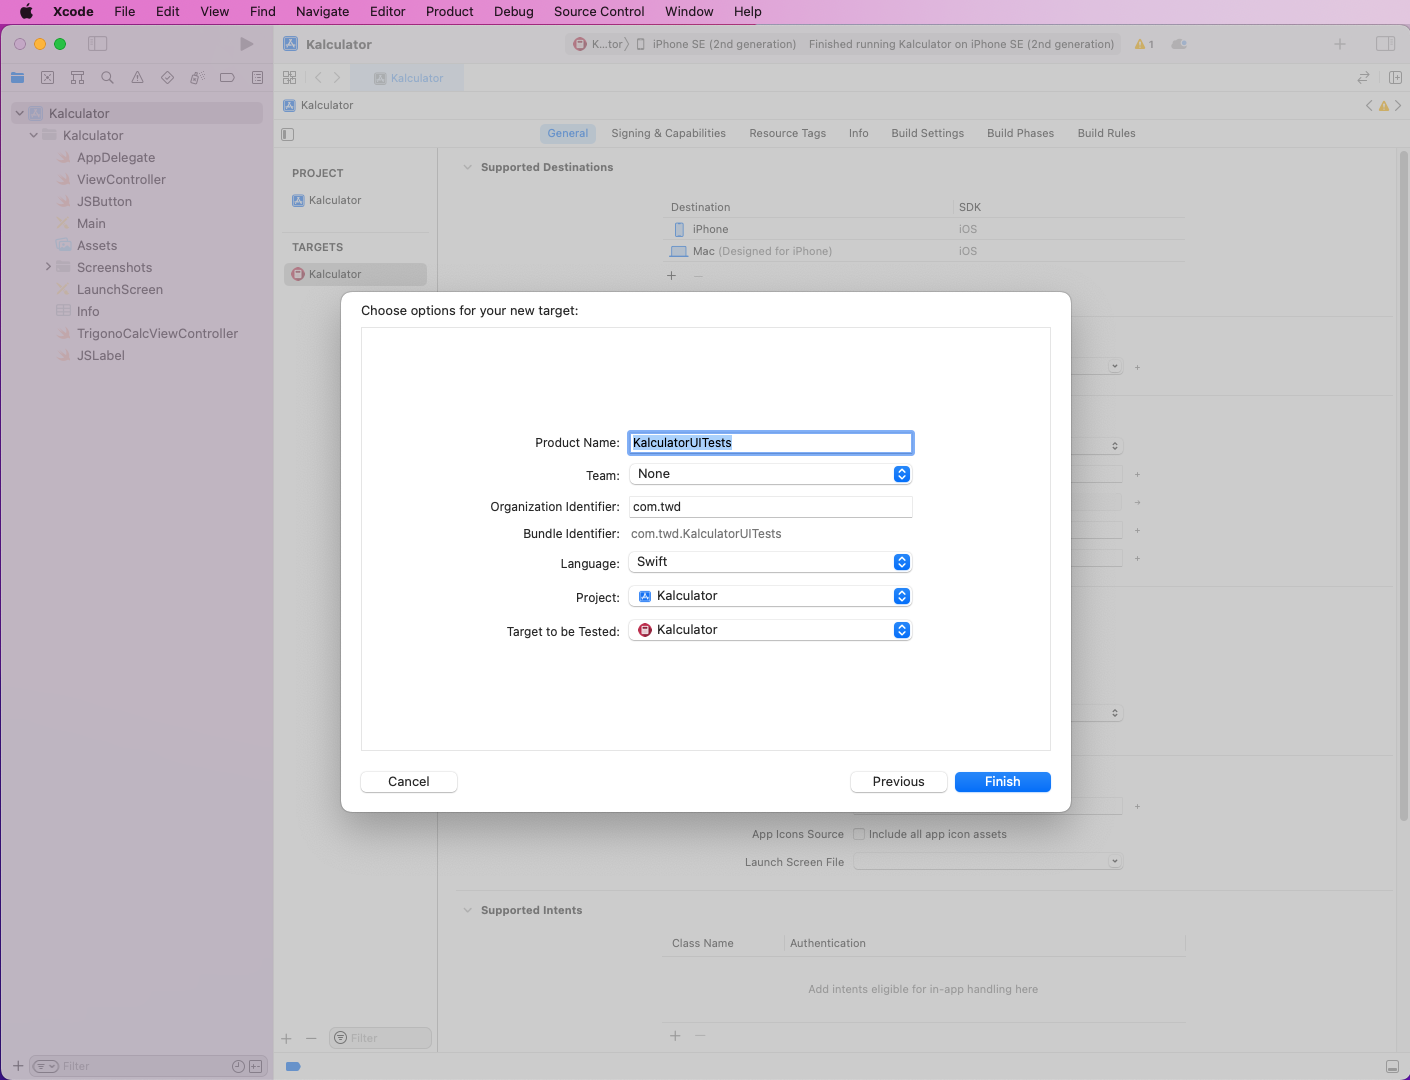
A new pop-up window will open, where we'll keep everything as default. After that, click on the Finish button.
Now, we will see a new folder of KalculatorUITests created. It contains the two required files.
Setup for Test Cases
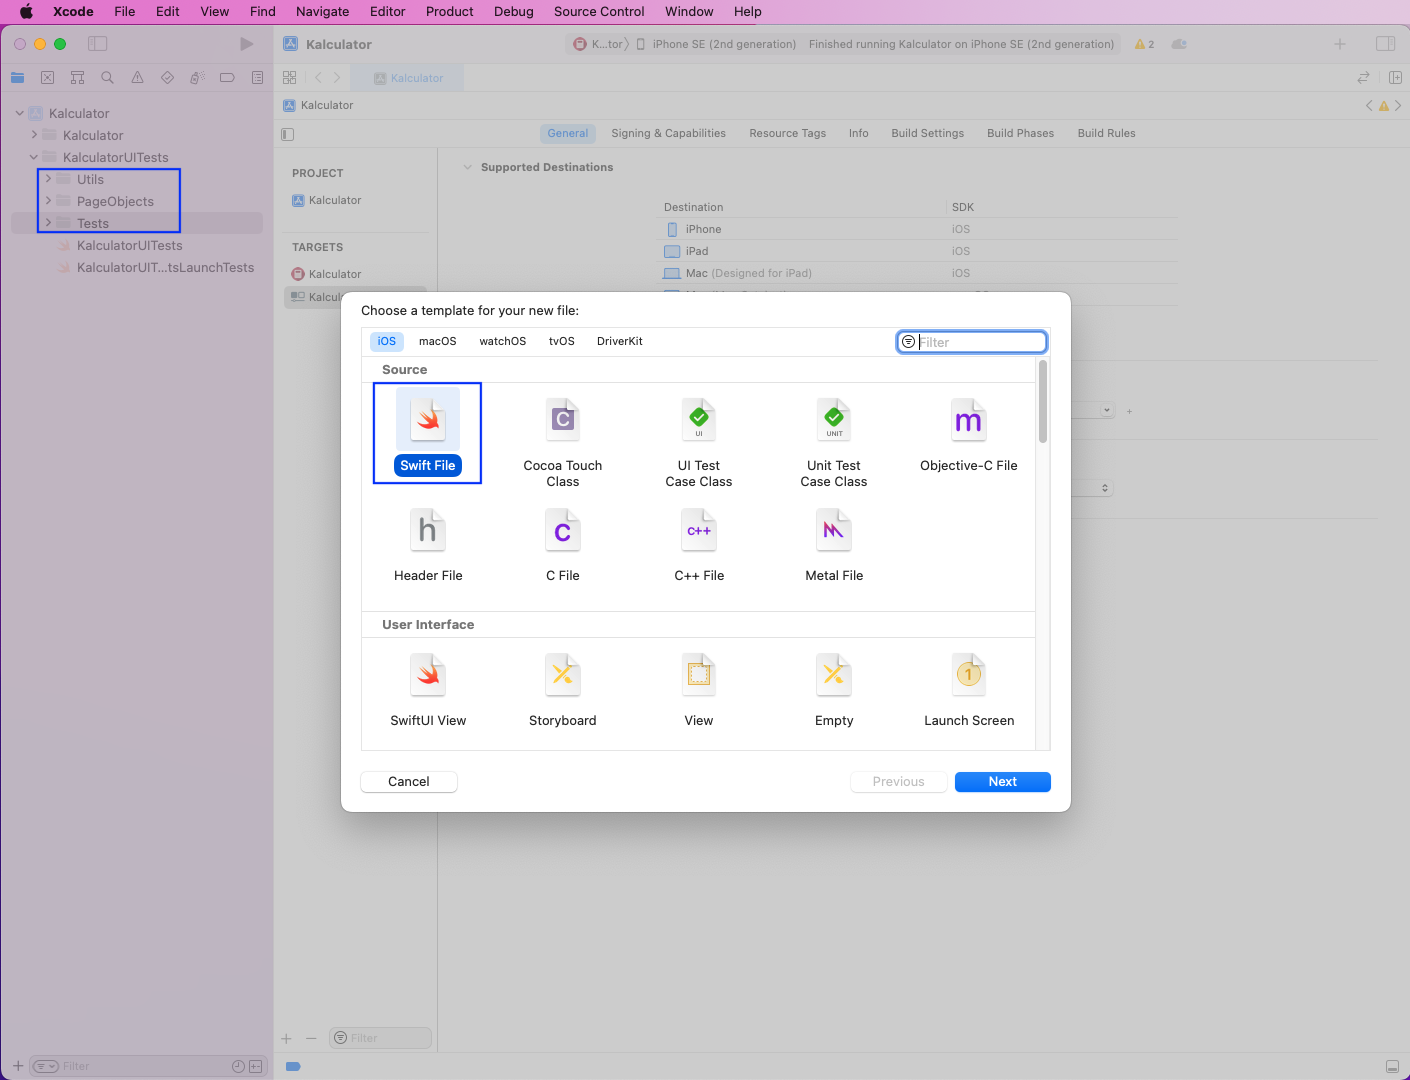
We'll start creating test cases. So, inside the KalculatorUITests folder, create three new folders called Utils, PageObjects, and Tests. Then right-click on the Tests folder and click on New File. Click on Swift File in the new pop-up window and then click on the Next button.
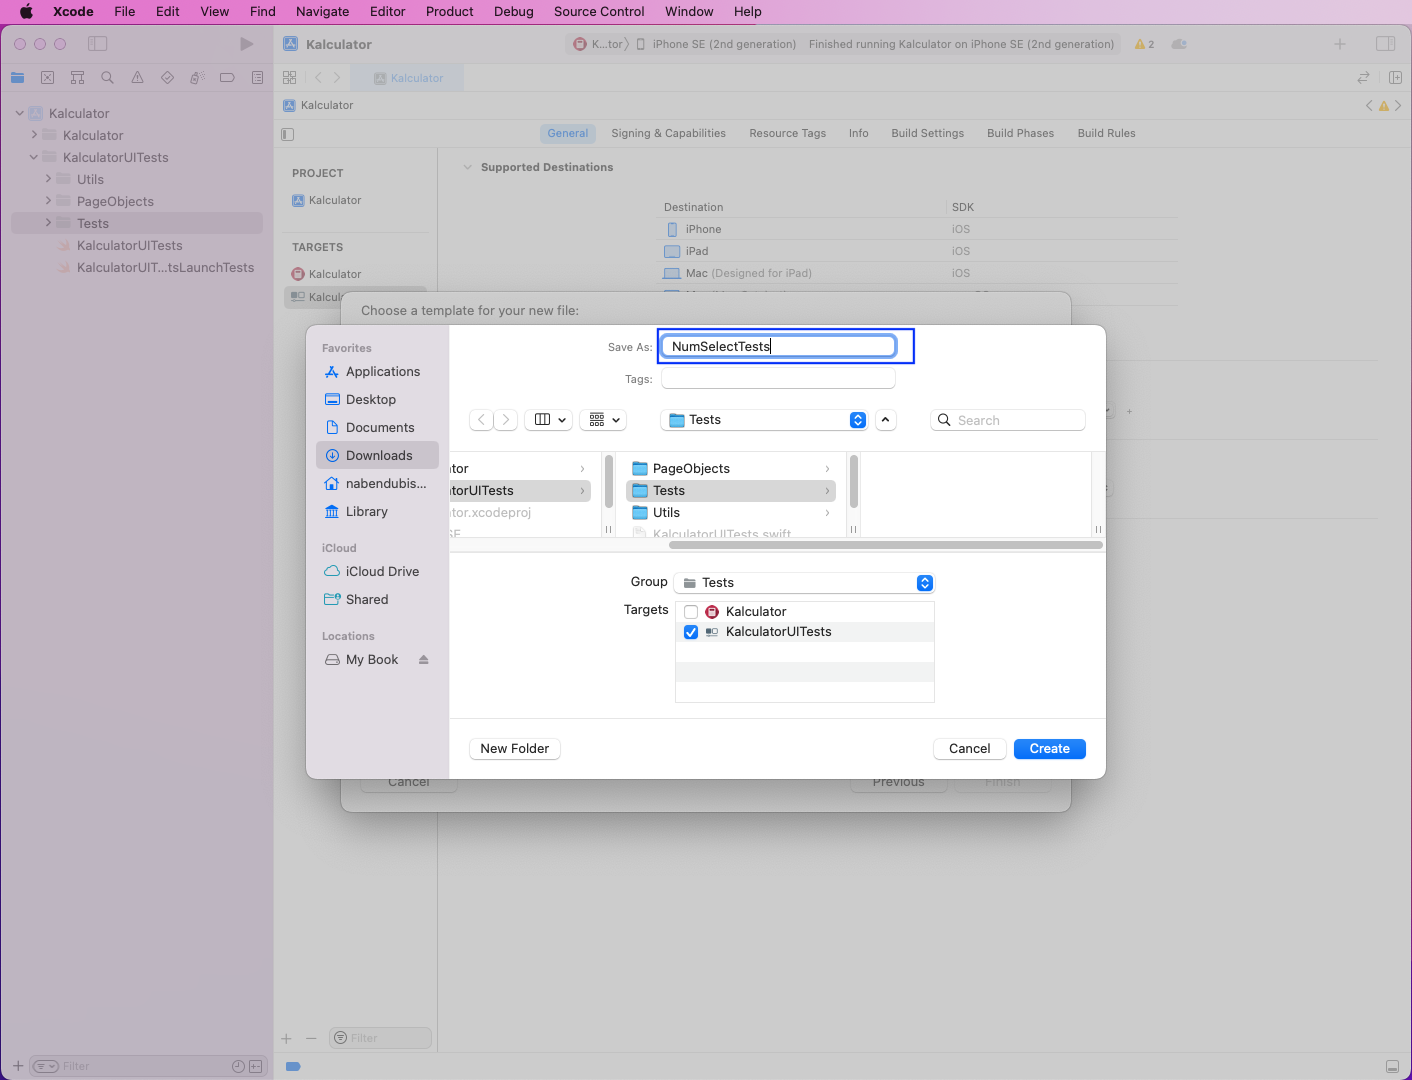
Give the new file name of NumSelectTests and click on Create button.
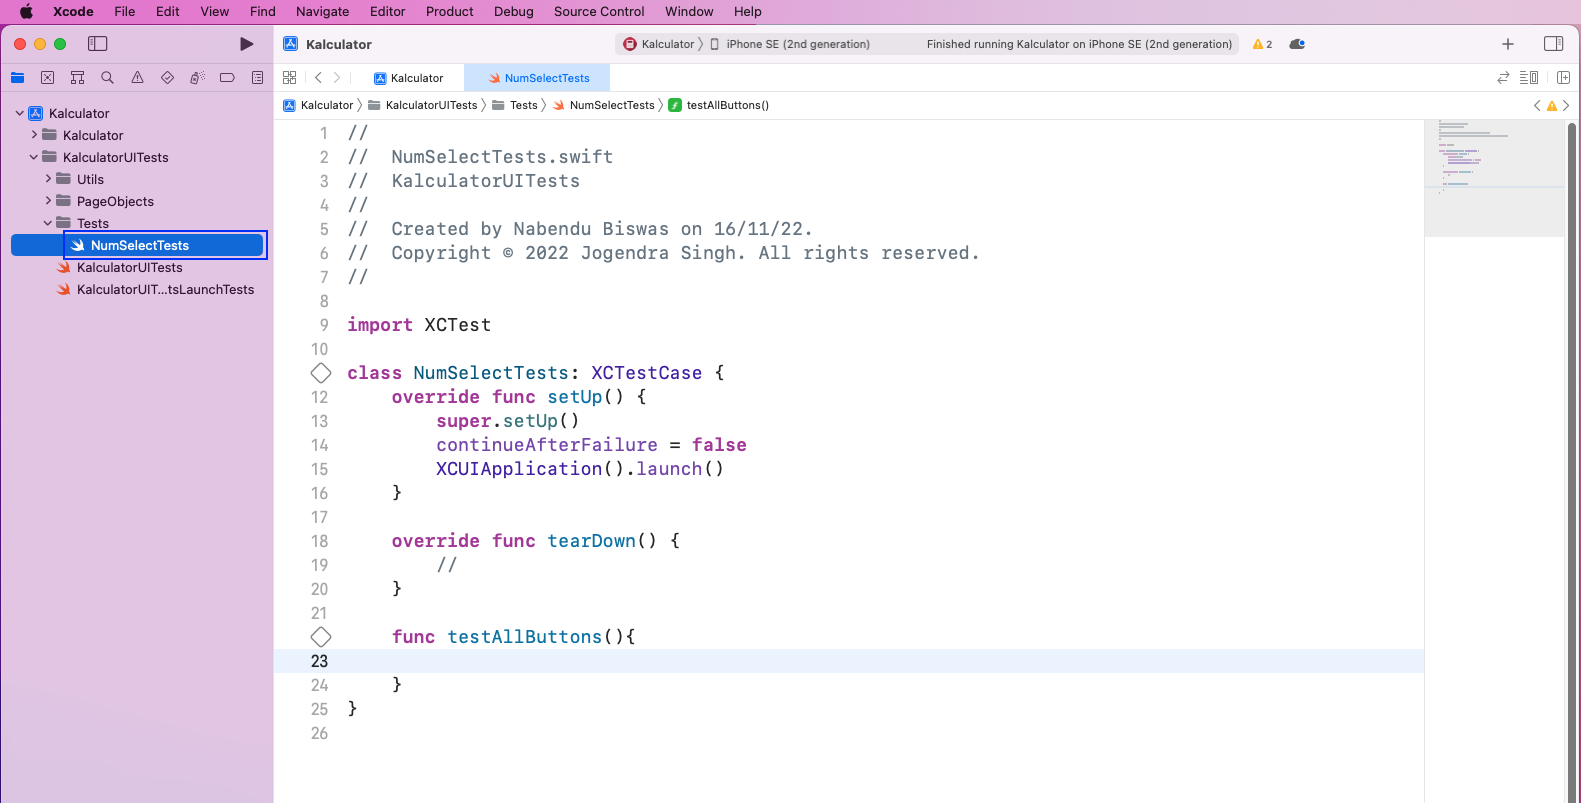
Next, in the NumSelectTests file, put the code for overriding the setUp() function, which will run before every test. We also have an empty function of tearDown().
Now, create a new file BaseTest in the PageObjects folder. This file contains the boilerplate code needed to perform XCUITest.
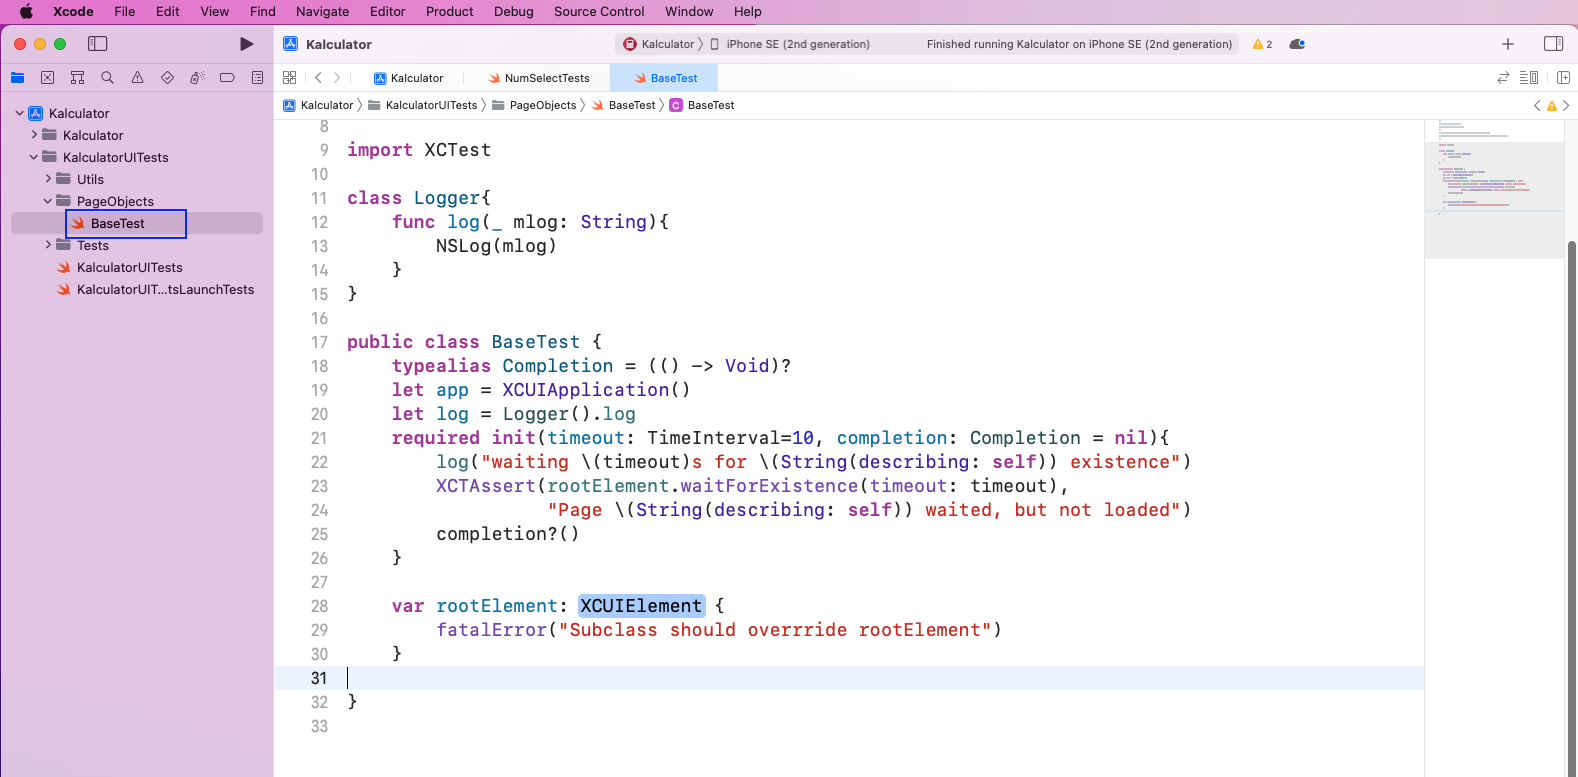
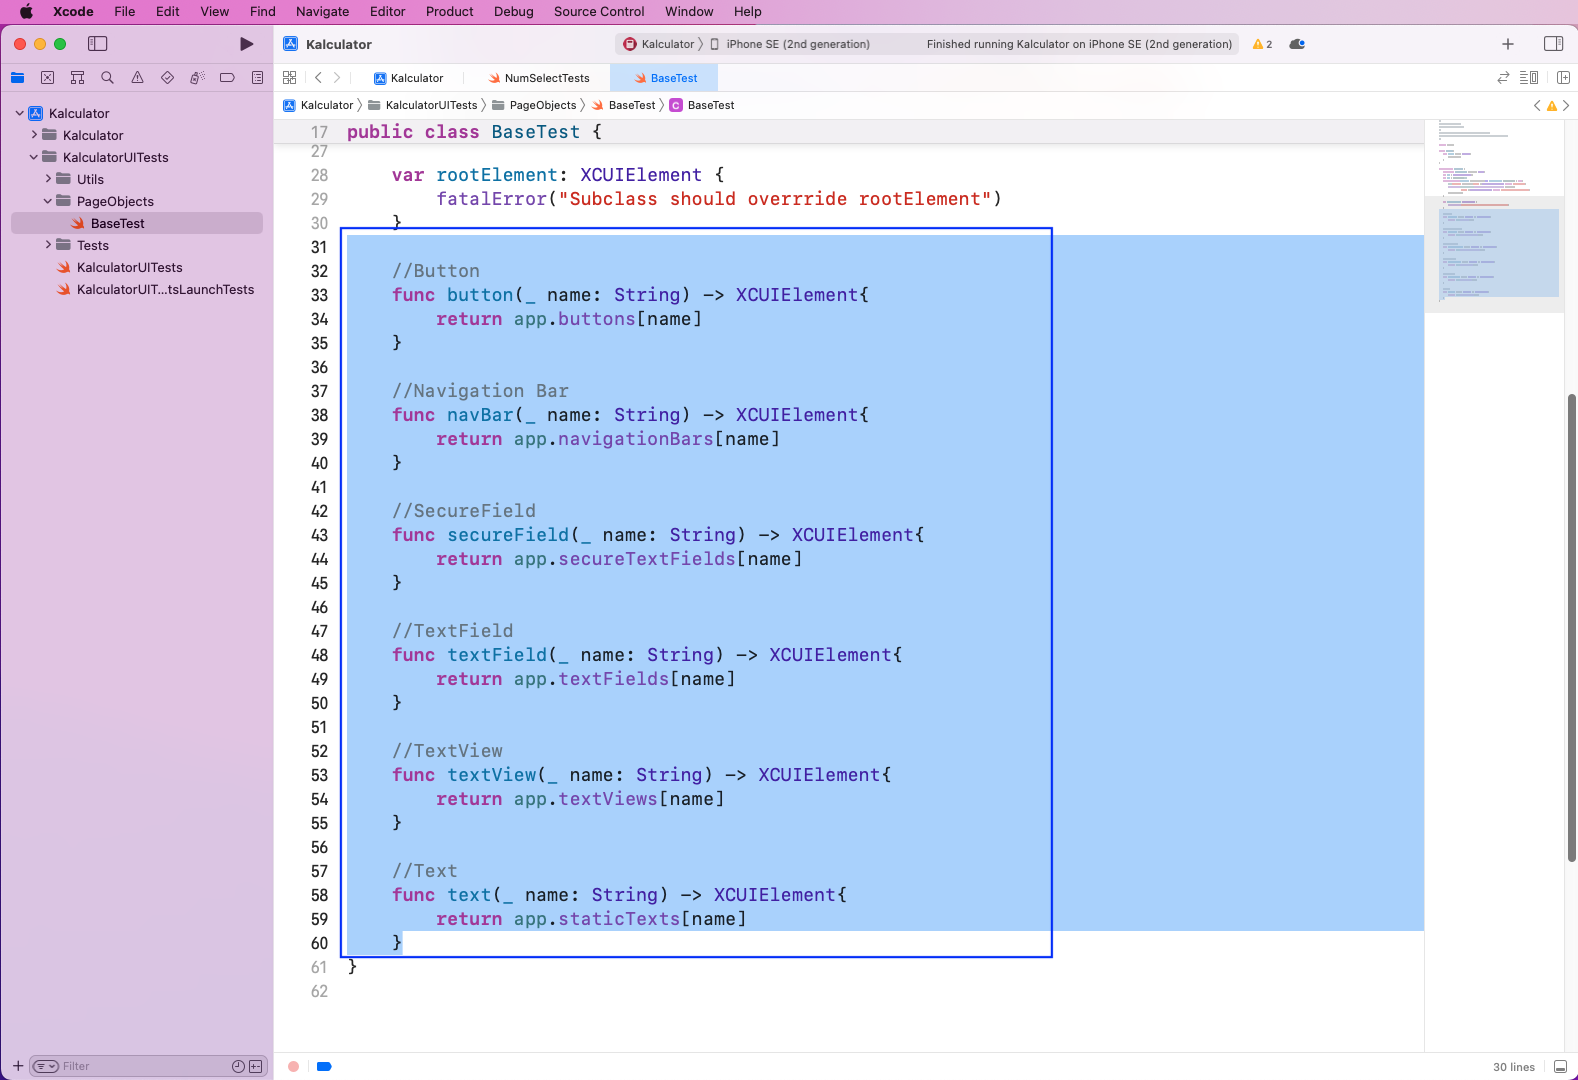
Next, we'll refer to the different fields through XCUIElement in our BaseTest file. We're not going to use all the fields in our code, but these are for every type of field.
Getting Labels Through Accessibility Inspector
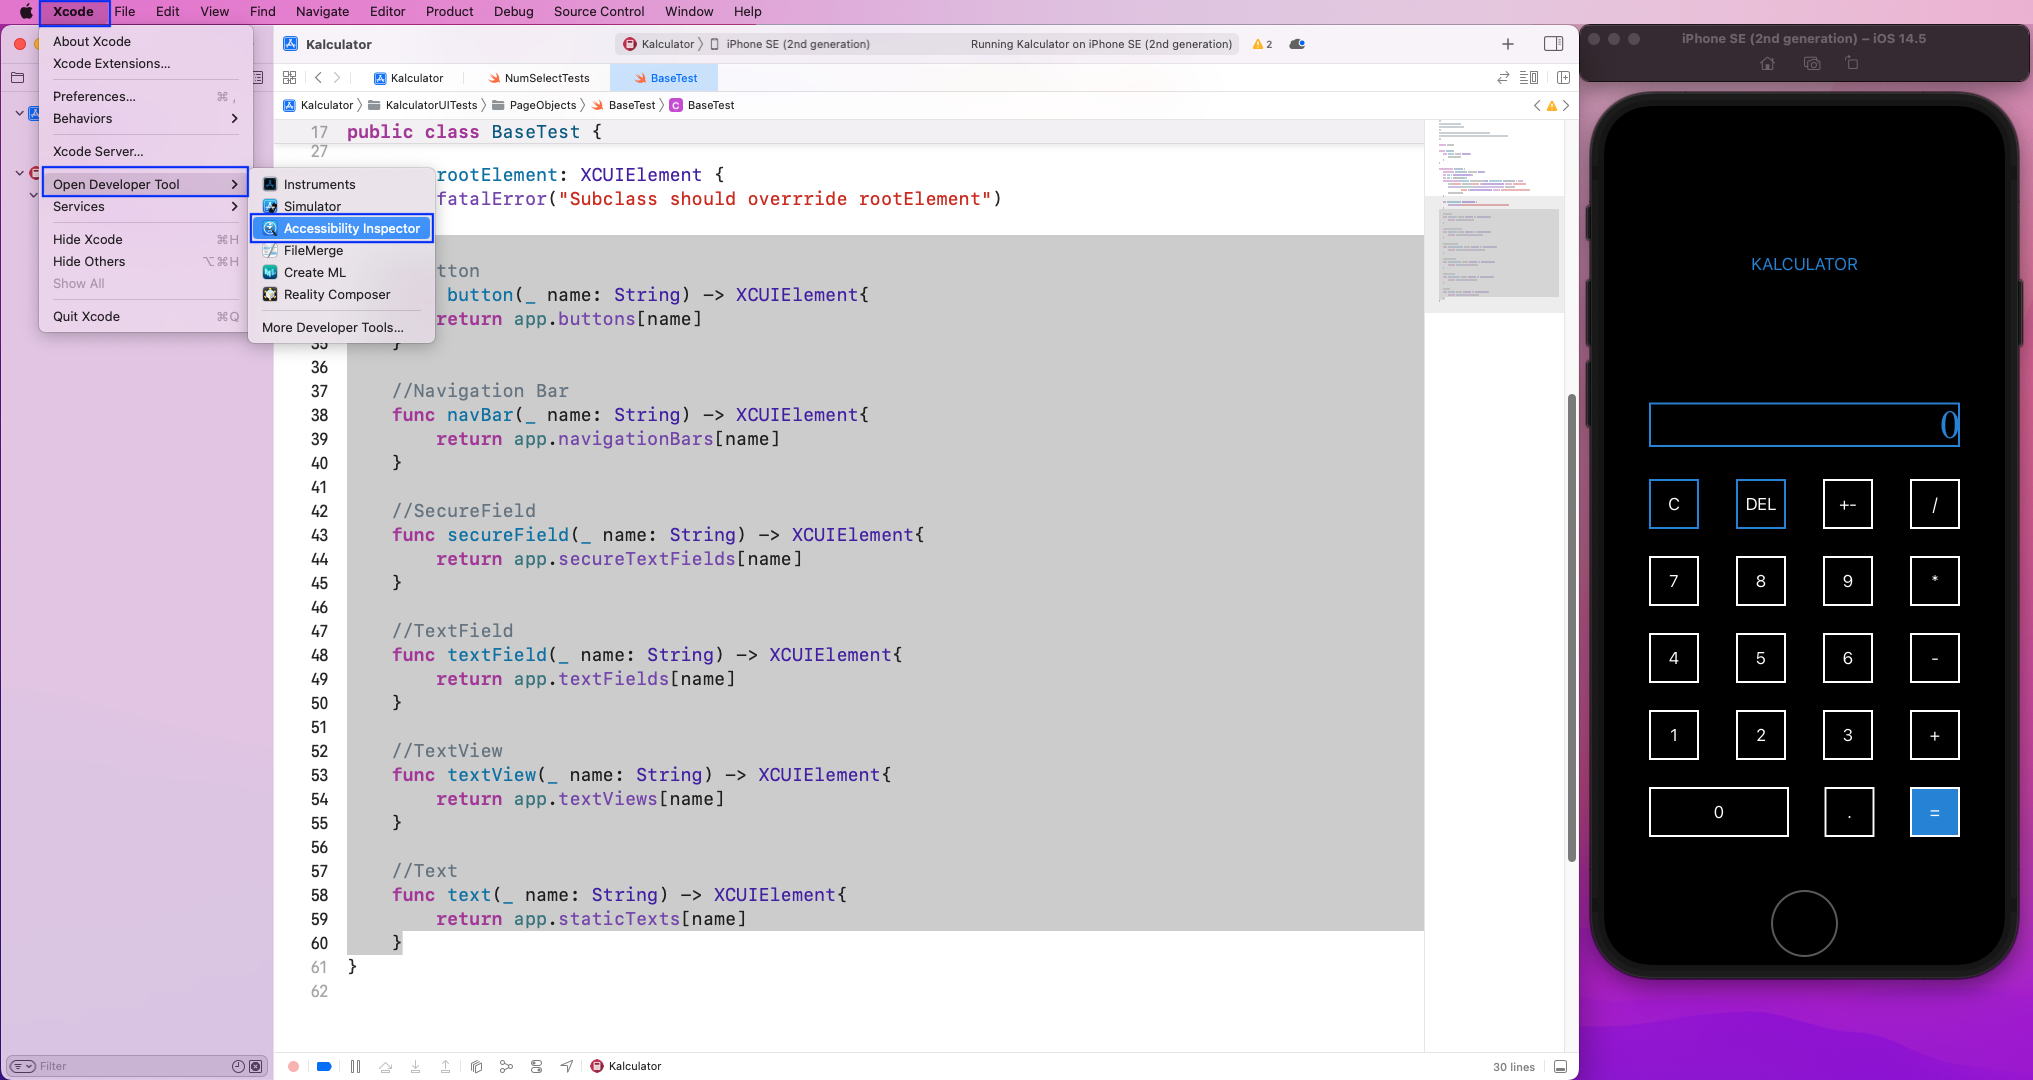
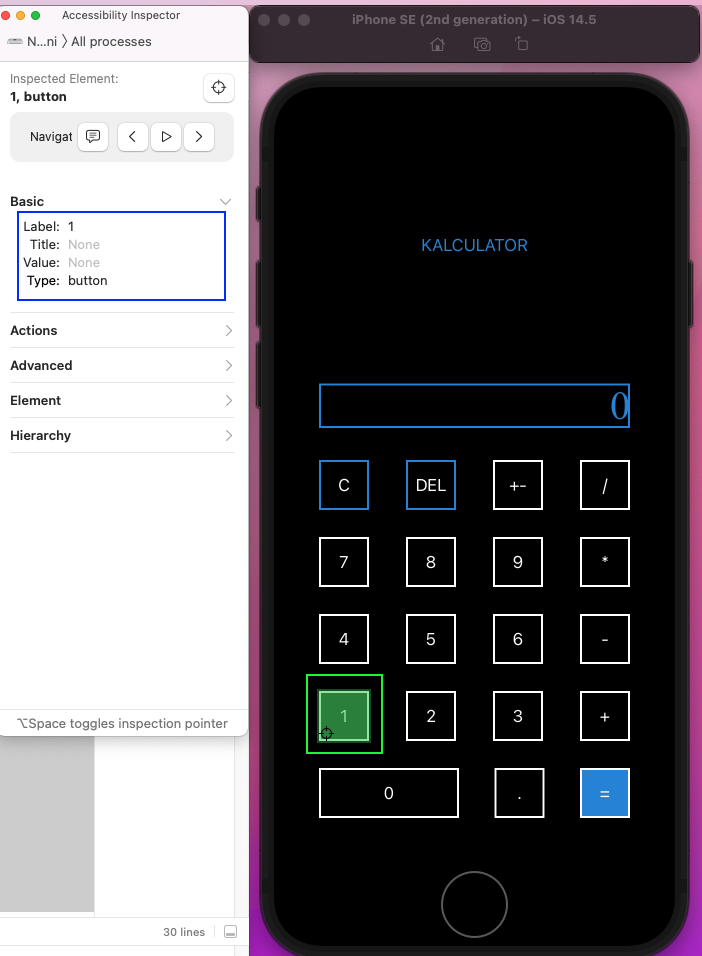
We need a unique ID for our app's elements. This is a must-have for automation testing. We're going to use a label for each element in our app. We'll use the Accessibility Inspector to get the labels. Open it by clicking on XCode -> Open Developer Tool -> Accessibility Inspector.
Next, open the calculator app in our simulator. Now, from the Accessibility Inspector, click on the target icon in the upper-right corner.
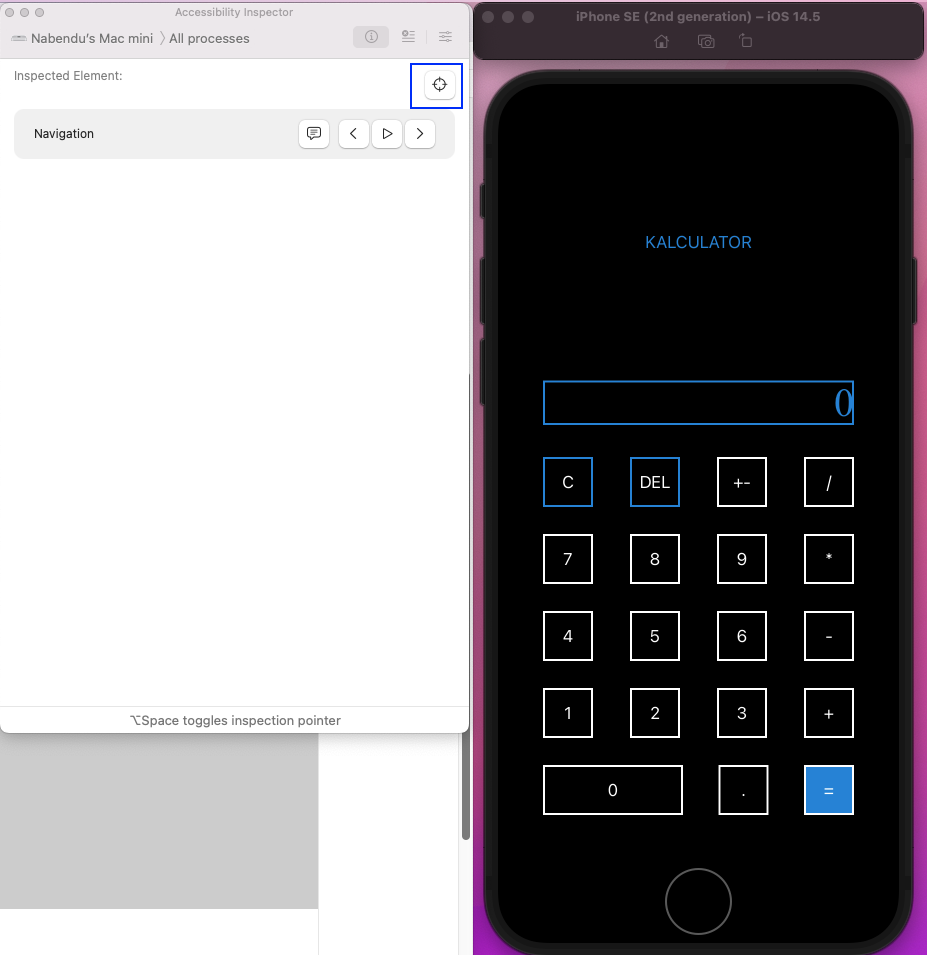
Now, in the Simulator, click on the different elements to get their labels. In the screenshot, you can see that we've clicked on Digit 1. Here, the Label is 1 for this element.
Executing Test Cases
Create a file CalcTest inside the PageObjects folder. First, the CalcPage class is inheriting from the BaseTest class. Then we are overriding the rootElement to have staticTexts of the 1.
Next, we created four variables: oneButton, plusButton, fiveButton, and equalButton. We took the labels for the same from our earlier interactions with Accessibility Inspector. These labels are used inside the staticTexts to get access to the elements.
We also created four functions: tapOne, tapFive, tapPlus, and tapEqual. These functions use the built-in method of tap and will perform the tap when testing is done.

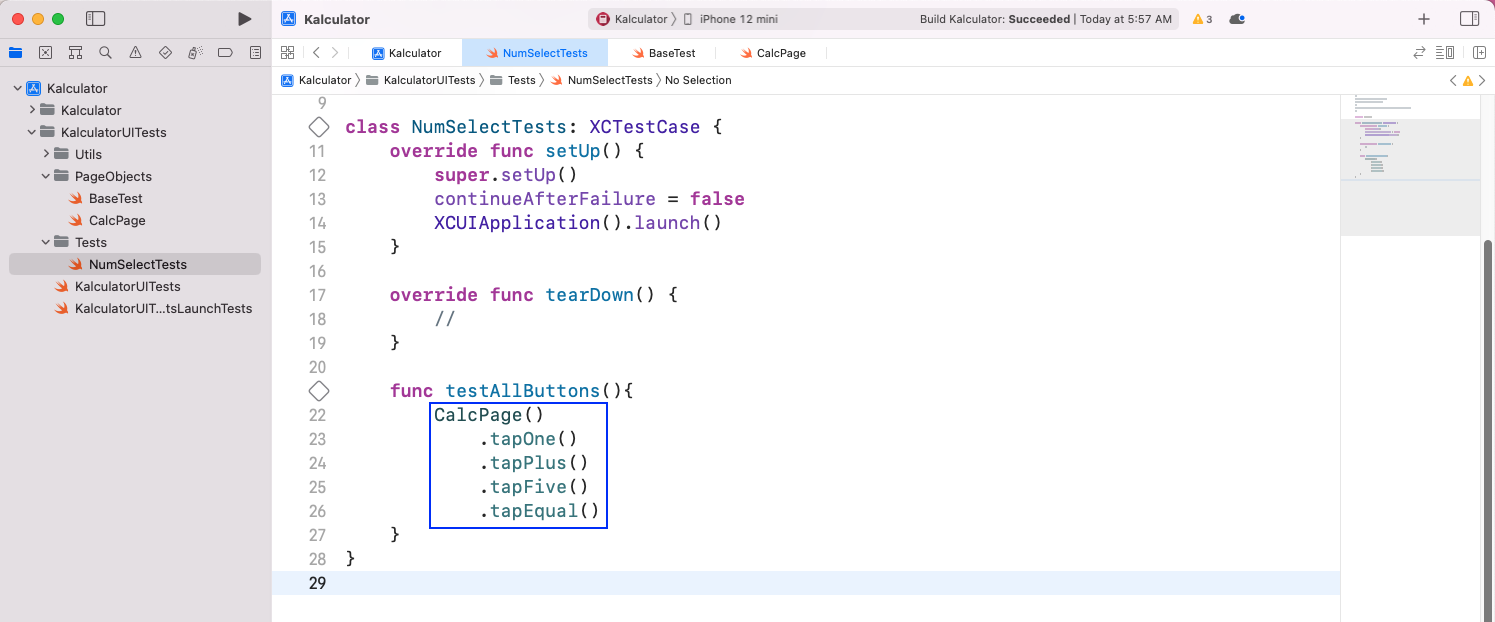
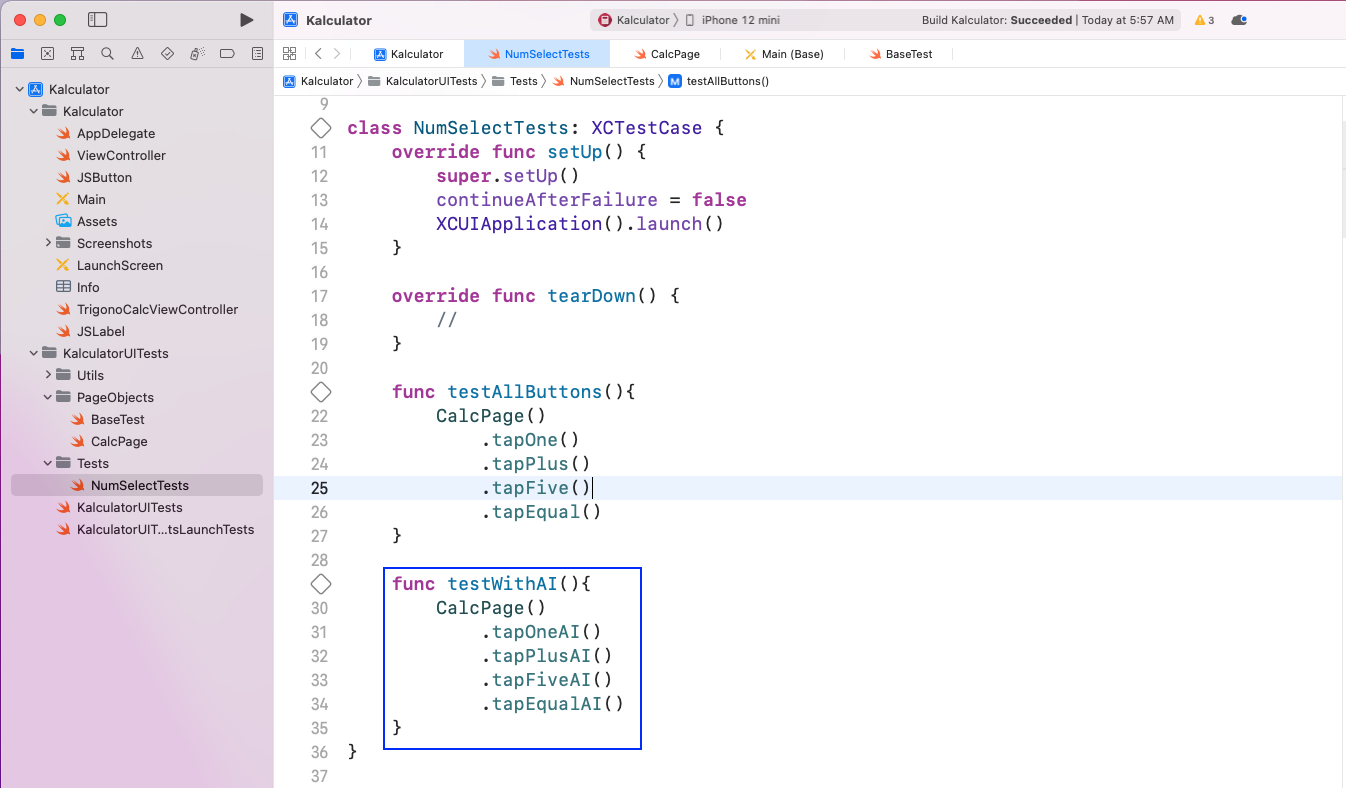
Next, in the NumSelectTests file, we'll first call the CalcPage class. Then we'll call all these functions.
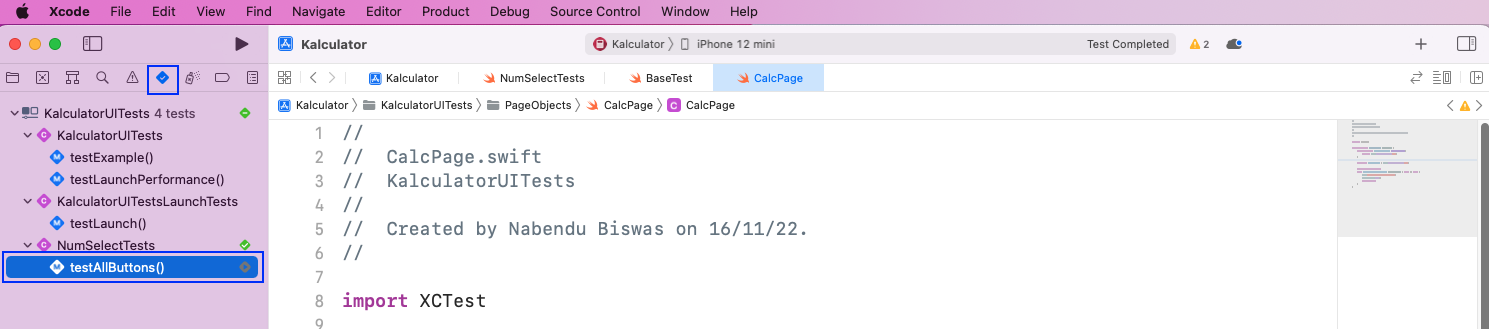
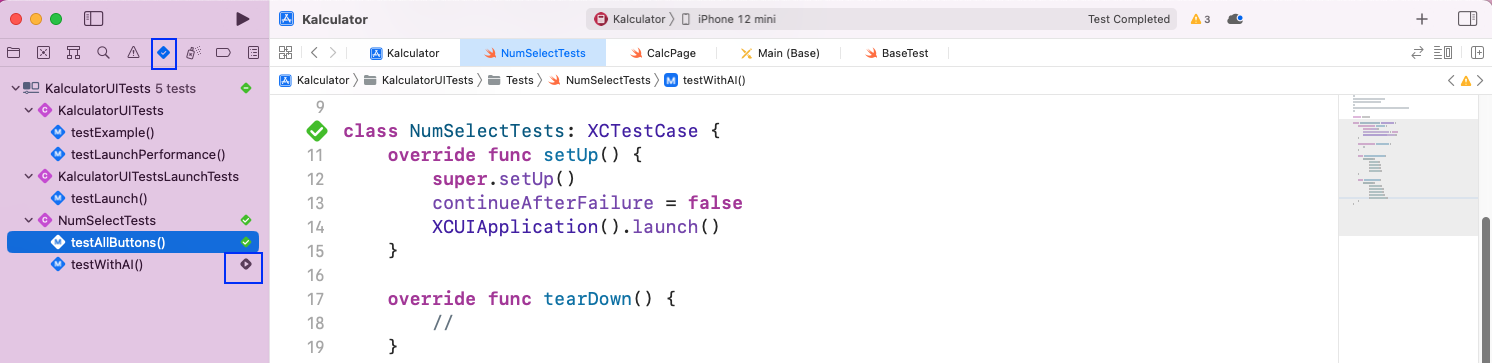
To run the test, go to the test tab. This is done by clicking on the tick icon, shown in the screenshot. Next, in testAllButtons, click on the play button to run the test.
The automated test will be run in the simulator. All the buttons will be pressed as if a real user is pressing them. We will also see the logs showing the test cases have passed.

Test Cases Through Accessibility IDs
The best locator strategy for automation testing is to find the Accessibility IDs. These IDs are generally unique because they are user given. And they are preferred in other automation testing, for example, with Appium.
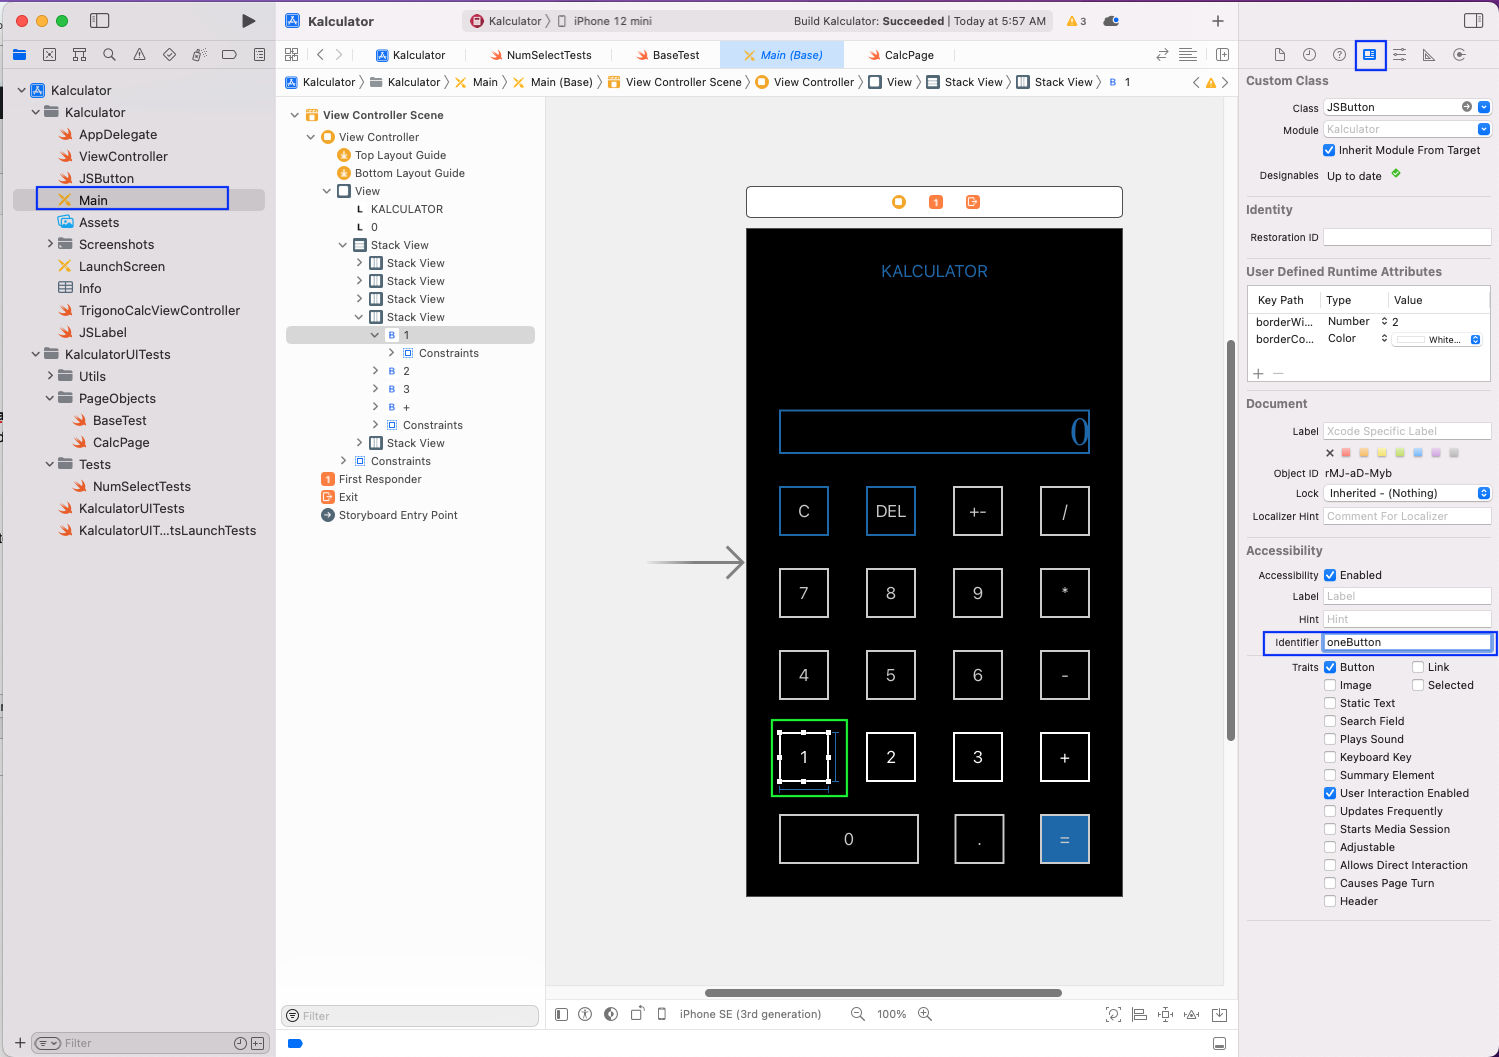
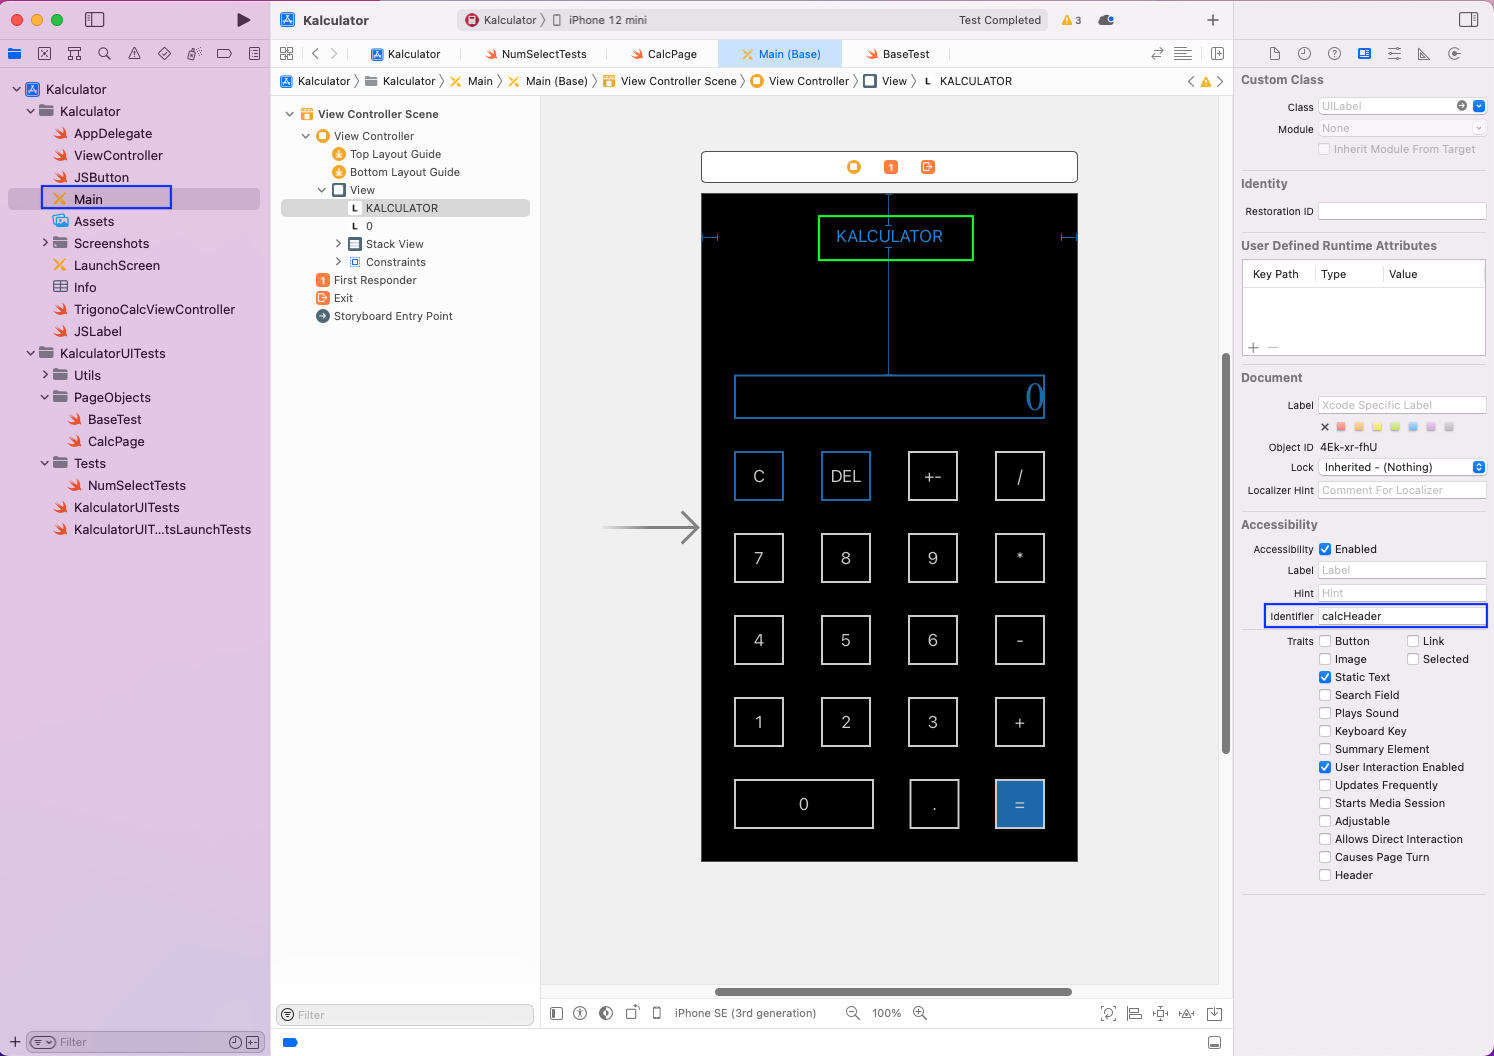
These identifiers are generally set by the developer during the coding. But the testers can also give them in iOS through Storyboard. In the calculator app, open the Main file. Select the digit one and give the Accessibility Identifier by giving the name in the Identifier box. We have given the unique name oneButton.
Following a similar procedure, we have given Identifier for digits 5, +, and = as fiveButton, plusButton, and equalButton, respectively.
Now we can access all buttons through their new Accessibility Identifier in our CalcPage file. We've also created new functions for all of them.
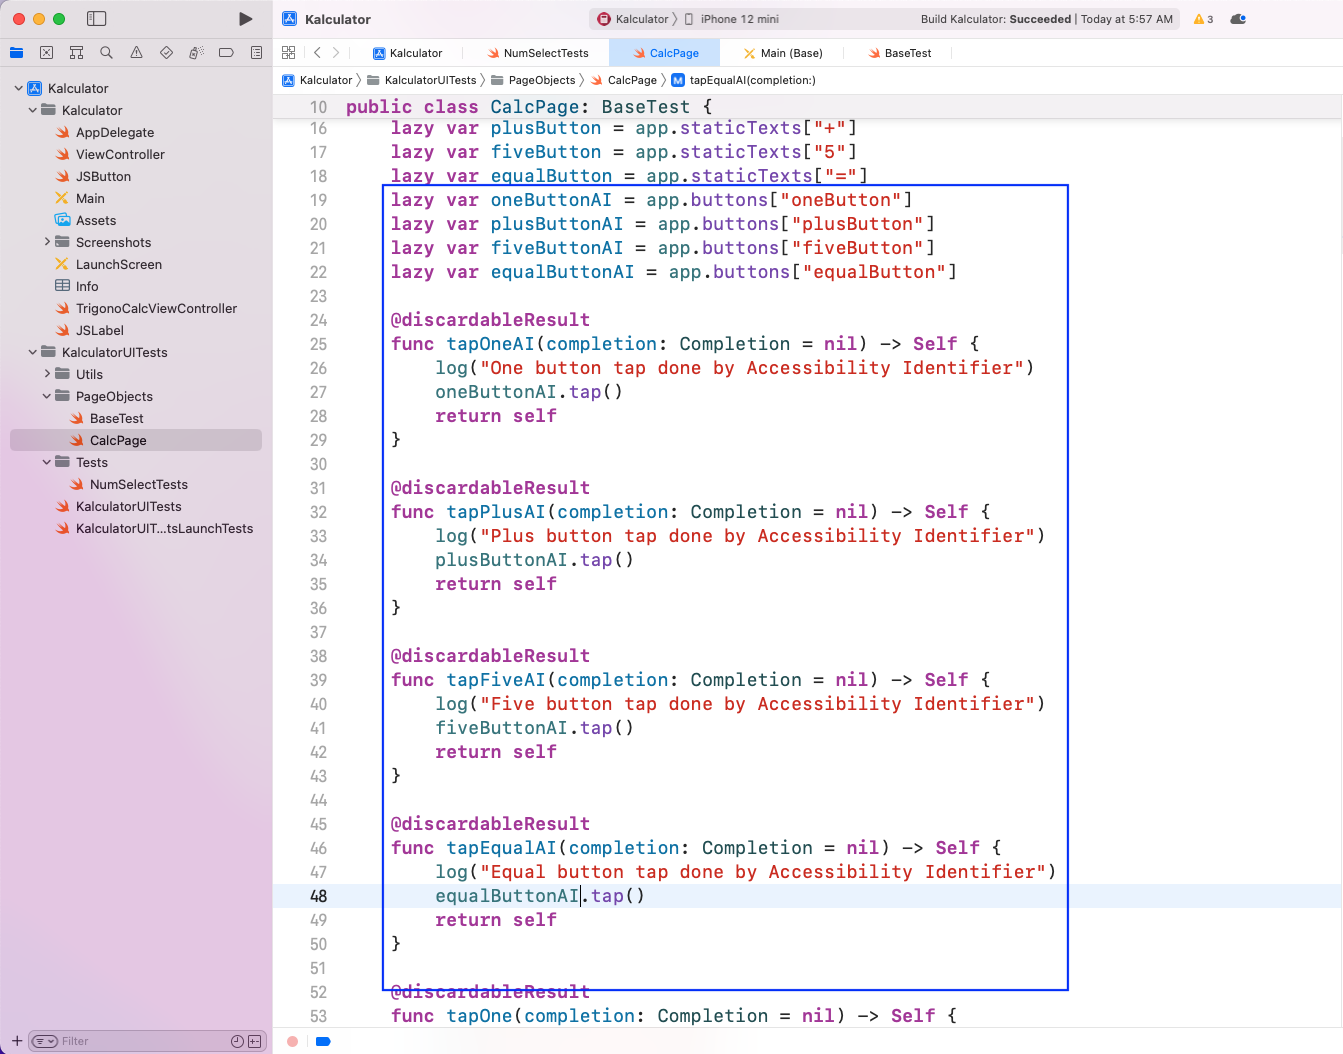
Next, in the NumSelectTests file, we've created a new function of testWithAI(). Here, we'll call the CalcPage class first. Then we'll call all these functions.
We'll also add another test to see if the header of KALCULATOR is there in our app. So, again in the storyboard file Main, we'll select it and give it an identifier called calcHeader.
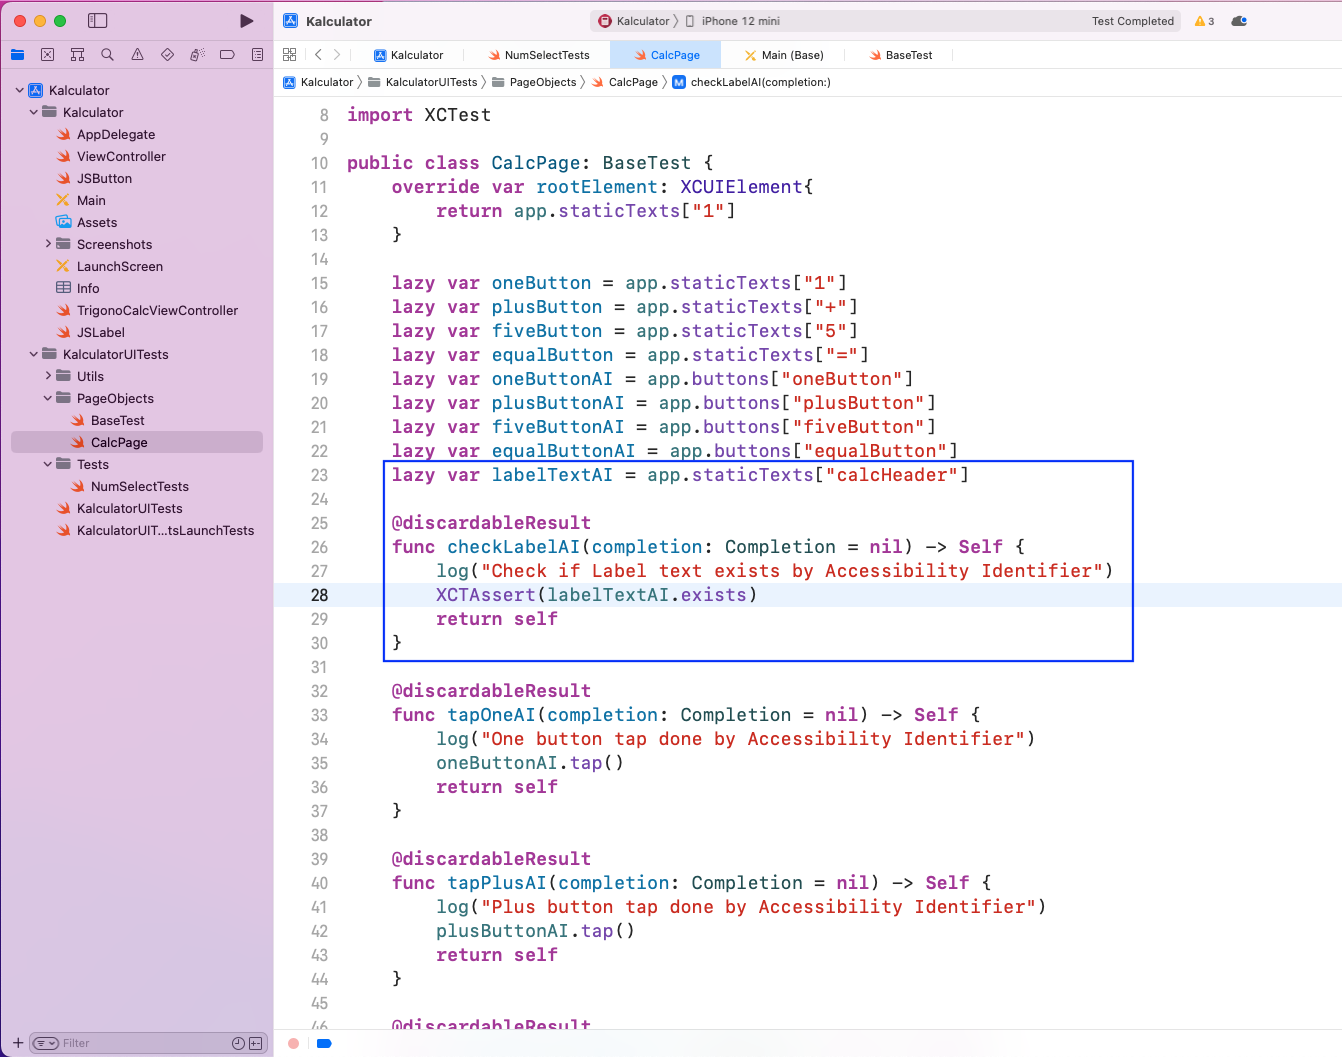
Back in the CalcPage file, we added the new variable of labelTextAI. We selected this static text, using Identifier calcHeader.
After that, we created the function checkLabelAI(). Notice that here, we're using the XCTAssert() function to test whether that label exists.
Next, we'll call this new function checkLabelAI() from within testWithAI() in the NumSelectTests file.

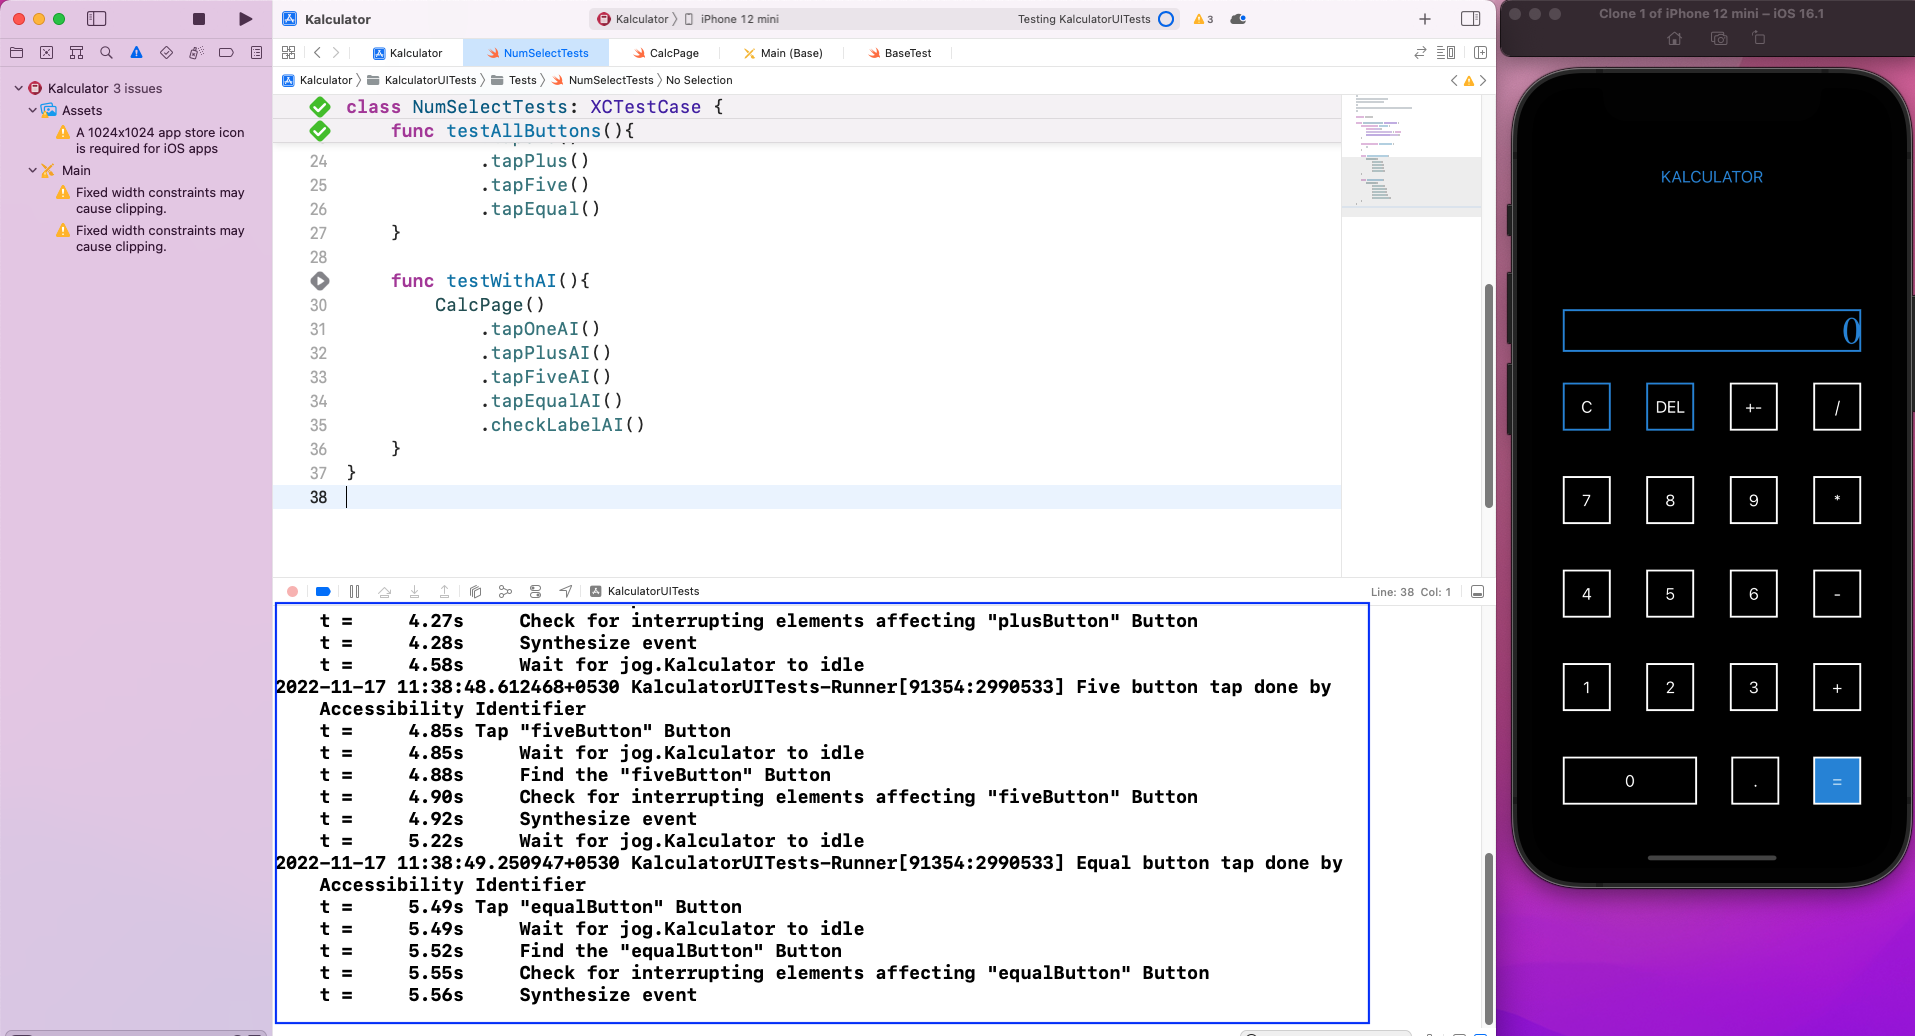
Again, go to the test tab. Click the play button after testWithAI() to run the test.
The automated tests will run in the simulator. And we'll also see the logs showing the test cases have passed.
Performance Tests
We can also do performance tests easily with XCUITests. These tests are very important for apps. And they tell how our app will perform under load, like a lot of users accessing it at once.
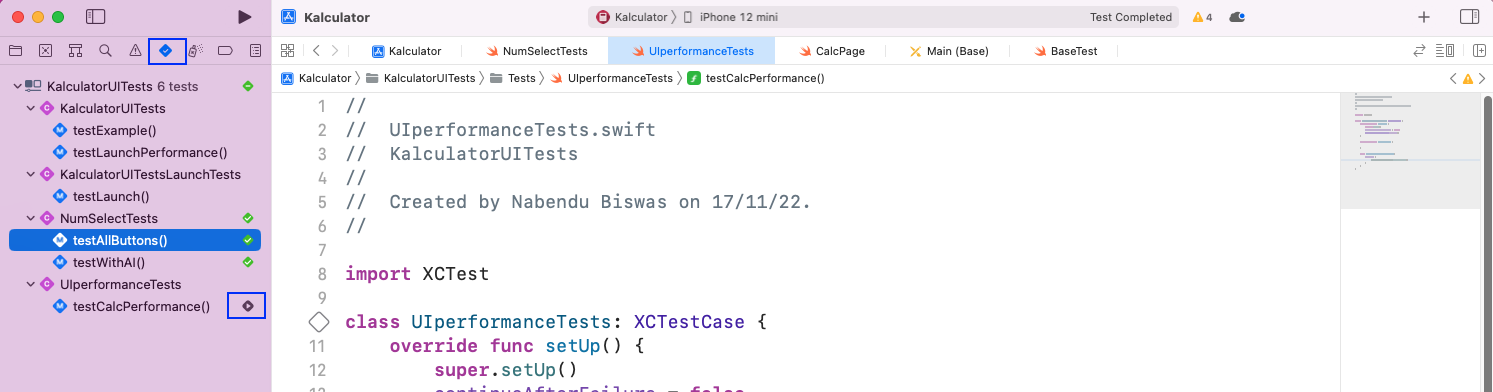
We will now create a new file, UIperformanceTests, inside the Tests folder. As with NumSelectTests, we have the initial setup of launching the app. After that, we have a function testCalcPerformance(). Inside it, we have a measure parameter, and inside it, we are running the testWithAI() function.

Now, we'll run this new test case of testCalcPerformance() from the test tab.
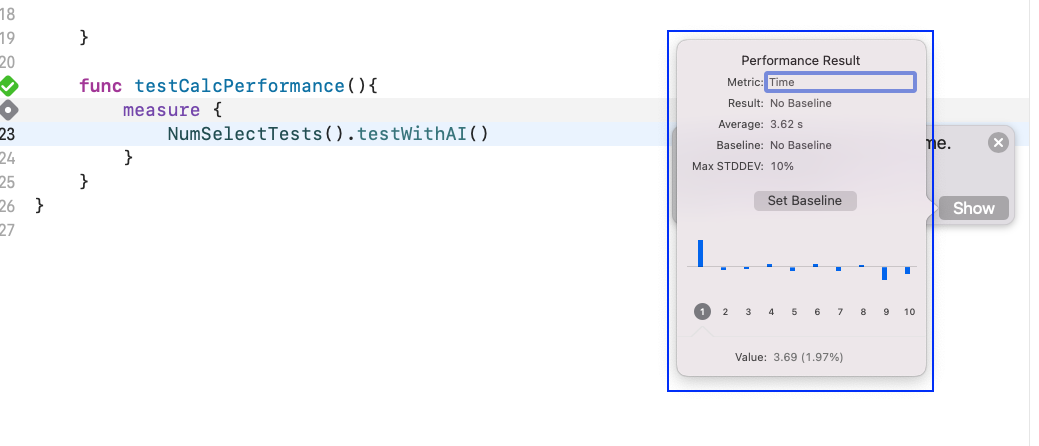
The testWithAI() function will be run 10 times in the simulator. After that, we'll get a pop-up in the project.

Clicking on this pop-up will expand it. After that, click on the Show button.

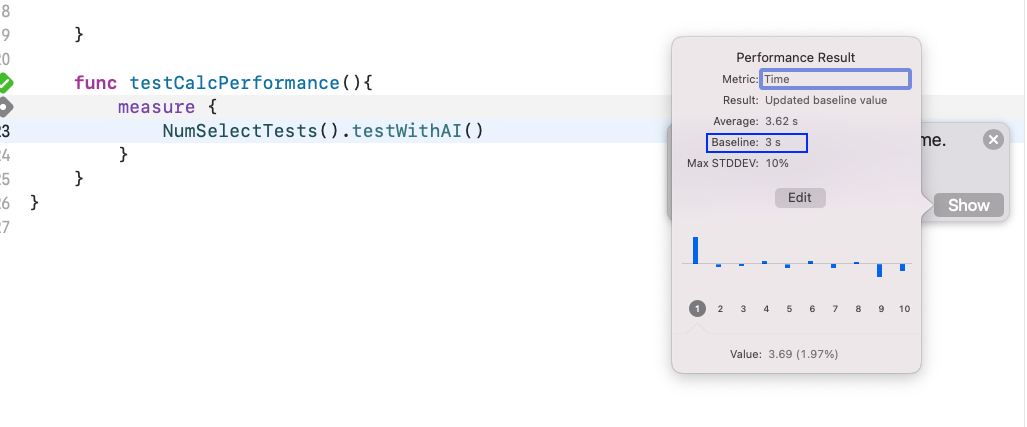
This will show the details of the performance test, namely, that our function took 3.62 seconds to run.
We'll now edit the baseline and give it 3 seconds. In production apps, we'll always give the baseline and try for our program to run within it.
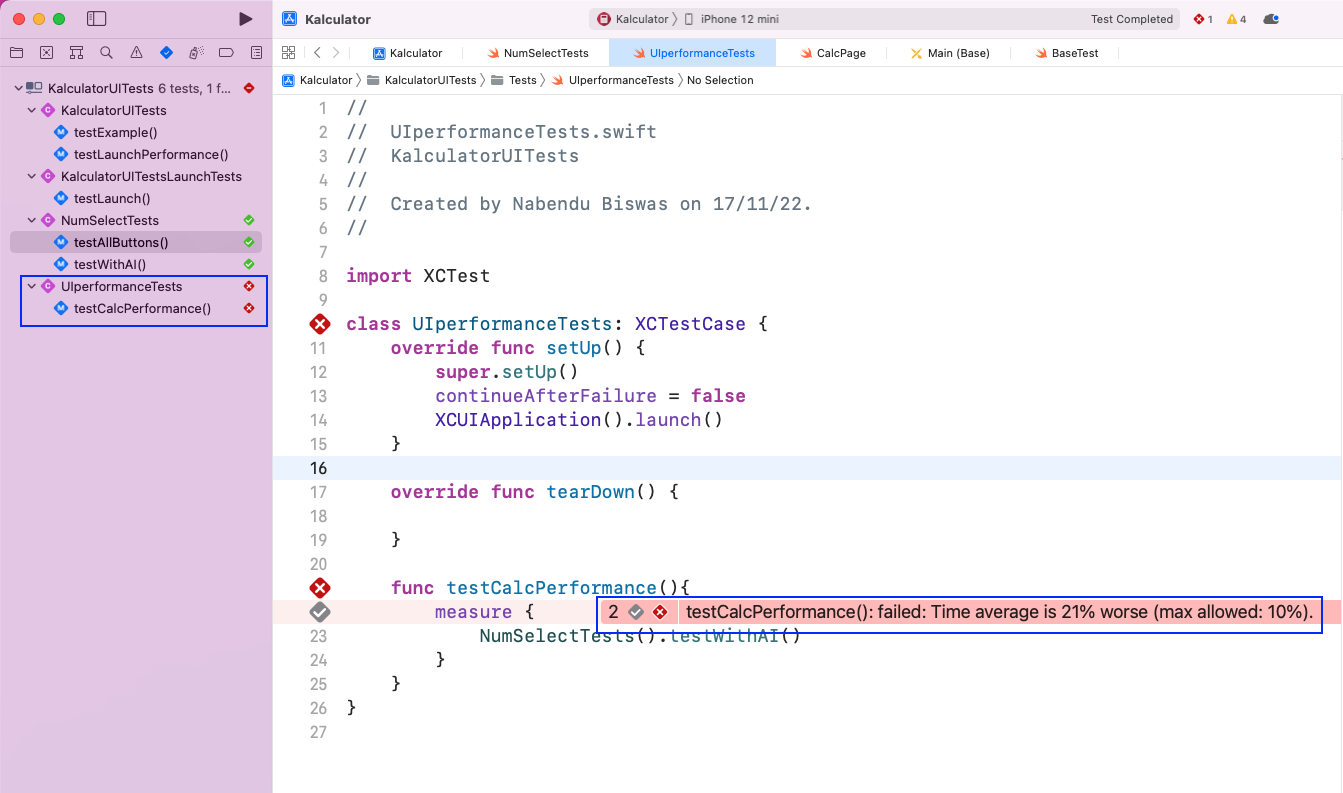
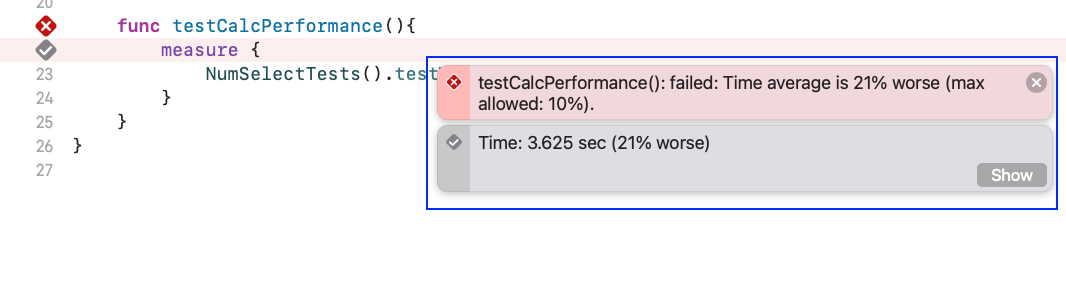
We will again run the test, and this time it fails. And we'll get a red pop-up for the same.
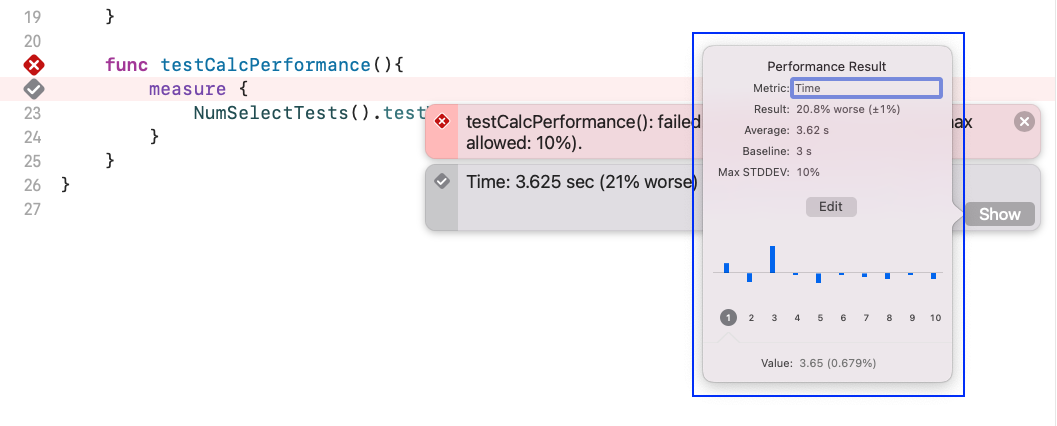
Clicking the pop-up will expand it. Again, click on the show button.
It will show the detailed pop-up again.
What You've Learned
In this post, you learned about the XCUITest, which is the default automation framework in XCode. You learned to do automation testing in iOS apps using XCUITest. Then you learned to test both through labels and Accessibility Identifiers. In addition, you learned to do performance testing in the same app.
But if you want to test your apps more easily, then give Waldo a try. You only need to provide the APK or IPA (iPhone Application) file. Once you upload the APK file and run the test, Waldo automatically generates test cases and emails it to you.
Automated E2E tests for your mobile app
Get true E2E testing in minutes, not months.


