


.jpg)
Automation testing with Appium requires a unique ID to identify the on-screen element of a mobile app.
Accessibility IDs are given programmatically by the developer of the mobile app. They generally have a benefit over using an element ID or other identifier.
In this post, we'll cover Appium accessibility IDs in depth. Then, we'll create an app and learn how to put accessibility IDs in it.
.png)
What Is Appium Accessibility ID?
Appium accessibility ID is a type of locator strategy used to find an element.
A developer provides the Appium accessibility ID when writing the code. It's a unique ID with the name accessibilityLabel, which is given as a tag to any element. Later on, we'll see an example of this when we use it in a project.
The accessibility label is known as the accessibility ID on iOS and content description on Android.
One major advantage the accessibility ID has is that it's a cross-platform. This means that if an app is created with cross-platform frameworks like React Native or Flutter, it'll be the same on iOS and Android devices and, thus, the same test will run in both.
They are also faster in comparison with other locator strategies like XPath and element IDs. These IDs can be found directly by traversing the code, whereas in XPath the whole app needs to be traversed.
When we give accessibility ID, it also helps people with some form of disability. Many people browse through apps and websites using screen readers. The accessibility IDs help in those cases, and they're even a requirement in some countries.
However, one major disadvantage is that the accessibility ID is completely dependent on the developer. So, developers have to give good unique IDs, and the testers should have access to the code to know the ID before testing.
Locator Strategies
Locator strategies refer to the type of selector we'll use to select a UI element.
Suppose we have a button and we want to select it to write test cases with Appium. Then, we can select it according to ID, class name, name, XPath, and accessibility ID.
These are known as locator strategies. We can find them by clicking on any element in Appium Inspector in the connected app.
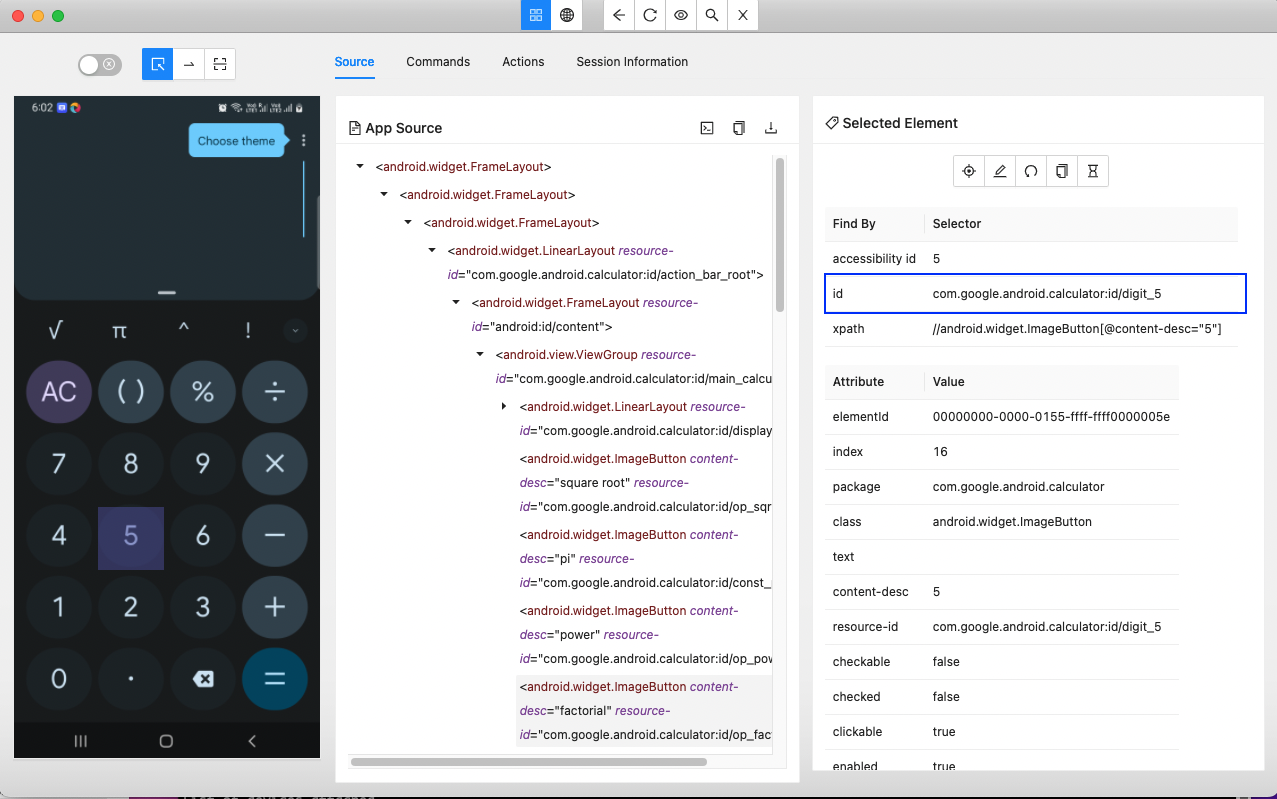
Now, the code to find this by ID (our locator strategy) will be below. Here, we're using the findElement method of Selenium/Appium related to the number 5 by passing its ID.
You can learn more about how to find locator strategies in our post titled "How to Write 3 Types of UI Tests With UIAutomator."
Our React Native Project
Now, let's set up the accessibility label in a simple React Native app.
To use Appium, we need to complete the WebDriver setup in the app. Instructions about the initial setup and WebDriver setup can be found in our post titled "How to Test React Native Apps With Appium."
The App.js file in React Native is the starting point. Additionally, it contains a lot of boilerplate code. So, in the App.js file, remove all the boilerplate code and insert the content below.
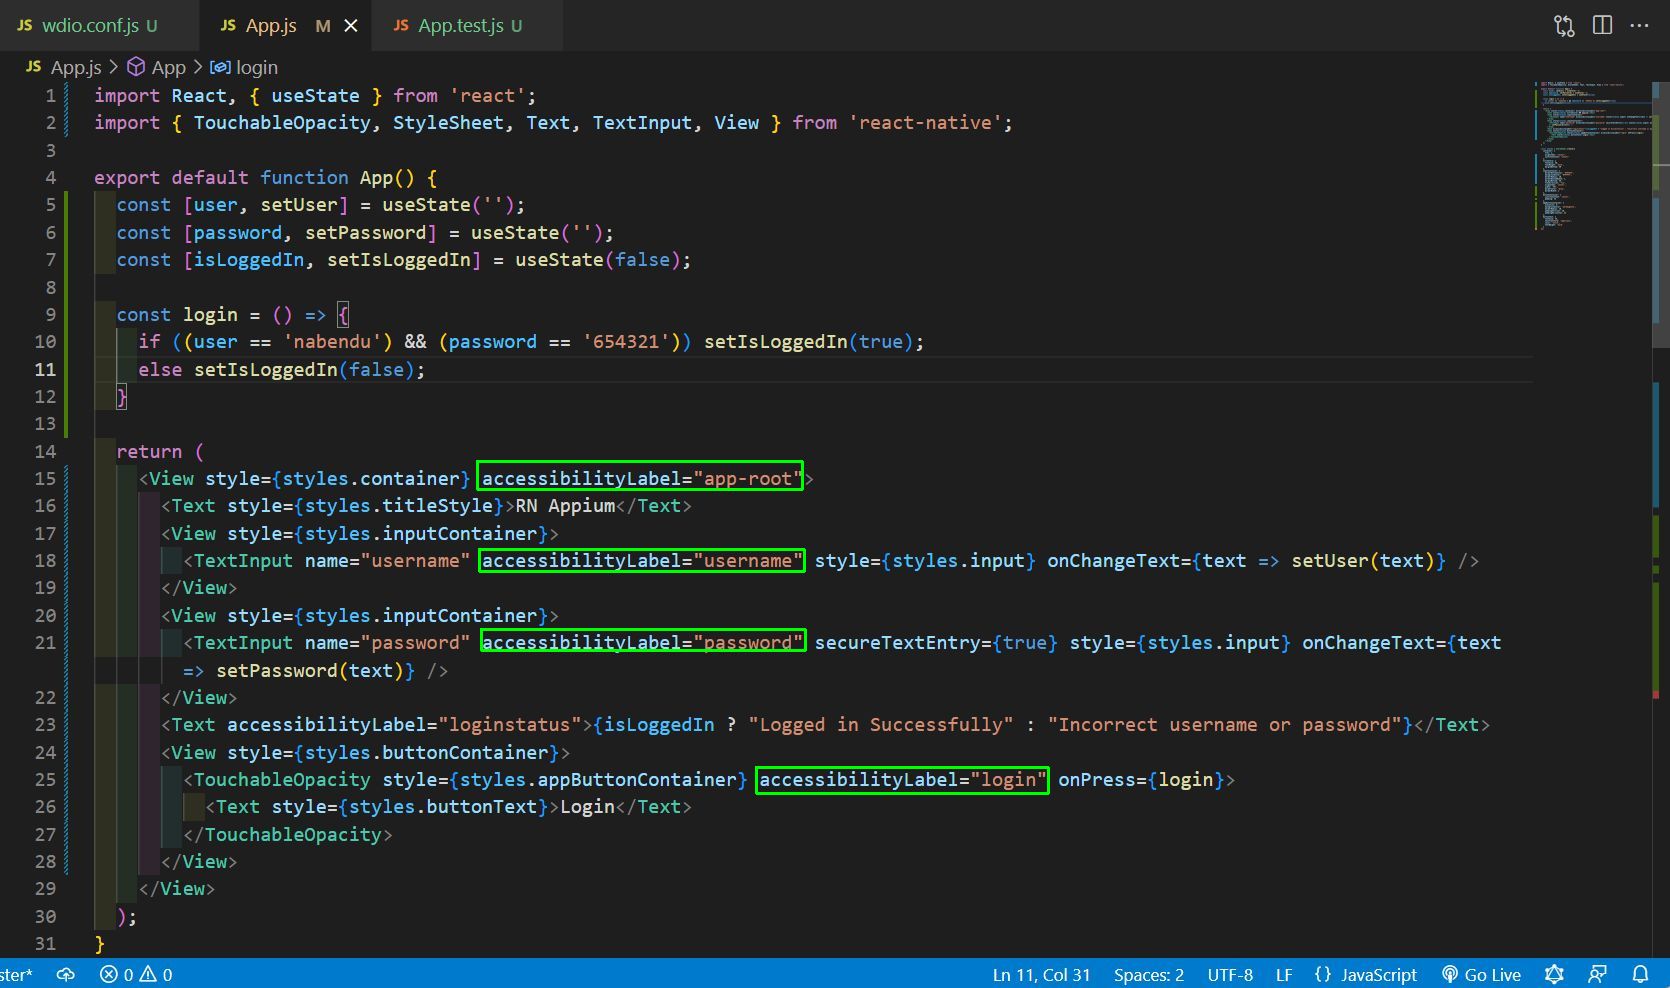
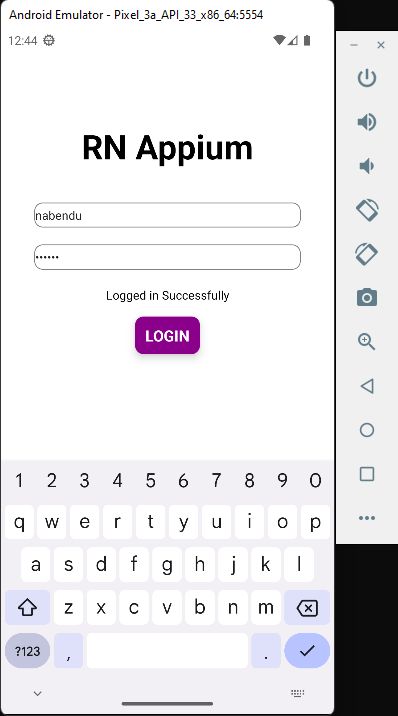
Here, we're using the useState hook of React to create three states: user, password, and isLoggedIn. Inside the return, we have two TextInput to take input for username and password.
Next, we have a login button that activates the login function. This is simply checking for a user, "nabendu," with a password, "654321."
It sets the isLoggedIn variable to true or false depending on whether the correct credentials are given. Furthermore, it'll show either "Logged in successfully" or "Incorrect username or password" depending on the isLoggedIn variable.
The main thing to notice here is the attribute of accessibilityLabel in each of the elements.
This is the accessibility ID, and it's set by the developer. So, the developer is expected to give something unique to it while also conveying the same to the tester.
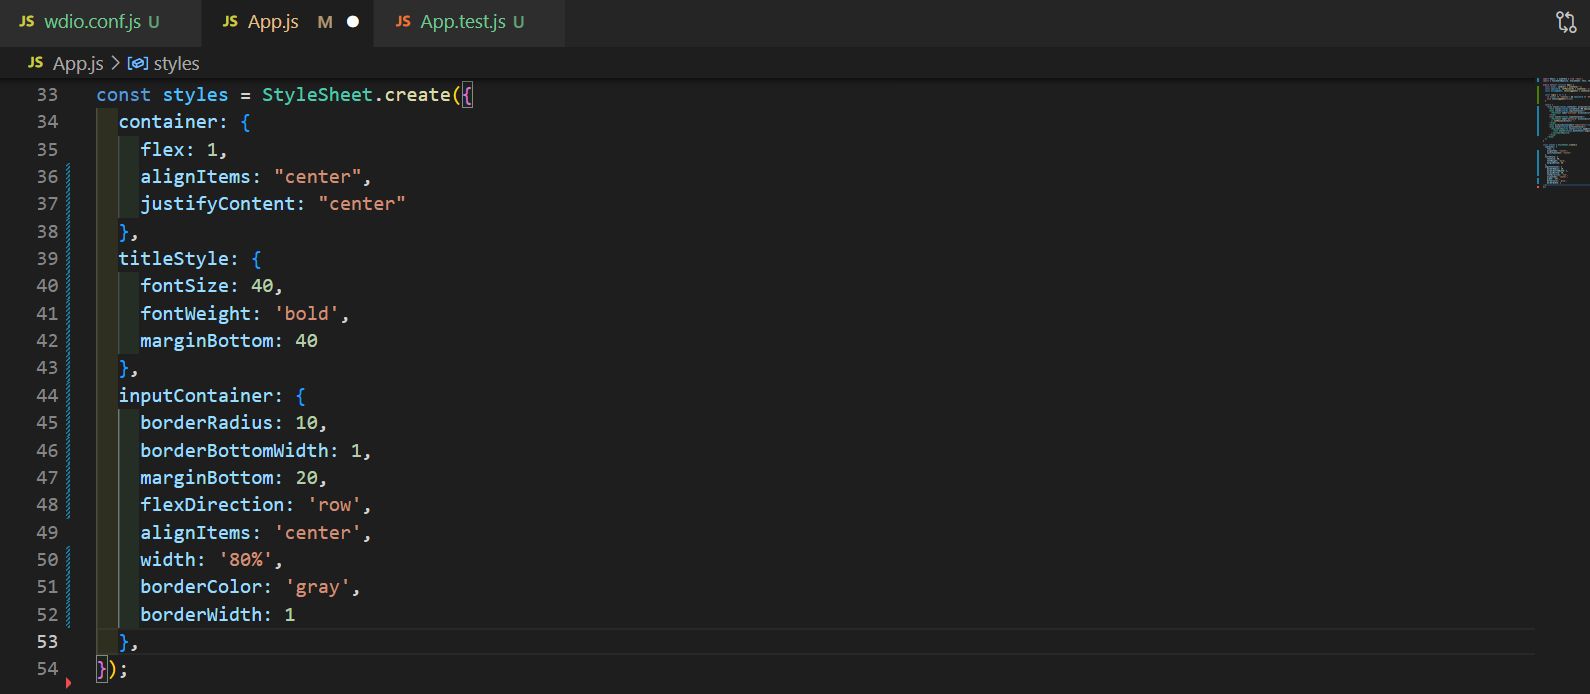
Now, let's add styles in the App.js file. Here, we'll first add the styles for the root container, title text, and the input containers.
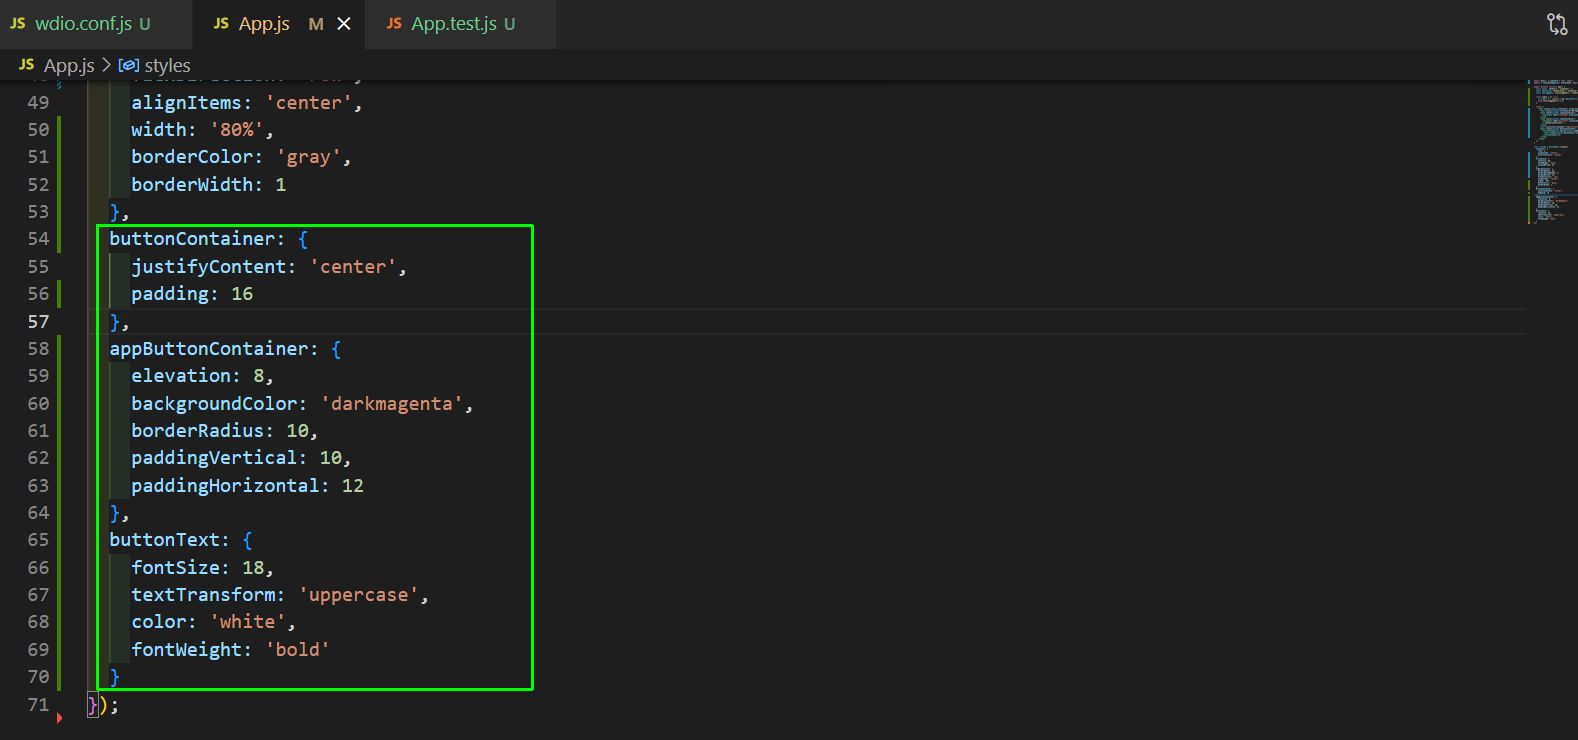
Then, we'll add the styles for the button in the App.js file.
Writing Test Cases
Even before writing test cases, we need to generate an APK file and change configurations in the wdio.conf.js file.
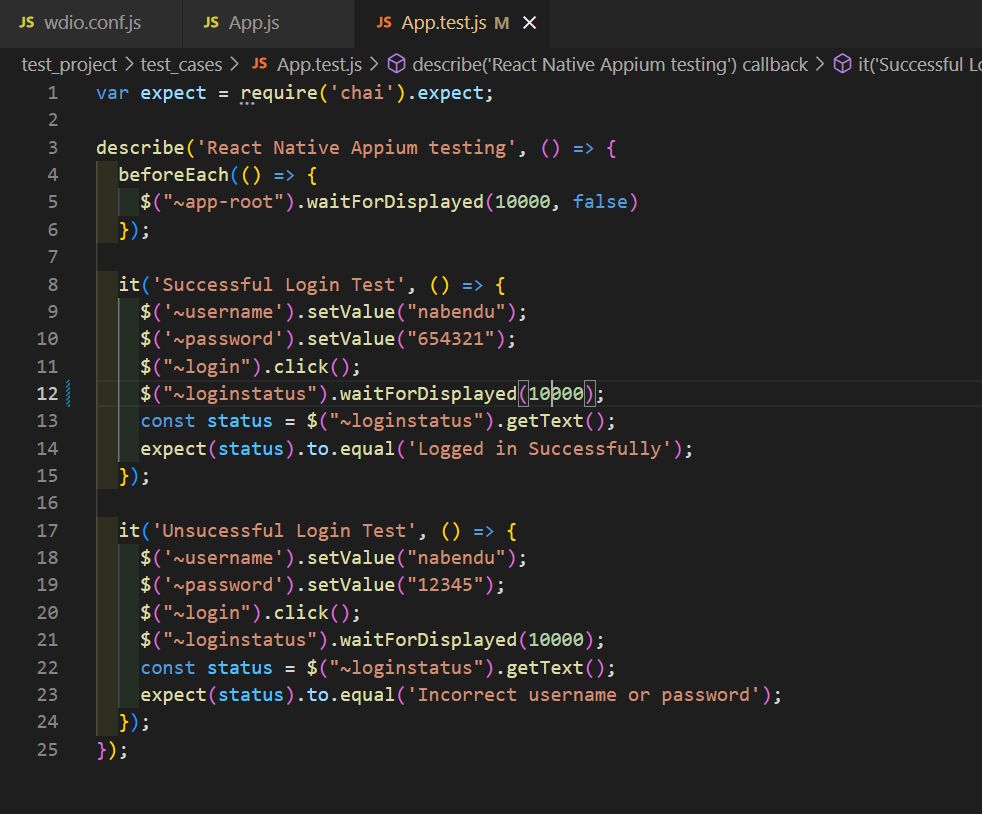
We'll write the test cases in an App.test.js file. Create this file inside a test_cases folder, which we can create inside the test_project folder.
Here, we'll write our test cases with the Chai framework. The describe function will give the test name, which is "React Native Appium testing" in our case.
In beforeEach, we mentioned that the test should be displayed after 10 seconds. Then, we need to give the code in beforeEach, as the test should run after our app is loaded in the connected device.
In our App.test.js file, we have two simple tests. Both tests are exactly the same, but we're giving the wrong credentials in an unsuccessful login test. Also, the message is based on what we gave in our App.js file.
The main thing to note here is the usage of accessibility ID in lines 5, 9, 10, 11, 12, and other places. Notice that to access the element, we're using the tilt (~). The different ways of all languages can be found in this official documentation.
How to Know Which Element Has Accessibility ID
It's somewhat difficult to find the accessibility ID if the developer doesn't share that information. If they do, you can directly write test cases as we did above.
In most cases, you'll only receive the APK file from the developer. So, you'll have to manually find the accessibility ID of each element.
The Appium Inspector or UIAutomator Viewer tool can help you do this easily.
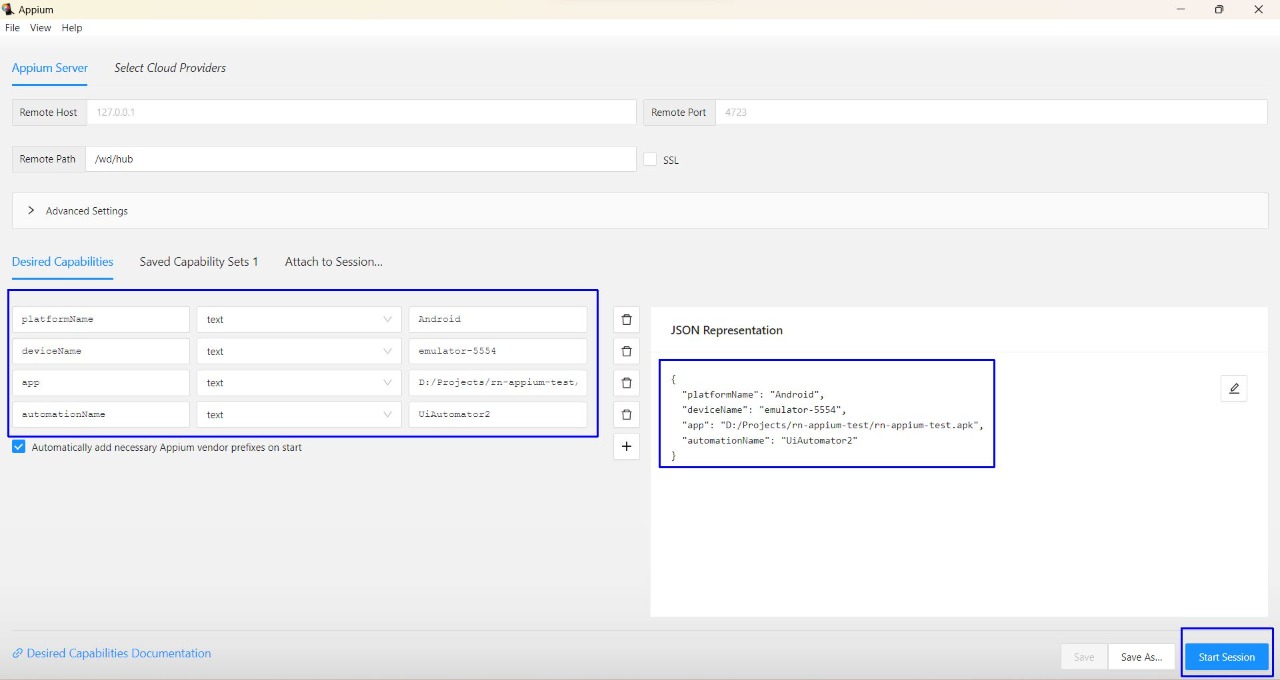
After starting Inspector, we need to give the desired capabilities to connect to the app. We also need to give the desired capabilities for our React Native app. Notice that the APK file is mandatory to give.
Now, click on any element to get all its locator strategies, including the accessibility IDs.

How to Find My Element ID in Appium
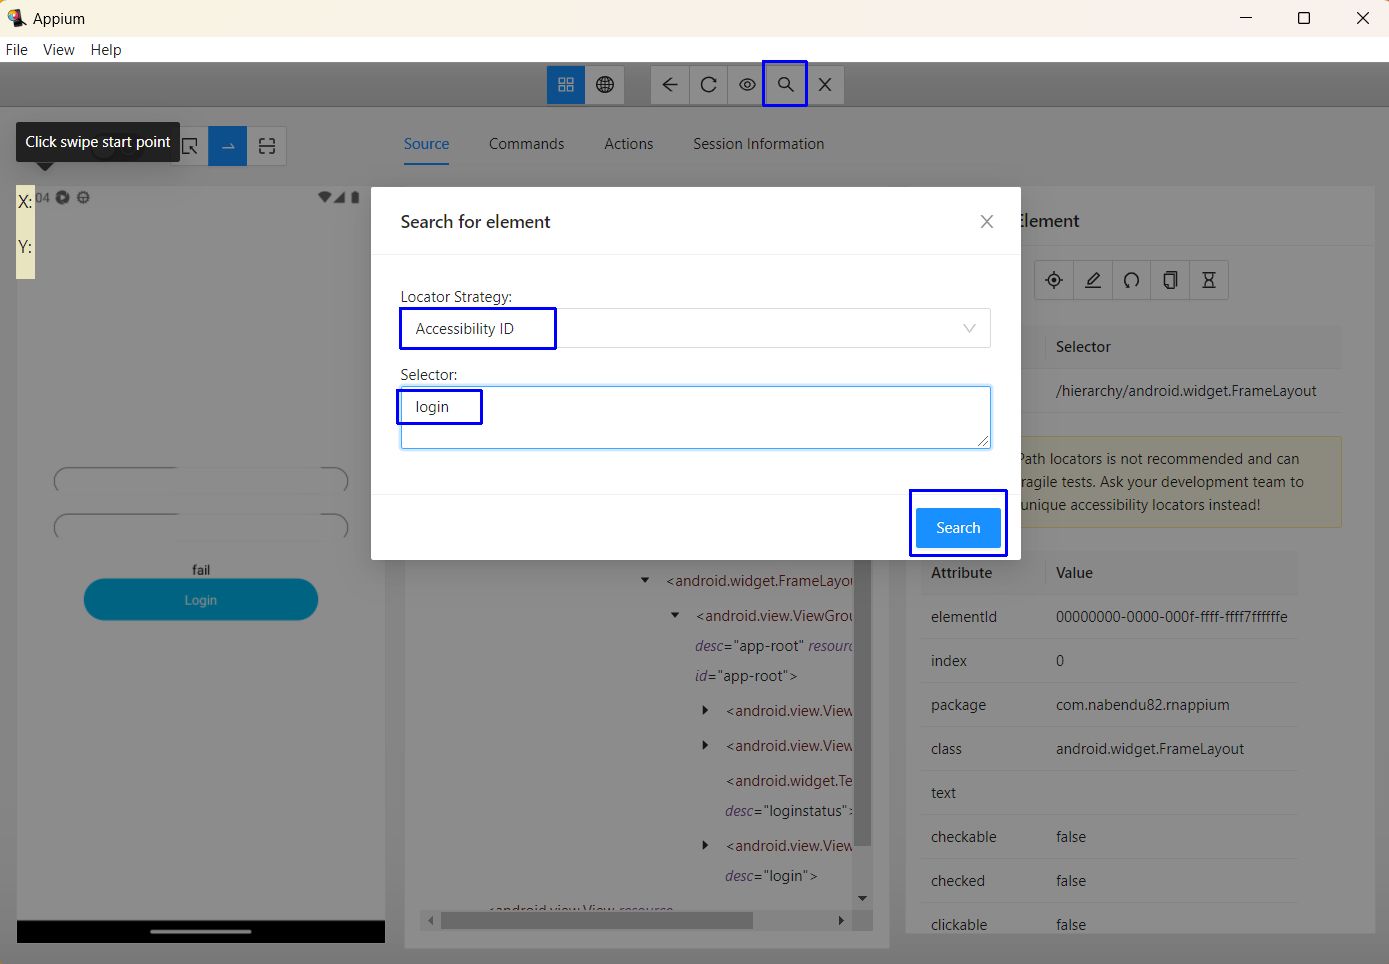
Sometimes you know the accessibility ID but need to know the unique element ID. Appium Inspector has a feature to help you do this.
Open the Search for element pop-up by clicking on the magnifying glass icon. Here, select "Accessibility ID" from the Locator Strategy drop-down and type "login" in the Selector field. Then, click on the Search button.
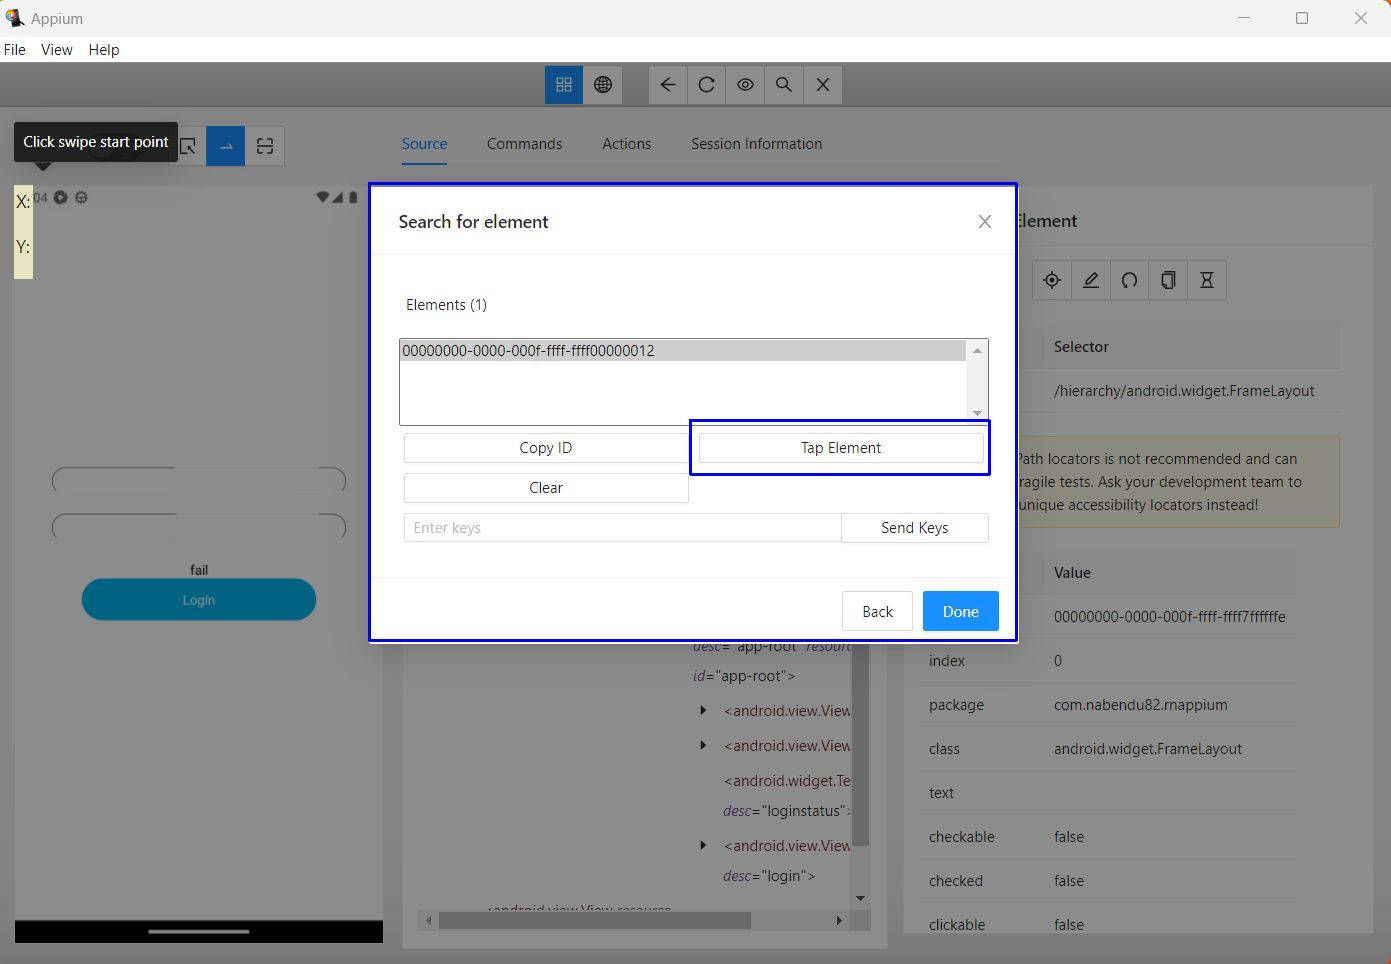
A pop-up will show us the elements. We can copy the ID for further use in our test cases.
Again, we can also click on Tap Element, and this will actually activate the Login button in our emulator.
Running Appium Tests
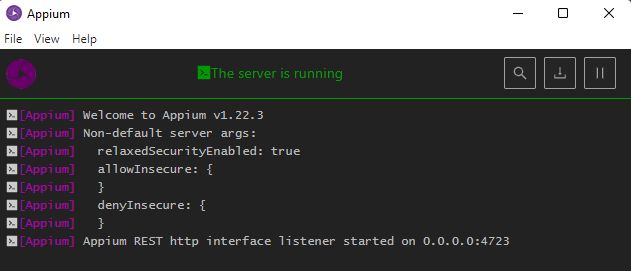
Now, to run the tests, we need to bring the Appium server up. Here, we'll start it using the desktop app.
Next, we need to run the below command from inside the test_project folder:
Our emulator will perform the automated tasks.
What We've Learned
In this post, we've learned about Appium accessibility ID, including the fact that developers set the accessibility IDs and that it's very useful for testers to quickly write automated tests.
We've also created a React Native app to learn these things.
If you want to test your apps more easily and without the hassle of writing test cases, then you should try Waldo. This no-code testing platform only requires you to provide the APK or IPA file. Then, you're able to interact with the mobile app like a real user, and it'll automatically generate the test cases and send you results via email.
Automated E2E tests for your mobile app
Get true E2E testing in minutes, not months.


