


React Native is used to write cross-platform apps, which can run in both iOS and Android. Now, writing unit test cases in React Native is a pain since we need to write for both platforms, so we prefer to do automated testing using a framework like Appium.
In this post, we are going to briefly discuss what Appium is and then show you the steps for using it to run automated tests for React Native.
What Is Appium?
Appium is a completely free-to-use mobile app testing framework. It can be used to test native apps written in languages such as Kotlin, Java, Swift, or Objective-C. Or it can be used to test hybrid mobile apps created using languages like React Native or Flutter. In this post, we are going to test a mobile app written in React Native.
We can write test cases in Appium using languages like Java, Python, JavaScript, or PHP. In our post on automated testing with Appium and Python we showed how to test an app using Python. Appium runs test cases on connected devices as if a real user is interacting with the device.
Some might wonder, Can Appium be used for React Native? Yes! We can use Appium to test React Native apps. The test cases can be written using a React Native testing framework like Chai, which is what we'll be using.
Testing React Native With Appium
With Appium, we can write test cases for automation testing. Then the tests will run in the connected device or emulator and appear as if a real user is interacting with the device.
The two main components of testing a React Native app with Appium are WebdriverIO and Chai. WebdriverIO is a completely free testing utility that connects Appium to a React Native app. Chai is a popular framework used to write test cases in React Native.
Appium Installation
Appium can be installed in two ways in the system. One is through an npm package using the command line, and the other is through an EXE file.
Initial Setup and Webdriver IO Configuration
We will first create a React Native Expo app. You can also check out our post in which we created a React Native Expo app to show video.
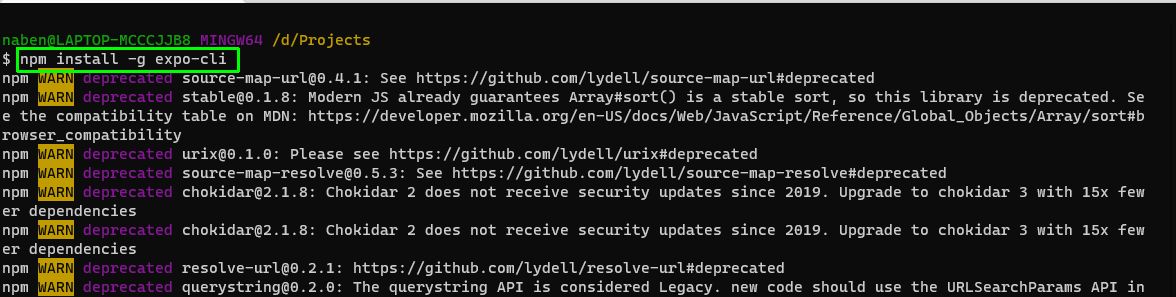
We need to install expo-cli globally if that has not already been done. The same can be done from the terminal using the below command:
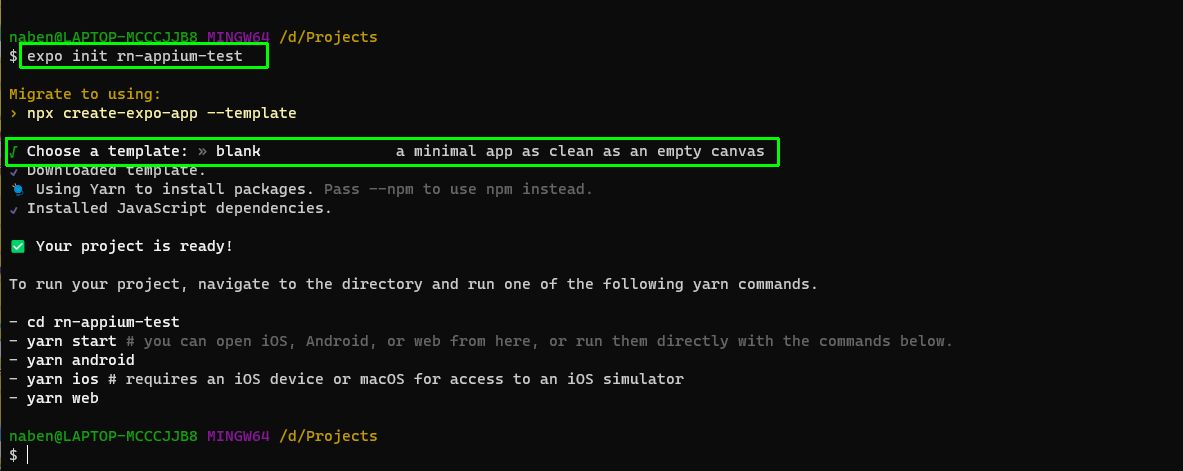
Next, we will create a new Expo app using the expo init command. Here we need to choose a blank template as shown in the screenshot.
After our app is successfully created, we need to change it and create a new folder called test_project in it. Here we will not only create an empty package.json file with the npm init -y command but also install the npm packages of WebdriverIO, WebdriverIO CLI, and Chai in it.

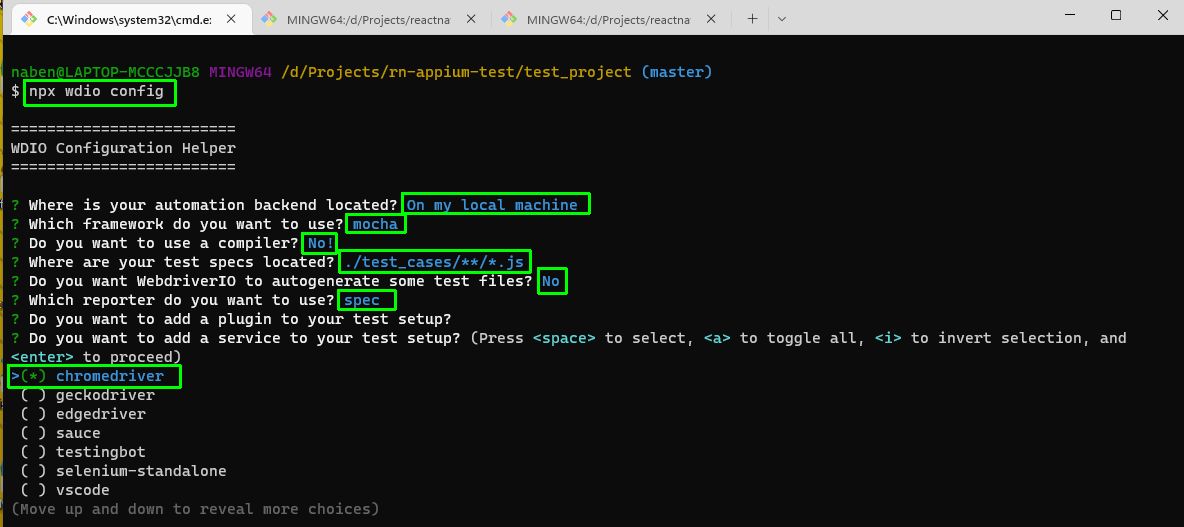
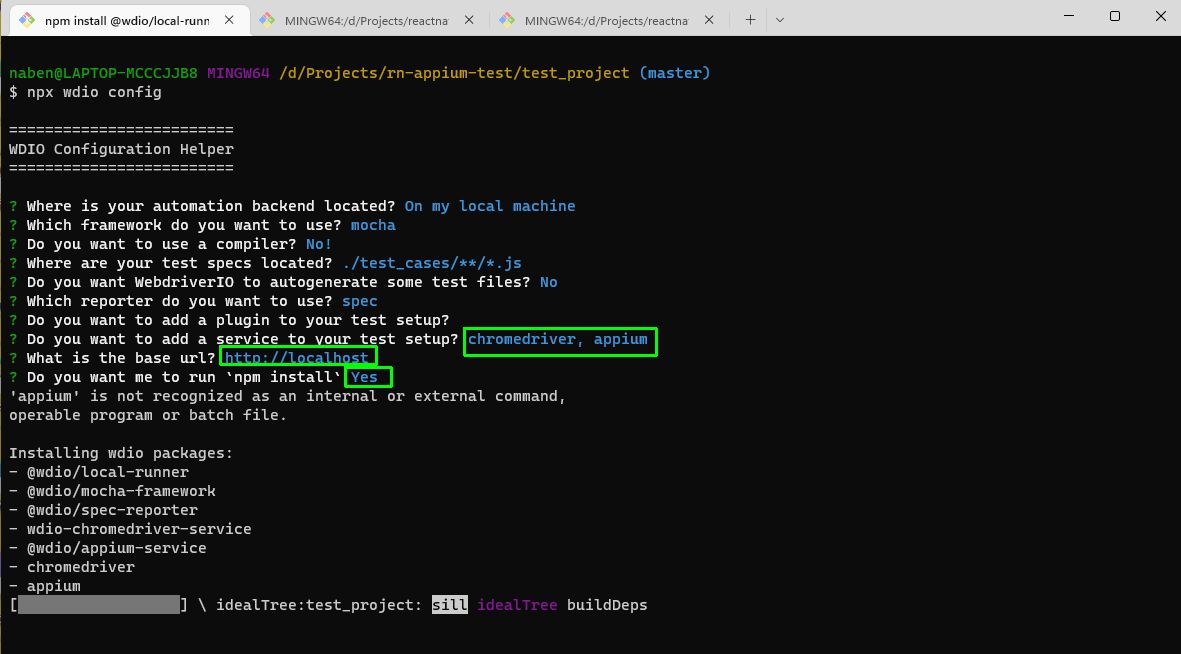
Now we will configure WebdriverIO with the npx wdio config command. It will ask us a bunch of questions, and the answers can be taken from the below screenshot. Note that for the question "Do you want to add a service to your test setup?" we need to first select chromedriver. We also need to select appium in it.
Lastly, it will ask permission to run npm install. After we enter yes, it will add all of the drivers to our project.
Our React Native Project
We will now create a simple React Native project. So, in the App.js file, remove all the earlier content and put the content shown below:
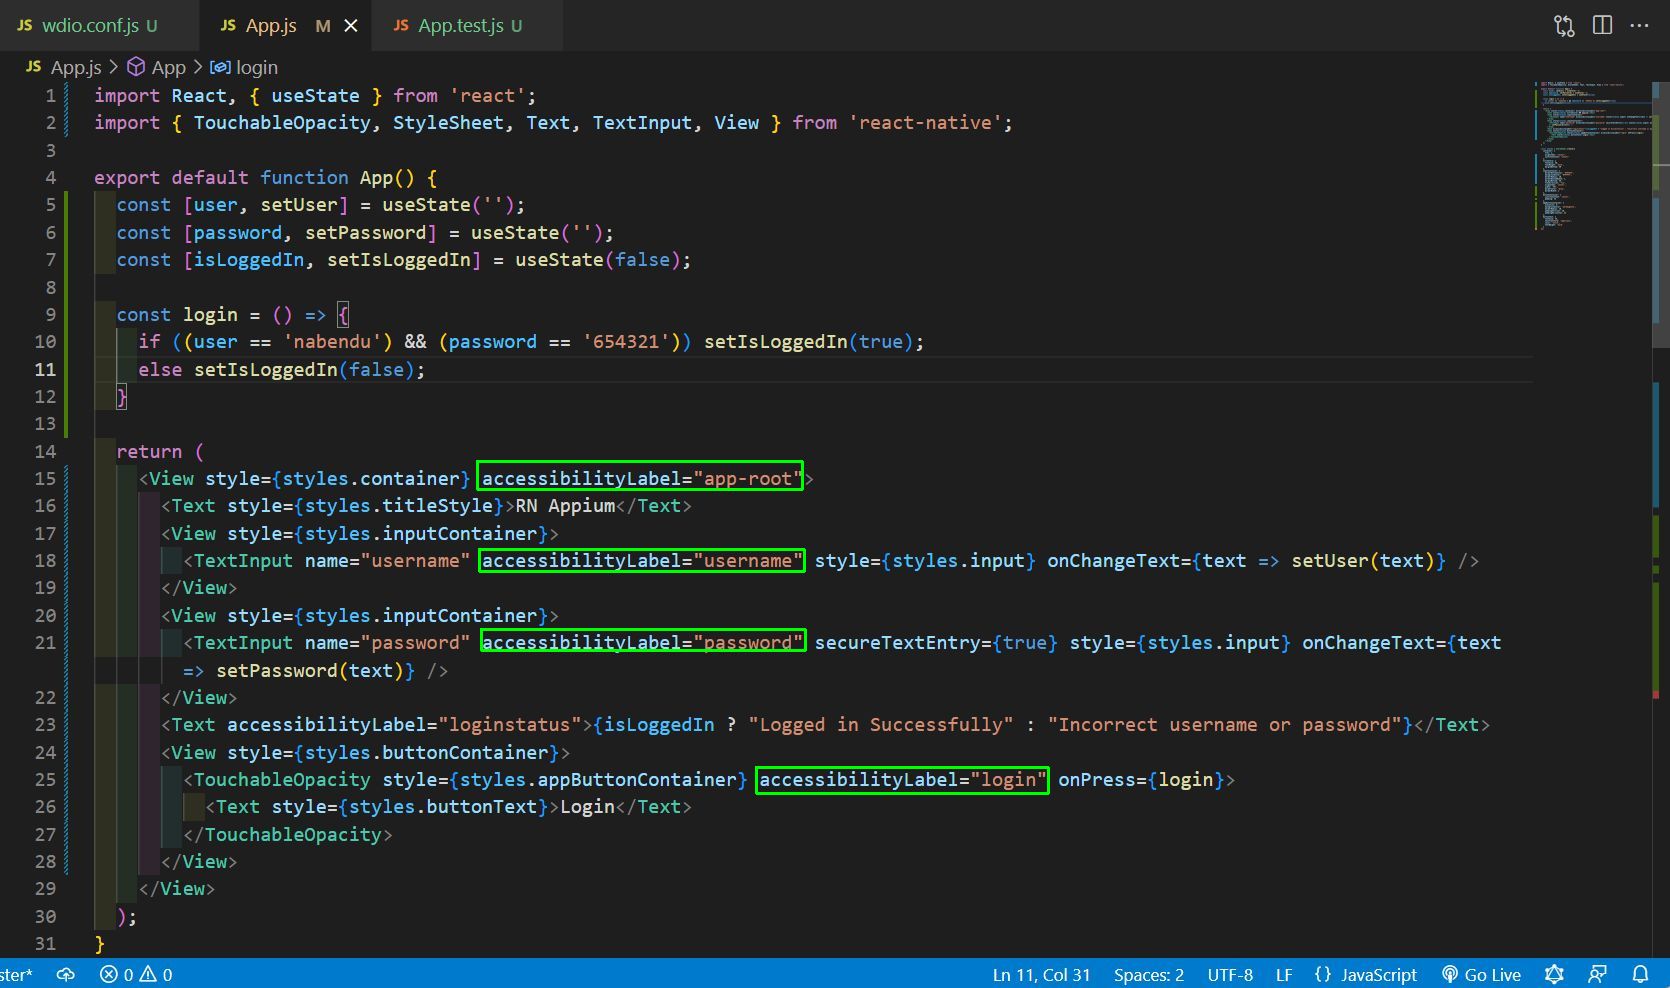
Here we have three states: user, password, and isLoggedIn. Inside the return, we have two instances of TextInput to take input for username and password.
After that, we have a button that we created using TouchableOpacity from React Native. On clicking this button, we are calling a function login. This function is checking whether the user is "nabendu" and whether the password is "654321." And it sets the isLoggedIn variable to true or false depending. It will show either "Logged in Successfully" or "Incorrect username or password" depending on the isLoggedIn variable. Also, notice that we have an attribute of accessibilityLabel in each of the elements. We need this for testing our app through Appium.
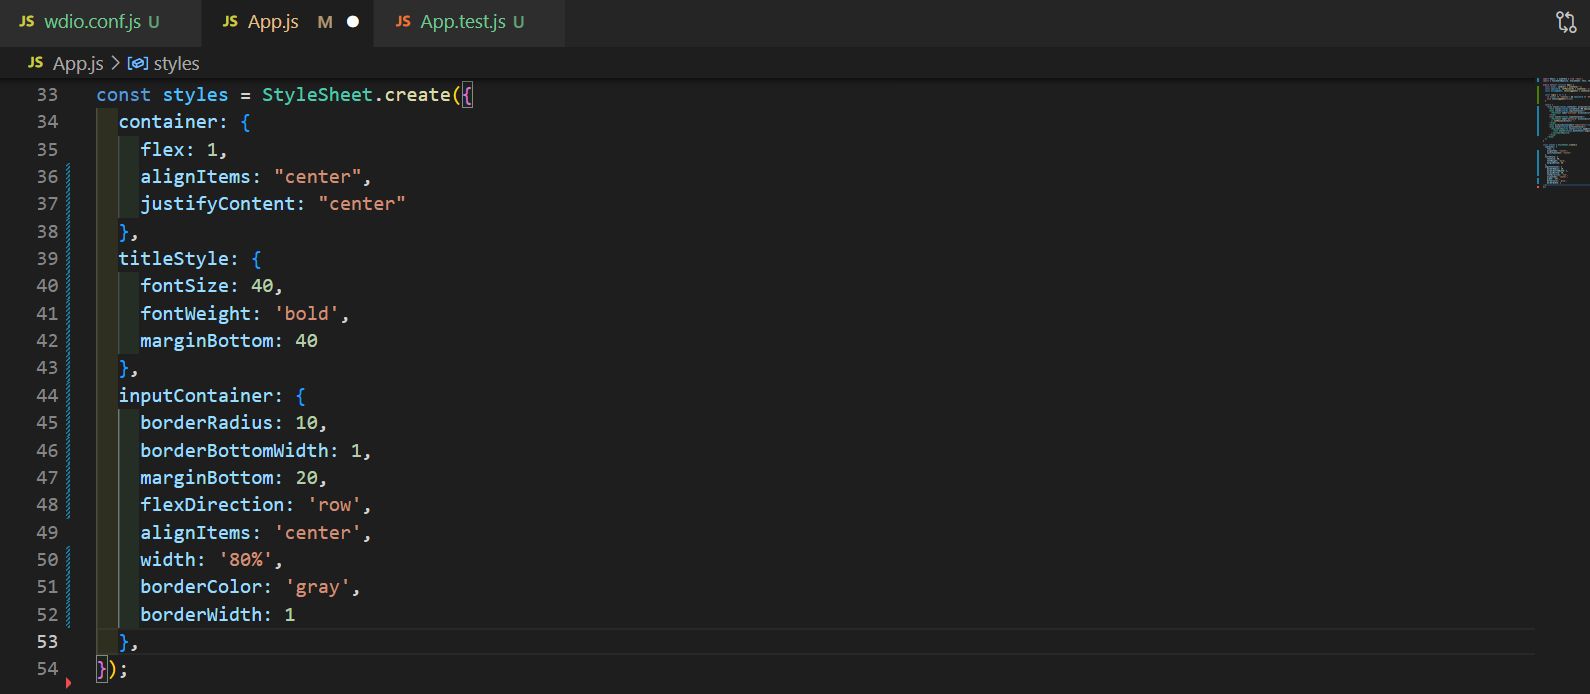
Now we will add styles in the App.js file. Here we are first adding the styles for the root container, title text, and the two input containers:
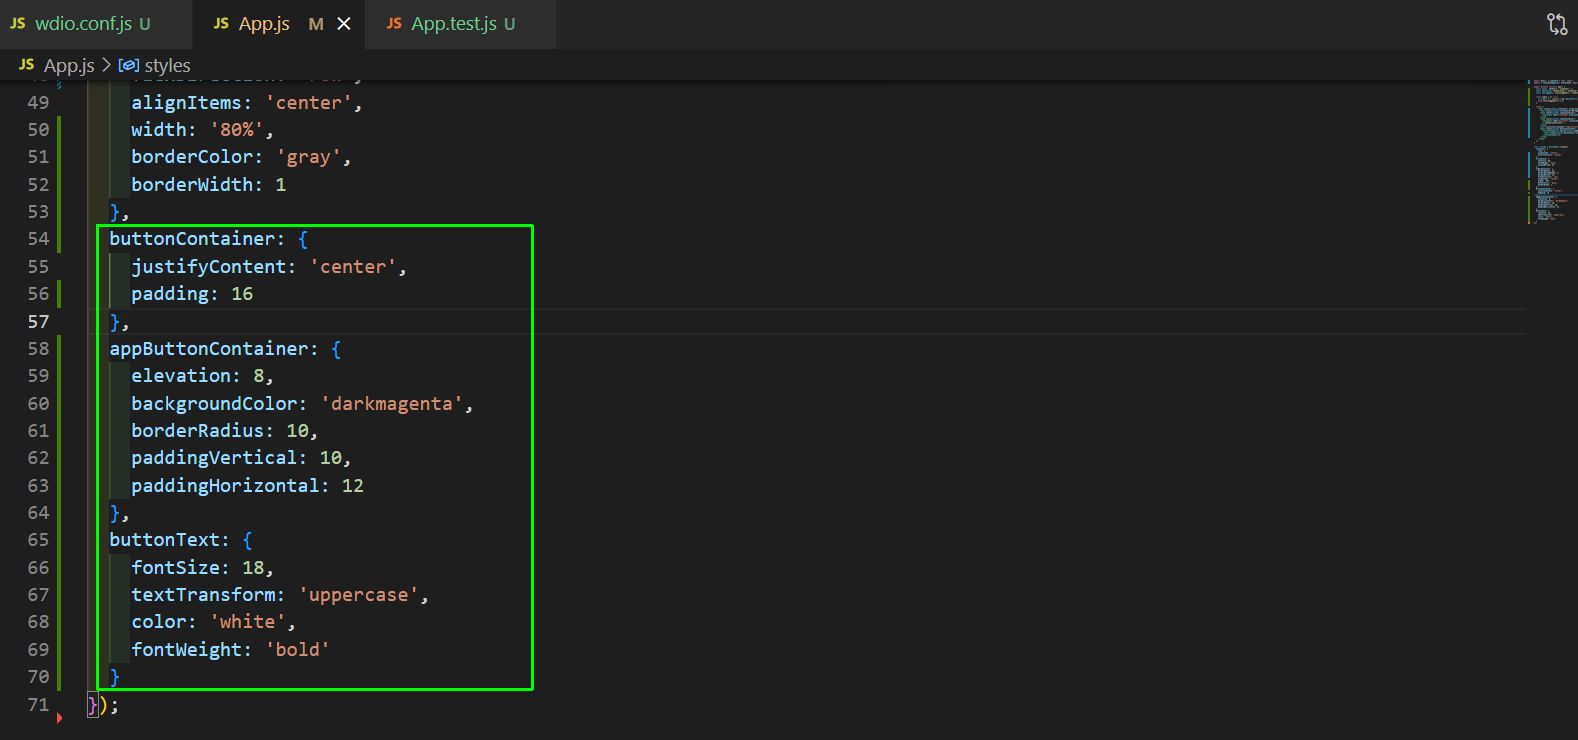
Lastly, we will add the styles for the button in the App.js file:
Creating the APK File
We need the APK (Android Package) file for our testing with Appium. This file is also required when we deploy our app to the Play Store. It is very easy to create an APK file using Expo.
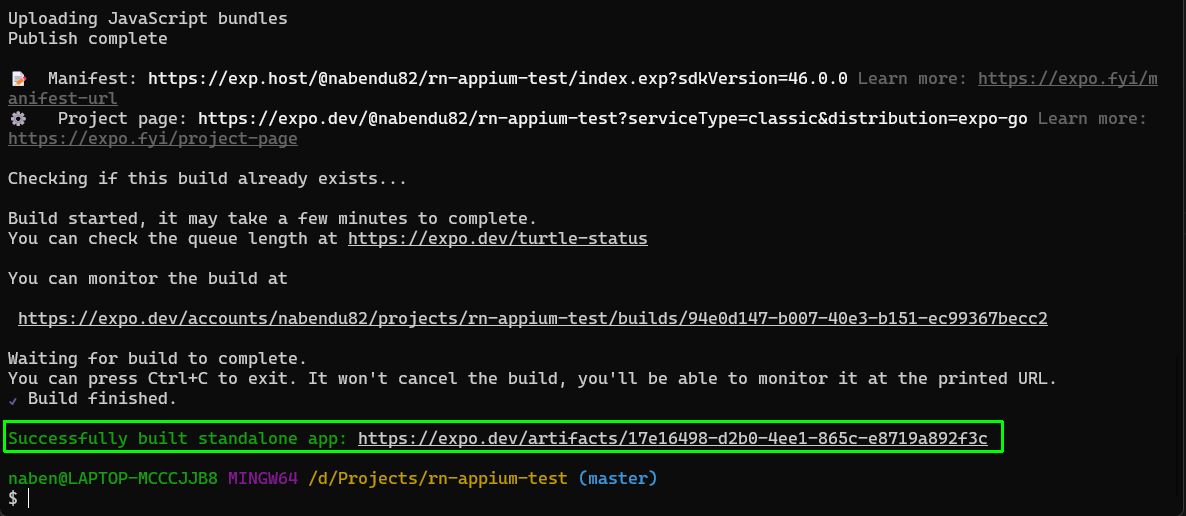
Now, from the terminal, we need to run the below command. It will ask us some questions and also our credentials for Expo. Give the answers according to the screenshot below.
expo build: android
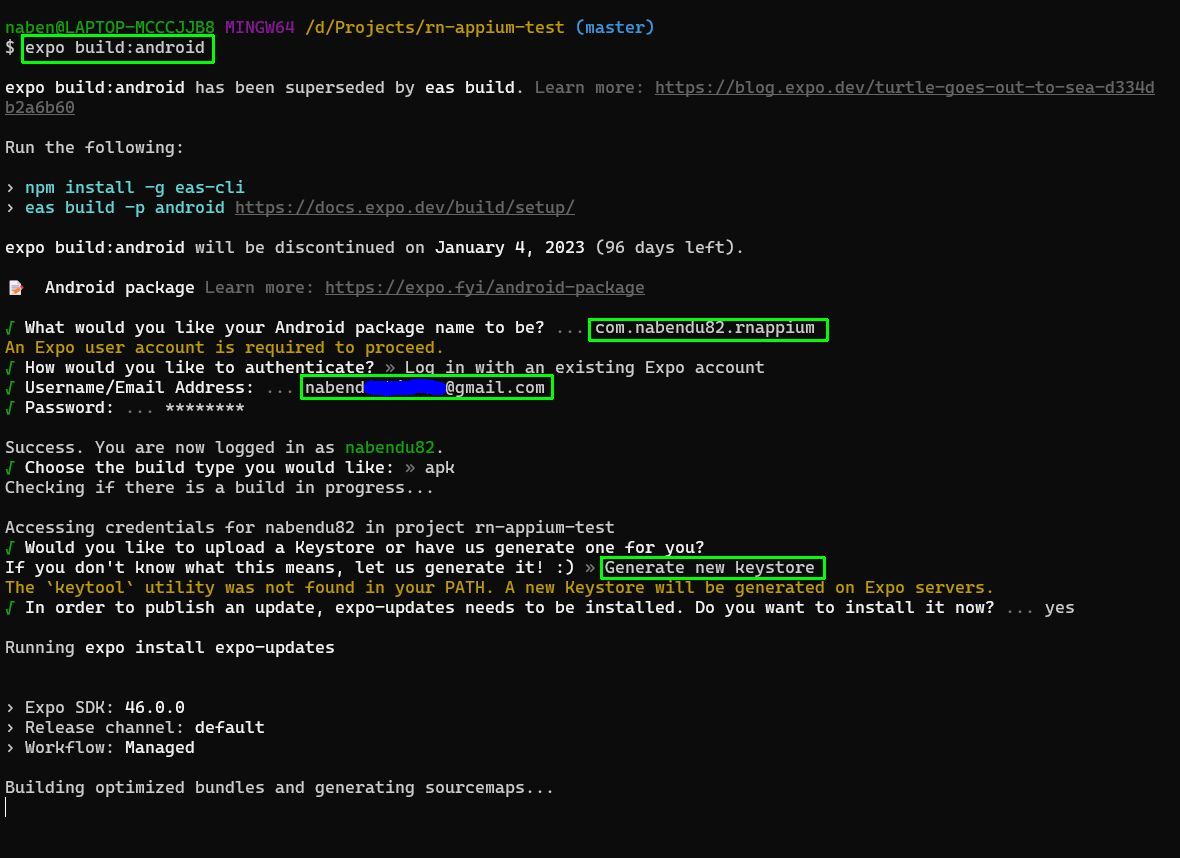
It will take 15 to 20 minutes to create the APK file. Once the file is created, we will get a link to download the APK file on our machine. We need to put the file in a location we know, such as inside the project. We have done that here:
Running the App
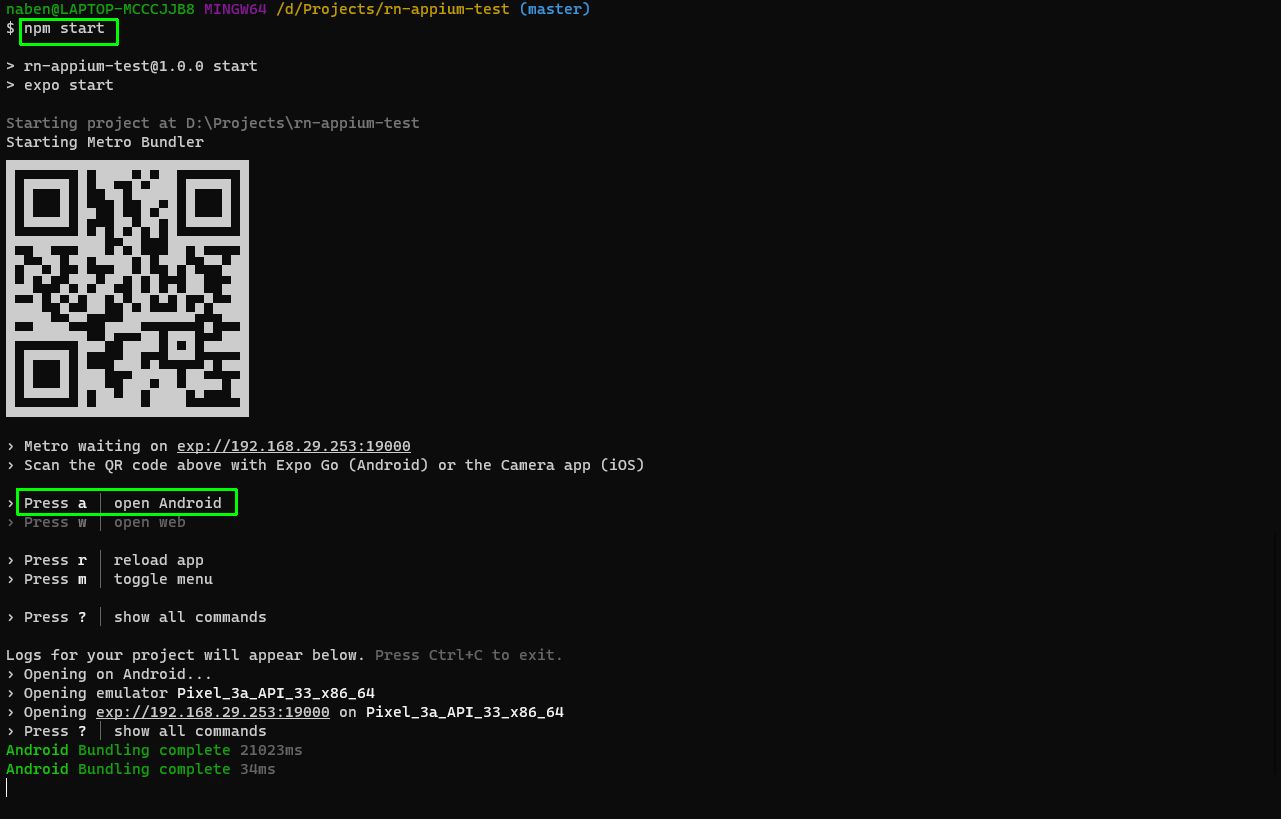
We need to run npm start from the project directory to start the app. After that, press a to open it in the Android emulator. Note that we need to have Android Studio installed in our system and also the environment setup already done. The instructions to do so can be found in React Native's official doc.
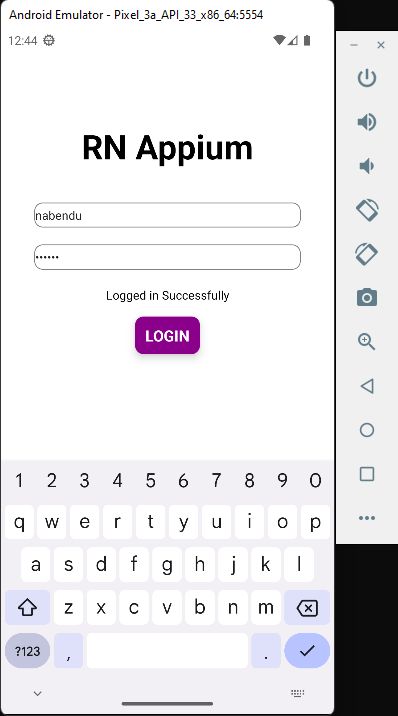
Our React Native application is up and running in the Android emulator. Here, give the correct user and password, and then press the Login button. We will get the message "Logged in Successfully."
If we give the wrong password, we will get the message "Incorrect username or password."

Writing Test Cases
Before writing test cases, we need to change some configurations in the wdio.conf.js file. This file was created earlier when we had answered the question after giving the command npx wdio config.
In the file, we also need the device name, which we can find by running the command adb devices from the terminal. Notice that our connected emulator name is shown.

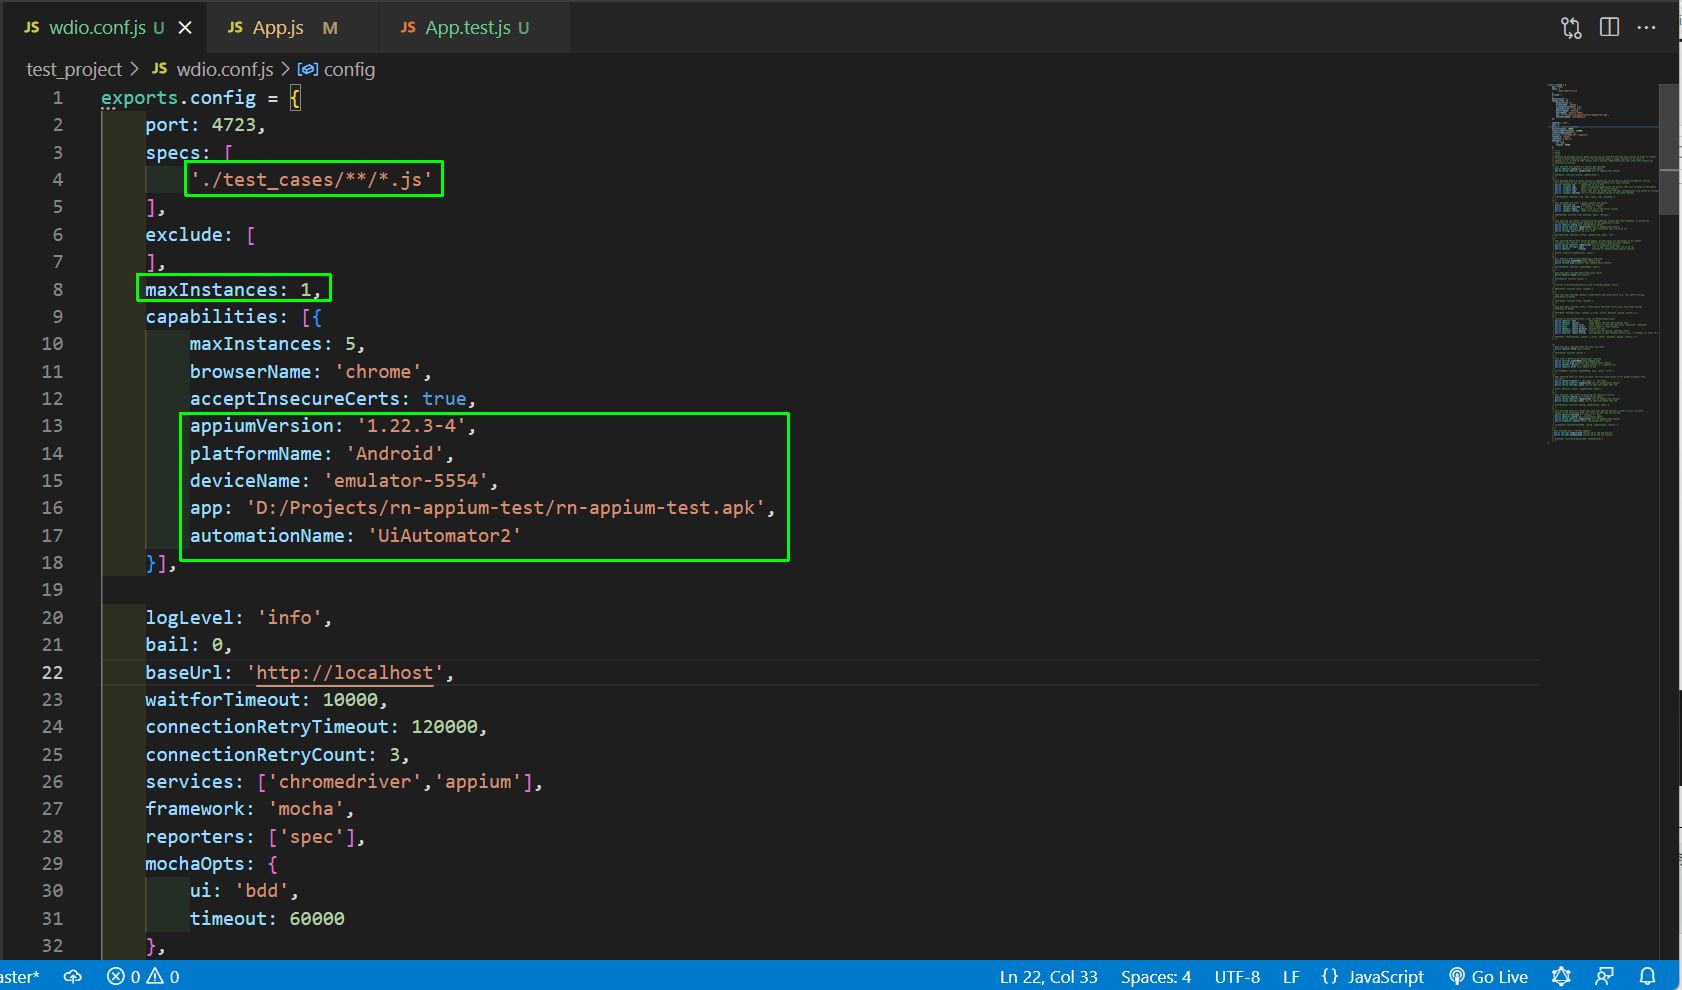
After that, in the wdio.conf.js file, we will make the below marked changes. Here we are giving the exact location of the specs file. We'll also change the max instances to 1, as we don't want to start a lot of processes.
The Appium version can be taken from the installed Appium application. The platform name will be "Android," and the device name is the name we got from the earlier step. In the app, we need to give the APK location.
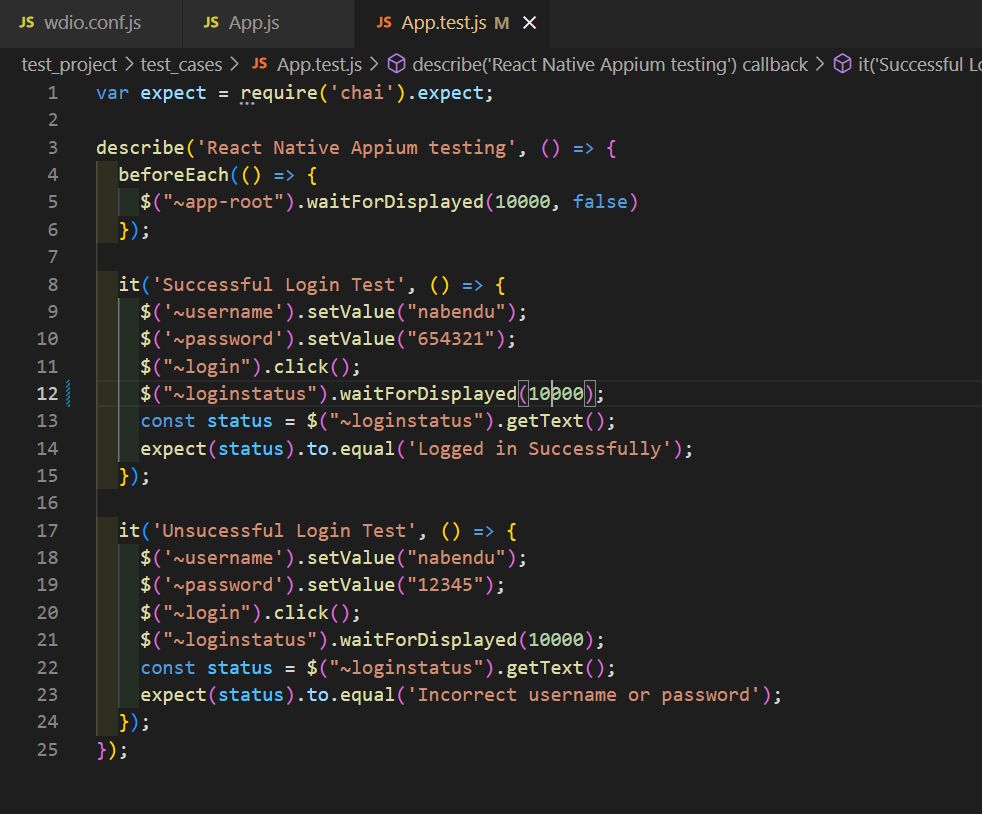
Finally, we will write the test cases in an App.test.js file. We will be creating this file inside a test_cases folder, which we had created inside the test_project folder.
Here we are using a simple test program with Chai. The describe function will give the test name. In beforeEach, we mentioned that the test should be displayed after ten seconds. We need to give the code in beforeEach, as the test should run after our app is loaded in the connected device.
In our App.test.js file, we now have two simple tests: one for a successful login and another for an unsuccessful login. Both tests are exactly the same, but we are giving the wrong credentials in an unsuccessful login test. Also, the message is based on what we gave in our App.js file.
Running Appium Tests
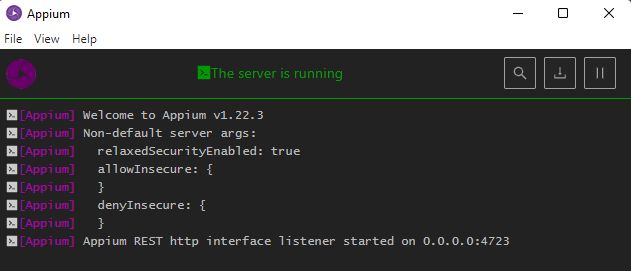
To run the test through Appium, we need to bring the Appium server up and start it using the desktop app.
Next, we have to run the below command from inside the test_project folder:
npx wdio ./wdio.conf.js
The automated part will be performed on our emulator, where the successful login test and unsuccessful login test will be done. It will seem as if a real user is logging in by entering their username and password.
Wrapping Up
In this post, we first reviewed what Appium is. After that, we walked through a lot of installation steps and finally did the automated testing by writing test cases in Chai.
But you can test your apps more easily with Waldo. Plus, you can avoid going through the hassle of installing and configuring all of this, as well as writing test cases in Chai.
Automated E2E tests for your mobile app
Get true E2E testing in minutes, not months.


