


.jpeg)
Structs are data types in Swift that can store multiple values. They are also known as structures and are in almost all programming languages. In Swift, the structs have more power than in other programming languages. They have some of the power of classes and are quite similar to them. In fact, it is advised in Swift to use structs most of the time instead of classes.
In this post, we will first talk about the basics of structs and how to use them. After that, we will discuss the differences between structs and classes.
Xcode Setup
Swift is an iOS exclusive language and is used to create iOS apps, and we will run it on Xcode. Install Xcode on your Mac through the App Store if you don't already have it.
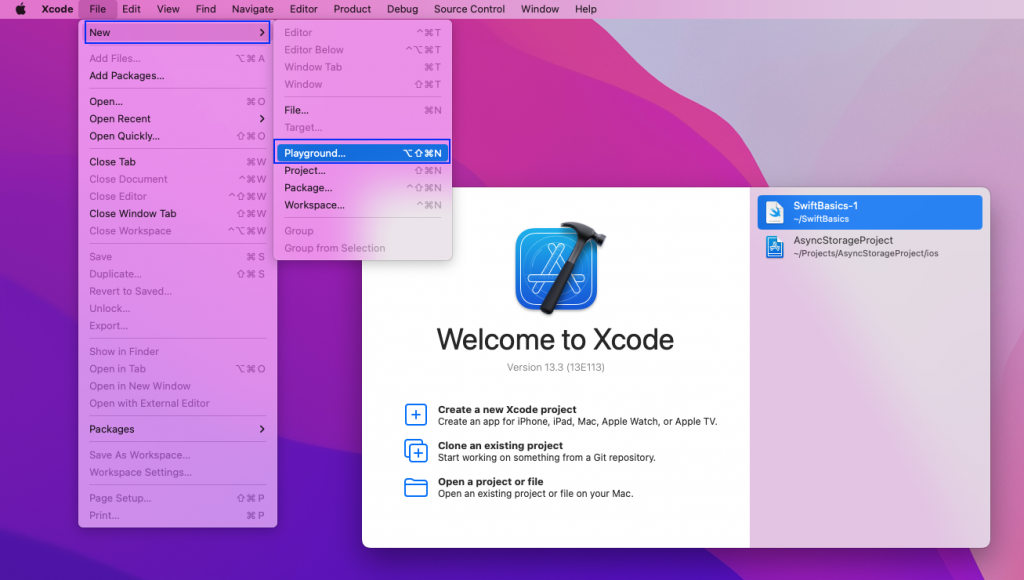
Then, open Xcode and click on File and then Playground.
Select iOS and then Blank. Press the Next button.
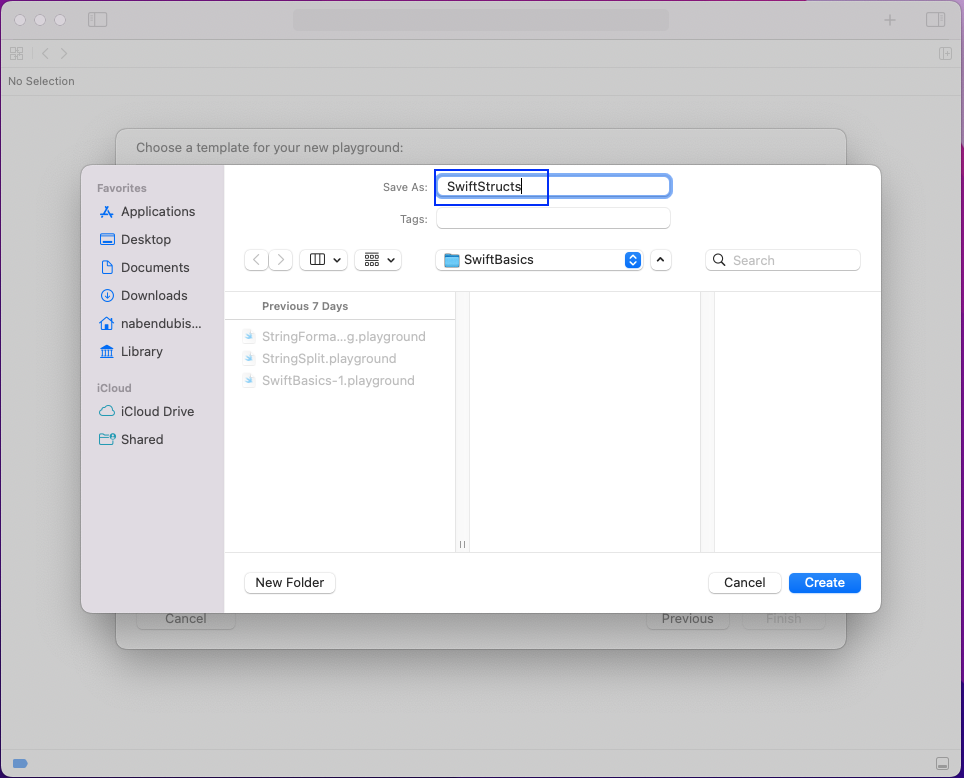
Now give the playground the name "SwiftStructs". And then click on the Create button.
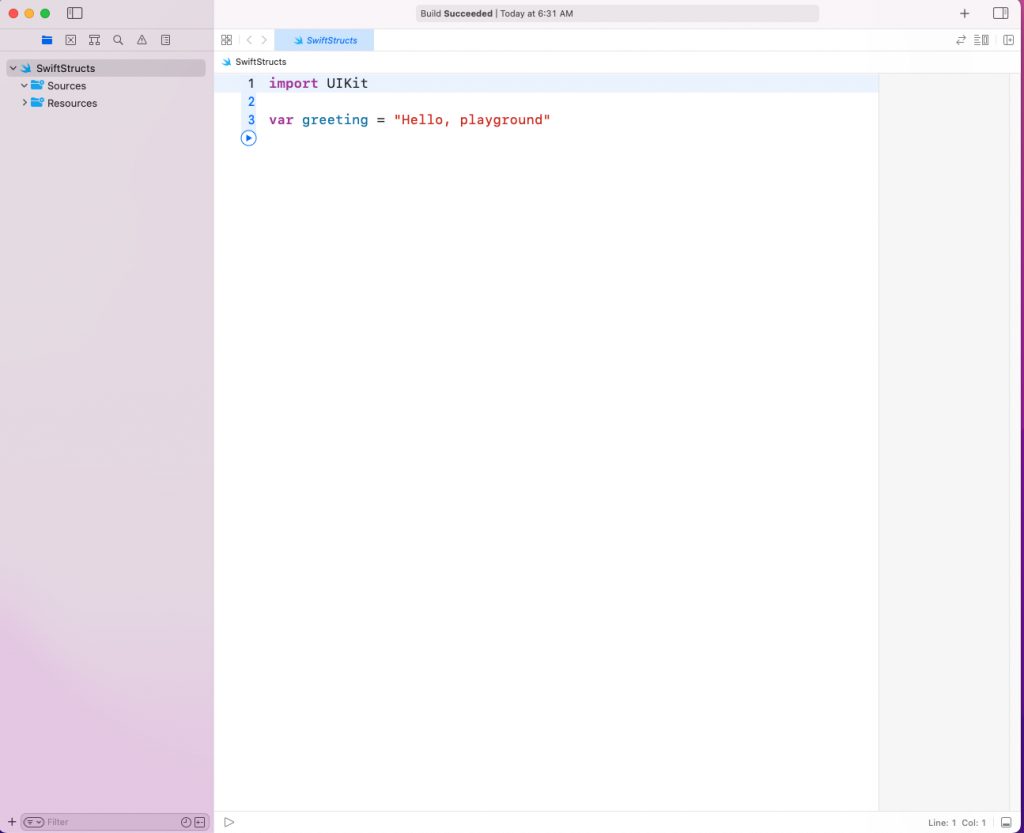
Next, we will get the playground in which we will write the code.
Structs Basics
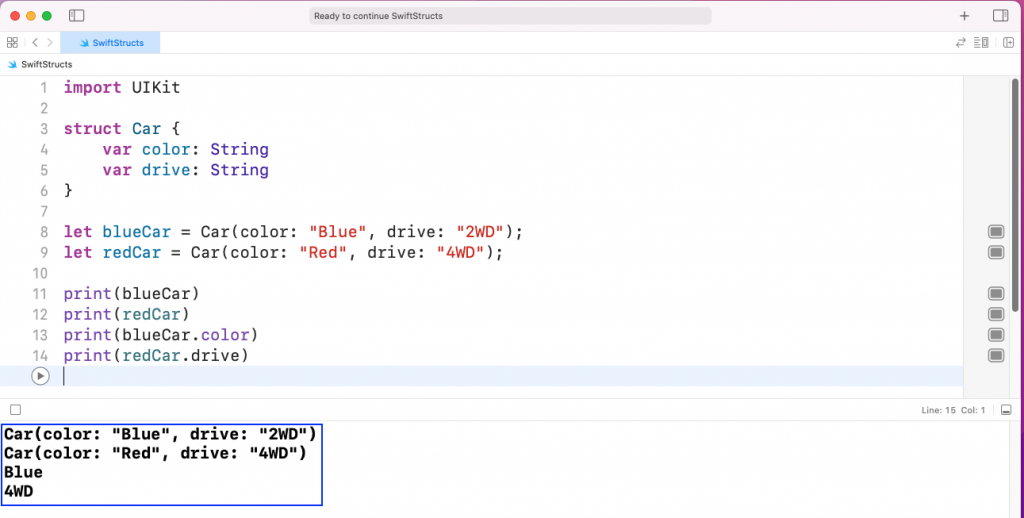
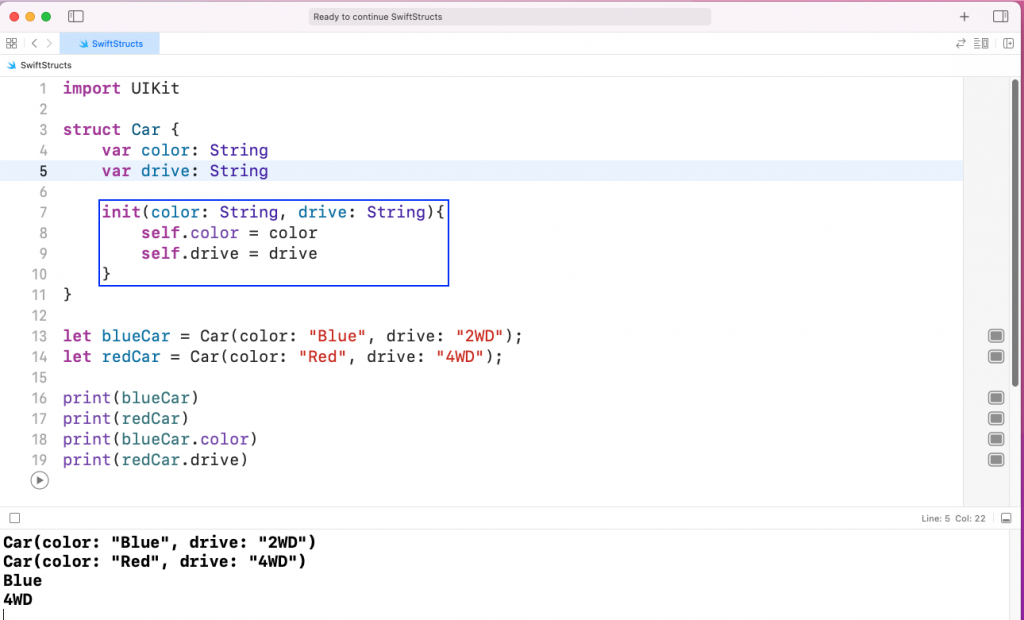
With structs in Swift, we create a complex data type. It can hold multiple values, including functions. We define it with the struct keyword and the values within curly brackets. In the below example, we have a struct of Car. It has two string values, color and drive.
Now we will create instances of it using the below code. Here we are creating two constants of blueCar and redCar. After that, we add in the values of color and drive.
Notice that the above way is quite similar to other languages. This is the same with classes, where we also create instances. These instances get their own copy of the struct and can be used multiple times.
After creating the instances, we will print them. To access a variable, we need to give the instance a name, followed by the dot and variable name.
In Swift, we don't need to give any initial code for the struct, although we can mention it with init(). Notice that the above code will run the same.
Functions in Structs
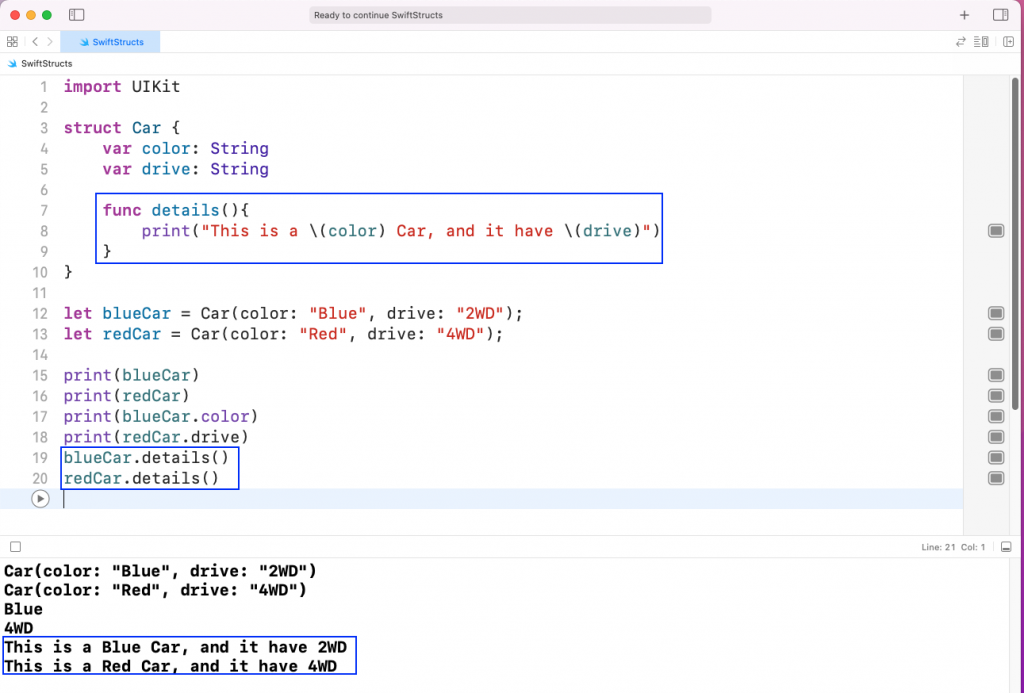
We can have functions inside structs, which is not possible in other programming languages. Functions are only allowed with classes in other programming languages.
We will add a function in our existing Car struct, using the func keyword. Here we are printing the color and the drive of the car.
We access the function again with the dot notation with the instance.
Classes vs. Structs
Because Swift structs have a lot of class properties, it is important to know the differences between the two, which we will discuss in this section.
Required Initializer
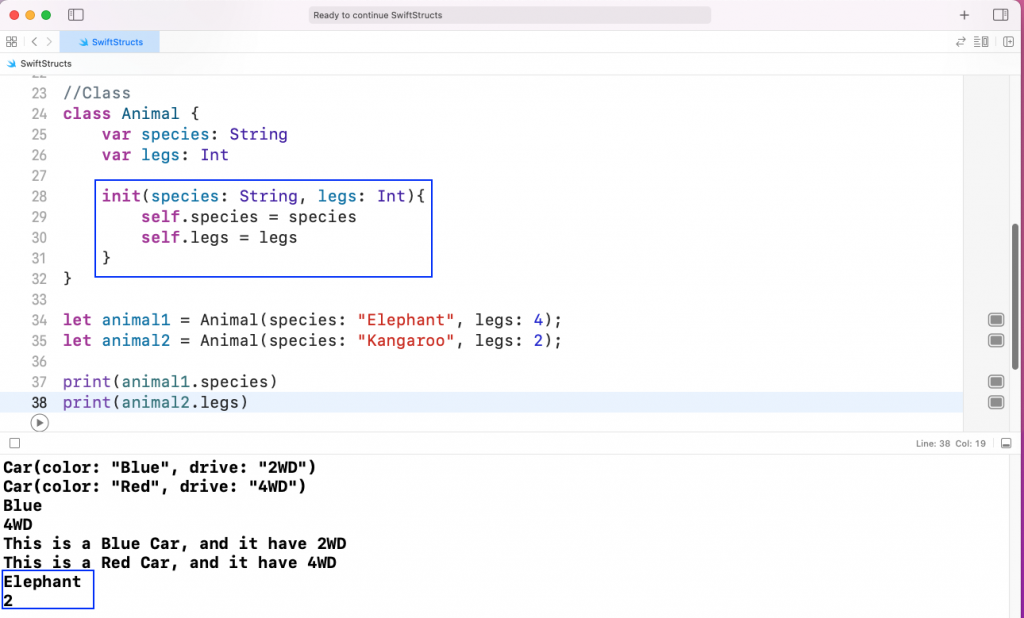
We showed in the earlier struct section that the initializer is not mandatory. But in class, it is mandatory, or else we get an error.
In the below code we have created an Animal class. We have two variables, species and legs. The initialization of species and legs with the init() is mandatory here.
When we run the above code in Playground, we get the desired output. Notice that most of the code is similar to that of a struct.
Reference vs. Value
A very big computer science issue is the "copy by reference" issue. Generally, when we copy a variable to another variable, its address reference gets copied. That means that when we change one variable, the other will be changed too. In most cases, it is not desired. But this is the behavior that happens when we copy an instance variable to another in a class.
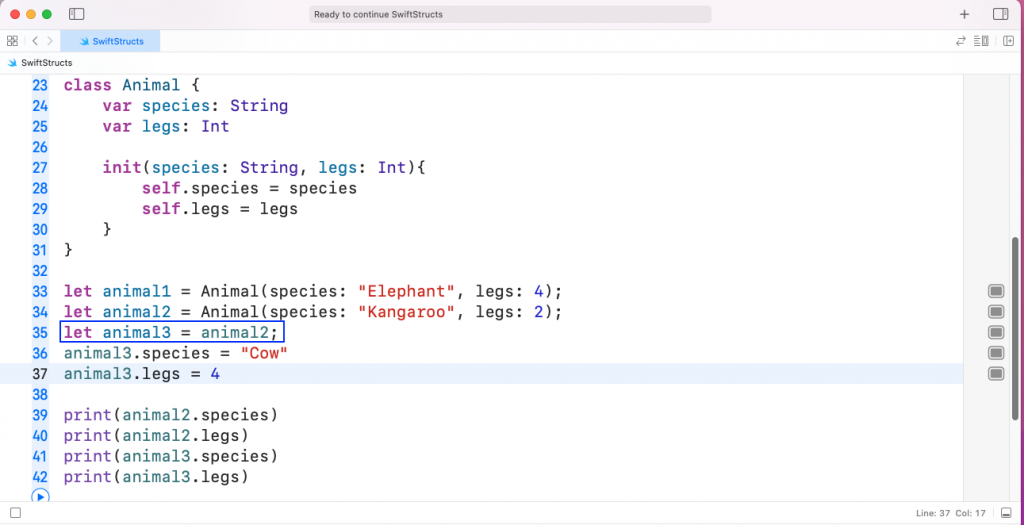
We have now updated our class code to have an animal3, which is equal to animal2. We are giving a species ("Cow") and legs ("4") to animal3.
Next, we print the species and legs for animal2 and animal3. We can see that animal2 is also a cow with four legs.

Now, the above outcome is not desired in most situations. When we copy one variable to another, we don't want it to update the other variable. In these situations, structs come to our rescue. They copy by value.
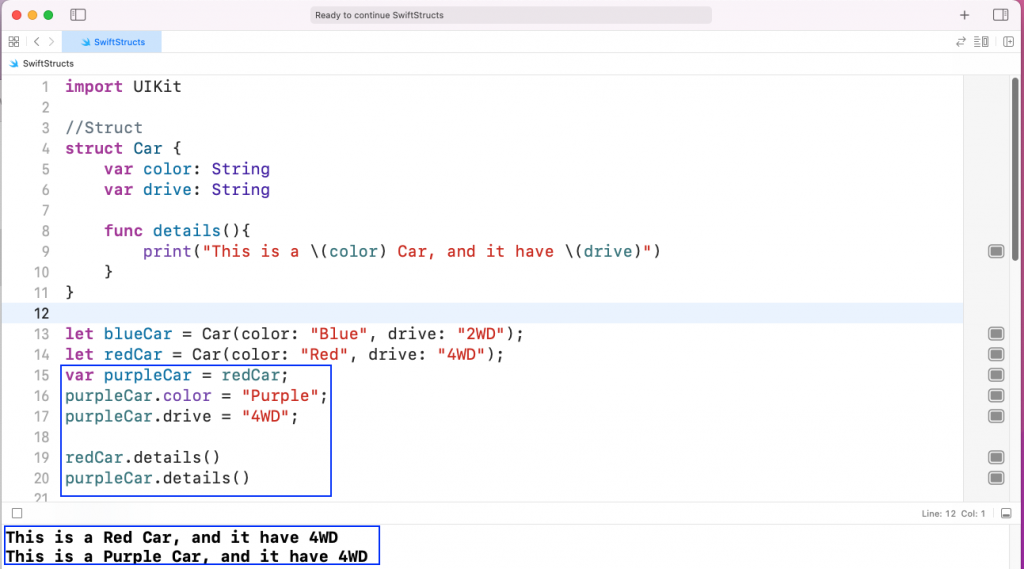
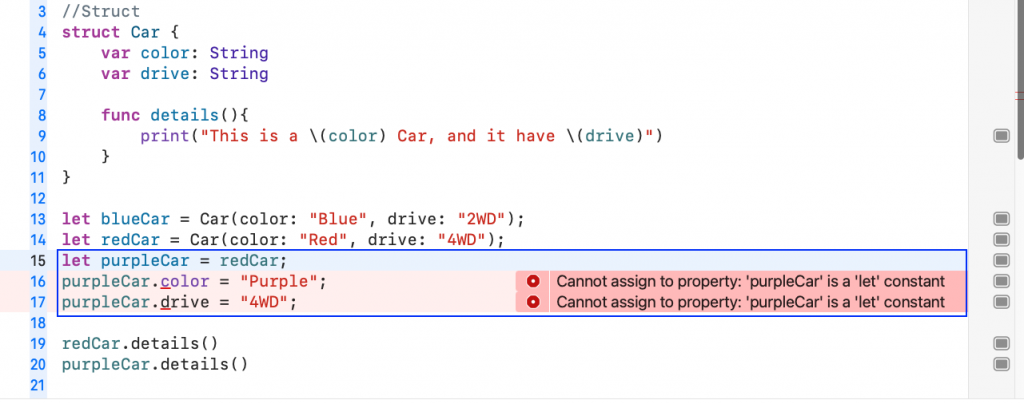
We have updated our struct code to have a purpleCar, which is equal to the redCar. We are giving a color ("Purple") and drive ("4WD") to purpleCar.
Next, we print details of redCar and purpleCar. We can see that the redCar values remain as they were earlier and only the purpleCar values are updated.
Constants vs. Variables
In structs, the instance type needs to be variable, which is var in the case of Swift. If we try to change the example in the earlier part to a let, the playground will throw an error.
But this is not the case with class, which allows instances to be a constant. As from the example in the earlier part, we are able to use constants in Swift. We declare variables as constant with the let keyword in Swift.
Inheritance in Classes
Like in all other programming languages, we have the concept of inheritance in classes. But we don't have the concept of inheritance with structs.
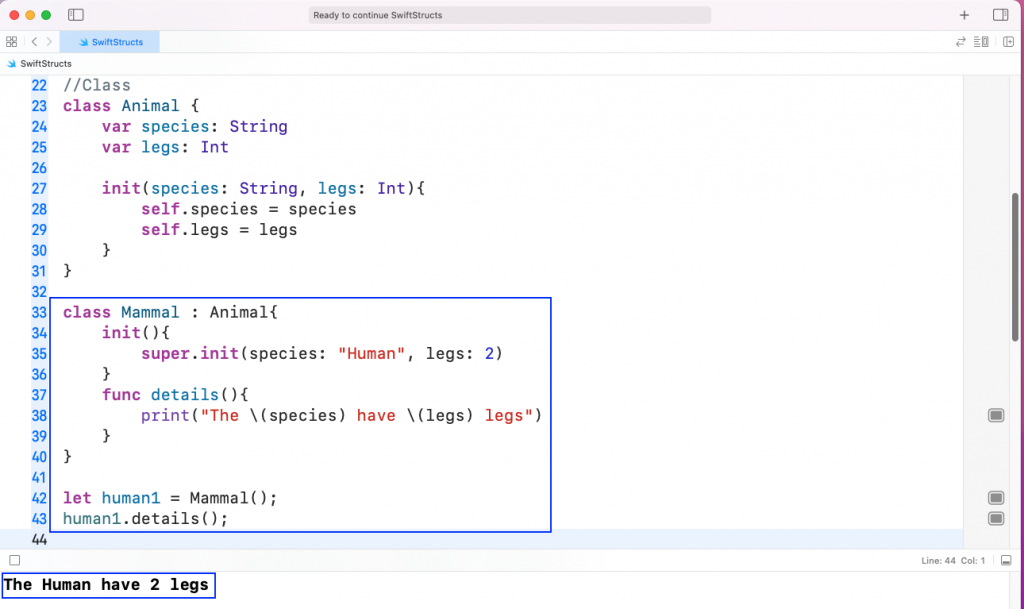
With inheritance, a subclass can inherit the properties of the base class. In the below example, we have updated our earlier code to have a subclass of Mammal. Notice that in this class, we have used a colon (:) to inherit from the base class of Animal.
Now we can use the species and legs variables from the base class of Animal in Mammal. Here we need to have the super.init() inside the init method of Mammal. We also have another function of details, which prints both species and legs.
We can also have other advanced features of overriding in inheritance.
When to Use Structs
From the above section, it is obvious that structs are almost similar to classes in Swift. So, when should we use them? According to the official documentation, we should use Swift most of the time unless we need some complex features like inheritance and method overriding.

XCTest Testing
It is very important to test our app, so we will test our playground code with the XCTest framework.
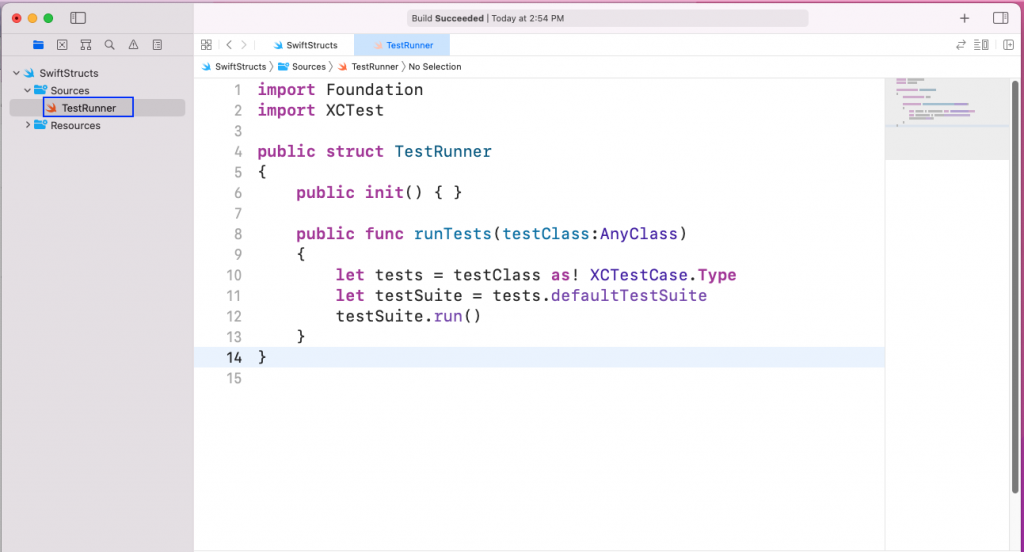
The first thing we need to do is to create a file called "TestRunner" in the Sources folder. Add the below code in it. First, we are doing the required imports and then writing a structure called "TestRunner". The boiler-plate code inside it tells that it will run all test cases.
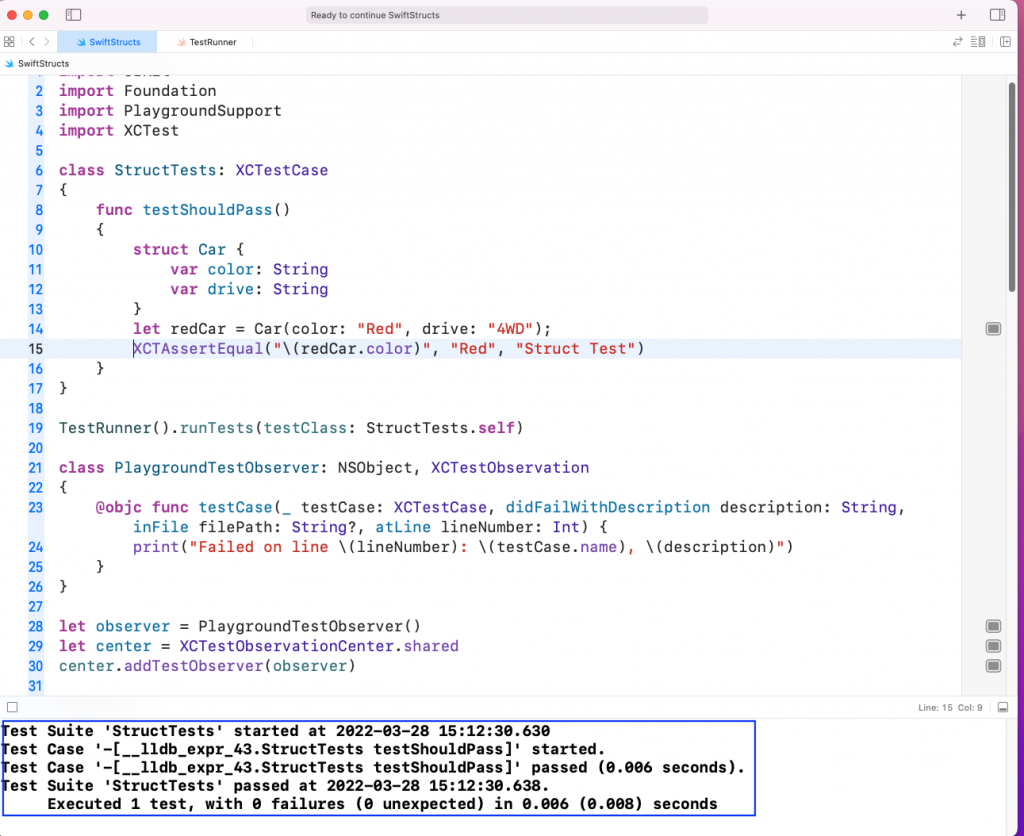
Now, in our SwiftStructs playground file, we are doing the required imports first. After that, we are writing a class called "StructTests". We have a function of testShouldPass(), and inside we have a struct of Car. We also have an instance of it called redCar, where we are passing the variables of color and drive. Next, we are doing the XCTAssertEqual() to check if the redCar.color is Red.
Next, with TestRunner, we are running the runTests() function. Here we are passing our StructTests.
The boiler-plate code for PlaygroundTestObserver is required to run the test cases in Playground. Finally, when we run the file, it will show the test case to be successful.
The single test case ran successfully. But adding complex things like function inside structs would require us to write a fairly complicated test case. We can use Waldo, the no-code testing platform, instead of writing all test cases manually.
In Waldo, we can also do user iteration like clicking on the button. We just need to generate the IPA file from the app and upload it in Waldo. The test cases will be generated automatically, and the test results will be sent to our inbox.
So create a free Waldo account and give it a try.
Conclusion
In this post, we did the basic setup of Playground. After that, we talked about the basics of structs in Swift. Next, we discussed the differences between classes and structs in Swift. Finally, we tested the app through the XCTest framework.
But instead of doing all that, we can test our app easily through Waldo. Learn more about our Swift testing framework here.
Automated E2E tests for your mobile app
Get true E2E testing in minutes, not months.


