


Ranges are special features in Swift that aren't available in other languages. They're very powerful and used to select part of an array or string.
In this post, we'll look into the three types of ranges in Swift: closed range, half-open range, and one-sided range. After that, we'll learn about NSRange. Let's start.

Playground Setup
We'll run our Swift code in Playground, which is available in Xcode, the Mac OS code editor. Playground is a feature that allows us to check the result of code without creating an app.
First, we need to open Xcode and click on File > Playground.
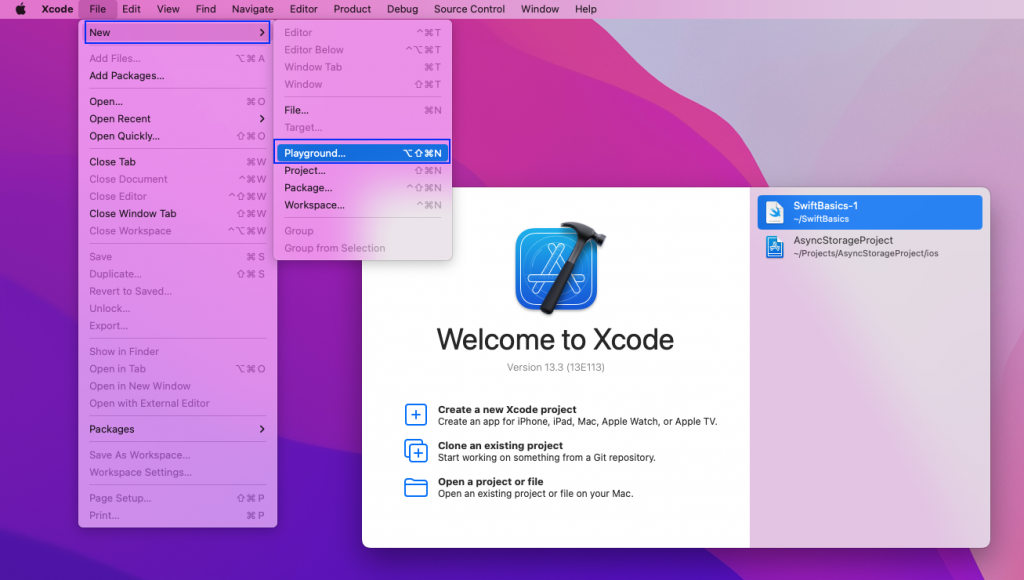
Now, on the next screen, select iOS and Blank. After that, press the Next button.
Let's give our Playground the name SwiftRange. After that, click on the Create button.

Now, we'll write the code in Playground.

Swift Range Basics
Range is a special operator in Swift represented by three dots (...) or two dots and a less-than sign (..<). They're helpful to select part of an array or string. There are three types of ranges in Swift:
- closed range,
- half-open range, and
- one-sided range.
Let's take a look at each.
Closed Range
The closed range is given by three dots (...). In it, we give two numbers, one at the start and the other at the end. This will give us all the numbers in a range including those numbers. So, 1...6 will give us the numbers 1, 2, 3, 4, 5, and 6.
In the example below, we're using it in a "for" loop to print the numbers from 1 to 6.
When we execute this in Playground, we'll get the numbers 1 to 6.

We can also use the closed range to iterate over an array. In the example below, we have an array name lang that contains the name of four mobile app development languages as strings.
Now, we're getting the endIndex of the array by the lang.count method in Swift. It displays a 4, but the last element index is 3, so we subtract one from it.
Now, in the "for" loop, we're using 0...endIndex, which converts to 0...3. Here, inside the "for" loop, we're using the index to get each element and print it. So, the first time it'll print lang[0], which is Swift, and so on.
When we execute this in Playground, we'll get the four languages.

We can also get part of the array by passing it in the range. In the example below, we're passing 0...2 in the array.
Upon execution, this is printing the first three languages from the array.

Half-Open Range
The half-open range is given by two dots and a less-than sign (..<). Similar to the closed range, we give two numbers, one at the start and the other at the end. This will give us all the numbers in the range excluding the second number. So, 1..<6 will give us 1, 2, 3, 4, and 5.
In the example below, we're using it in a "for" loop to print the numbers 1 to 5.
When we execute this in Playground, we'll get the numbers from 1 to 5.

We can also use the half-open range to iterate over an array. In the code below, we've updated our closed-range example.
In it, we don't have to subtract one from the endIndex since the half-open range uses all numbers before the second number.
When we execute this in Playground, we'll get the four languages.

We can again get part of the array by passing it in the range. In the example below, we're passing 1..<3 in the array.
Upon execution, it's printing the second and the third language from the array.

One-Sided Range
The one-sided range can be given by both three dots (...) and two dots and a less-than sign (..<). It has only one number either at the start or end, and it behaves differently in both cases.
If we give the number at the end, it'll take numbers from zero until the number. So, ..<3 will give us 0, 1, and 2. Similarly, ...3, will give us 0, 1, 2, and 3.
We can't use the one-sided range in a "for" loop or it'll give us an error. So, we'll get part of the array by passing it in the range. In the example below, we're passing ..<3 in the array.
Upon execution, it's printing the first, second, and third language from the array.

If we give the number at the start, it'll take the number from that index until the end.
Again, we can't use it in a "for" loop or it'll give us an error. So, we'll get part of the array by passing it in the range. In the example below, we're passing 2... in the array.
Upon execution, it's printing the third and fourth language from the array.

If we try to use it in a "for" loop to get elements of an array, we'll get an "index out of range" error. We get this error after all languages are printed because Swift won't know when to end.

Using NSRange
In Swift, we don't have many string functions to get the substring. To get the substring, one method is to get it through NSRange. Now, NSRange is equivalent to range in Objective-C.
We still can use NSRange in Swift because it succeeds Objective-C, and most Objective-C features can be used here.
In the example below, we have a constant text, which is an NSString. After that, in the print statement, we're using the substring function. Here, we need to use NSRange and give the starting index and length to get the substring.
Upon execution, it's printing Swi.

XCTest Testing
We'll test our Playground code with the XCTest framework from Swift. This is better suited if we haven't created an iOS app.
First, create a file called TestRunner in the Sources folder. After that, add the code below in it. Here, we have a structure called TestRunner. Inside it, we have a function called runTests that accepts test classes as parameter and will run all test suites.

Now, in our Playground file of SwiftRange, do the imports first. Next, we'll write the class RangeTests. Inside the class, we'll do an Assert test to check on the NSRange code we completed in the previous section.
After that, we'll run the runTests() function from the TestRunner created earlier. Here, we'll pass our RangeTests as the parameter.
The boiler plate code for PlaygroundTestObserver is required to run the test cases in Playground. Finally, when we run the file, it'll show the test case is successful.

Our test case ran successfully. However, adding complex things like a "for" loop would require us to write a fairly complicated test case. Instead, we can use the no-code testing platform Waldo. With this platform, you'll only have to upload the IPA file. This is the file we upload while publishing our app to the App store.
Waldo can also perform user iteration like clicking on a button, which is a must for any app. So, create a free Waldo account here and give it a try.
Conclusion
In this post, we've completed the basic setup of a Playground in which to write our code. After that, we looked into the three types of ranges in Swift: closed range, half-open range, and one-sided range. We also learned how to use NSRange to get a substring out of a string.
Finally, we tested the app through the XCTest framework. But we can also test the app with the no-code testing platform Waldo.
Automated E2E tests for your mobile app
Get true E2E testing in minutes, not months.


