


Developers use Xcode to write iOS apps in Swift or Objective-C. As the default code editor for macOS, Xcode is tightly integrated with the Apple ecosystem and requires no setup. The default unit testing framework for Xcode is XCTest. But there's an alternative framework for writing unit tests: Quick. Quick in Swift follows behavior-driven development (BDD) and is always used alongside Nimble, another framework.
In this post, we'll learn about Quick and Nimble and their applications in Swift. Then, we'll learn to create simple unit tests using Quick and Nimble.
What Is Quick in Swift?
Quick is a completely free and open-source framework for writing unit test cases for iOS apps. It differs from unit testing in XCTest, where we write unit tests to test whether some function or part of the code is working. Instead, Quick follows a different approach to writing test cases using BDD. Here, we find the behavior of the app and write test cases according to it. We've also used this approach to write test cases using Calabash in an earlier post.
We can use both Swift and Objective-C to write these test cases. As with other BDD frameworks, we have the describe-it block. But with Quick, we use expect to check if the test is true. The expect function comes from the helper framework, Nimble.
What Is Nimble in Swift?
Nimble is a helper framework used with Quick to write test cases. It gives us access to a wide range of expect functions that we use for testing. The expect function is quite similar to XCAssert from XCTest, which is used to check assertions.
Let's compare the two. To check that 3 plus 1 equals 4, we would use the below code in XCTest:
To do the same in Nimble, we would write the following:
How Do I Use Quick and Nimble in Swift?
You can use Quick and Nimble in Swift to perform unit testing. The two frameworks together can be used as an alternative to XCTest. But we can't use Quick and Nimble for performance testing, unlike XCUITest, Apple's automation testing framework.
Both Quick and Nimble are open-source software. So, to use them for unit testing we need to install them in Xcode. This is unlike XCTest and XCUITest, which are built into Xcode. We give a deep dive into the difference between XCTest and XCUITest in an earlier post.
There are a couple ways to install Quick and Nimble. You can find them in the official documentation. Later in this post, we'll walk through how to install Quick and Nimble using CocoaPods. But first, let's set up a basic Xcode project to test.
The Setup
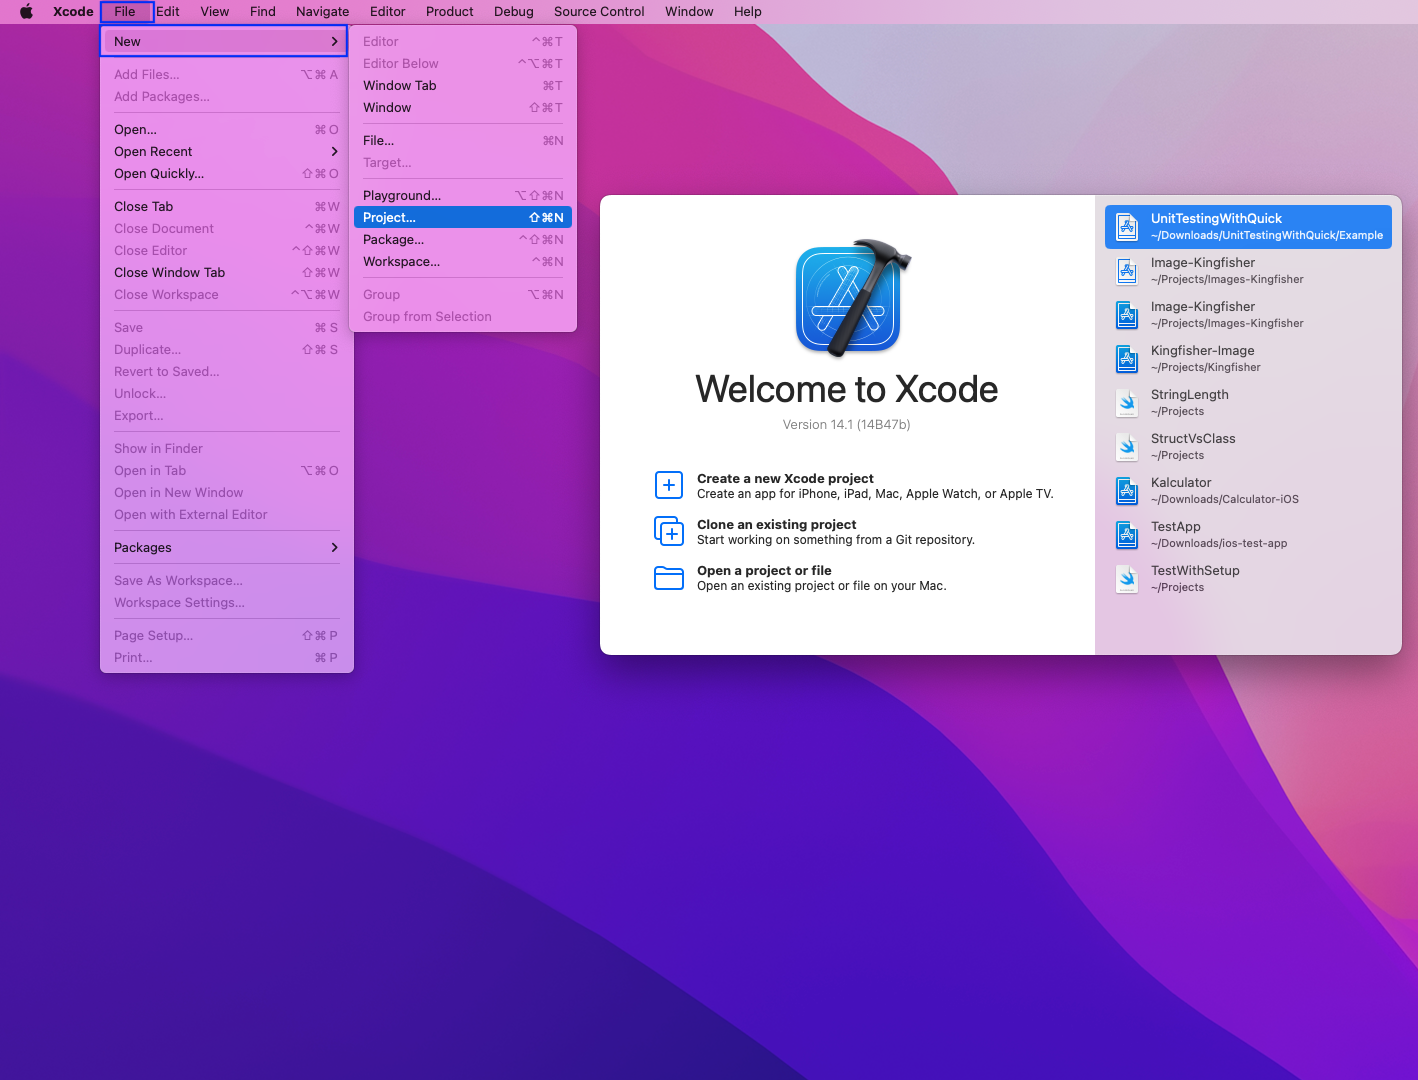
First, create a new project in Xcode.
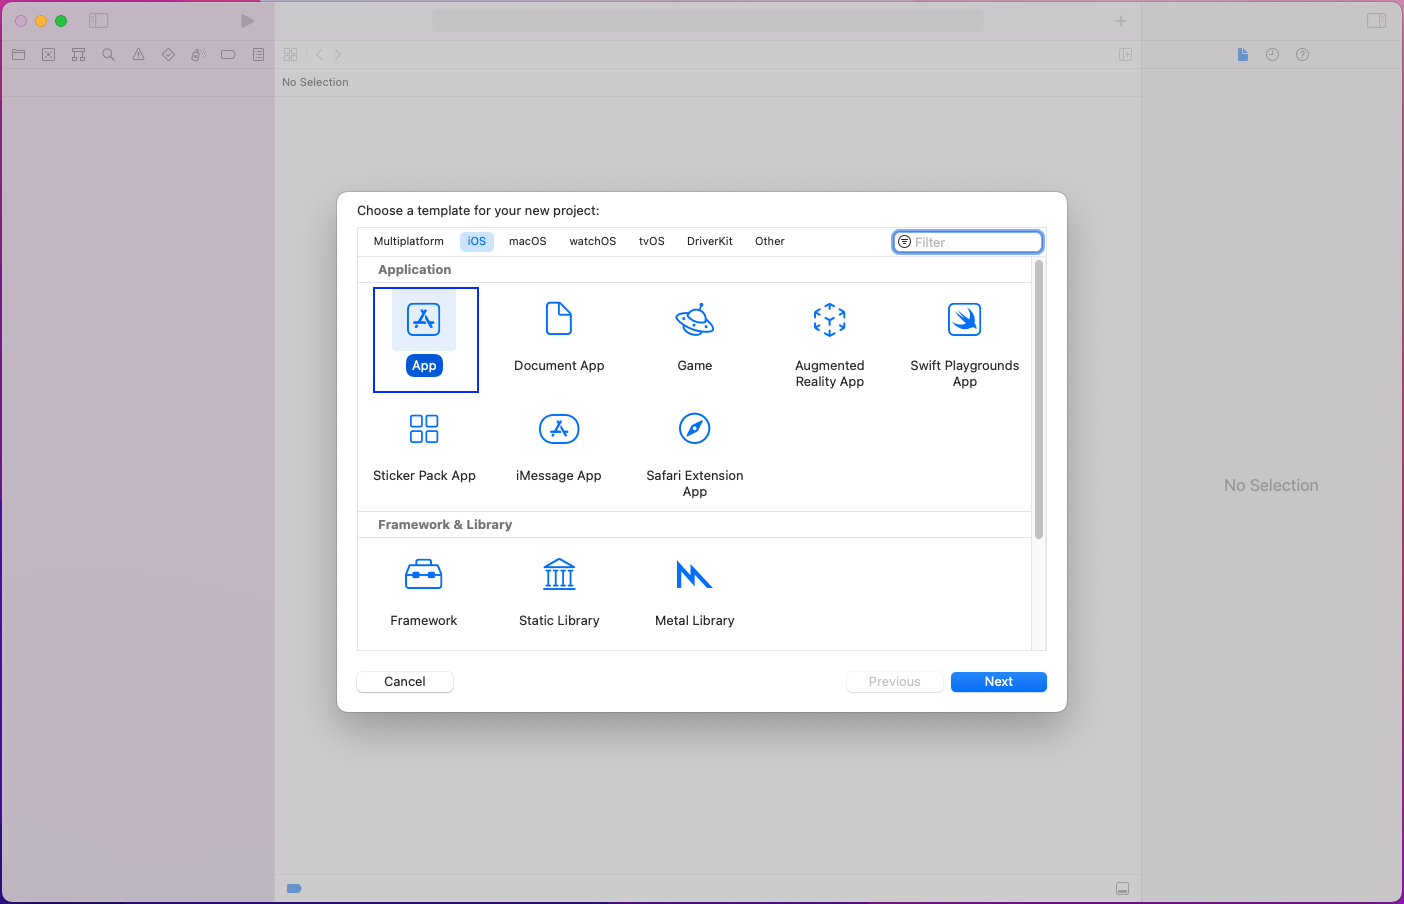
In the pop-up that opens, make sure the iOS tab is selected. After that, click on App and then the Next button.
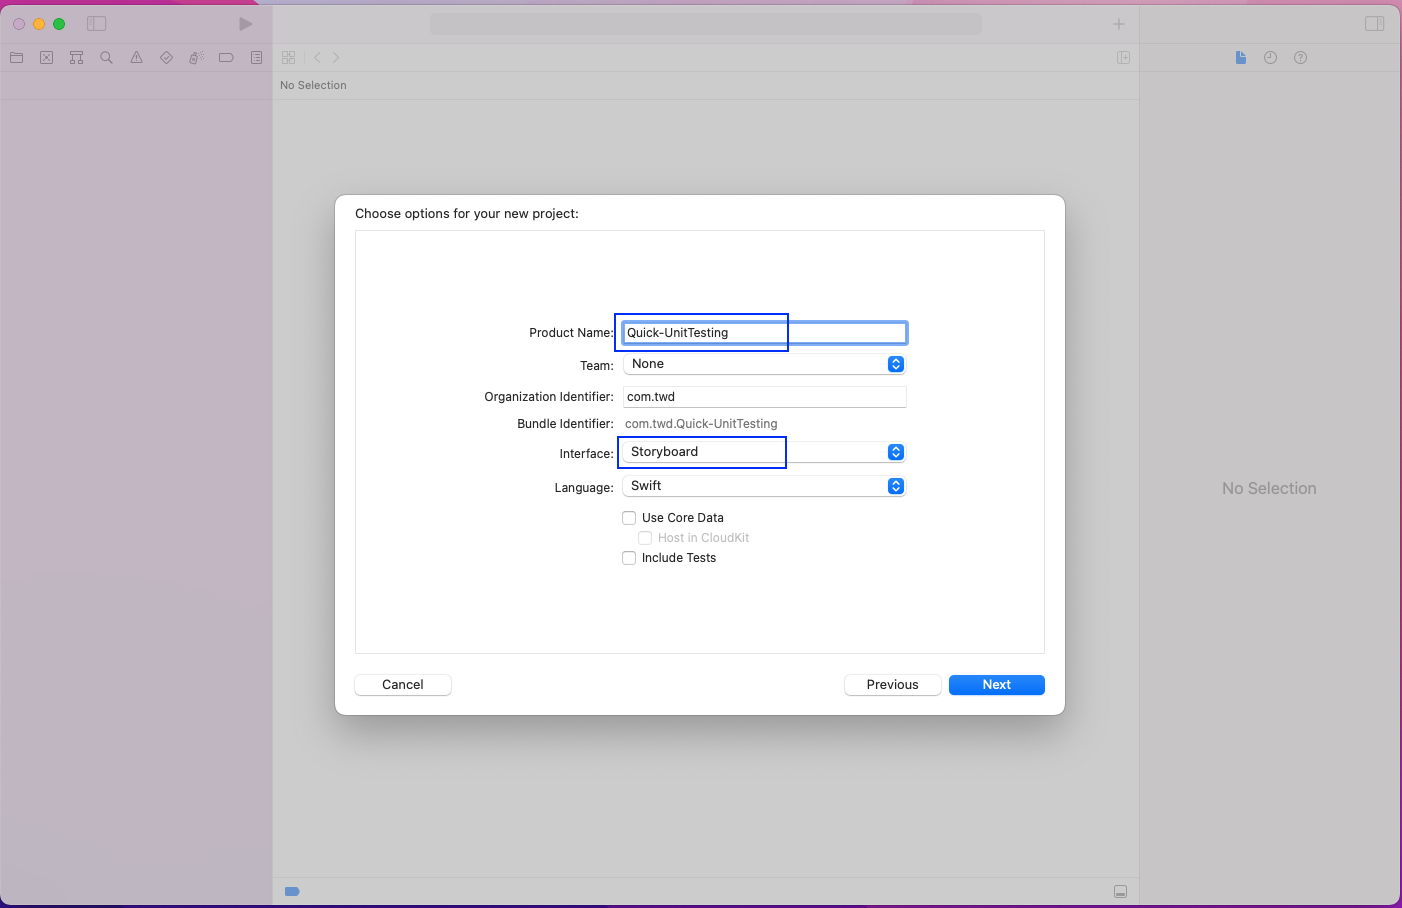
In the next pop-up, give the Product Name, which is Quick-Kingfisher in our case. The Interface should be Storyboard. After that, click on the Next button.
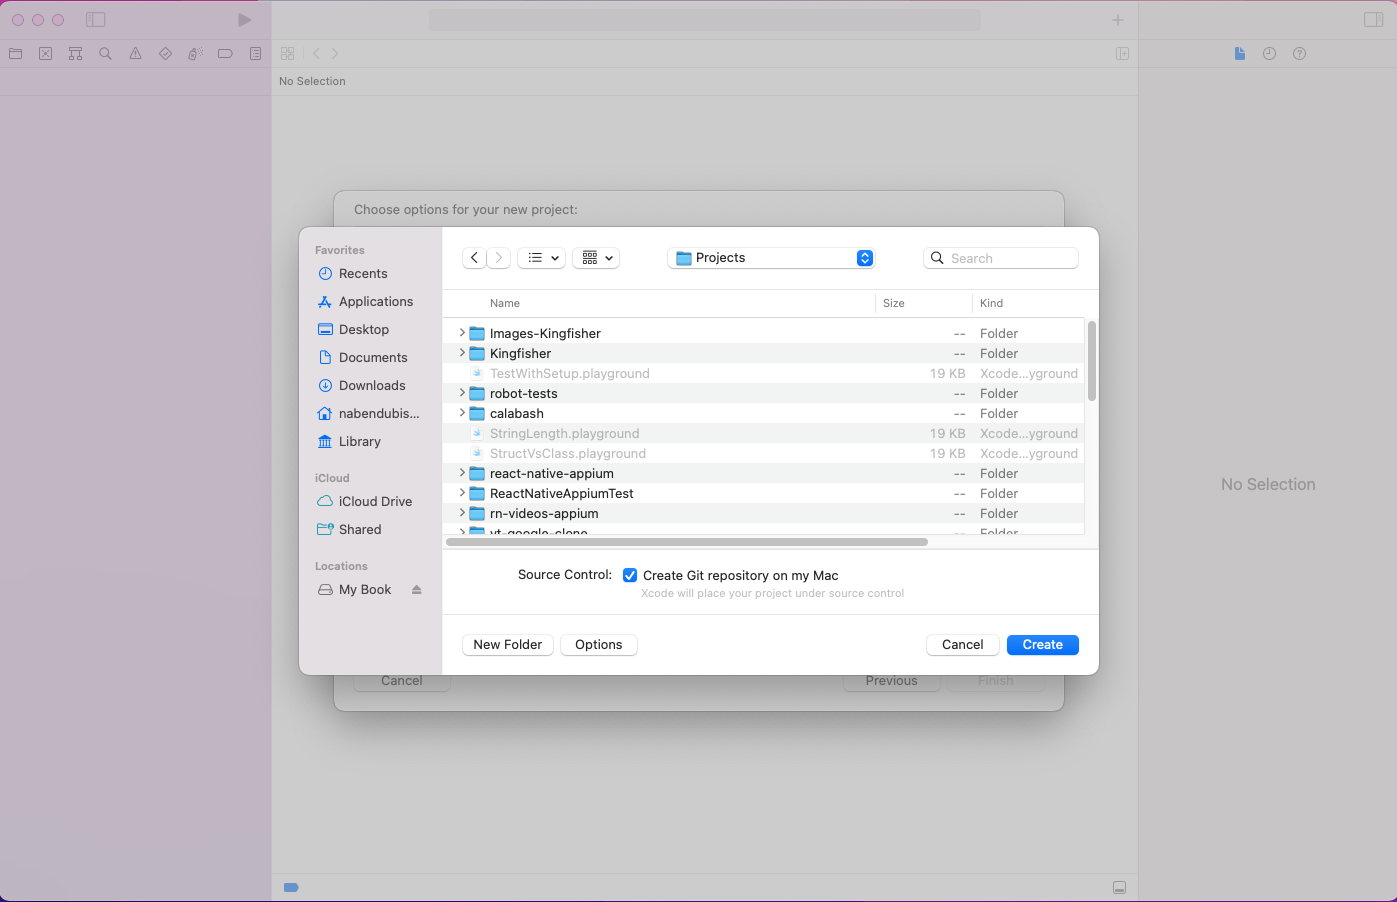
In the next pop-up, simply click on the Create button after choosing a folder.
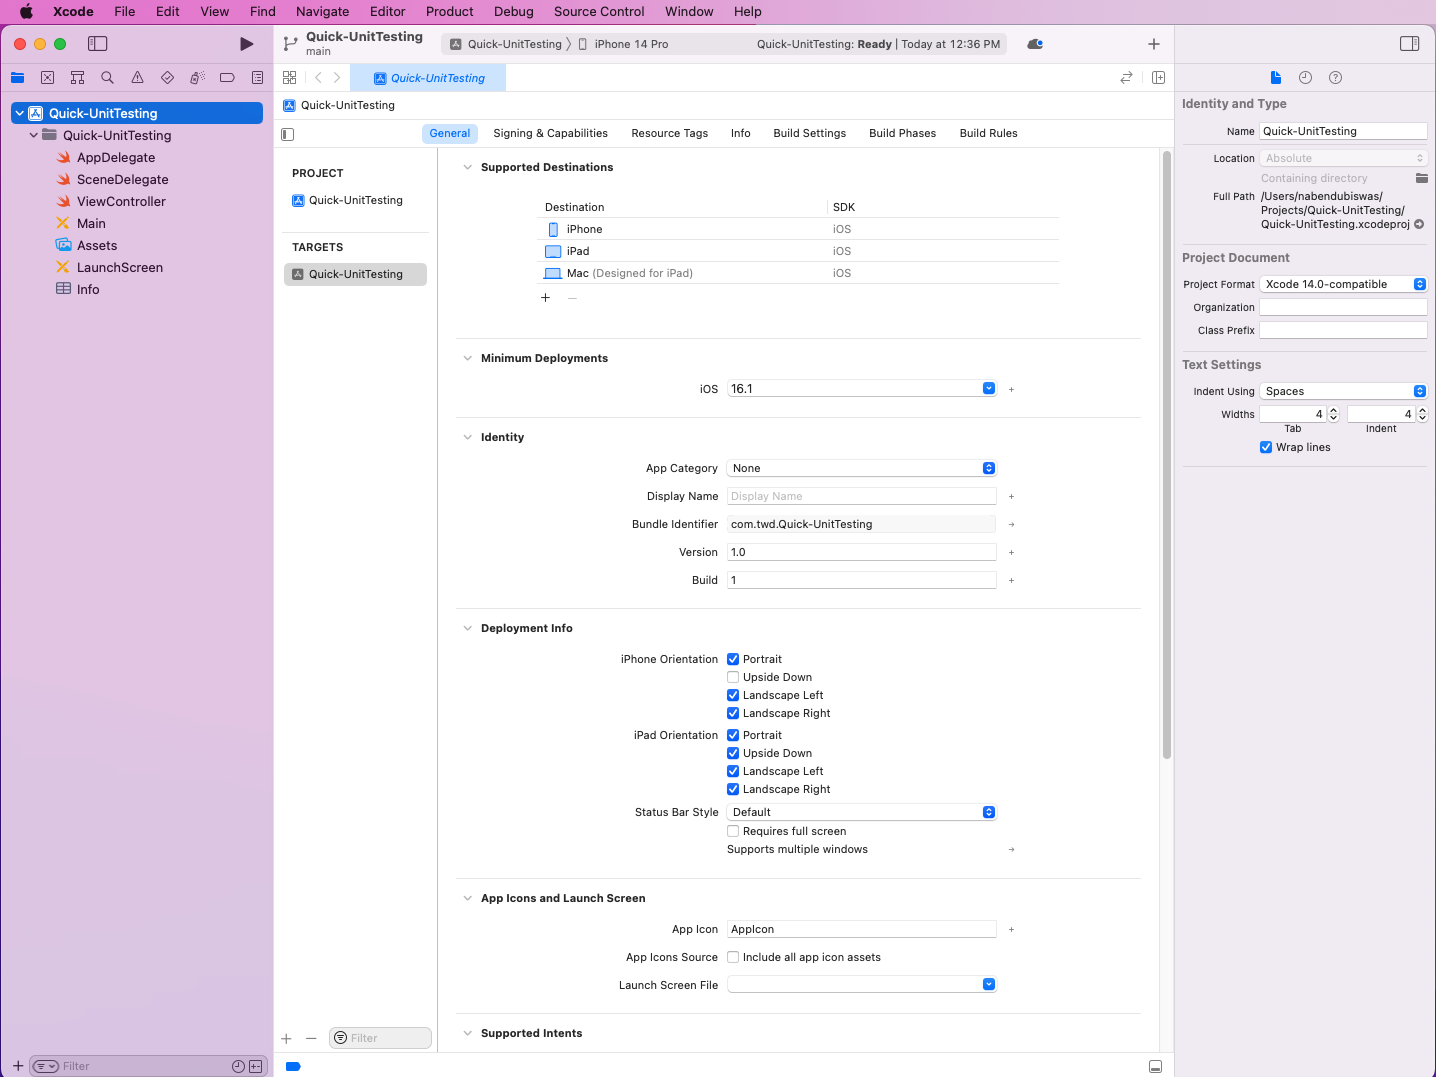
Our project opens in Xcode with all dependencies installed.
Test Setup
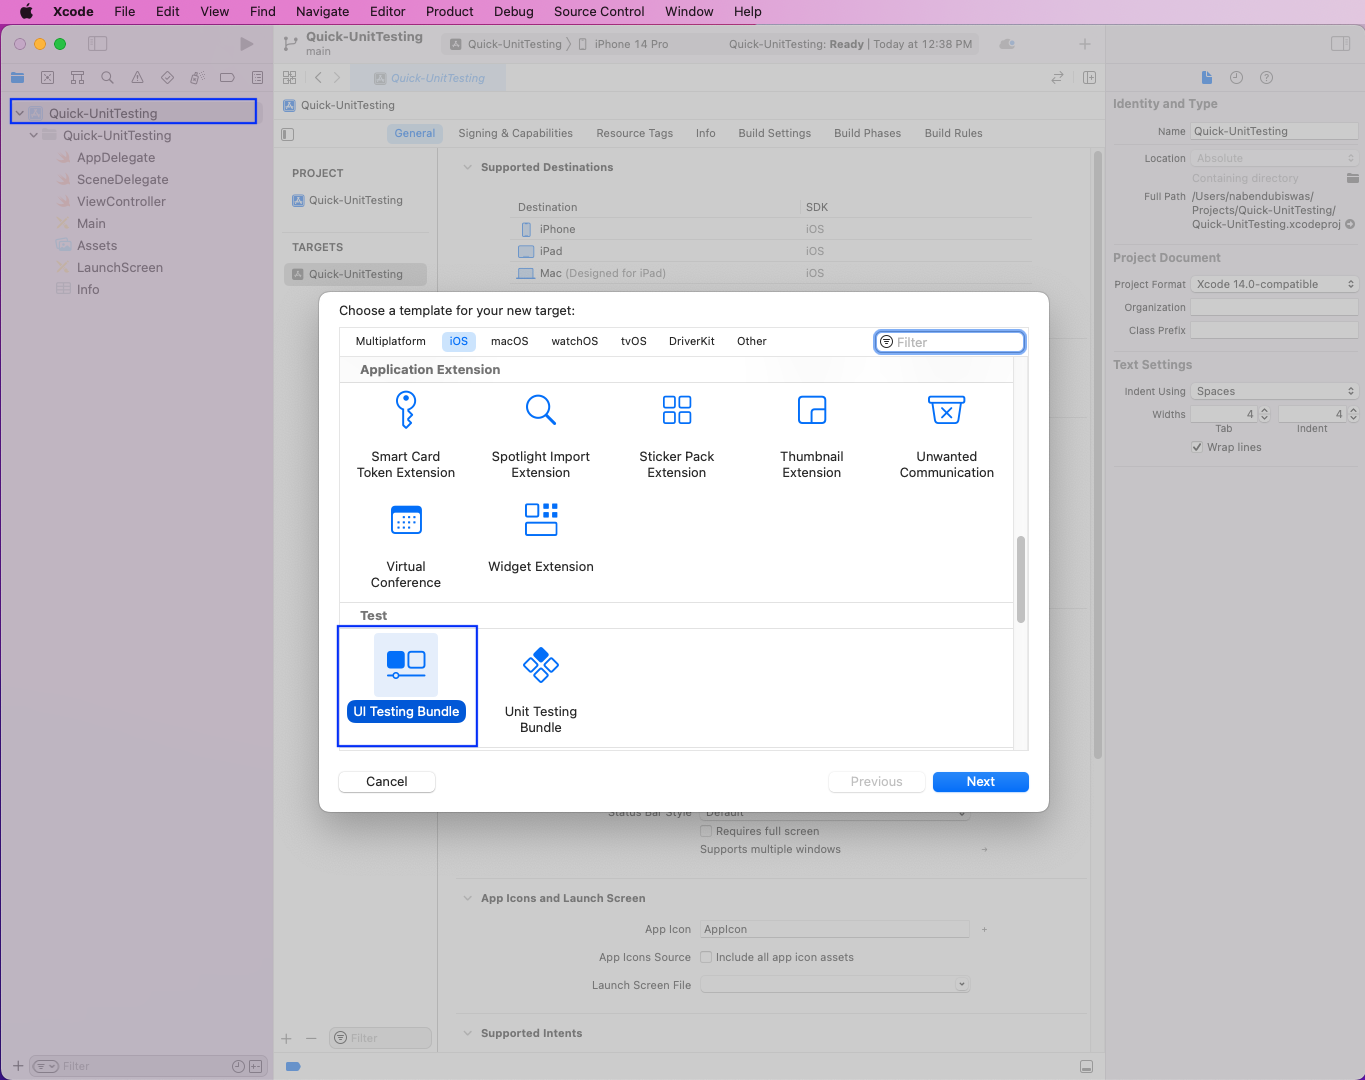
We need to do a test setup to run any kind of test in the iOS app. First, click on the root of the app, which is Quick-InitTesting in our case. It opens a screen where you need to click on the + icon at the bottom left. This will open a pop-up, where you'll click UI Testing Bundle and then the Next button.
On the next screen, everything will be auto-generated. Just click on the Finish button.
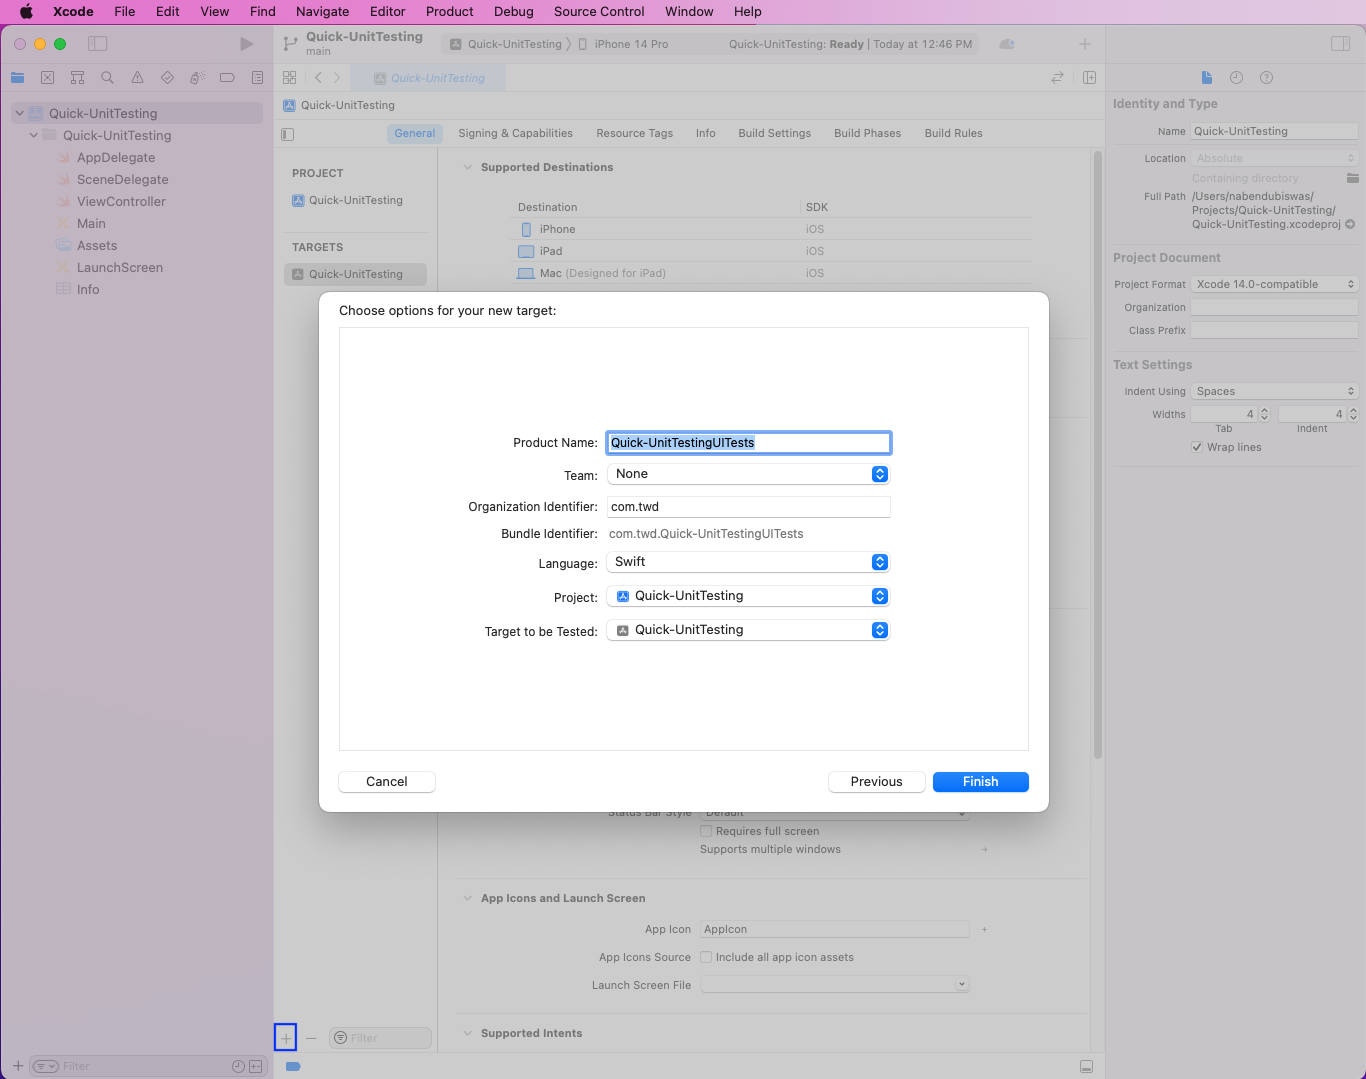
Now, a new folder of Quick-UnitTestingUITests will be created. It contains all the required installations for testing.

Unit Test With XCTest
We'll first create a simple unit test with XCTest before writing similar tests with Quick. First, create a folder of Tests. After that, inside the Tests folder, create a new Swift File.
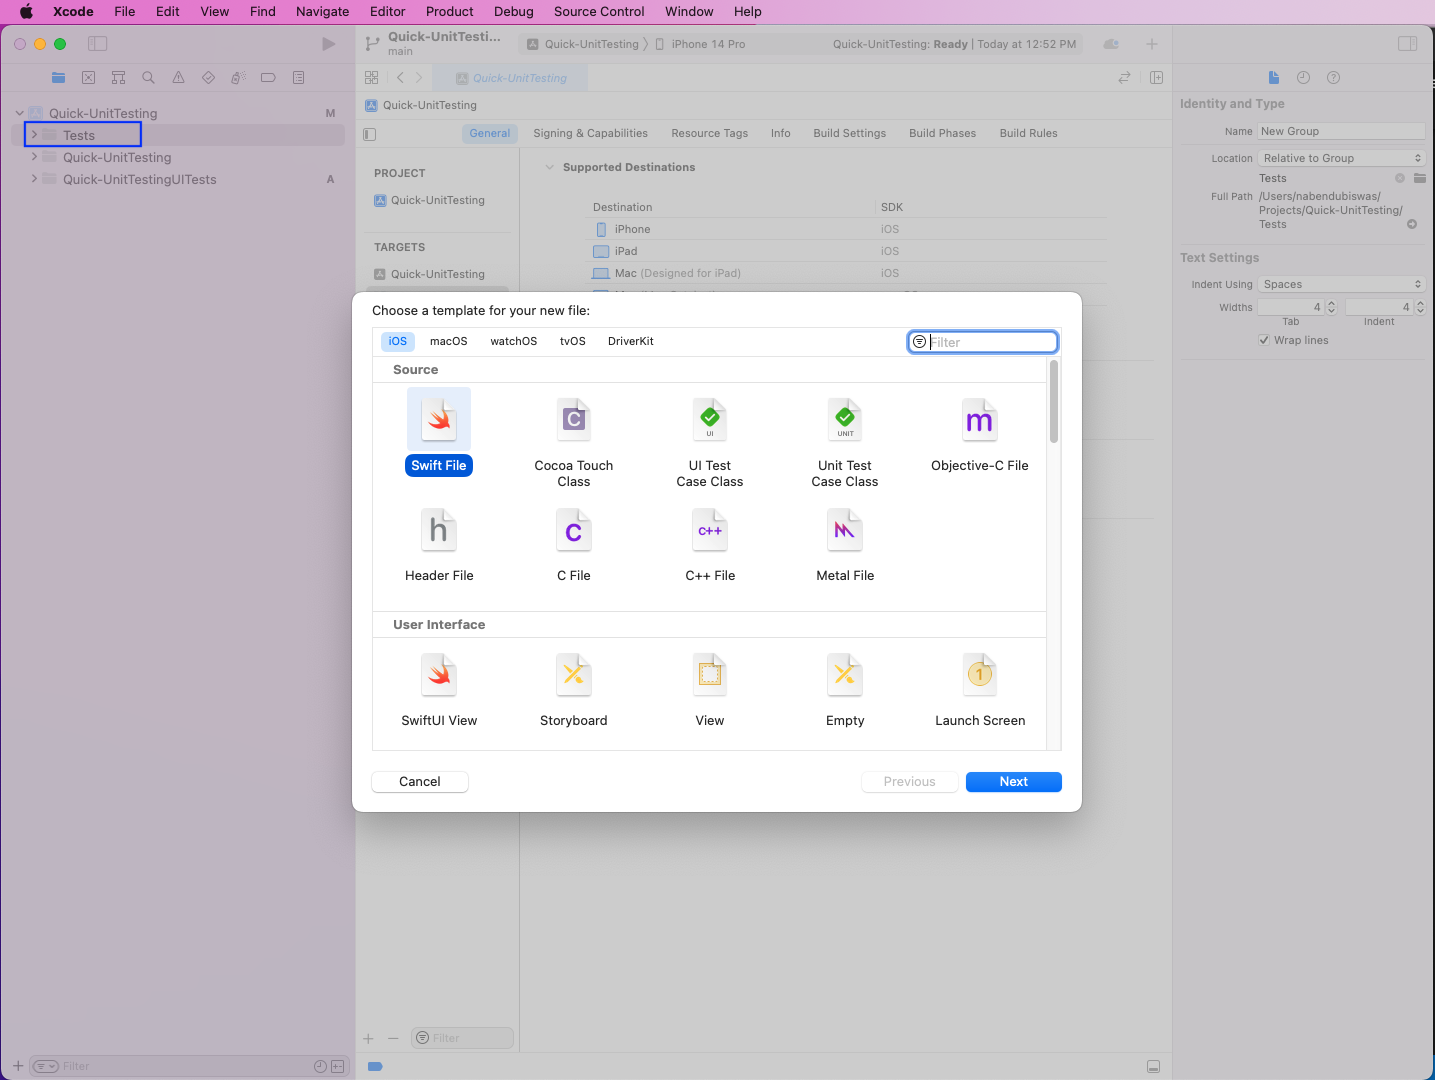
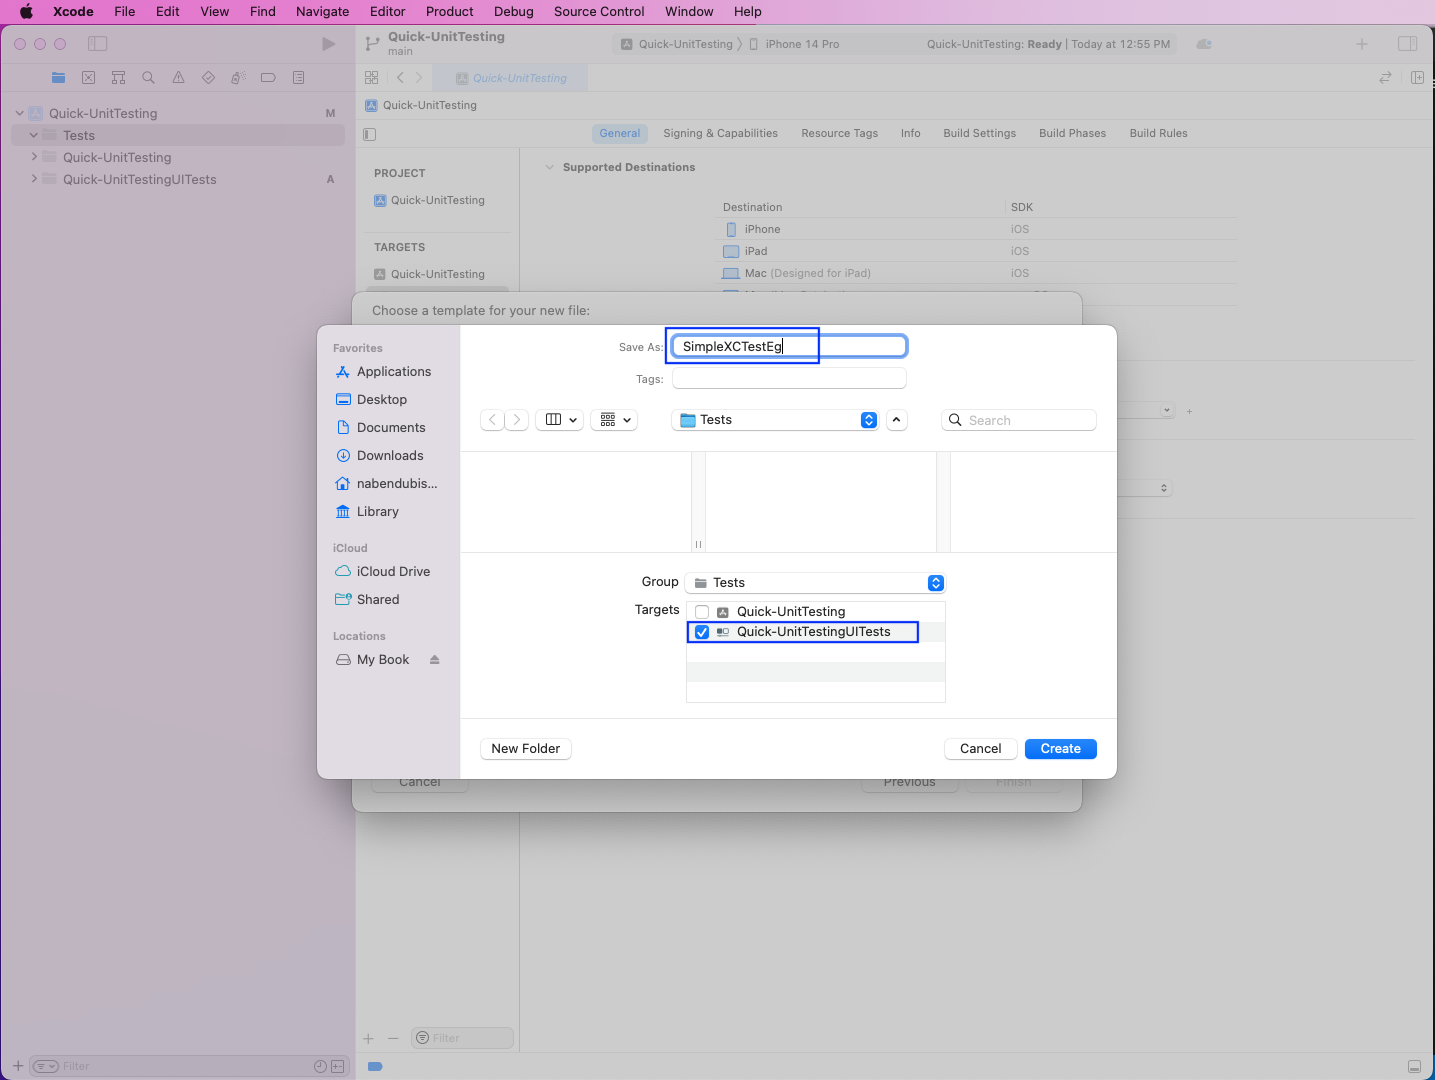
Now, we'll name this new file SimpleXCTestEg. But we need to make sure that the Quick-UnitTestingUITests checkbox is selected. After that, click on the Create button.
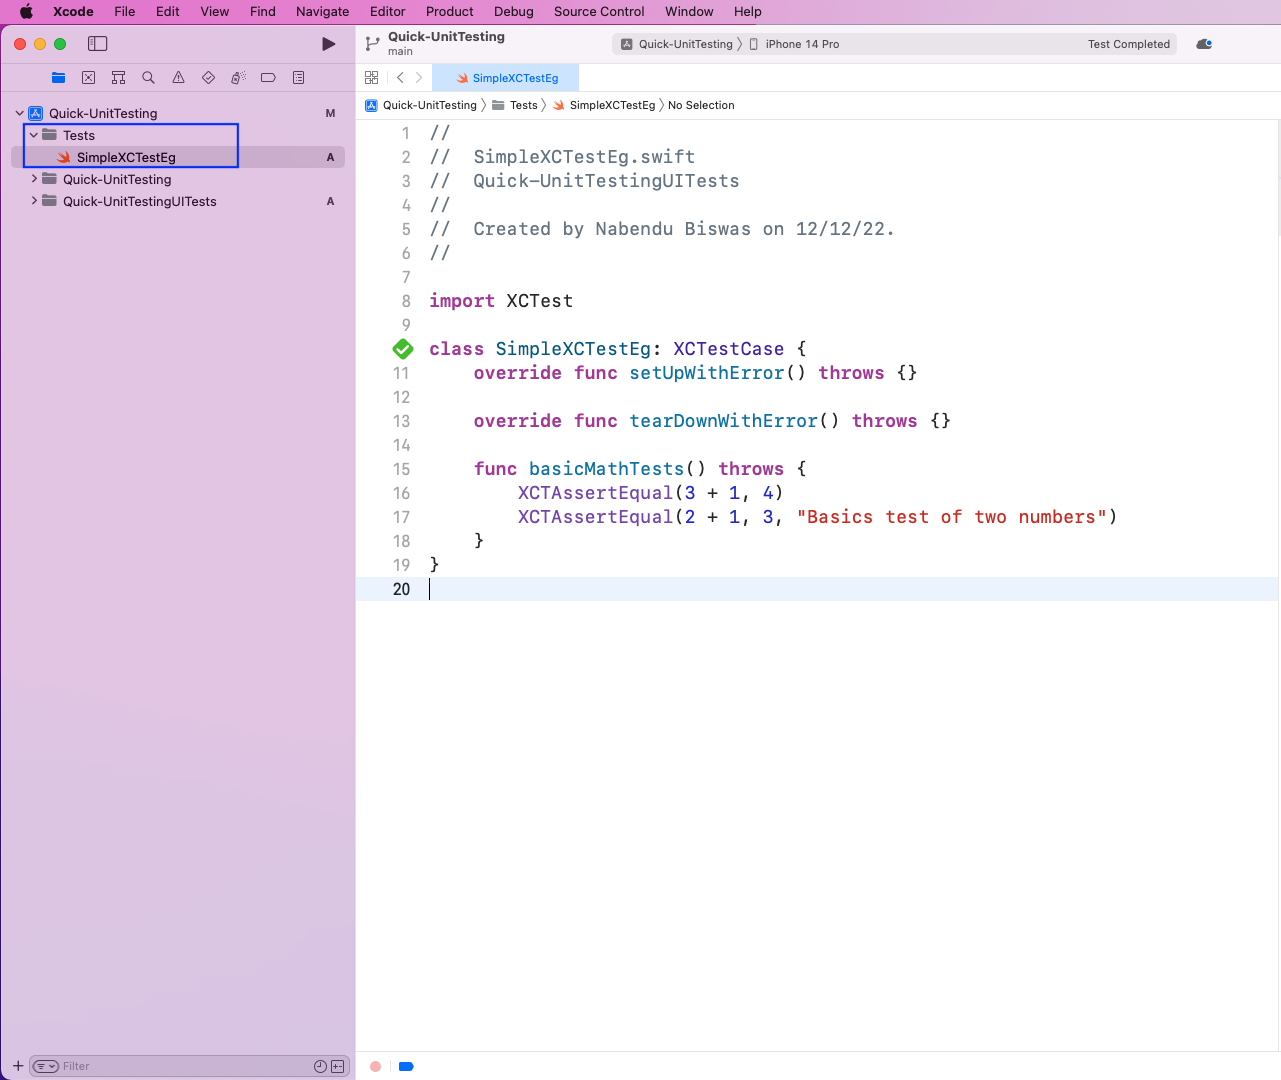
Next, in the SimpleXCTestEg file, put the below code. Here, we're inheriting from XCTestCase first. After that, we're overriding the setUpWithError() and tearDownWithError() functions. These functions are run before and after every test. You can learn about them in our earlier post on XCTest setup.
Our simple function basicMathTests() is checking two simple math operations with XCTAssertEqual expressions. The first one will check if 3 plus 1 equals 4. The second one will check if 2 plus 1 equals 3. It also has an additional description.
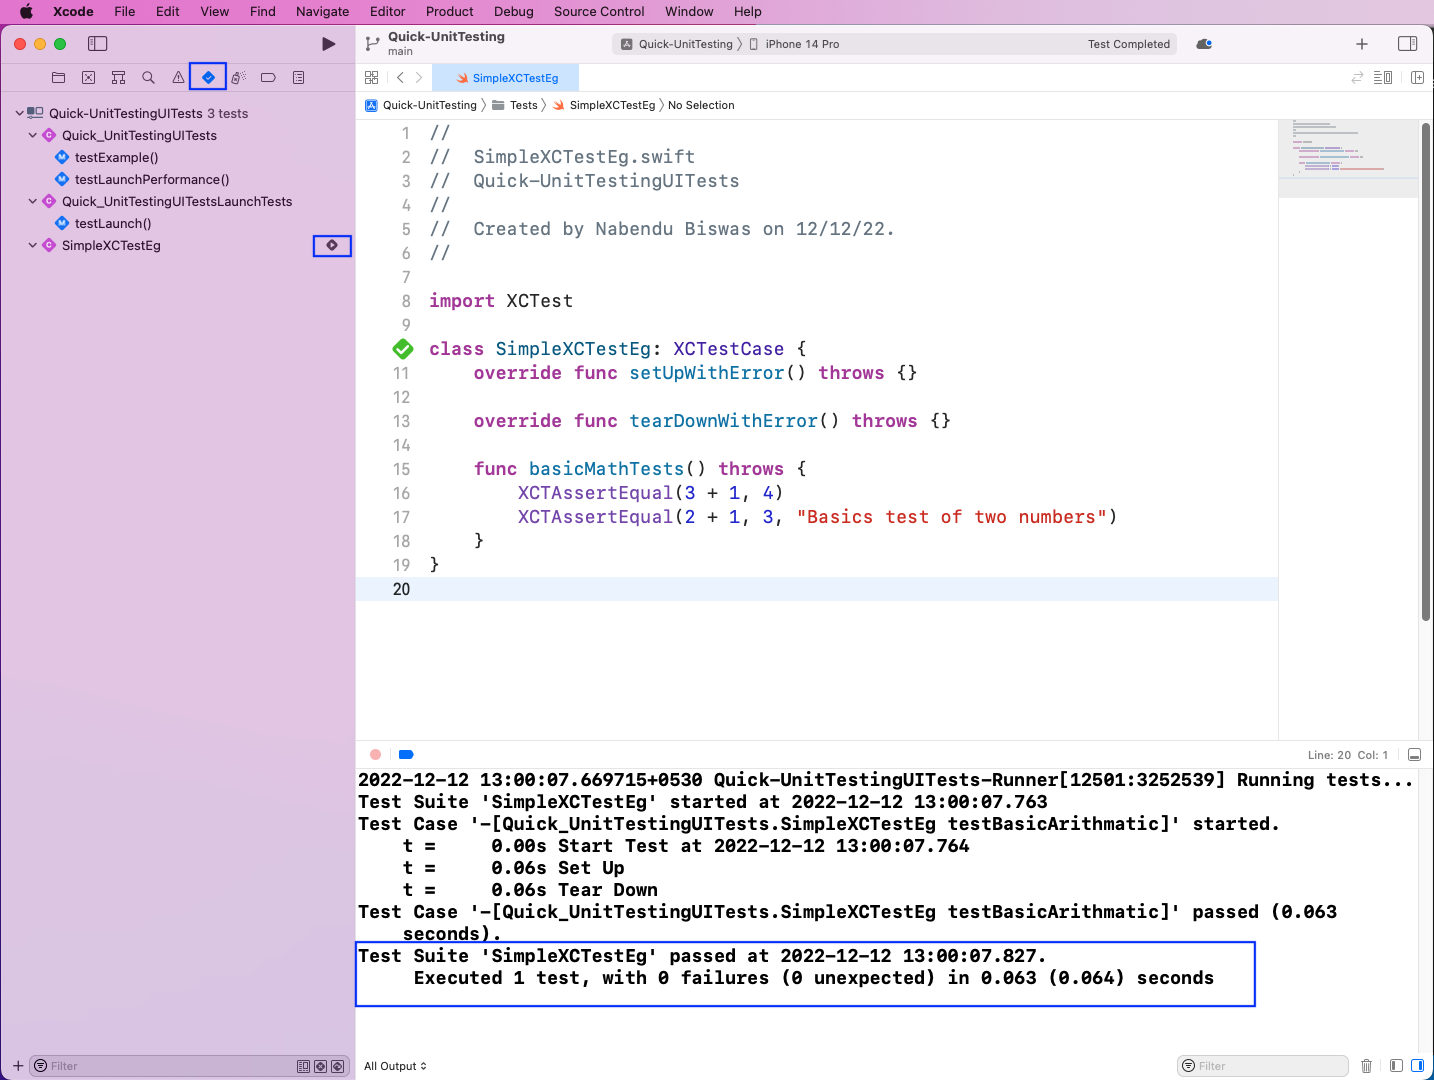
To run test cases, go to the test tab. Click on the check icon, as shown in the screenshot. Now, in SimpleXCTestEg, click on the play button. It will run our test and the result will be shown in the console. Also, a green check will be shown beside the test code.
Installing Quick and Nimble
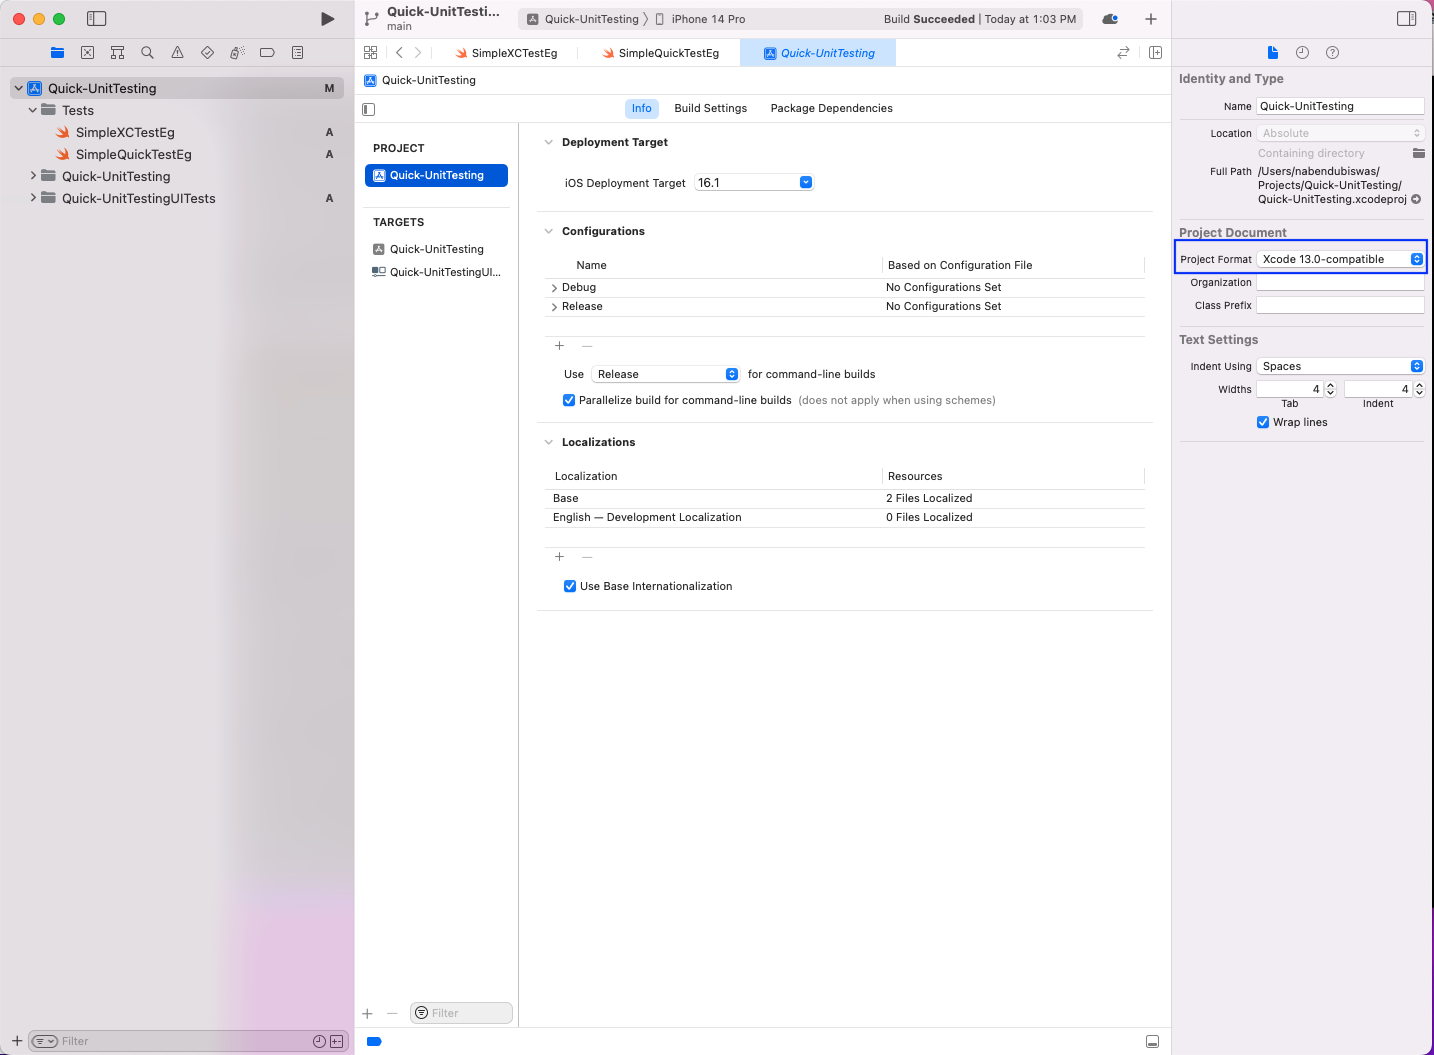
We'll install Quick and Nimble through CocoaPods. Instructions for other methods of installing Quick and Nimble can be found in the official documentation here. Using CocoaPods (aka pods) with the latest version of Xcode has some issues, so we open Xcode again and change the project format to Xcode 13.0-compatible:
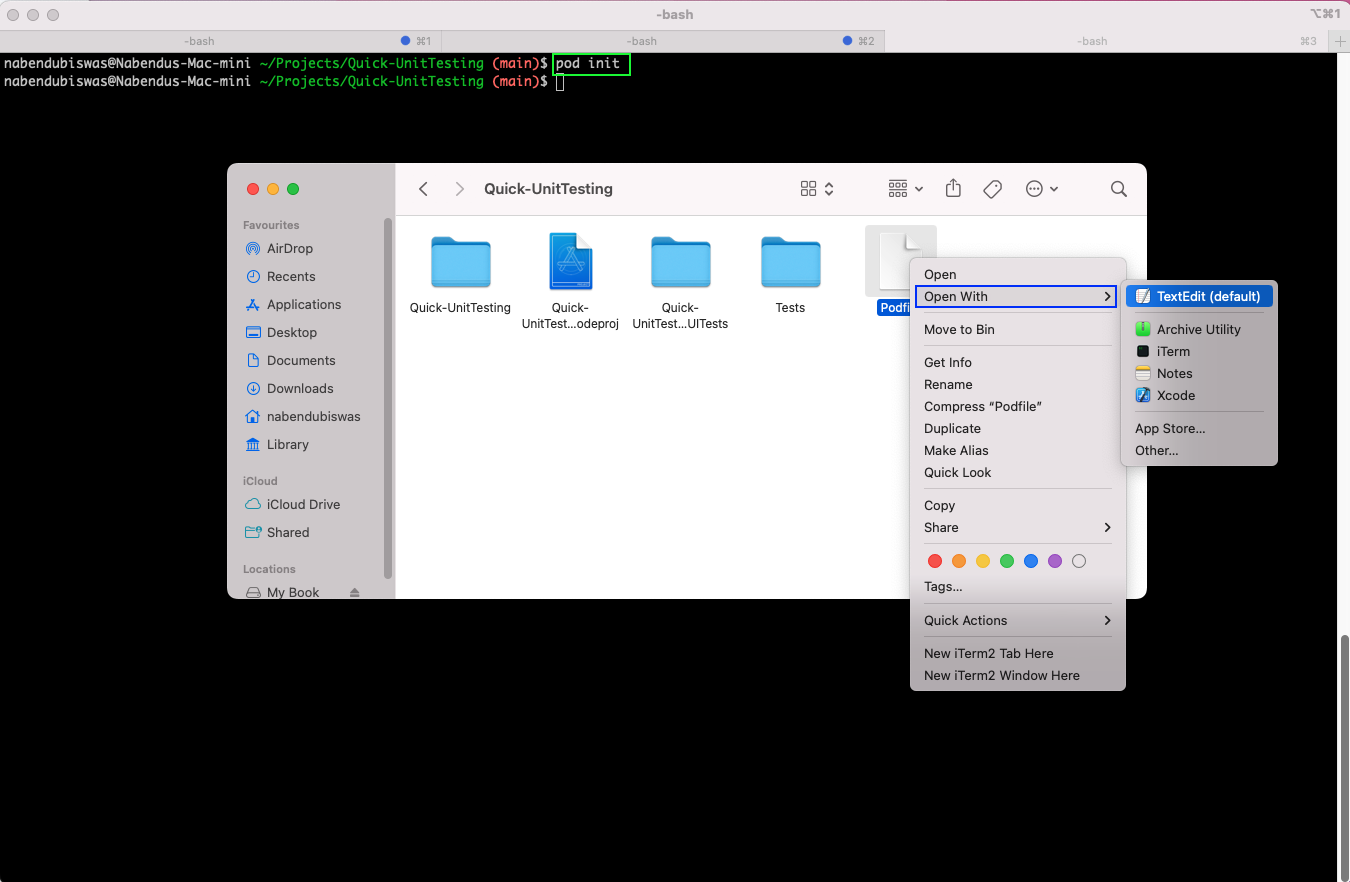
From the project directory, we'll run the pod init command. It will create a Podfile, which will be shown in the finder. Right-click on it and open it with TextEdit:
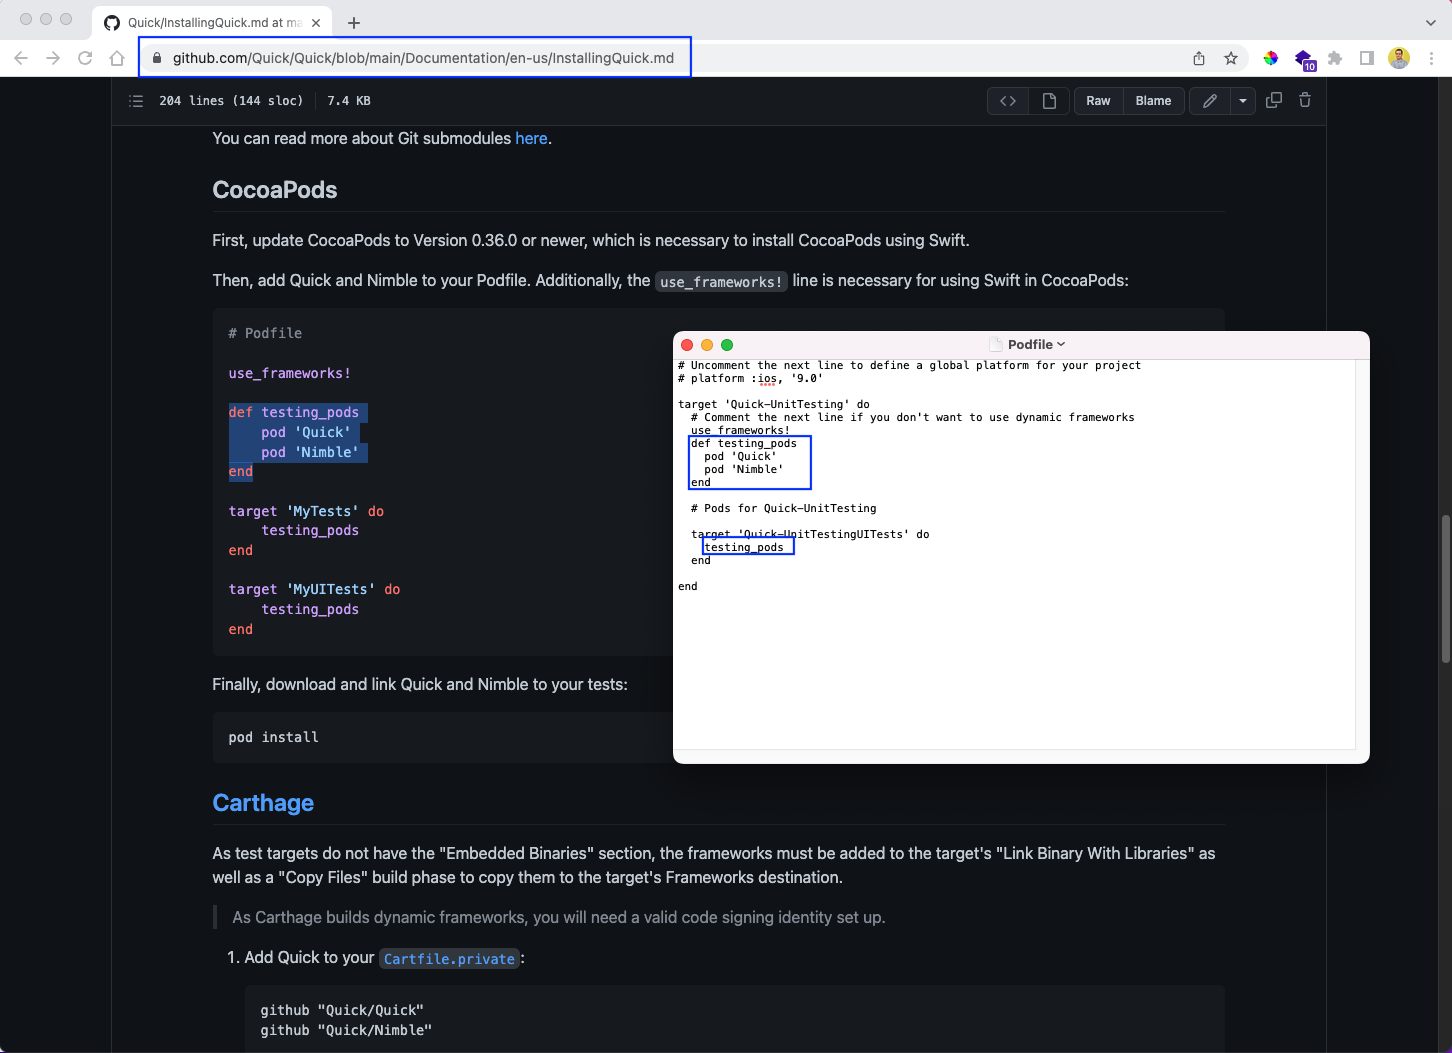
Now, as per the official documentation, we need to add Quick and Nimble in the Podfile:
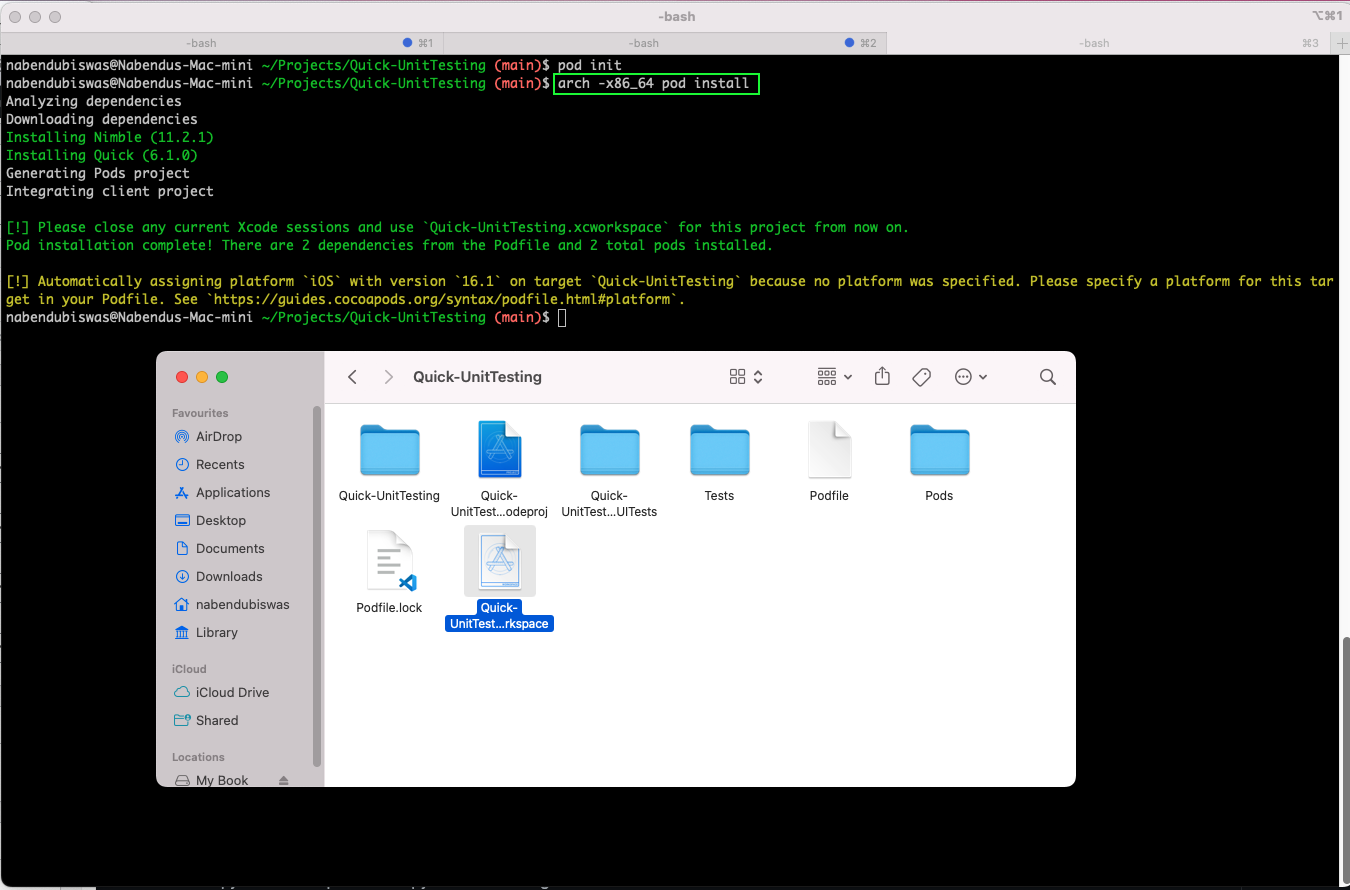
After saving the Podfile, we'll now run the pod install command from the terminal. But if you're using the latest Mac M1 machines, run the command arch -x86_64 pod install. This is required because the new machines have a different arm architecture.
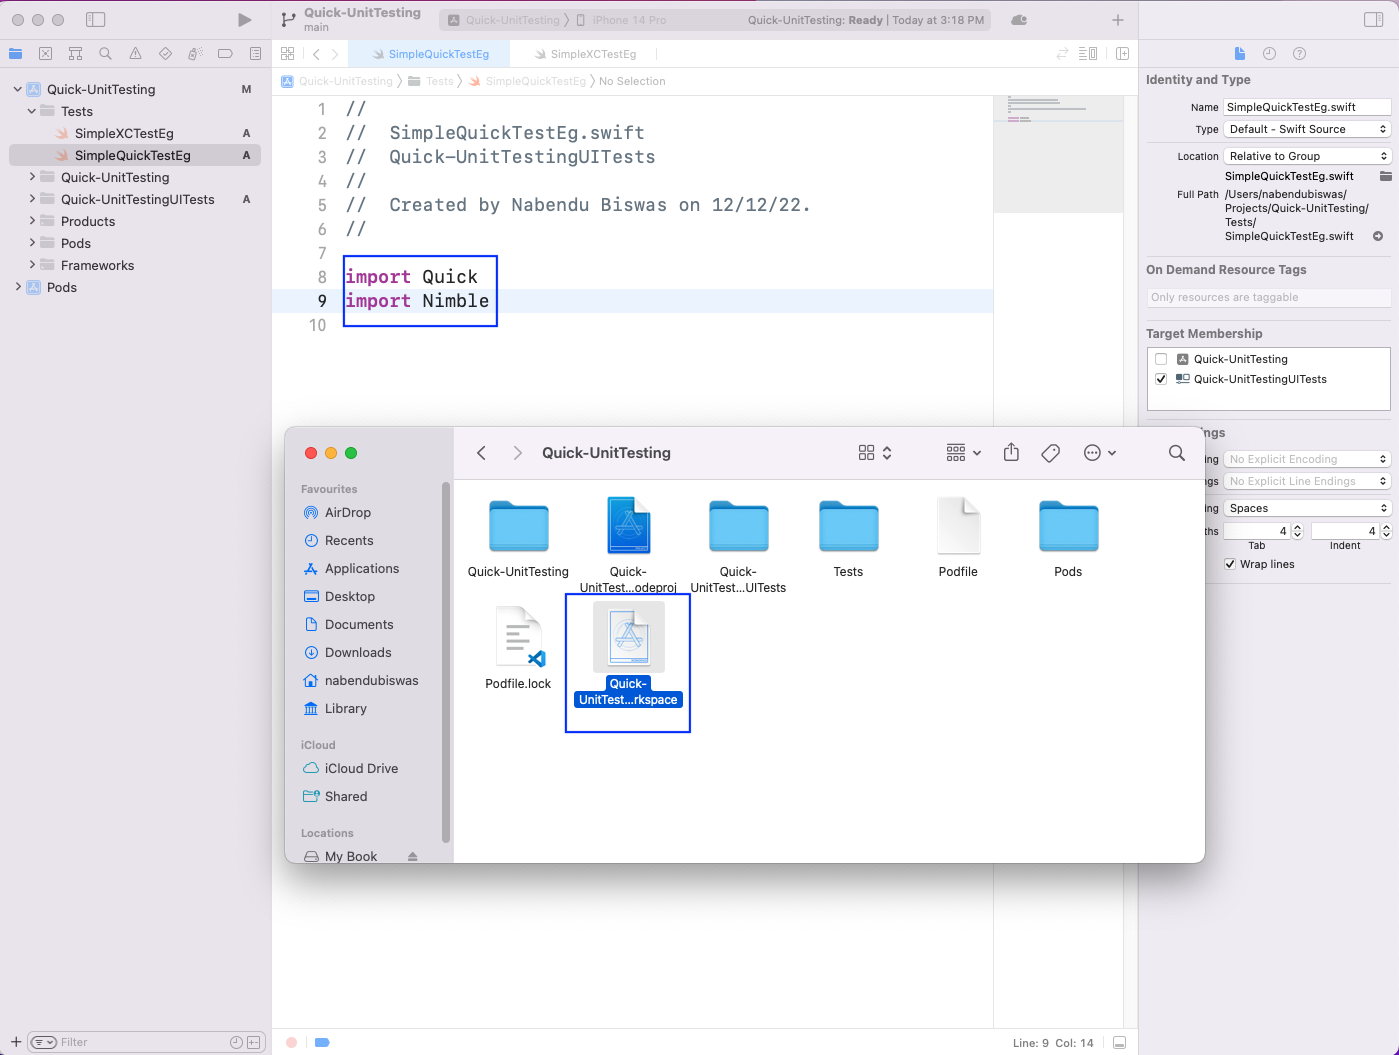
The command will install Quick and Nimble and will also create a new Quick-UnitTesting.xcworkspace file with a white background:
Unit Testing With Quick and Nimble
We need to open the new Quick-UnitTesting.xcworkspace file in Xcode. After that, create a new file SimpleQuickTestEg in the Tests folder and write the import statements for Quick and Nimble. Notice that we didn't get any errors because we had installed them successfully earlier.
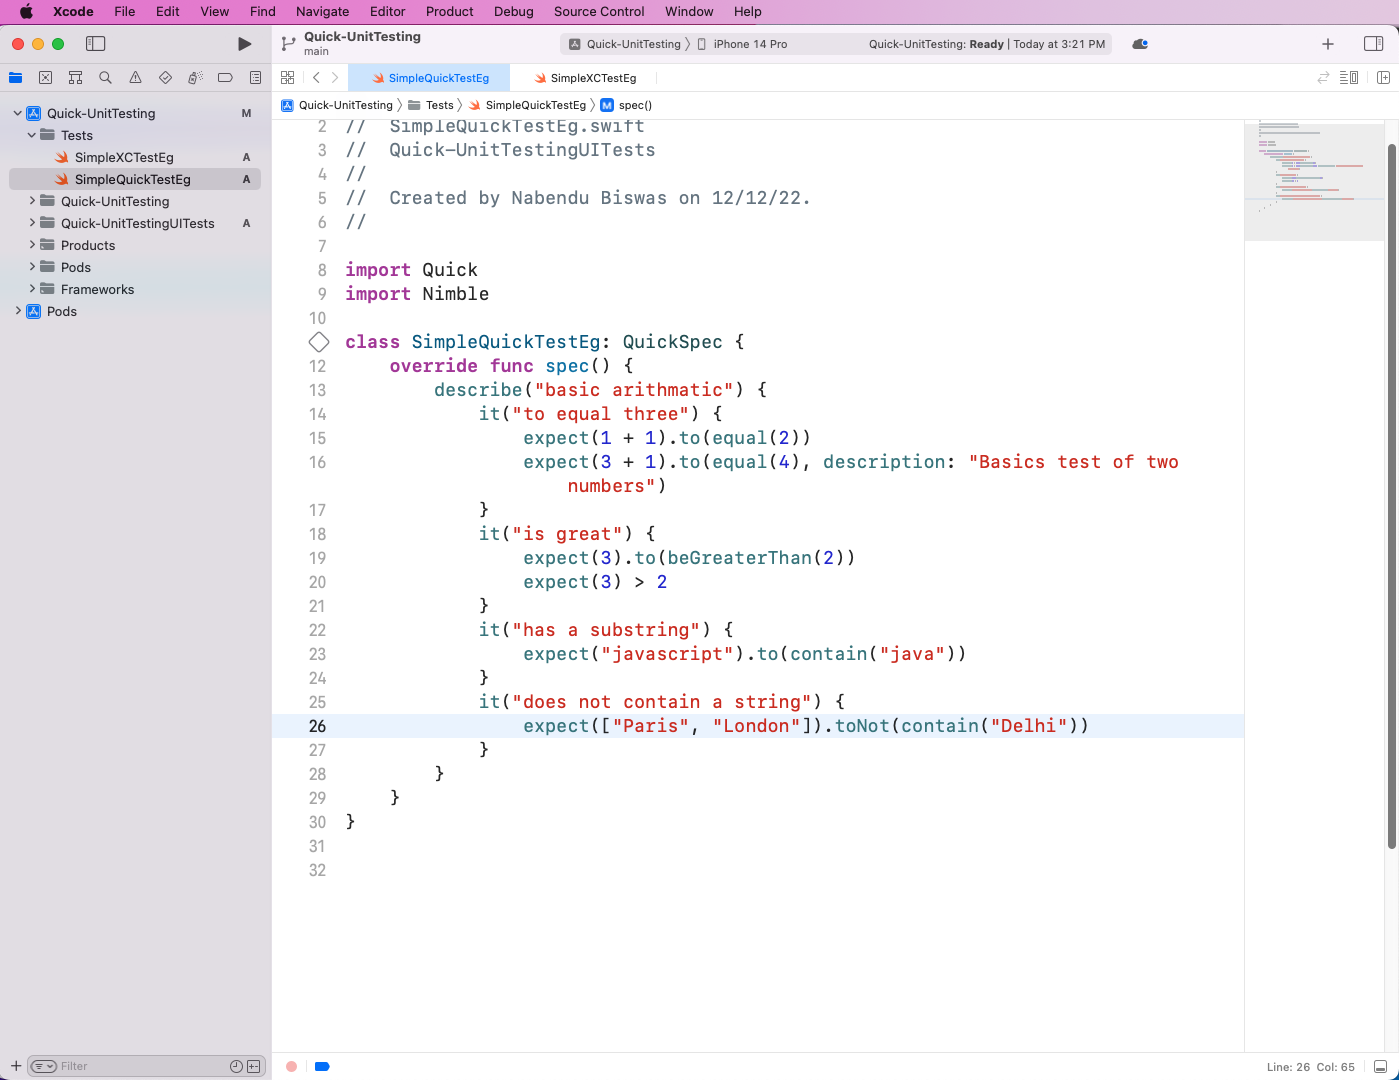
Now, we'll create a class SimpleQuickTestEg, which will inherit from QuickSpec. Here, inside a spec function, we need to write the whole code. We have the familiar describe statement wrapping everything. Inside it, we have four it statements. Each it statement also gives a description of the tests.
Now, these it statements are using expect with to for checking simple arithmetic operations.
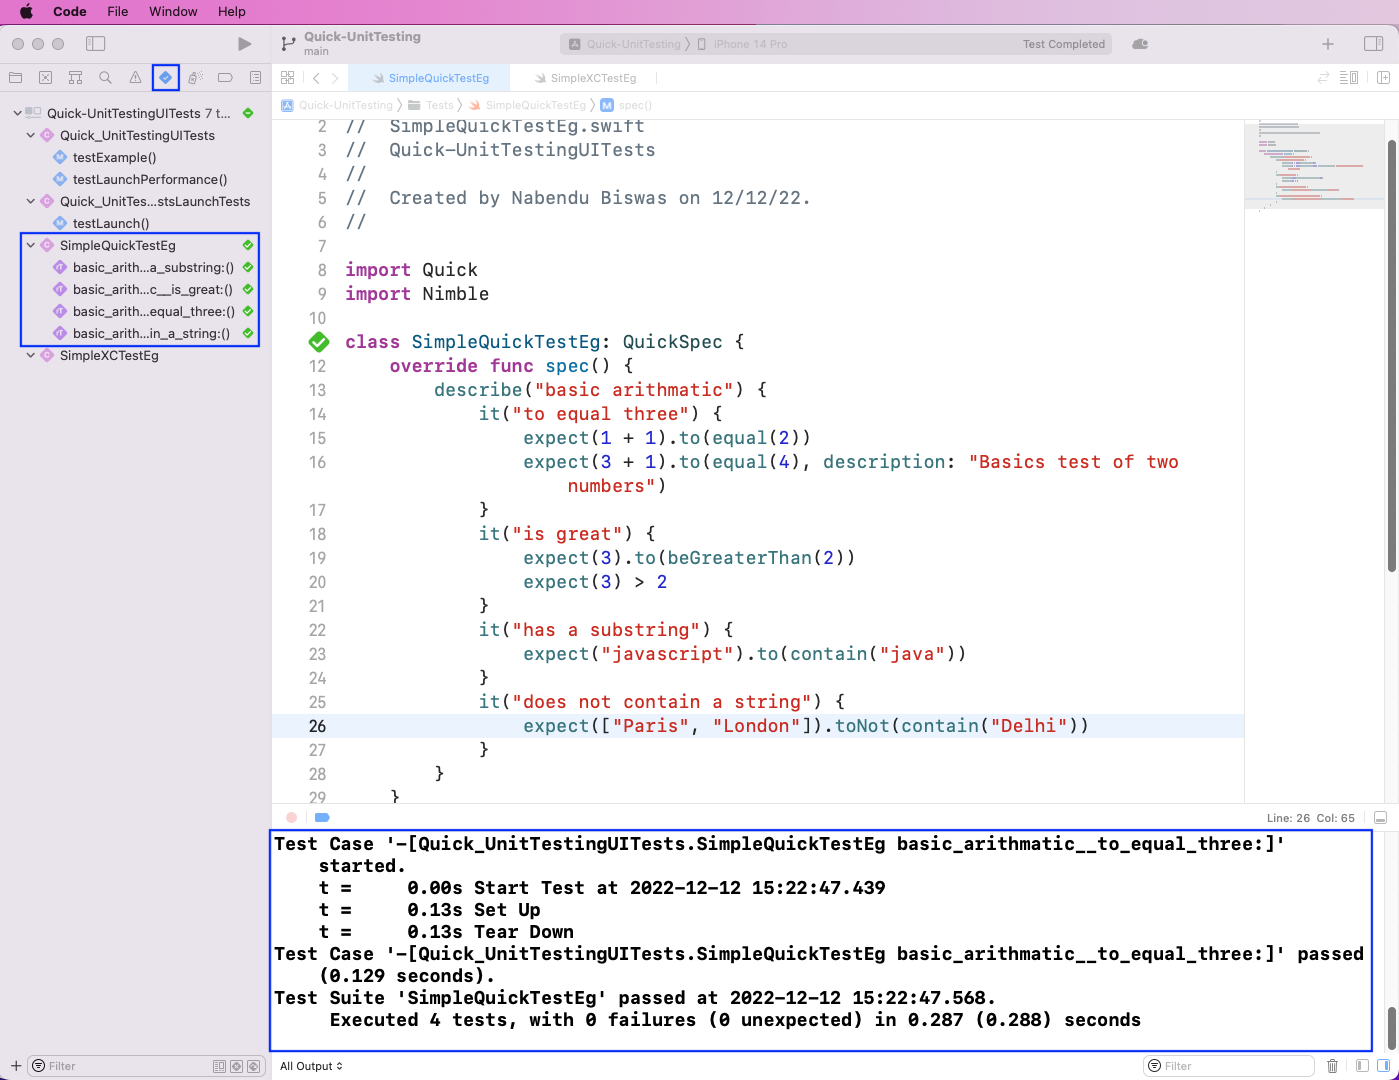
To run the test cases, go to the test tab. Now, in SimpleQuickTestEg, click on the play button. It will run our tests and the result will be shown in the console. Also, a green check will be shown beside the test code.
What You've Learned
In this post, we talked about unit testing in Swift using the BDD framework Quick. We created a simple project in Xcode, set up a test, and wrote a simple XCTest case. After that, we installed Quick and Nimble in our project and wrote arithmetic tests using them.
But the setup is complicated. Writing test cases in Quick is also a task, and knowledge of the Swift programming language is required. To test your app without complicated setups or having to write test cases, try Waldo. You only need to provide the APK or IPA file. Waldo automatically generates test cases and emails you a nice report.
Automated E2E tests for your mobile app
Get true E2E testing in minutes, not months.


