


Monkey testing is a type of testing in which the tester gives a lot of random input to a web or mobile app. With this testing, we can make sure that the app is working well with a large range of input.
Also, load testing or performance testing is done in this process.
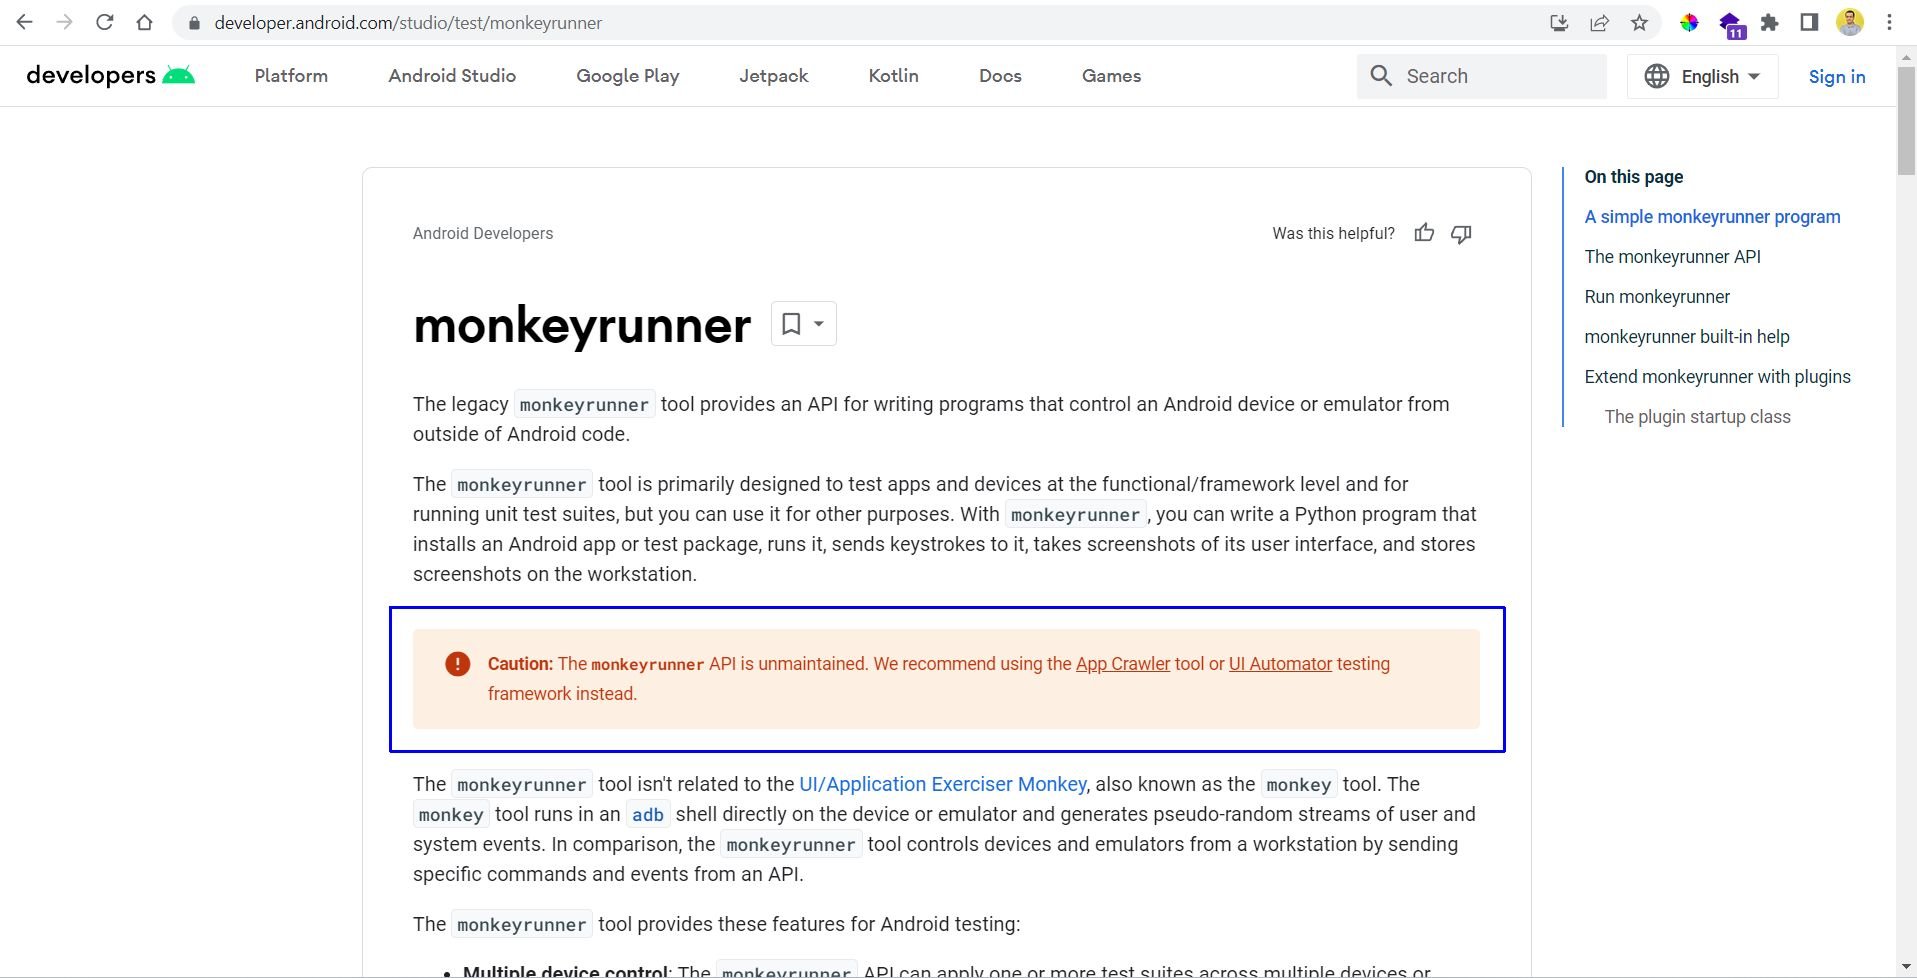
Most of the time, monkey testing is done by a tool. Monkeyrunner, which is part of Android Studio, is one such tool.
In this post, we'll first learn about monkeyrunner. After that, we'll learn to test an app with monkeyrunner. Finally, we'll see some of its alternatives, including one for iOS.
Android doesn't recommend monkeyrunner anymore because this package has not been maintained for some time.
.png)
What Is Monkeyrunner?
The monkeyrunner tool allows us to run monkey tests on any connected Android device or emulator. It's a Python program that can control the Android device or emulator. It also can click different elements on the app screen, enter all keys, and even take a screenshot.
But as conveyed earlier, this tool is not recommended, as it's not maintained. And monkeyrunner is also not available on iOS. So, we'll look into other tools that run monkey testing for iOS apps.
Python Script Setup
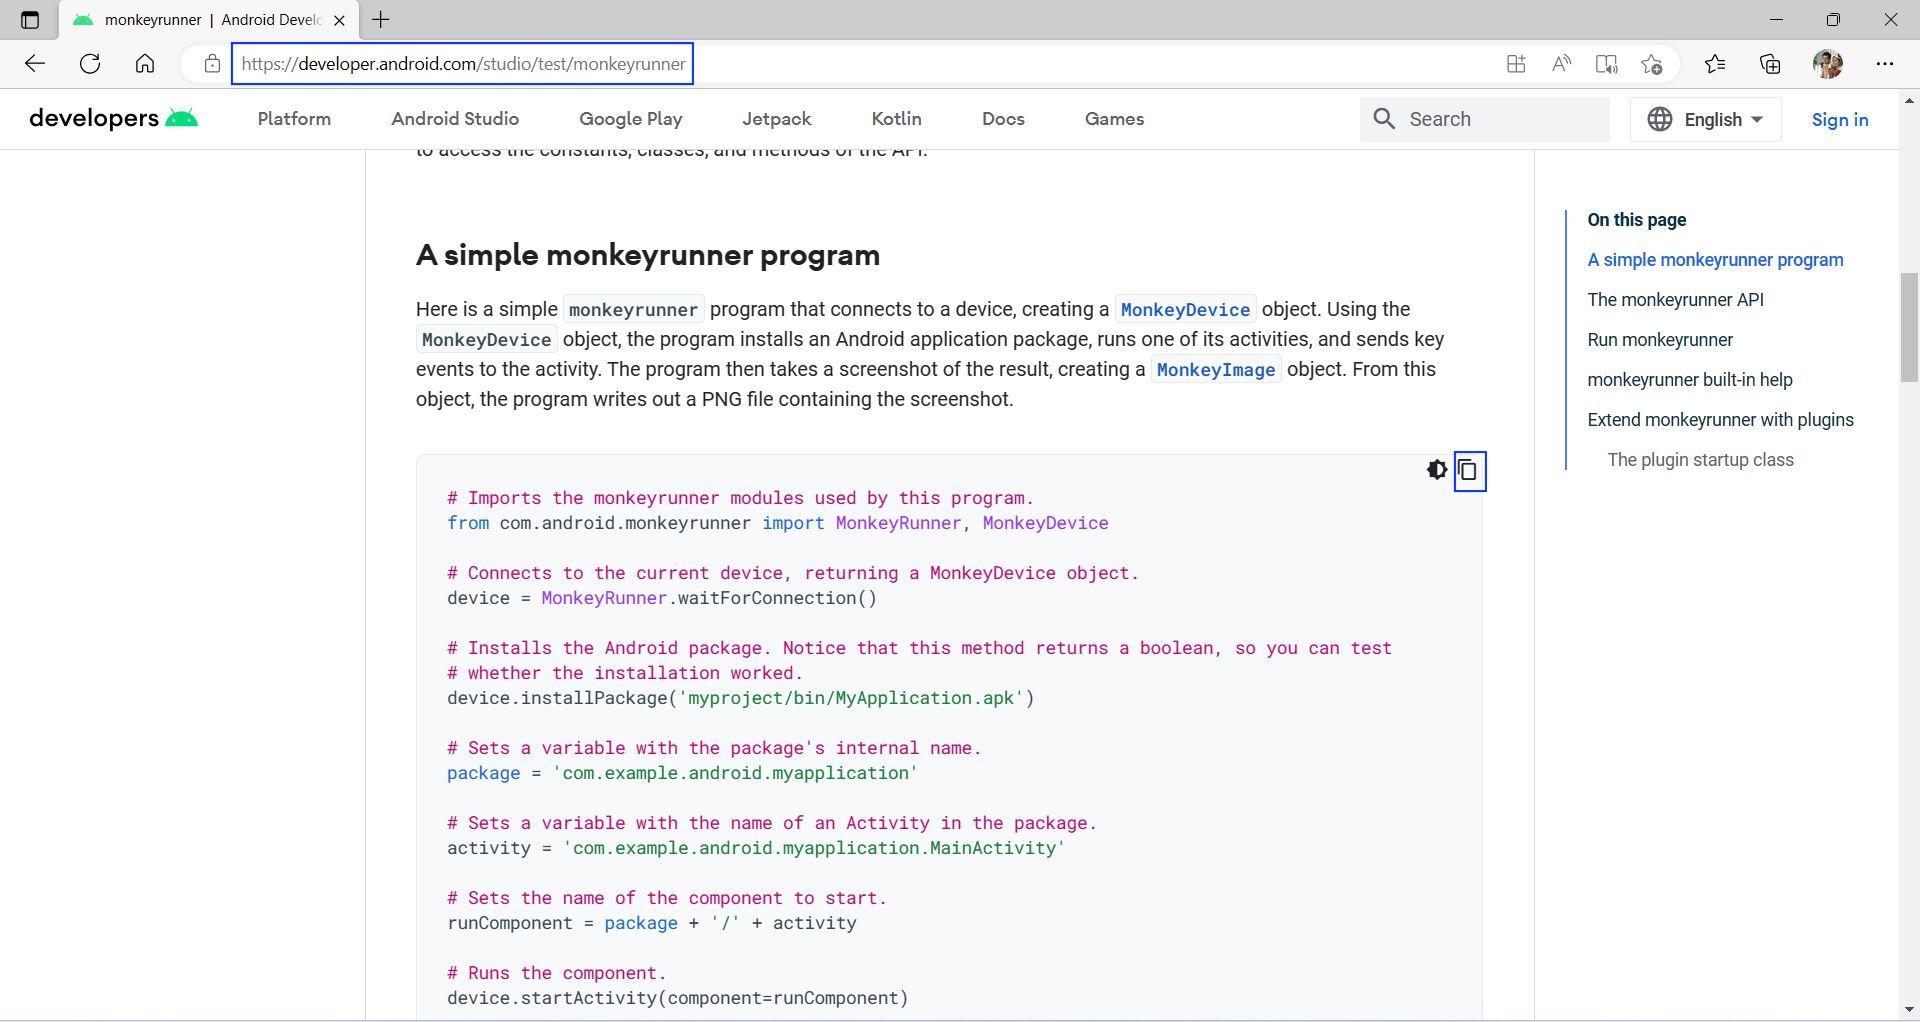
The monkeyrunner program is a Python program. So, we need to do some setup. The official documentation of monkeyrunner contains a simple program that we're going to use.
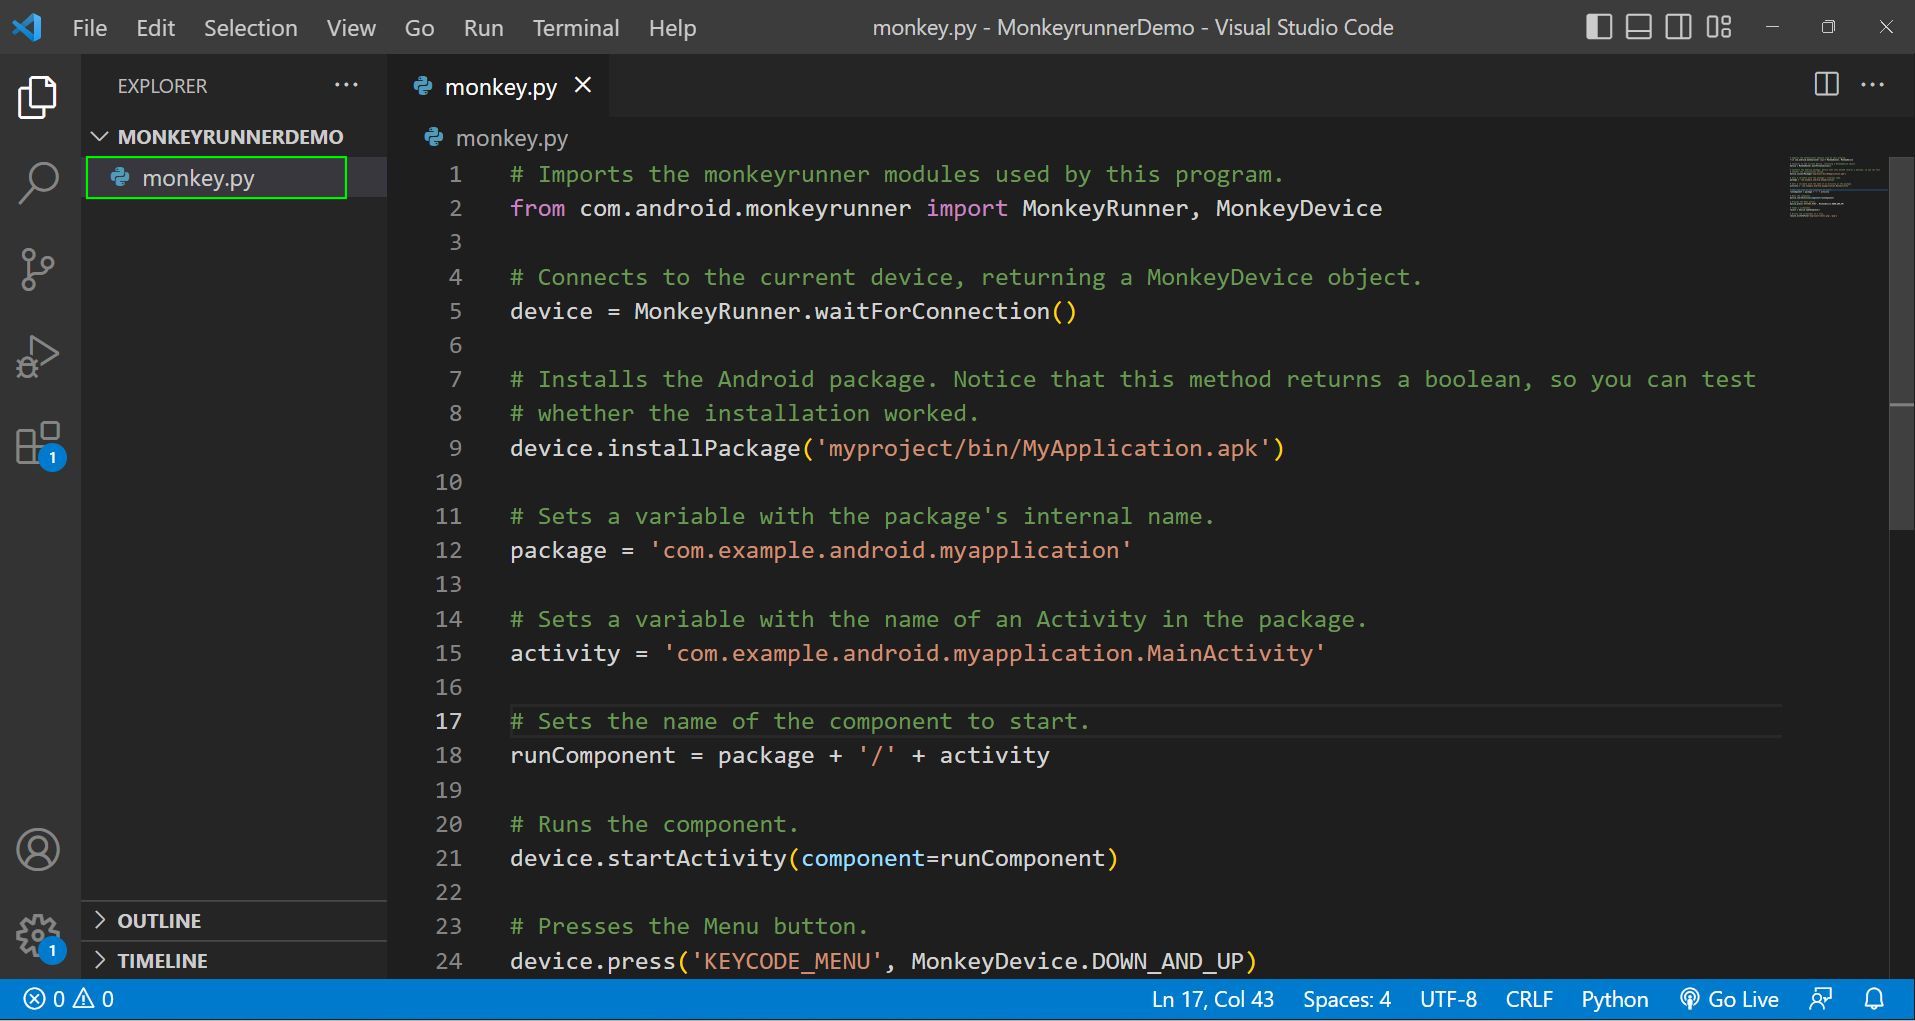
First, create a folder called MonkeyrunnerDemo and open it in VS Code. After that, create a file named monkey.py inside it.
We've added the code below in it, which we got from the official documentation.
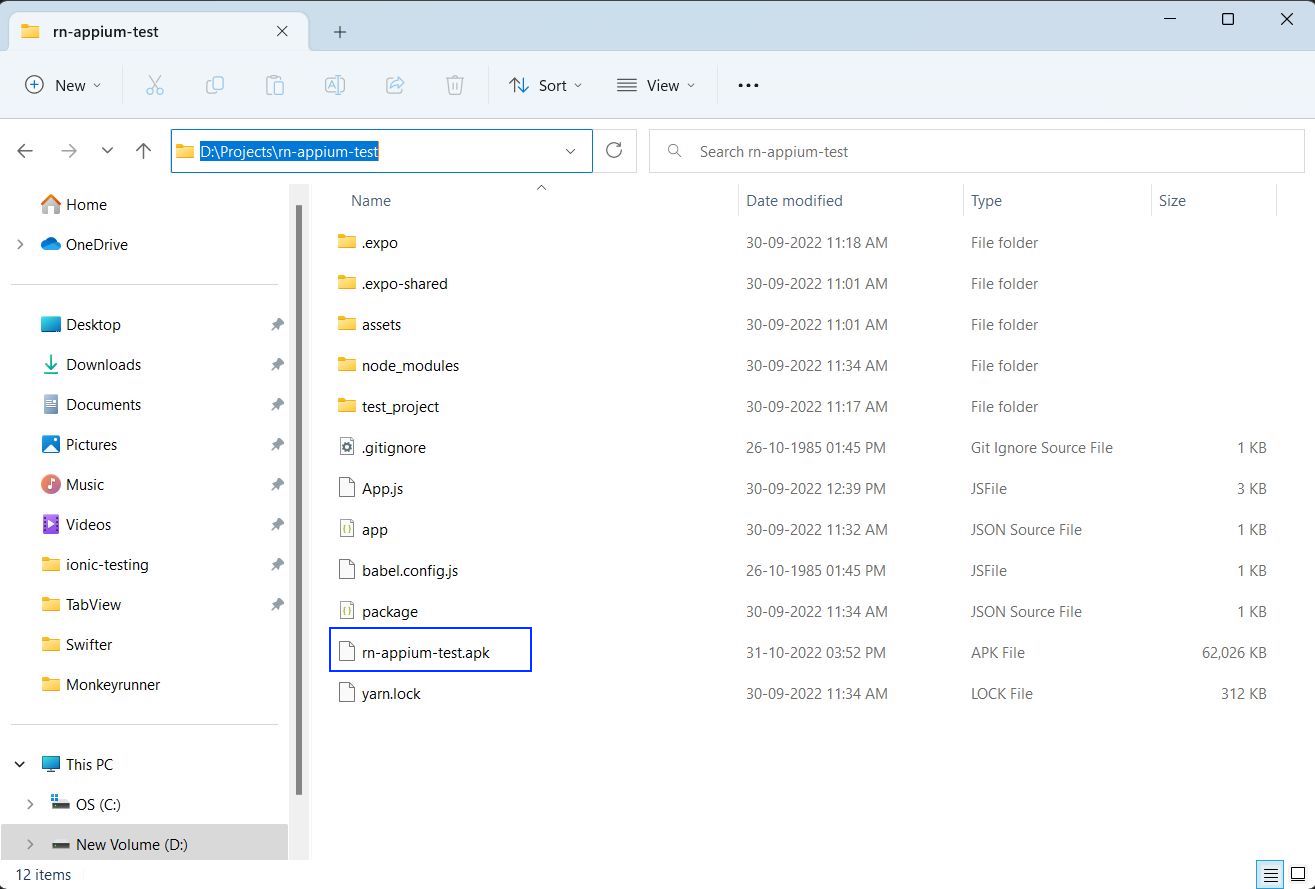
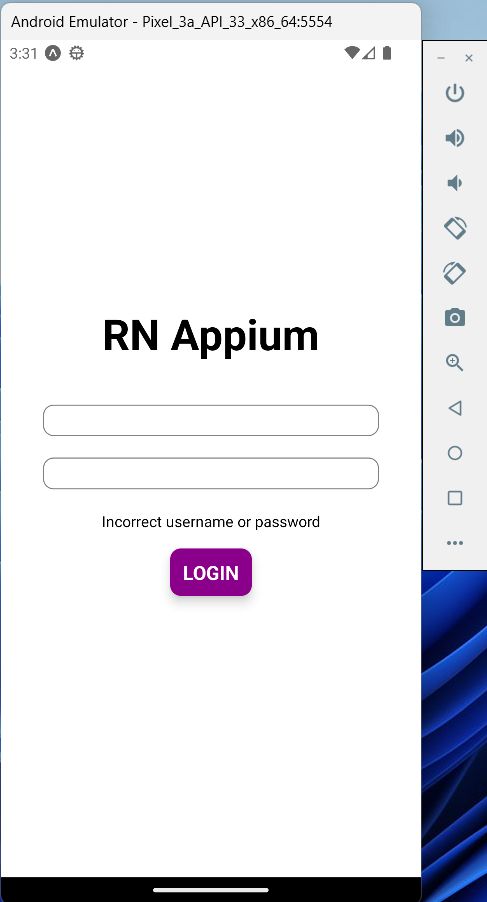
We need a project with an APK file to test our app. So, we'll take the same app we've created in our React Native Appium post.
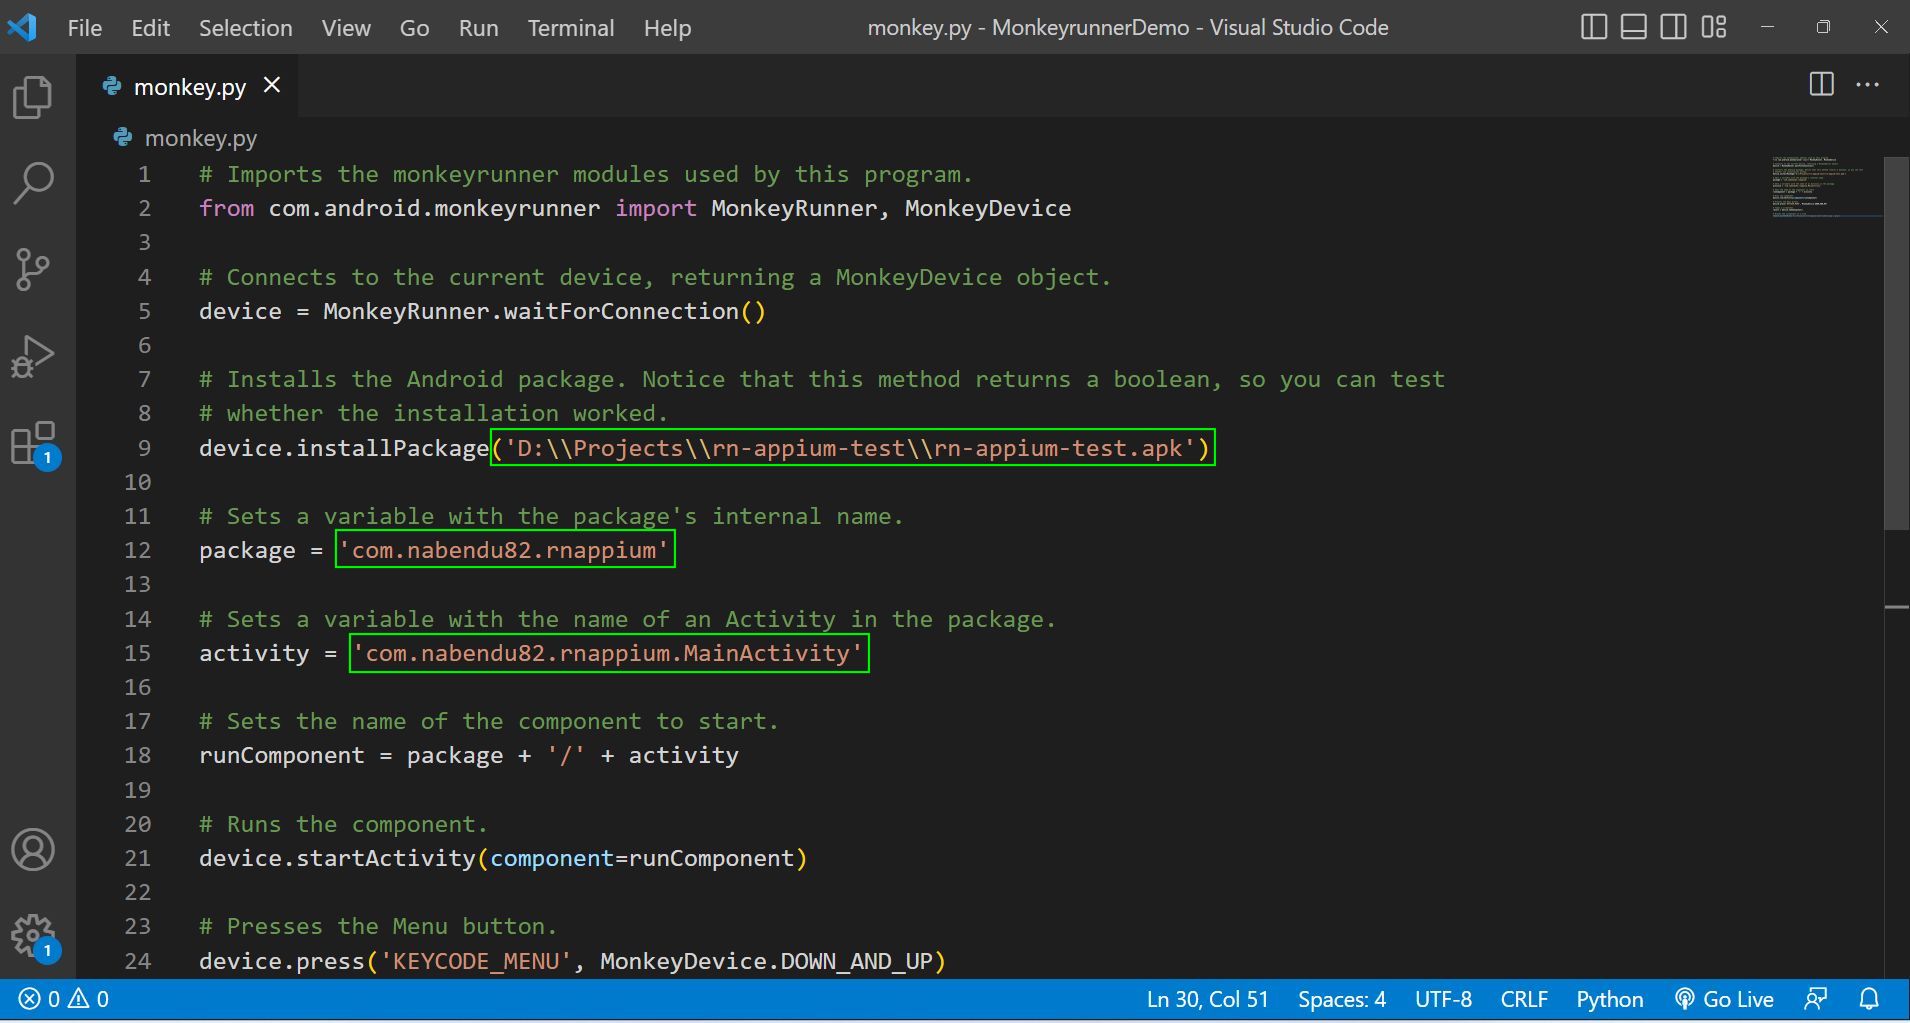
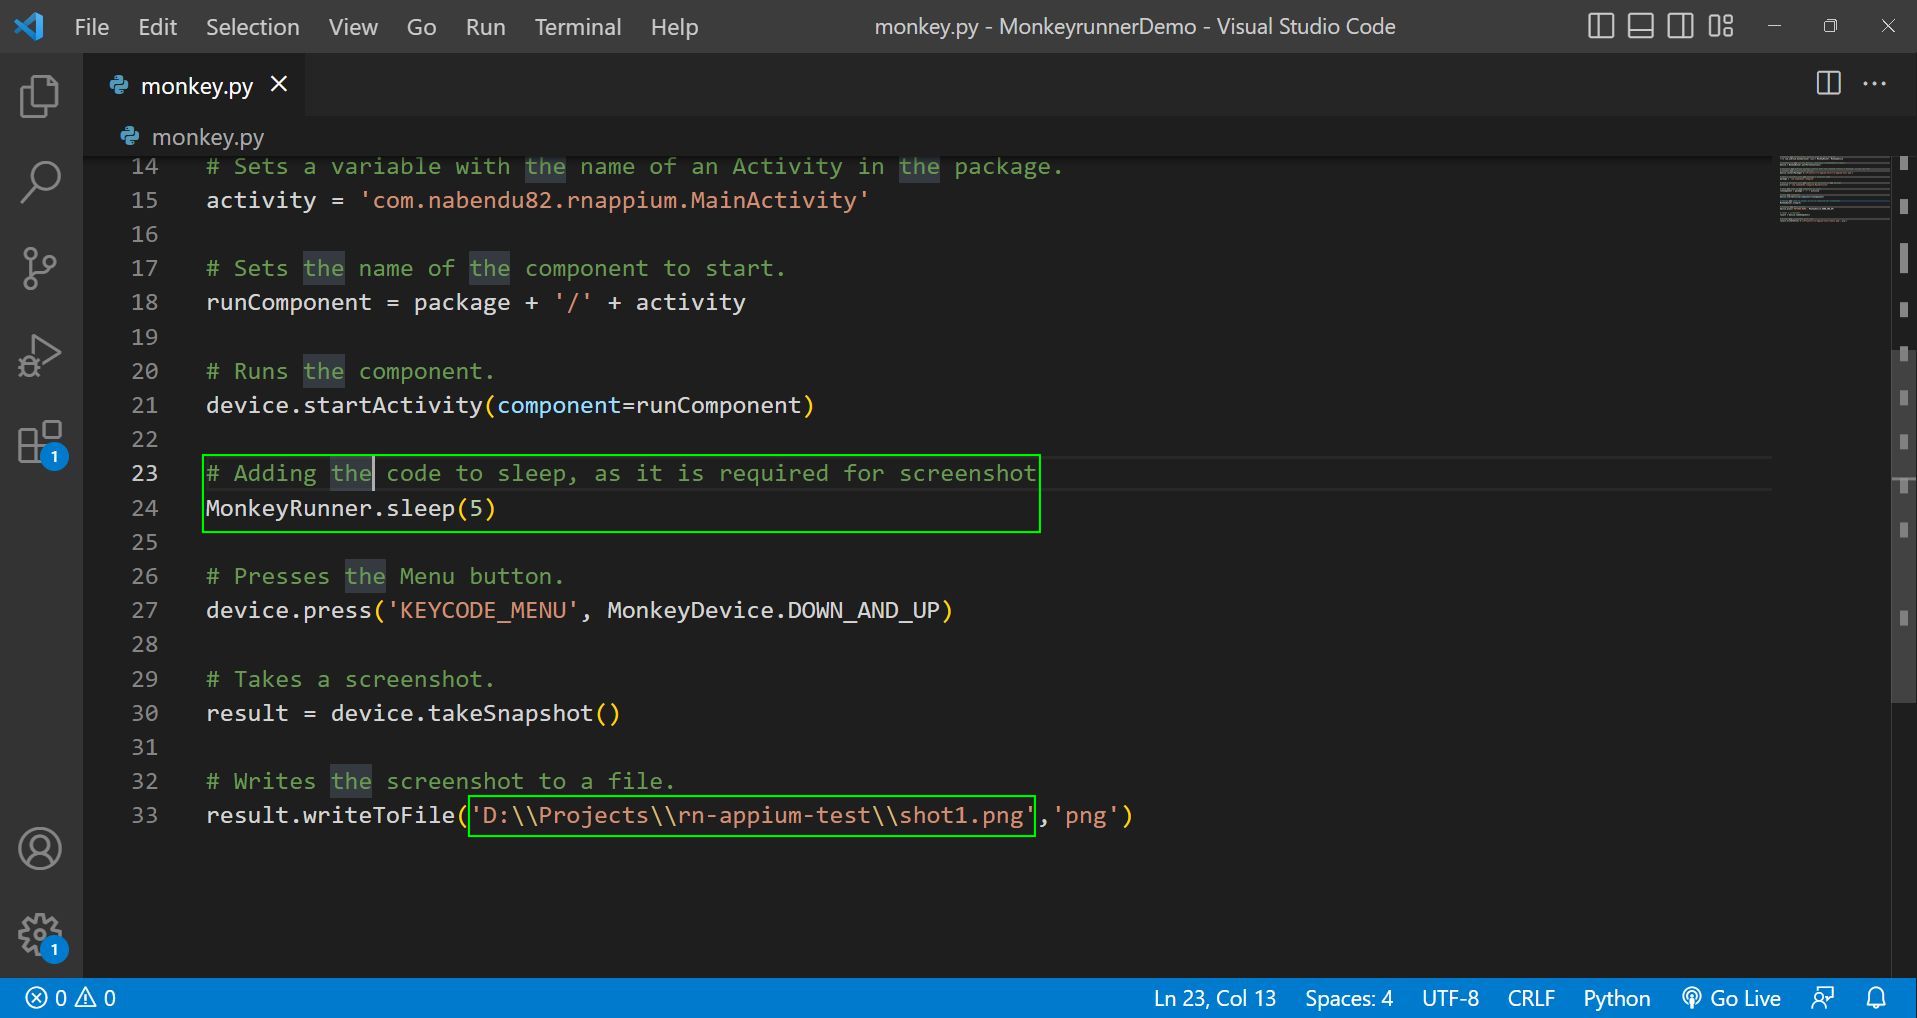
Now, we'll update the monkey.py file to contain the correct details. Here, we've updated the APK path, package, and activity name.
We'll also add a sleep code in our Python file. This is required because it takes some time (one to two seconds) to take a screenshot, and the app should be running in that time. We've also updated the path to take a screenshot.
Command Line to Run Monkeyrunner
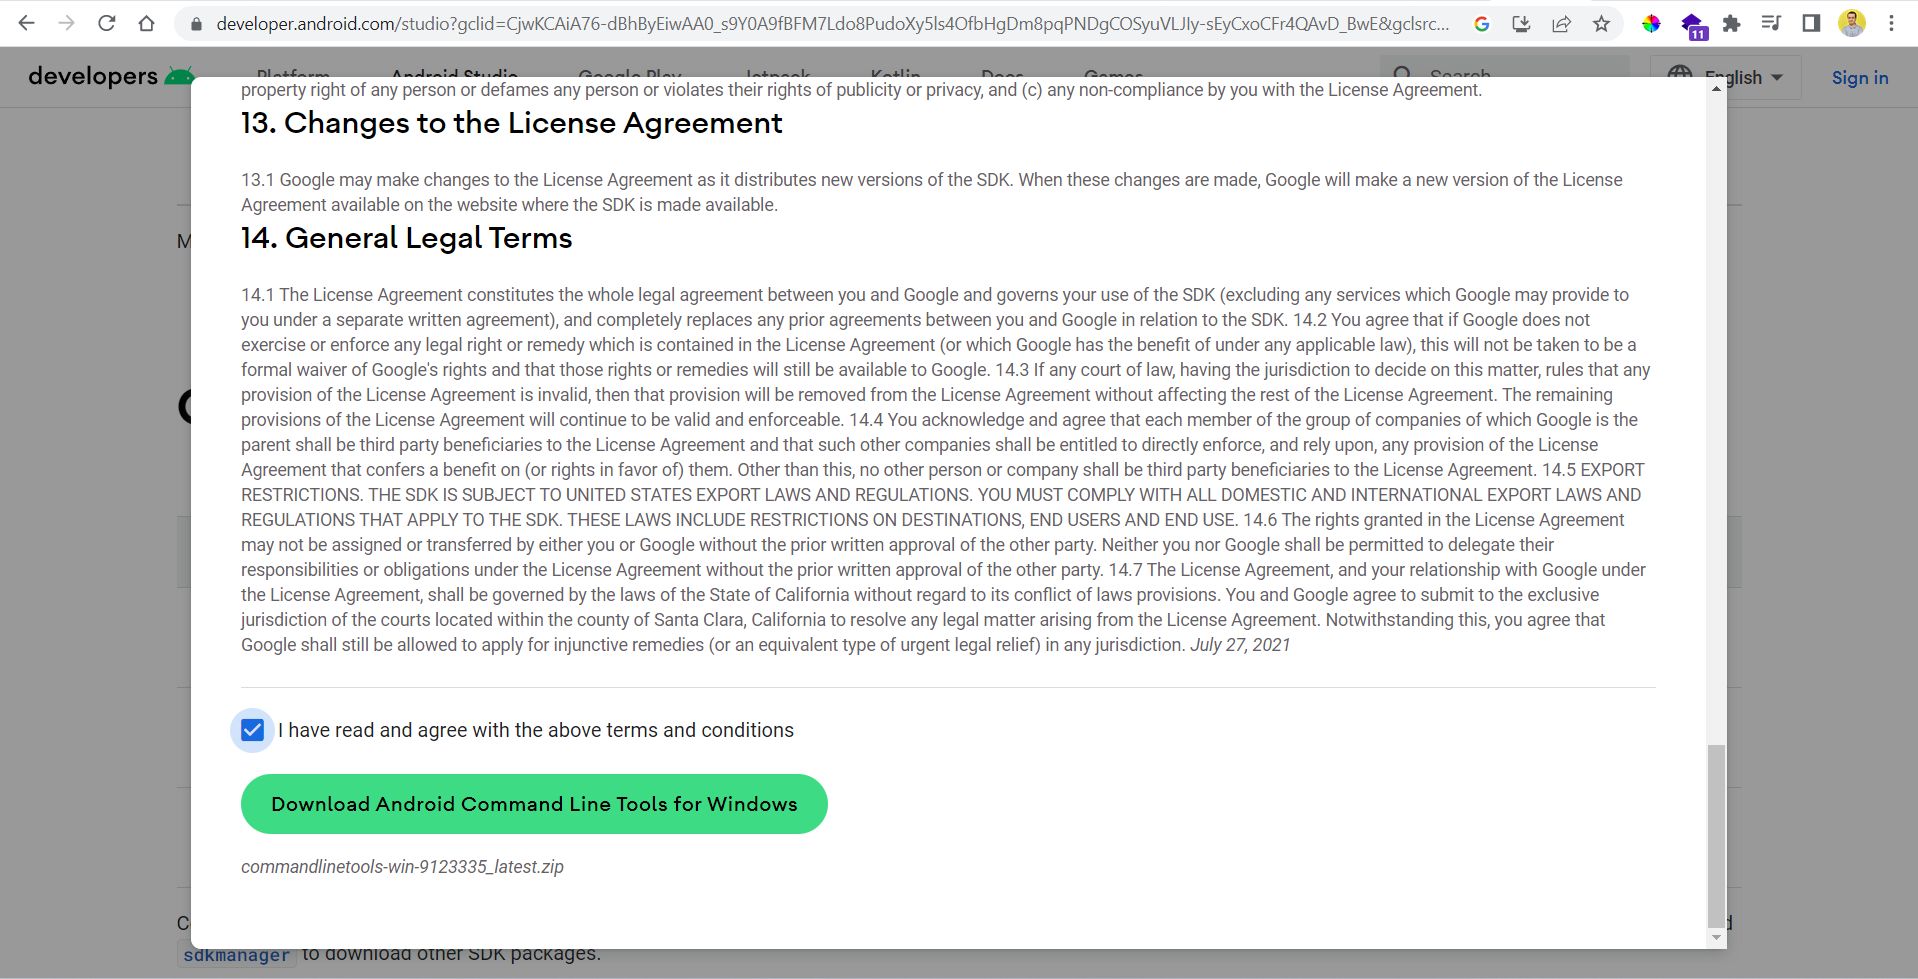
To run monkeyrunner, we need command line tools installed in our Android Studio. If the same is not done, then go to this official link and download the command line tools according to your operating system.

Before the command line tools are downloaded, we need to agree to the terms.
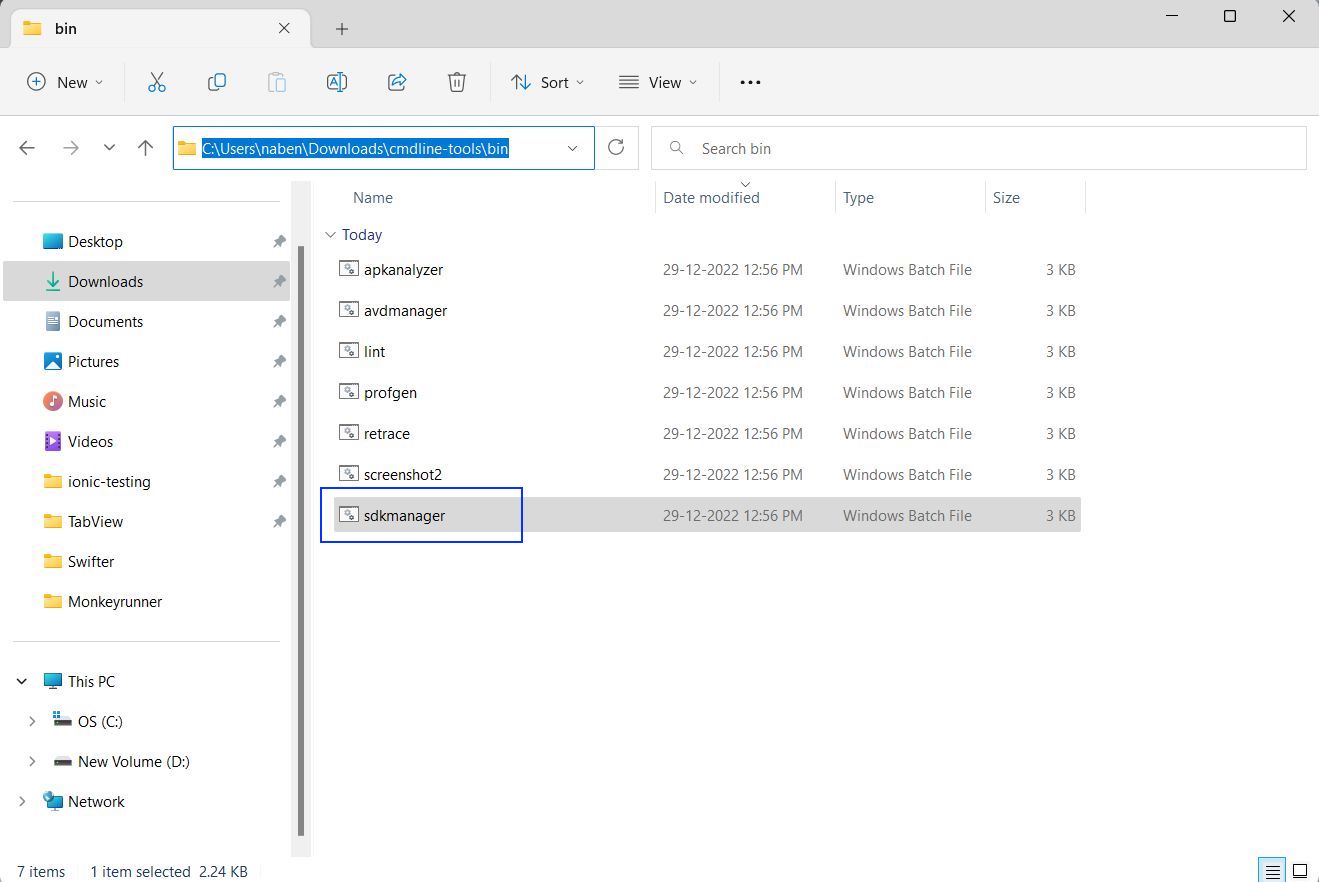
After extracting the zip file contents, go inside the cmdline-tools folder and then the bin folder. Here, run the sdkmanager by double-clicking on it.
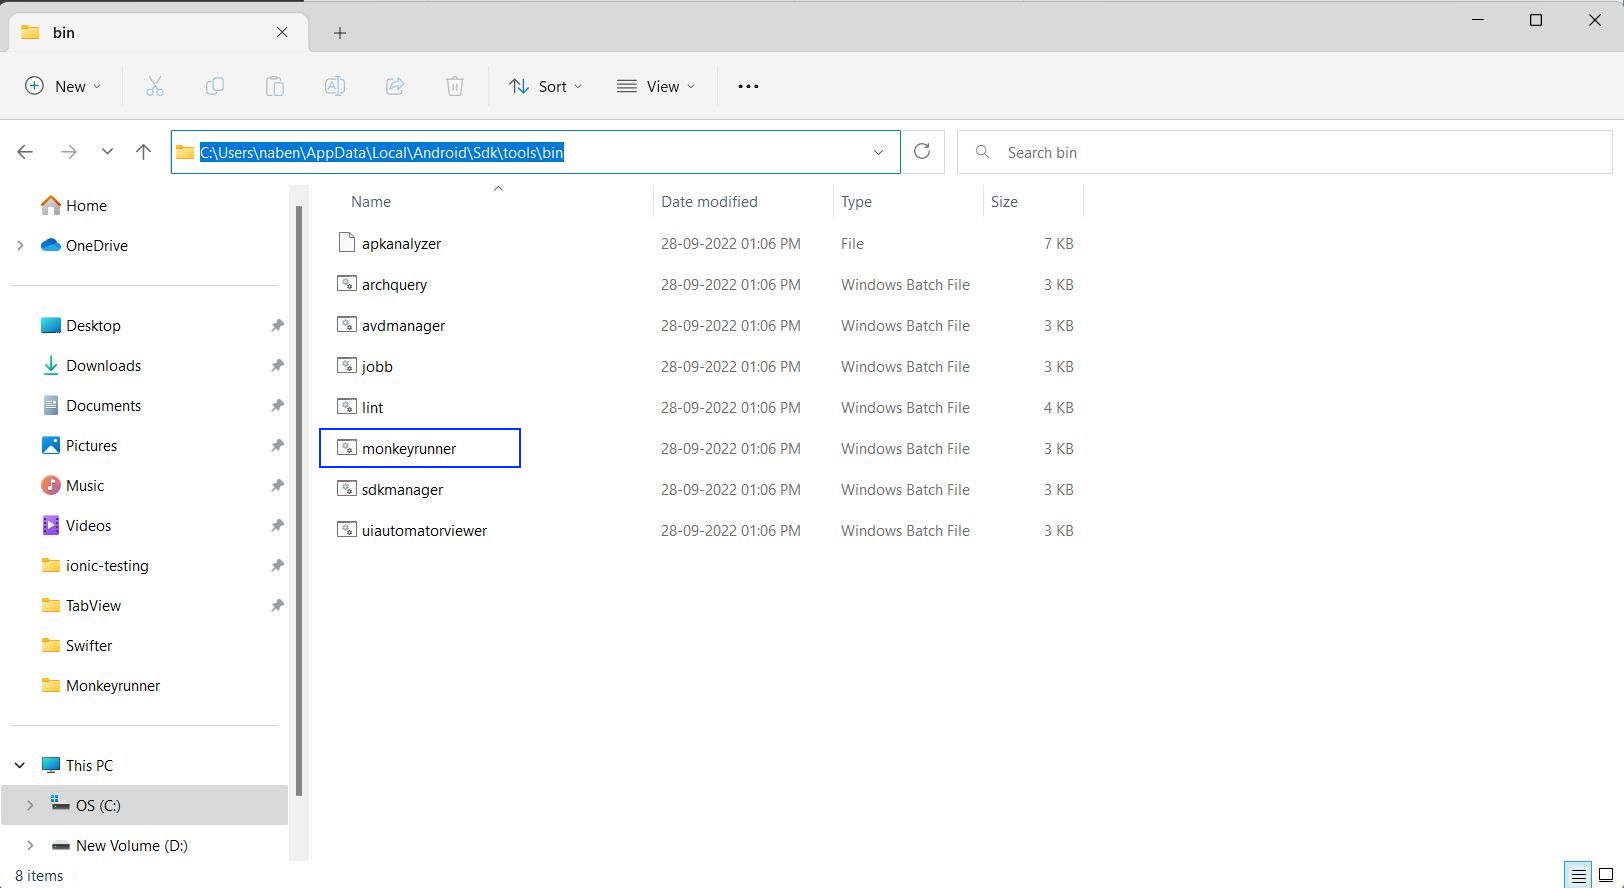
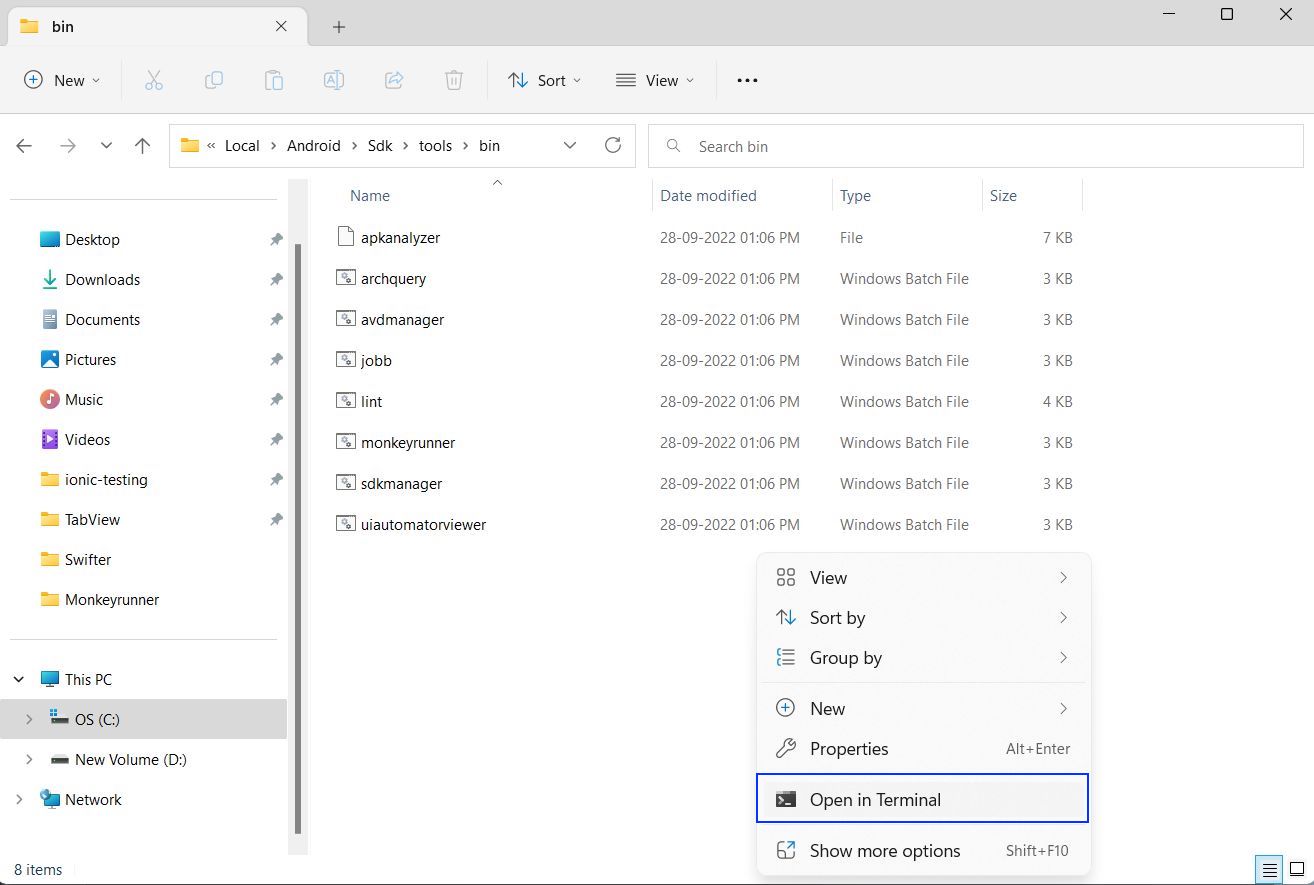
Now, go to the directory C:\Users\*Username*\AppData\Local\Android\Sdk\tools\bin, and here you'll find the monkeyrunner batch file.
Right-click anywhere in the file explorer and then click on "Open in Terminal."
Then, give the command below to run the monkeyrunner script. Here, we have to give the exact path where our monkey.py file is located.
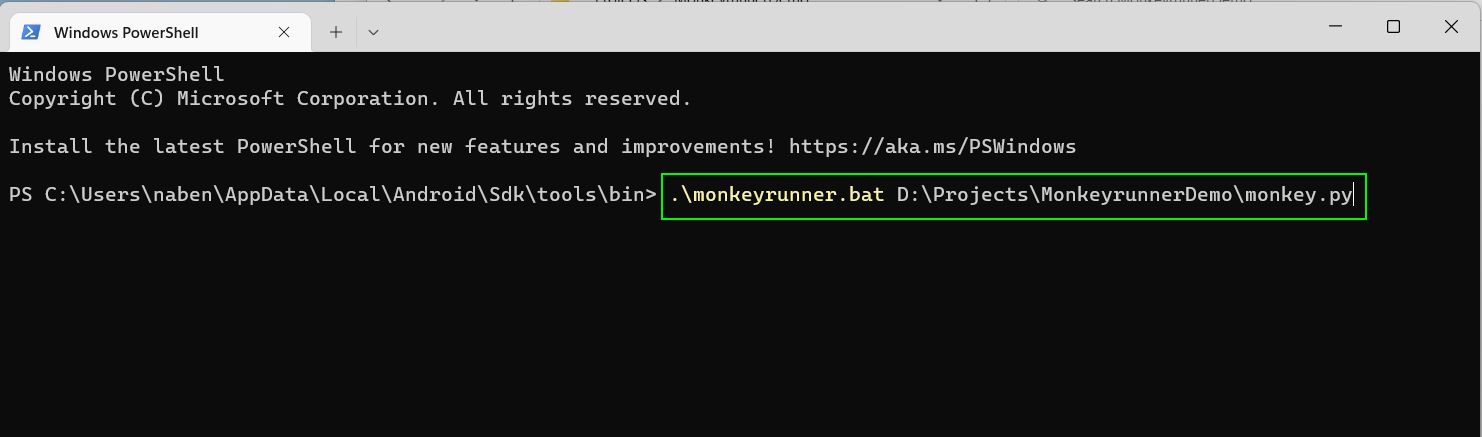
This will open the app on the connected device or emulator and also take a screenshot.
Monkey Test in iOS Using SwiftMonkey
As told earlier, monkeyrunner is not available to test an iOS app, as it's an Android-exclusive feature. However, we can use the open-source project of SwiftMonkey to test the iOS app with the monkey test.
Instead of creating a new iOS app, we'll use the app created in our earlier post on SwiftyJSON.
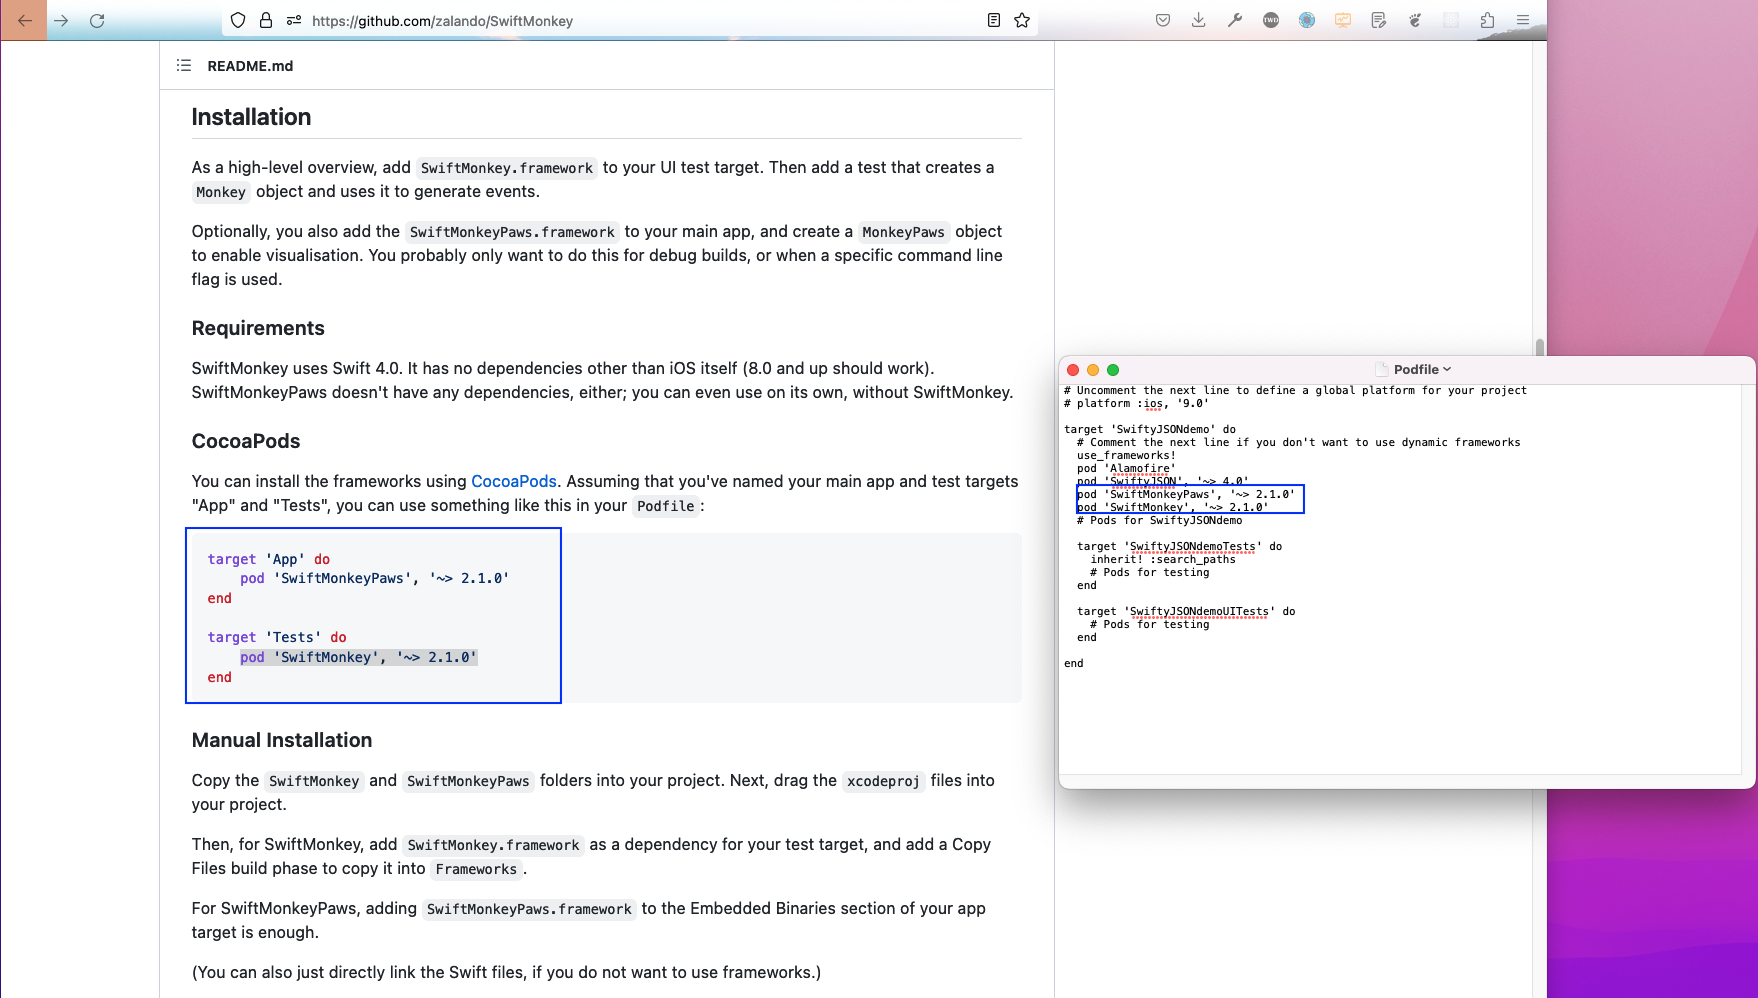
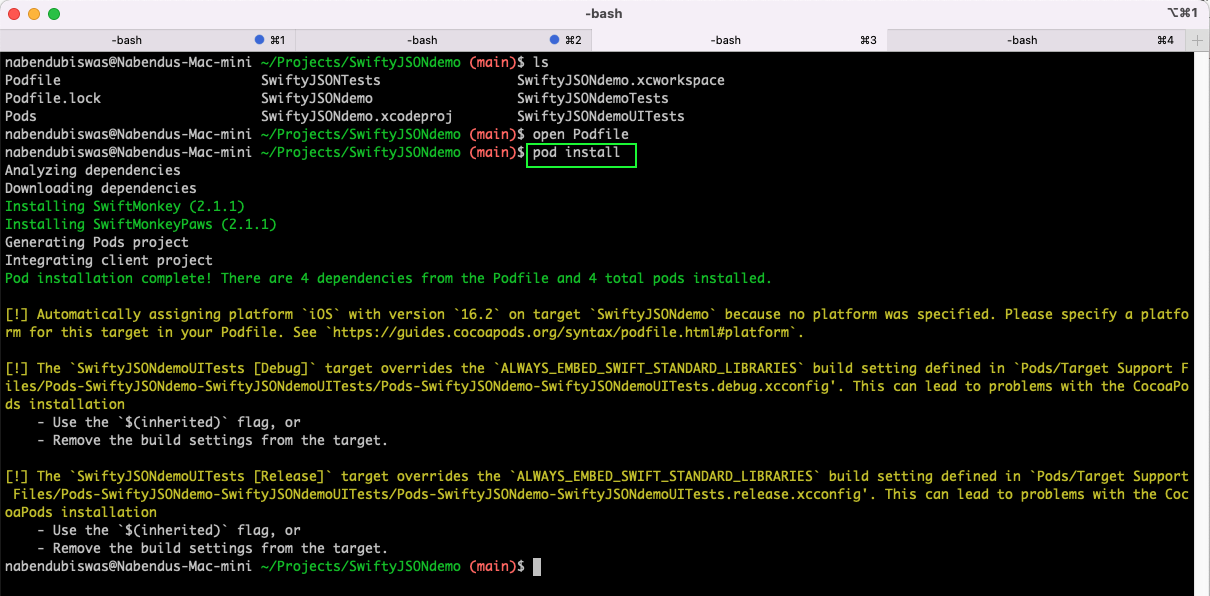
Here, we'll first go to the directory containing our project. After that, open the Podfile in TextEdit with the open Podfile command.

Now, as per the documentation, we need to add the pod commands for SwiftMonkey and a helper framework of SwiftMonkeyPaws.
Next, run the pod install command from the terminal to add these packages.
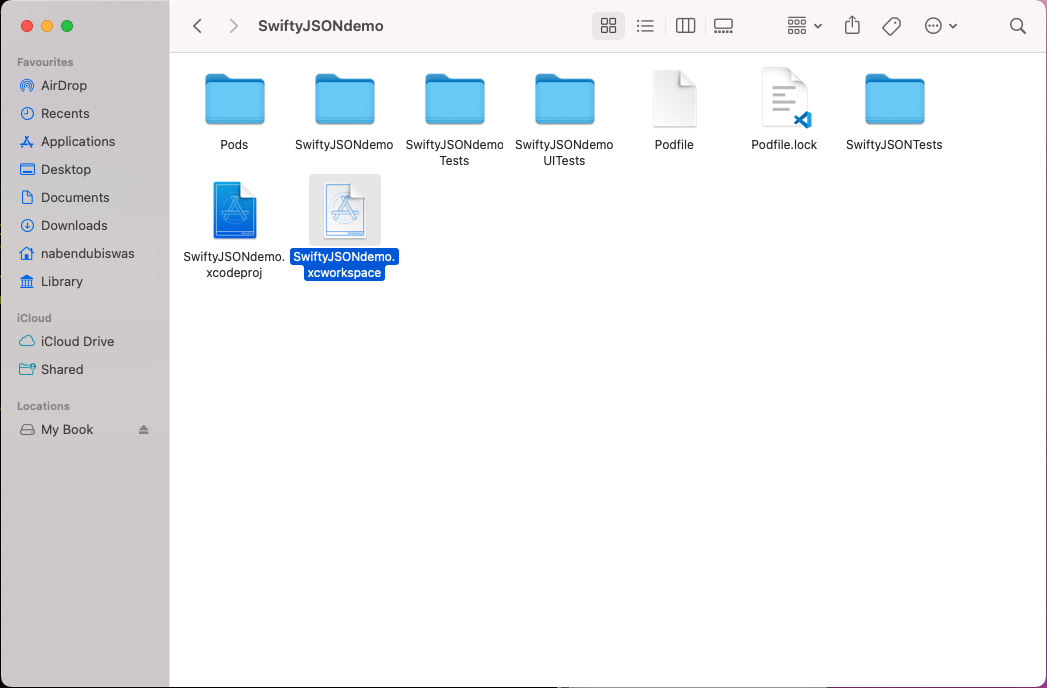
In the Finder, the SwiftyJSONdemo.xcworkspace file with a white background will be updated. To use the updated project with SwiftMonkey and SwiftMonkeyPaws installed, open this in XCode.
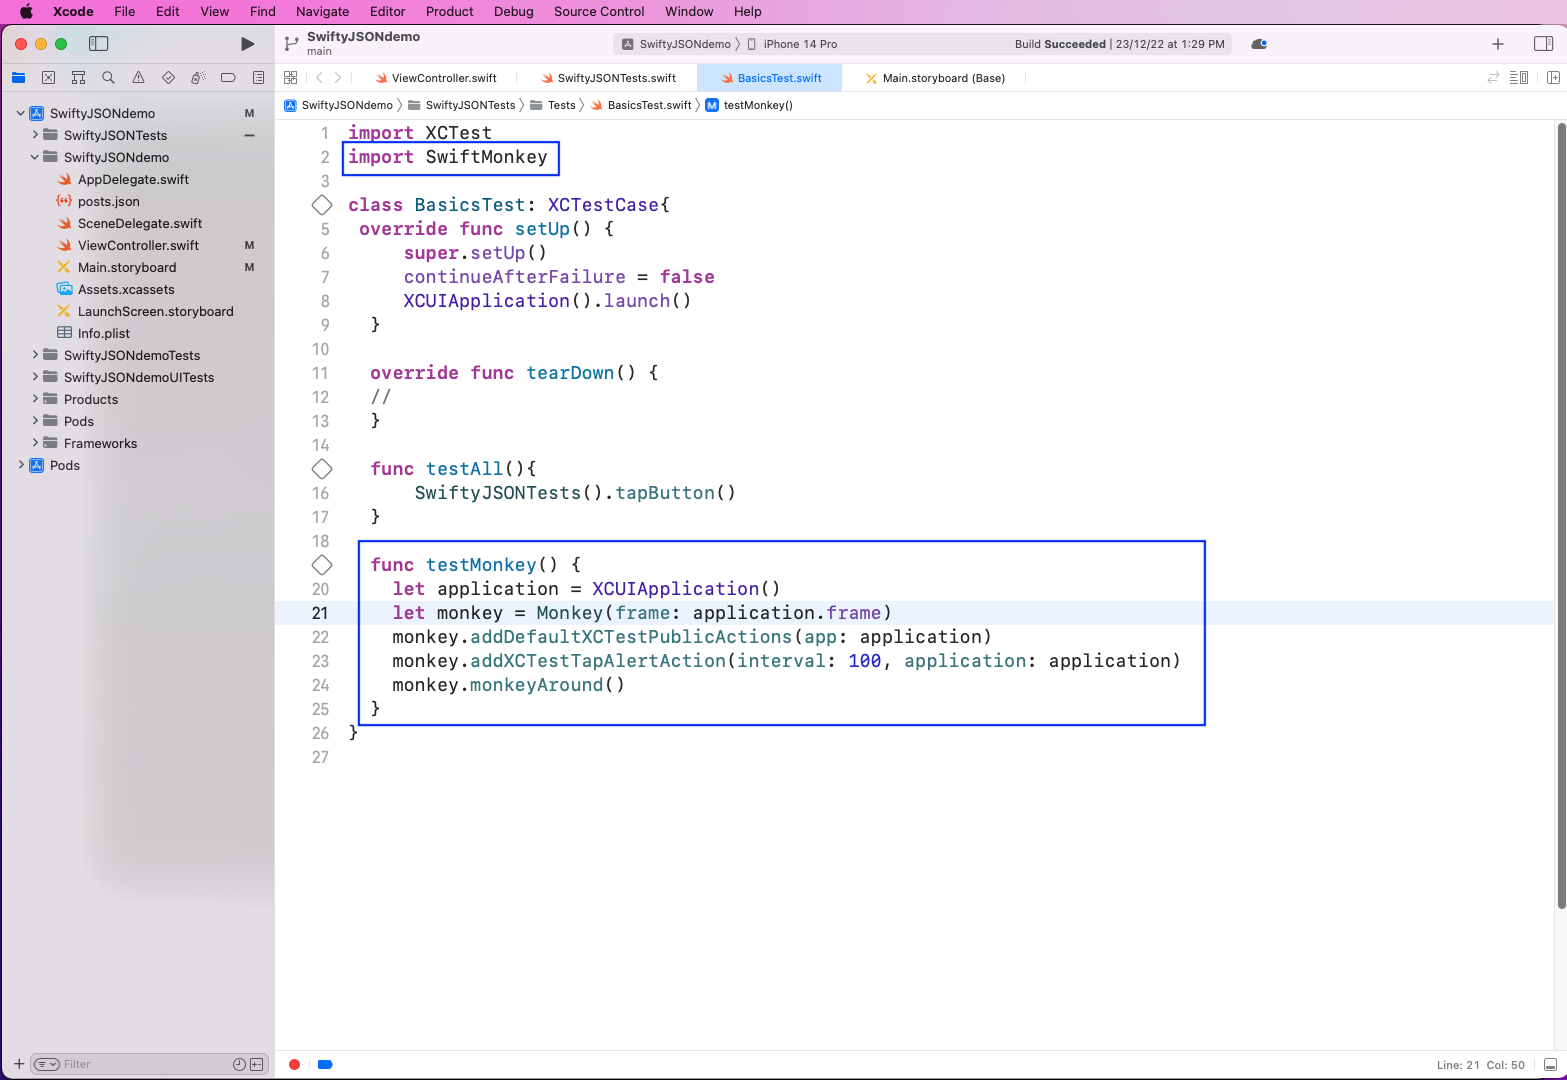
Now, as per the documentation, we'll add the code below in our BasicsTest.swift file. Here, we're launching the app with SwiftMonkey doing the touch gesture after every 100 milliseconds.
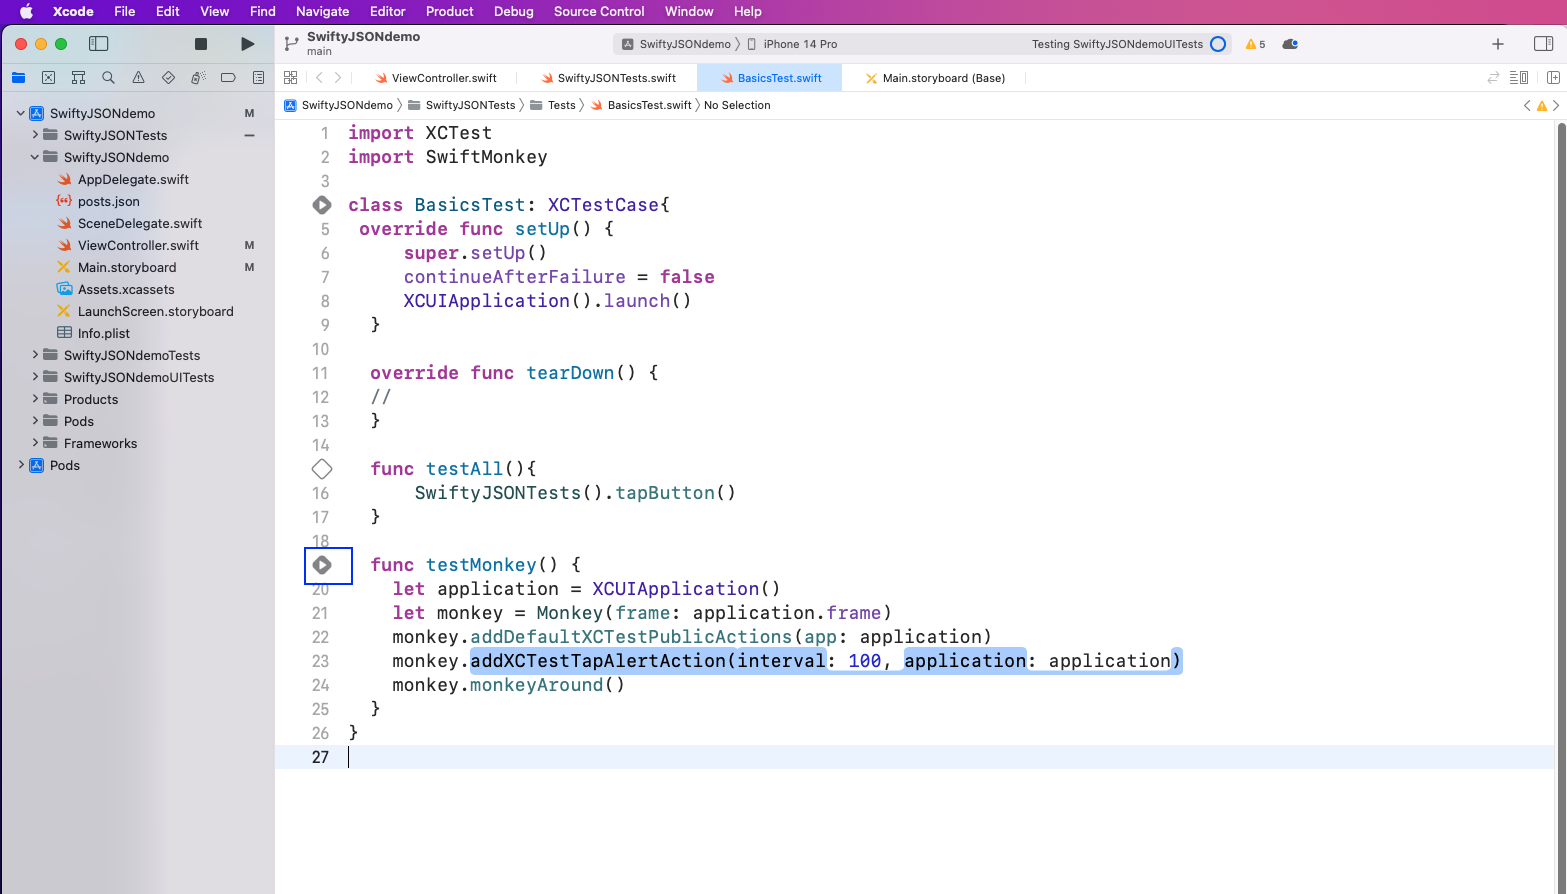
Now, hover the mouse pointer over testMonkey(), and we'll get a play button. Click on it to run this test.
Alternatives to Monkeyrunner
As per the official document, the monkeyrunner API is unmaintained, so it instead suggests we use App Crawler or UIAutomator.
The first way to use App Crawler can be found in the official documentation. With App Crawler, you need to provide your JAR and APK file, and we'll run it from the command line.
This will do all the user interactions, and we get rest without writing any code.
The other method that's recommended here is for UIAutomator. We've previously written detailed posts to test apps with UIAutomator. In that post, we wrote three types of tests with UIAutomator and tested the built-in Calculator app in Android.
Also refer to our post on UIAutomatorViewer to learn about usage for the same.
Additionally, we have another post showing the differences between UIAutomator and Espresso. Refer to it here.
What We've Learned
In this post, we've talked about monkey testing and learned about the package monkeyrunner, which is used for monkey testing in Android apps.
After that, we learned to write Python script to test an Android app through an APK file.
Next, we learned to do monkey testing in an iOS app through the package of SwiftMonkey.
We've also learned about two alternatives to monkeyrunner recommended by Android. We need to use these new tools of App Crawler or UIAutomator since monkeyrunner is not maintained anymore.
With monkeyrunner, we've seen that a popular third-party tool can be deprecated as no development happens. Also, these tools require knowledge of a programming language, like monkeyrunner needs knowledge of Python.
However, the recommended replacement App Crawler or UIAutomator is not that easy to use or set up.
Instead of all these options, such as learning a programming language or doing a complicated setup, we can use Waldo to perform such tests.
Here, you're only required to provide the APK or IPA file. Then, just run the Waldo test, and it automatically generates test cases and emails you everything.
If you want to learn about Waldo's support for end-to-end tests, refer here.
Automated E2E tests for your mobile app
Get true E2E testing in minutes, not months.


