


Android Studio allows developers to run their apps on a real Android device. In some cases, running your app on a real device can be more straightforward than setting up an emulator. For instance, using a real Android device with Android Studio could be as easy as connecting the device to your computer via a USB and hitting the run button.
Some of the reasons why you may pick using a real device to test your Android Studio project include speed and simplicity as compared to using an emulator.
In this post, we'll learn how to run an Android Studio app on a real device. We'll also take a look at the advantages of using a real device over an emulator. In addition, you'll learn about why you should pick one over the other.
Benefits of Running an Android Studio App on a Real Device
The following are some benefits of using a physical Android device to run your apps:
- Faster setup: Yes, it's fast to set up Android Studio to run your application on an Android device that you own. On the other hand, using an emulator requires more steps like downloading a system image and creating a virtual device. Also, you may need to relaunch the virtual device every time you reboot your computer. However, for a real device, just connect and hit run.
- Uses fewer system resources: When you're using a real device, you don't need to create and store a virtual device on your computer. Also, since the app runs on an external device, you don't use extra RAM or processing power from your computer. As a result, a real device is the better option if you use a low-end computer.
- Access to real hardware: If your app depends a lot on device features like GPS, GSM, and a camera, a real device shines here. For example, it's easier to get real location data or capture images on a real device.
How to Use a Phone as an Emulator With Android Studio
Now, let's walk through the actual steps to run an app in Android Studio. Before we continue, ensure you have the following items.
Prerequisites
- Android device (phone or tablet)
- USB cable capable of data transfer
- Android Studio
Step 1: Enable Developer Options / USB Debugging
The developer options is a special setting on Android devices. You can enable this option using a simple trick. On most devices, the trick involves tapping on the build number about 10 times or until you see a "You are now a developer" message.
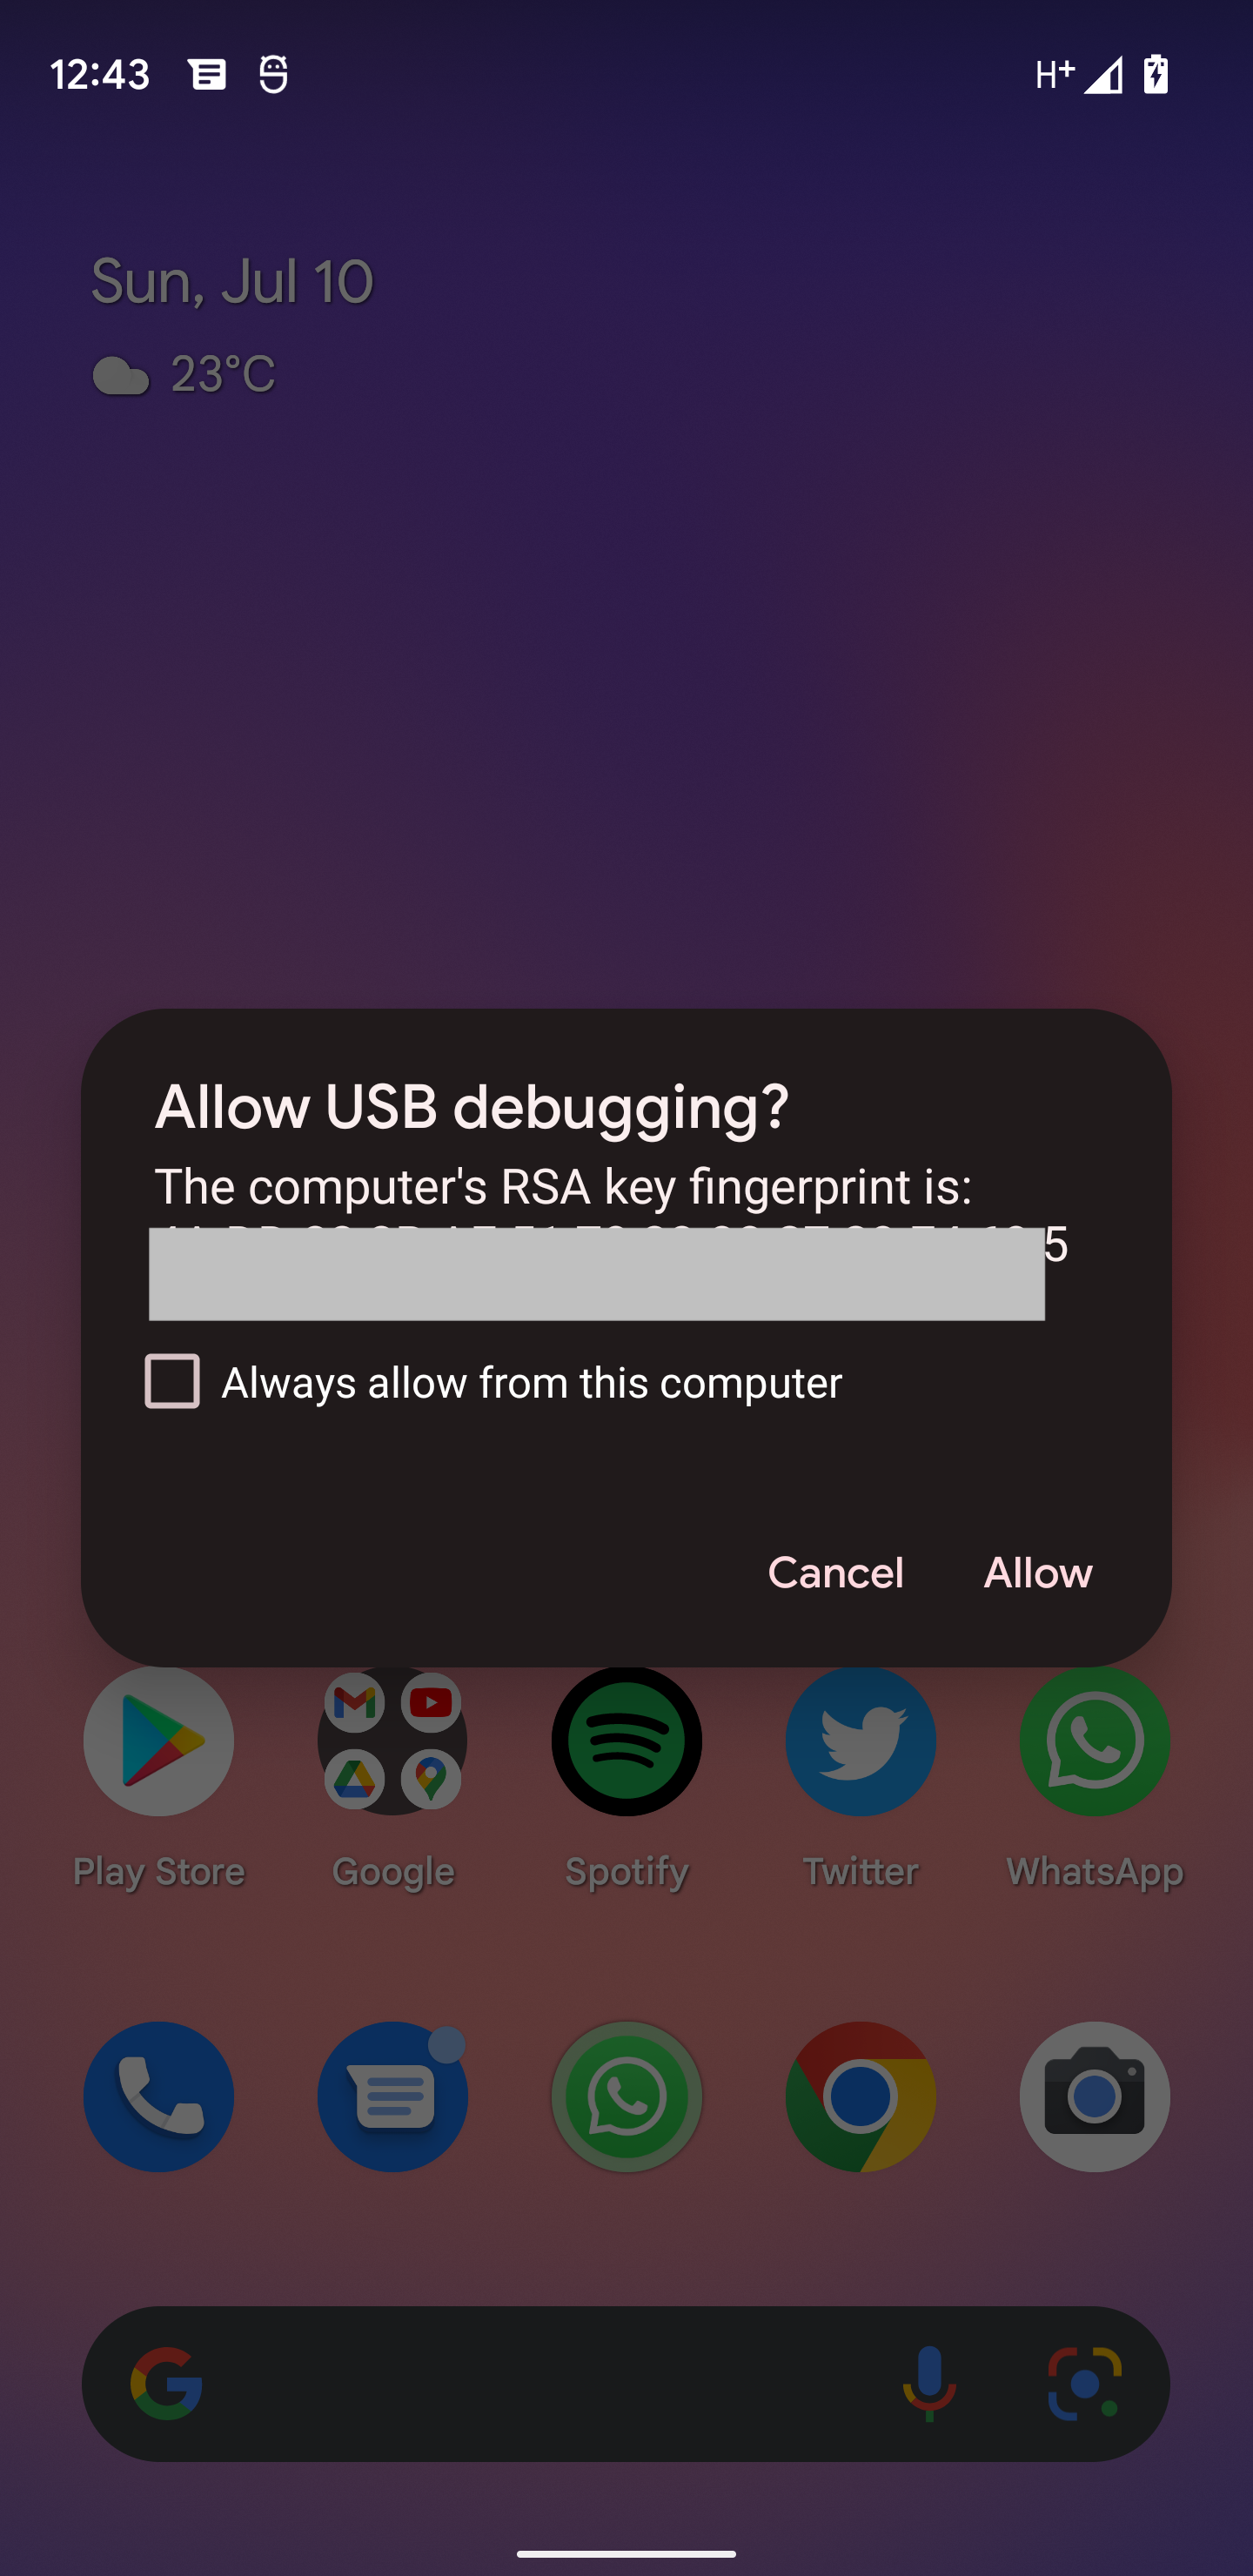
Once that's done, open the device settings app again, and you should find the developer options. Open the developer options and toggle USB debugging on. After that, your device is now ready for Android Studio to push code to it.
.png)
Step 2: Connect Device to Computer
Open Android Studio, then connect your Android device to your computer using a USB cable that supports data transfer.
If your device is recognized, you should see an alert dialog requesting your permission to allow USB debugging from the computer. Grant the permission to proceed.
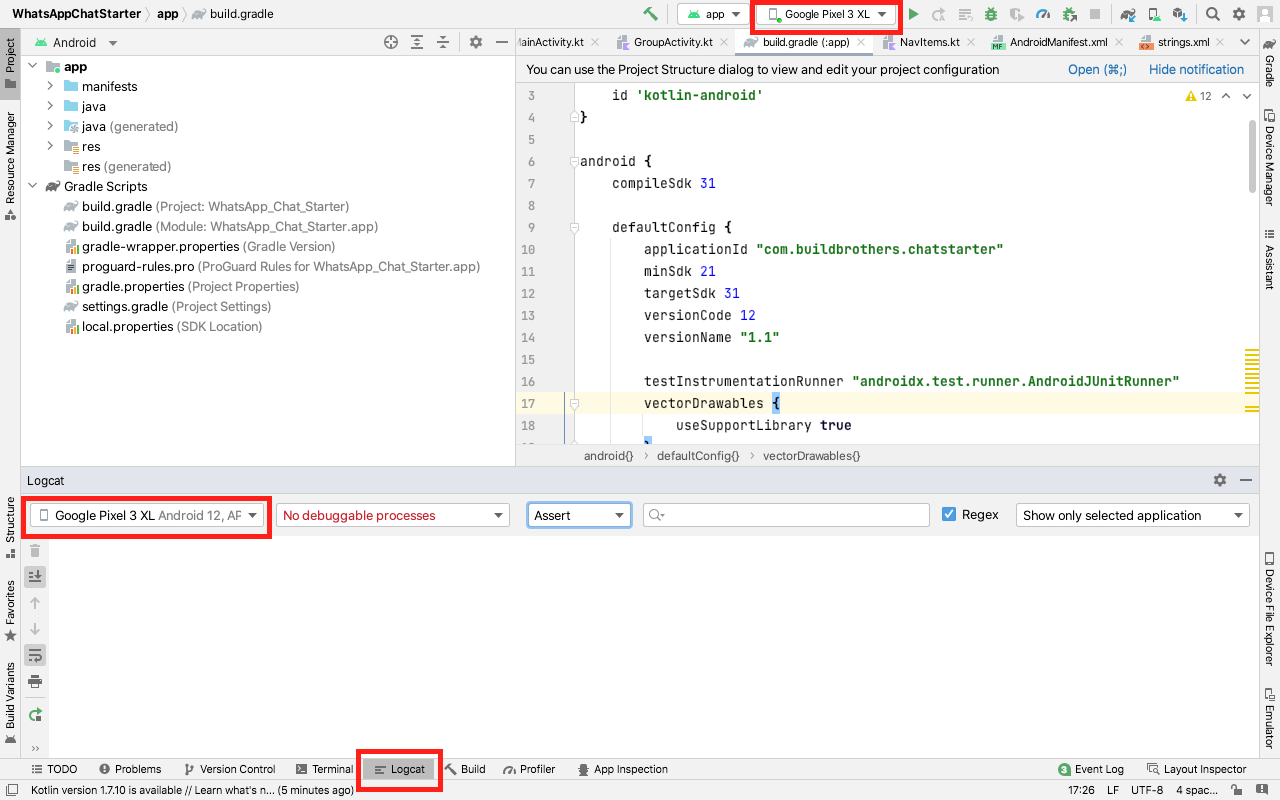
After that, you should see your device name and model in Android Studio like this:
If you can't find your device and the permission dialog doesn't show, you should try one or more of the following steps:
- Disconnect and reconnect the USB cable from the computer
- Install the correct USB drivers for your mobile device if you're using a Windows PC
- Check that you did not decline the USB debugging permission
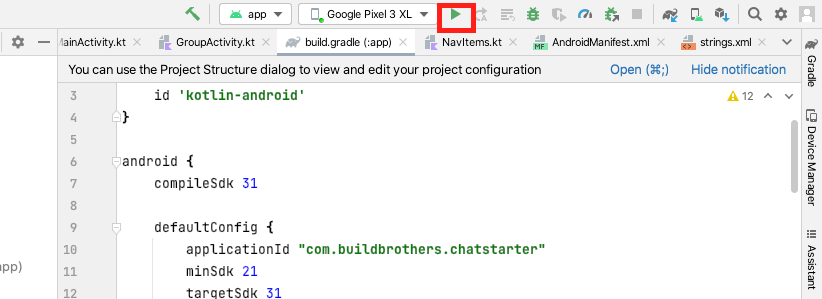
Step 3: Push Application to Device
Now that we have our real device set up and Android Studio is able to communicate with it, we're set to push our first code to it. To do this, hit the green play button in Android Studio and confirm that your device is selected. Next, wait for the project to build and install. After that, unlock your mobile device and you should find your app running on it.
How to Run App in Android Studio Using Real Device Without USB Cable
Using a USB cable to debug your application can get annoying, considering you need your phone to be connected all the time. However, it's also possible to push your apps from Android Studio to a real device without a USB connection. In this section, we'll take a look at just how to do that.
Before recently, there were several ways for debugging Android apps via Wi-Fi. However, for this tutorial, we'll be using the Wireless Debugging feature built into the latest version of Android Studio. At the time of this post's writing, the latest version is Android Studio Chipmunk | 2021.2.1.
Note: This feature requires you to use a device running Android 11 or later.
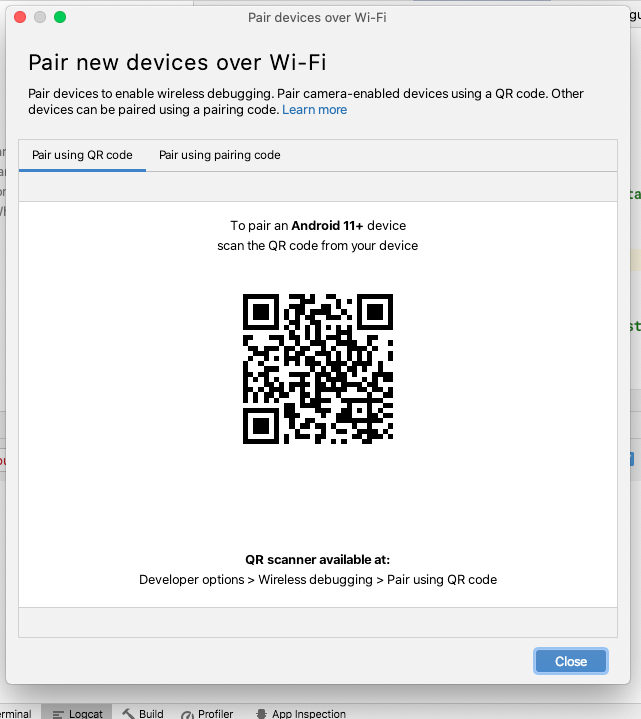
Step 1: Open Pair New Devices Over Wi-Fi Window in Android Studio
In Android Studio, click on the device list drop-down at the top, then select the Pair Devices Using Wi-Fi option.

Now, you should see a window with a QR code and some instructions. In the next steps, you'll learn how to scan this QR code.
Step 2: Enable Wireless Debugging on Mobile Device
On your Android device, navigate to Settings > Developer Options > Wireless Debugging, then toggle the switch on.
Once Wireless Debugging is enabled, you'll be able to access the Wireless Debugging menu.
Step 3: Scan QR Code
Again, on your Android device, navigate to Settings > Developer Options > Wireless Debugging > Pair Using QR. Then scan the QR code generated by Android Studio using your phone.
Once this is successful, you can push code to the device you paired by hitting the green play button just like we did earlier using a USB cable.
How to Debug an App on a Phone
With Android Studio, you can set breakpoints in your code, log data or error messages to Logcat, and access them while running your application either on an emulator or a real device.
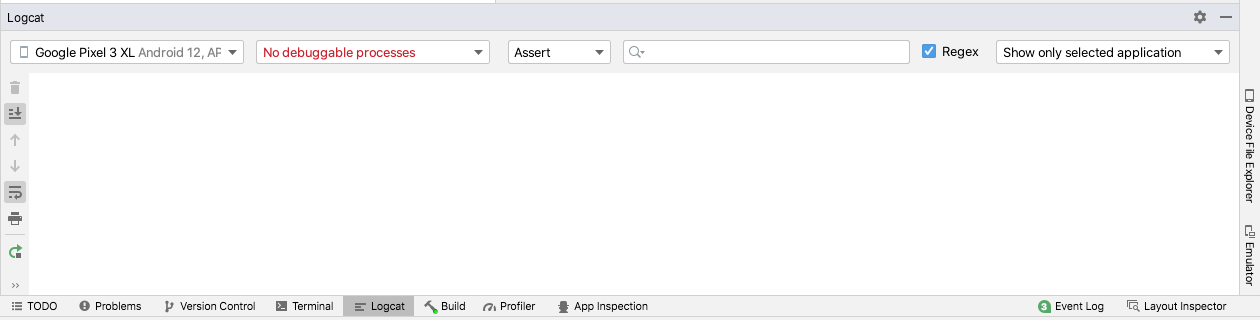
In order to live debug your application running on a phone, you'll need to keep the phone connected to Android Studio. You can access log messages from your application running on a phone by opening the Logcat pane in Android Studio. You can find the Logcat pane on the bottom menu in Android Studio. To get more accurate data, ensure you select your device in Logcat.
Limitations of Physical Device Over Emulator
Earlier, we saw some of the benefits of using a real device to run apps in Android Studio. However, using a real device has its own limitations too. In this section, we'll list some of these limitations.
- Requires extra hardware: Using a real device means you may need to acquire extra hardware, like the real device you'll be running your app on. If you don't have a data USB cable, you'll also need to get one before you can connect your device to the computer.
- Limited Android (API) versions: Usually, a real device may only run one version of Android at a time. For example, the device I used for this article currently runs Android 12. If I need to test APIs that were added in Android 13, I may need to get a new device that supports that version of Android or update to Android 13 via system updates. Unfortunately, my device, the Pixel 3 XL, will not be getting Android 13, so a software update is not even an option.
- Cables: Running your app on a real device sometimes means having the device connected via a USB cable. This can cause a lot of inconveniences like a messy desk and may even lead to physical damage to the USB cable.
Automated Testing in Android
Running your application using only the steps we've described in this post is manual testing. That's to say, you will have to manually interact with each feature on your app to verify that it works as expected. However, Android Studio also provides a way to write automated tests for your application.
Automated tests in Android Studio involve writing code with instructions on what you want to test on the user interface (UI) of your application. In addition to that, you can set assertions to verify the behavior of your application. For example, you may write a test script in Android Studio that will launch your application, then tap on a button and verify that a certain view is visible. You can write UI tests for your Android application using the Espresso testing framework.
Automated testing is an improvement over manual testing as it saves time and tests are easier to repeat. However, it involves writing extra code (script) and makes testing more technical. An alternative to the built-in testing tool in Android Studio is Waldo. Waldo is a dedicated mobile testing tool that makes it possible to do automated testing for your app without writing scripts.
Conclusion
By reading this post, you've learned the following:
- How to run your Android Studio app on a real physical device
- The benefits of using a real device to run your app
- How to run apps on a real device without USB cables via Wi-Fi
Finally, we concluded by taking a look at some of the limitations of using a real device to test our application. Both emulators and real devices have their strengths and weaknesses. Hence, your choice of which option to use may be influenced by whether your computer is powerful enough to run an emulator. Another factor is whether your application uses a lot of device-specific features that run best on a real device.
Automated E2E tests for your mobile app
Get true E2E testing in minutes, not months.


