


JavaScript Object Notation (JSON) is the most common way for data transfer on the internet. Whether you're using a web app or a mobile app, the data from the back end will always come as JSON.
Most of the time, the back-end engineers use a framework like NodeJS (JavaScript), SpringBoot (Java), or .NET(C#) to create an API endpoint. The API endpoints interact with the database.
Now, from the web app front end, we use a library like Axios to make the API call. Meanwhile, from an iOS app, we use the library of Alamofire to do the API call.
Alamofire doesn't have any problem, but Swift is a strongly typed language that requires a lot of complex code for JSON. So, the data we get from Alamofire needs a lot of modification before being usable.
We've faced the same issue in our guide to Alamofire.
In this post, we'll first look into a solution to the JSON issue using SwiftyJSON. Then, we'll create a small project and learn to use SwiftyJSON on both locally stored JSON and JSON we get from Alamofire.
What Is SwiftyJSON?
SwiftyJSON is a completely open-source and free-to-use library that helps to format JSON in an easy and usable format.
Since Swift is a strongly typed language, it requires us to provide the data types of each JSON key. Aside from this, most of the time we need to create a model separately and give the types for each key.
Also, we need functions like JSONDecoder() to decode the JSON. We'll check out this problem later in the post.
SwiftyJSON provides an easy-to-use function called JSON through which we can easily get the data in the required format.
Project Setup
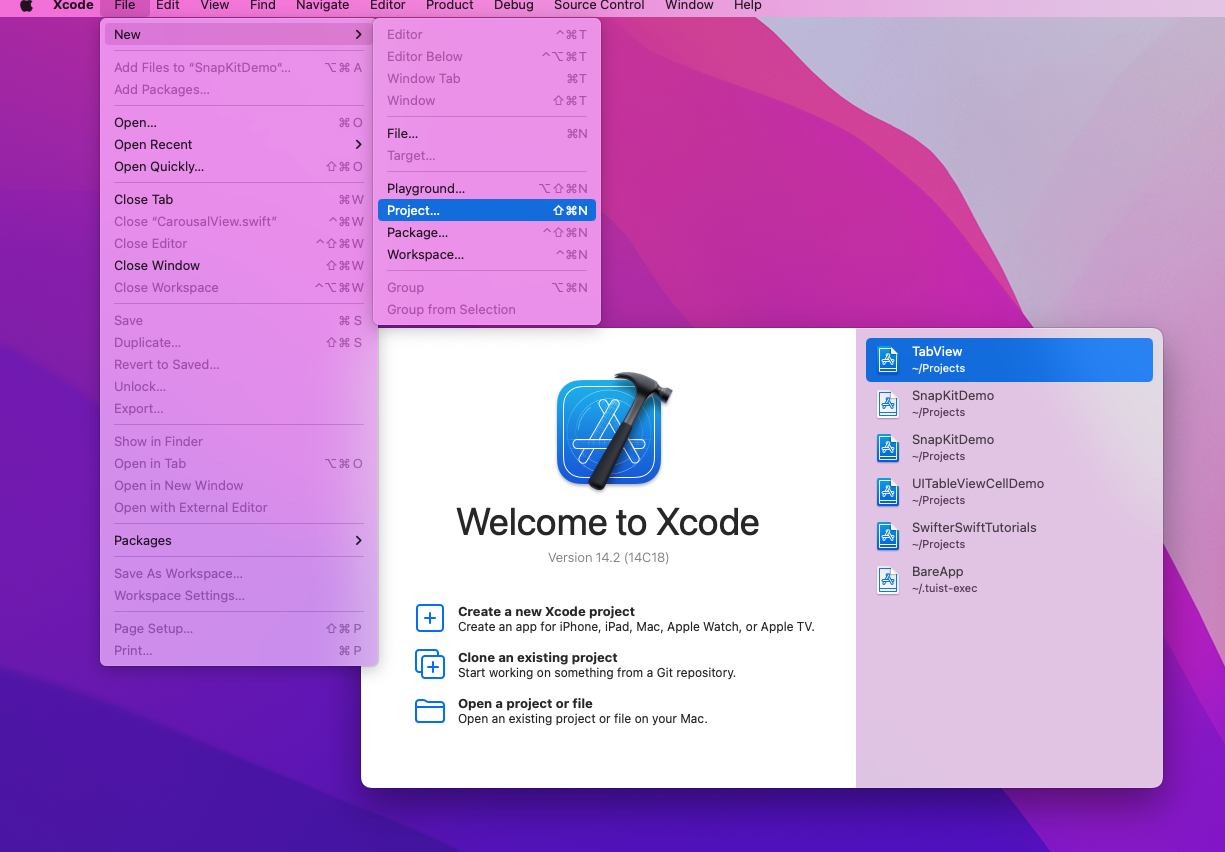
Let’s first create a new project by opening XCode. After that click on New > Project.
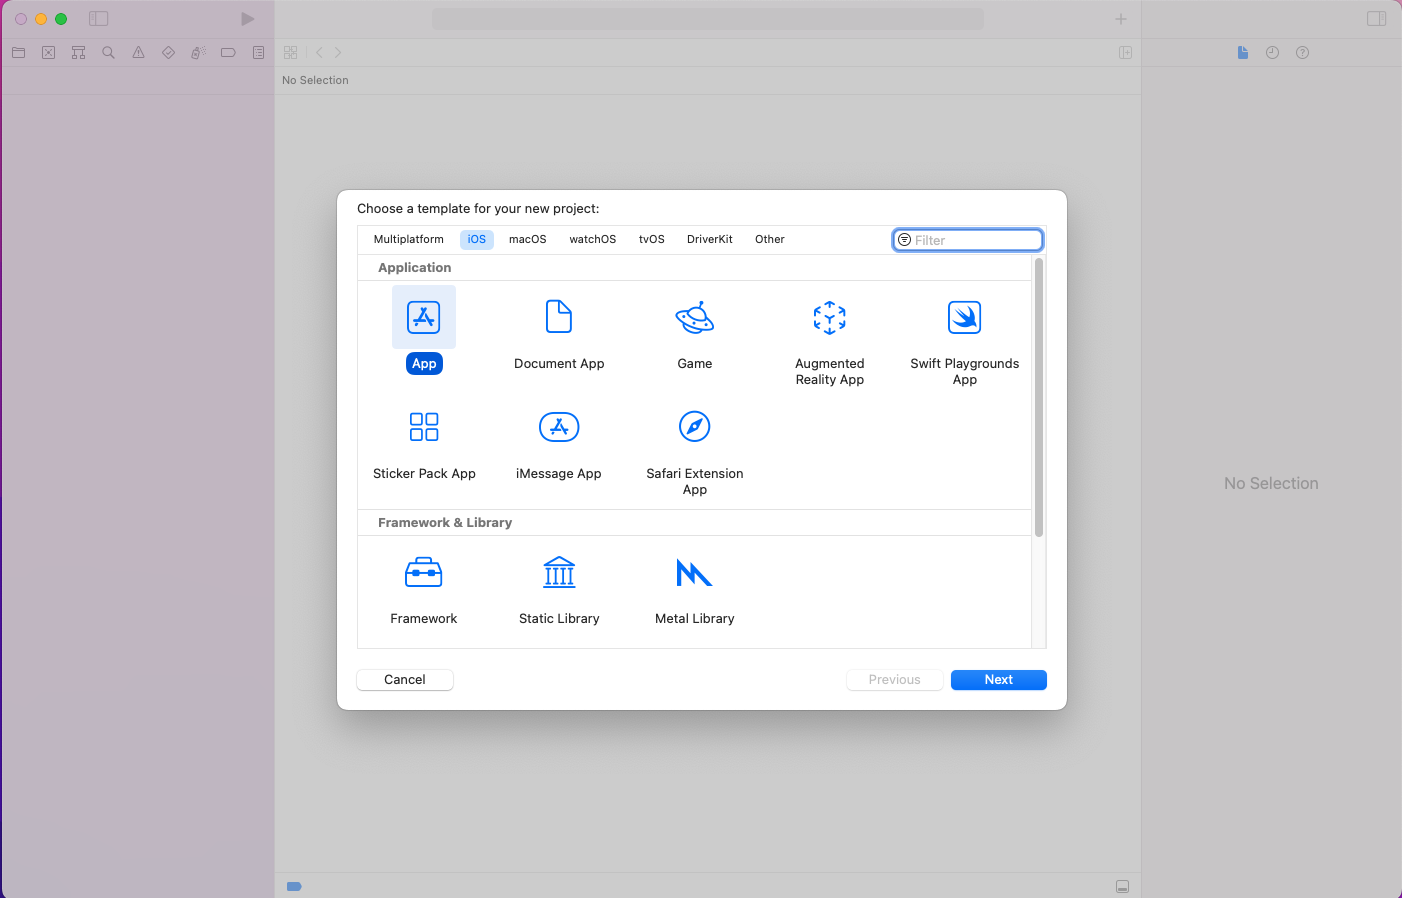
In the next pop-up, click on App and then the Next button.
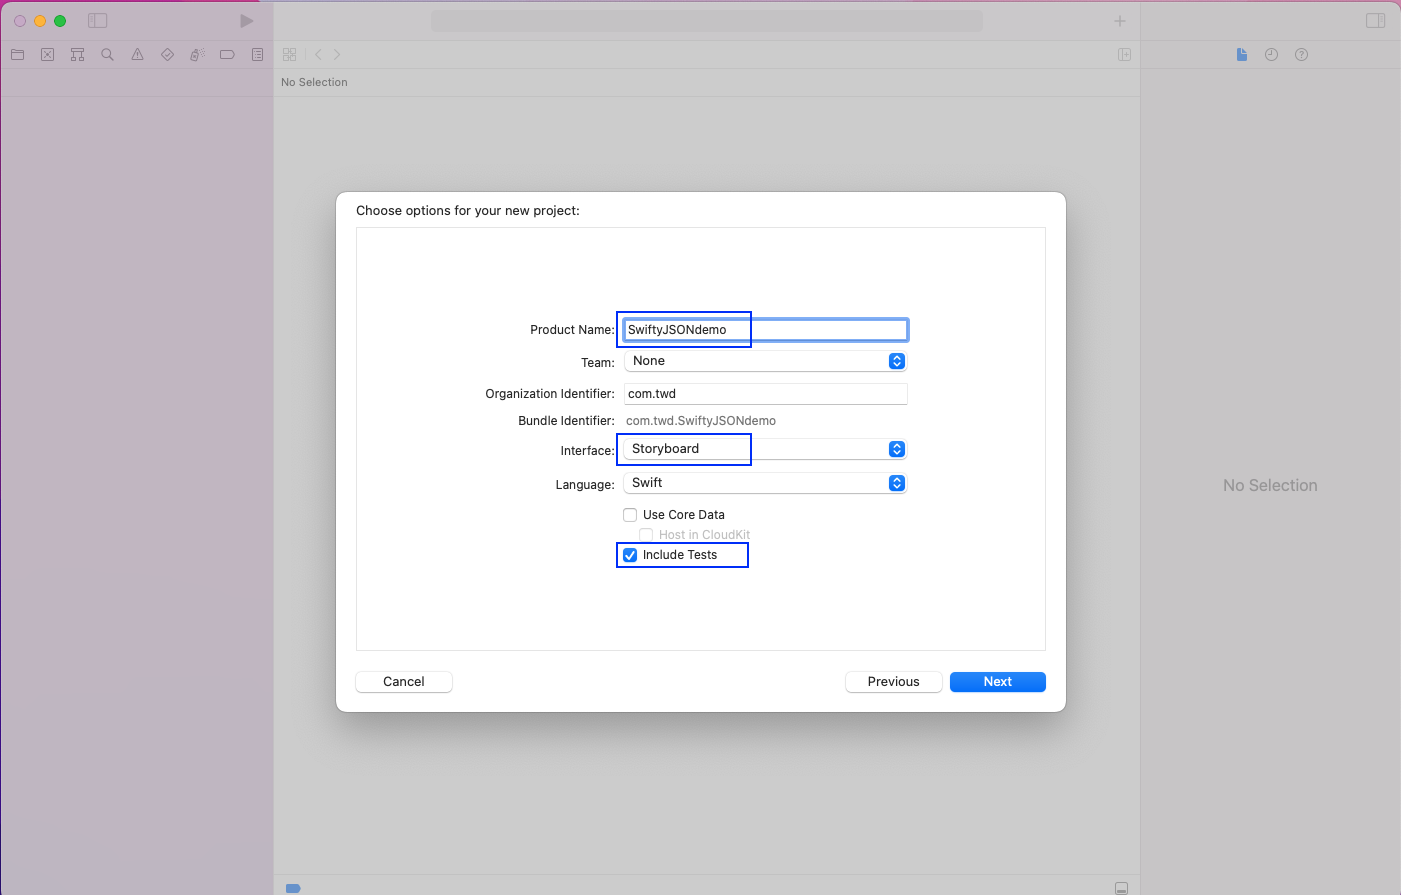
In the new pop-up, give any product name. We'll give it the name SwiftyJSONdemo. The interface should be Storyboard because we’re going to use Storyboard in our app.
We'll also include tests because we're going to test our app.
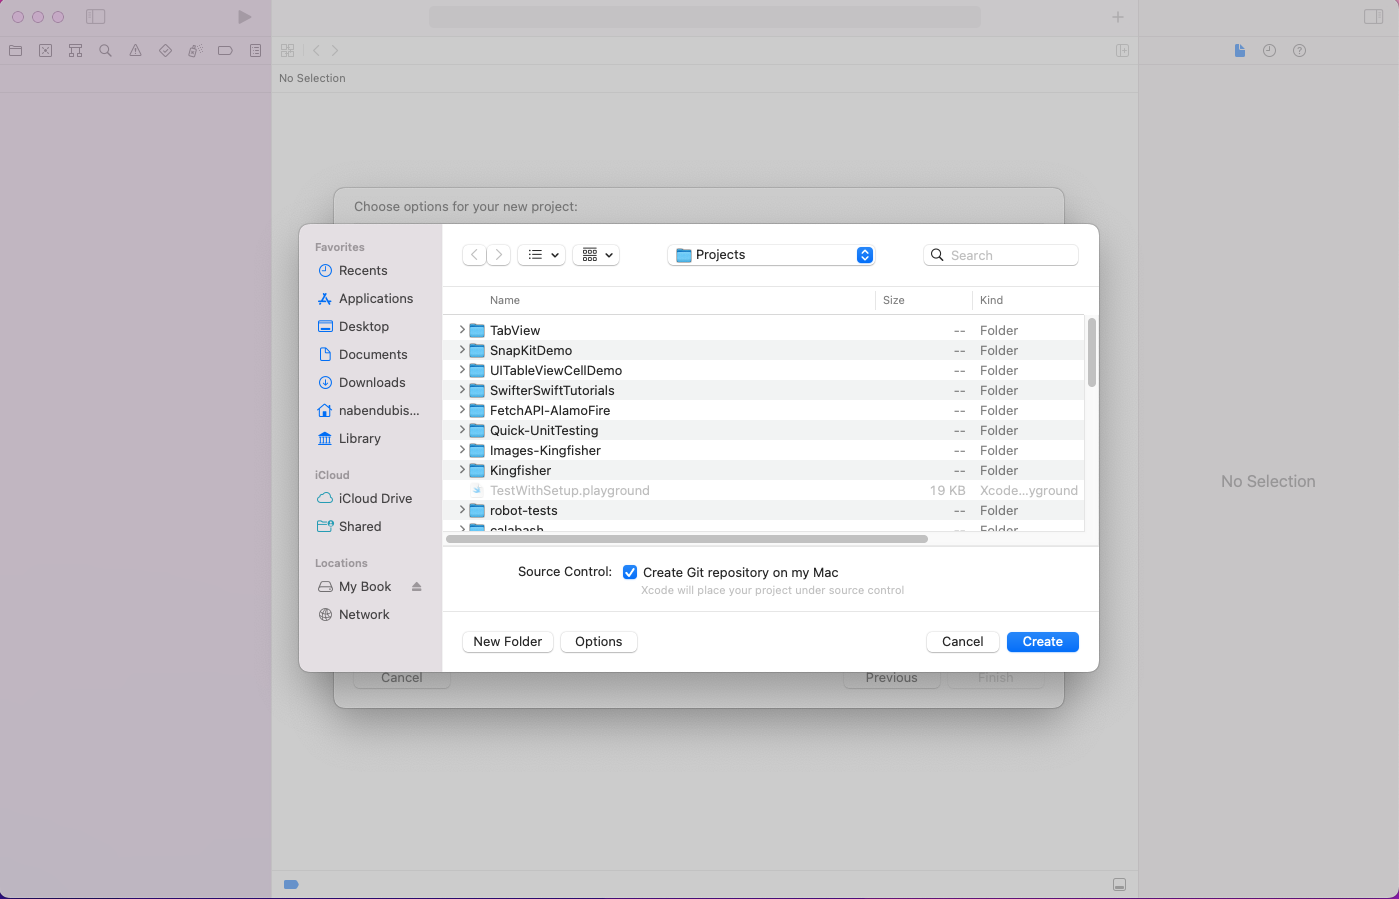
In the next pop-up, click on the Create button after choosing a suitable folder.
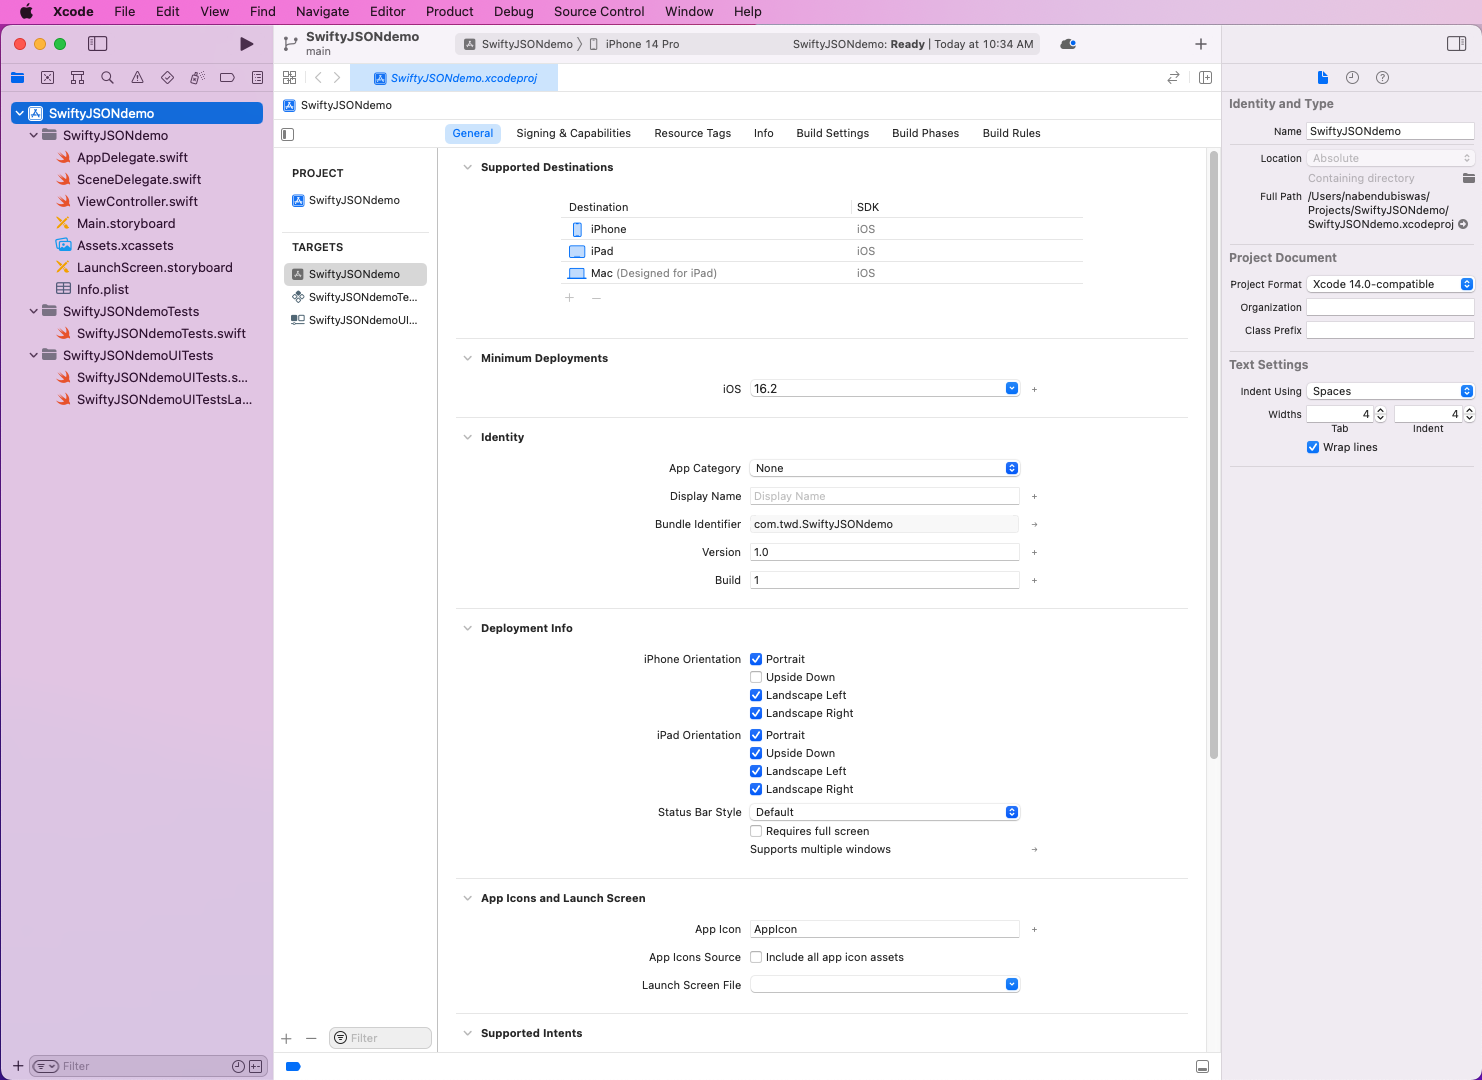
Our project will open in XCode, and it'll look like this:
Installing Dependencies of SwiftyJSON Through Podfile
Now, let's install the dependencies of SwiftyJSON in our project. We're also going to install the dependency of Alamofire in our project because we're going to use it to do API calls.
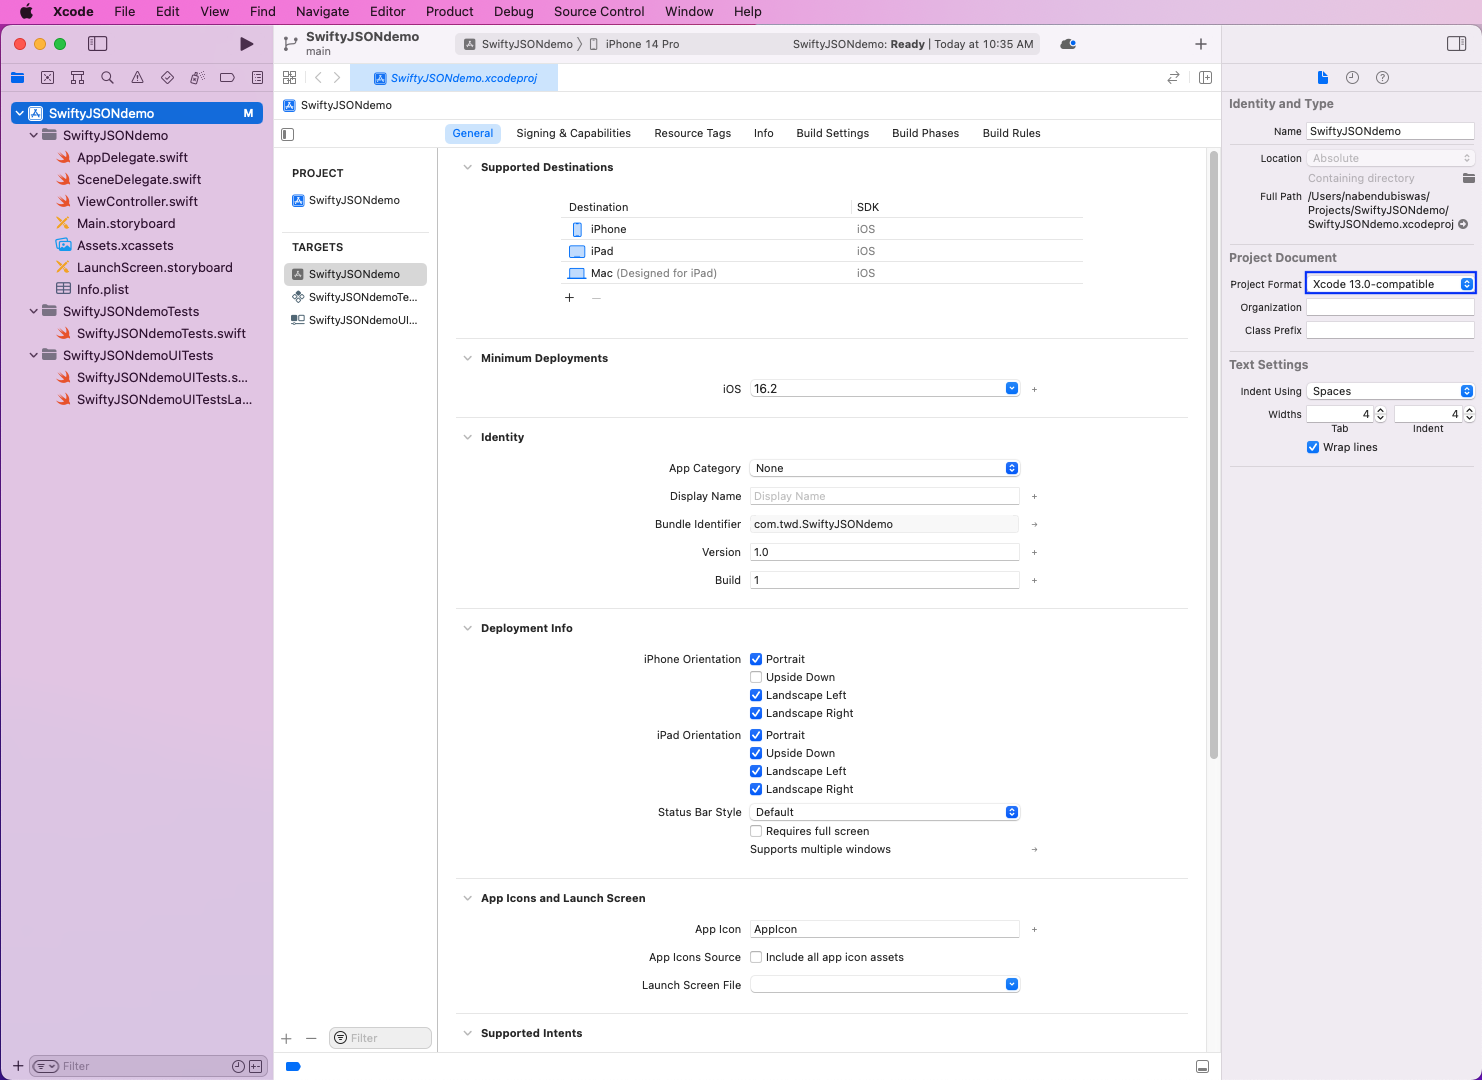
The best way to install both of them is through Cocopods. However, the latest version of XCode has some issues on the latest Mac running M1 chips. Therefore, we'll change the project format to XCode 13.0-compatible.
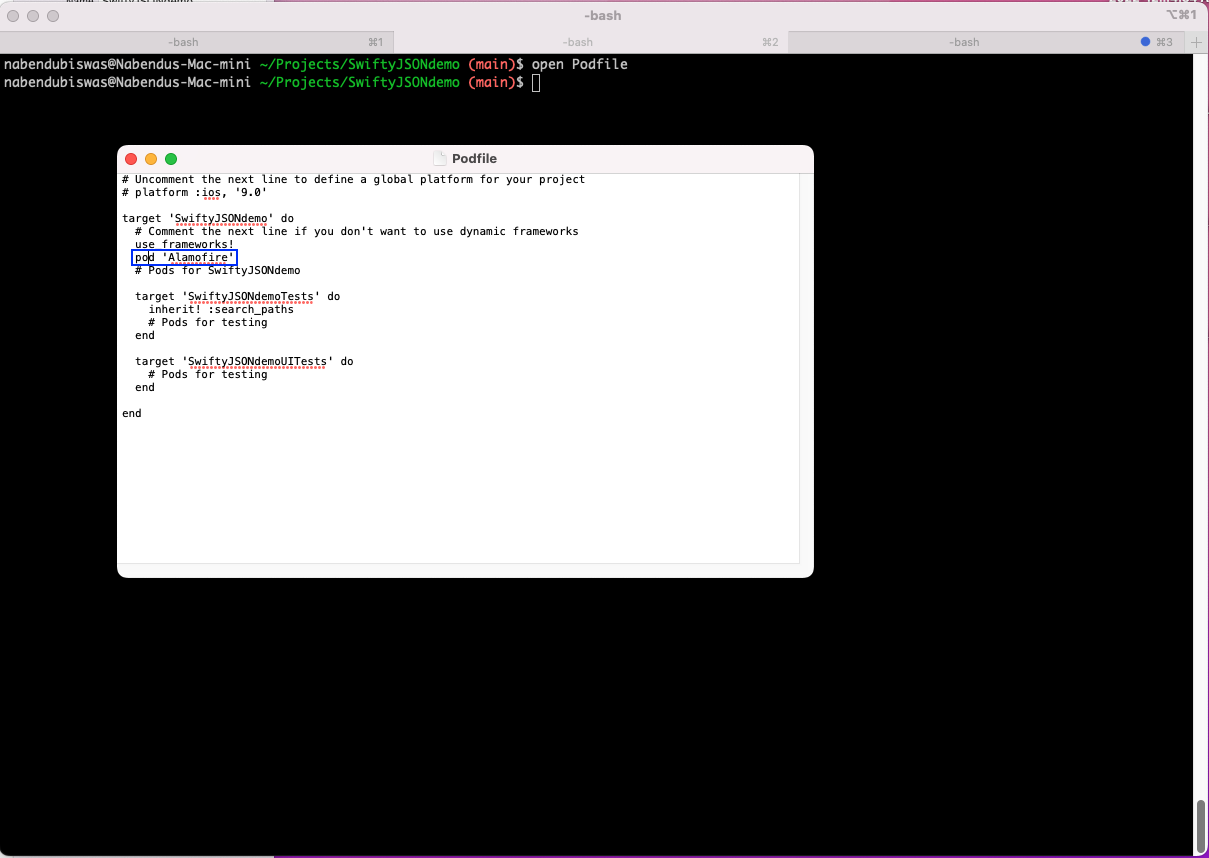
Now, in the project directory, run the pod init command from the terminal. This will create a Podfile, which can be seen in the terminal through the ls command.

Next, from the terminal, to open the file in TextEdit, give the command open Podfile. Here, add the line pod 'Alamofire' with the correct spaces. To save the file, press Cmd + S and then close it.
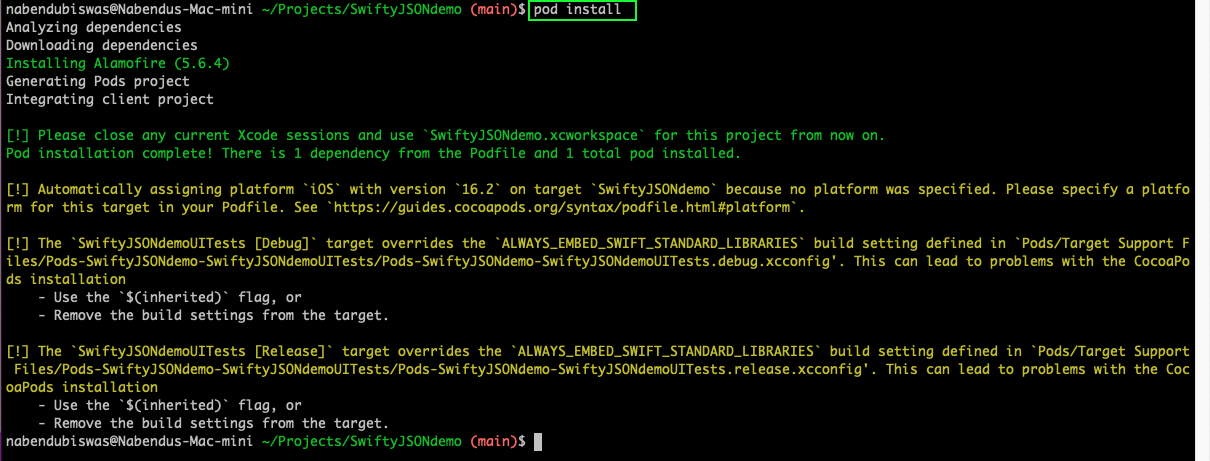
Then, from the terminal, run the pod install command. This command will install Alamofire in our project.
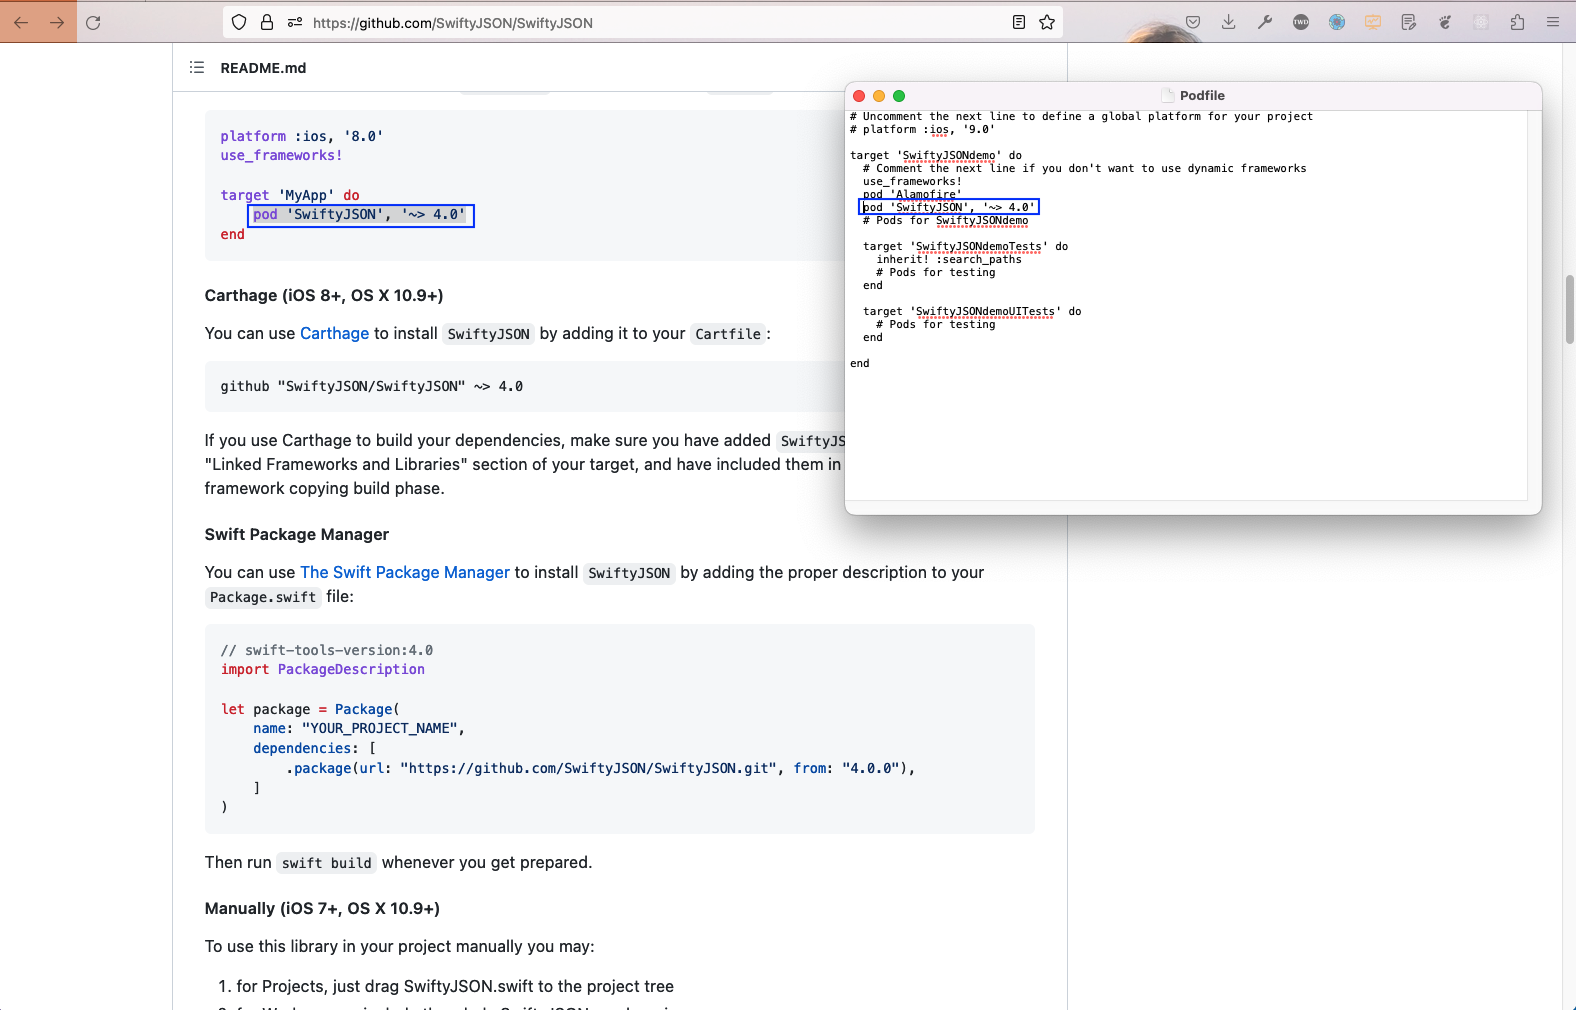
Now, let's again open the Podfile and add the line pod 'SwiftyJSON', '~> 4.0' with the correct spaces. We got this command from the SwiftyJSON GitHub page.
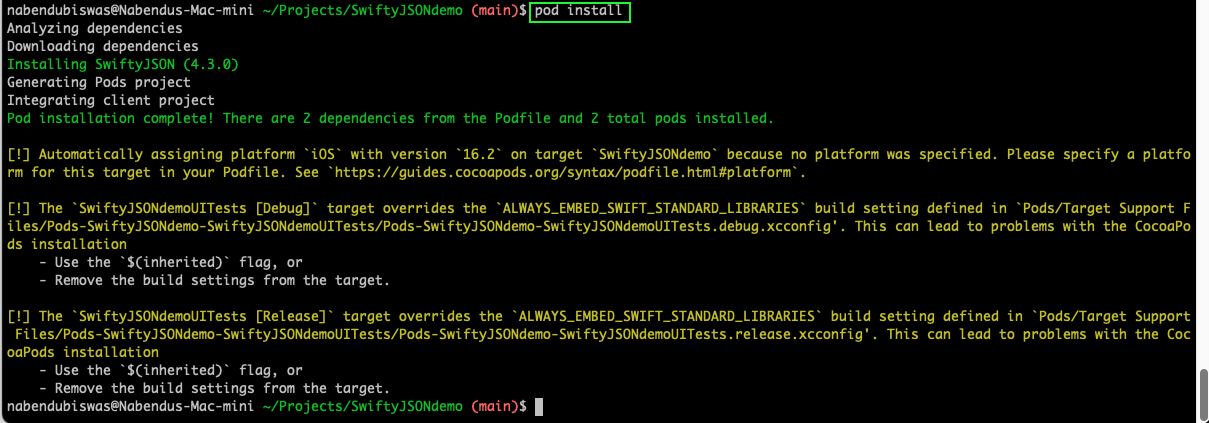
From the terminal, run the pod install command. This command will install SwiftyJSON in our project.
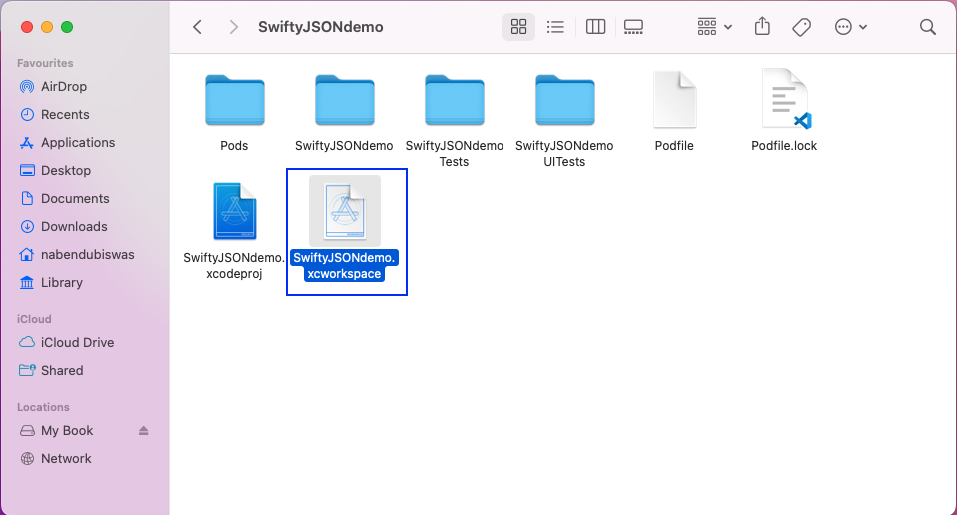
In the Finder, a new SwiftyJSONdemo.xcworkspace file with a white background will be created. To use the updated project with Alamofire and SwiftyJSON installed, open this new file with a white background in XCode.
Layout Through Storyboard
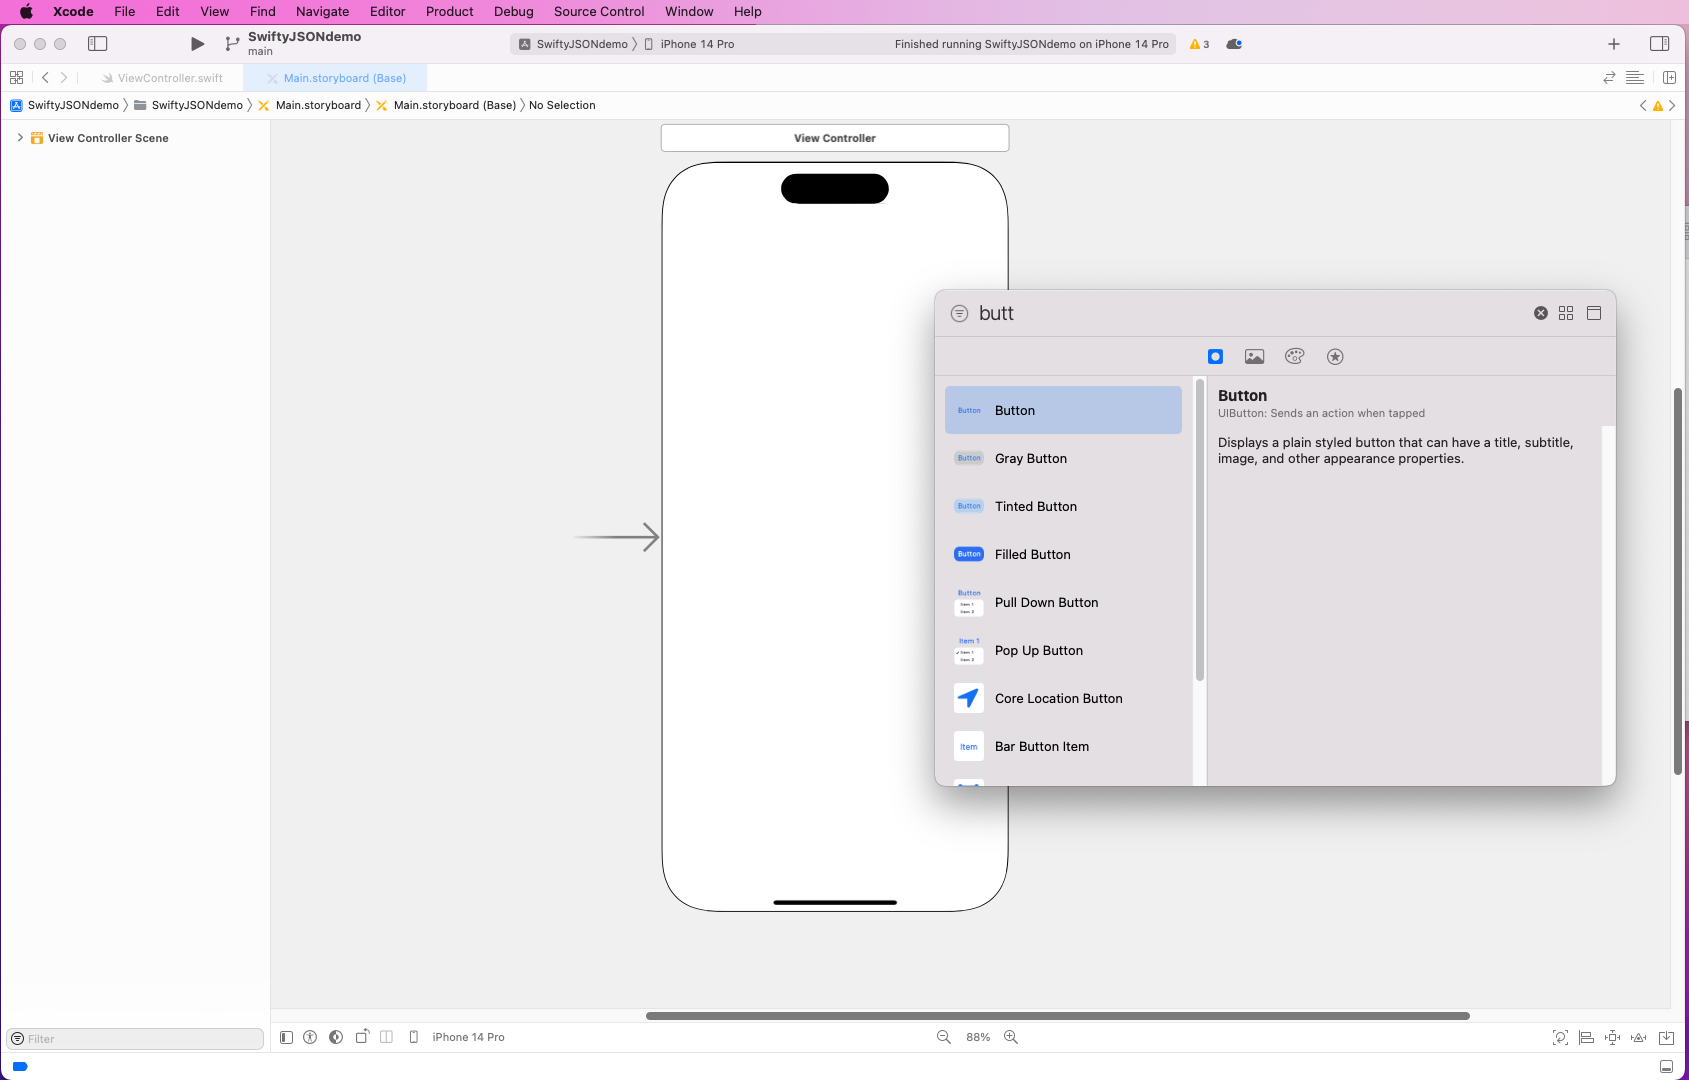
We'll create our app to parse JSON with the click of a button. To do so, click on the Main.storyboard file, which will show an image of an iPhone. After that, open the object library by clicking on the + sign in the upper-right corner.
Here, search for the button and click on Button. Then drag it to the iPhone image:
We've also expanded the button and given it the name Get JSON Data. Additionally, we've changed the background color.
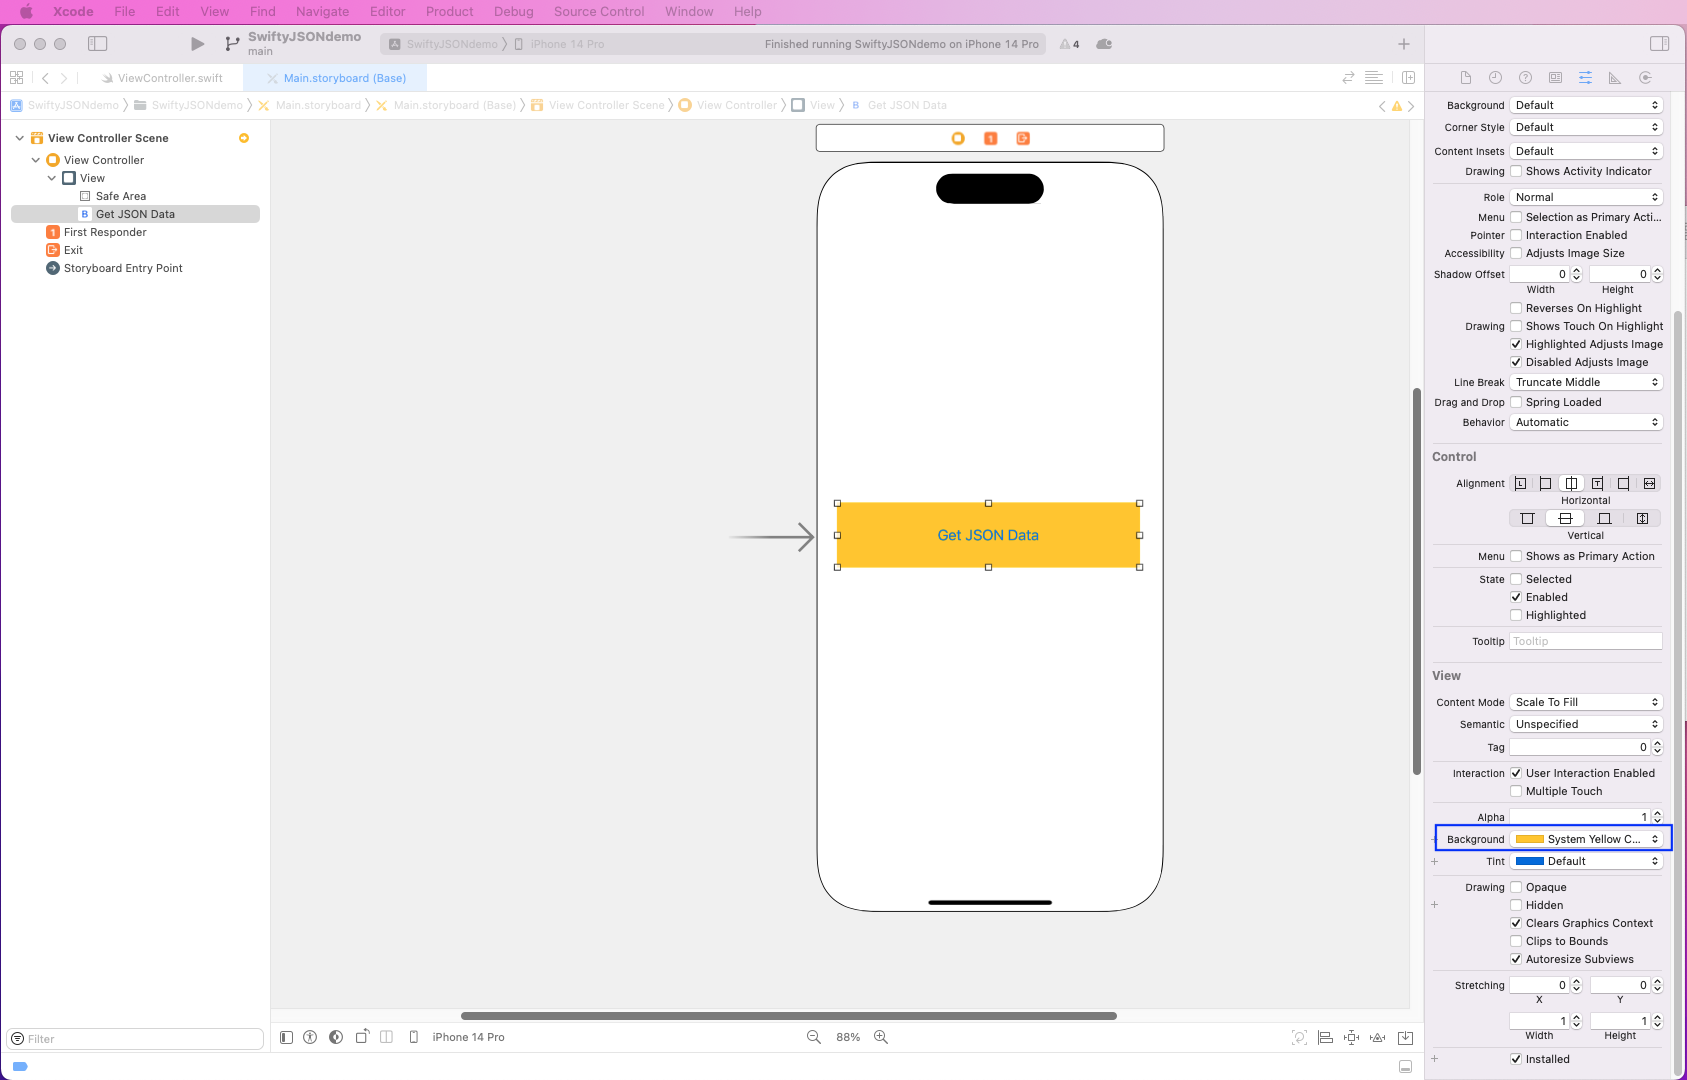
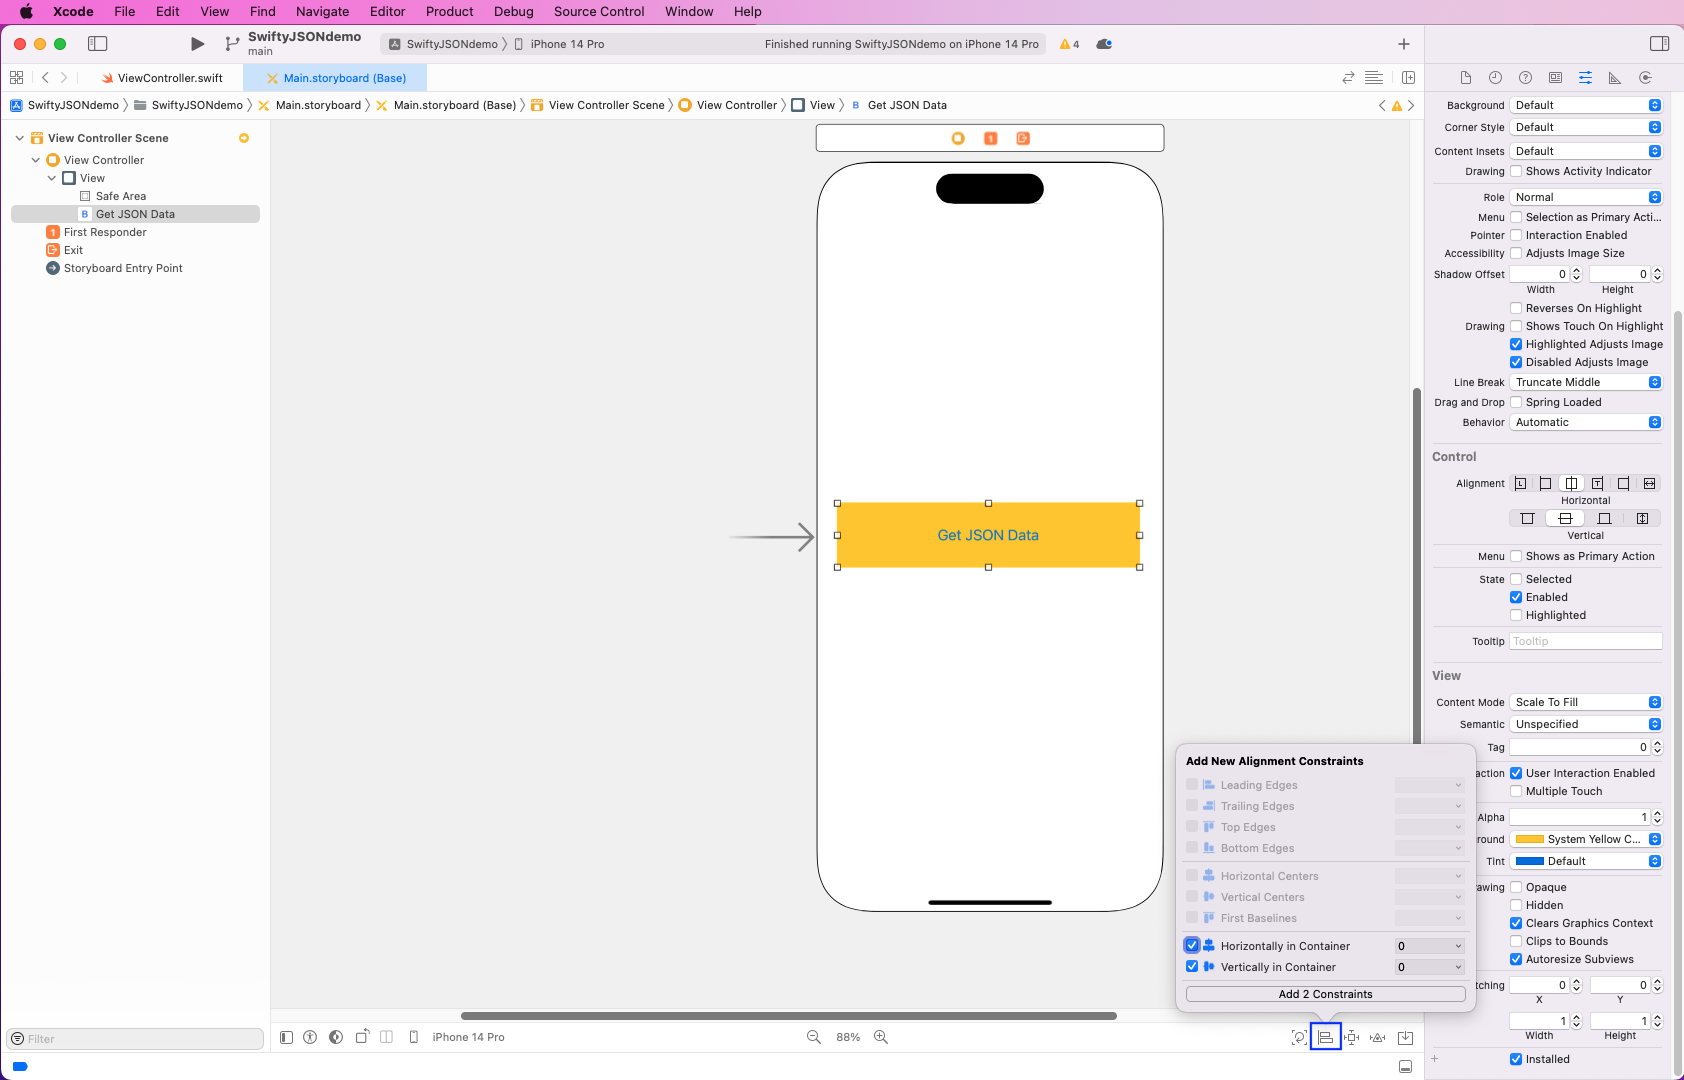
Now, click on the Align icon on the bottom-right of the screen. Here, select both of the checkboxes and then the Add 2 Constraints button.
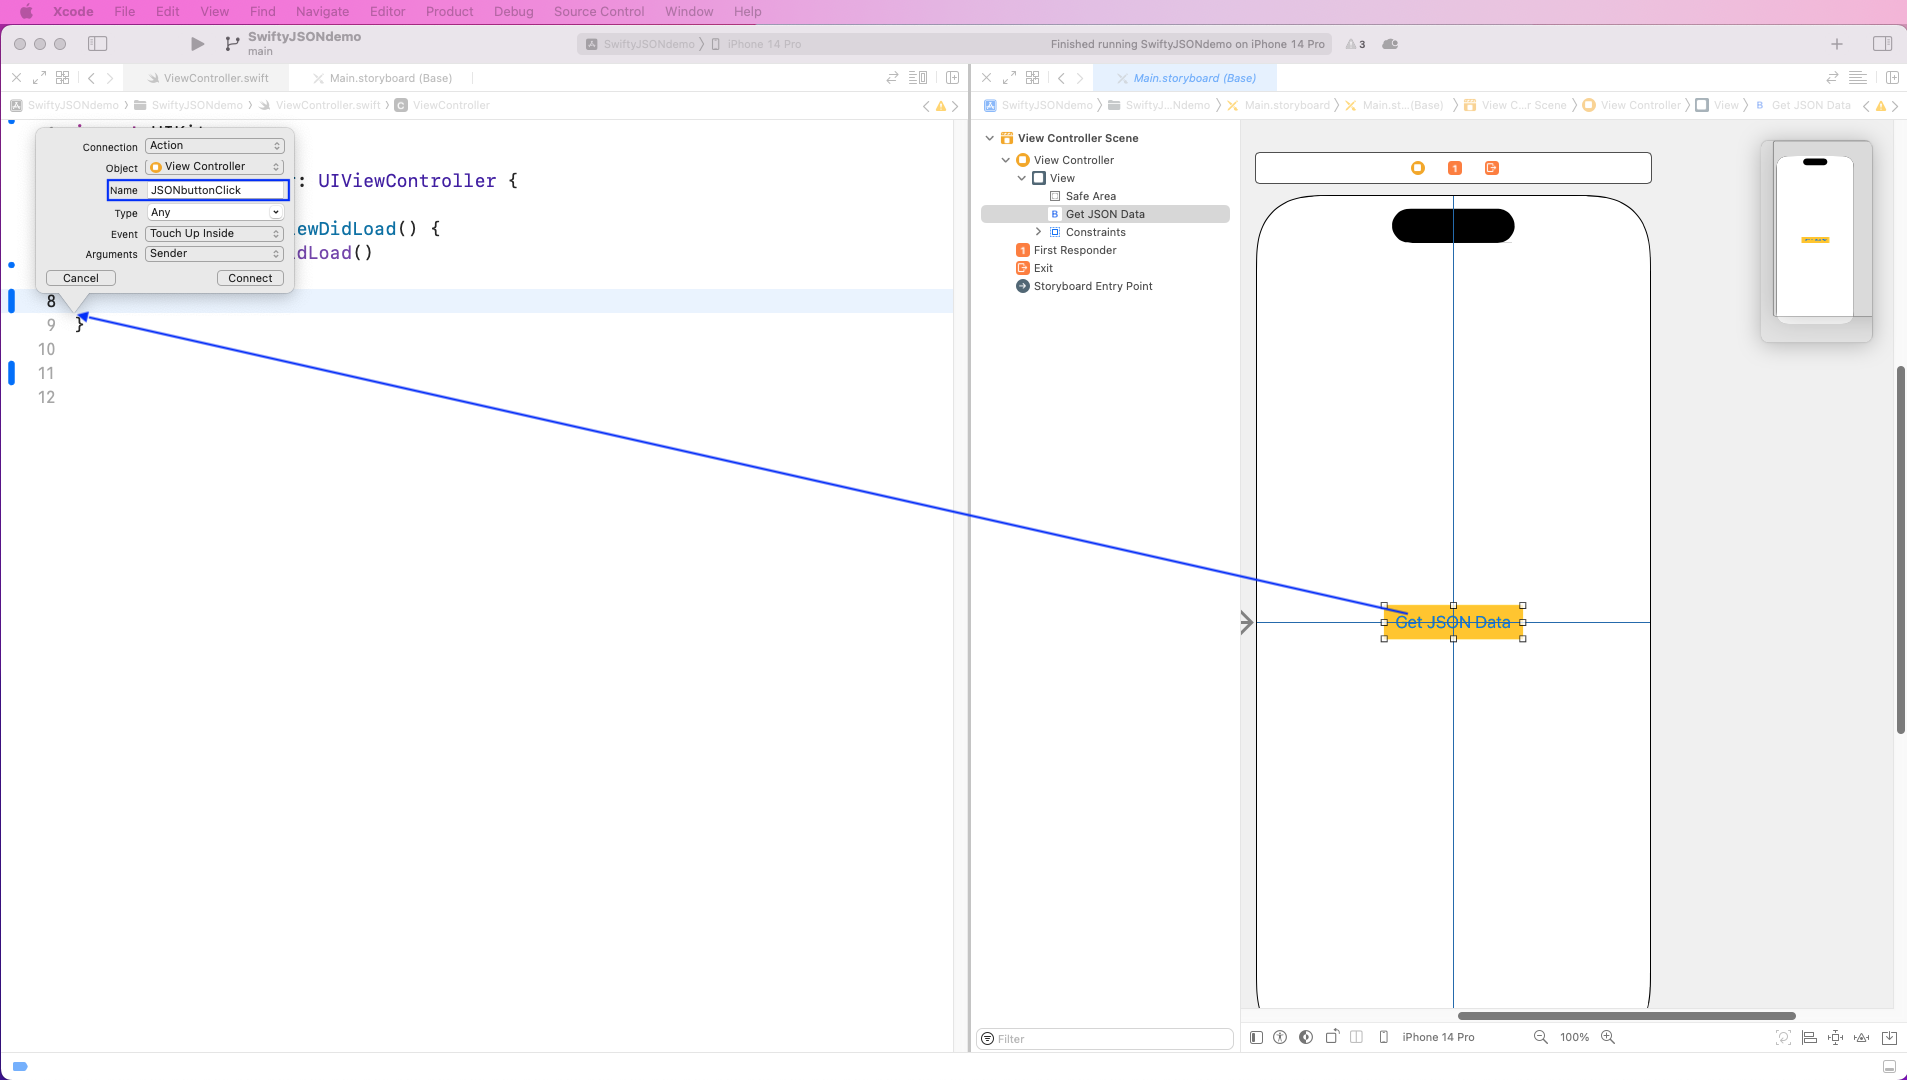
Next, we need to open an outlet in the project for the button. So, open the ViewController.swift file on another screen.
After that, press the Ctrl key and, with a pointer, drag the button to the ViewController file. Here, a pop-up will be opened that gives the outlet a name.
Parsing Locally Stored JSON
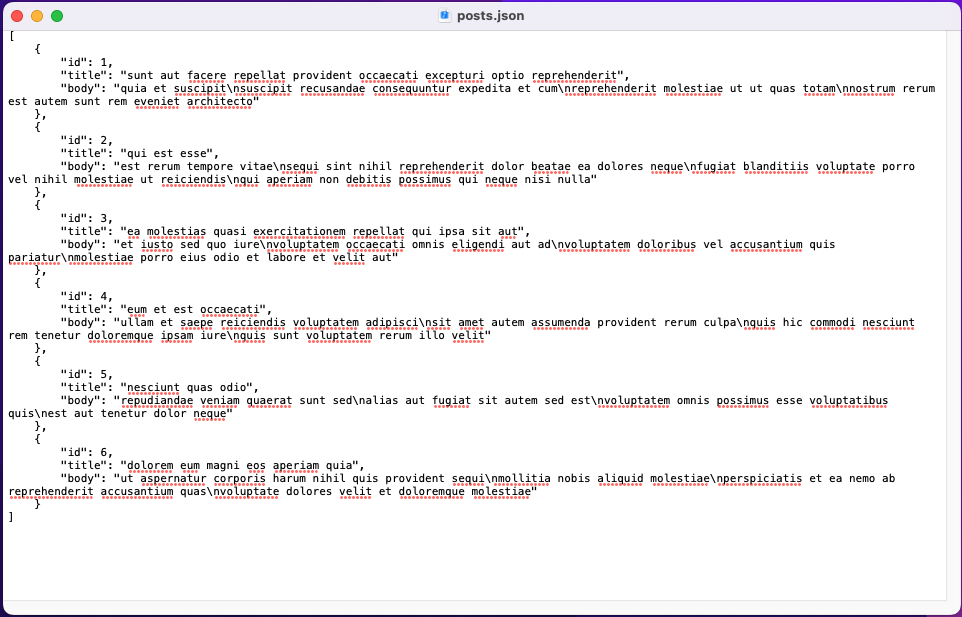
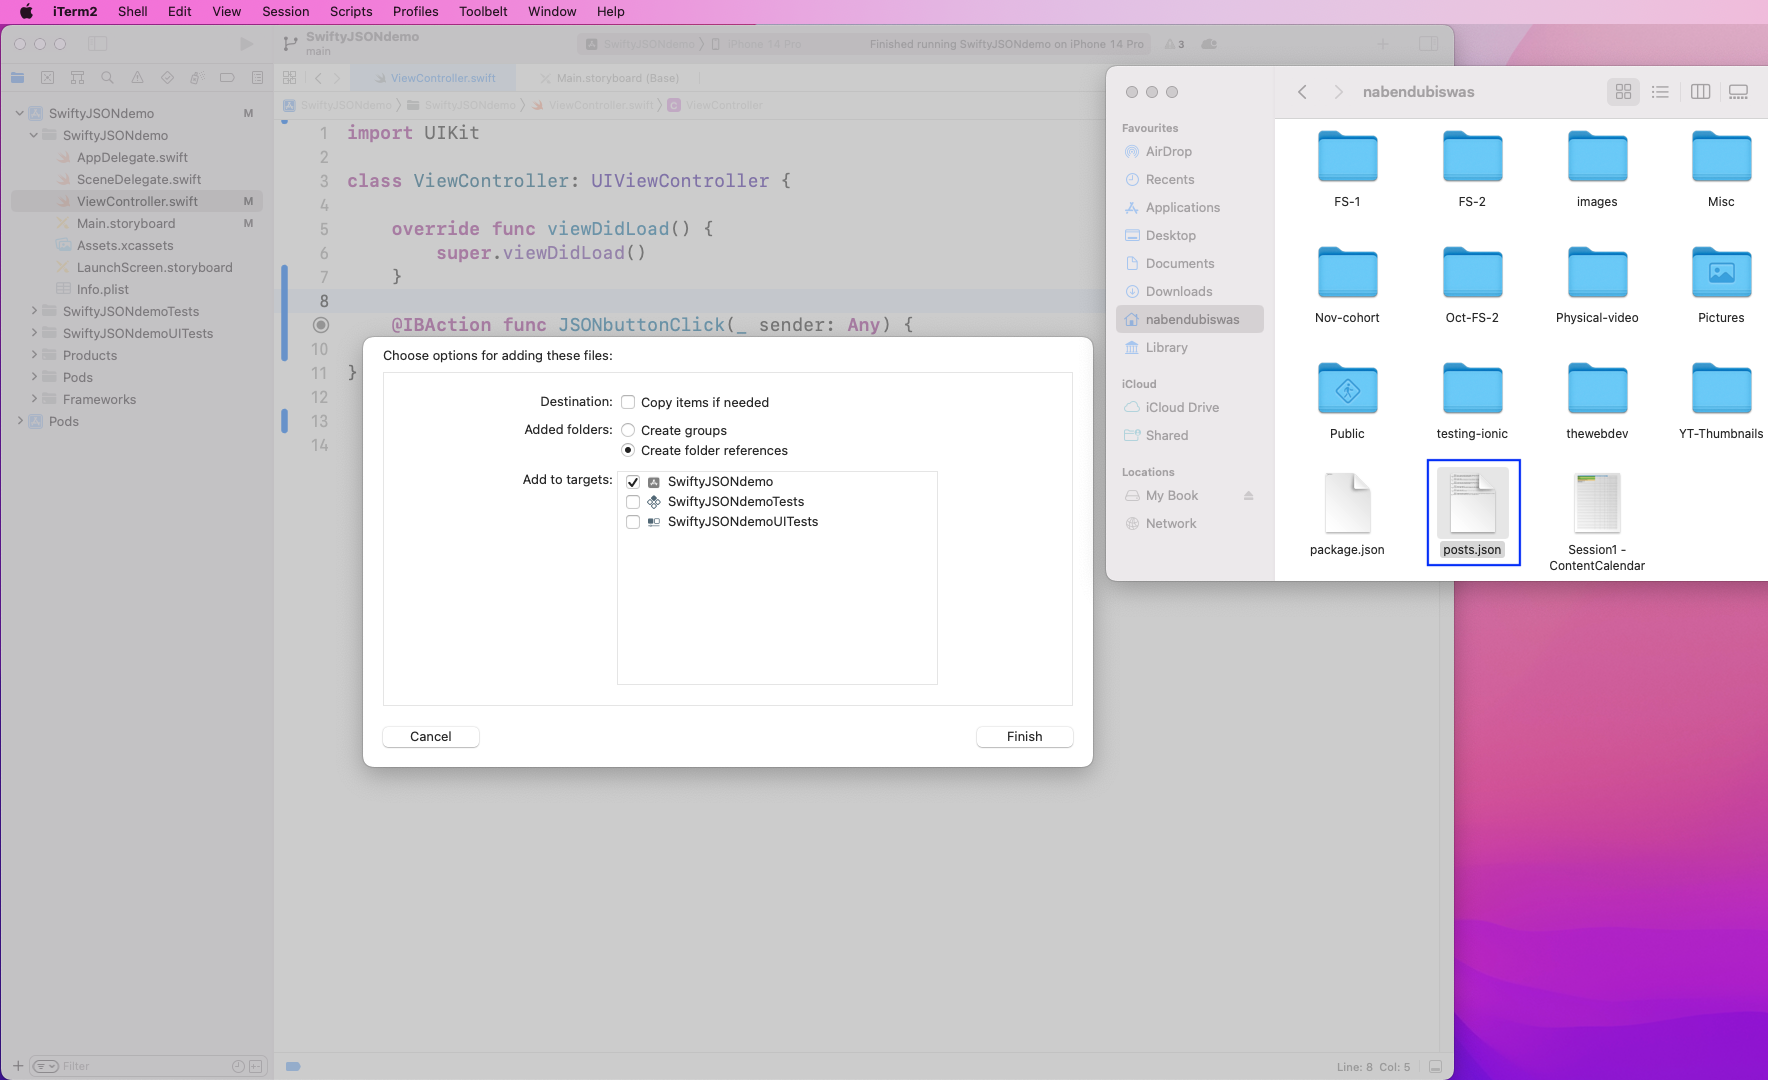
We'll first learn to parse a locally stored JSON. For this, we have a posts.json file that is an array of objects.
We've dragged the file in our project inside the SwiftyJSONdemo folder. This will open a pop-up, where you can click on the Finish button.
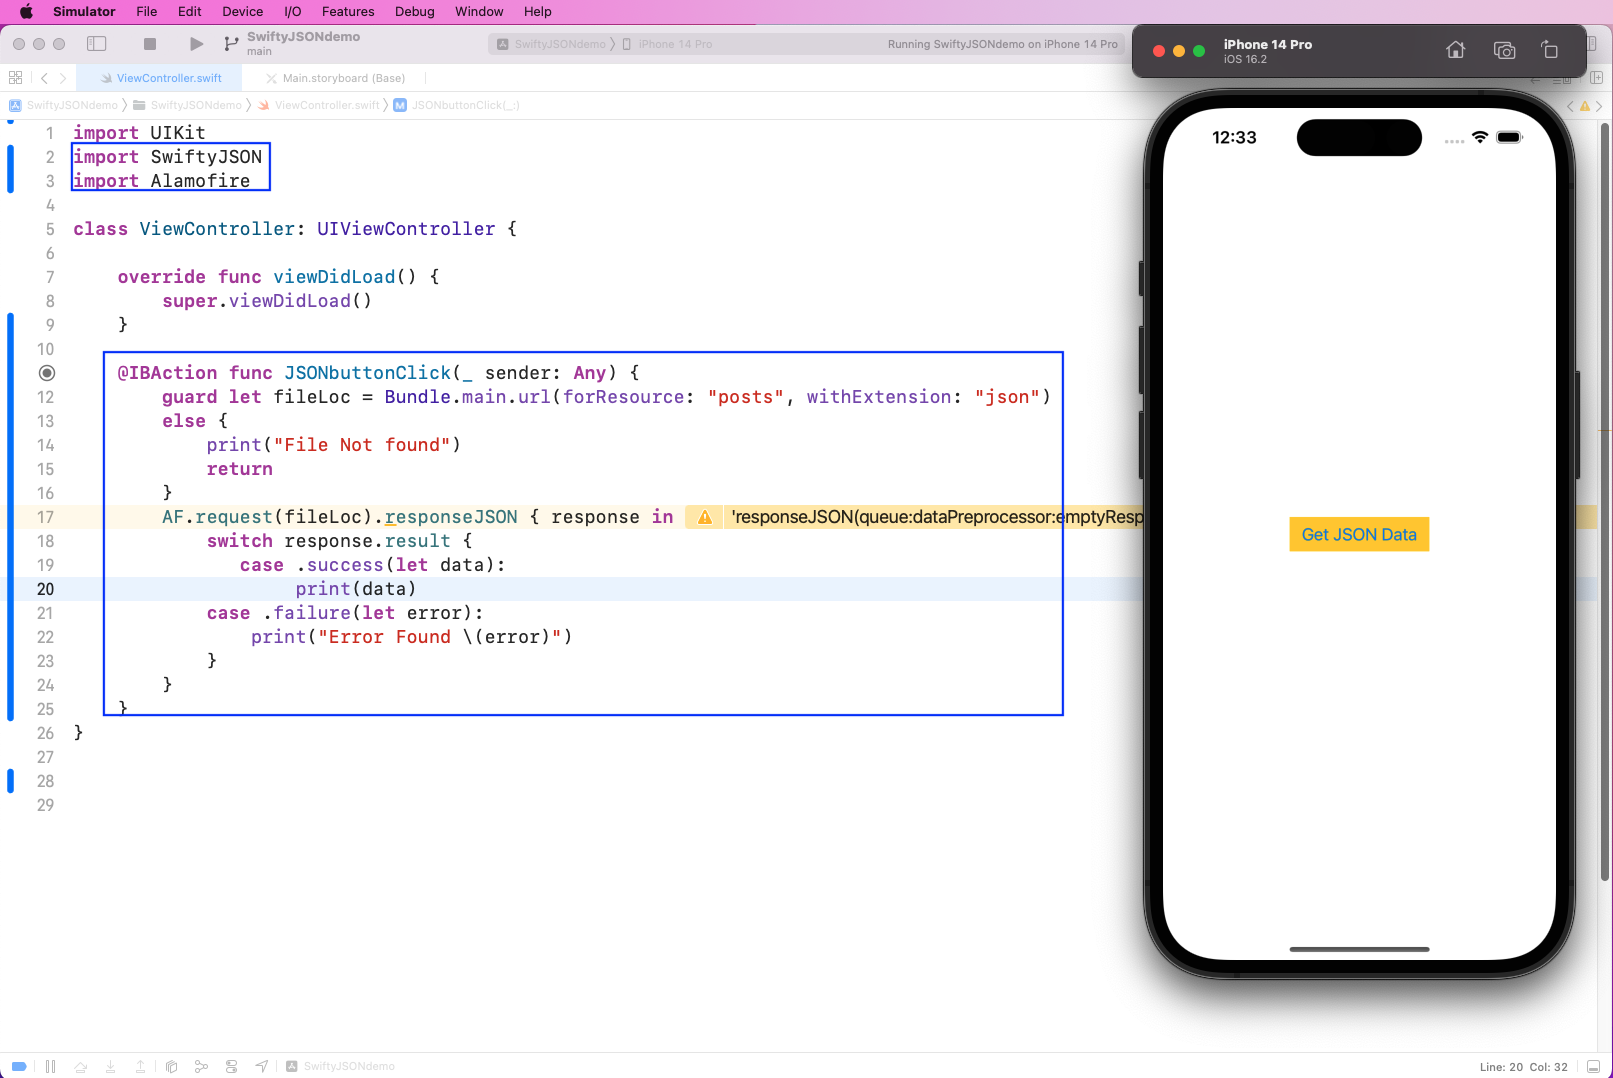
Now, in the ViewController.swift file, we'll first import SwiftyJSON and Alamofire. After that, inside the button outlet, add the code below.
Here, we'll first use the posts.json file through a Bundle. After that, we'll use the Alamofire request to hit the JSON file.
In a switch case upon success, we reprint the data. Upon an error, we print the error.
We've also started the app on the simulator, which is showing the button.
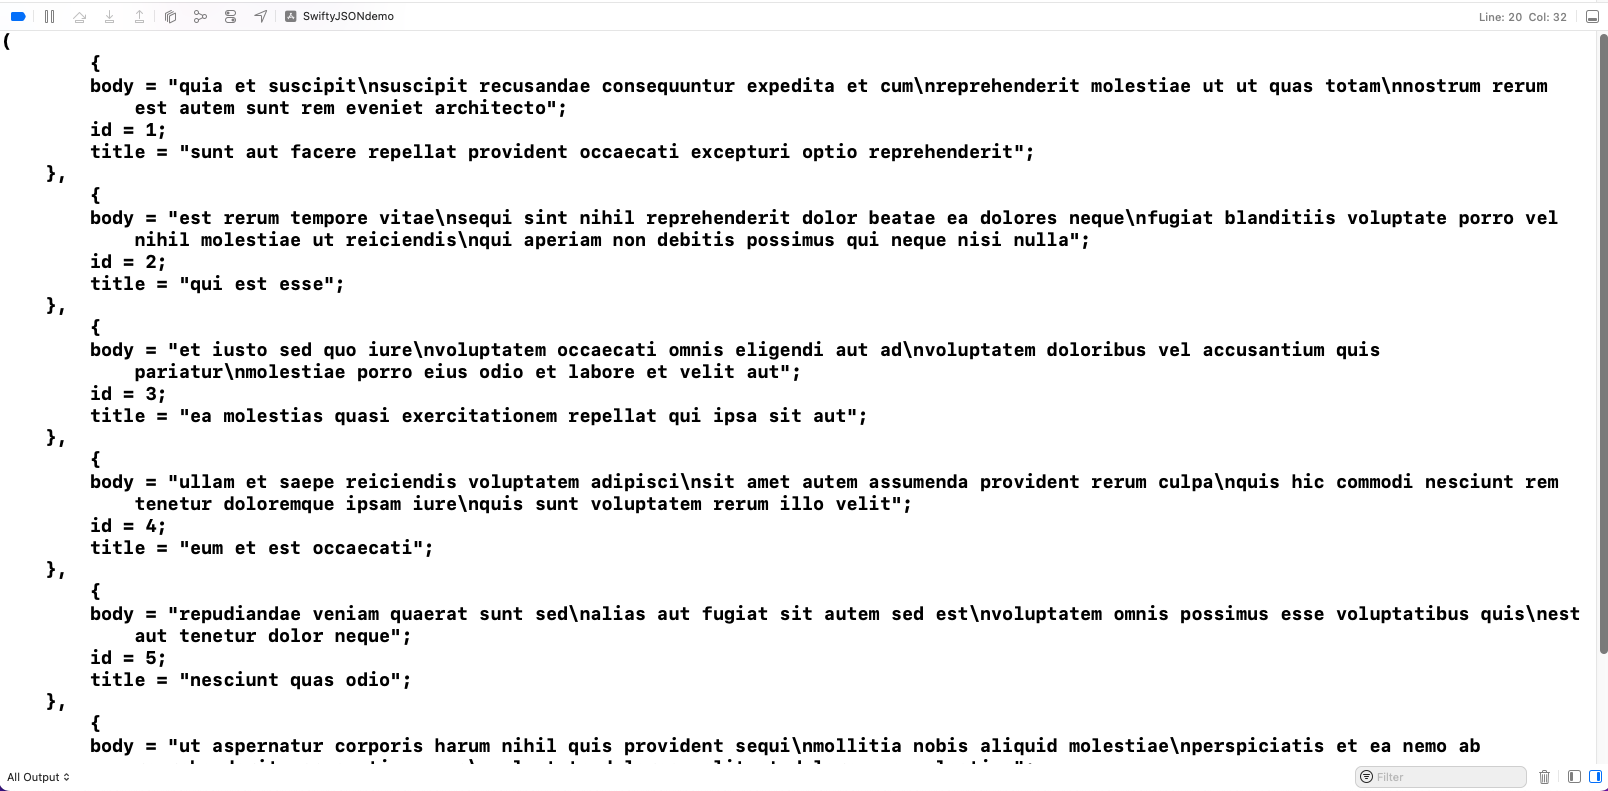
Upon pressing the Get JSON Data button, we'll get the data printed in the console. However, as seen, the data is not the array of objects and seems out of sync. It's also very difficult to get a value out of it.
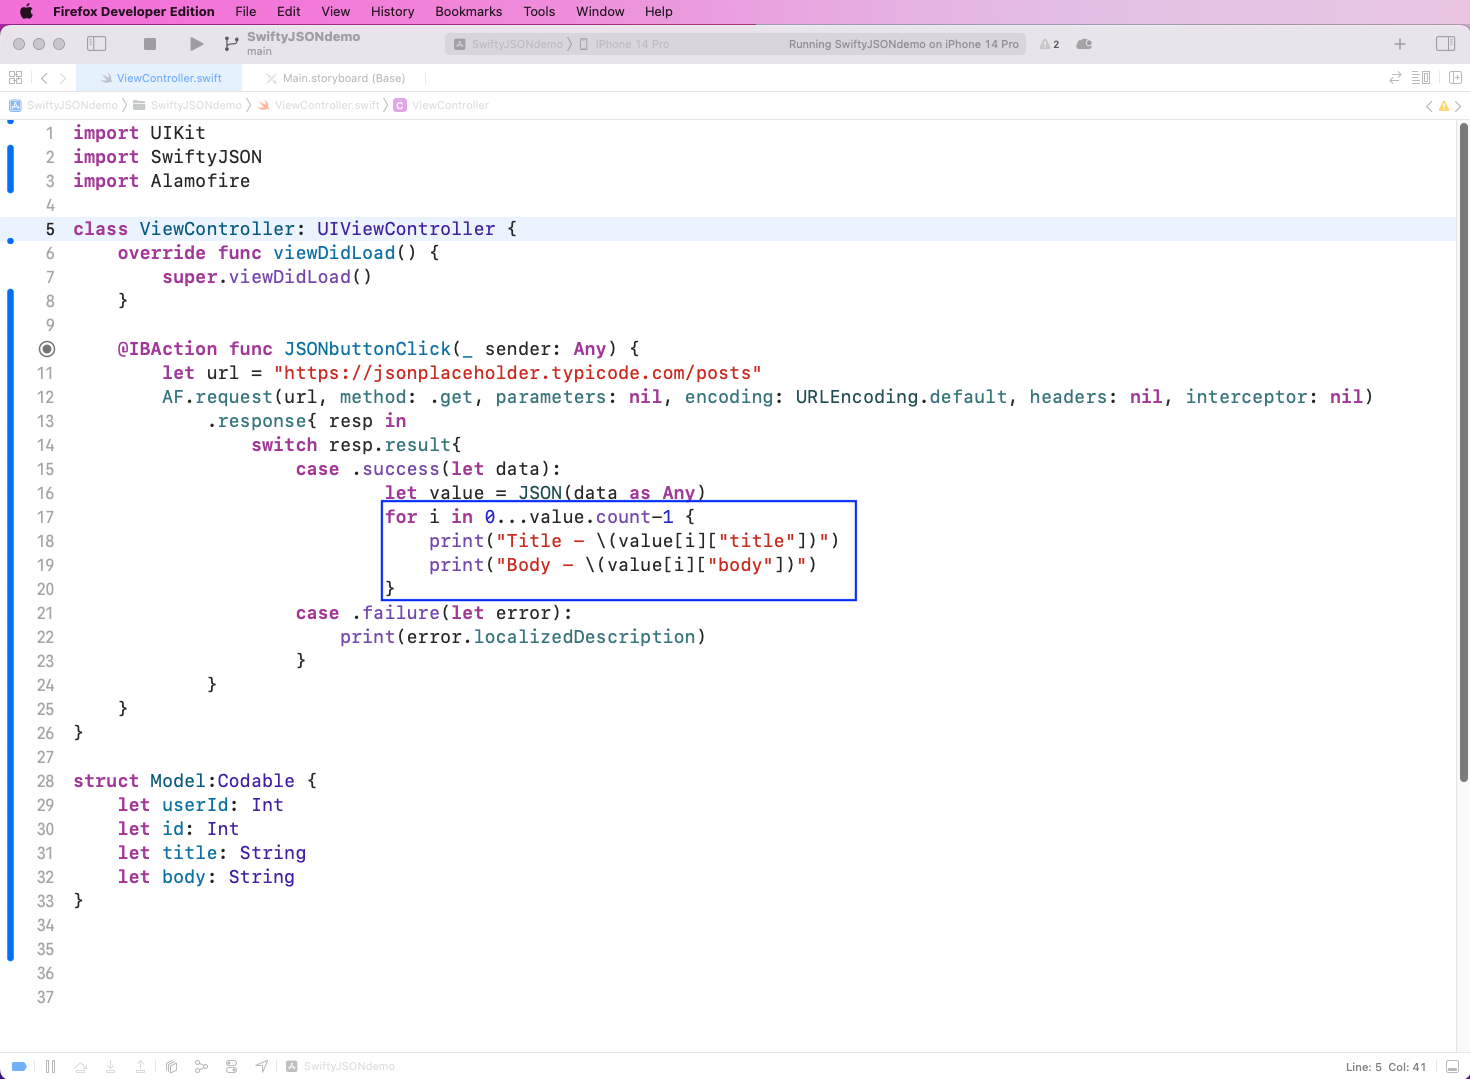
Next, we'll update our code in the ViewController.swift file to use the JSON function from SwiftyJSON. This function converts our JSON to an easy-to-use value.
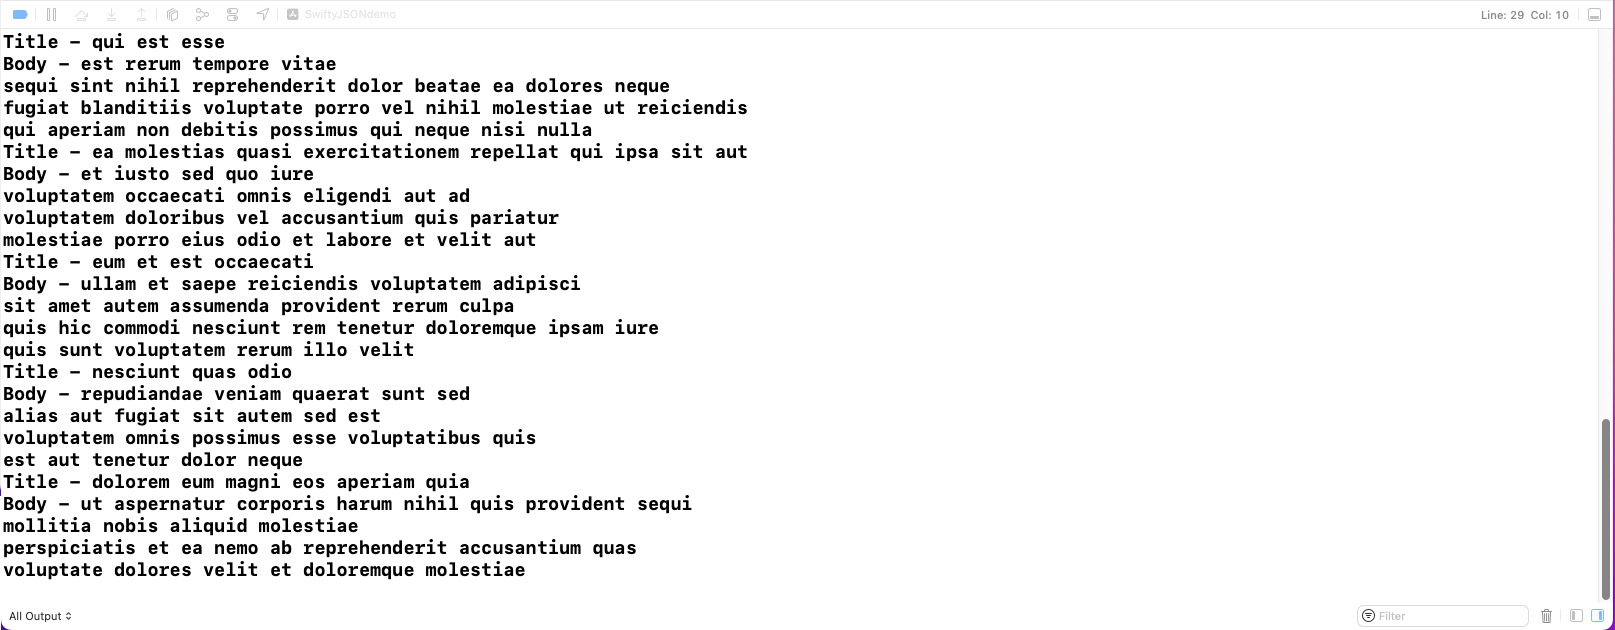
Then, we'll use a for loop to go through our JSON data, which is stored in value. Here, we'll print the Title with value[i]["title"] and the Body with value[i]["body"].
These are exactly how you'll print an array of objects in other languages like JavaScript.
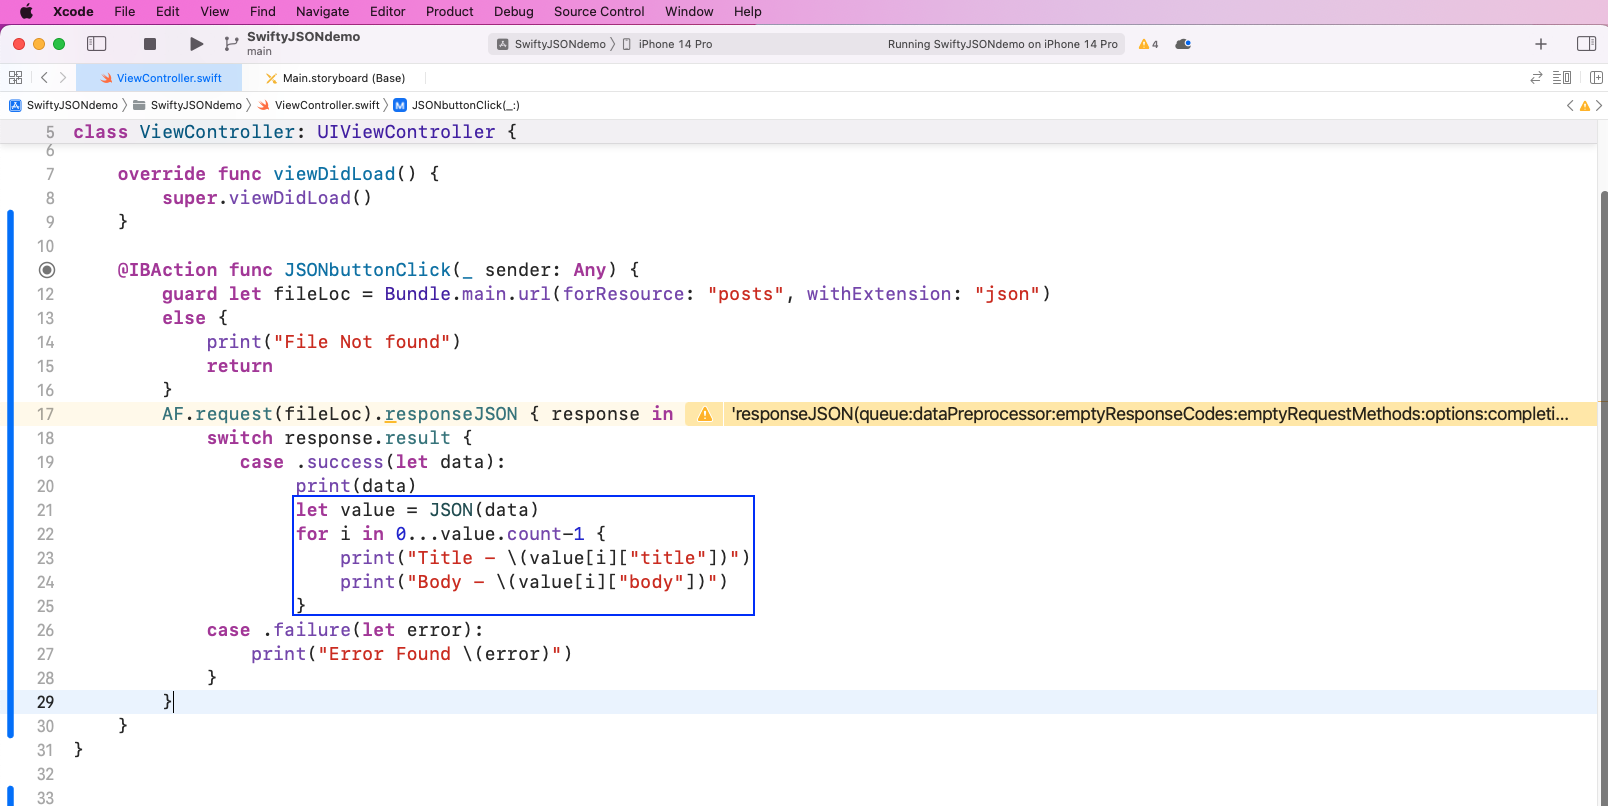
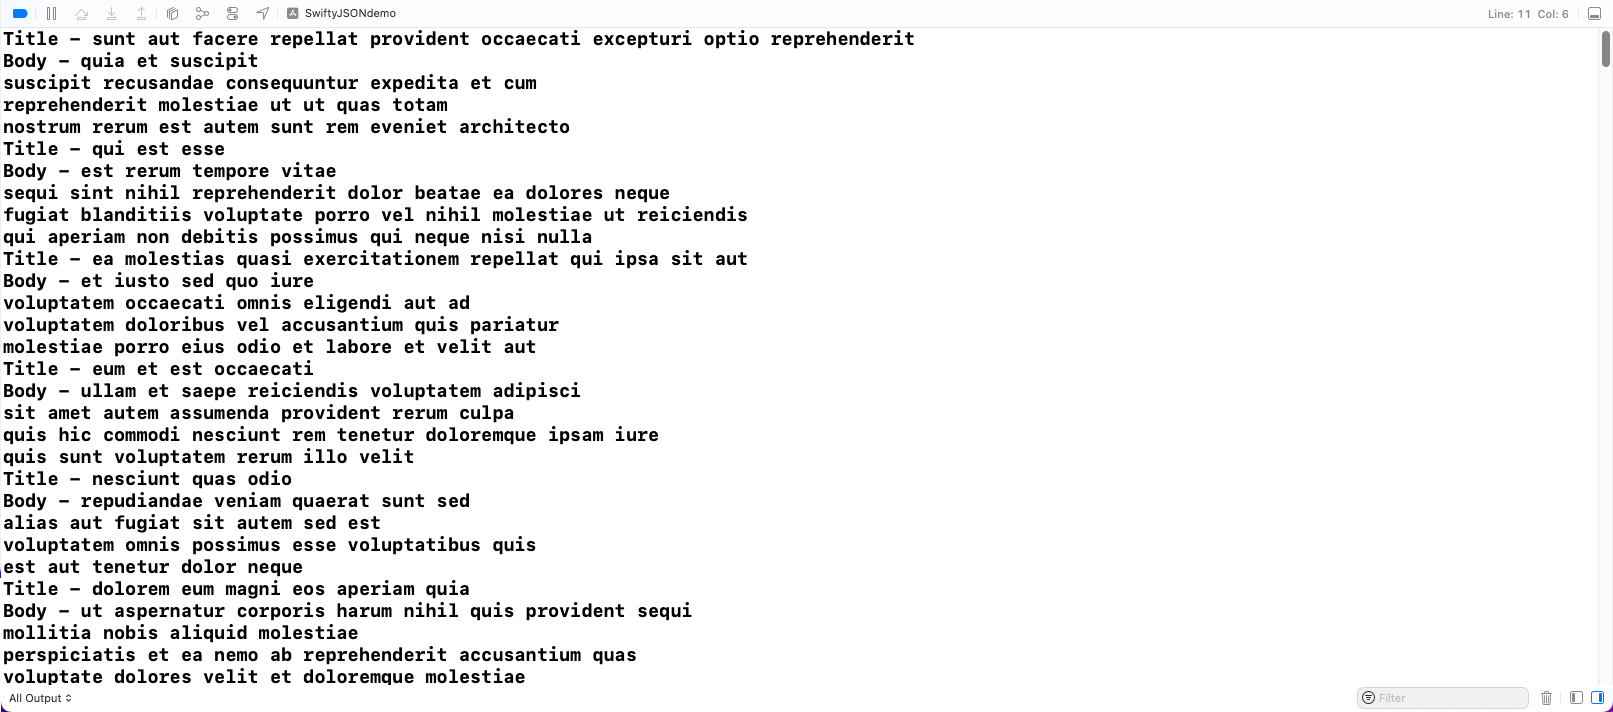
Now, upon running the app again, we'll get the data correctly in the console.
Parsing API Data
In real apps, we don't use locally stored JSON data, but we get it from an endpoint. We'll take our data from the famous JSON placeholder endpoint.
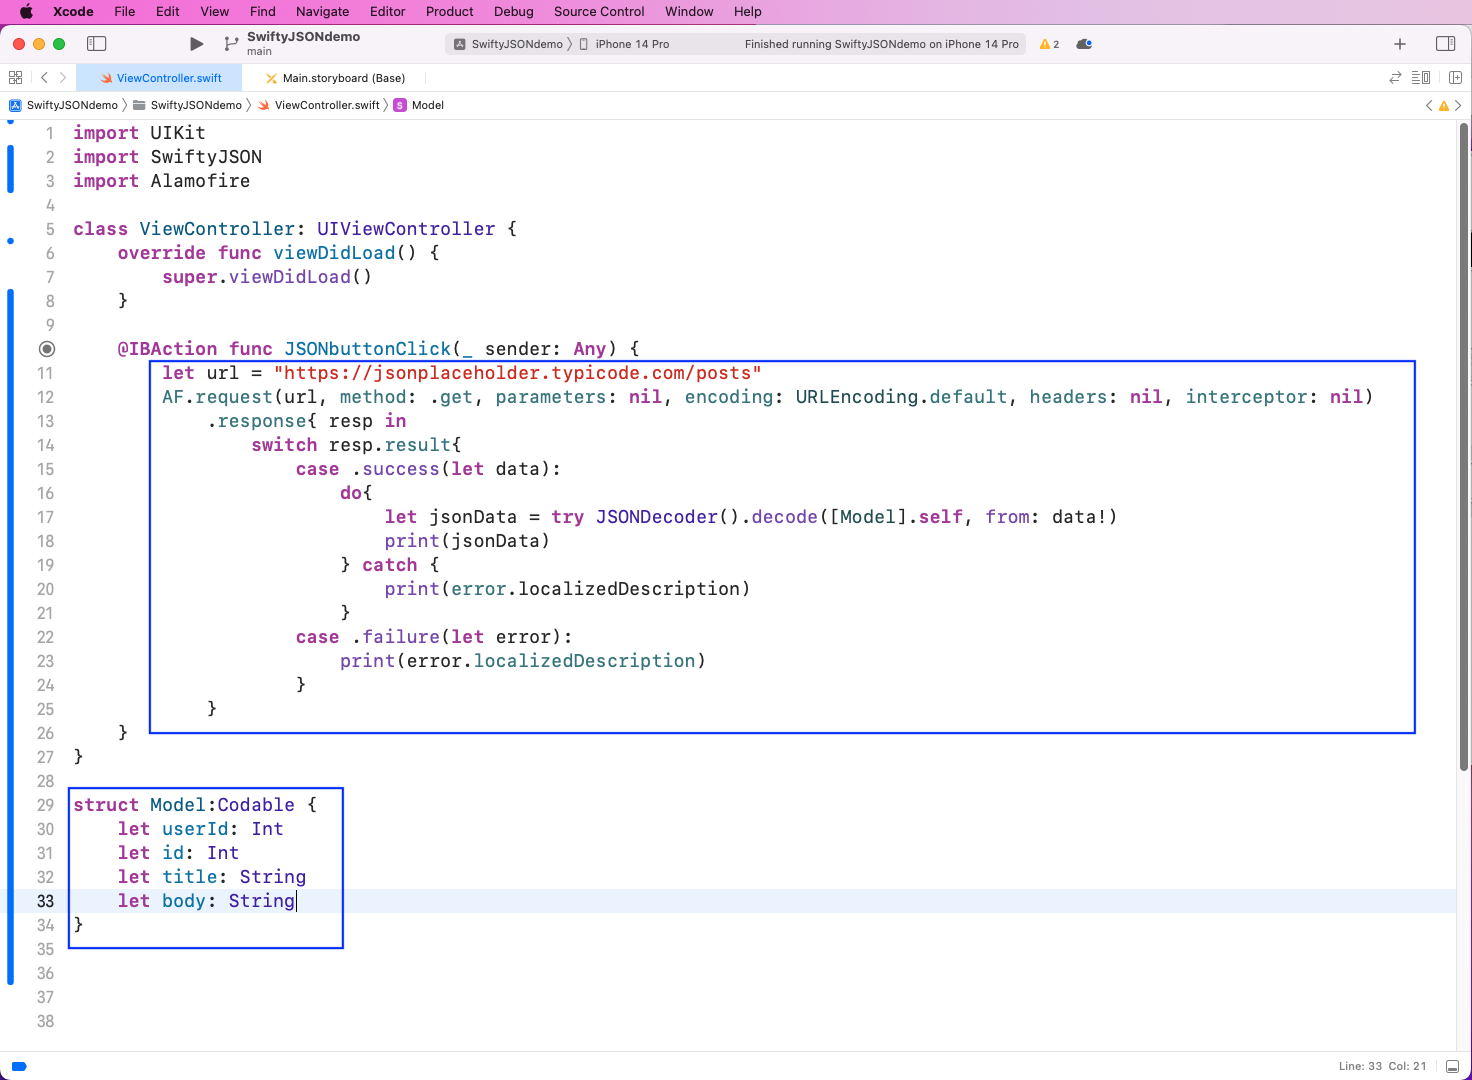
The code that has been used is taken from our Alamofire post. Here, we'll use a longer form of Alamofire's (AF) function, in which we give different parameters including the URL.
Again, inside a switch statement, we'll get the result. But since the data is not in the correct format, we have to use JSONDecoder() to convert it into JSON.
Also, notice that we’re using a struct Model, which contains the exact fields from the JSON placeholder endpoint.
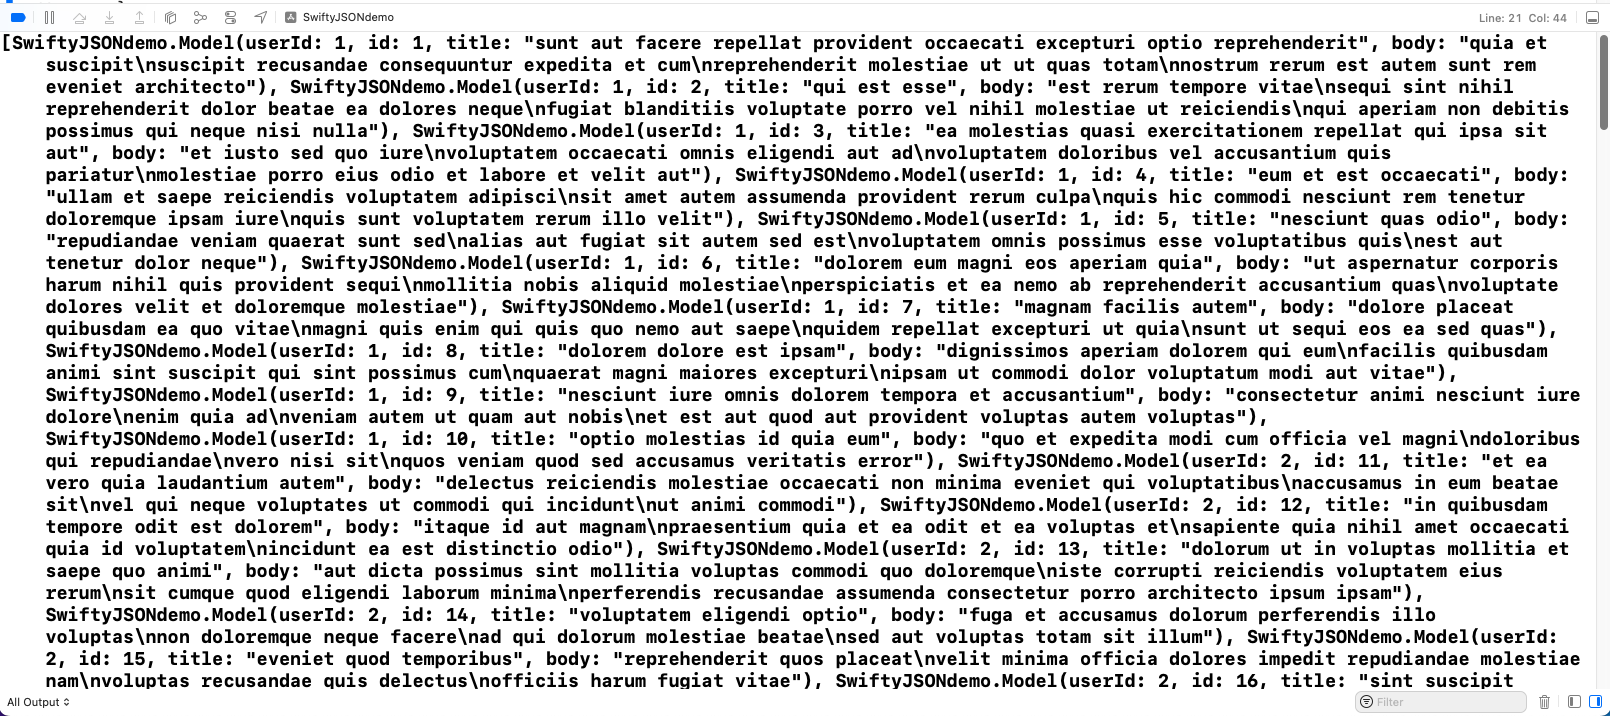
Even after all this, our data is not in the correct readable format, as shown in the console.
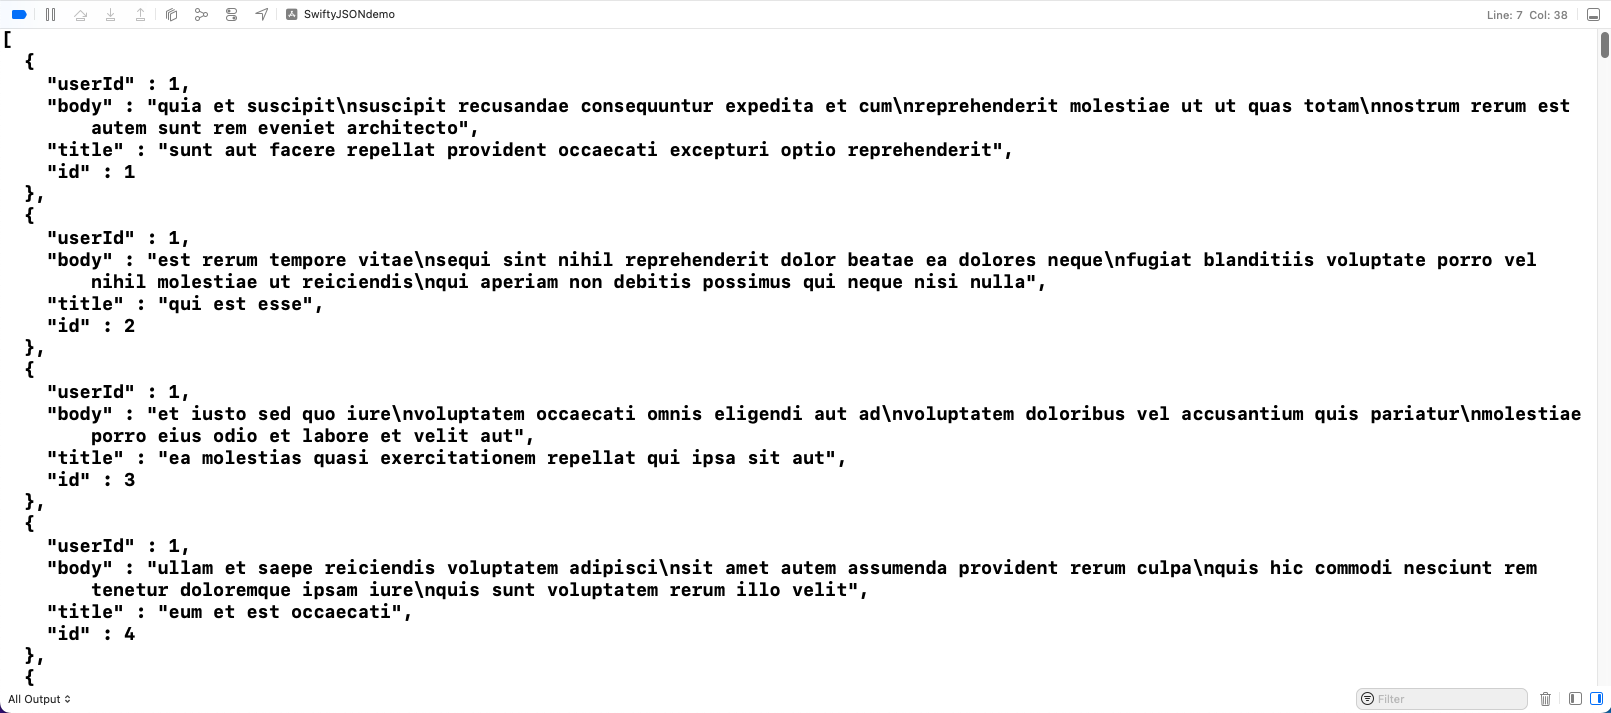
So, we'll remove the complex JSONDecoder() and use the simpler JSON function again.

Now, upon running the app again, we'll get an easy-to-read output.
Then, we'll again add the for loop from the earlier section to show the title and body.
And we'll again see the desired output in the console.
Testing the App
Finally, we'll test our app with XCUITest in XCode. Refer to our post on XCUI methods to learn the setup for test cases.
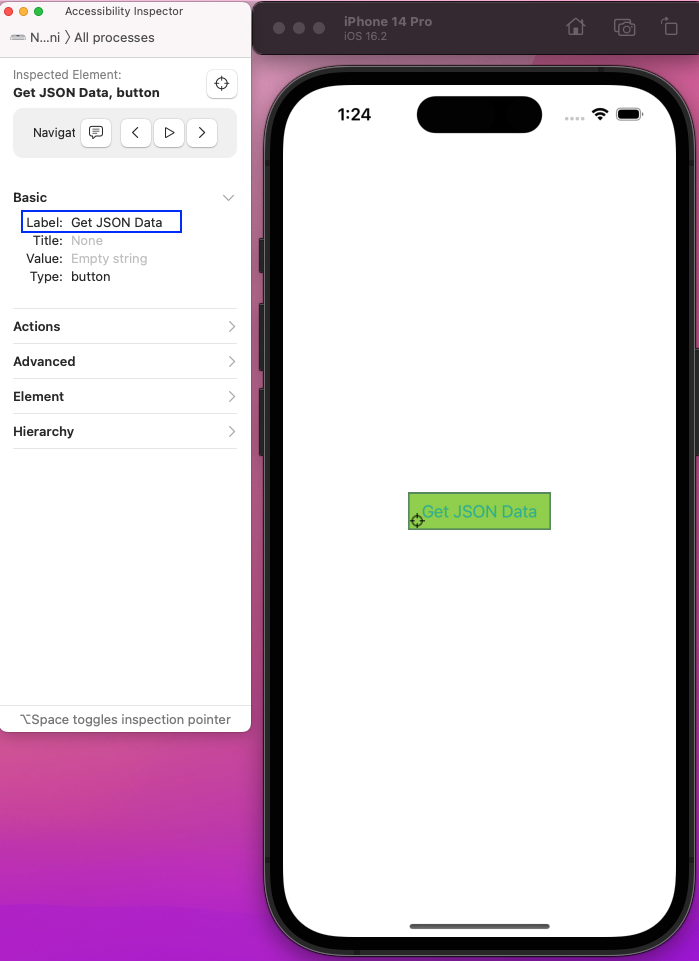
For testing, we need the unique ID for an element. For this, we'll use the Accessibility Inspector to get the unique IDs. Just open it by clicking on XCode > Open Developer Tool > Accessibility Inspector.
After that, open the simulator on the side and use the pointer to click on the button. Then, we'll get its unique ID of Label as Get JSON Data.
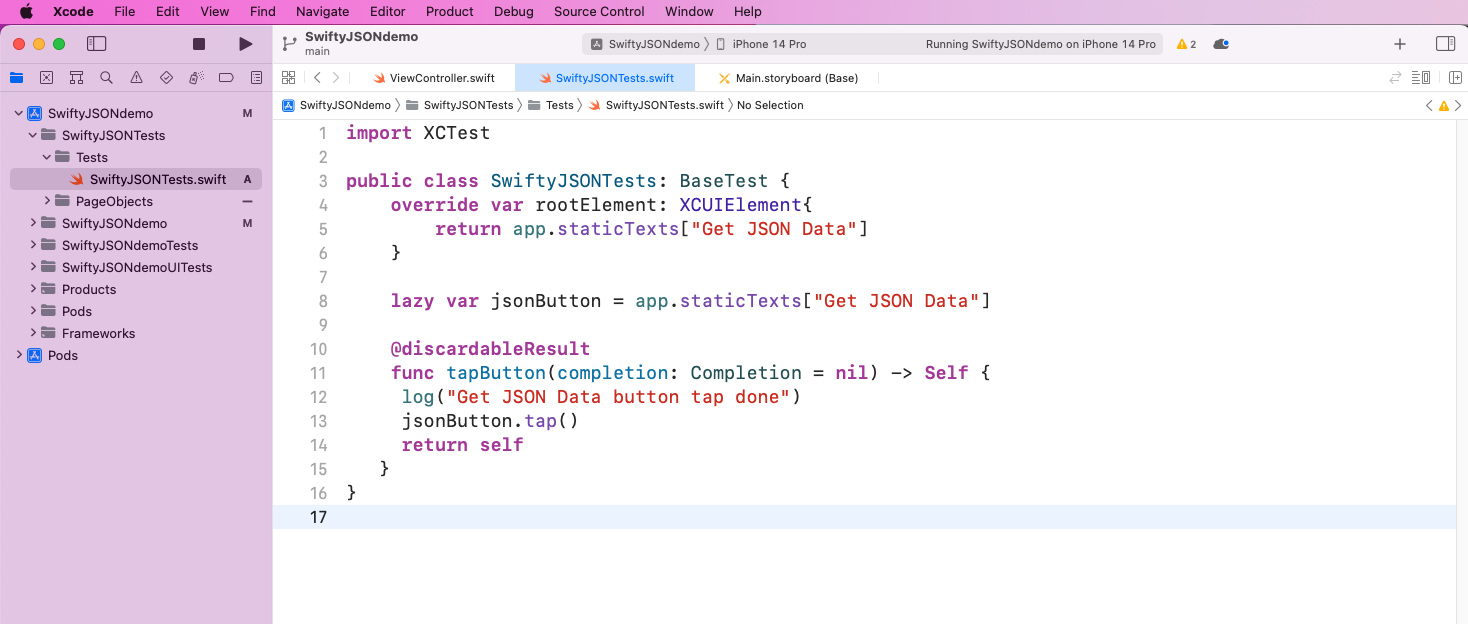
For testing, first, create the file SwiftyJSONTests.swift inside the Tests folder. Here, we'll create a jsonButton variable to get the element.
Next, we've created a tapButton function, which will tap on the button.
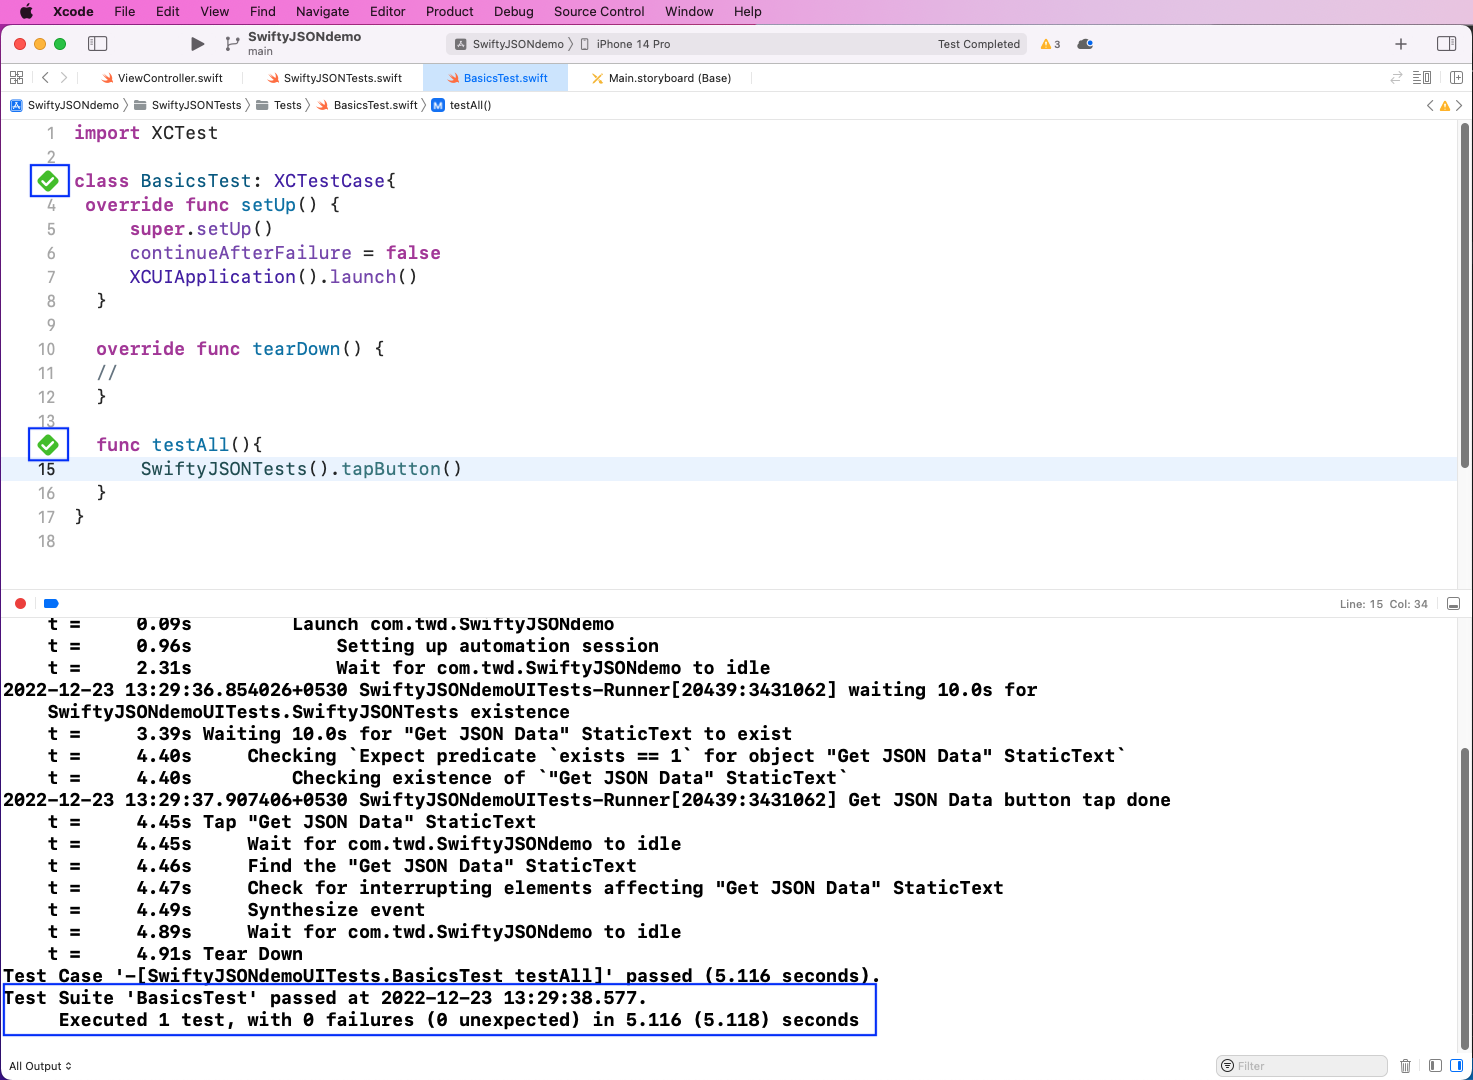
Finally, in the BasicTests.swift file, we'll call the SwiftyJSONTests class and then the tapButton function:

Upon clicking on the play test button in the project, our test will pass. All our test cases ran successfully, and the logs also confirmed that.
What We've Covered About SwiftyJSON
In this post, we talked about an easier way to parse JSON data using the SwiftyJSON library. We created a simple project in XCode and then parsed both the locally stored JSON file and the file from API using SwiftyJSON.
We also wrote simple test cases using XCUITest.
But writing test cases to test API calls used in the project can be very complex, as it requires mocking logic.
Instead of that, try Waldo, where you only need to provide the APK or IPA file. Then, just interact with the mobile app by pressing the button. Waldo will automatically generate test cases and email you the results.
Automated E2E tests for your mobile app
Get true E2E testing in minutes, not months.


