Waldo sessions now support scripting! – Learn more
App Development

How to Use UITabBarController With Swift

Juan Reyes
Juan Reyes
How to Use UITabBarController With Swift
December 6, 2022
18
min read

The purpose of this article is to prepare any Swift developer interested in expanding their knowledge or any mobile developer looking to learn more about Swift for the process of effectively implementing the UI element known as UITabBarController. To achieve this, I'll walk you through the process of creating a simple Swift app with a basic implementation of the UITabViewController. This app will show you the current time, the current weather in your location, and your current location on the map. 

You can take this as a pretty simple introduction to the world of Swift development. You can also check out my other Swift-related articles for more.

Now, before you start coding, it's essential that you understand the basics of the UITabBarController and the UIController framework that it's built on top of. So let's get into that. 

UITabBarController Basics

A UITabBarController, like all other UIController-based UI elements in an iOS developer's toolset, is known as a navigation interface, or as Apple puts it: "A container view controller that manages a multiselection interface, where the selections determine which child view controller to display."

A UITabBarController, like all other UIController-based UI elements in an iOS developer's toolset, is known as a navigation interface, or as Apple puts it: "A container view controller that manages a multiselection interface, where the selections determine which child view controller to display." 

What Is a TabController?

What this means is that, just like a hierarchy, the UITabBarController functions as a parent container handling the complexities of navigation for you while displaying only the child view the user is presently interacting with, offering a straightforward interface. 

One screen is visible at a time, keeping the UI simple and more approachable, while the rest of the views are accessible at the touch of the tab buttons on the bottom of the screen. 

Now, unless you've been living under a rock, you've seen these before. Here's an example to ensure we're all on the same page.  

screenshot iphone time


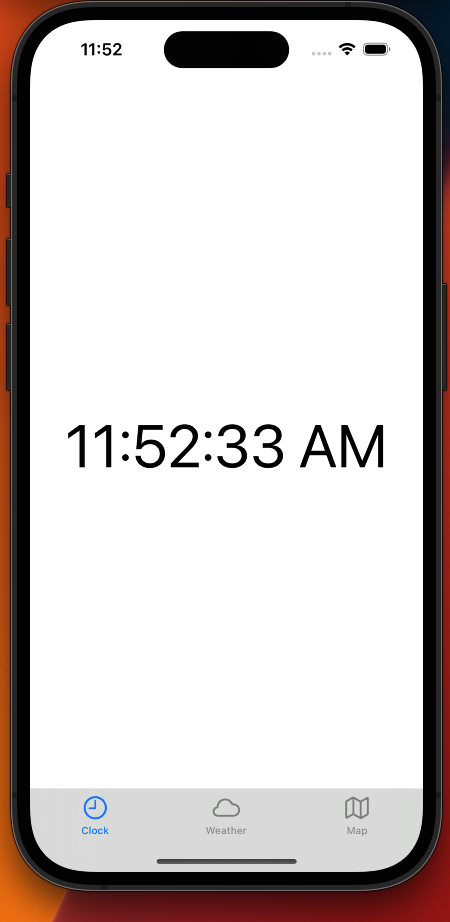
Simple, elegant, great. 

Let's build it. 

Creating a UITabBarController

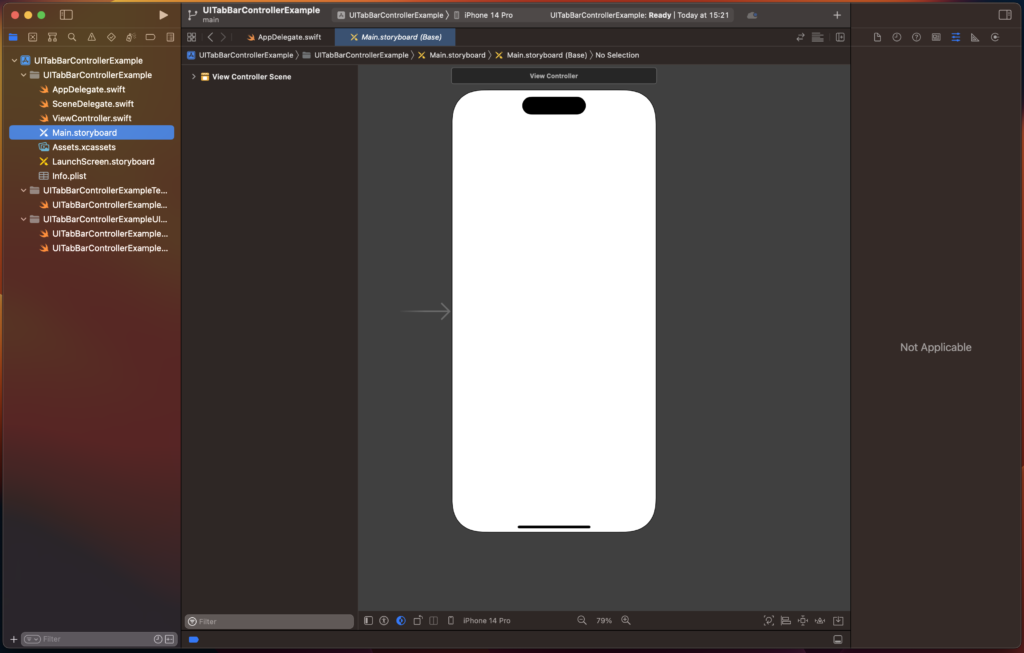
Open XCode and create a new iOS app. Select Storyboard as your design framework of choice, and move into the Main storyboard


screenshot creating open xcode


Note: If you want to know how to create great apps using SwiftUI, you should check out my other articles on the topic here. 

Great! Now, you need to add the UITabBarController as the default controller, since the one that XCode starts you with is just a standard UIViewController. 

Delete the original view controller and click on the plus (+) button on the top right of your developer tool. Then, search for the tab bar controller and simply drag it into the storyboard. 

screenshot uittabbarcontroller


And there you go. You have everything you need for your new and fancy tab bar app. Well, mostly... 

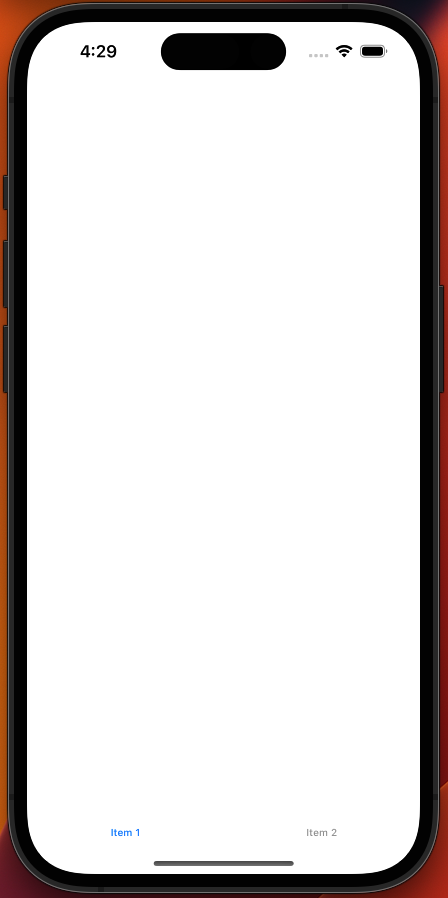
If you want to be adventurous and run your app, you'll see the following:  

screenshot blank iphone screen


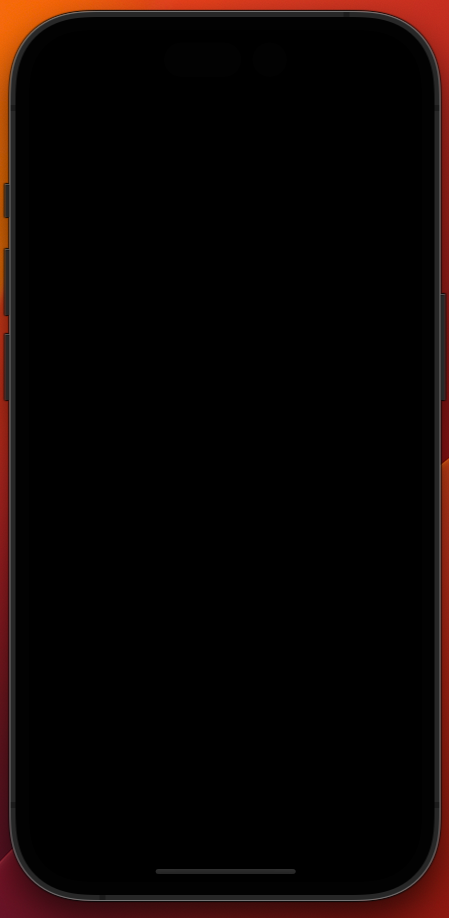
Now, what's going on here? First, let's check the console for some clues.   

code


All right, that's helpful. This basically means that the app doesn't have a view controller set as the starting point—a simple fix. 

Click on the parent controller, and then, in the settings tab on the right side corner, tick the Is Initial View Controller box. 


screenshot parent controller


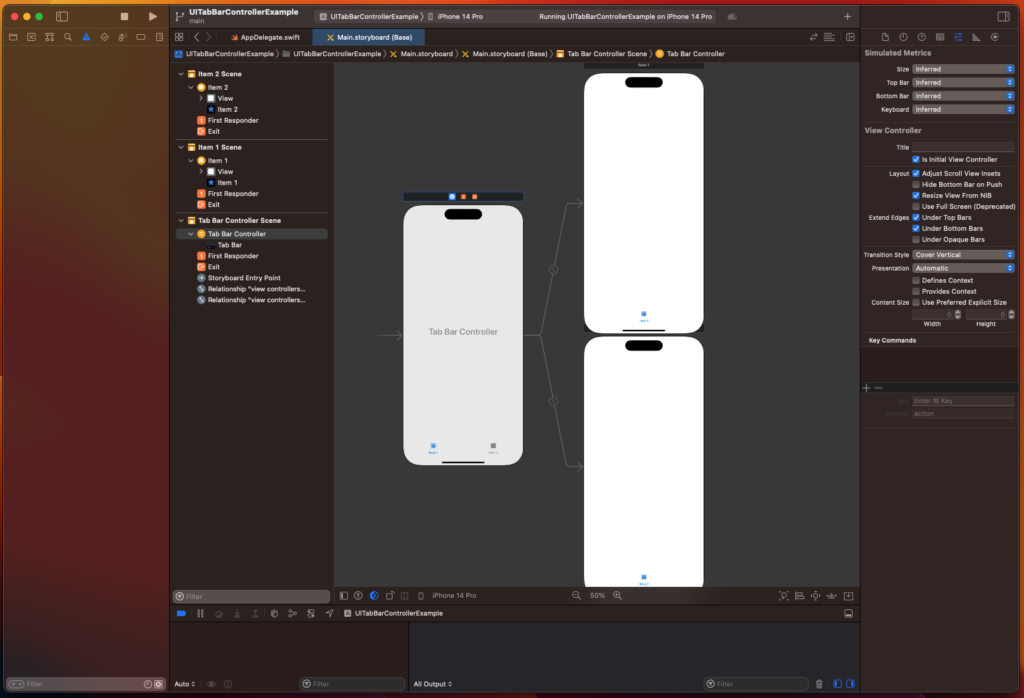
Now, rerun the code and...  

screenshot return the code

 All right. Now we're talking! 

Working on Your UITabBarController

So far, you've mostly been playing around with the default features and setup XCode offers. No code has been written. But don't worry, to actually use the power of the tab bar controller, you'll be programming some views in it that are actually more useful than a blank screen. 

Adding Some Views

The first view you'll add to your tab bar controller app is a simple clock. 

To simulate a clock, all you need is a single label that's constantly updated with the device's time every second. So, start by dropping a label and setting the view constraints and connections.  


screenshot simulating a clock


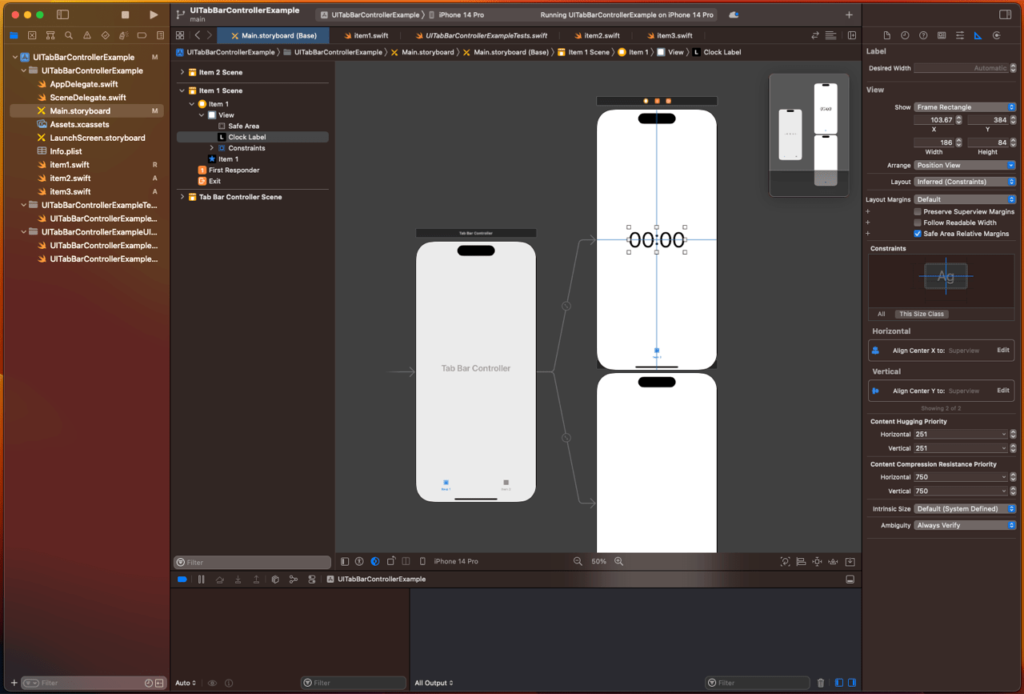
Now, create some Swift classes with their class definitions. You can call them item1.swift, item2.swift, and item3.swift on your project. Following that, go to the respective view on the storyboard and set the class of the view controller to be the class of item1

Once you've done that, go to the class and add the following code: 


//
//  ViewController.swift
//  TabBarControllerSample
//
//  Created by Juan Mueller on 11/19/22.
//  For more, visit www.ajourneyforwisdom.com

import UIKit

class ViewController: UIViewController {
    // Outlet for label
    @IBOutlet weak var clockLabel: UILabel!
    // Date formatter
    let dateFormatter = DateFormatter()
    
    override func viewDidLoad() {
        // Call the viewdidload super
        super.viewDidLoad()
        // Configure date formatter
        dateFormatter.dateStyle = .none
        dateFormatter.timeStyle = .medium
        // Schedule a timer to trigger every second to invoke method updateLabel
        Timer.scheduledTimer(timeInterval: 1,
                             target: self,
                             selector: #selector(updateLabel),
                             userInfo: nil,
                             repeats:true);
    }
    
    // Method that updates the label text witht he current date time
    @objc func updateLabel() -> Void {
        // Update the text of the clock label with the time of the current date
        clockLabel.text = dateFormatter.string(from: Date());
    }
}

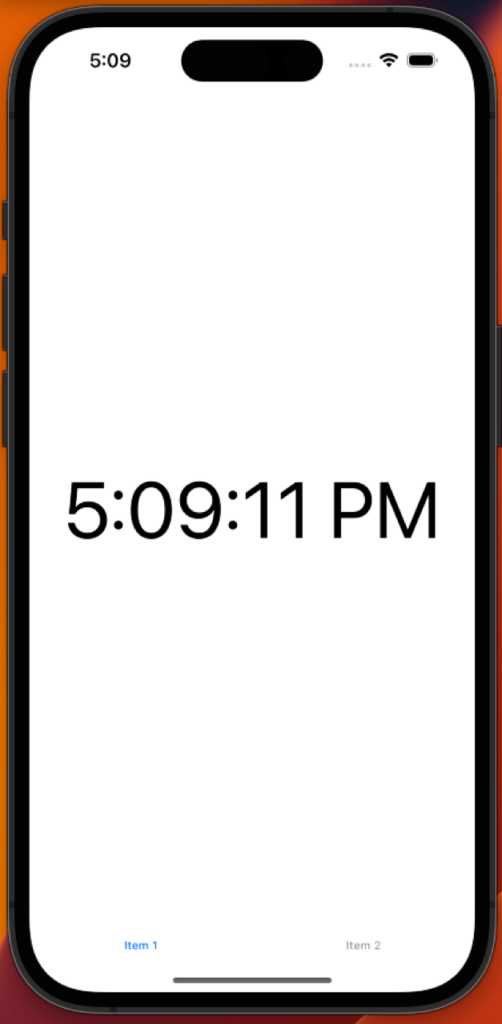
Finally, set the label referencing outlet to the label defined in the Swift class you created. Now, run your code, and you should see a clock running on the item1 tab.

screenshot of clock running


Adding More Views

For the second tab, let's add a new controller: a table view controller. This controller will display some weather information on a table structure. Nothing complicated. Start by dropping a TableViewController from the items, just as you did with the TabBarController. Then, with the control button pressed, drag a connection between the TabBarController and the TableViewController, and set the relationship as a child view reference. 

That's how you add more views to your tab bar. 

Following that, modify the code on your item2.swift class to the following: 


//
//  ViewController2.swift
//  TabBarControllerSample
//
//  Created by Juan Mueller on 11/19/22.
//  For more, visit www.ajourneyforwisdom.com

import Foundation
import UIKit

class ViewController2: UIViewController, UITableViewDataSource, UITableViewDelegate {
    // Outlet for tableView
    @IBOutlet weak var tableView: UITableView!
    // Weather data JSON property
    var wdata: [String: Any]?
    
    override func viewDidLoad() {
        // Call the viewdidload super
        super.viewDidLoad()
        // Always register the tableview cell with the corresponding identifier in the storyboard
        // so it can be reused
        tableView?.register(UITableViewCell.self, forCellReuseIdentifier: "dataCell")
        // Set the tableview datasource to self
        tableView?.dataSource = self
        // invoke the requestWeatherData method and handle its completion
        requestWeatherData {
            // Code inside this block will be executed in the main thread
            DispatchQueue.main.async { [self] in
                // Reload the tableview
                tableView?.reloadData()
            }
        }
    }
    
    func tableView(_ tableView: UITableView, cellForRowAt indexPath: IndexPath) -> UITableViewCell {
        // Retrieve the registered reusable cell from the tableview
        let cell: UITableViewCell = tableView.dequeueReusableCell(withIdentifier: "dataCell",
                                                                  for: indexPath)
        // Switch between the 4 possible rows to display
        switch indexPath.item {
        case 0:
            // Set the cell text
            cell.textLabel?.text = "Temp: " + (wdata != nil ? "\((wdata!["current_weather"] as! [String : Any])["temperature"] ?? "---")" : "---")
            break
        case 1:
            // Set the cell text
            cell.textLabel?.text = "Elevation: " + (wdata != nil ? "\(wdata!["elevation"] ?? "---")" : "---")
            break
        case 2:
            // Set the cell text
            cell.textLabel?.text = "Wind speed: " + (wdata != nil ? "\((wdata!["current_weather"] as! [String : Any])["windspeed"] ?? "---")" : "---")
            break
        case 3:
            // Set the cell text
            cell.textLabel?.text = "Feels like: " + (wdata != nil ? "\(((wdata!["daily"] as! [String : Any])["apparent_temperature_max"] as! [NSNumber])[0])" : "---")
            break
        default:
            break
        }
        // Return cell
        return cell
    }
    
    func tableView(_ tableView: UITableView, heightForRowAt indexPath: IndexPath) -> CGFloat {
        // Set the height of cells as fixed
        return 60.0
    }
    
    func tableView(_ tableView: UITableView, numberOfRowsInSection section: Int) -> Int {
        // Set the number of rows to 4
        return 4
    }
    
    // Method that requests the weather data to meteo and updates the wdata property
    func requestWeatherData(_ completion: @escaping () -> Void) {
        // create the url
        let url = URL(string: "https://api.open-meteo.com/v1/forecast?latitude=32.22&longitude=-110.93&daily=temperature_2m_max,temperature_2m_min,apparent_temperature_max,apparent_temperature_min,sunrise,sunset¤t_weather=true&temperature_unit=fahrenheit&timezone=America%2FLos_Angeles")!
            
        // now create the URLRequest object using the url object
        let request = URLRequest(url: url,
                                 cachePolicy: .reloadIgnoringLocalAndRemoteCacheData,
                                 timeoutInterval: 30.0)
            
        // create dataTask using the session object to send data to the server
        let task = URLSession.shared.dataTask(with: request, completionHandler: { [self] data, response, error in
                
           guard error == nil else {
               return
           }
                
           guard let data = data else {
               return
           }
                
          do {
             //create json object from data
             if let json = try JSONSerialization.jsonObject(with: data, options: .mutableContainers) as? [String: Any] {
                 // Update wdata property
                 wdata = json
                 // Call completion handler
                 completion()
             }
          } catch let error {
            print(error.localizedDescription)
          }
        })
        // Trigger request
        task.resume()
    }
}

I know it's a lot of code, but don't let it intimidate you. Most of it is standard code used on all table view designs, and it's pretty straightforward.

For now, focus on the @IBOutlet

Like last time, you need to connect the view from the storyboard to the actual class. You can do this similarly by dragging and dropping with the control button pressed. 

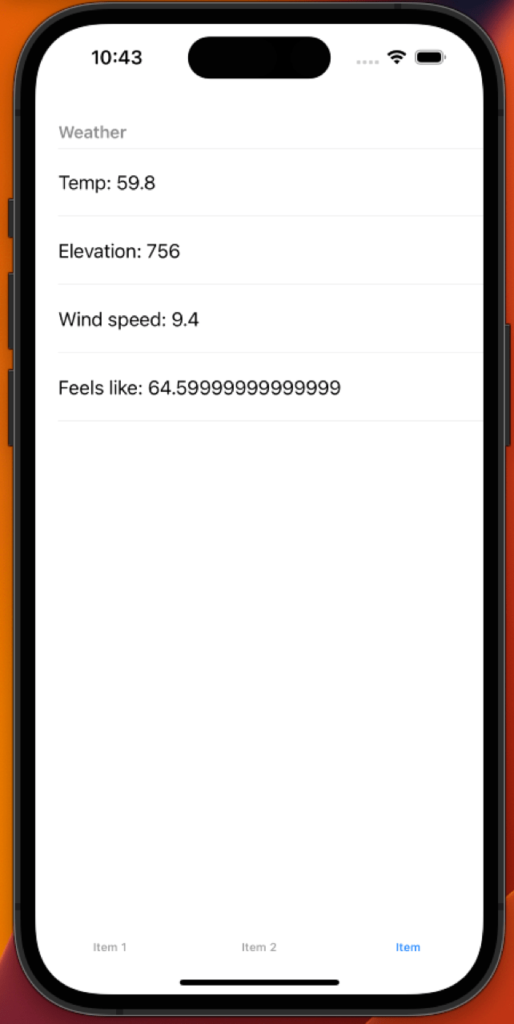
Now, rerun your code, and it should show you the weather information like the following:  

screenshot reunning code


Now, for the final view, let's drop a MapView on the last view controller associated with the tab bar and expand it to fit the view edges. Again, don't forget to set the constraints to match the edges. Otherwise, it won't keep the size, depending on the device. 

Put the following code on the item3.swift class and connect the @IBOutlet accordingly. 


//
//  ViewController3.swift
//  TabBarControllerSample
//
//  Created by Juan Mueller on 11/19/22.
//  For more, visit /www.ajourneyforwisdom.com

import Foundation
import UIKit
import MapKit
import CoreLocation

class ViewController3: UIViewController, MKMapViewDelegate, CLLocationManagerDelegate {
    // Outlet for mapView
    @IBOutlet weak var mapView: MKMapView!
    // Location manager property
    var locationManager: CLLocationManager?
    
    override func viewDidLoad() {
        // Call the viewdidload super
        super.viewDidLoad()
        // Initialize location manager
        locationManager = CLLocationManager()
        // Configure location manager to request for location permission
        locationManager?.delegate = self
        locationManager?.requestAlwaysAuthorization()
        locationManager?.requestWhenInUseAuthorization()
        locationManager?.desiredAccuracy = kCLLocationAccuracyBest
        // Configure map view
        mapView.delegate = self
        mapView.mapType = .standard
        mapView.isZoomEnabled = true
        mapView.isScrollEnabled = true
    }
    
    func locationManagerDidChangeAuthorization(_ manager: CLLocationManager) {
        // Check if permissions are not available
        if manager.authorizationStatus == .denied ||
            manager.authorizationStatus == .restricted ||
            manager.authorizationStatus == .notDetermined {
            return
        }
        // Trigger location retrieval
        locationManager?.startUpdatingLocation()
    }
    
    func locationManager(_ manager: CLLocationManager, didUpdateLocations
                         locations: [CLLocation]) {
        // Initialize coordinate with user location data
        let locValue:CLLocationCoordinate2D = manager.location!.coordinate
        // initialize default map span and region
        let span = MKCoordinateSpan(latitudeDelta: 0.05, longitudeDelta: 0.05)
        let region = MKCoordinateRegion(center: locValue, span: span)
        // Set map region to frame the mapView on a specific region
        mapView.setRegion(region, animated: true)
        // Initialize map annotation (pin)
        let annotation = MKPointAnnotation()
        annotation.coordinate = locValue
        annotation.title = "You are Here"
        // Add annotation on map view
        mapView.addAnnotation(annotation)
    }
}

Here, you'll also need to set the permissions to your current location on the info.plist file so that the device requests them on load. 

Now rerun your app, and that's it. You got an interactive map centered on your location! 

Customizing the TabBarController

As you've seen, working with a TabBarController is pretty straightforward. Adding your views is pretty much a drag-and-drop affair, and ensuring you have your outlets adequately set is easy. And if you want to make further customizations to the tab bar section, well, that's pretty simple too.

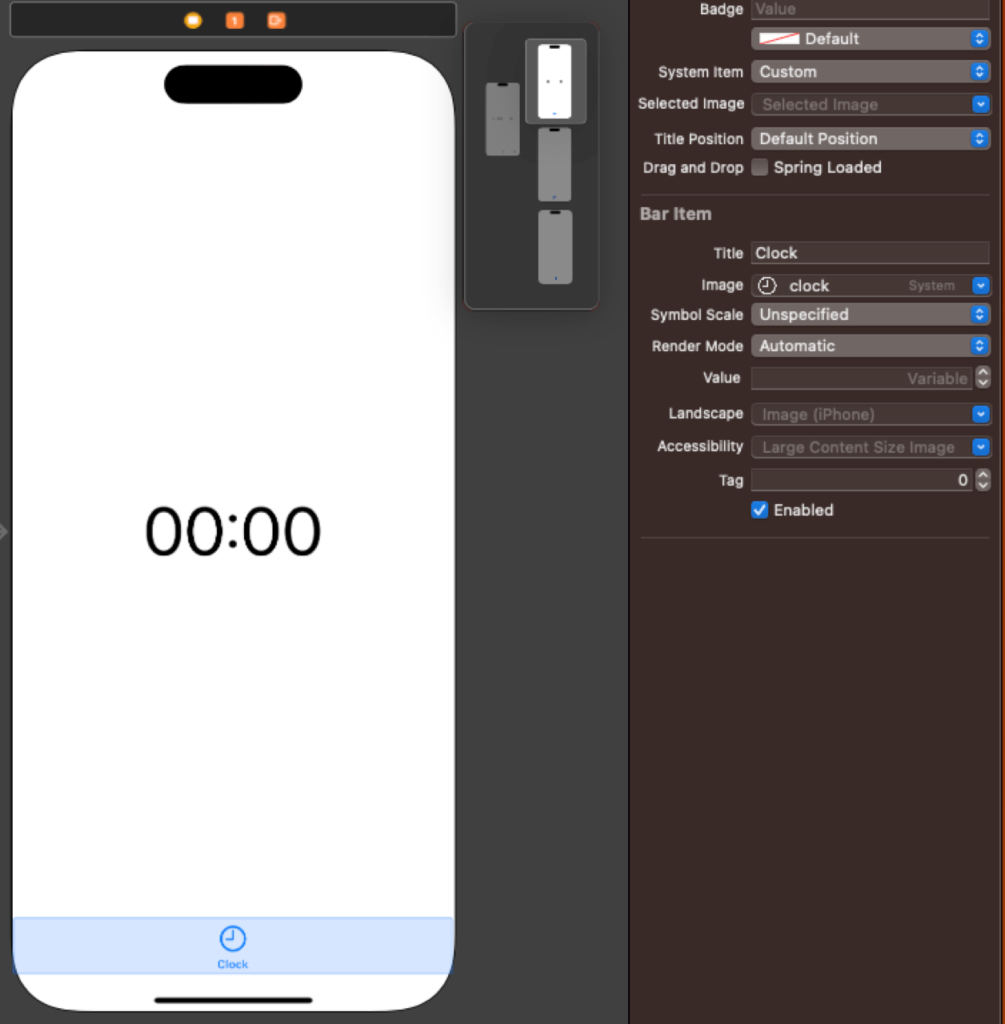
First, to change the text and icon for the pages, you can do so on the corresponding view controller settings.  

screenshot changing text icons

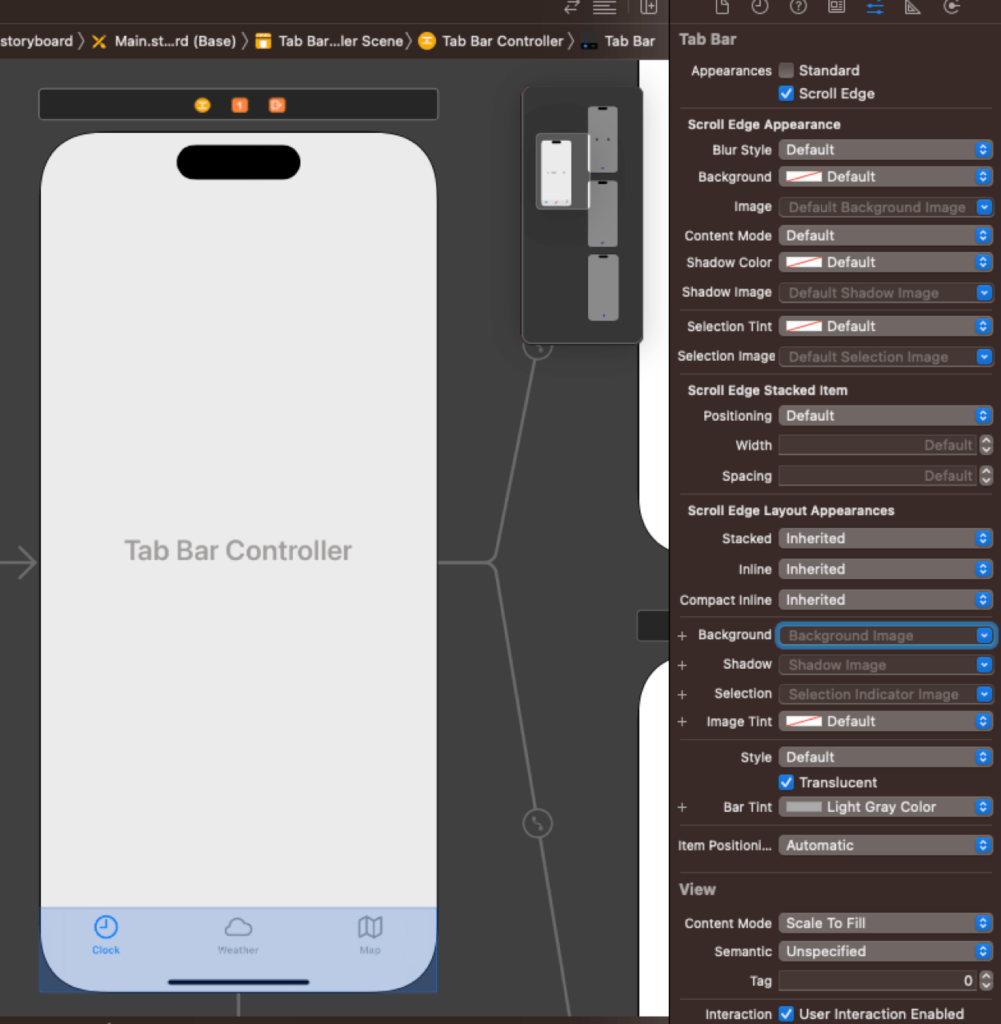
 Secondly, to change the style and format of the tab bar, you can modify the settings in the TabBarController bar itself. For example, you can set the background, font, tint, style, and, most importantly, appearance. 

This last setting controls whether the tab bar lives on top of your content (Scroll Edge) or below it (Standard). If it lives on top, the content will be partially visible underneath with transparency when you scroll. However, you can change this, if you prefer. 

screenshot of setting controls

 You can find the complete project here

I recommend you that you play to your heart's content and try to make the best out of the features available. However, if you're working on a large project and you need to ensure your code is ready for prime time, you'll need to do some serious testing

Testing can be difficult and time consuming. But it doesn't have to be. If you're looking for a more comprehensive and convenient testing solution, I recommend starting a trial with Waldo's extensive toolset for UI testing. It requires no coding and is very approachable, even for beginners. 

Moving On

In the world of mobile development, there are very few staples of tried-and-tested UI structures like the tab bar. Perhaps due to its simplicity and ease of use, it's one of the most common design patterns followed by apps all over the App Store. 

And this is not a situation unique to Apple. Android has an even more prominent representation of this design pattern in its library, with the vast majority of apps making use of it to switch between maybe two or three screens. 

It's clear that if you want to take your journey in the world of mobile development to the next level, the tab view is a tool you need to master and have in your toolset.

Automated E2E tests for your mobile app

Waldo provides the best-in-class runtime for all your mobile testing needs.
Get true E2E testing in minutes, not months.

Reproduce, capture, and share bugs fast!

Waldo Sessions helps mobile teams reproduce bugs, while compiling detailed bug reports in real time.