
Android Unit Testing
.webp)
Android unit testing is one of the many types of testing developers can perform. It’s the smallest unit of automated testing for Android. As a result, this type of testing validates the behavior of a small piece of code, like a class or method.
Usually, your Android app project consists of several files, one of which is a class file. Inside a class file, you write methods or functions that perform specific tasks or objectives. Unit testing tests these methods or functions to confirm that they behave correctly and return the right values.
For instance, an app that displays the current age of a user after they insert their year of birth may have a function for calculating the age. A unit test can verify that the function works as expected even before you deploy the entire app to a device or emulator. Hence, unit tests help you catch bugs early.
A couple of the upsides of unit testing are that it's fast and runs on the IDE. Writing unit tests in Android requires some libraries and procedures for working with these libraries. In this post, we walk through a step-by-step guide for setting up the libraries and writing your first unit tests for Android.
Prerequisites
In order to follow along better, make sure to have the following:
- Android Studio
- Basic knowledge of writing code in Kotlin or Java
Steps
For this tutorial, we'll describe an example birthday app. First, we’ll create this learning project to guide you through writing unit tests.
1. Create New Project
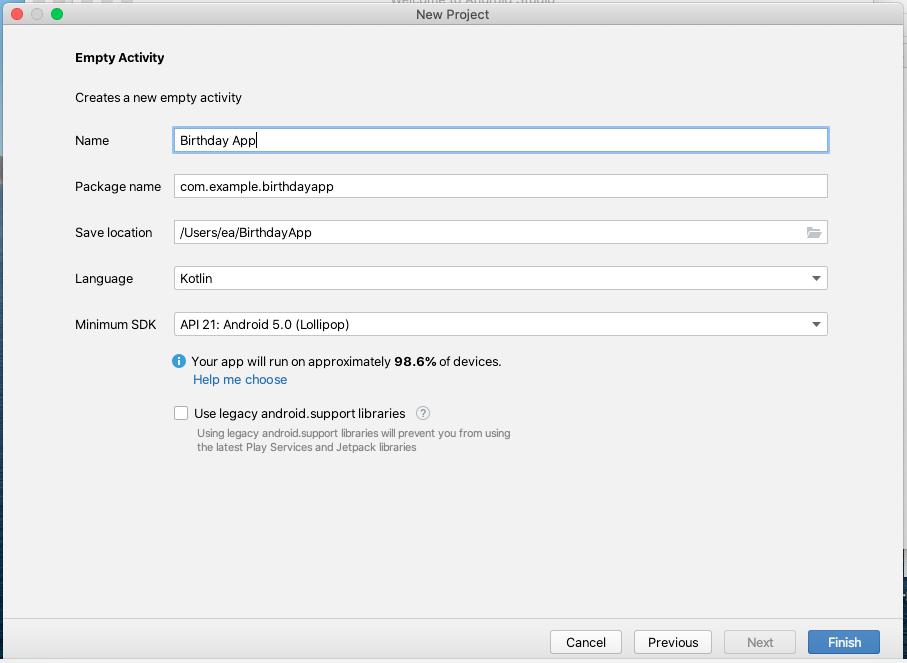
Open Android Studio and navigate to New -> Project or click on New Project from the Welcome screen. Create a new project by selecting Empty Activity, and name it Birthday App.
Once your new project is ready, Android Studio will generate some default files for the project. You can find these files in the project files pane to the left.
2. Create New Class File
After creating the project, let's add a class file to it. This class file will contain the actual methods that we'll be writing unit tests for later.
In order to create the class file, from the project files pane, right-click on the main package ("app/src/main/java/com.example.birthdayapp") and select New -> Kotlin class/file. Save the class as Utils.kt.
Once that's done, add a new function to the file. We'll add an empty getCurrentAge() function to the Utils class with the code below:
3. Create Test Class
Right-click on the class name and select Generate -> Test to start up the Create Test Wizard.
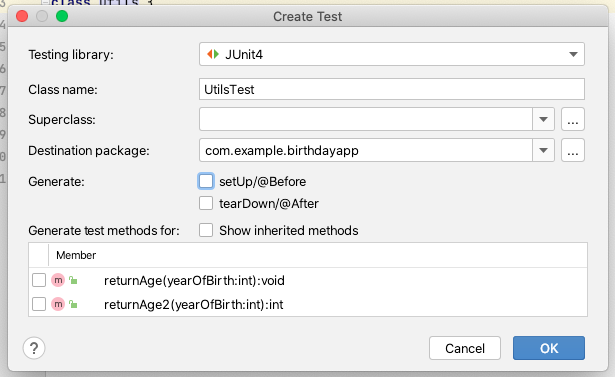
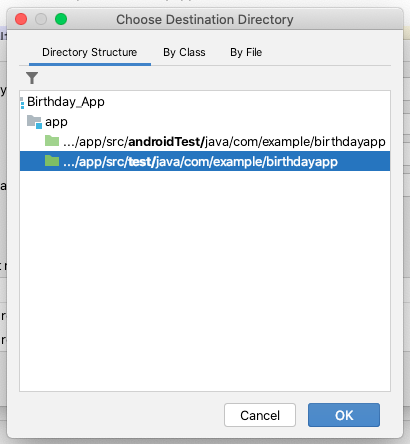
Select JUnit4 as your Testing library and leave the test class name as UtilsTest. Next, uncheck all checkboxes and click OK. This should open the Choose Destination Directory dialog, where you can select the option that begins with .../app/src/test from the test directory list. Avoid selecting the directory that begins with .../app/src/androidTest, because that directory saves files for other kinds of tests, like end-to-end tests, but not unit tests.
When finished, you should have a new test class inside the app/src/test directory. In the next step, we'll start writing our test in the class.
4. Write First Test
We'll write the test for our method even before we finish writing the logic for it, following a common practice in automated testing. Also, by doing this, our test starts by failing and eventually passes when we finish writing the method.
The content of the UtilsTest file should look similar to this at the moment:
The first change we'll introduce is adding the @RunWith annotation to the class. To do this, add the following code on a new line, just above the class UtlisTest:
Next, let's write a new test function inside UtilsTest. Add the following code inside the class:
A test function looks very similar to a regular Kotlin function, with the major difference being the presence of the annotation @Test. Ensure you always add this annotation to every individual test function. Failing to do so causes the system to ignore your test function.
Inside the returnsValidAge test function, we call the assertEquals() function from JUnit4. The first argument indicates the number for the current age we expect the actual getCurrentAge() function in our app to return. The second argument calls the getCurrentAge function with 1994 as the year of birth.
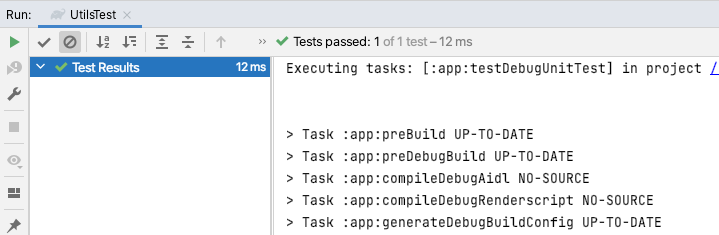
5. Run Test
You can run Android unit tests in few different ways. The easiest way is to hit the green Play button next to the test function. Alternatively, you can hit the play button next to the class keyword. However, using this second option will run all tests in your test class, should you have more than one test function.
Hit the Play button next to the returnsValidAge test function and observe the result. This test should fail with the following output:
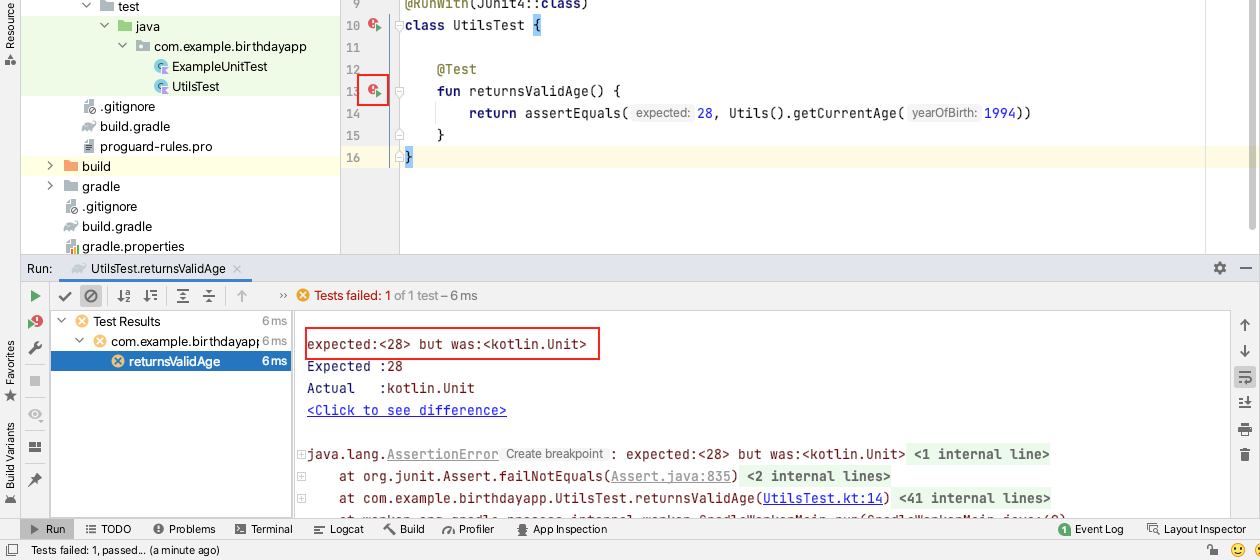
Notice that our test fails with a message “expected:<28> but was:<kotlin.Unit>.” This happens because we don't actually have any code in the function we tested. Also, our function should return an integer, but it currently returns void (or Unit in Kotlin). In the next step, we'll fix this by completing our app's Utils function.
6. Write App Function
In Step 2, we left the getCurrentAge() function empty intentionally, and now we’ll add the logic for the function. To do that, open the Utils class and update getCurrentAge() to look like this:
The above code subtracts the year of birth from 2022 to return the user's current age.
Re-run the test again and it should pass, because someone born in 1994 will be 28 years old in 2022.
Testing Tools/Libraries
In this section, we discuss the testing tools we used in this post. Note that we didn’t import any extra dependencies in build.gradle to run our test. We didn’t need to because we used the default unit testing tools that come configured in a new project.
JUnit 4
JUnit is a popular framework for writing repeatable unit tests. It has several versions, and at the time of writing this post, Android Studio sets the default for a new project as Junit 4. However, you can change the version of JUnit for your tests depending on your needs. You can make this change from the app-level build.gradle file. For our example test, JUnit 4 works perfectly.
Google Truth
Google Truth is a custom test assertion library. You can use it together with JUnit 4 to write unit tests. A major advantage of Google Truth is that it improves the readability of assertions and test failure messages. However, for our example, we used the JUnit 4's assertion function because we want to keep things simple and reduce the number of initial setup steps.
Conclusion
In this post, we defined unit testing as the smallest type of automated test. In addition, we walked through the steps to perform Android unit testing. You can find the complete source code for the example app here. Unit testing just saved us time because we could test this function of our app without even interacting with a user interface.
In order to build more stable apps, you should test extensively. Automated testing with unit testing is one way to test more efficiently.
Check out Waldo to learn more about Android testing.
This post was written by Peter Morlion. Peter is a passionate programmer that helps people and companies improve the quality of their code, especially in legacy codebases. He firmly believes that industry best practices are invaluable when working towards this goal, and his specialties include TDD, DI, and SOLID principles.