


.jpg)
Automation testing with Appium requires some ID to identify the on-screen element. There are many kinds of IDs and tools to identify those IDs.
In our earlier post on accessibility IDs, we used these programmatically created IDs to identify elements. In this post, we'll cover another type of ID called UISelector in depth. Then, we'll learn how to use UISelector in an app.
.png)
What Is UISelector in Appium?
Appium uses the UI Automator framework from Android to interact with connected Android devices or an emulator. Now, through this UI Automator framework, we have a UISelector API available.
It's also a locator strategy that's used to identify elements in the app. All automation testing, including with Appium, requires some unique ID to identify the element in the app. We can use the IDs, XPath, and accessibility IDs for the same.
But when using an Android device, we can also use UISelector. Let's look at an example.
Here, we're first using the MobileBy method from Appium and calling the AndroidUIAutomator function in it. Then, select the ScrollView class with the UiSelector API. After that, get the child of it with the getChildByText function. Inside this function, find the TextView called Learn.
As we see above, we can find some deeply nested elements just with chaining functions.
Advantages of UISelector
- It's an Android standard and well-maintained by the Android team.
- UISelector can be used to find deeply nested element IDs. It's not possible to use only element IDs.
- XPath can also help us to get deeply nested element IDs. But XPath is slow and not advised for use. This is not the case with UISelector, which is quite fast.
Disadvantages of UISelector
- It can be used only to test apps running on an Android phone or emulators. UISelector is not available for iOS devices.
- The queries to find deeply nested elements can become complicated soon. Using accessibility IDs is a better approach.
Project Setup
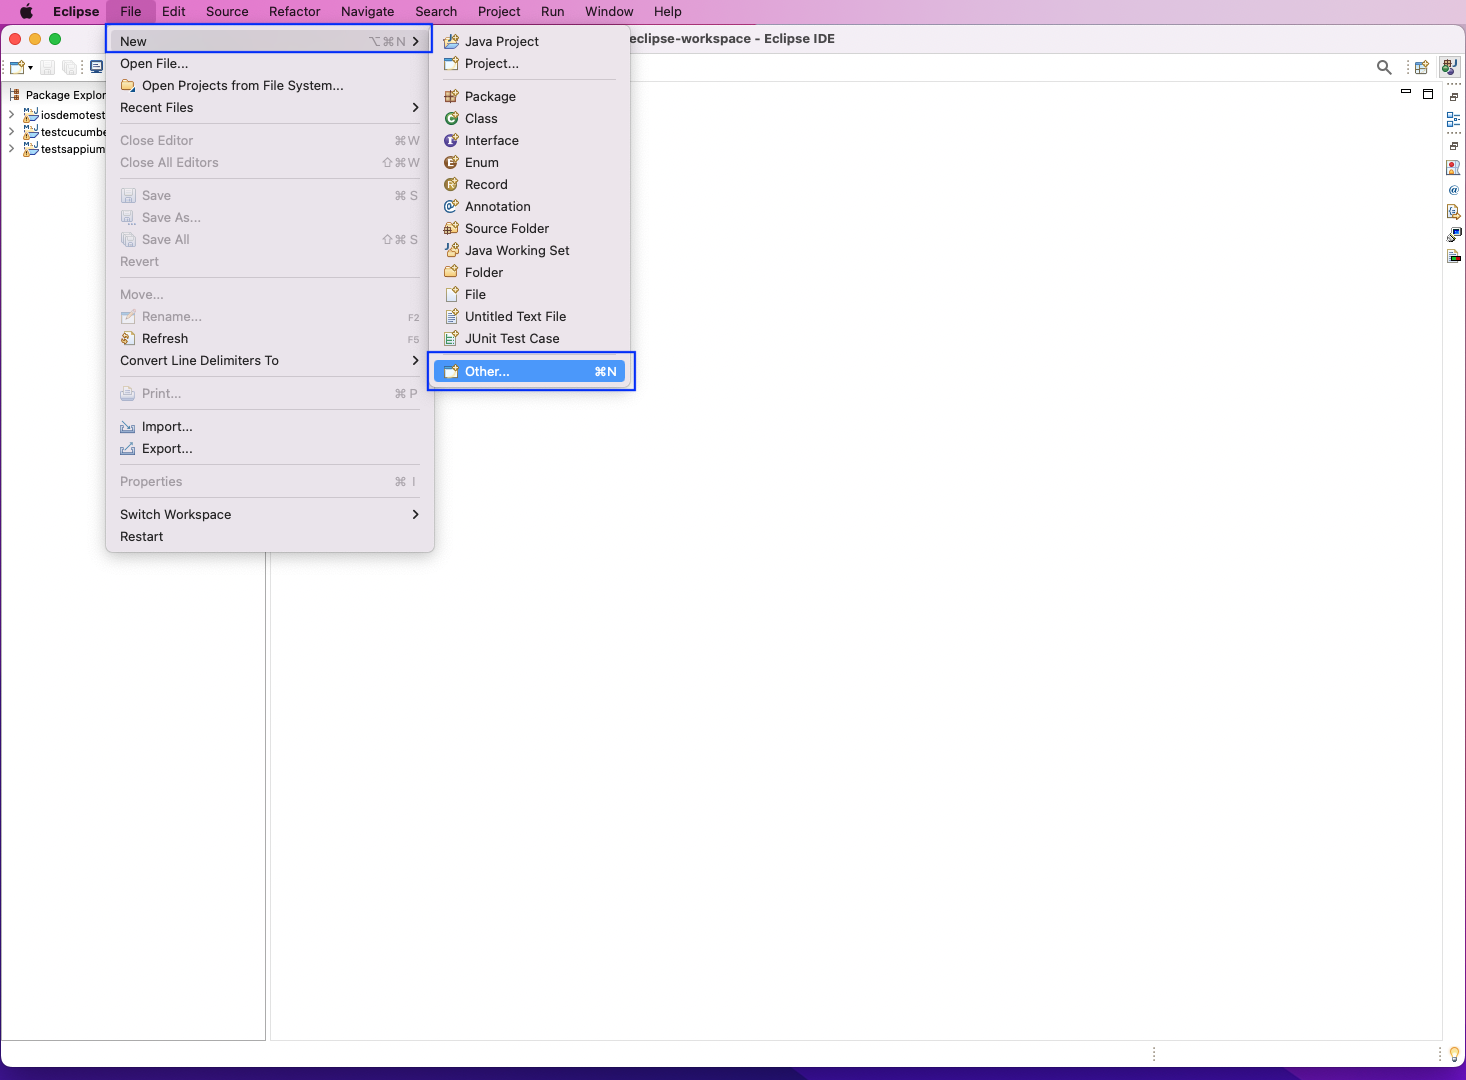
Now, let's write our test cases in Java. The Java IDE (integrated development environment) of Eclipse will be used to write our test cases. Open Eclipse, and then, click on File > New > Other.
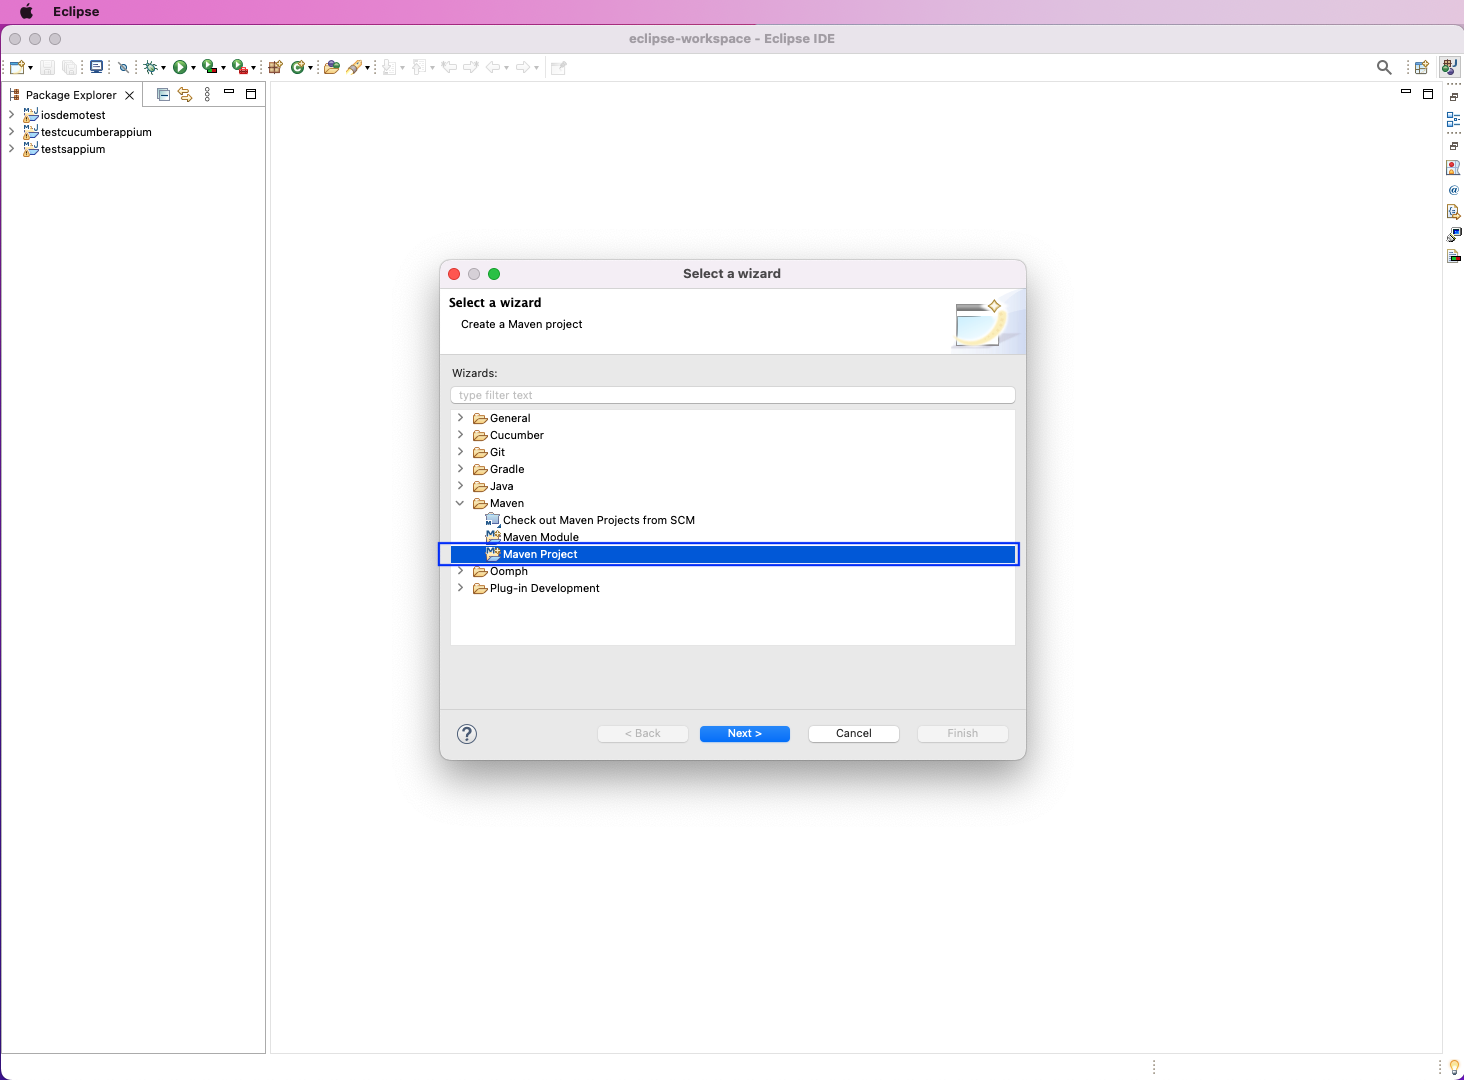
After that, select "Maven Project" and click on "Next."
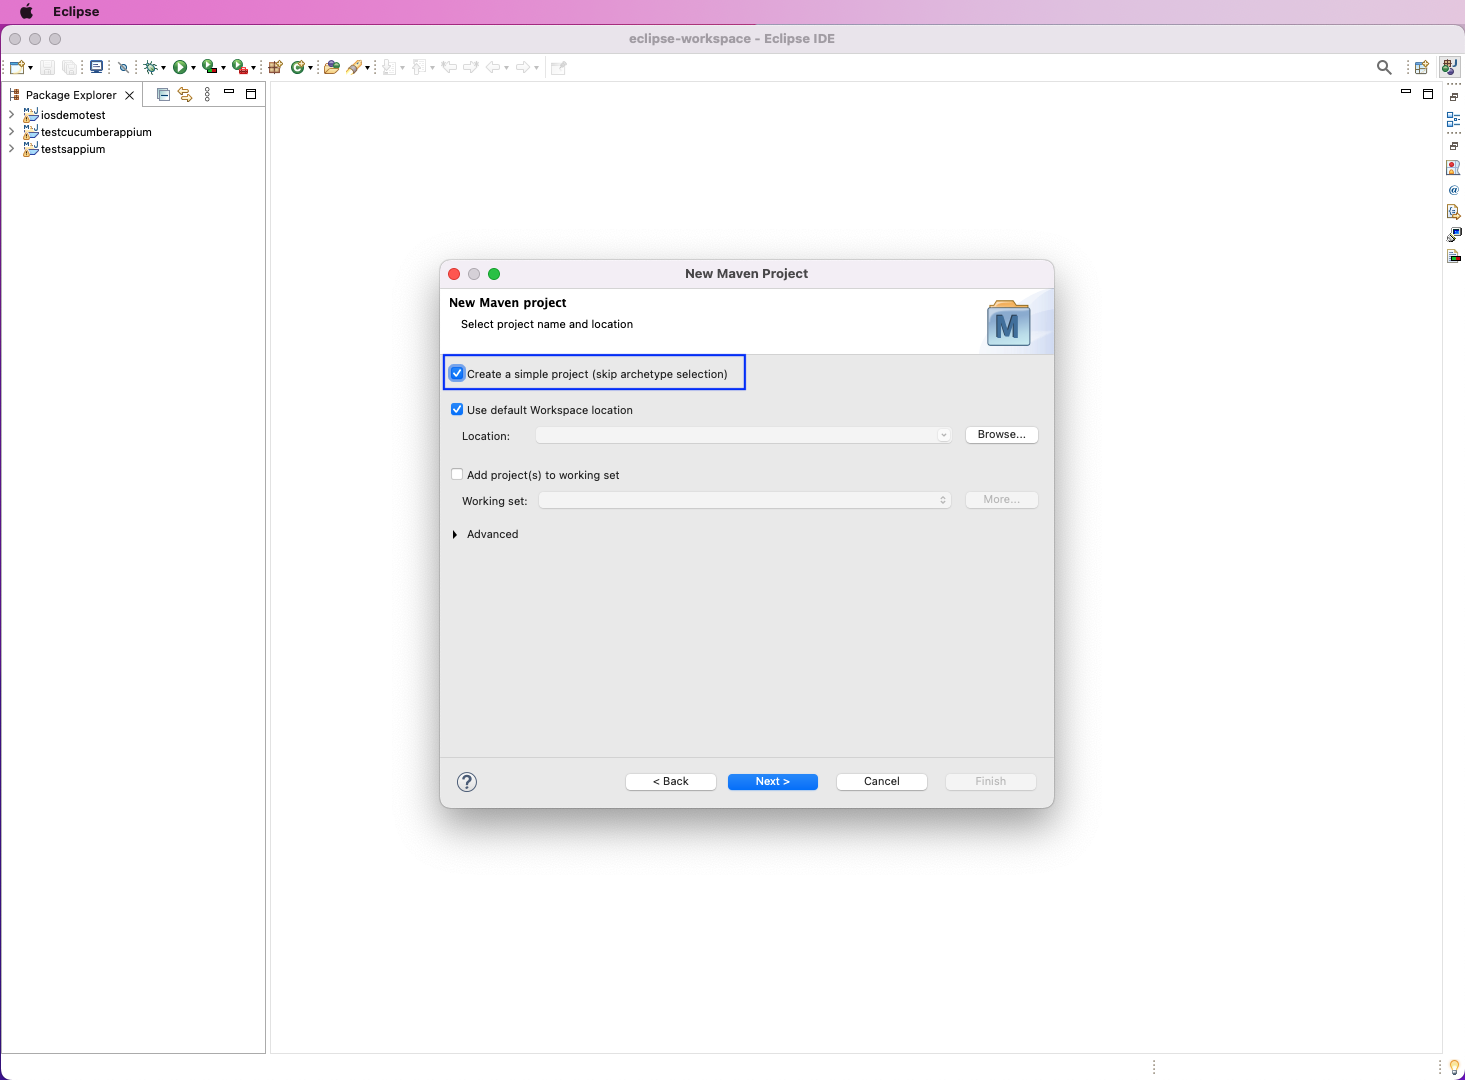
Make sure that the first checkbox with the text "Create a simple project" is clicked. Then, click on the "Next" button.
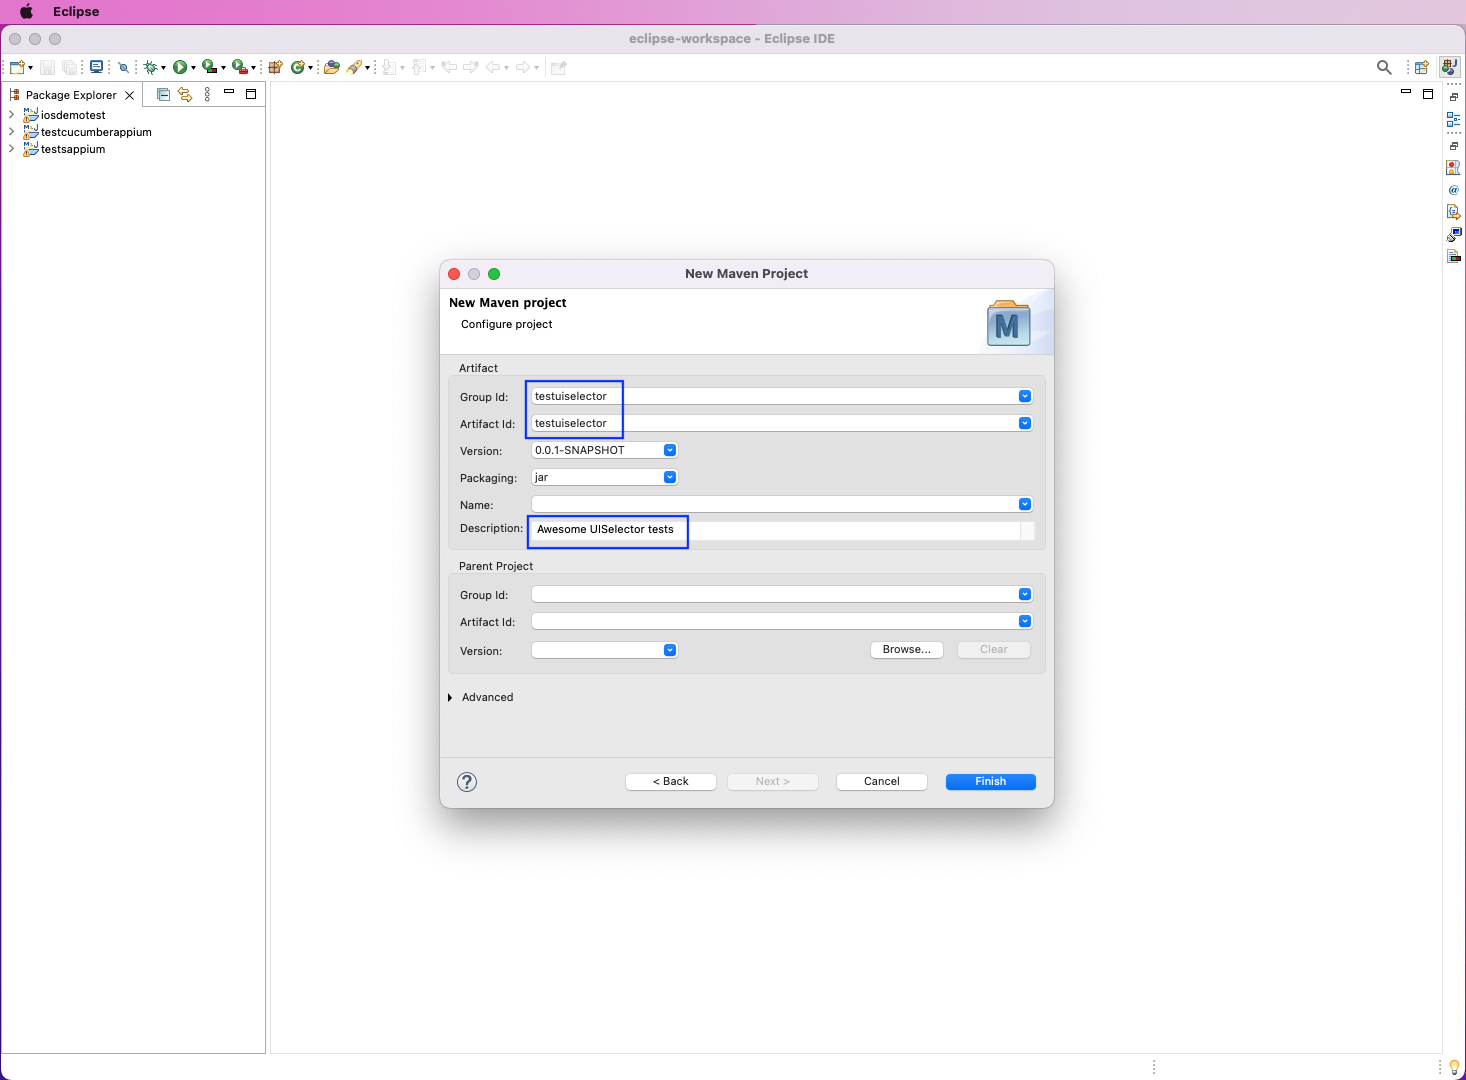
In the next pop-up, give the Group ID and Artifact ID, which is TestUISelector in our case. Note that both of them should be the same. Also, give some descriptions. After that, click on the "Finish" button.
Installing Dependencies
We need to add various Appium dependencies to our project. For this, we need to go to the MVN Repository to get them. The detailed steps and dependencies can be found in the "UIAutomator in Appium" section of our UI Automator blog.
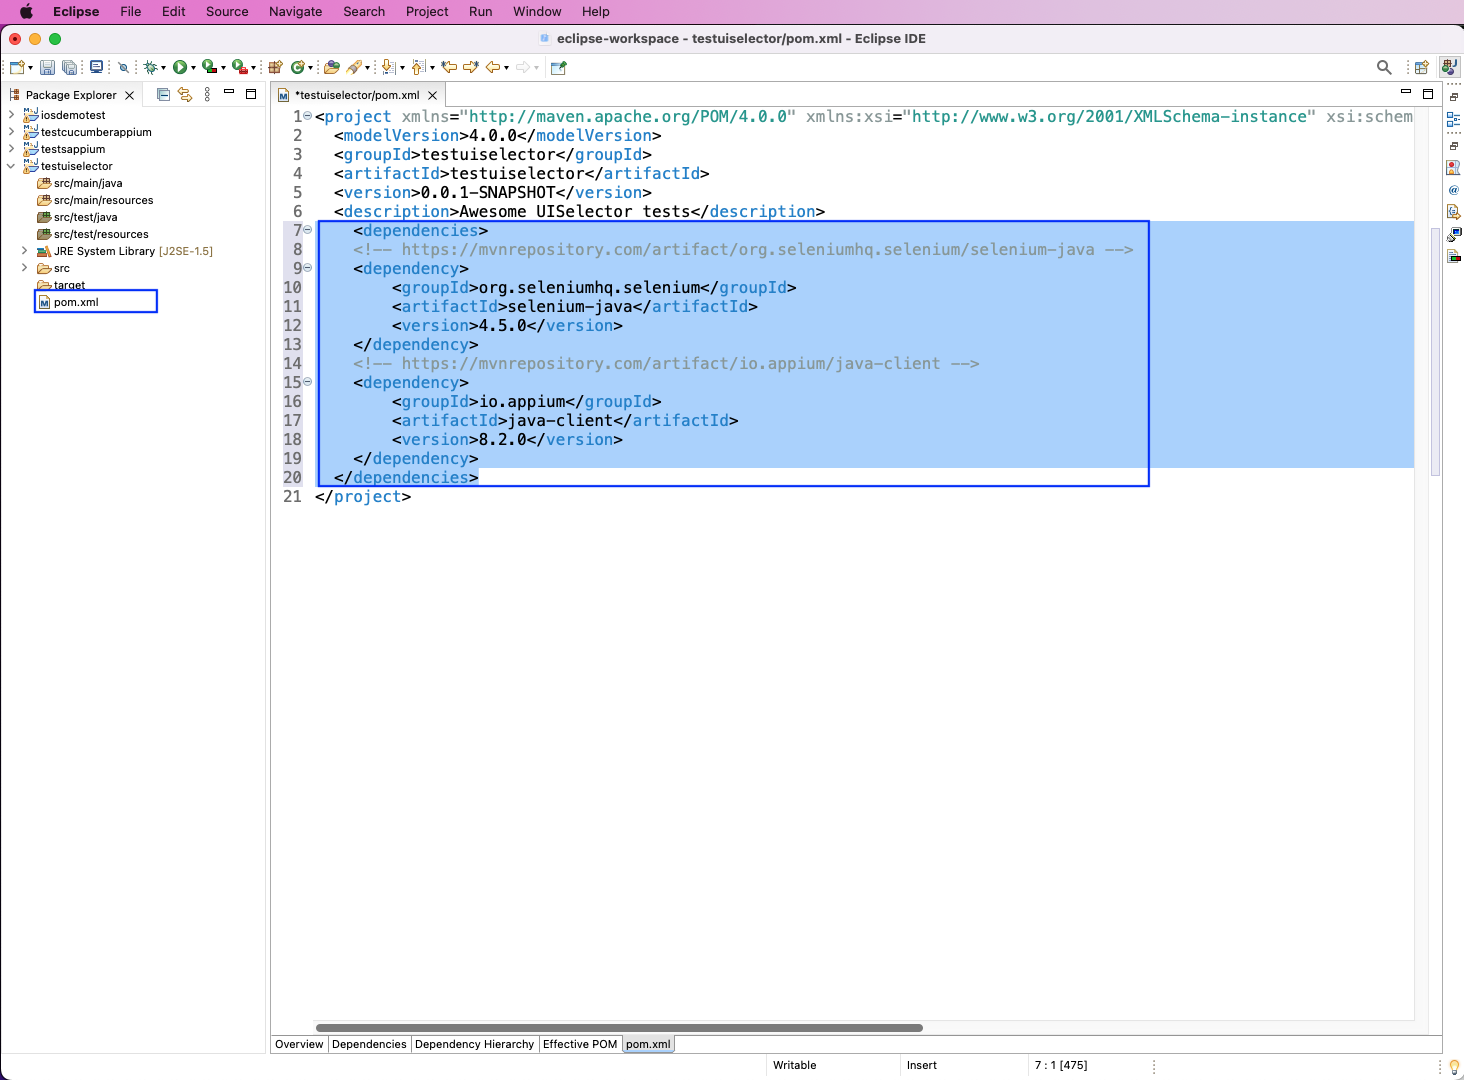
Following the blog, we've added the dependencies below in our pom.xml file.
Test Cases With Java
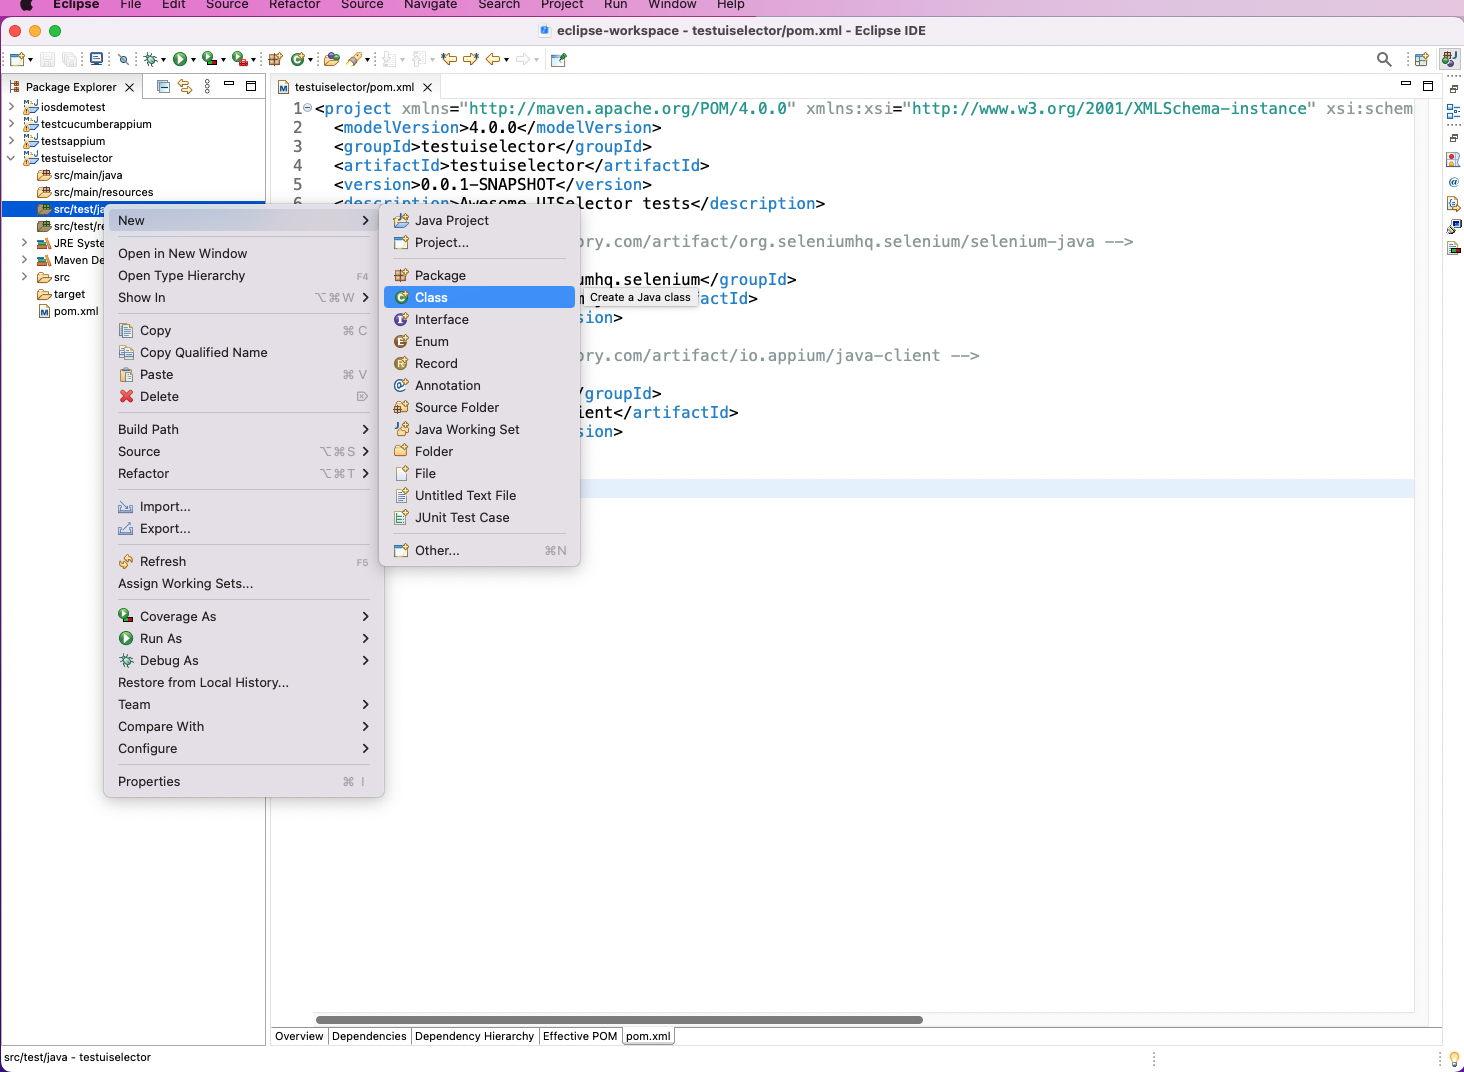
We'll use Java to write our test cases. So, right-click on src/test/java and then click on "New." After that, select "Class" to create a new class to write our test.
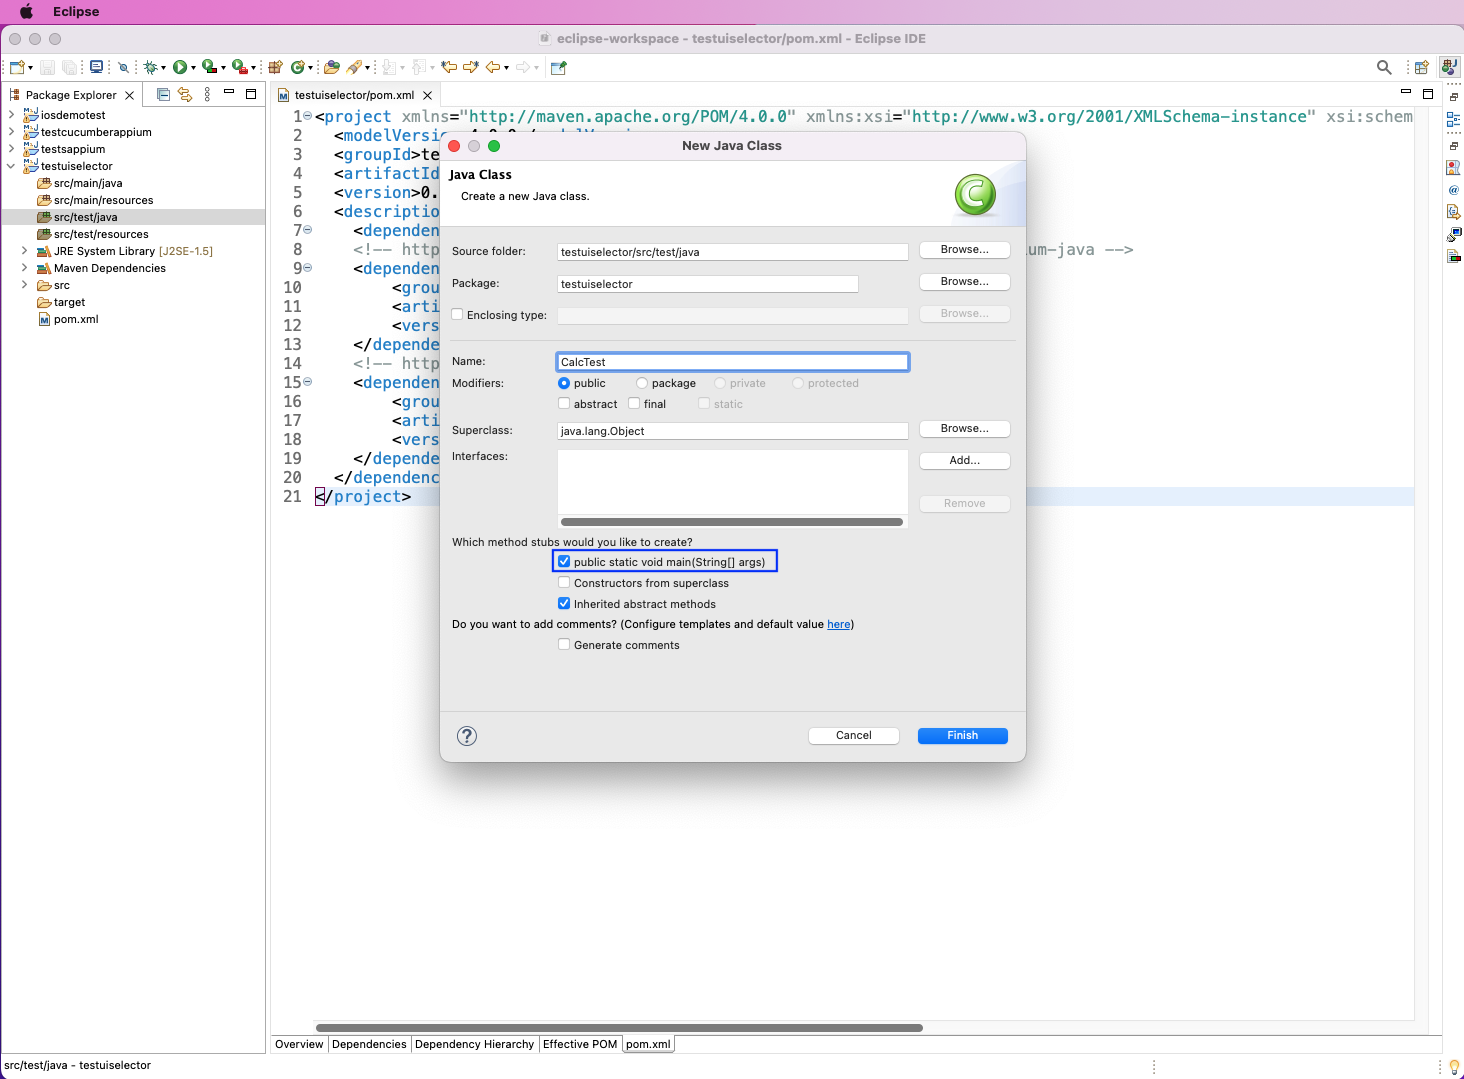
In the next pop-up, we've given the test file the name CalcTest and clicked on the checkbox to create a main method.
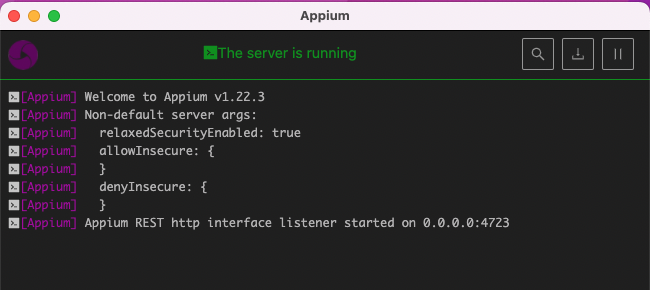
Before writing the test cases, we need to start the Appium server. We've done the same from the installed GUI server application. Here, click on the startServer button.
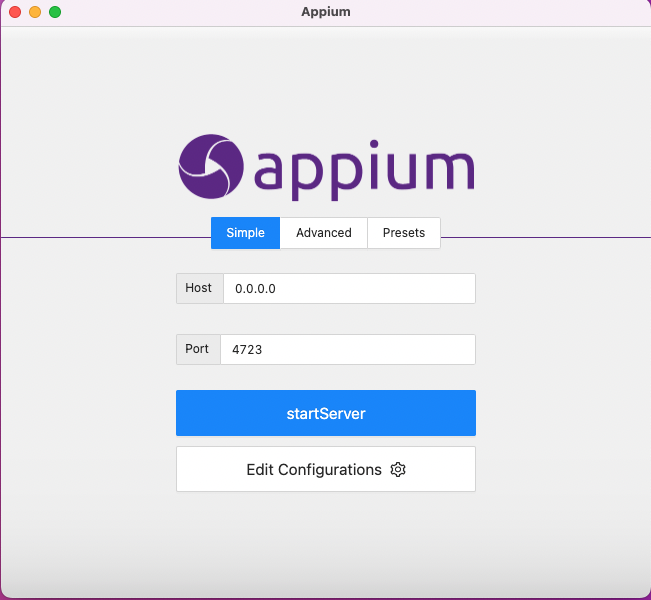
This will start a locally running Appium server on port 4723.
In CalcTest.java, we've imported the required dependencies. Then, in the main() method, we're calling the calcOpen() method.
Now, inside the calcOpen(), we've given the desired capabilities for Appium. Let's connect to the Appium driver by passing the URL and capabilities.
Then, we'll print out a system log. After that, we'll right-click on the code followed by "Run As" and "Java Application.

The correct logs will be shown. Additionally, the Calculator app will open automatically on our connected mobile device.

Using Appium Inspector
Any type of automation testing, including one with UISelector, requires us to know some unique ID of the element. We can get the element ID through the UIAutomatorViewer.
We can also get it from the Appium Inspector.
In the Appium Inspector, give the desired capabilities. These capabilities should be the same that we gave earlier in our code.
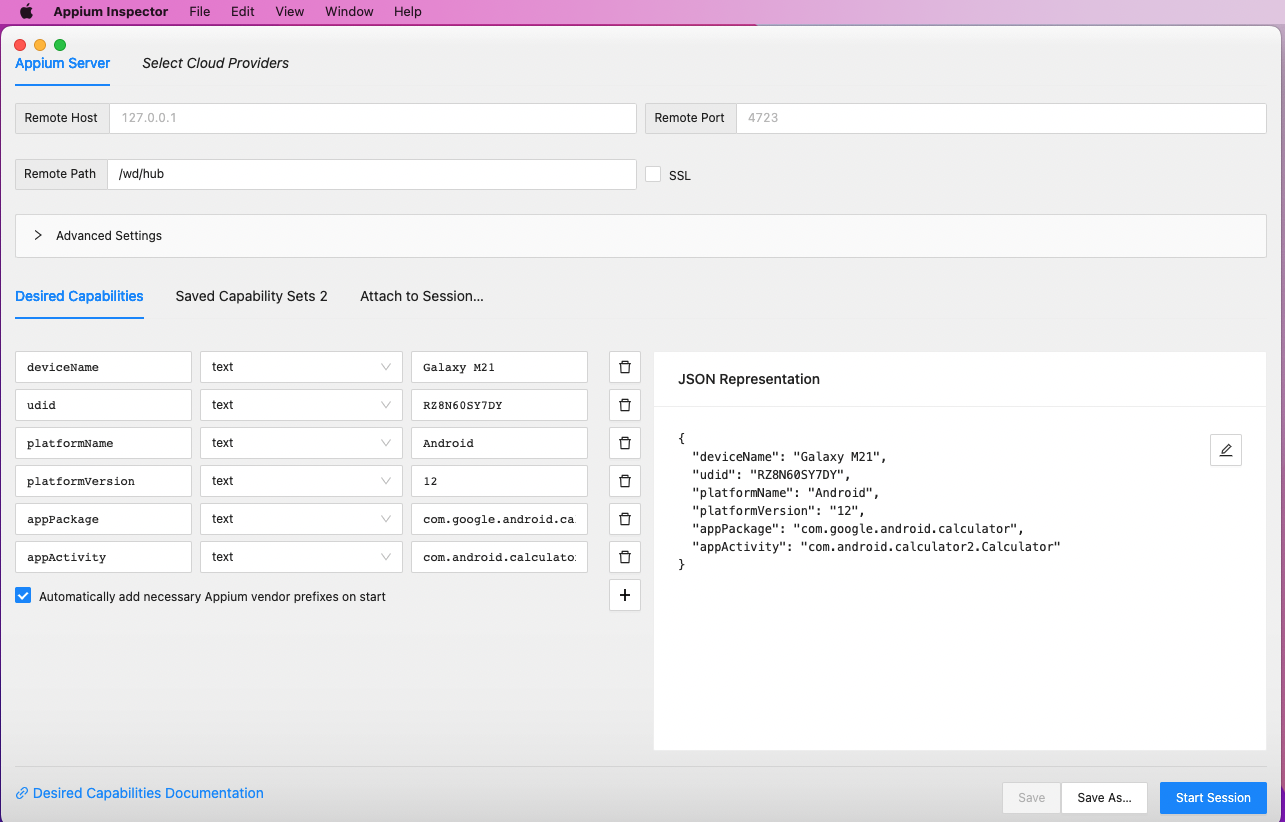
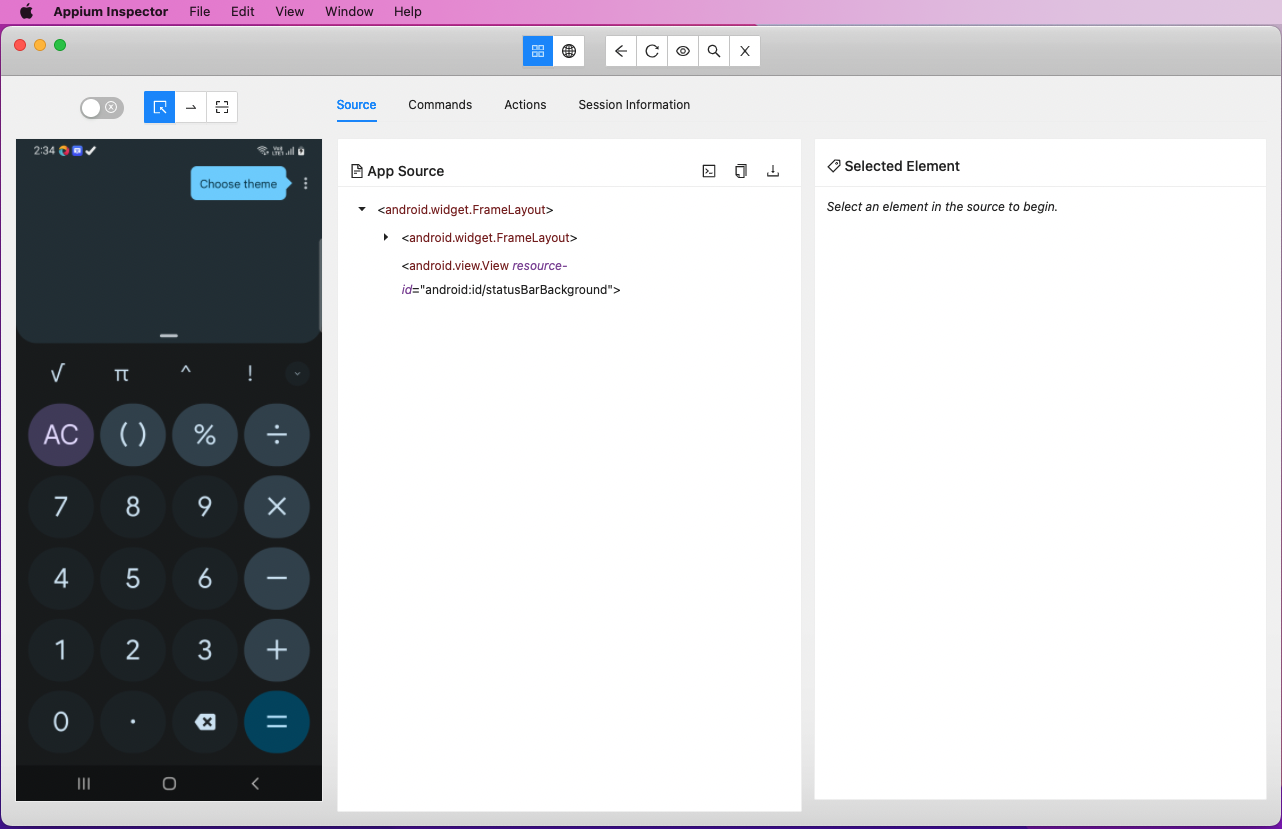
Once the "Start Session" button is clicked, the application will open. Here, the Calculator app will be shown.
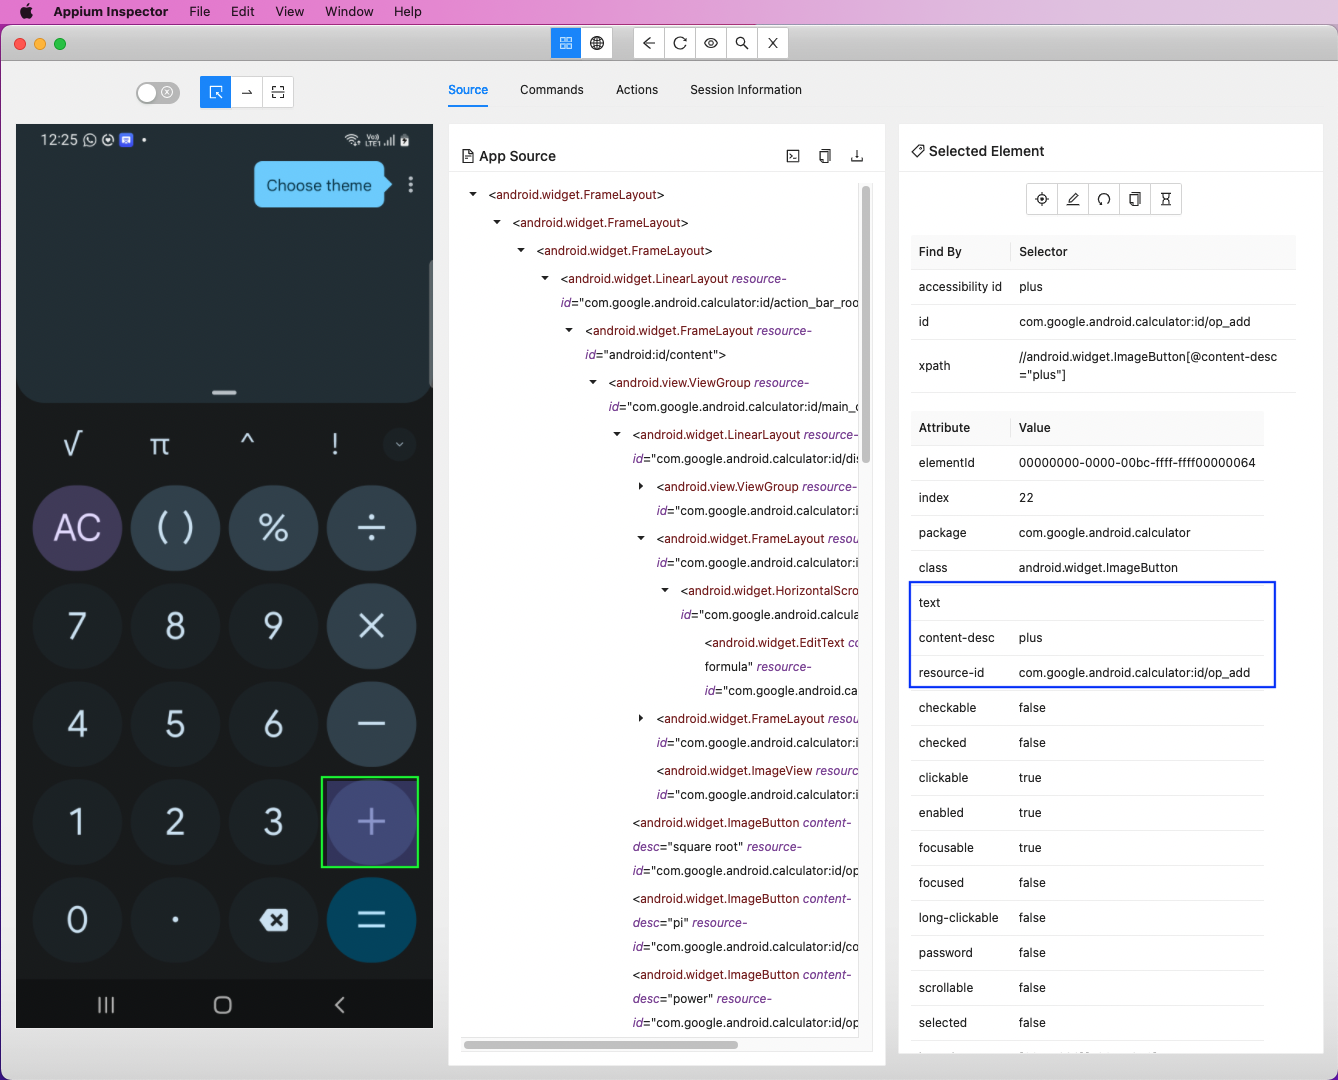
Now, click on the 5, 3, +, and = buttons. Note the text, content-desc, and resource-id for each of them.
Automation Testing Through UISelector
Now, we're going to use three types of IDs to check our applications. There are many more IDs to check the application, and the complete list can be found here. We'll look into getting IDs through text, content-desc, and resource-id.
UISelector IDs Through Text
In our Android calculator, we don't have text set in any buttons. When we clicked on the 5, 3, +, and = buttons, the text was blank in all of them. In most apps, the text will be there, contained in a heading or other places.
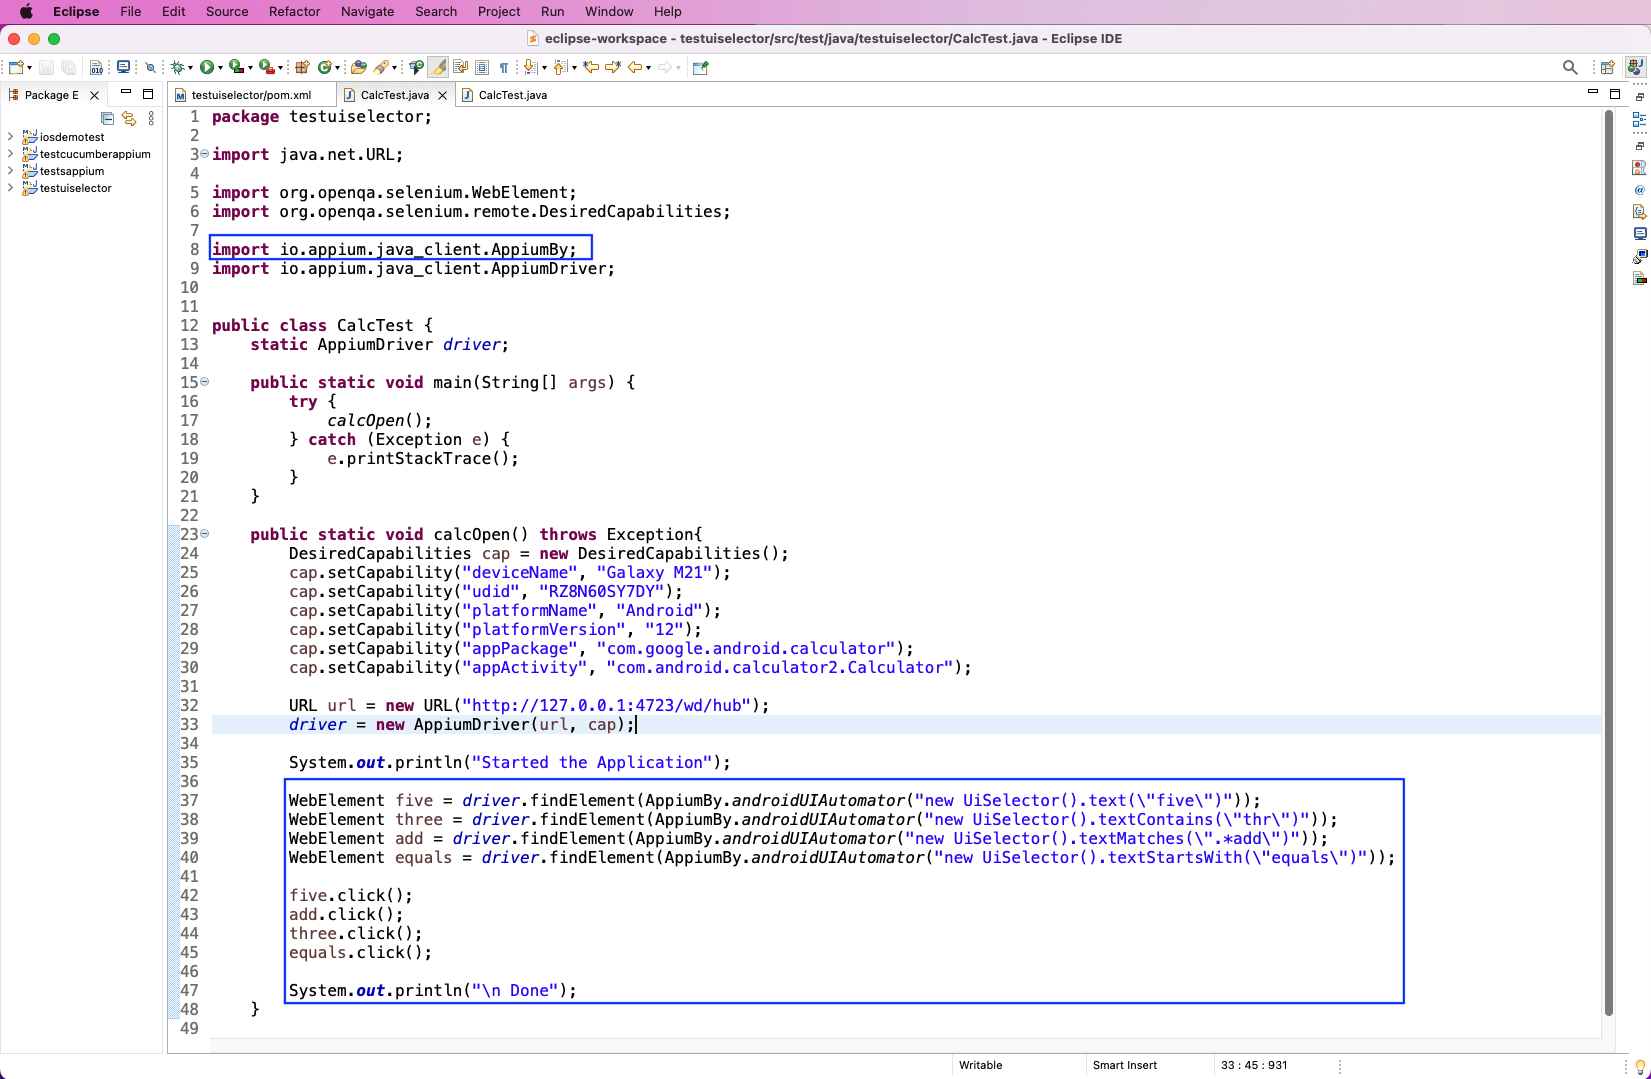
However, we'll also look into the four methods of text. We're using the driver.findElement() method to find these four elements. Inside this method, we're using AppiumBy.androidUIAutomator() instead of the By.id() of the UI Automator post.
Inside the method, we have to create a new instance of UiSelector() and then call different methods of it. The details of different text methods are below.
- text()—The passed text in this function should match the exact text on the screen for an element. We're passing 5 in our example. So, this should match the one on the label.
- textContains()—The passed text should be contained in the label of our app. In our example, we have passed "thr." So, we should have a label with passthree/three or something like that.
- textMatches()—The passed text can be a regular expression, and it will be matched with the labels on the app.
- textStartsWith()—The passed text should be the starting label of our app. In our example, we have passed equals. So, we should have a label that reads equals/equalsThree or something like that.
UISelector IDs Through Content Description
In our Android calculator, we have content-desc for all the buttons. When we clicked on the 5, 3, +, and = buttons, we got the correct description for them in Appium Inspector. In our above example, we just need to change the text with the description.
The methods of description(), descriptionContains(), descriptionMatches(), and descriptionStartsWith() are the same as the earlier four text methods. The difference is that instead of text, they check for description.
We gave the correct description in our app and also ran the same. All tests were passed, and the log was shown correctly. Also, the Calculator app was run, and the buttons 5, 3, +, and = were pressed. Additionally, we got the correct result of 8 in it.

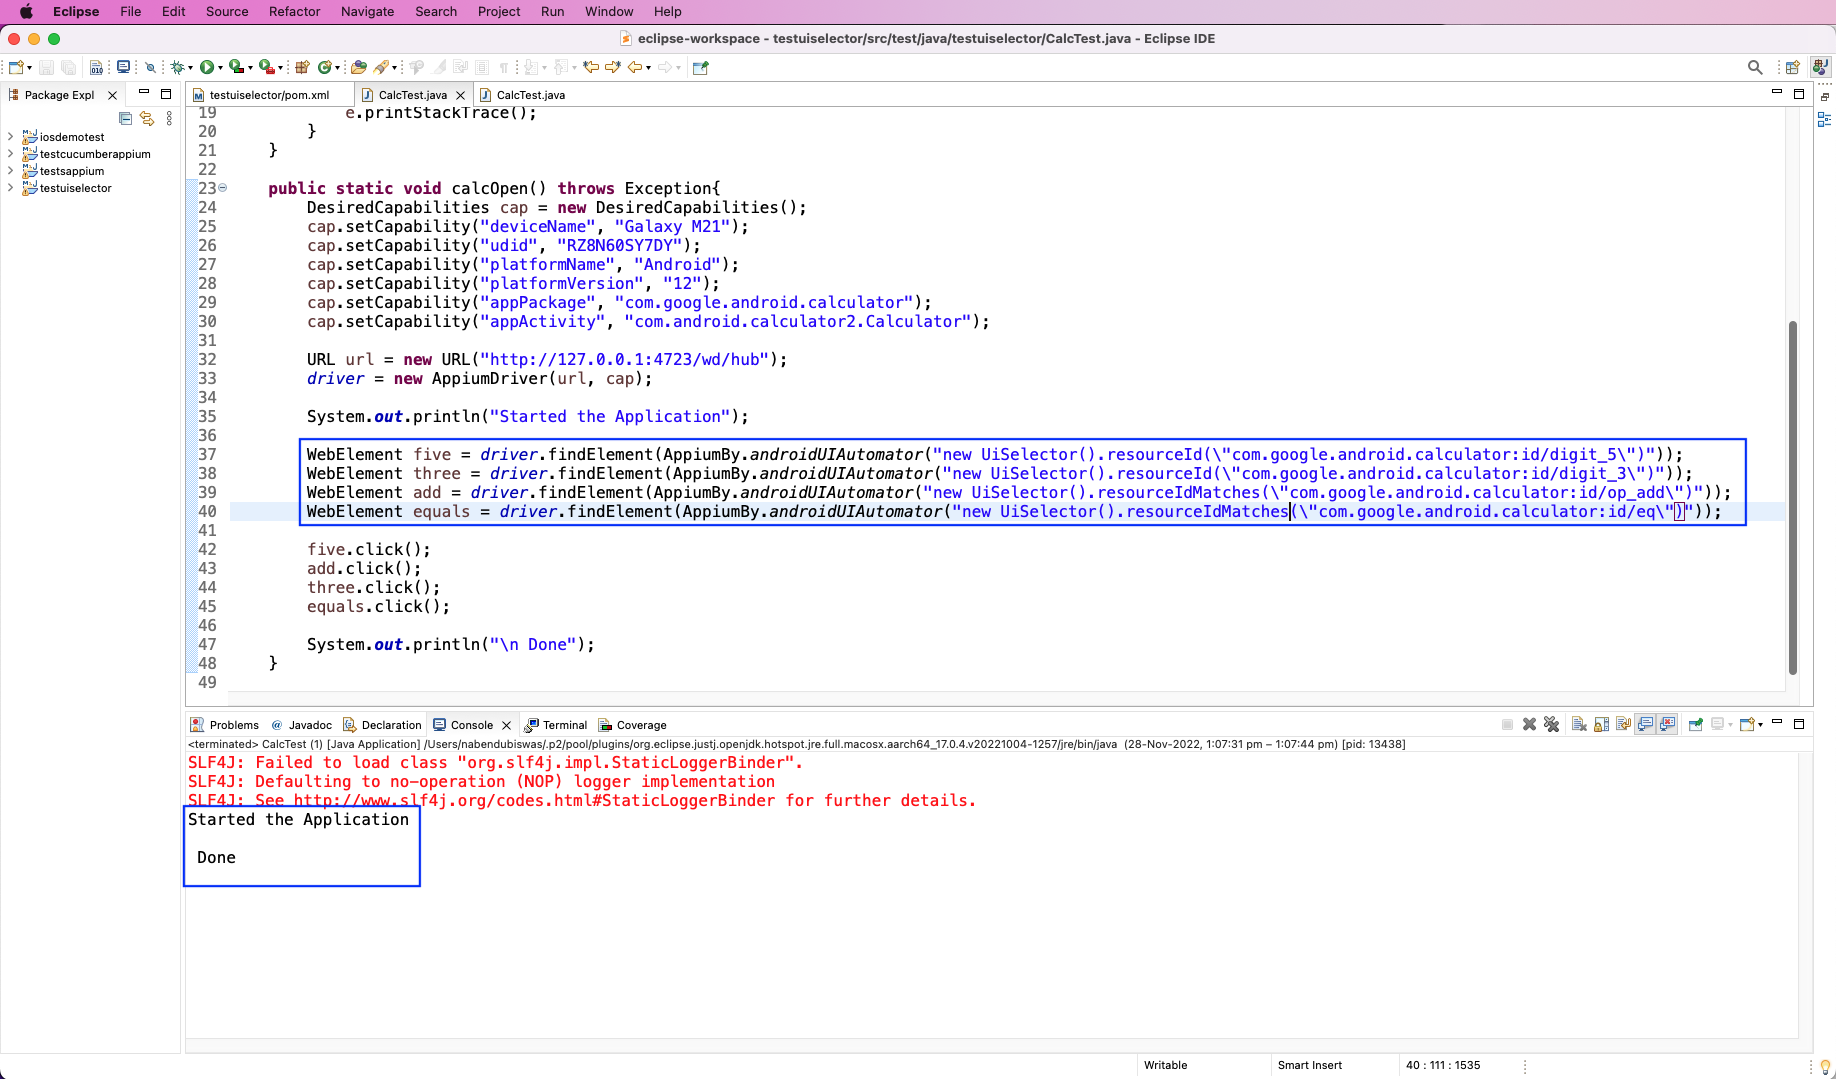
UISelector IDs Through Resource ID
The resource ID is the same as the ID for the Android app, but we can use it through UISelector. In our Android calculator, we have resourceID for all the buttons. When we clicked on the 5, 3, +, and = buttons, we got the correct description for them in Appium Inspector. In our above example, we just need to change the description with resourceID.
The methods of resourceId() and resourceIdMatches() are only there. These two methods are the same as description() and descriptionMatches() but use resourceID instead of a description.
We gave the correct resourceID in our app and also ran the same. All tests were passed, and the log was shown correctly. Also, the Calculator app was run, with the buttons 5, 3, +, and = pressed. Additionally, we also got the correct result of 8 in it.
What We've Learned
In this post, you learned about UISelector in Appium, including its advantages and disadvantages. After that, you learned how to do the basic setup for running an Appium test. Lastly, you learned to use UISelector IDs through text, description, and Resource ID.
But do you want to test your apps without all these complicated setups?
Then Waldo is the right answer. With Waldo, you only need to provide the APK or IPA file. After that, you can interact like a real user. And, finally, click the test button so it'll automatically generate the test cases.
Automated E2E tests for your mobile app
Get true E2E testing in minutes, not months.


