


In this post, we are going to discuss the desired capabilities of Appium. The client-side code, whether written in Python or JavaScript, needs to send desired capabilities to the Appium server. This server only runs automated tests on the connected mobile or emulator. Some desired capabilities like platformName or deviceName are mandatory, but others are not.
We will learn about all of them in this post, followed by guidance on how to add these desired capabilities.
What Do Appium Capabilities Tell the Server?
The capabilities for the Appium server are sent through a JavaScript Object Notation (JSON), which is a special kind of object in which key-value pairs are given with double-quote strings. These key-value pairs tell the Appium server about our requirements.
Now the desired capabilities can be given through the client programming or we can set it in the Appium server's graphical user interface (GUI). We will look into both methods in the next section.
General Capabilities
In a previous post, "How to Test React Native Apps with Appium," we gave the desired capabilities in the wdio.conf.js file. In this case, we have given the appiumVersion, platformName, deviceName, app and automationName. These terms refer to the following:
- appiumVersion: the version of the Appium server on our local system.
- platformName: the name of the platform on which our tests will be performed. The two platforms are iOS and Android.
- deviceName: a mandatory field; we need to give the exact physical device or emulator name.
- app: the path for the apk file (for Android) or the ipa file (for iOS).
- automationName: This refers to the automation engine we are using. It is UiAutomator2 for Android and XCUITest for iOS.

In another post entitled "Automated Testing with Appium and Python: A How-To Guide," we gave the desired capabilities in the testing file of test_webapp.py file. In this case, we have again the platformName and deviceName and added the browserName. We need the browser name because we are writing a test case for the browser. The term "browserName" refers to the browser on which the web app will run—values like Safari, Chrome, Chromium, or Browser.

One thing to note here is that, in both cases, we have given the capabilities in different formats and not as a JSON object. In these cases, the client software will change it to a JSON object before sending it to the Appium server.
More General Capabilities
Now we will look into some more general capabilities. These capabilities are applied in both Android and iOS platforms. Below are some capabilities and their meanings.
- platformVersion: the operation system for the mobile version, such as Android 12, 14 or iOS 16.0.2.
- language: the language of our application, such as fr for French or ru for Russian.
- orientation: the orientation in which the app will run. The acceptable values are LANDSCAPE and PORTRAIT.
- clearSystemFiles: This will delete any system files the Appium server generates at the end. This is false by default.
- enablePerformanceLogging: This will log the performance in web or browser apps. This is false by default.
Android-Only Capabilities
Some capabilities are only available on Android, and we will look into them now. These capabilities are:
- appPackage: Most Android apps start with the app package that we want to run, such as app.android.settings.
- appWaitPackage: These are the android packages we want to wait before starting our application—for example, if we want app.android.settings (for settings) to load before our app.
- appWaitActivity: Here we give the Android activity that we want to wait for—for example, SplashActivity.
- appWaitDuration: This is the time after which the appWaitActivity will start in milliseconds.
- deviceReadyTimeout: This is the time in seconds until the device is ready.
- androidInstallTimeout: This is the time (in milliseconds) required for the apk to install. It defaults to 90,000 milliseconds.
- adbPort: This is the port used to connect to the Android Debug Bridge (ADB). This is a set of command line tools for giving different commands to the connected Android device. The default is 5037, which we can change.
- avd: Android Virtual Device (AVD) is the name of the emulator that will launch.
iOS-Only Capabilities
Some capabilities are available only on iOS. We will look into them now. These capabilities are:
- calendarFormat: The format of the calendar used in an iOS simulator or real device—for example, Gregorian.
- udid: If we have connected to a real iOS device, this will tell the iPhone or iPad the unique id.
- launchTimeout: The time (in milliseconds) before the system assumes that the simulator hung up. For example, 2,000.
- locationServiceEnabled: This capability will enable the location service. By default, it is set to sim settings. The values can be true or false.
- autoAcceptAlerts: Many apps throw alerts, which the user needs to accept. This capability will auto-accept the alerts. The values can be true or false.
- autoDismissAlerts: This is the opposite of the autoAcceptAlerts. If any alerts come through the app, it will reject or dismiss them. Again, the values can be true or false.
- showIOSLog: With this enabled, the log messages appearing on the device will show up in Appium logs. By default, it is false.
- appName: the name of the iOS app that we are testing.
Desired Capabilities Through the Client
As mentioned earlier, there are two ways to add desired capabilities. One is through the Appium client in which we are coding the tests. We have seen both of them in detail in our previous posts on Appium
Desired Capabilities Through the Appium Server
The second way to use desired capabilities is through the Appium server's GUI application. First, we need to download the file for the correct operating system using this link. Since we are using a Mac, we download the zip file for Mac.

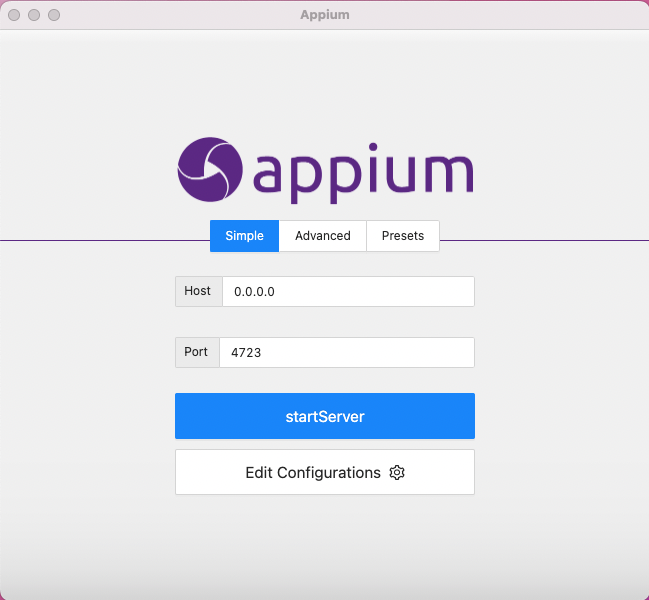
To open the Appium server, click on the startServer button.
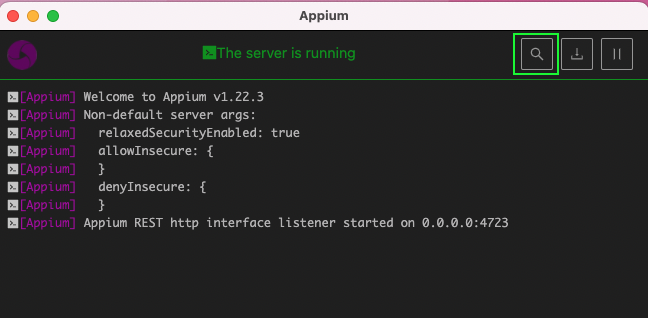
Once the server starts running, click on the Search icon in the top right corner.
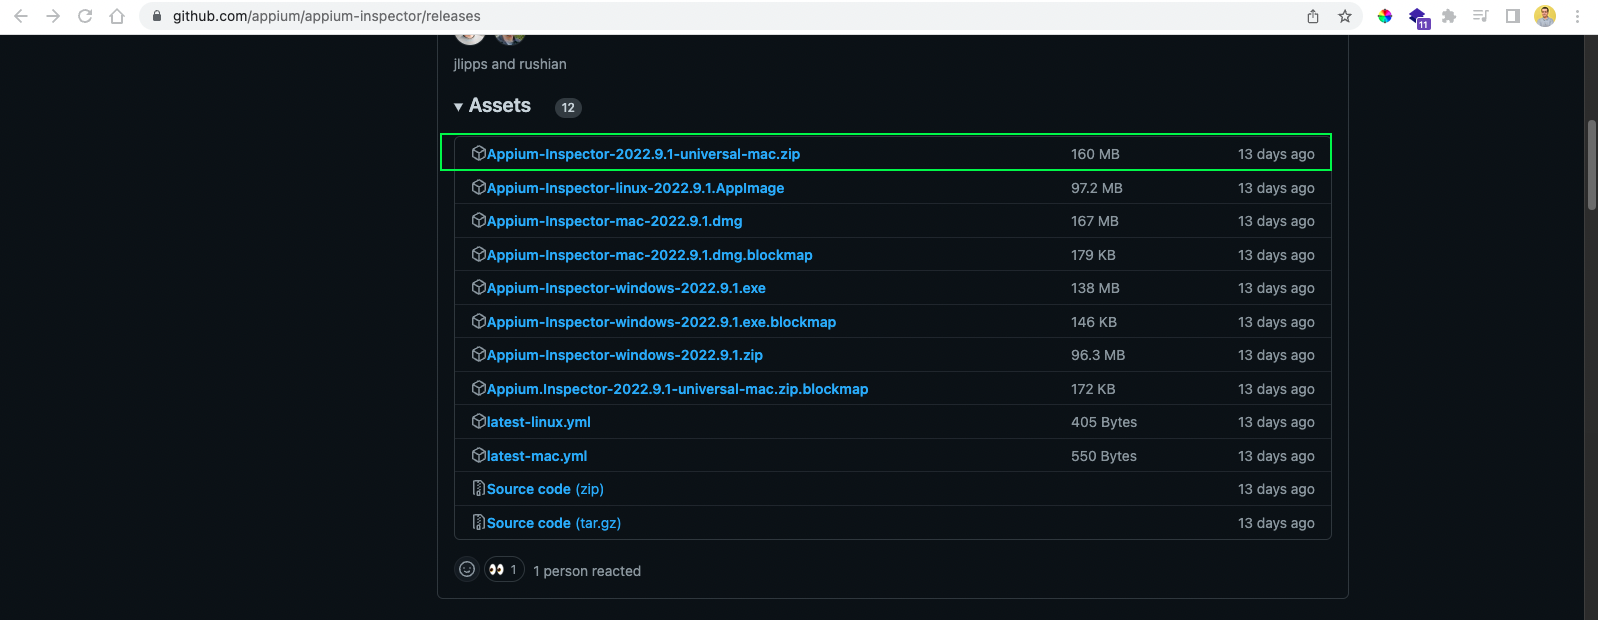
This will open the GitHub link for Appium Inspector and ask us to install the same. Again, we will install the Mac version.
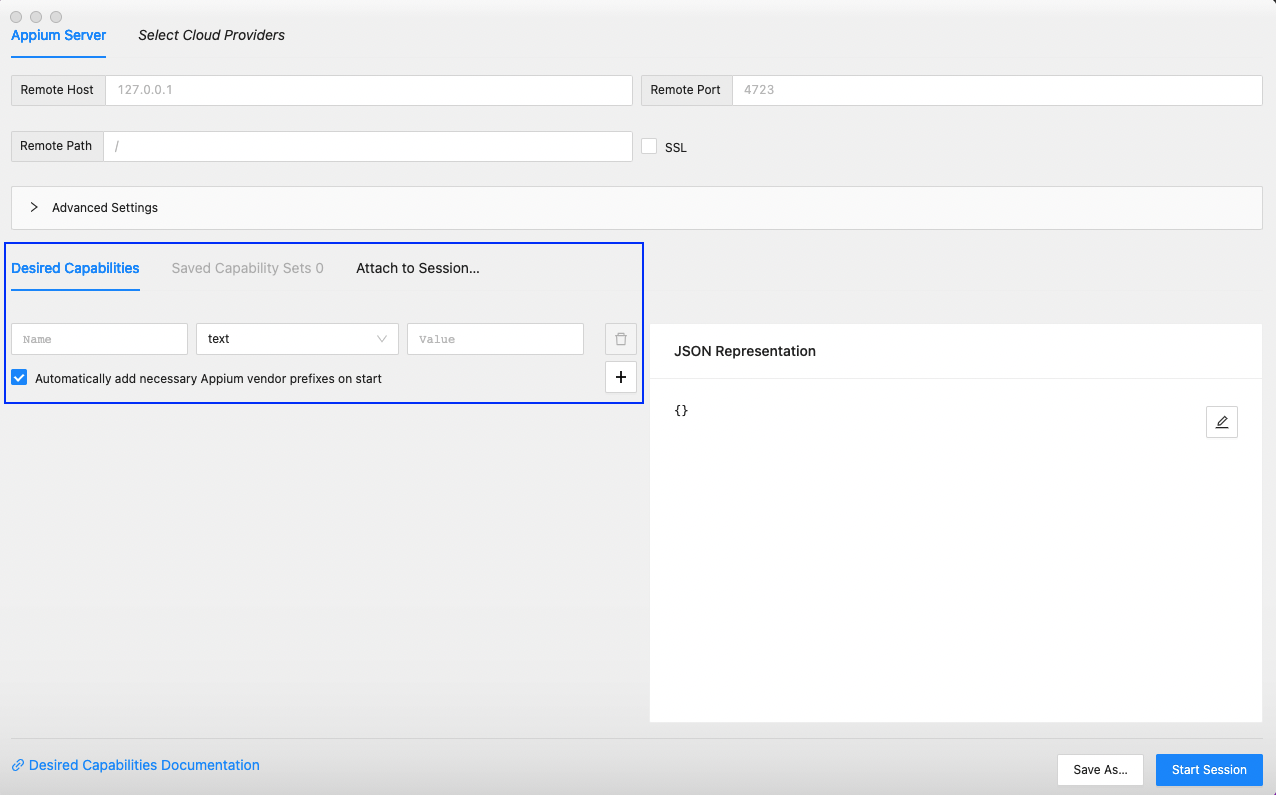
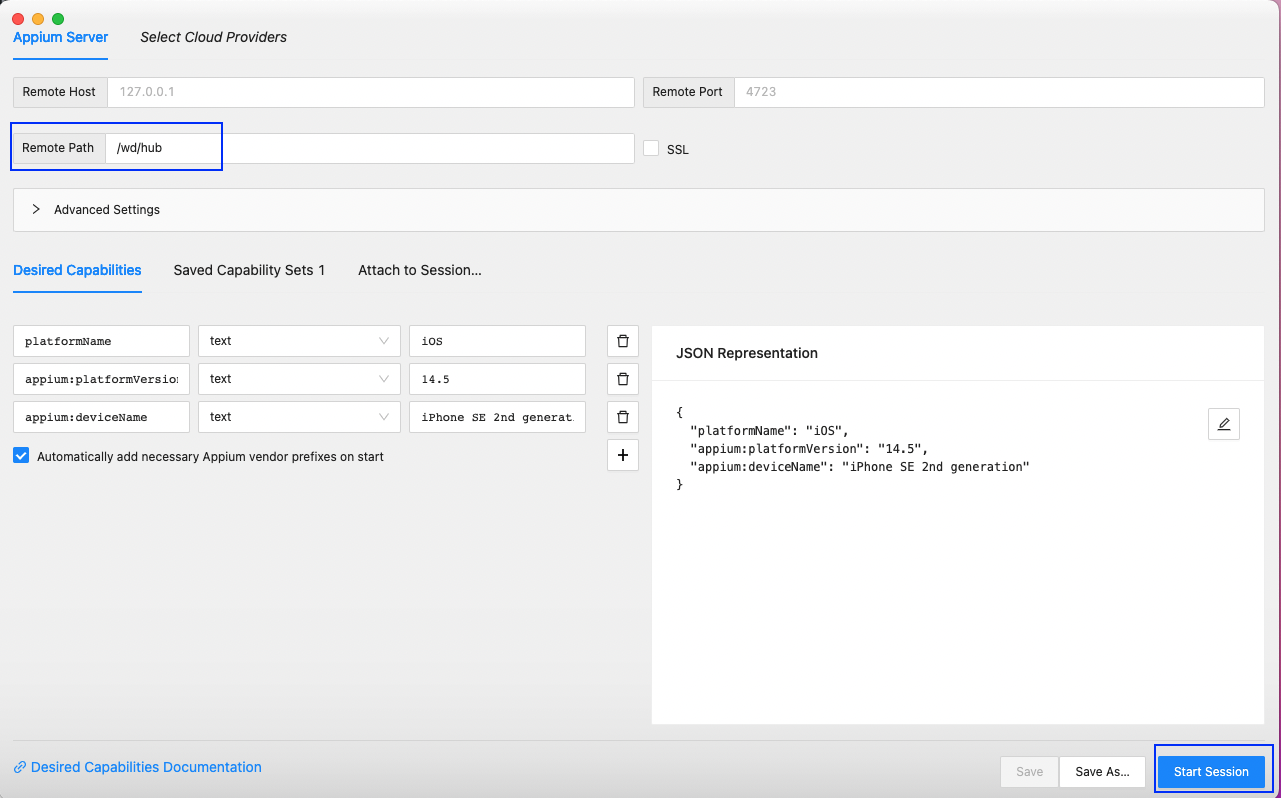
After installation, the Appium Inspector will open (see below). Here, we need to give the desired capabilities in the Name and Value boxes.
After adding some capabilities, we need to click on the Save As button.

This will open a pop-up where we can enter any familiar name for the capabilities. After that step, click on the Save button.

The Saved Capability Sets tab will store this capabilities list. Click on the Edit icon in the set and it will load.

We have started an iOS simulator on our Mac and given its desired capabilities. Here, notice also that we have to give Remote Path as /wd/hub.
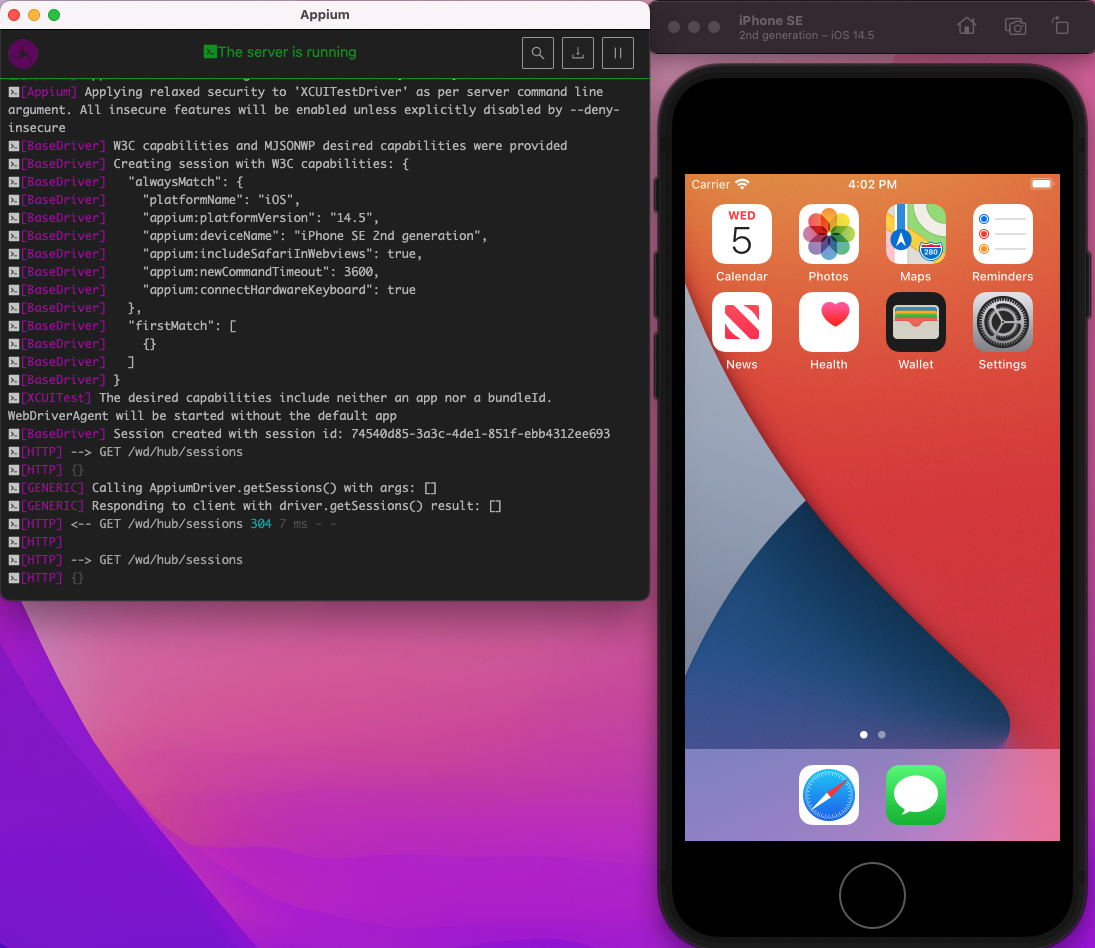
The Appium server will show the logs for connecting this. We will need additional capabilities for a connected app.
Conclusion
In this post, we learned about the desired capabilities in Appium—general capabilities as well as Android- and iOS-specific capabilities.
If we want to test apps more easily, try Waldo. With this, we can avoid the hassle of installing and configuring all this and also write test cases.
Automated E2E tests for your mobile app
Get true E2E testing in minutes, not months.


.png)
