


Creating an app with interactive features like maps can be very challenging. When you don't know how these APIs work and the documentation on the elements necessary is a bit obtuse and segregated, it can feel like you're walking blind on a minefield. Even worse, if you are on a tight timeline, you might as well prepare for some long nights of work.
But hey, it doesn't have to be that way as long as you find the right article. And luckily for you, if you are looking for a simple guide on implementing a map on SwiftUI, the search is over.
This article aims to provide you with a straightforward approach to creating a map with MapKit in SwiftUI. First, I will begin with a short intro to SwiftUI so that we are all on the same page. Then I will explain what MapKit is and what are the APIs that comprise it. Finally, I will show you how to develop a simple SwiftUI application illustrating the core concepts of working with MapKit in a single-view app.
You might find it difficult to follow the post if you don't have any prior experience with Swift coding. More articles introducing Swift, however, can be found here.
Introducing SwiftUI
SwiftUI represents the transition to a more modern and intuitive UI design paradigm in the Apple ecosystem. Apple designed SwiftUI expressly to work and enhance its Swift language infrastructure. With it, Apple allowed developers to build app user interfaces using code.
Apple states in its documentation that "SwiftUI provides views, controls, and layout structures for declaring your app's user interface. The framework provides event handlers for delivering taps, gestures, and other types of input to your app, and tools to manage the flow of data from your app's models down to the views and controls that users see and interact with."
A typical SwiftUI fresh project contains two files, a ContentView.swift file and an <APP_NAME>App.swift file. In this case, APP_NAME stands for the name provided for the project.
Developers construct SwiftUI views in regular Swift classes. These classes are referred to as View Classes and follow a basic structure. The View struct specifies the design of the view itself and its functionality. Meanwhile, a PreviewView struct works as a helper for the convenient emulator displaying the view in real time.
Furthermore, a single variable of type View called "body" defines the body of the ContentView. Any change to this variable will result in an observable modification to the current view.
A straightforward TextView element with the text "Hello World!" will be present in the base view class when you create a new project.
I advise reading these other articles if you want to learn more about the logic and organization that make up SwiftUI.
What is MapKit?
Alright, so what is MapKit? And how do we use it to create a map in SwiftUI?
Put simply, MapKit is one of Apple's many APIs to access and customize core features within its iOS ecosystem. One such core feature is the interactive map view that apple uses in its Maps app, which is accessible to all developers with this API.
If you are not clear on what I mean by API, in this case, it is the set of libraries and objects that we can import into our project to make use of more sophisticated and sometimes restricted, features within the OS. Think of it like the toolsets and guidelines that Apple allows you to use to build your own version of a feature without worrying so much about the complexity behind the curtains.
As Apple states, MapKit can be used to:
- Embed maps directly into your app's windows and views.
- Add annotations and overlays to a map to call out points of interest.
- Add LookAround capabilities to enable users to explore locations at street level.
- Respond to user interactions with well-known points of interest, geographical features, and boundaries.
- Provide text completion to make it easy for users to search for a destination or point of interest.
The Maps app and its corresponding API have been a core feature of the iPhone since Apple launched the device in 2007. Since then, the approach to implementing a map view on an app has changed significantly. However, it is now easier than ever to create an elegant and responsive map view with SwiftUI.
Let's get to it.
Implementing a Map with MapKit in SwiftUI
Surprisingly, implementing a simple map view on an app with MapKit is almost trivial.
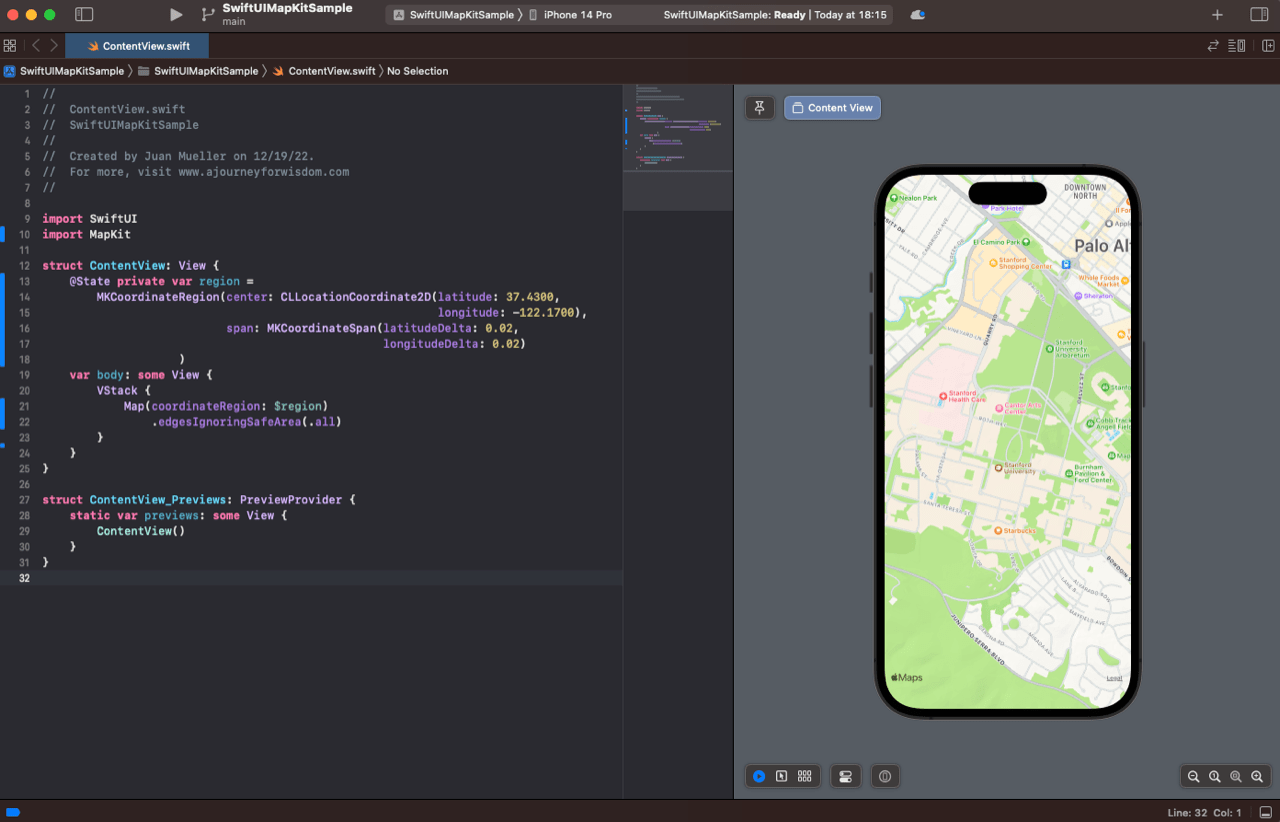
First, you need to import the MapKit library into your Swift class. Then you need to create a @State variable that will represent the region data for the map view to display. In this case, we can use the MKCoordinateRegion object to build a representable entity that the map view can use.
Finally, you just need to add the Map element into your body and pass the region state variable as the coordinateRegion to display.
And that's it, really. Not intimidating at all, is it?
Now, this is just the groundwork to have a fully featured map view for your users. You need to do a bit more work to enable features like location detection and markers.
Customizing a Map in SwiftUI
In order to detect the user's location, we need to make use of another one of Apple's APIs: CoreLocation.
Add the CoreLocation import to the class and remove the previously added state variables and map view. For this implementation, we will create a custom MapView struct representation with the help of the UIViewRepresentable protocol.
Now, create the MapView struct below the ContentView and add the following code.
As you can see, we first initialize the location manager, which will handle the request for location updates to the device's internal GPS and any other mechanism for locating the user. This is the tool the CoreLocation provides developers to manage request frequency and reduce the impact on battery and other possible effects.
Then, the makeUIView() and updateUIView() functions allow us to define and update the representable view that SwiftUI will use. In this case, we create an MKMapView instance, set it up, and return it. Additionally, the location manager is set up in a function on app initialization.
Now, you can use this representable in the body of the ContentView like so:
Before you run this code, it is essential to add the proper permission requirements in the application info section. To do this, go to the application configuration section and add the following two entries.
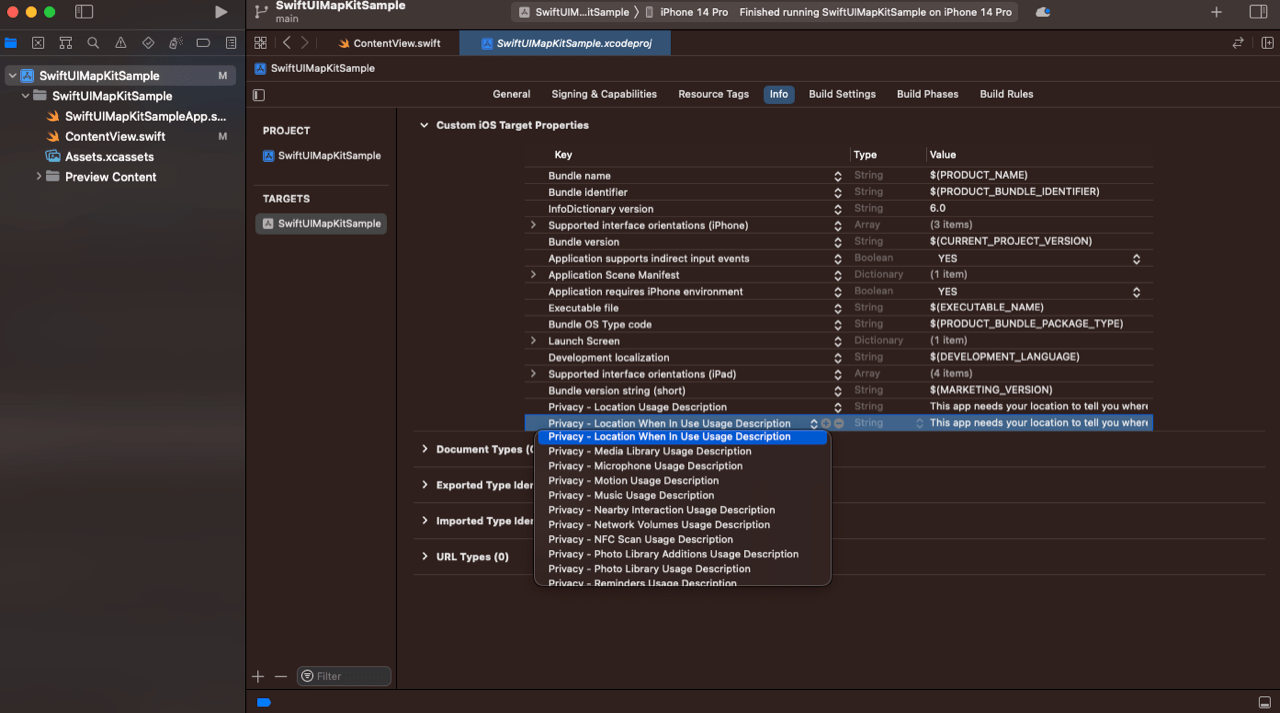
This will ensure that the app requests the user's permission to track them by the location manager. Otherwise, location requests would be ignored.
Now, proceed to run the app.
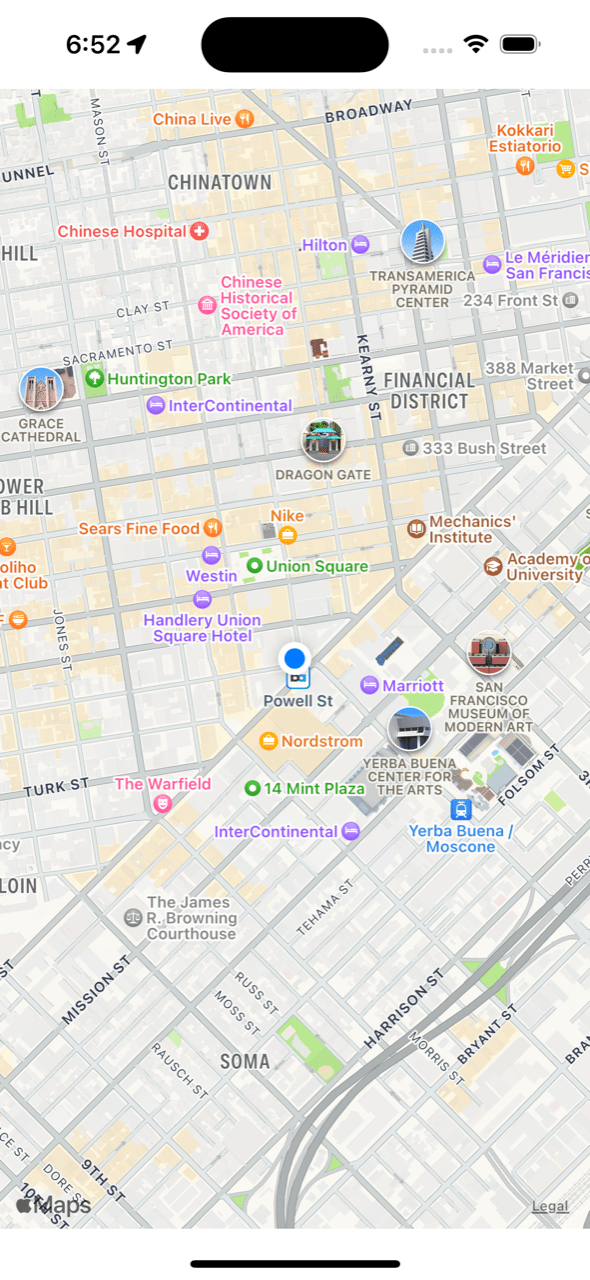
Excellent.
How about adding annotations to the map?
Well, that's quite simple.
First, create a function that will serve as the provider of annotations. In a real-world application, that could be a database or a remote service. Next, add an annotations property on the MapView struct and define it as an array of MKPointAnnotation. Then, add the annotations to the MapView instance using the addAnnotations() setter. Make sure to check that the annotations are there. Finally, pass the annotations to the MapView on the body.
That would look something like the following.
Now, run your code and check the results. Remember that the annotations in this example might not be near you, so they might not show up immediately until you move to them.
You can find the complete code of this example here.
Conclusion
Working with a modern and relatively young technology like SwiftUI can be challenging and stressful. When you don't have the expertise and extensive experience necessary to work your way through hurdles in a platform that is too new to have good community backlogs and documentation, it can feel like venturing into a dense forest at night where you know for a fact hostile creatures are lurking. That is not a very fun place to start a learning journey, let alone as a fresh developer.
That is why it is imperative to have resources like this where experienced developers can share their findings in their journeys to the unknown.
This situation is even more complex and delicate in the development testing world.
Check out Waldo.io's extensive toolkit for UI testing if you want a more thorough and appropriate testing solution for your project. Even for beginners, it is highly approachable and doesn't require any code.
Automated E2E tests for your mobile app
Get true E2E testing in minutes, not months.


