


The native app ecosystem has evolved drastically over the last few years. As developers build more complex apps, the need to test them becomes even more important. If you've ever worked with writing units or integration tests on the web before, you probably know how easy it is to test web apps. However, testing native apps can feel challenging at times.
Luckily, you can use a testing framework called Cypress to test React Native apps easily. So, in this post, I'll walk you through how you can test an Expo or a React Native app with Cypress.
.png)
What Is Cypress?
Cypress is a full-blown testing framework that takes all the traditional testing components you already know and packages them into one solution. Usually, in order to write end-to-end tests, developers would first select a testing framework like Jasmine or Mocha. This framework would help them write the tests. Then they would integrate an assertion library like Chai that would help them validate these tests. Finally, they would install Selenium or a Selenium-based wrapper to run these tests in a modern browser.
Cypress takes care of all the above for you. When you install Cypress, it gives you an interface to configure and run your end-to-end tests in a modern browser. Thus, it takes away all the heavy lifting and other cumbersome activities for developers. Moreover, it's blazingly fast, supports all modern front-end frameworks like React, Vue, Angular, etc., and also makes the entire testing process intuitive.
When you run your tests via Cypress, the framework helps you understand why your tests failed and how you can improve your code or write better tests. The best part is that even when you're working with a React Native app, Cypress is just as easy to configure and get started with as a traditional testing framework, and it allows you to test a native app in a modern browser.
Setup: Expo Project With Cypress
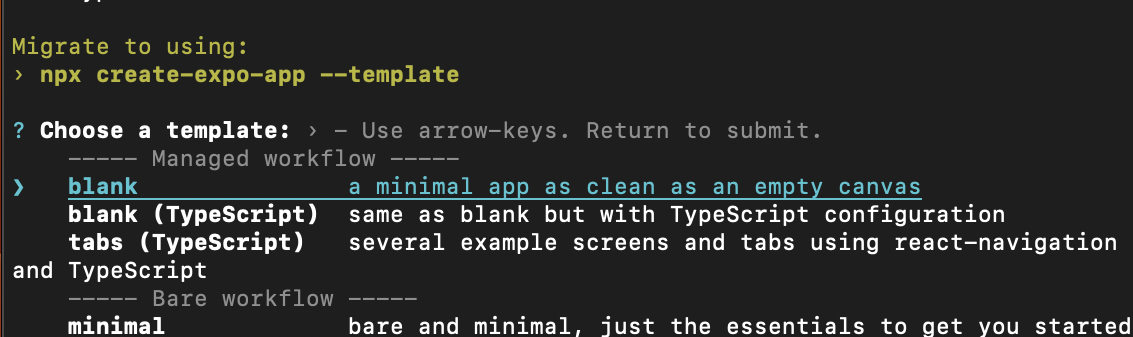
Now that you understand what Cypress is, let's see how we can install and configure it for our Expo app. Start by creating a new Expo project:
Chose a blank template:
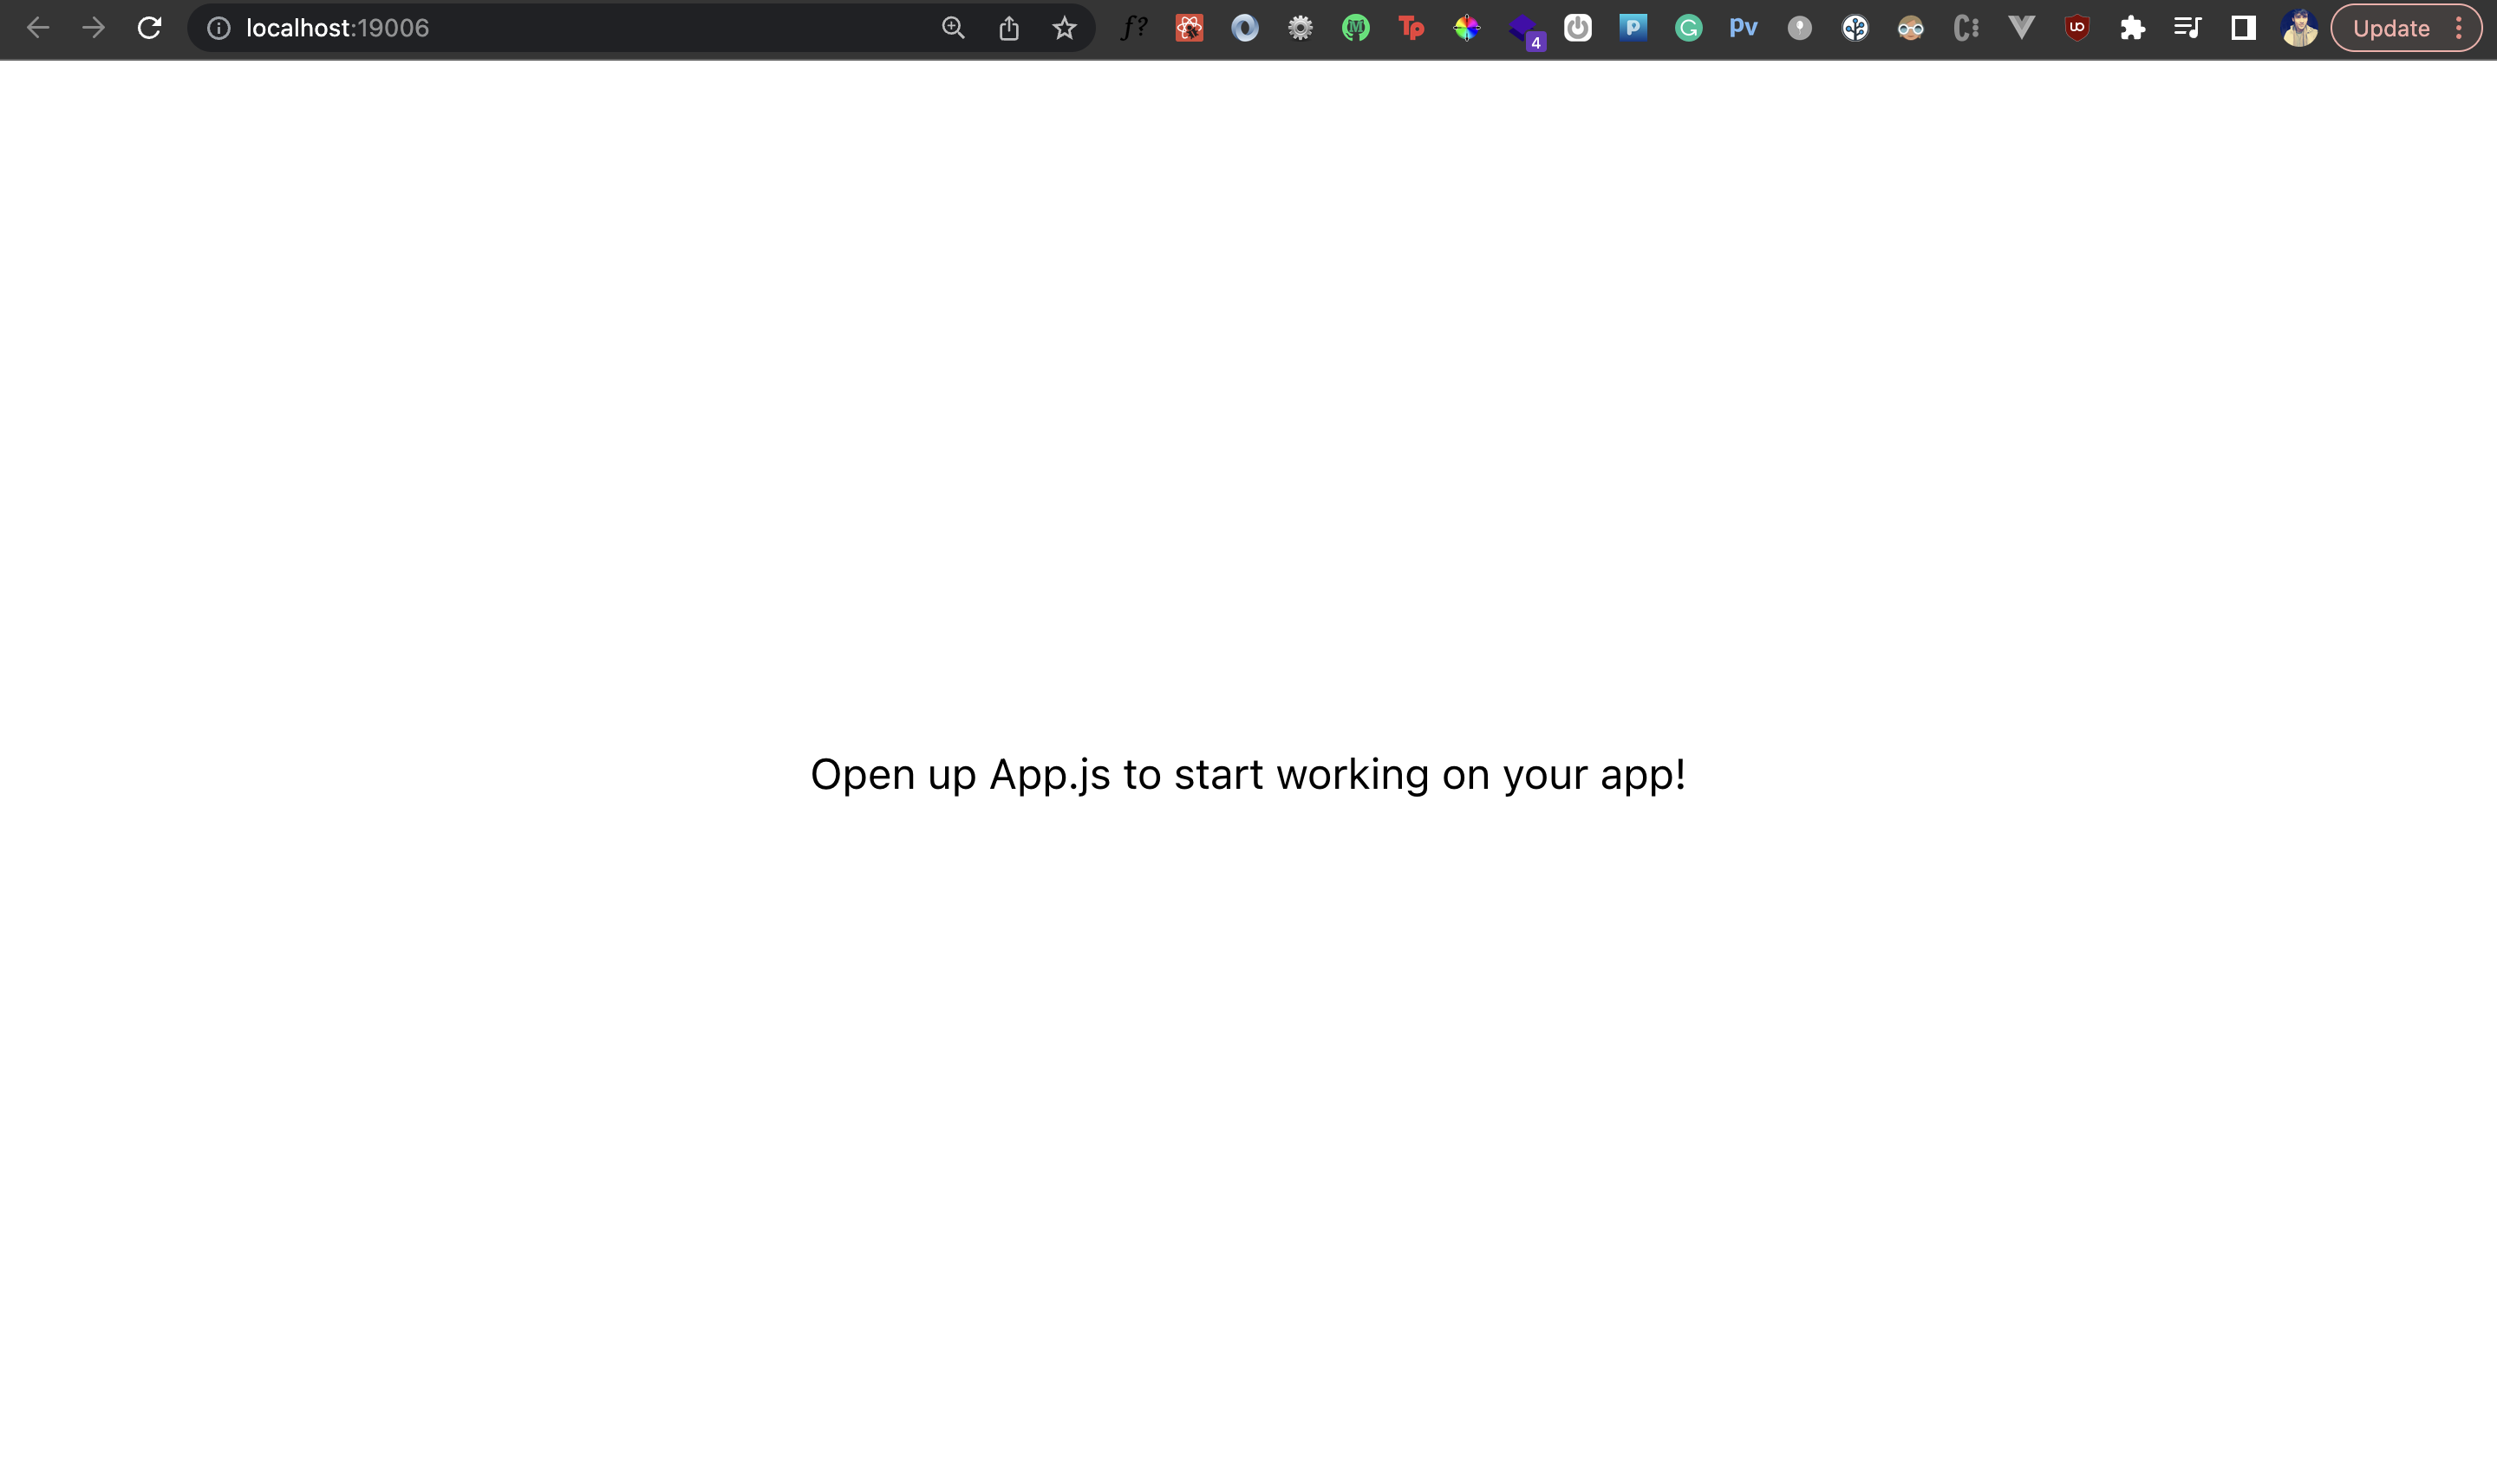
Once the app is installed, navigate into the app's directory. Open it via your code editor and kickstart the Expo development server:
Then, open your Expo app in the browser. You can do that by simply pressing w on the terminal or visiting the http://localhost:19006/ URL in your browser:
Great! Now, let's install Cypress as a developer dependency inside our project:
Then, open Cypress from inside the directory of your project using the following command:
Once you do that, you should see the Cypress app as shown below:
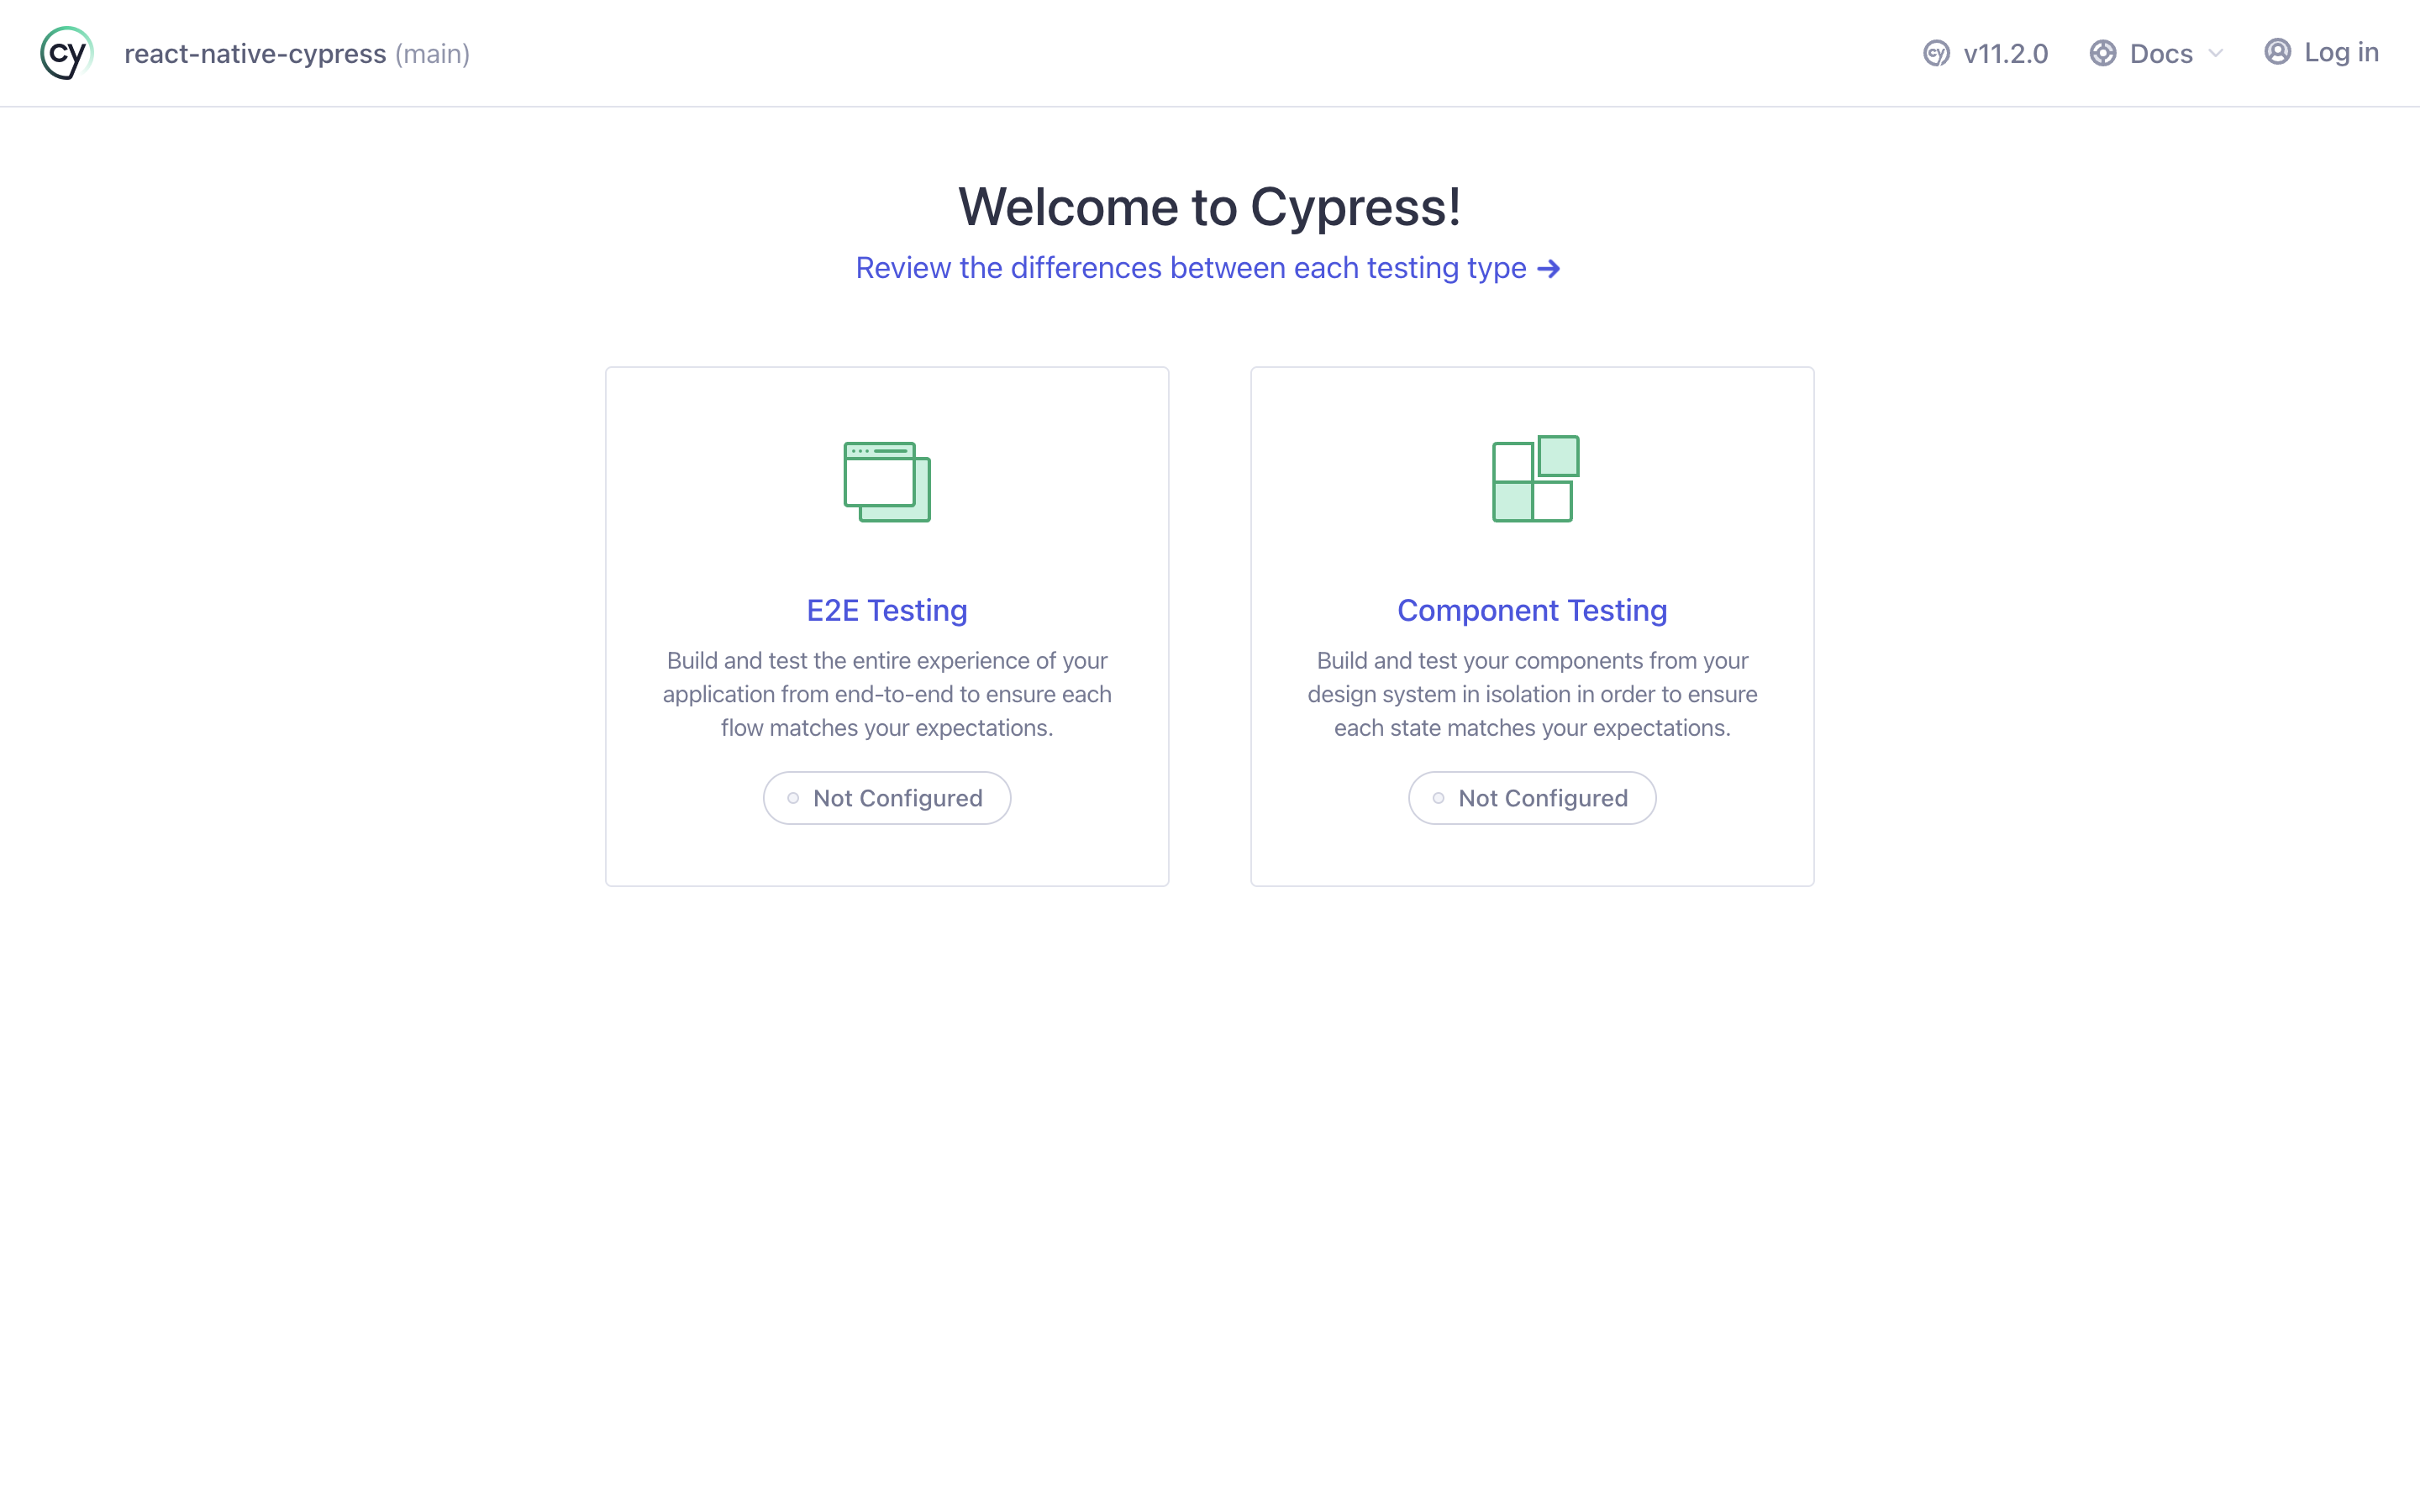
Notice that Cypress has already detected our Expo app in the top left corner. However, since it's the first time you've opened Cypress, you'll see both E2E and Component testing as not configured.
Configure E2E Testing for Expo Project With Cypress
Now, let's configure E2E testing for our Expo project. We'll simply follow the instructions. On the Cypress app, click on the E2E testing option:
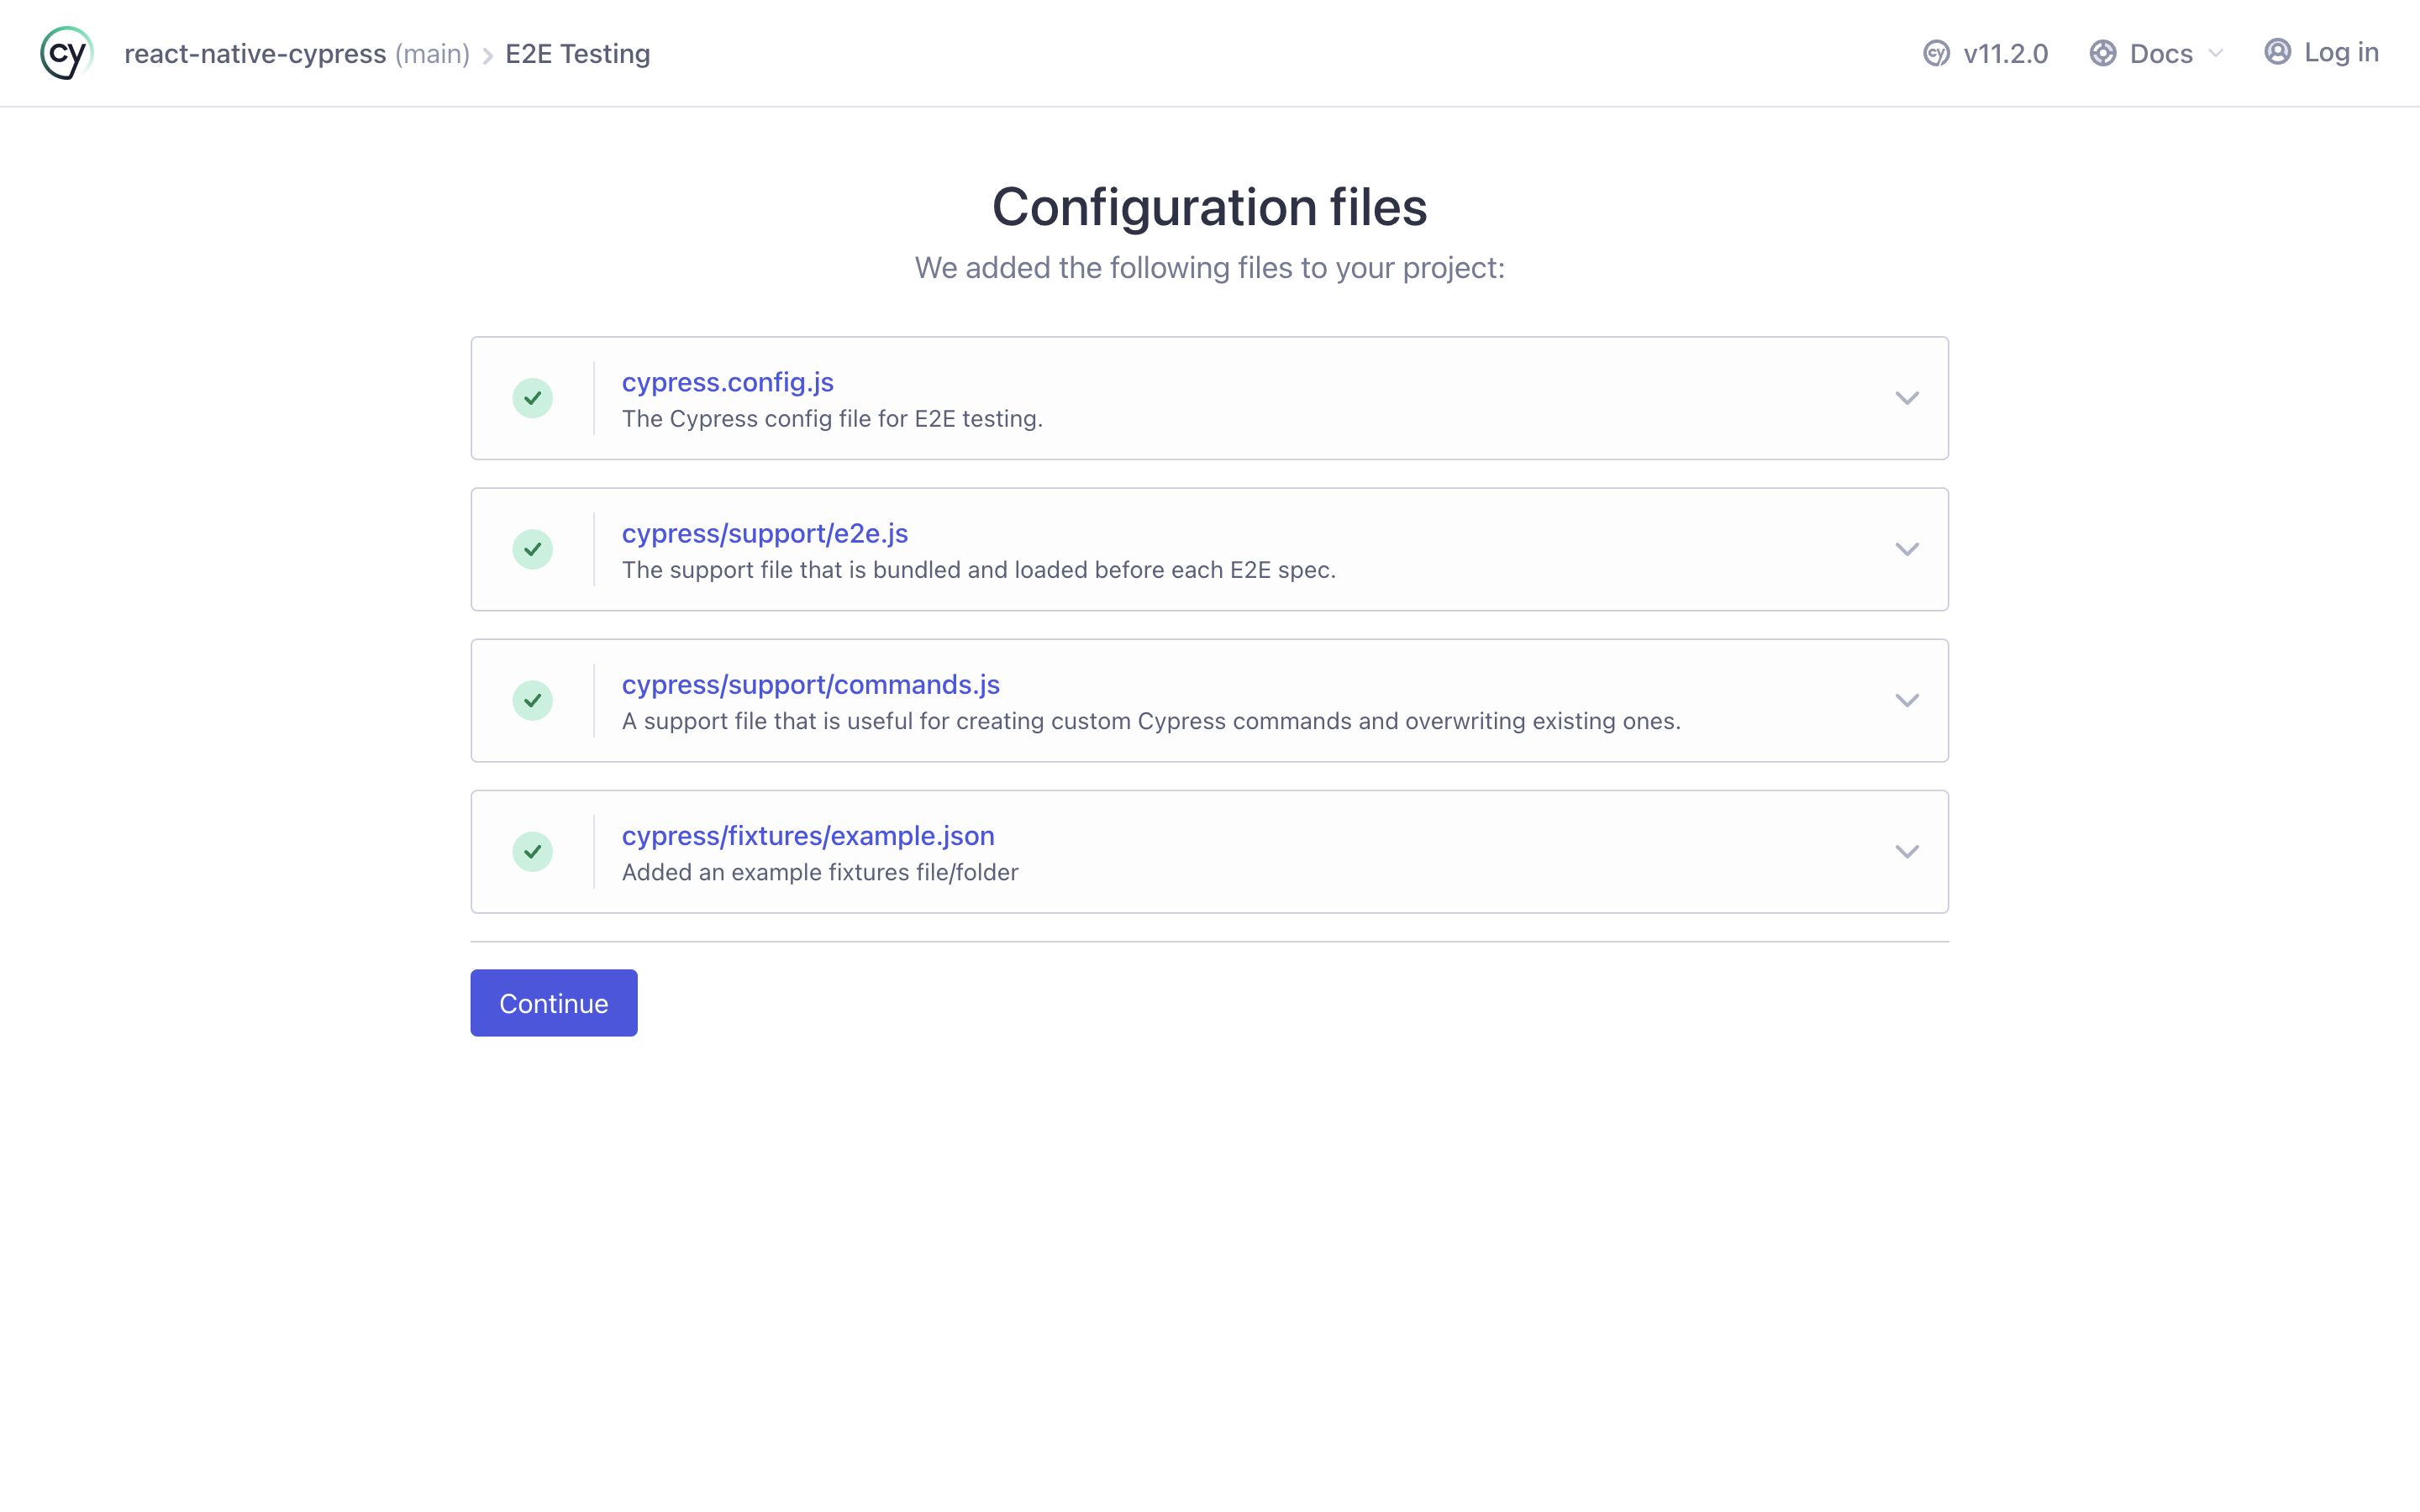
Cypress will tell you that it will automatically add the above configuration files to your project. You can read what each file means and expand on it to see further why it's needed. For now, we'll go ahead and click the Continue button:
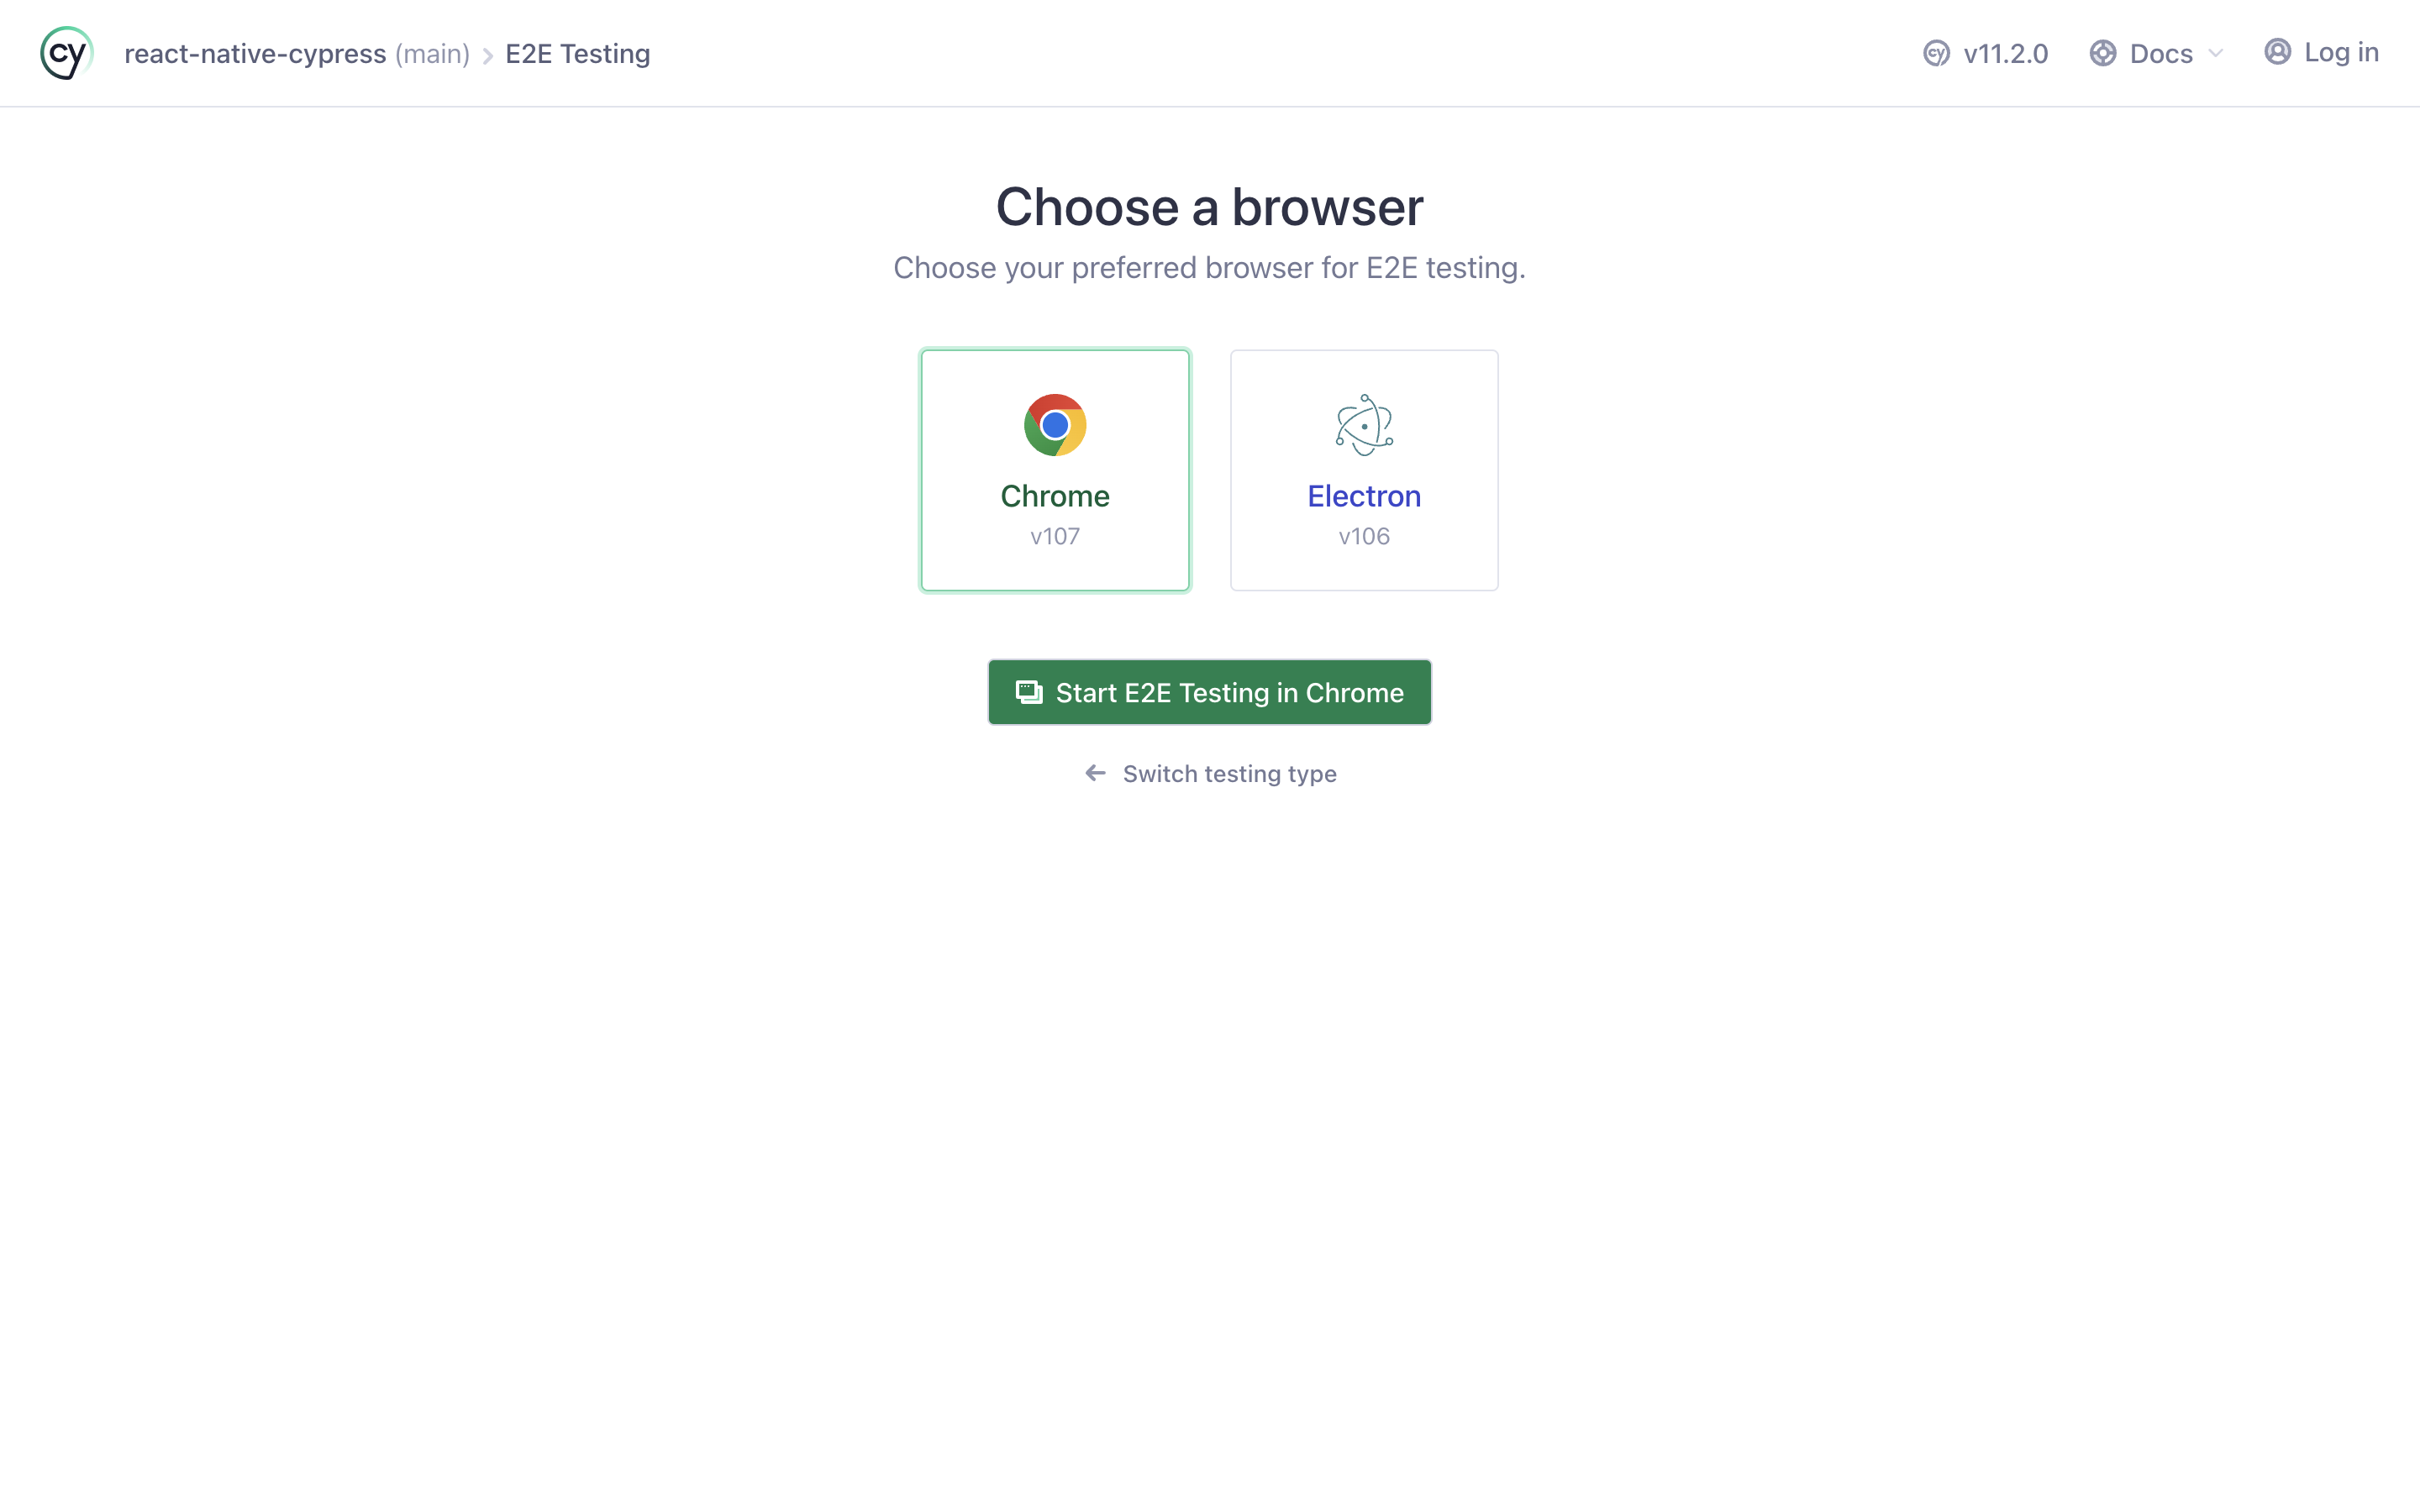
In the next step, you'll be asked to choose a browser. Cypress will run your tests in this browser. You can select Chrome or Electron, whatever you prefer. For this tutorial, I'm choosing the Electron browser. Now, let's go back to our Expo project and take a look at what's changed.
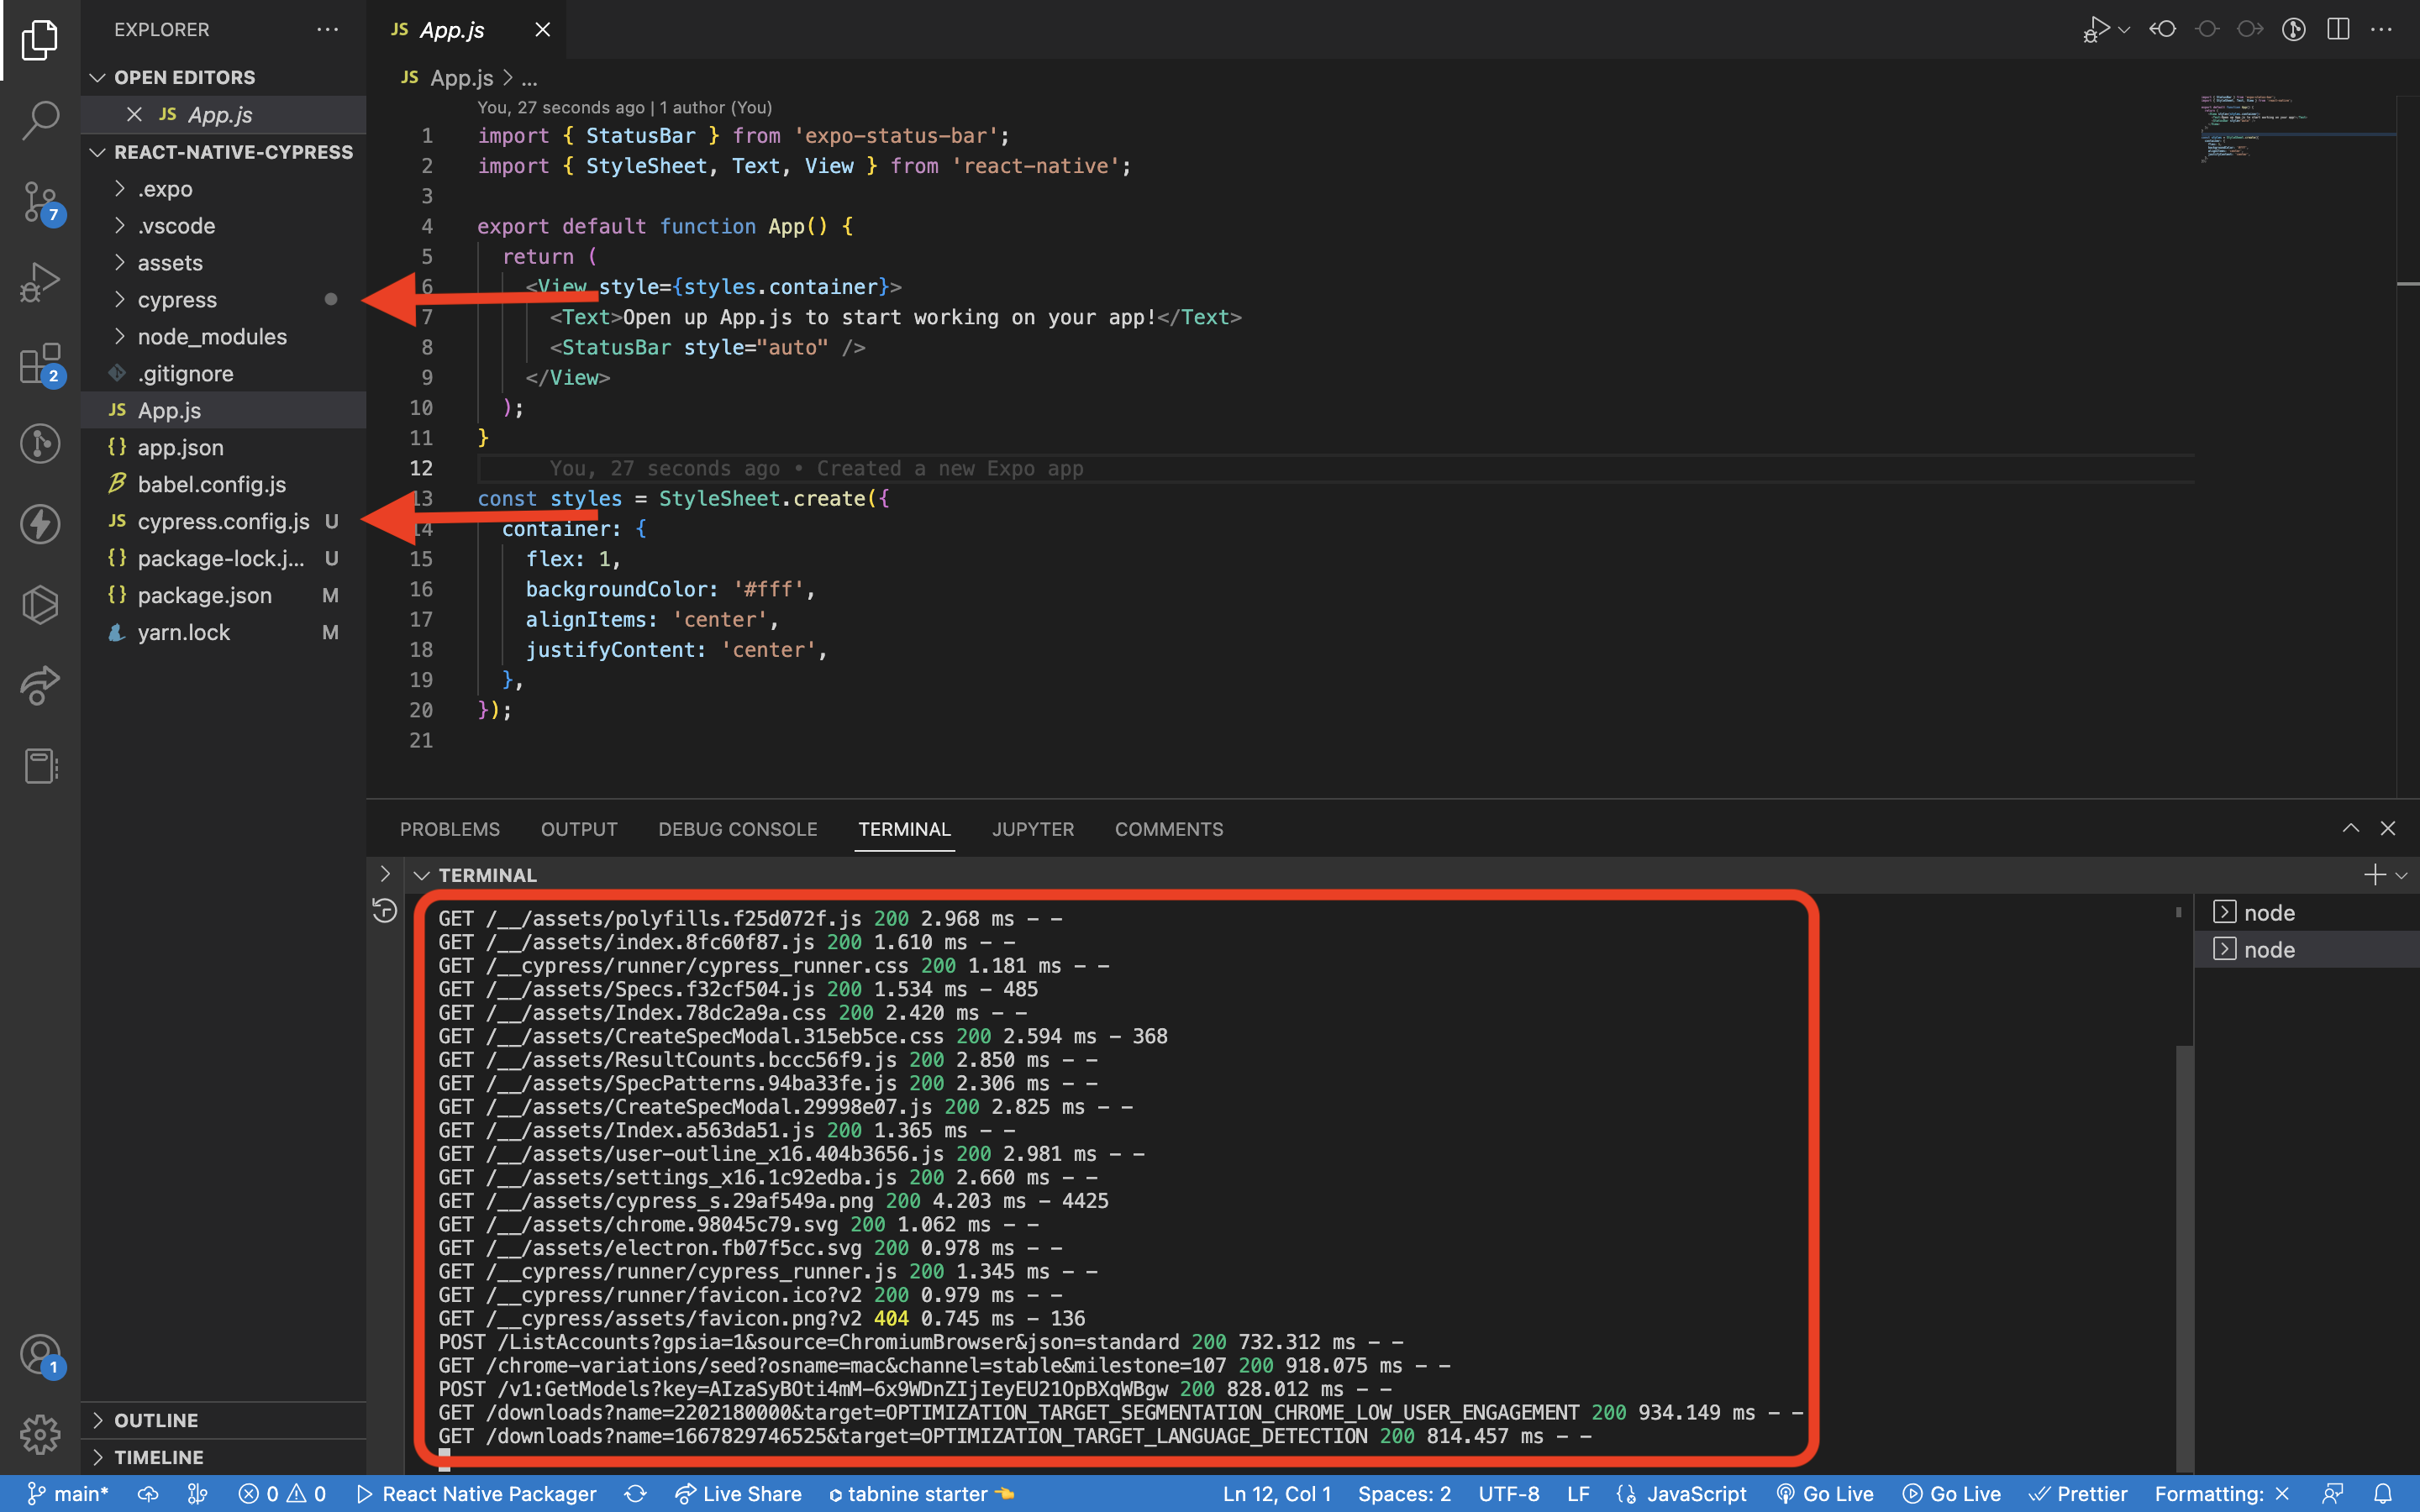
First, we have an additional file in the root directory called cypress.config.js. This holds some basic configurations for our Cypress setup. Then, we also have a directory called cypress with some more files inside it. These are the boilerplate files Cypress has added to our project that we previously talked about. You can also see the logs pertaining to the changes on the terminal window where you ran the Cypress open command:
We're all set up now. Awesome! Let's go ahead and write our first test in Cypress.
Writing Tests in Cypress
I've updated our example Expo project's App.js file as follows:
Cypress reads all your E2E tests in the /cypress/**/**/<test>.cy.js directory format. In our Expo project, we already have a directory called cypress. Let's create another directory called e2e inside the cypress directory. Here, let's further create a tests directory with a file called project-kickstart-test.cy.js inside it. Now, let's add the following to this file:
Cypress Test Syntax
Let's understand what's going on in the above test. The first line <reference types="cypress" /> is simply an IntelliSense reference for auto-completing Cypress syntax and commands in VS Code. Each test starts with a describe block. It's a special function where you specify the name of the test as the first parameter and a callback function as the second parameter.
Inside the callback function is where we write our assertion and condition. But before we do that, we first need to tell Cypress to visit the URL where our app is running locally. Note that the beforeEach block should be present before you write any cypress test assertions. Inside it, you can simply call the visit method on the cypress object (cy) and pass in your app's URL in the function.
Then, our assertion starts with it block, which takes the assertion title and a callback function. Inside this callback function, you write your test for the particular assertion. Our first test simply grabs the root element of our project and validates the text being rendered inside it.
Running Test in Cypress
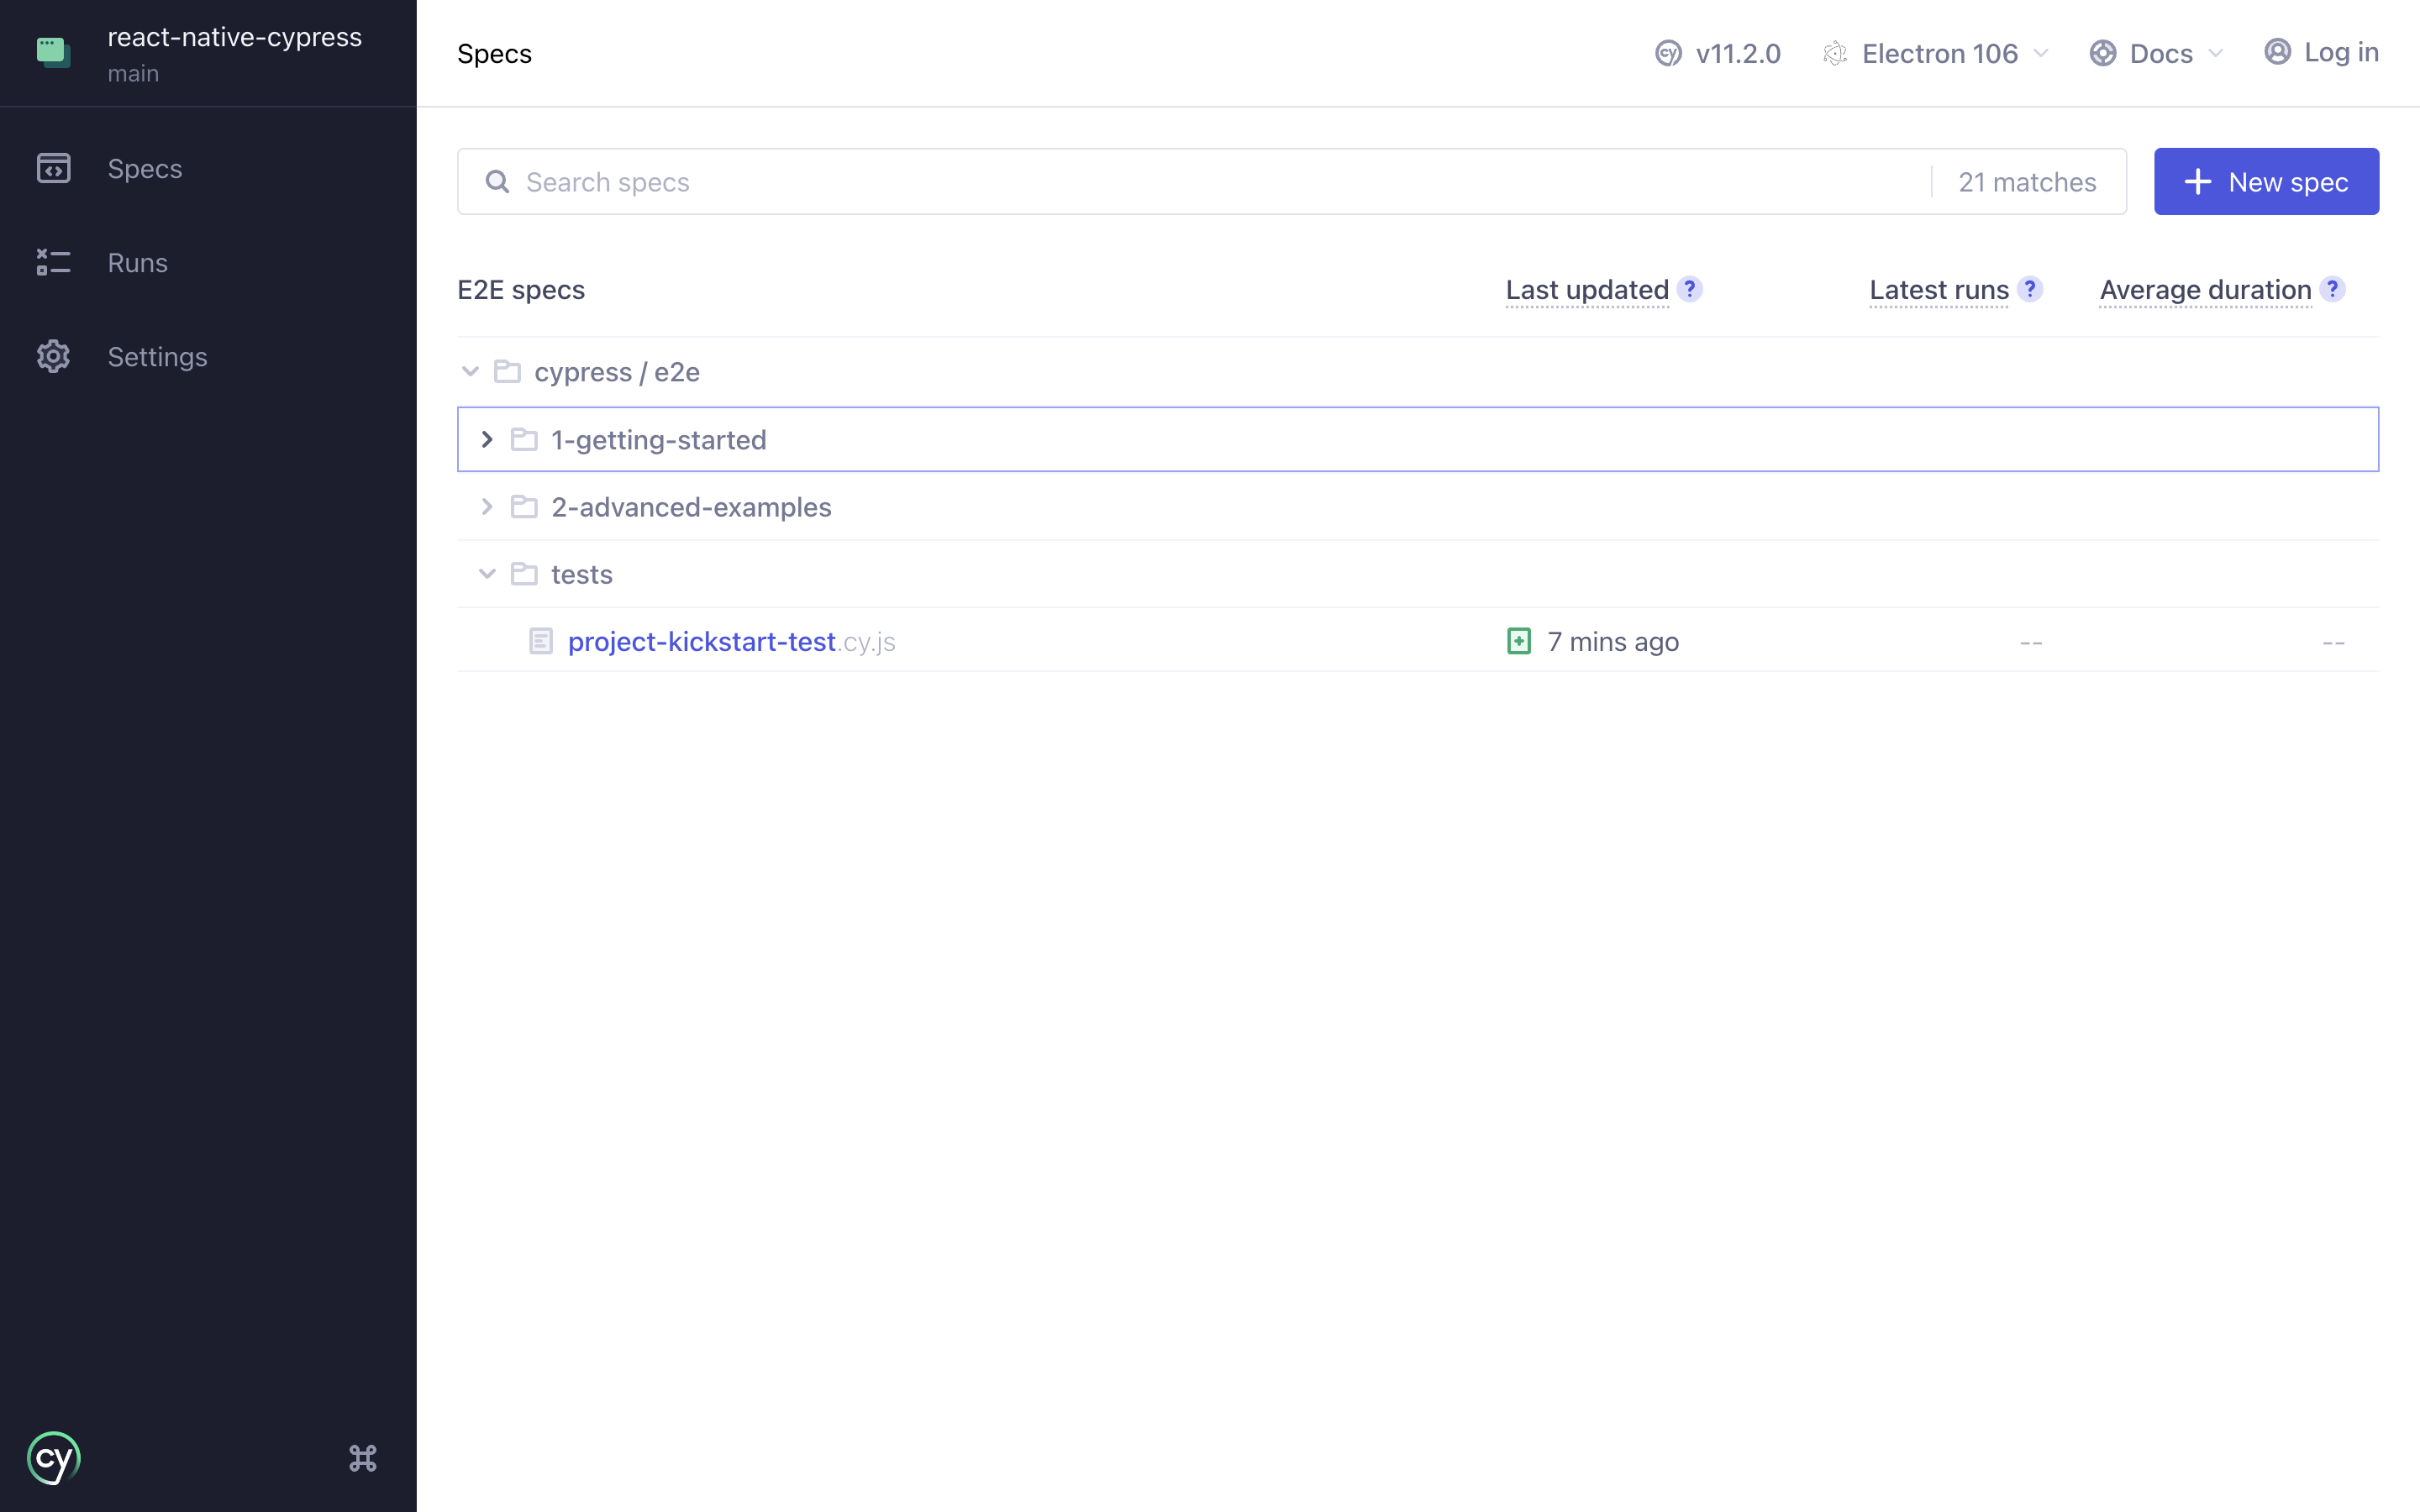
If you now open your Cypress browser, you should see our test file as shown below:
When you click on the test file, it should open in the specs tab. You can now click any test file that you want Cypress to run. Let's run our test by clicking on the spec file:
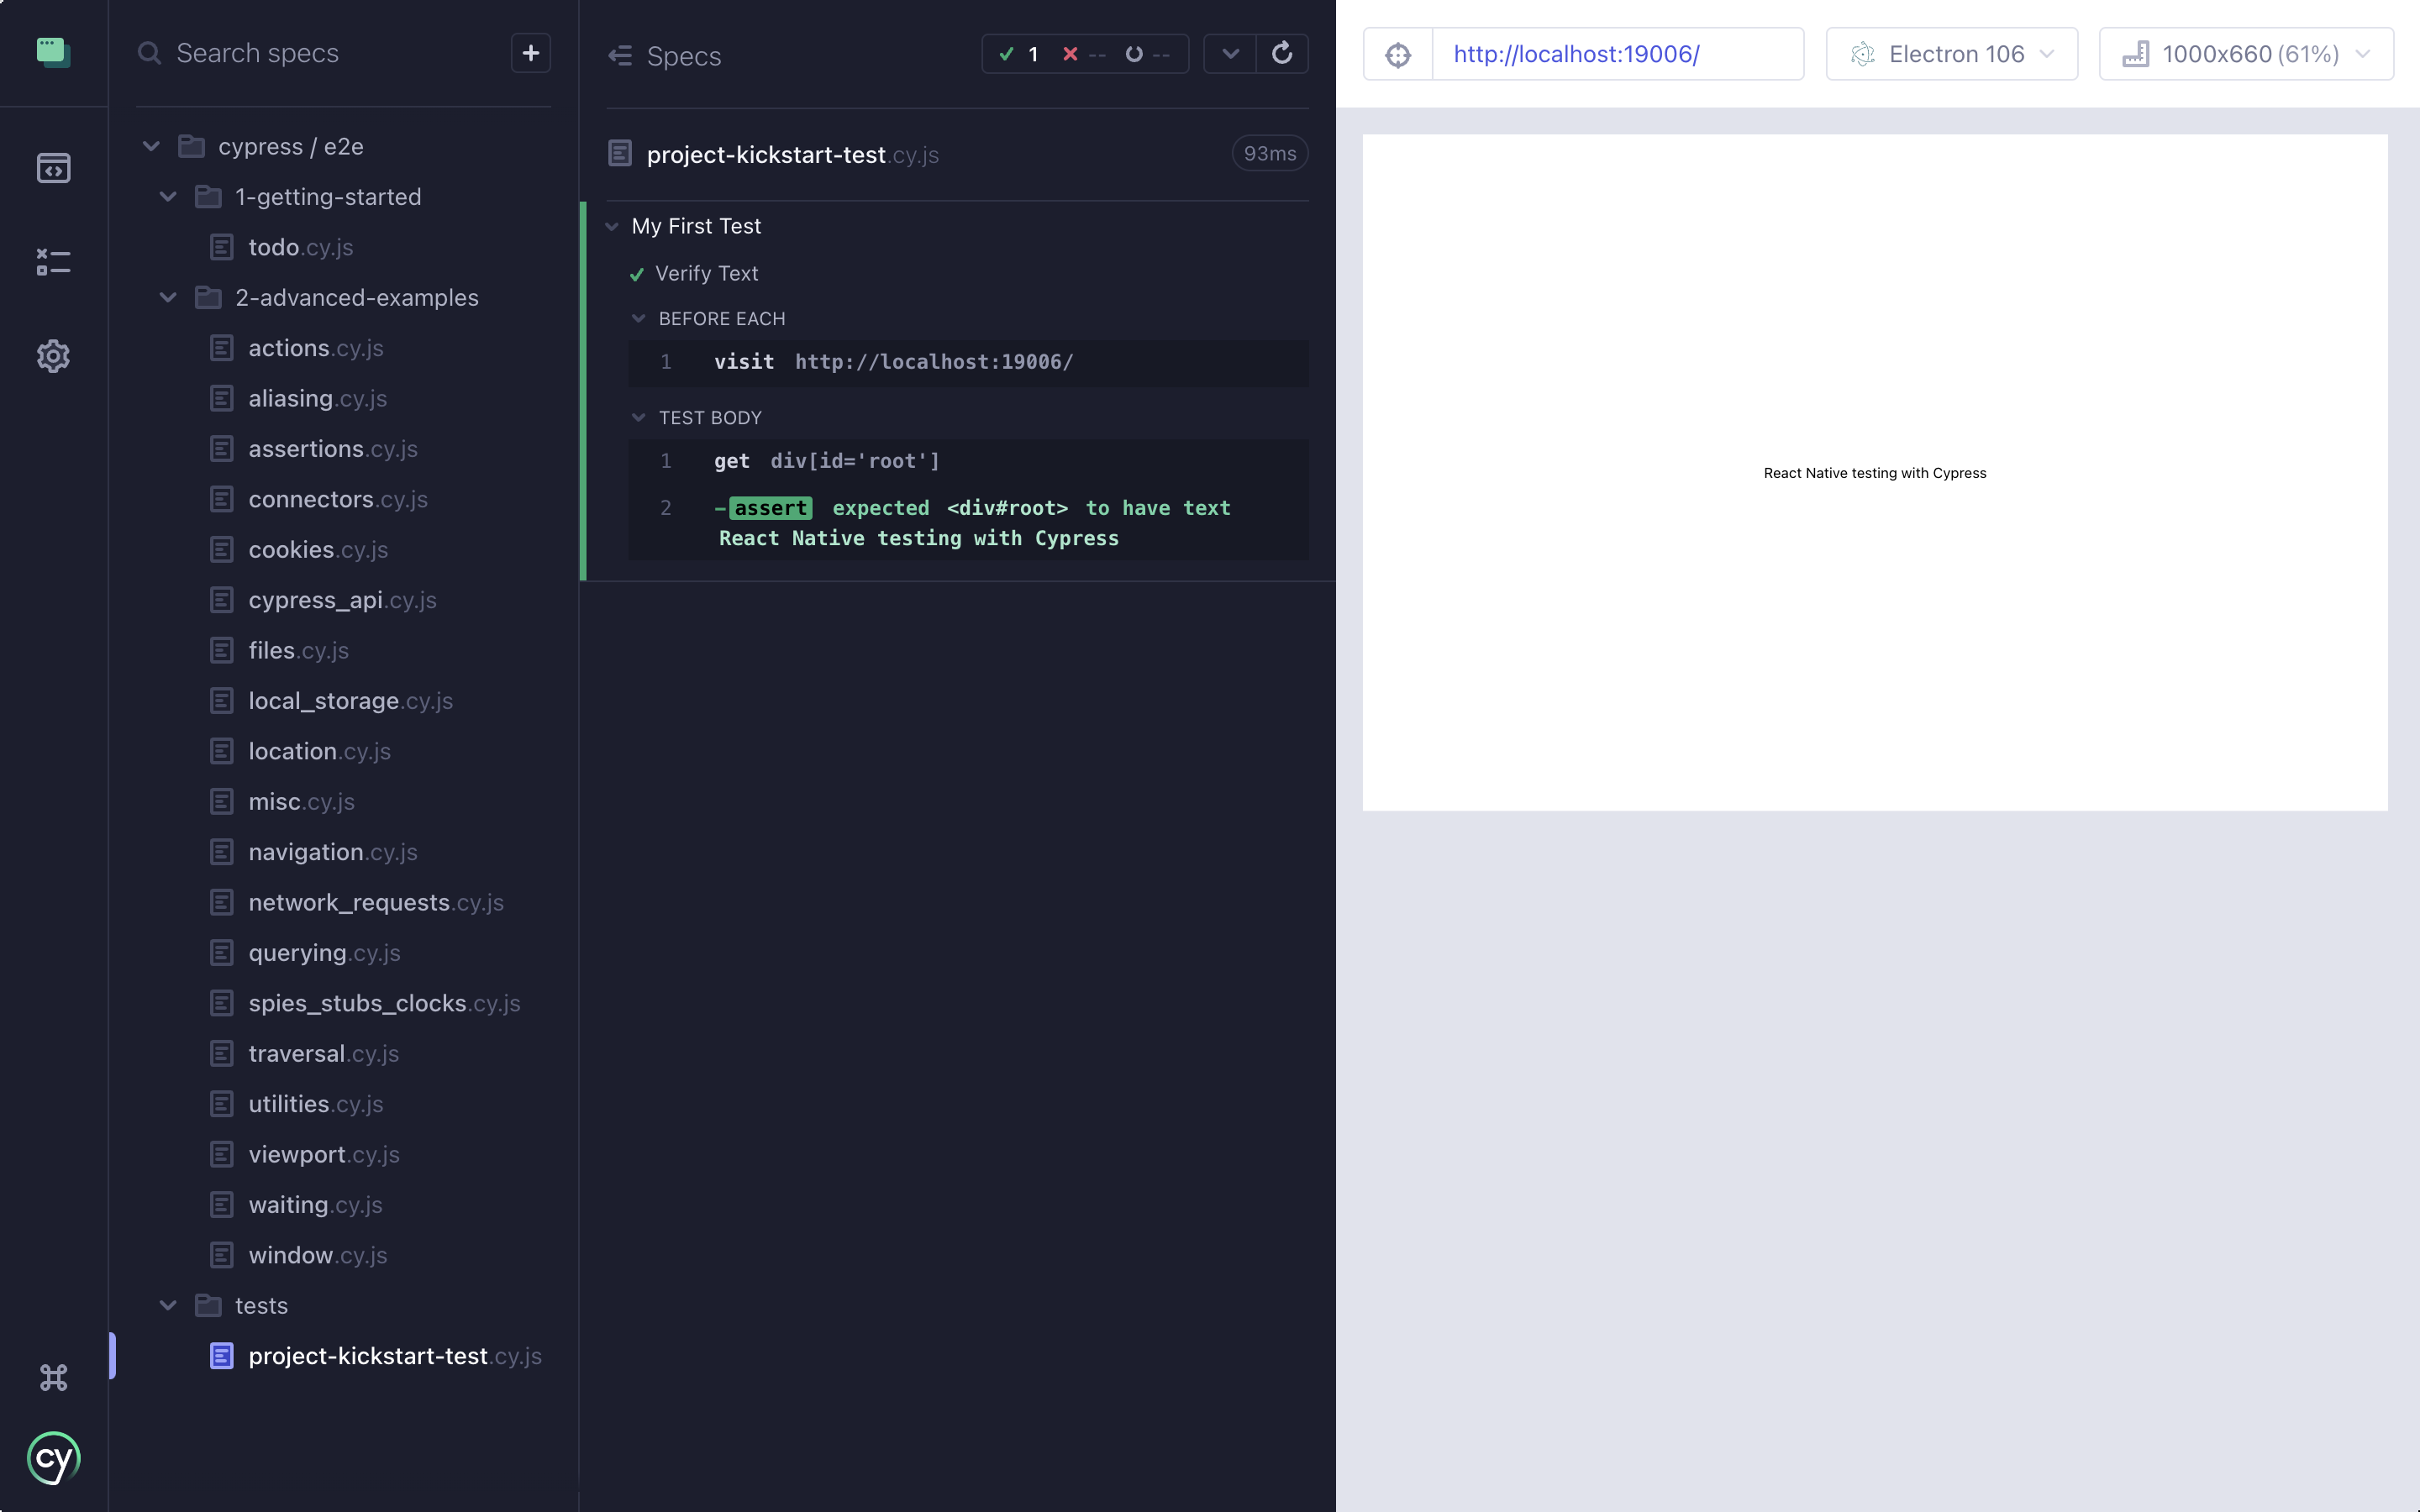
Our test passed with flying colors! We've written our first successful test for our Expo project using Cypress.
Validating API Call With Cypress
We've written a very basic test with Cypress. It's time to step up our game. A network request or an API call is quite common in any native application. Let's write some tests to validate an API call using Cypress.
API Call in React Native
First, I'll update the App.js file with the following code:
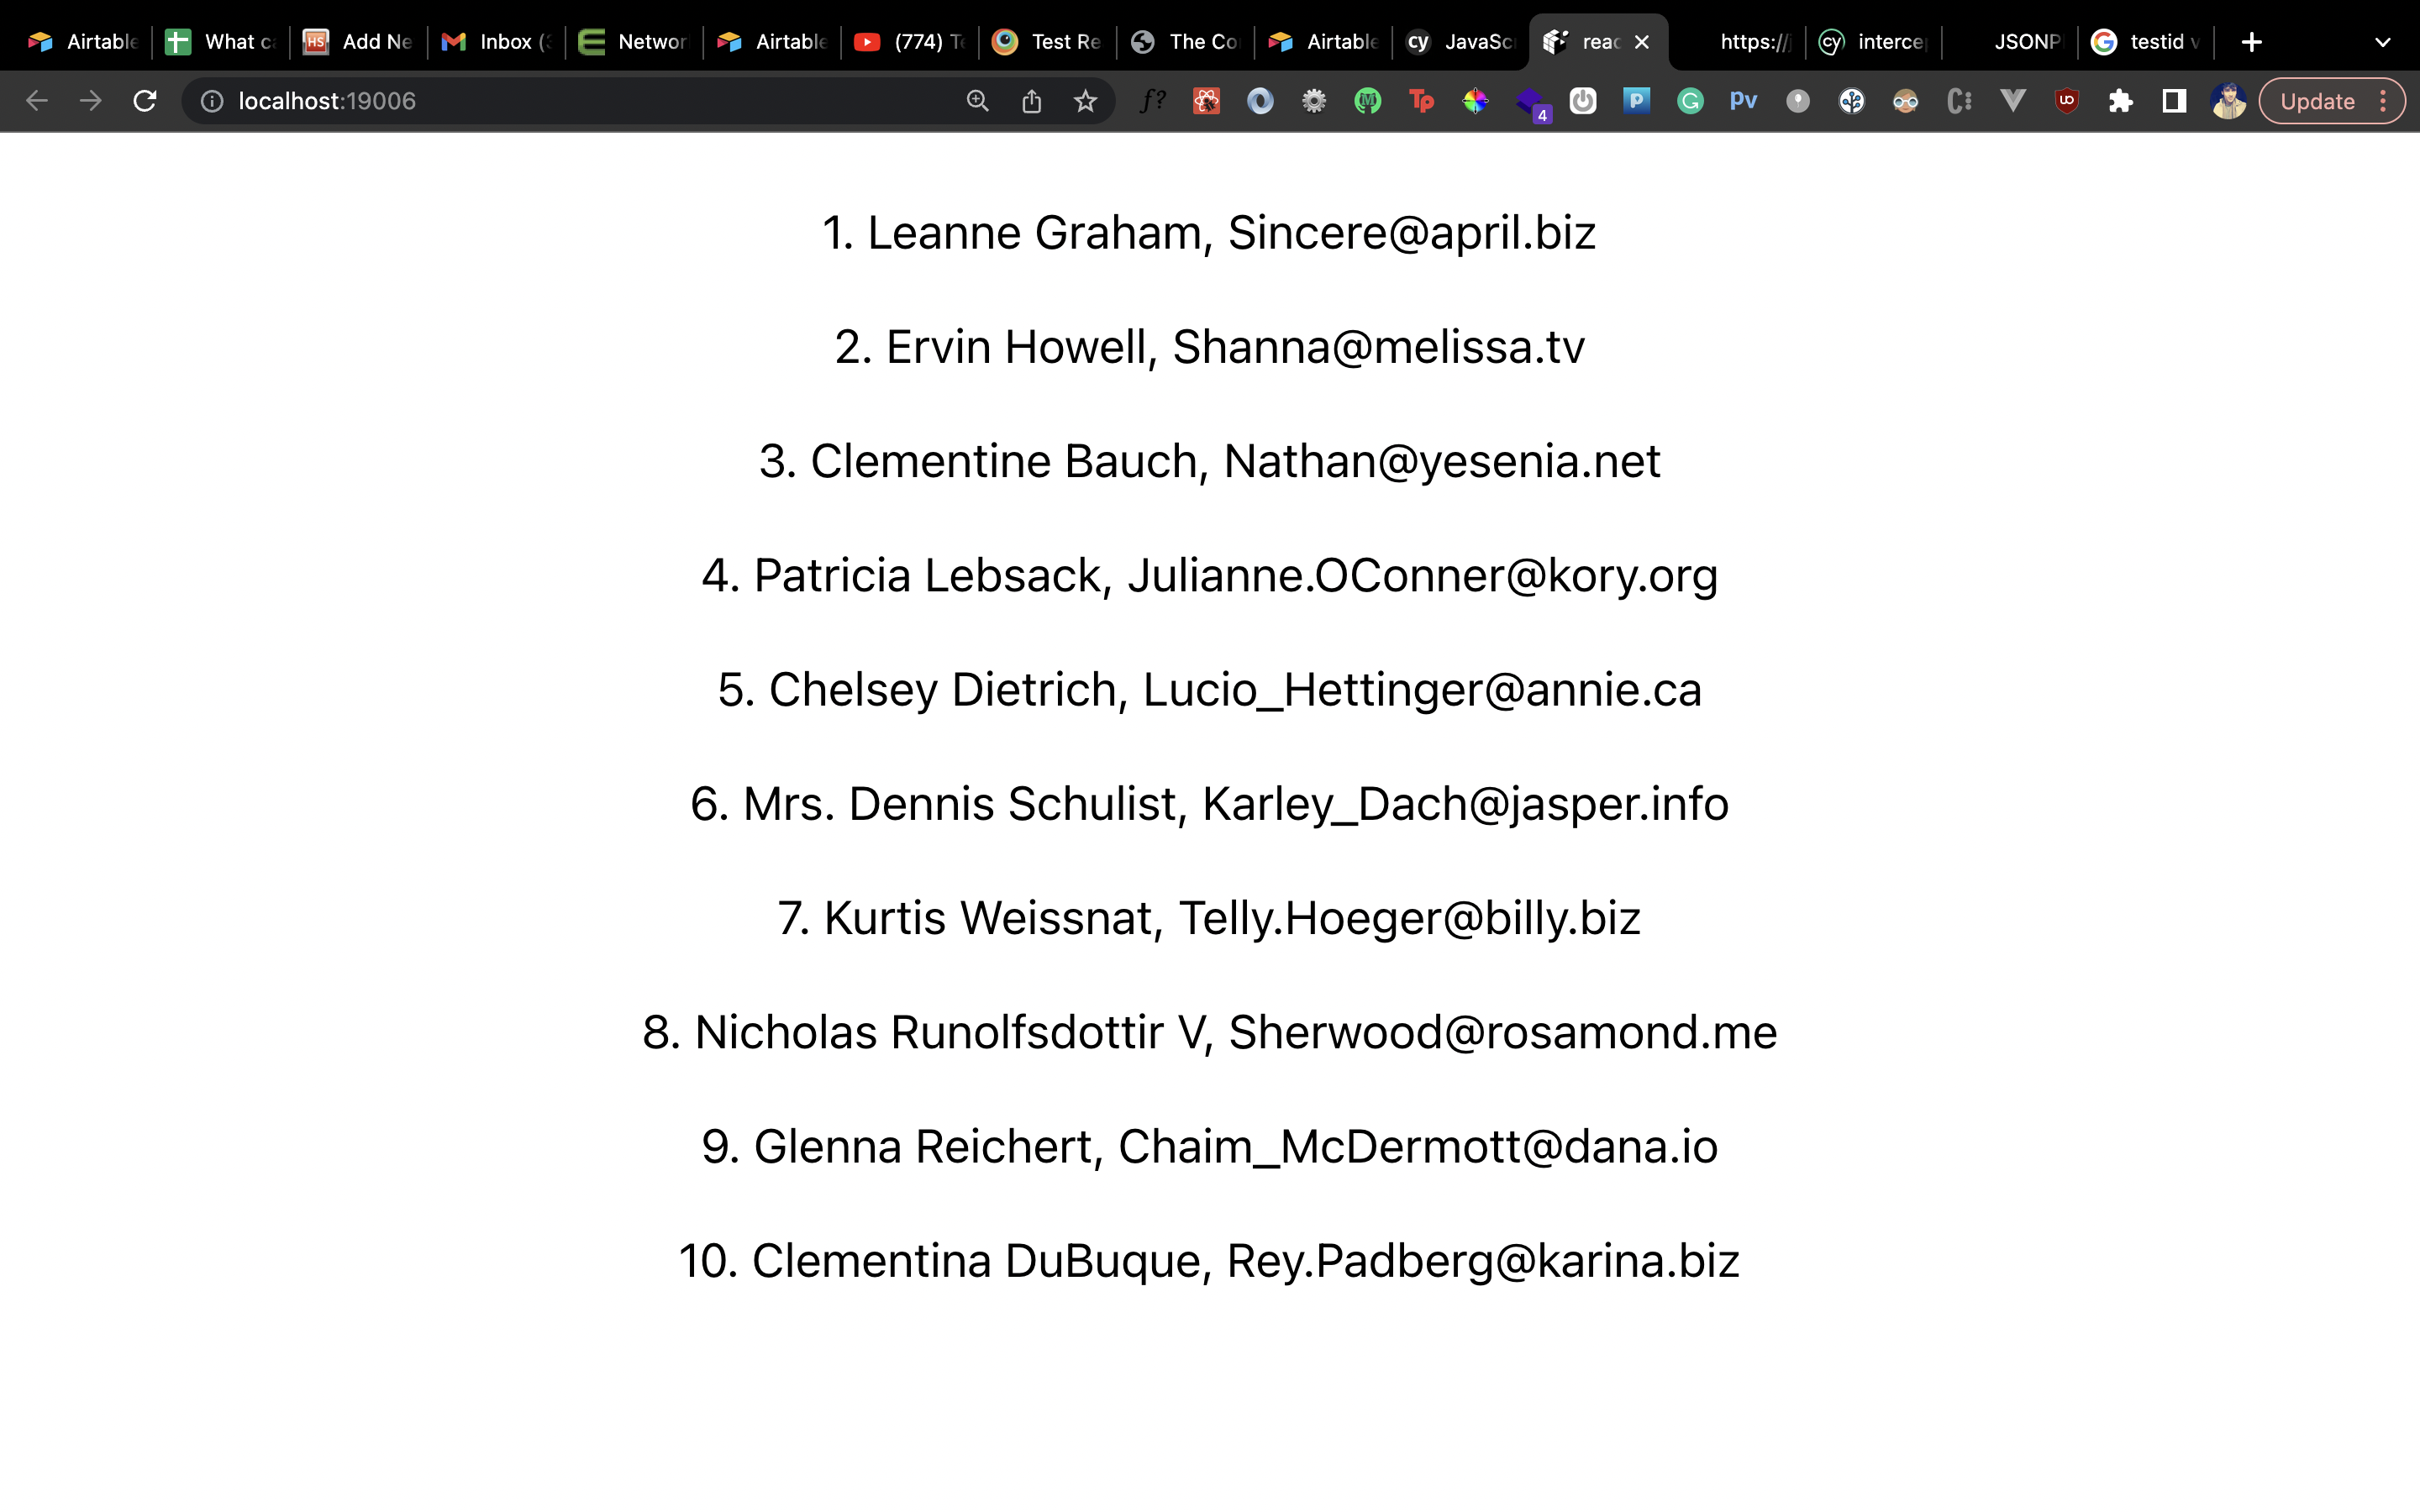
We have a function called fetch users which we call every time someone comes on the app. This function makes a GET request using the Fetch API to the URL https://jsonplaceholder.typicode.com/users which returns a list of dummy JSON data pertaining to a list of 10 users. While the API call is in progress (since it's an asynchronous action), we show a loader on the screen. After the API call is complete, we store the data from the API in a local React state and render it on the UI. Here's how that should look on the page:
Notice that we've given an accessibilityLabel to the <FlatList> component which renders the list of users. We've also given testID called user to the <Text> component that renders the information about a user. We'll use these values to grab these UI elements when we write out tests.
Verify API Success
Now, let's first verify that the API call is successful. Inside the same tests directory where we wrote out the first test, create a new file called validate-api-call-test.cy.js. Here, let's create a describe block with the title Validate User API Call. Since we're testing an asynchronous action, we don't want Cypress to visit the app before the API call is made. First, we'll use the intercept method to make the API call. We have an alias for the API call action called users and we don't need to pass the API URL since we can make use of the accessbilityLabel we assigned to the <FlatList> component previously.
After the intercept method, we will call Cypress to visit the app. Then, we'll wait on the API call using the wait method. Inside this method's callback, we'll have access to the response of the API. We can then assert the status code of the response to be 200, indicating a successful request.
Here's what the test would look like:
Let's see if the test passes:
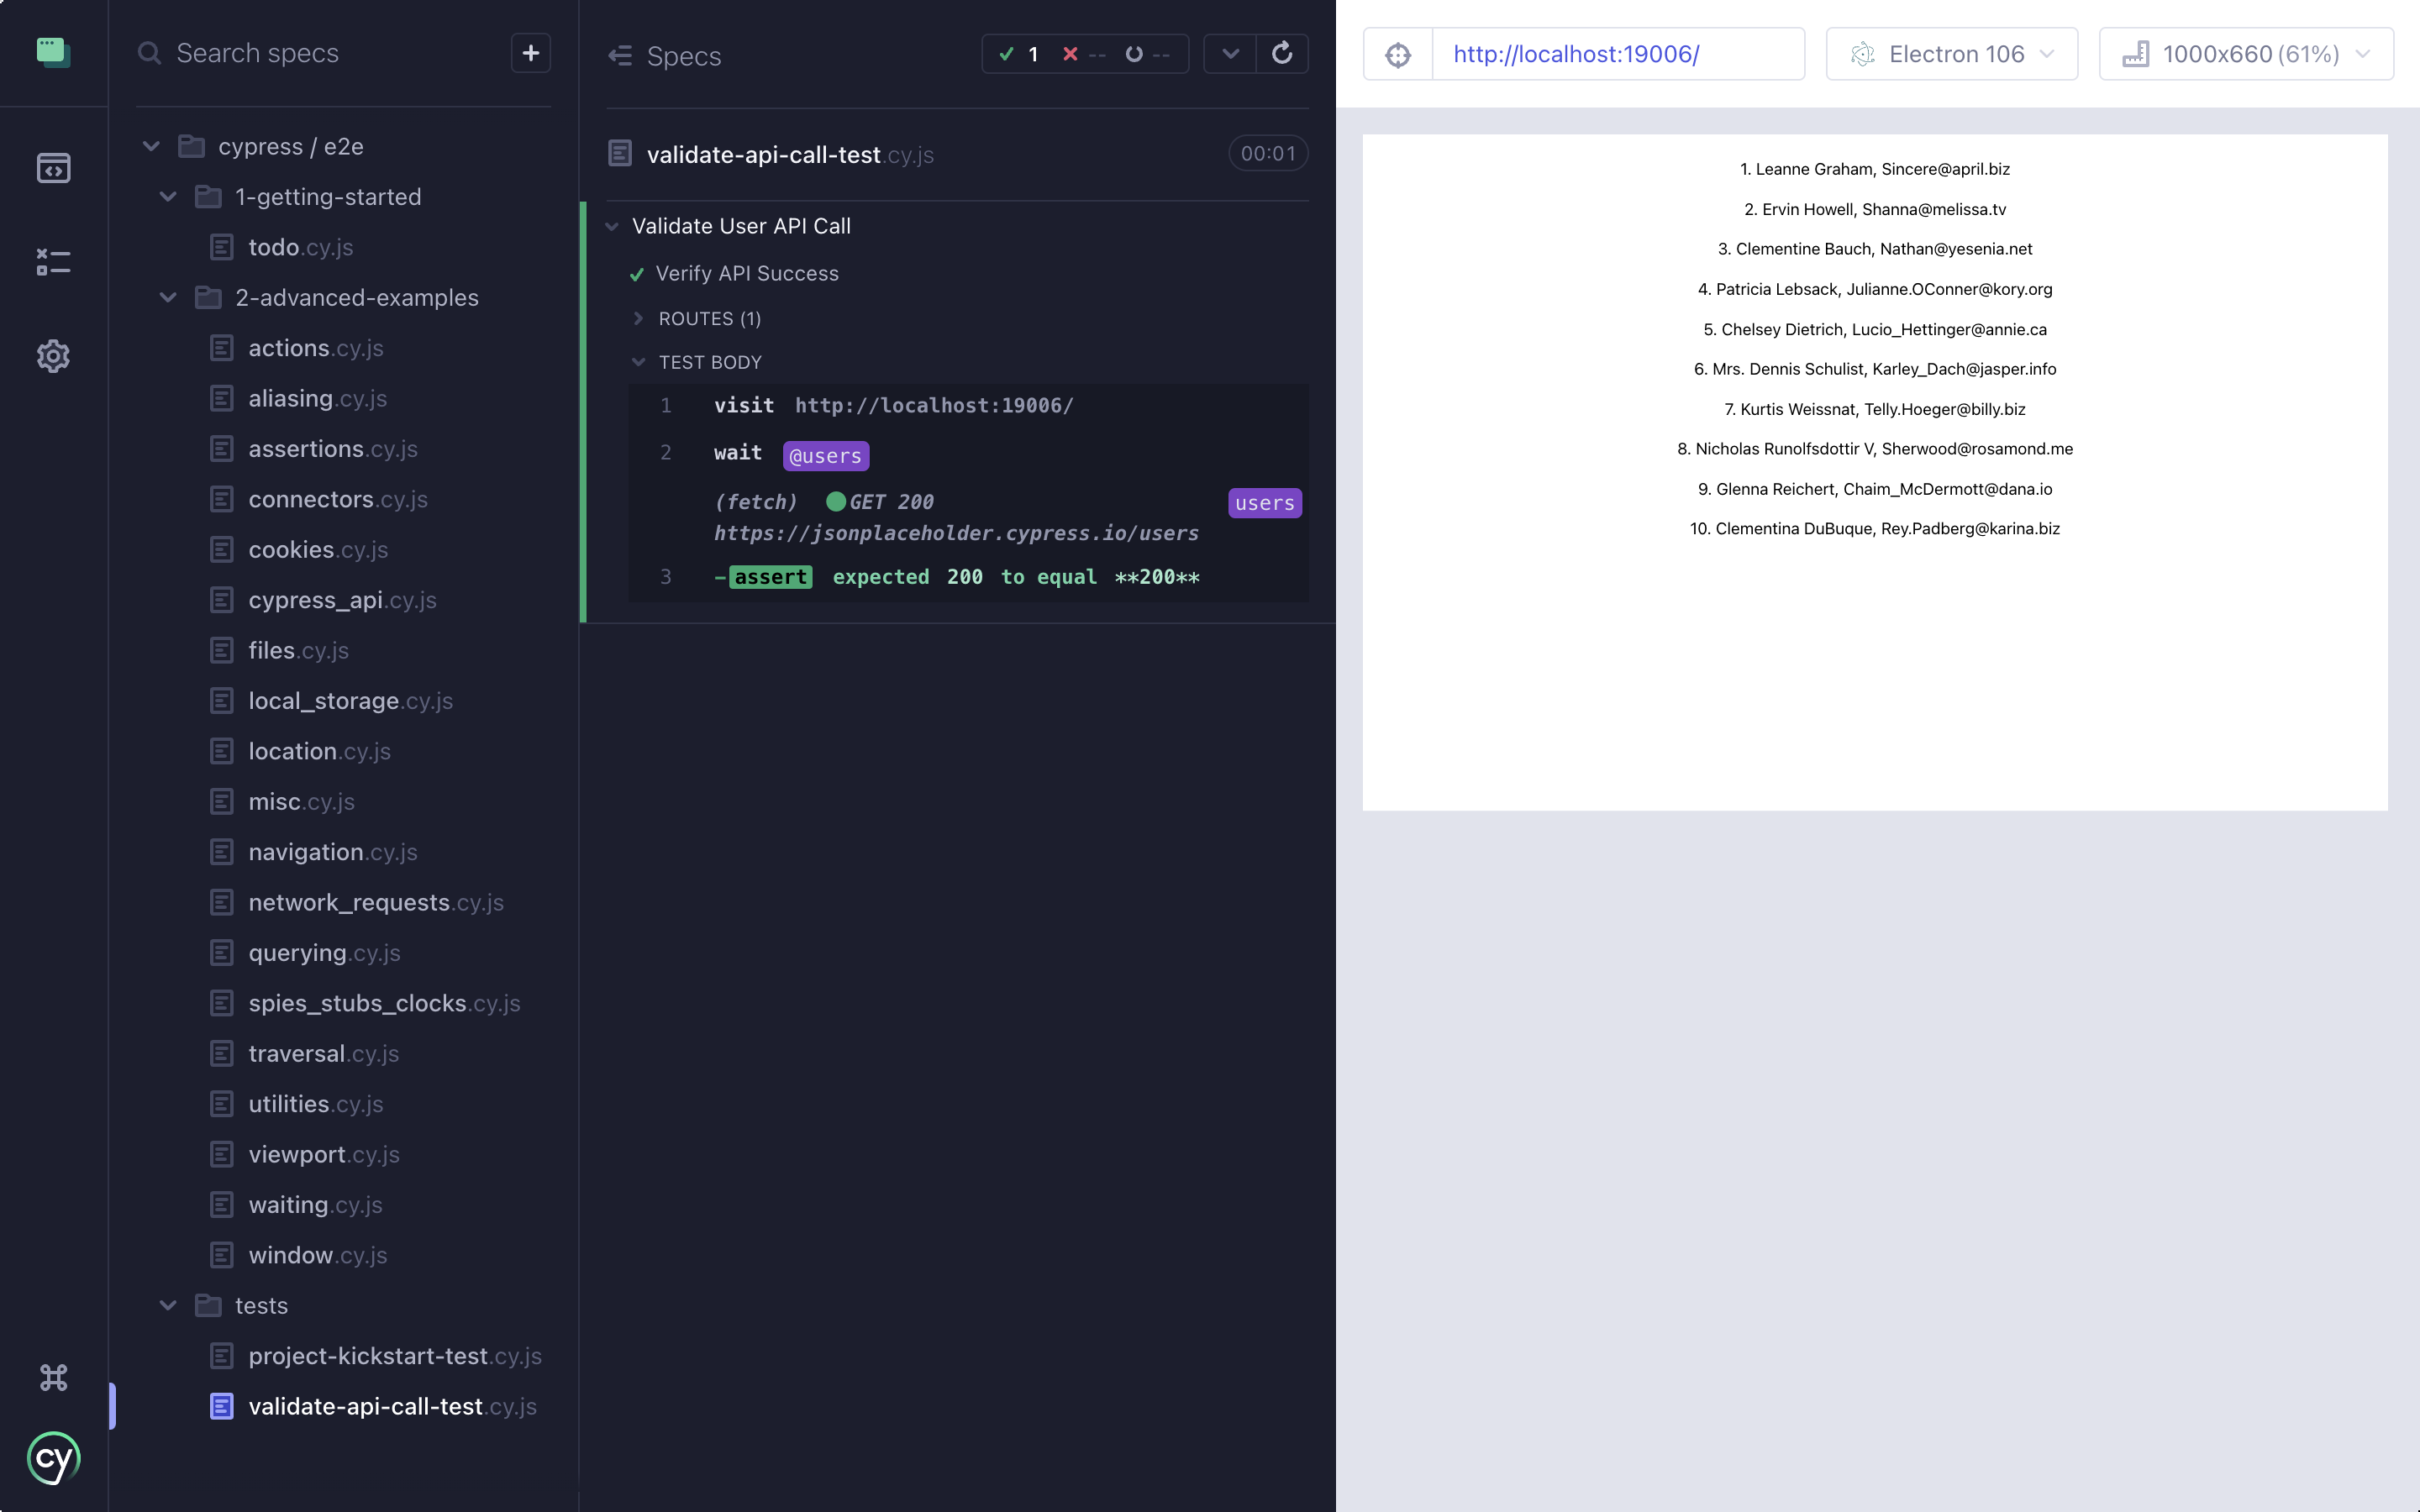
Looks like it does! Awesome! Let's write a few more tests to validate the API call.
Validate Non-Empty Data from the API
Similarly to the previous section, we can write the following test to validate that the API returns a nonempty array or list of users. Here's what the test would look like:
Here, we simply check the body inside the response to have a length equal to 10. You can also make this test less strict by checking for a length greater than zero.

If the API returns less than or greater than 10 users, the above test should fail.
Validate API Consumption
Let's also verify that our UI reflects the changes pertaining to the API call. We have two tests here. One makes sure we show a loader on the page till the data is rendered. And the other makes sure that the length of the rendered UI elements is 10 after the API call. Here's the test for this:
Anything before the API call is asserted before we fire the wait method. Anything after the API call can be asserted after we fire the wait method. Let's look at the result of these tests:
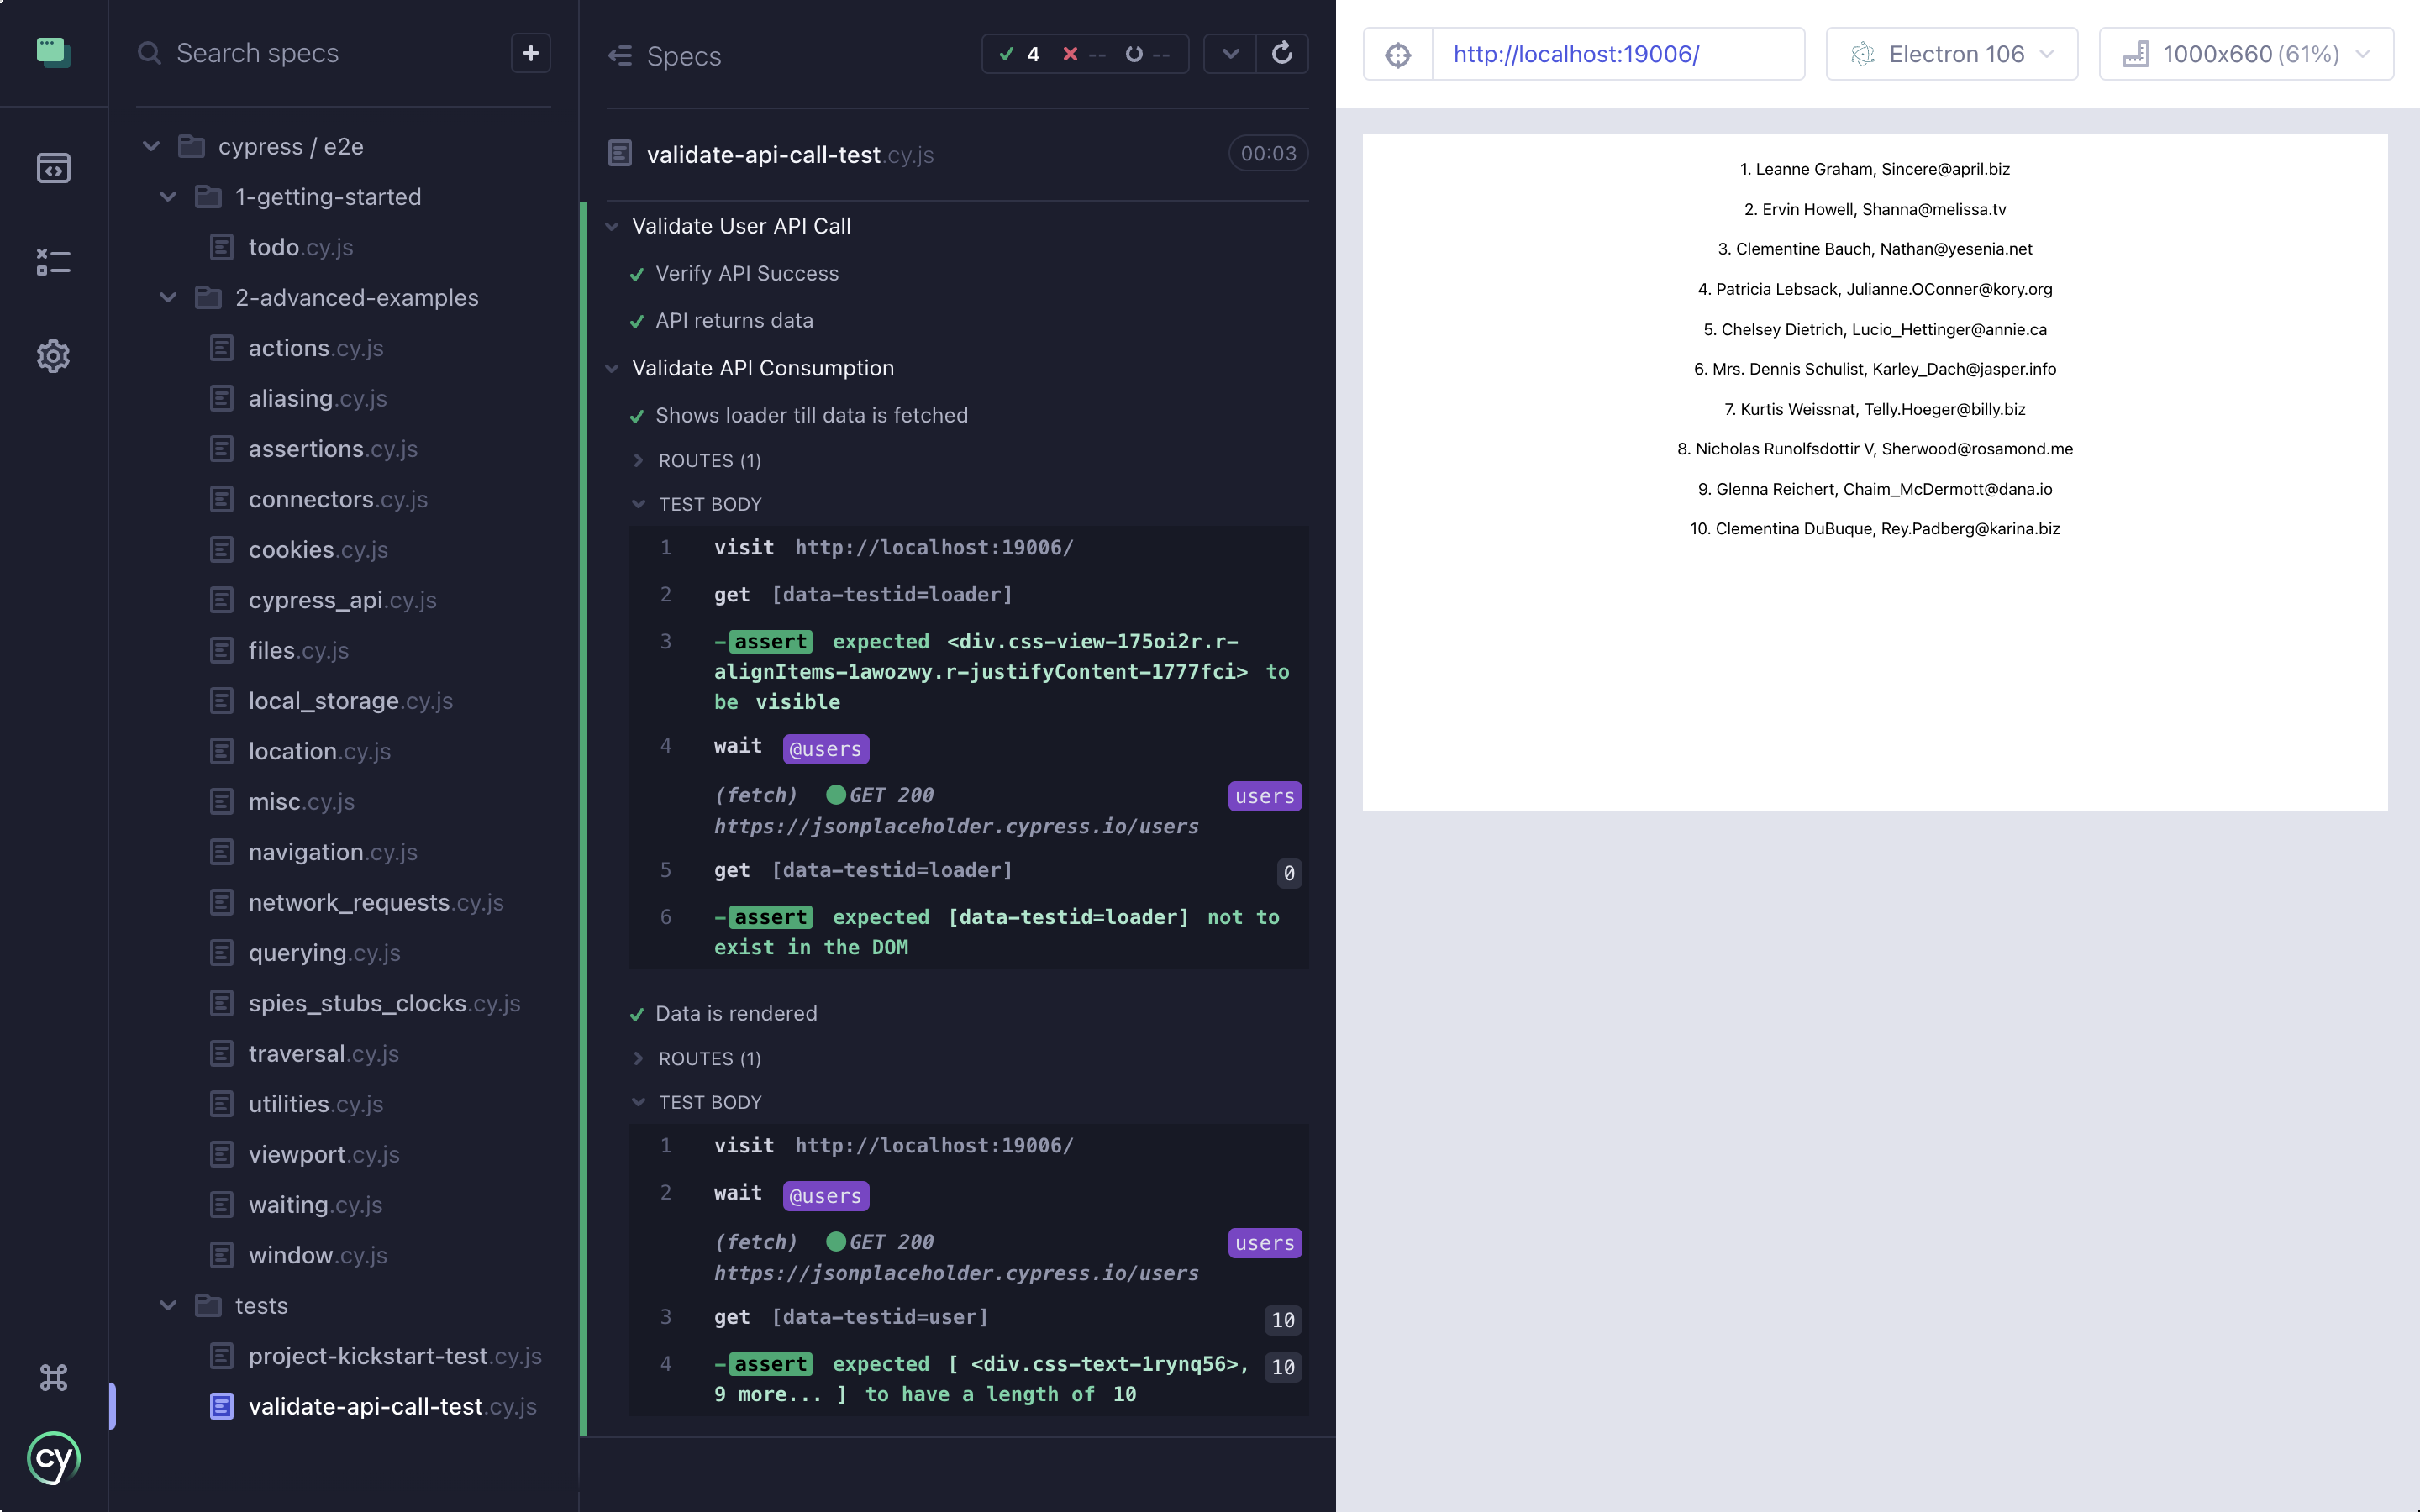
Looks like all our tests passed with flying colors! You can read more about other types of tests that you can write for an API here.
Conclusion
I hope it was fun exploring Cypress and understanding how easy it is to start writing tests for your React Native app. You can explore more syntax for learning Cypress in-depth by going through the official docs here. And if you're a mobile developer who wants to test their app right away, you canWaldo, a no-code testing platform for mobile.
Automated E2E tests for your mobile app
Get true E2E testing in minutes, not months.


