


You see loads of discounted products and offers when you open your favorite shopping app. Your Netflix app shows you recent movies and TV shows on its homepage. Your Instagram account displays your profile information as soon as you navigate to the page.
The native app interacts with a back-end server or an API to fetch some data in all these situations. In fact, fetching data from an API is a common task for any front end or user-facing application. So, in this post, I'll walk you through how you can use Fetch in React Native to get data from an API.
Primer on Fetch API
Let's do a quick overview of the Fetch API. The Fetch API is available on the global window object of the browser. It allows developers to send HTTP requests, as well as receive and extract JSON data from the response. The same is implemented in React Native.
Therefore, we can use the Fetch API in React Native to interact with a remote data server or an API. Here's a simple example of the Fetch API:
In the above case, our API endpoint is https://jsonplaceholder.typicode.com/todos/1. Fetch returns a promise so we can tack a .then() on it to convert the response to JSON format. This is also an asynchronous action and returns a promise. Hence, we tack on another .then() to extract the actual data.
Now, let's dive deeper into Fetch and see how we can use it to get real data from an API in a React Native app.
Create a New Expo Project
First, we'll create a new Expo project. Inside a directory of your choice, run the following command:
Then, head inside this project and kickstart the local development server:
We're all set up now!
Use Fetch to Get Data From an API
Now, let's use the Fetch API to grab some data from a dummy API. For the sake of this tutorial, we'll use the fake REST API offered by the JSON Placeholder API.
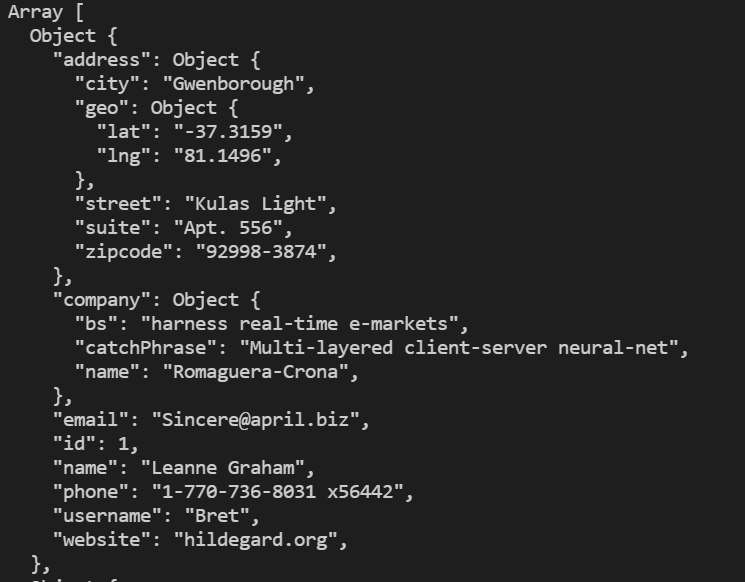
First, let's simply make a new API request to the users endpoint. This API will return us a list of 10 users with some data associated with each of the users. In our app, we'll first create a function that uses the Fetch API to get a response from this API and outputs the data on the console.
Now, we'll invoke the above function inside the useEffect in our App.js file:
Once you do that, you should see the user data logged on the console:
Handling Errors With Fetch
Sometimes your API might throw an error. This could be due to a number of scenarios. Maybe the server is down. It could also be that you didn't send the request to the correct endpoint. Another common scenario is that the user is out of network or WiFi, so a data connection cannot be established.
In all these cases, you need to handle the error returned by your API caller. You can handle errors with Fetch using the .catch block. Thus, whenever the Fetch request fails, your catch block will be invoked, which will automatically take an error object as a parameter.
You can then either log this error parameter to the console or display a custom error message to your user.
The above example represents the refactored version of the getData() function with error handling using the .catch handler. We'll talk more about another way to elegantly handle errors with Fetch requests later.
Display Data From Fetch
Now, let's hook our fetch API call with our app's UI. We receive the data from the users API, but since it's asynchronous, we'll also need some state to store it. Consequently, we'll also update our getData() function accordingly.
Great!
Next, we'll display the name of our 10 users on the UI. Since we store this data in our usersData state array, we'll simply map through the array and render a <Text> component with the user's name inside it:
Once you do that, you should see the list of users as shown below:

Awesome! Let's learn a little bit about how we can refactor our getData function using async/await and Fetch.
Use Async/Await With Fetch
Right now, we use the traditional approach of using the Fetch API. Each caller of the Fetch API asynchronously returns us a promise. Hence, we tack a .then method on each and do something with the data we get inside that callback.
This approach works and is technically correct, but we can rewrite that code in a more modern and neater fashion. We can use async/await, available in Es6, to refactor our code.
Here's what the updated getData() function should then look like:
We first make our getData function asynchronous by attaching the async keyword next to its name. Then, use await for any asynchronous line of code inside it. The above code makes the entire fetching data action cleaner with the same result.
Once you refactor your getData function, you should still see the same result that we saw in the previous section.
Error Handling in Async/Await
When we used the .then() blocks, we could use the .catch block to handle our errors. However, with async/await we can no longer use the .then and .catch methods directly.
So, how do we handle errors?
We can use the try/catch blocks in this case. Everything related to processing the data and making the Fetch call can be wrapped inside a try block. Then, we can have a catch block that automatically takes an error object as a parameter.
We can then do anything inside this catch block to handle that error.
Here's what the updated getData function would look like with try/catch blocks:
Notice that I intentionally appended an "X" in the endpoint so that the request would fail. We can now test it out by running the app:

We get an error logged to the console via the catch block. Sweet!
Implement Loading Action With Fetch
We know that getting data using the Fetch API is an asynchronous action. This means that the data is not displayed instantly to the user. Now, this might create a bad user experience for your app because it might leave users wondering what really is going on.
Therefore, in most cases, the data-fetching action is accompanied by a loader. Until you receive and process the response from your Fetch request, you can show a loader to the user to indicate that a data-fetching action is underway.
Use the .finally Handler in Fetch
However, with try/catch blocks on Fetch, we can handle the loading state very smoothly via the .finally handler. First, we'll create a new state that would store the loading status:
Then, we'll set this state to loading inside our useEffect right before we invoke the getData function. We'll also intentionally delay the getData function's calling using a setTimeout.
Now, we'll need to set the loading state back to null after the request is completed. Usually, you might do it two times—once inside the try block then again inside the catch block.
That's necessary because you also need to toggle the loading state in case of errors. However, we use the finally block to only toggle the loading state once.
The finally block is executed after the request is complete regardless of its success or error. Thus, even if your request fails, the finally block will run.
Now, let's conditionally render a loading message on the UI:
I've also updated the styles of the project just to make everything a little bigger:
Now, if you check back, you should see a loading message for three seconds before your data appears.
Awesome! You can do a lot more inside the finally block, as well, like setting an error state to display a custom error message.
Testing React Native Fetch With Jest
Let's now see how we can test our Fetch calls using Jest by mocking the Fetch function.
First, we'll install Jest and expo-jest in our app by running
We'll also install jest-fetch-mock, which will help us mock the Fetch API's implementation:
We now need to update our package.json as shown:
Next, we'll create a file called App.test.js. Here, we'll test if our mocked Fetch function works correctly or not.
We can now run the above test by running the following command:
And our test should pass correctly:
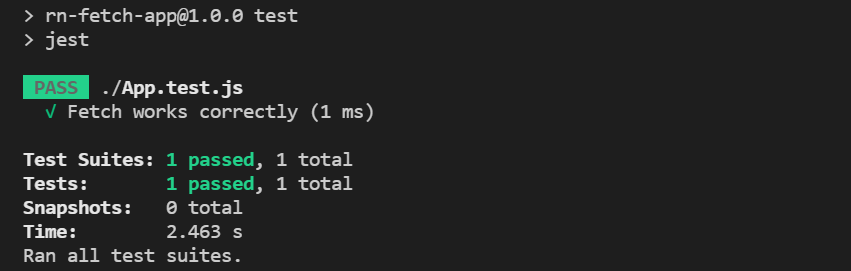
Great! You can now use this test as a wrapper for all the unit tests you write for your Fetch API calls.
Conclusion
In this post, we've seen how we can use React Native Fetch API to get data, implement loading action and handle errors with it.
There's a lot more you can do, however. You can try implementing an API retry mechanism by recursively calling your Fetch function. You can also conditionally revoke your Fetch API calls if the user is offline.
We've also seen how to mock the Fetch function in our unit tests. Further, you can also check out Waldo, which gives you a no-code testing environment for creating automated tests conveniently.
Automated E2E tests for your mobile app
Get true E2E testing in minutes, not months.


