


A FlatList is used to render lists in a React Native application. We can also use React to render a list in React Native, which is achieved by looping through a map. But doing so can lead to performance issues, which we’ll look at later. In addition, FlatList also has many additional features for mobile devices.
Basic Setup
In this project we are going to use the Expo CLI to create the FlatList demo app. It is much easier than the React Native CLI and better suited to a small demo like this. We first need to install Expo CLI globally by giving the command below from the terminal.
After that we will create a new project by giving the command below.
It will ask us to choose a template. For our demo app, we are choosing to create a minimal app.

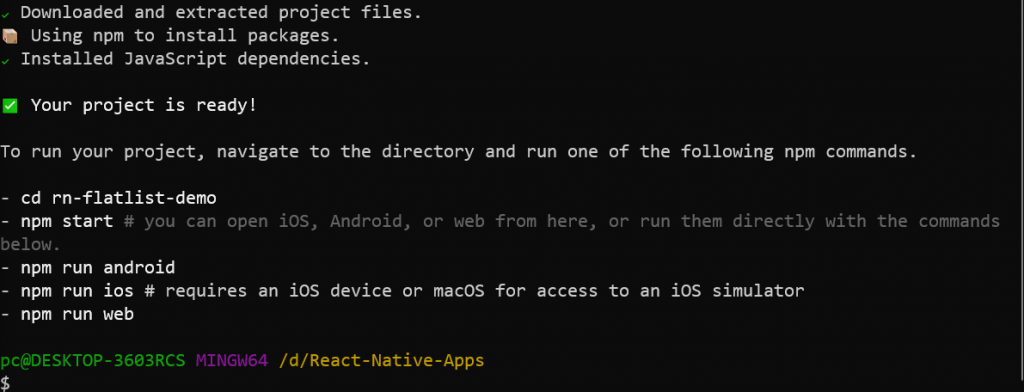
We will get a minimal React Native app in about two to three minutes. If everything is successful, we will get the screen below.
Starting React Native
Now, as per the instructions, we need to change to the directory and run the npm start command.

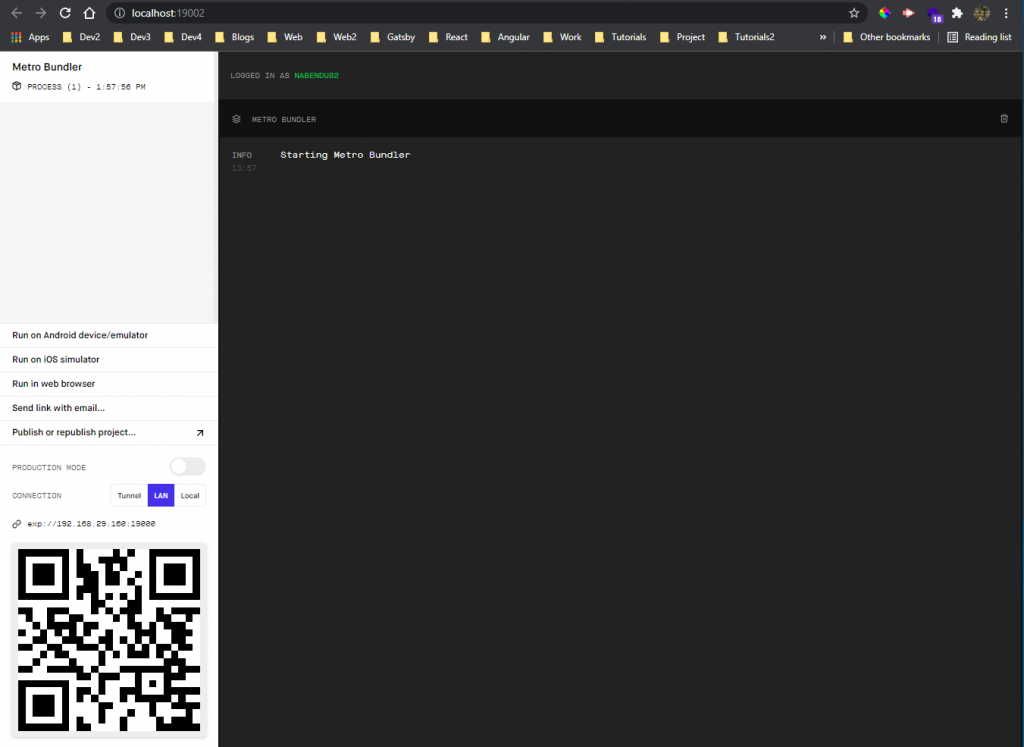
It will open the Expo app in http://localhost:19002/. We can run this app on an Android emulator or an iOS simulator, but I personally don’t run on either of them. I use the QR code at the bottom left and open it in a physical device.
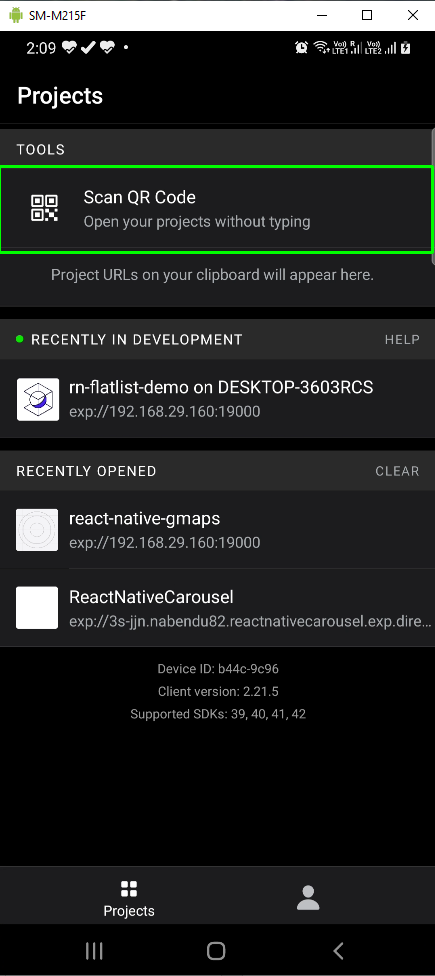
We can open the app on any Apple device or Android phone by installing the Expo Go app from the Google Play Store or the App Store.
Once the Expo Go app is installed on the phone, click on Scan QR Code.
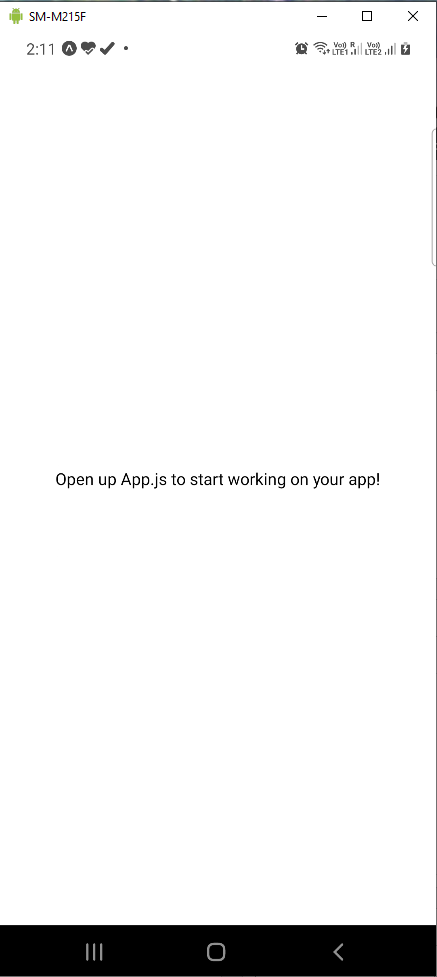
It will open the app and show the generic text, which asked us to work on App.js.
List Without FlatList
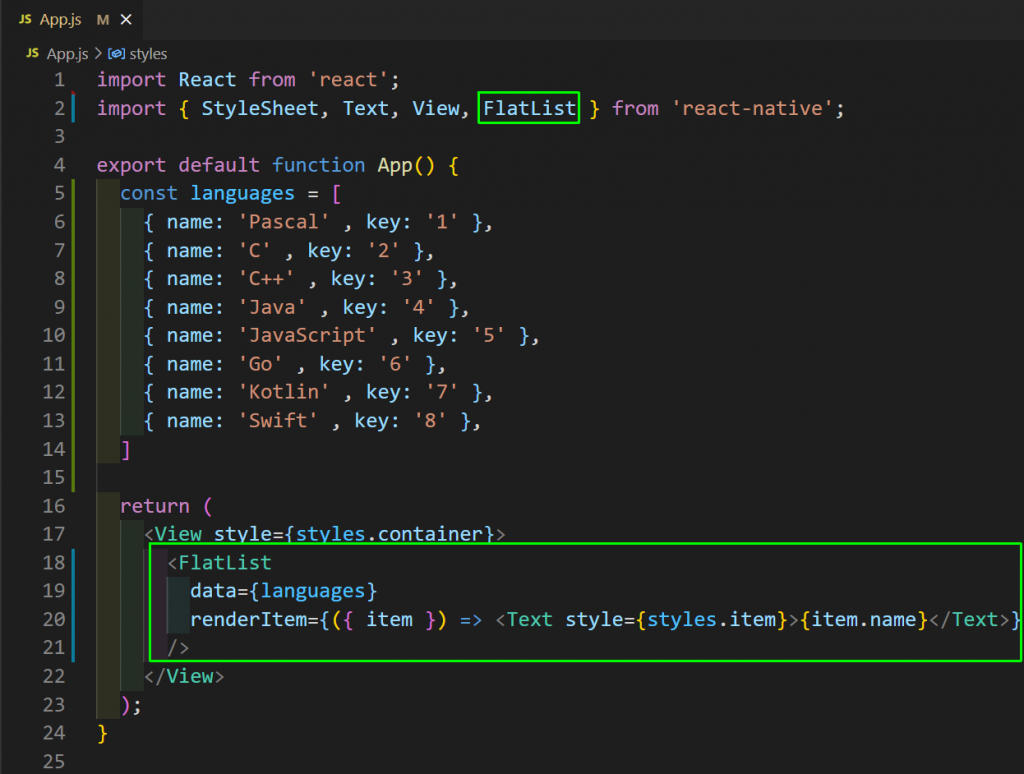
It is possible to create a list without a FlatList. Let’s look at an example of that first. We will update our App.js to contain the code below. Here, we are looping through an array of an object and showing the name.
This a common pattern in ReactJS programming. We are also styling the list to show it nicely in mobile devices.
Now, it displays nicely, but the last item will overflow the screen. We are also not able to scroll to the last item.
This happens because React Native works like this by default. If we want something to be scrollable, then we have to surround it with a ScrollView component.

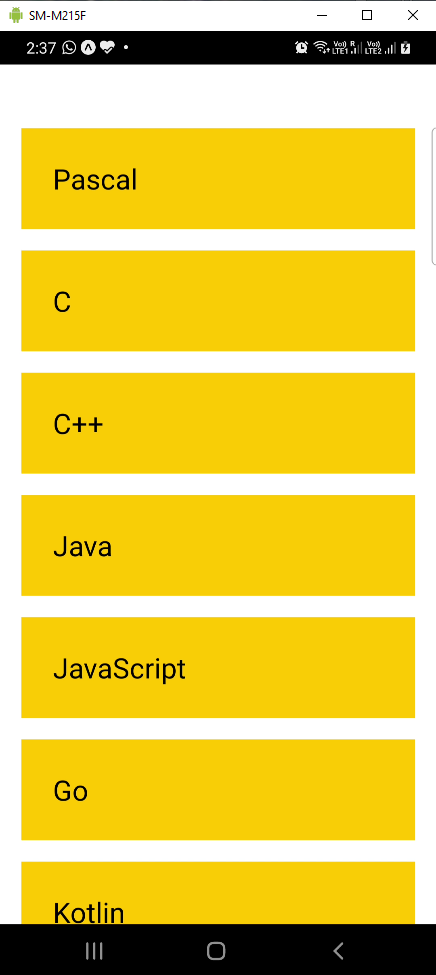
By adding ScrollView, we are able to scroll through the list.
List With FlatList
FlatList is a much better way to create lists in React Native. In fact, it is the recommended way to create lists.
A FlatList also comes with an automatic ability to scroll a list. We will import it first and then use it in our App.js file. In a FlatList we have a number of different props, which determine how our list works. The different props are described below.
- data: It specifies the data we want to output.
- renderItem: It is equal to a function, which returns JSX. It is basically the item from an iteration of a loop.
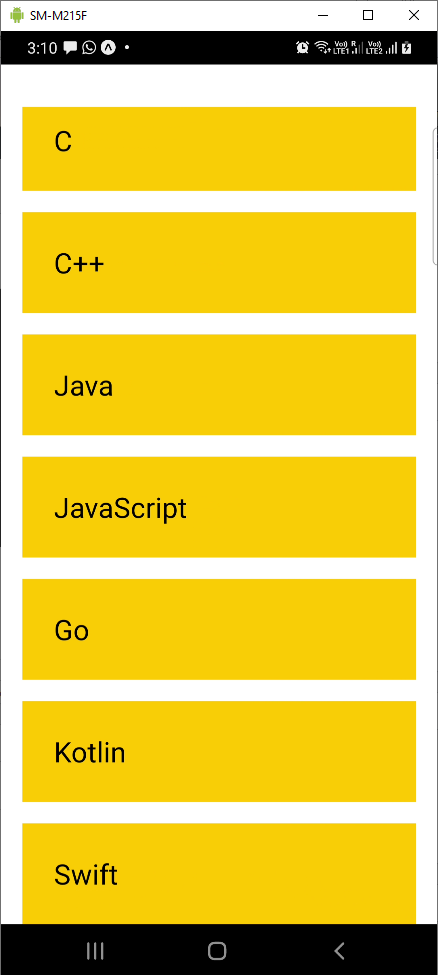
With the code below, we have basically changed our ScrollView to FlatList.
Our app will be rendered as earlier with scrolling features.

One of the benefits of the FlatList is that it doesn’t load all the items at once. Suppose we have hundreds of items in the list. It will render only the five or six items that will fit on a screen. After that more will load when we scroll down.
A normal list with ScrollView doesn’t have this feature and will load all of the items.

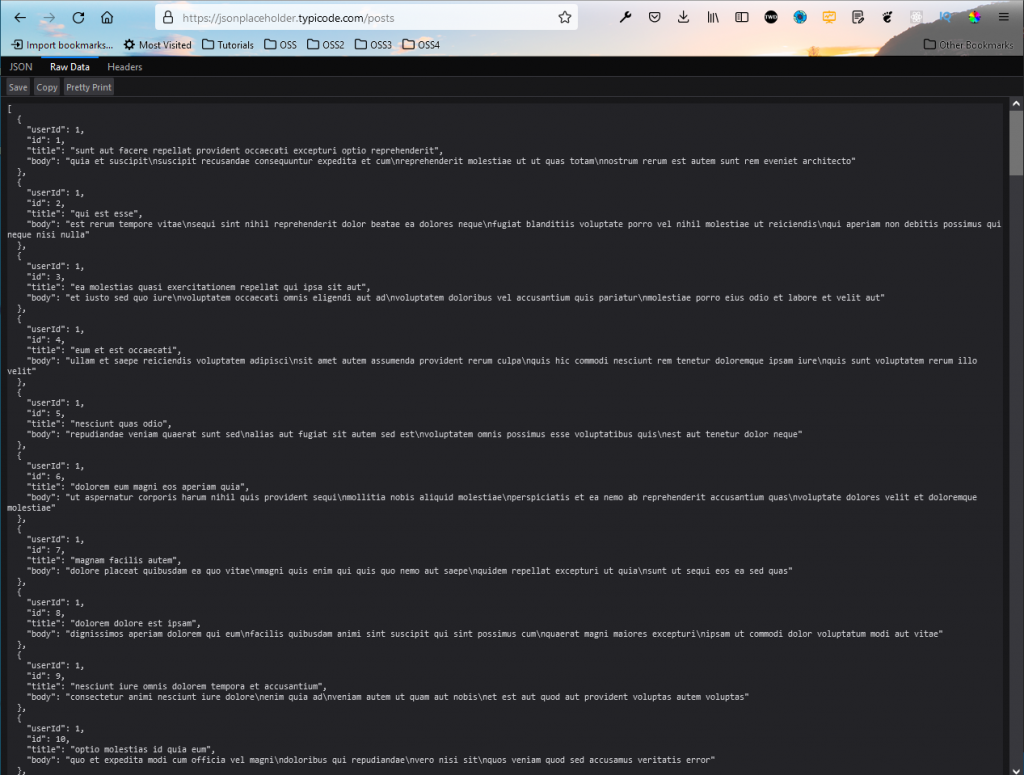
Data From API
Now let’s look into a real-world scenario that will display data from an external API. We are going to use the jsonplaceholder post endpoint to get our data.
To do the API call, we will use the useEffect hook and fetch API. Once we get the data from the API endpoint, we store it in the data state variable.
One more thing to notice is that FlatList requires a unique item-named key. If we don’t have a key, we have to use the keyExtractor prop. It specifies the item to be used as key, which is id in our case.
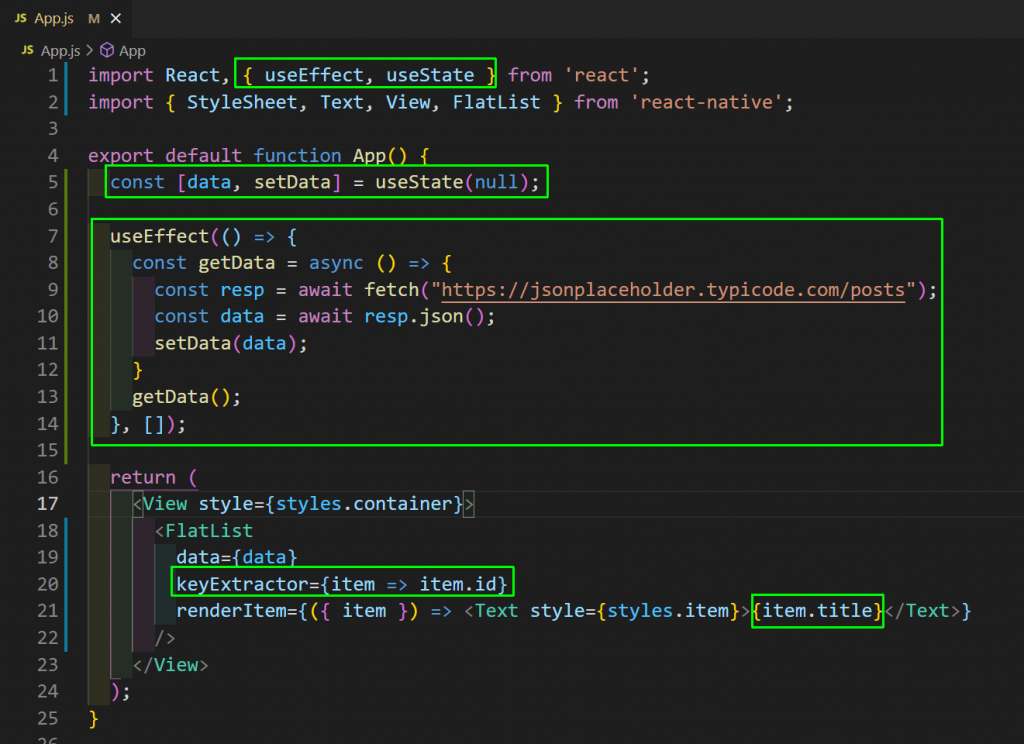
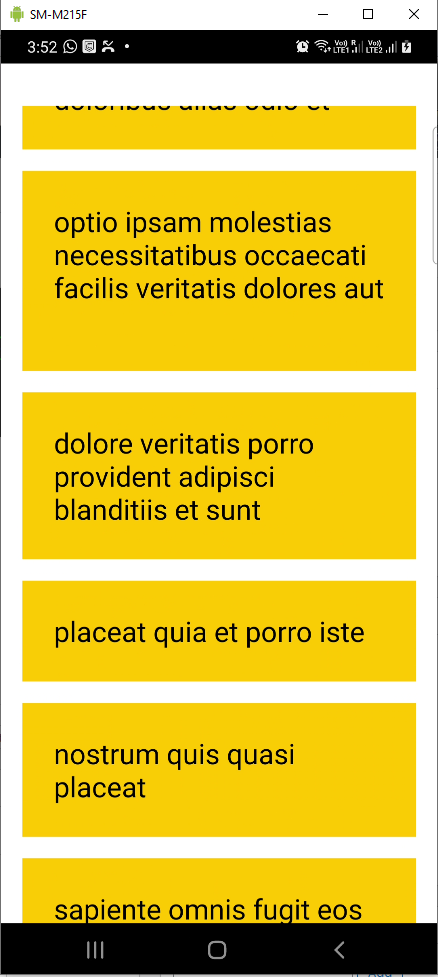
We are just showing the title in our app, and it is showing perfectly.
The APK File
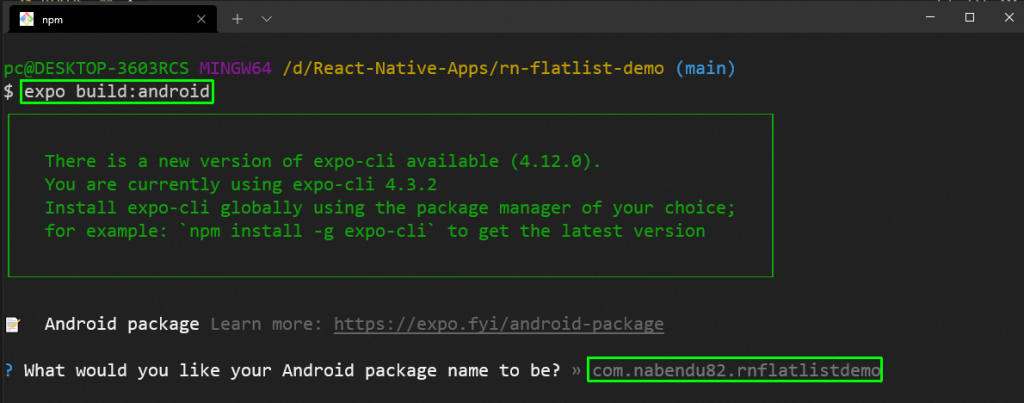
The APK file is required to deploy the app in the Play Store and also for the no-code testing we’ll do next. Give the command below from inside the app.
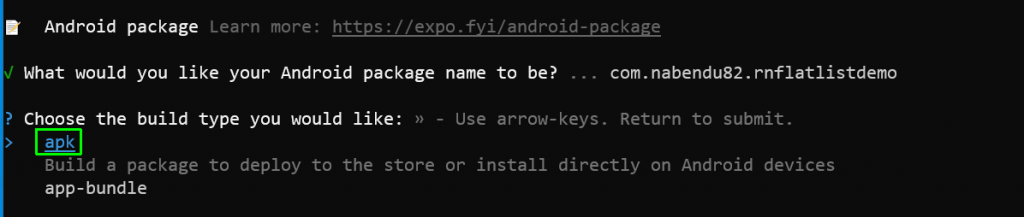
Now it will ask to provide a package name. The name given by Expo is good enough, so just press Enter to move ahead.
Next, it will ask the build type we would like. We want an APK file only, so just press Enter.
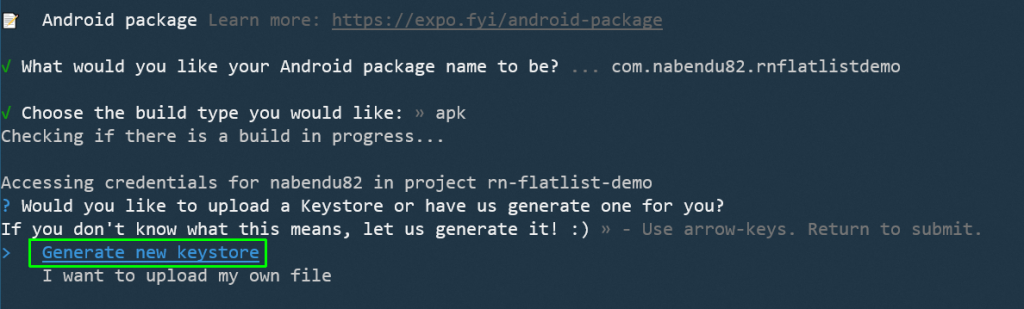
Now, it will ask to upload a keystore or generate a new one. Since we are creating this app for the first time, we will leave the default option to Generate new keystore. Press the Enter key to start the build.
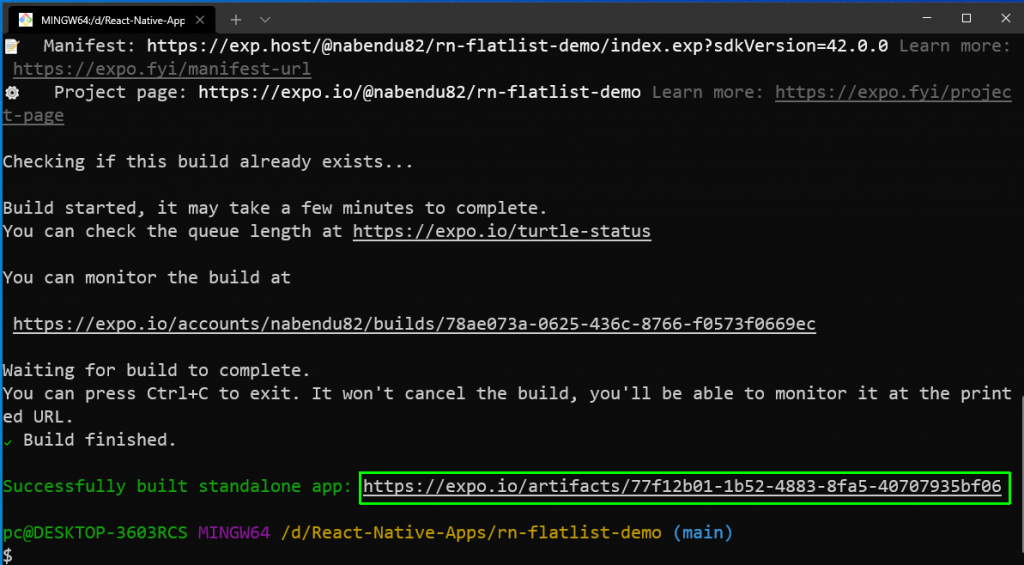
Now, the APK build process will start; it will take about 10 minutes. If the build process is successful, we will get a link to download the APK file. With the link, we can download the file in our system.
Automated Testing
We will use the awesome Waldo platform to test our application. Testing will require the APK file we downloaded earlier.
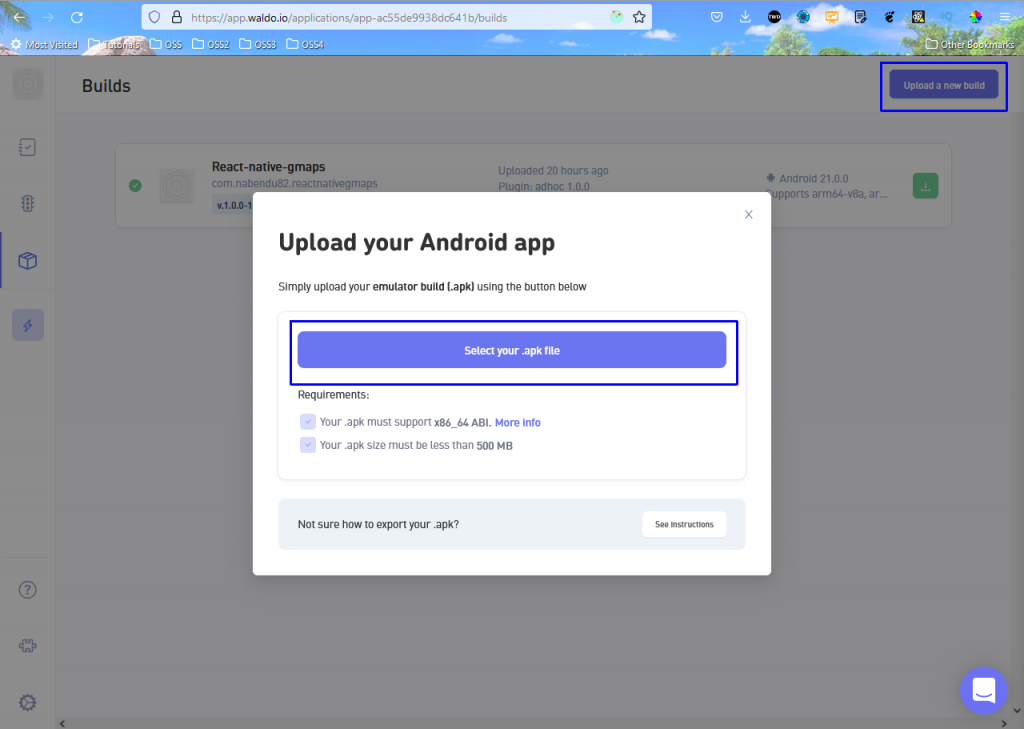
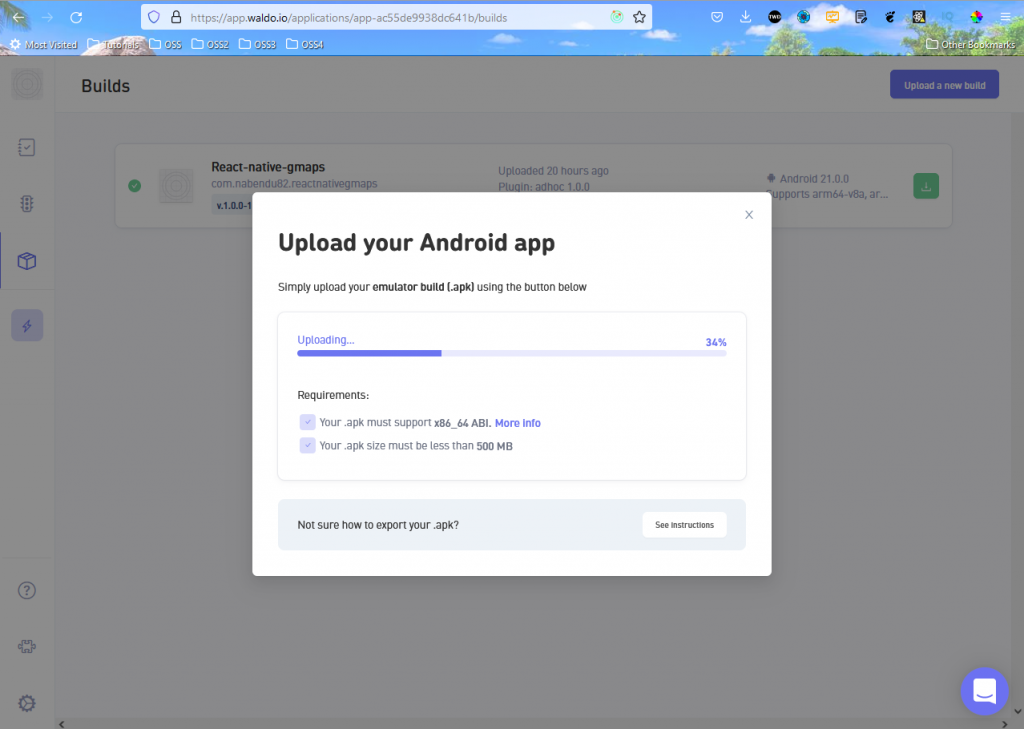
We need to first create a free Waldo account from this link. Once logged in, click on Upload a new build, and a pop-up will open. Click on Select your .apk file and select the file from your local system.
It will take about a minute to upload the file.
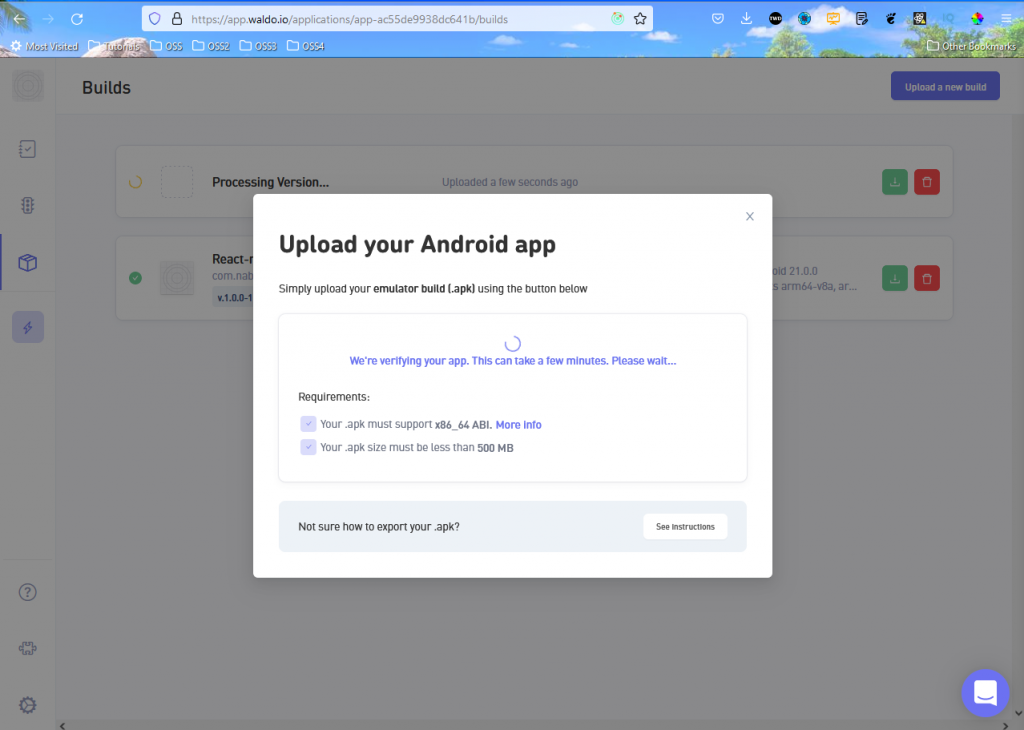
After that, Waldo will verify our app, which will take about four minutes.
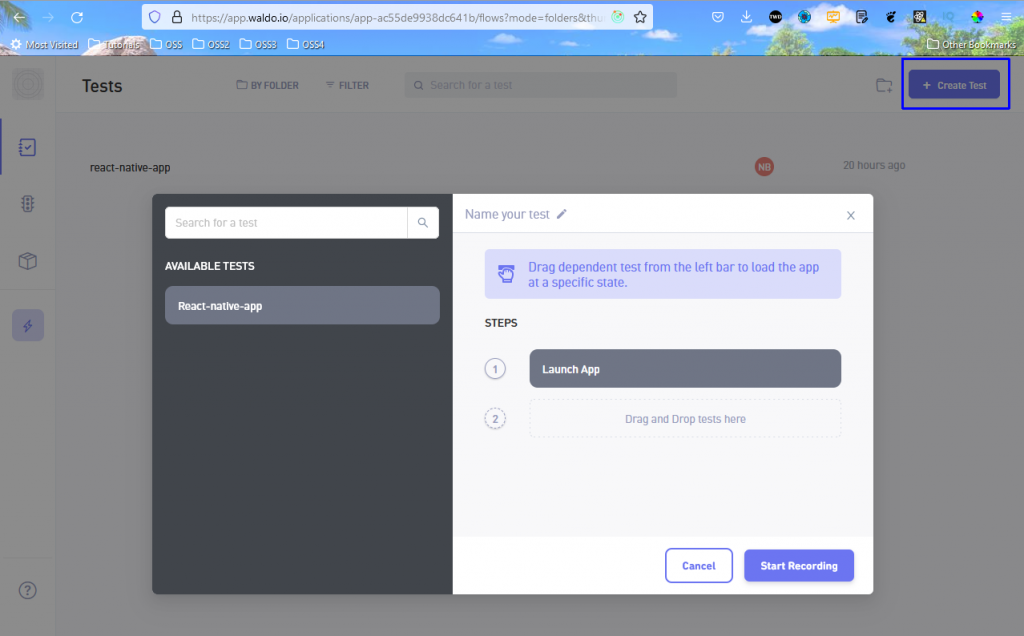
Now, go to Tests from the left menu and click on the Create Test button. A pop-up will open; click on Start Recording.
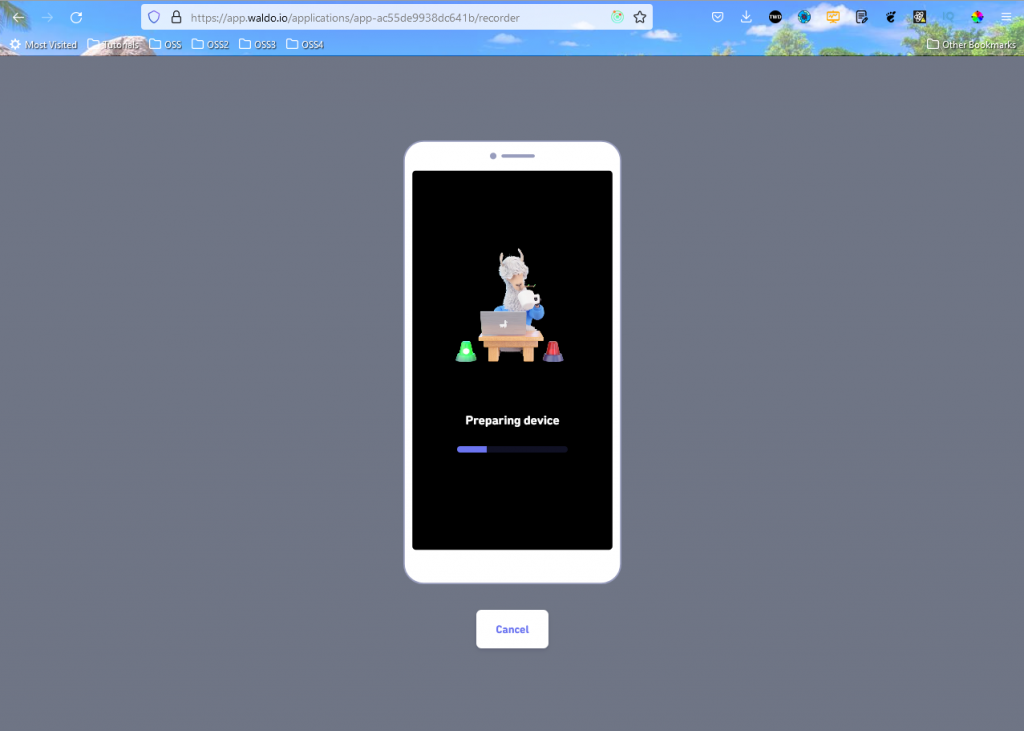
It will show us a nice animation while preparing for the test.
In the next screen, we will be able to perform up to 15 interactions (in the free version). After completing, click on the Save test button.
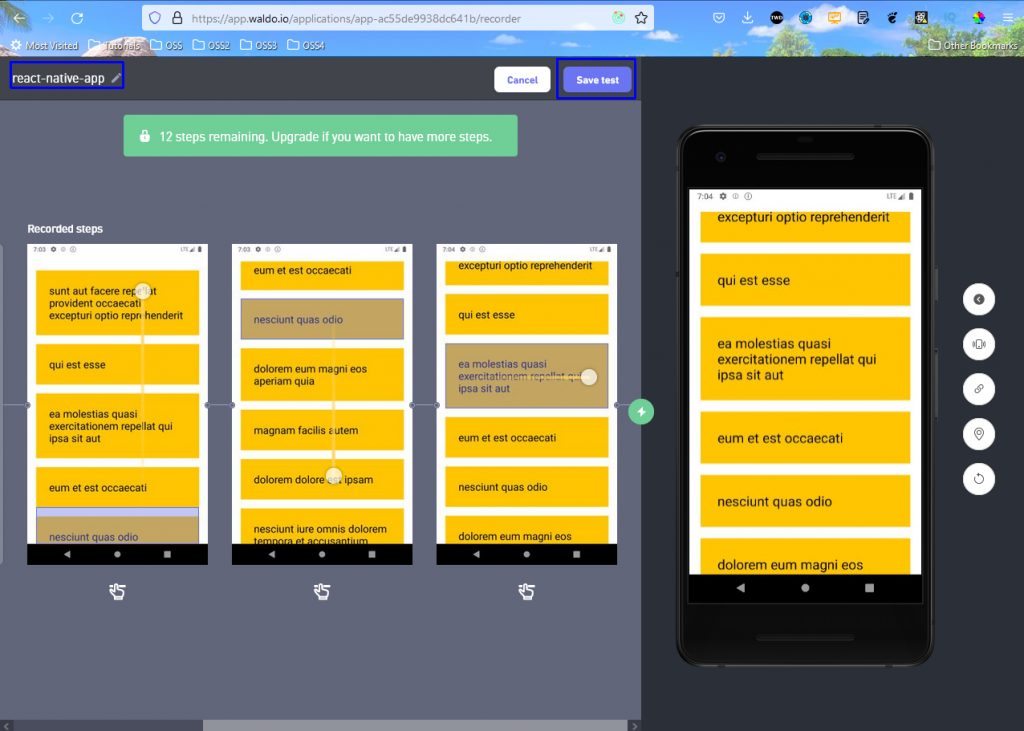
Now, click on Run test in the next screen, and it will take about two minutes to run the test.

Once the test is complete, we will also receive the test result to our registered email address.

Conclusion
In this post we have learned about FlatLists in React Native. We have started with creating using the React method and quickly discovered its limitations. After that we created a list using the React Native feature of FlatList. We also learned about the different props used in FlatList and the benefits of using FlatList.
After that we learned to create an APK file with Expo. We also did a successful test with the Waldo no-code testing platform.
With Waldo we were able to test our app without writing complicated and complex unit tests. Why not give it a try?
Automated E2E tests for your mobile app
Get true E2E testing in minutes, not months.


