


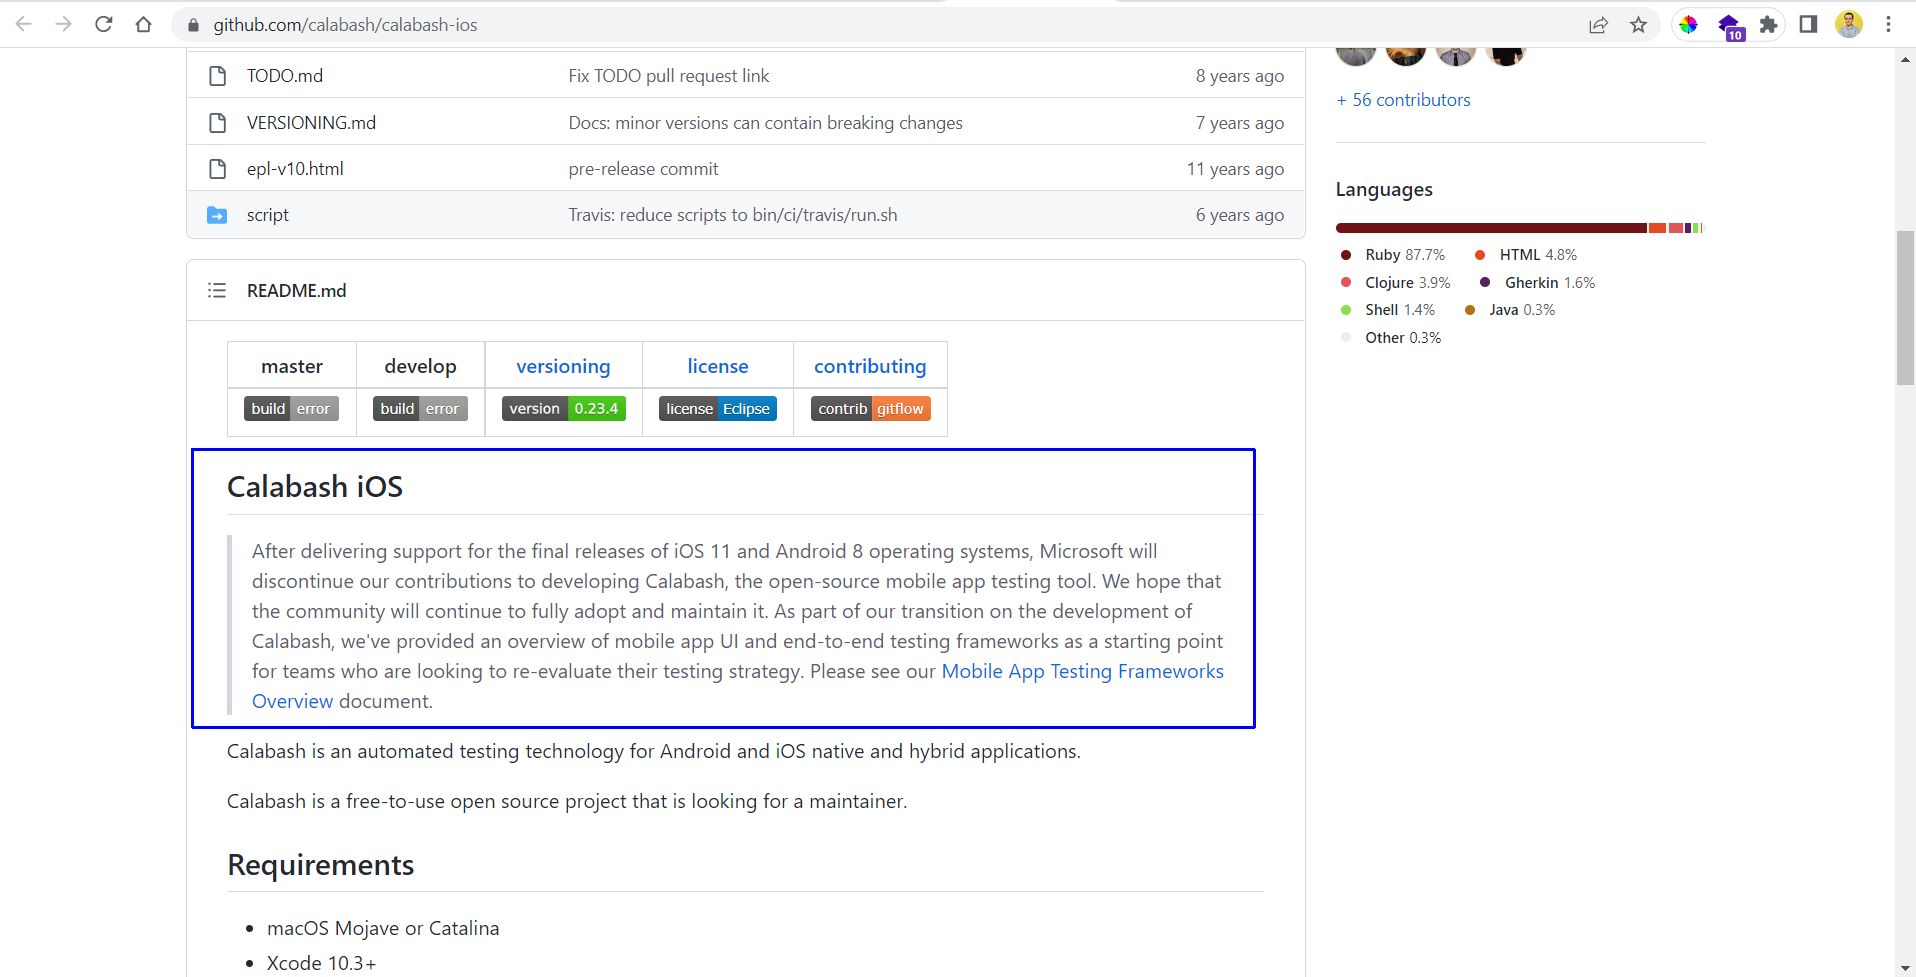
Calabash is a completely free-to-use open-source testing framework used to do functional testing in both iOS and Android applications. But its active development has been stopped, as mentioned on this GitHub page. So we should try to use other testing frameworks if we're starting testing on a new project.
Calabash is based on Ruby, and we write test cases using Cucumber. These test cases are written in an English-like language called Gherkin. The approach we use to write these test cases is called BDD (behavioral-driven development). The tester thinks of different behaviors the app should follow and writes test cases according to them, like entering a username and password and then trying to log in.
In this post, we are first going to set up Calabash iOS on a Mac. Then we'll do a simple test using Cucumber in an existing iOS app. Finally, we're going to look into some alternatives to Calabash and compare them.
.png)
What Is Calabash iOS?
Calabash for iOS is similar to Calabash for Android, but the setup and execution steps are completely different. You can refer to our earlier post on testing Android apps with Calabash to learn more about what that looks like. On a Windows system, as seen in the Android post, we need to have Android Studio. For Calabash iOS, we need to have Xcode installed on the Mac system.
Installing Calabash on Mac
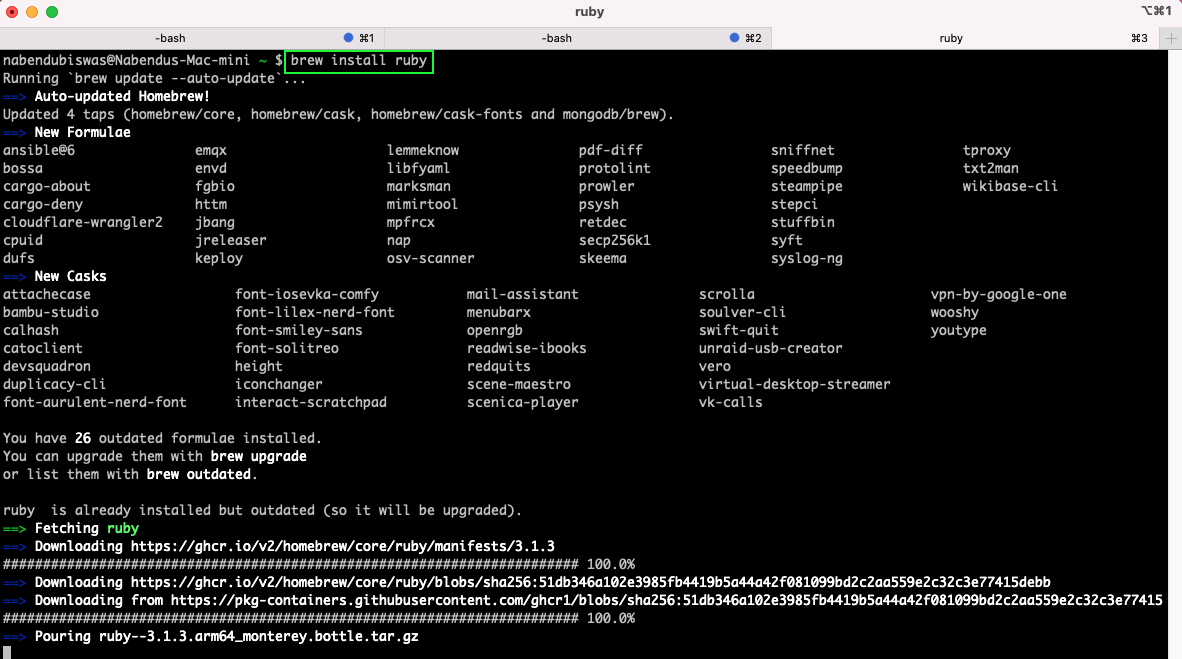
By default, Mac comes with Ruby built in, but we need to upgrade it to the right version with the brew install ruby command.
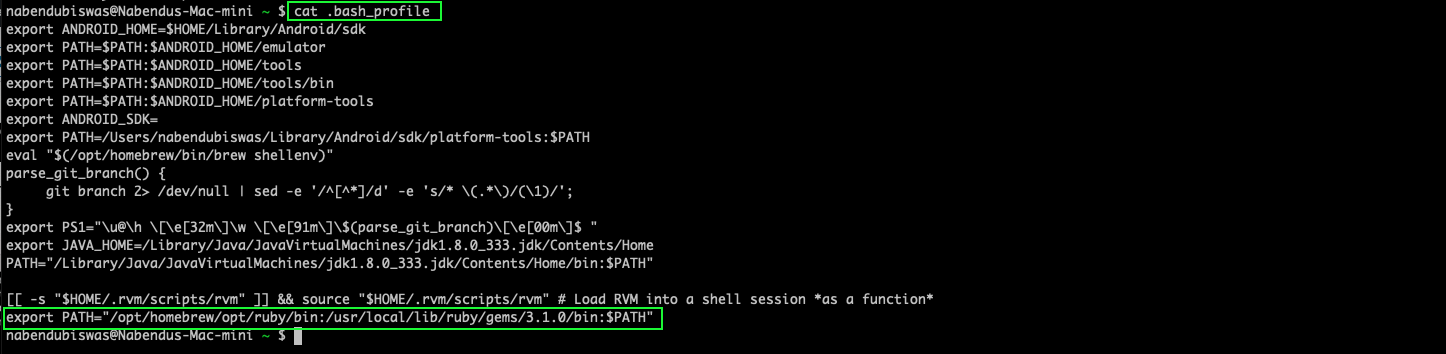
In the .bash_profile file, we also need to add the path in which Ruby is installed.
Now, with the which ruby command, we can confirm the new path. And with the ruby -v command, we can confirm the updated version of Ruby.

Before installing calabash-cucumber, we also need to install the bundler through the gem. Use the below command to install it:

When we gave the gem install command for calabash-cucumber, it started successfully.

And it also installed Calabash and Cucumber successfully on our system.

Adding Calabash in an Xcode Project
We can add Calabash testing to any existing Xcode project. Here we are taking the app from our earlier post on PromiseKit. We will create a separate -cal target, as per the Calabash official docs. This needs to be done because a project using Calabash should not be submitted to the App Store, or else it will be rejected.
Creating a Separate -cal Target
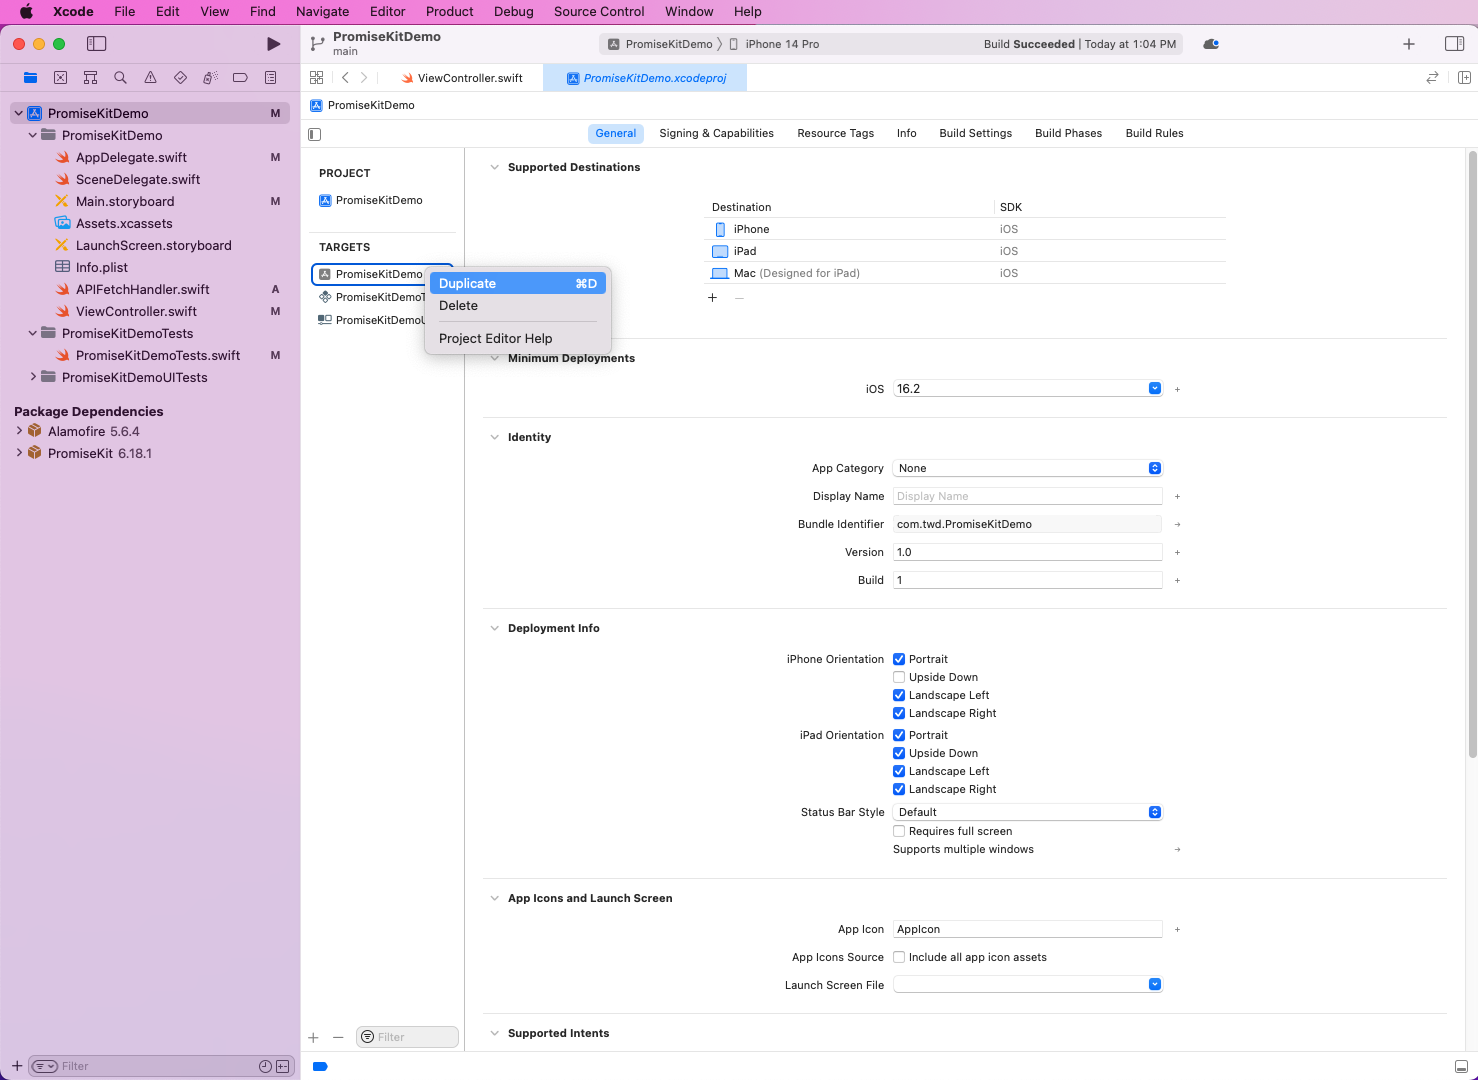
Open the project in Xcode. After that, from the root of the project, go to the Targets area. Here, right-click on the project and then duplicate it.
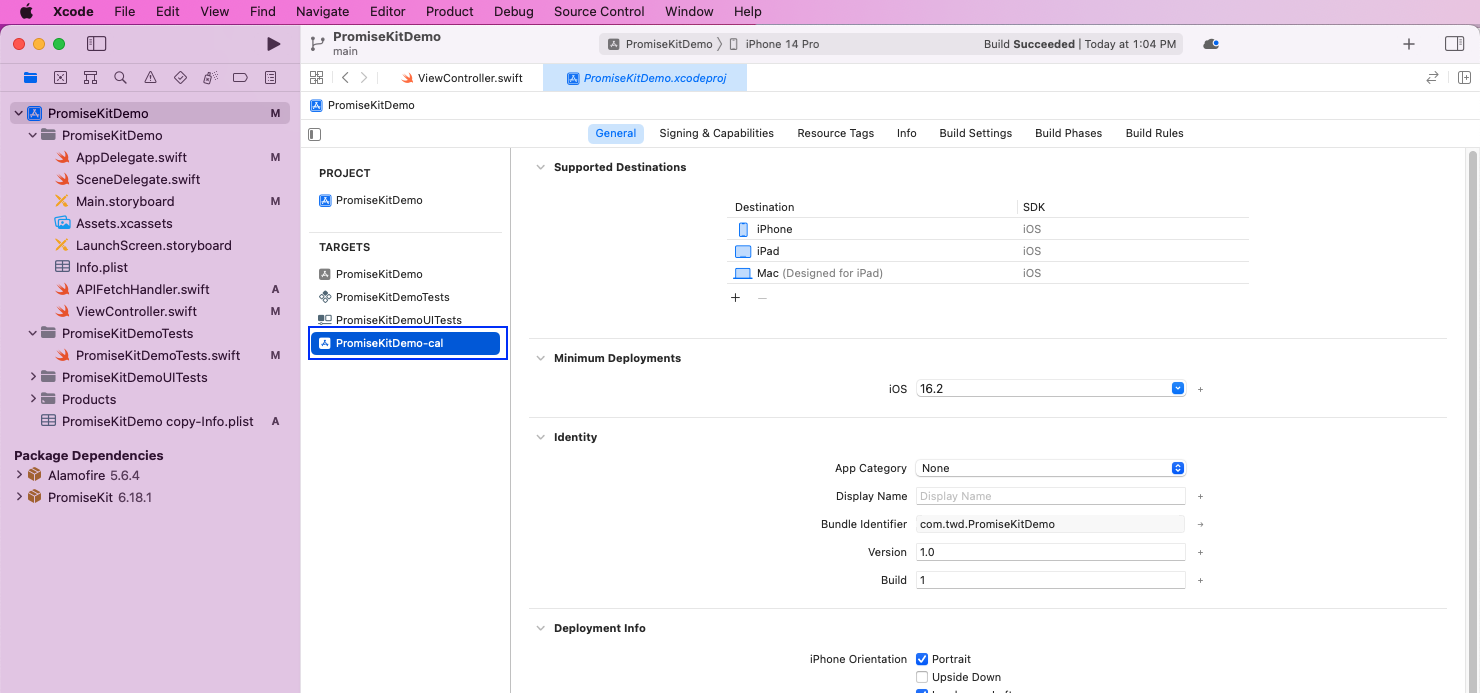
A new target will be created, but change its name to have -cal at the end. We have named the target PromiseKitDemo-cal.
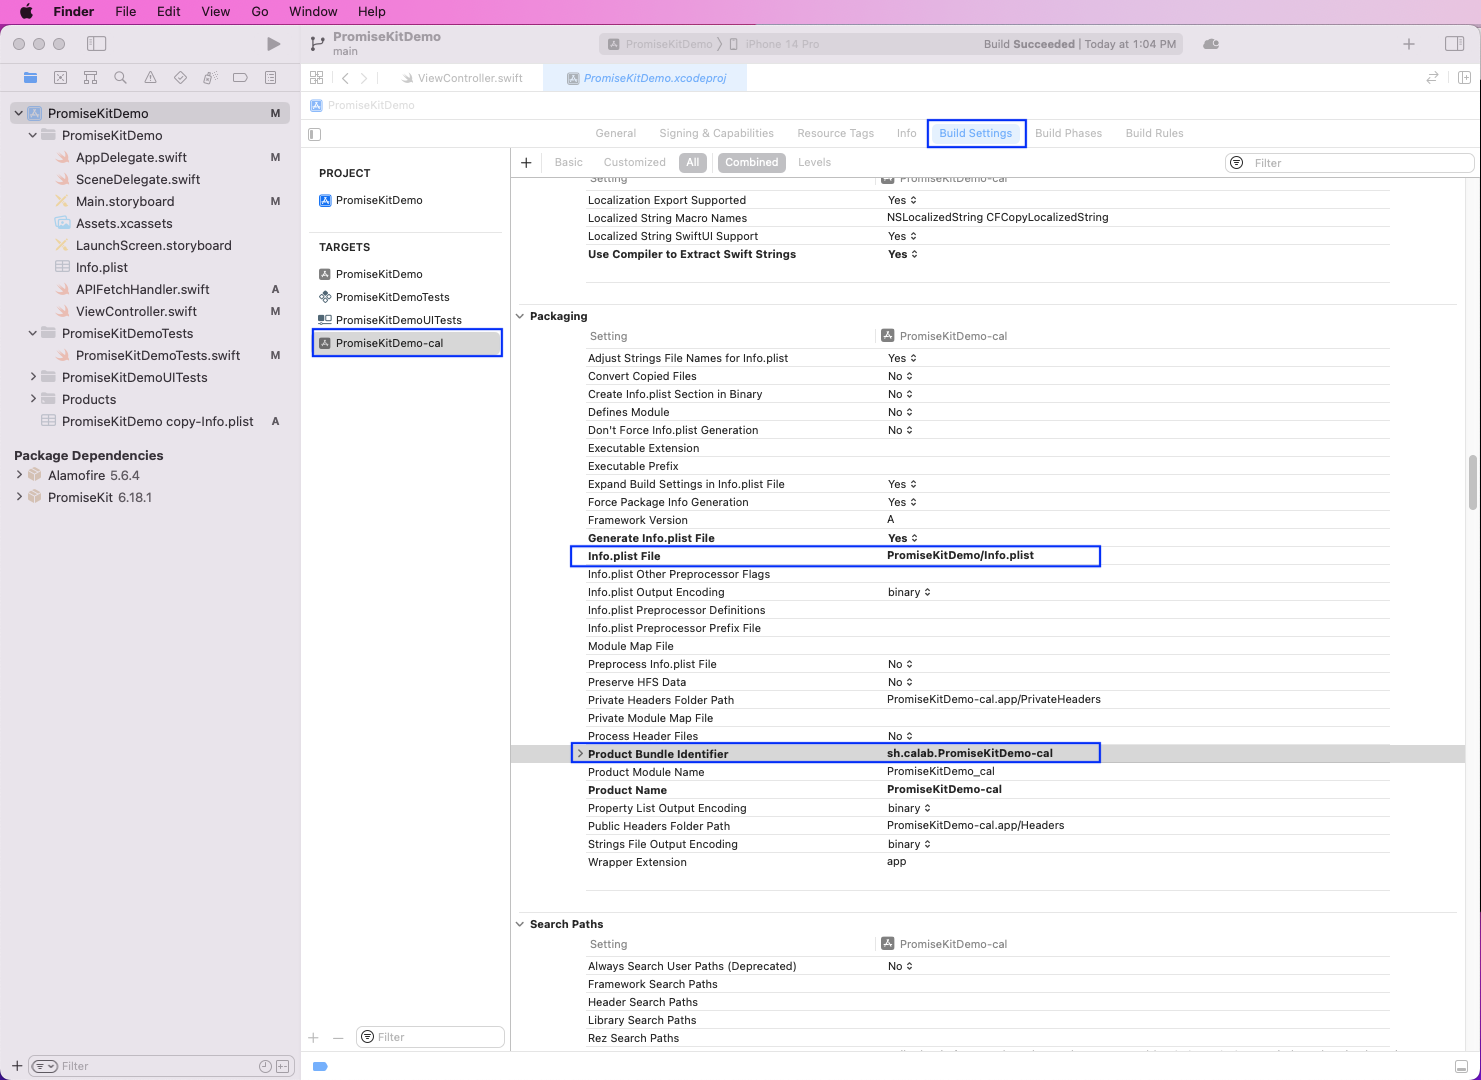
From the new PromiseKitDemo-cal target, go to Build Settings. Here, Info.plist file should be changed to PromiseKitDemo/Info.plist. And the Product Bundle Identifier can be given any name. We've given it the name sh.calab.PromiseKitDemo-cal.
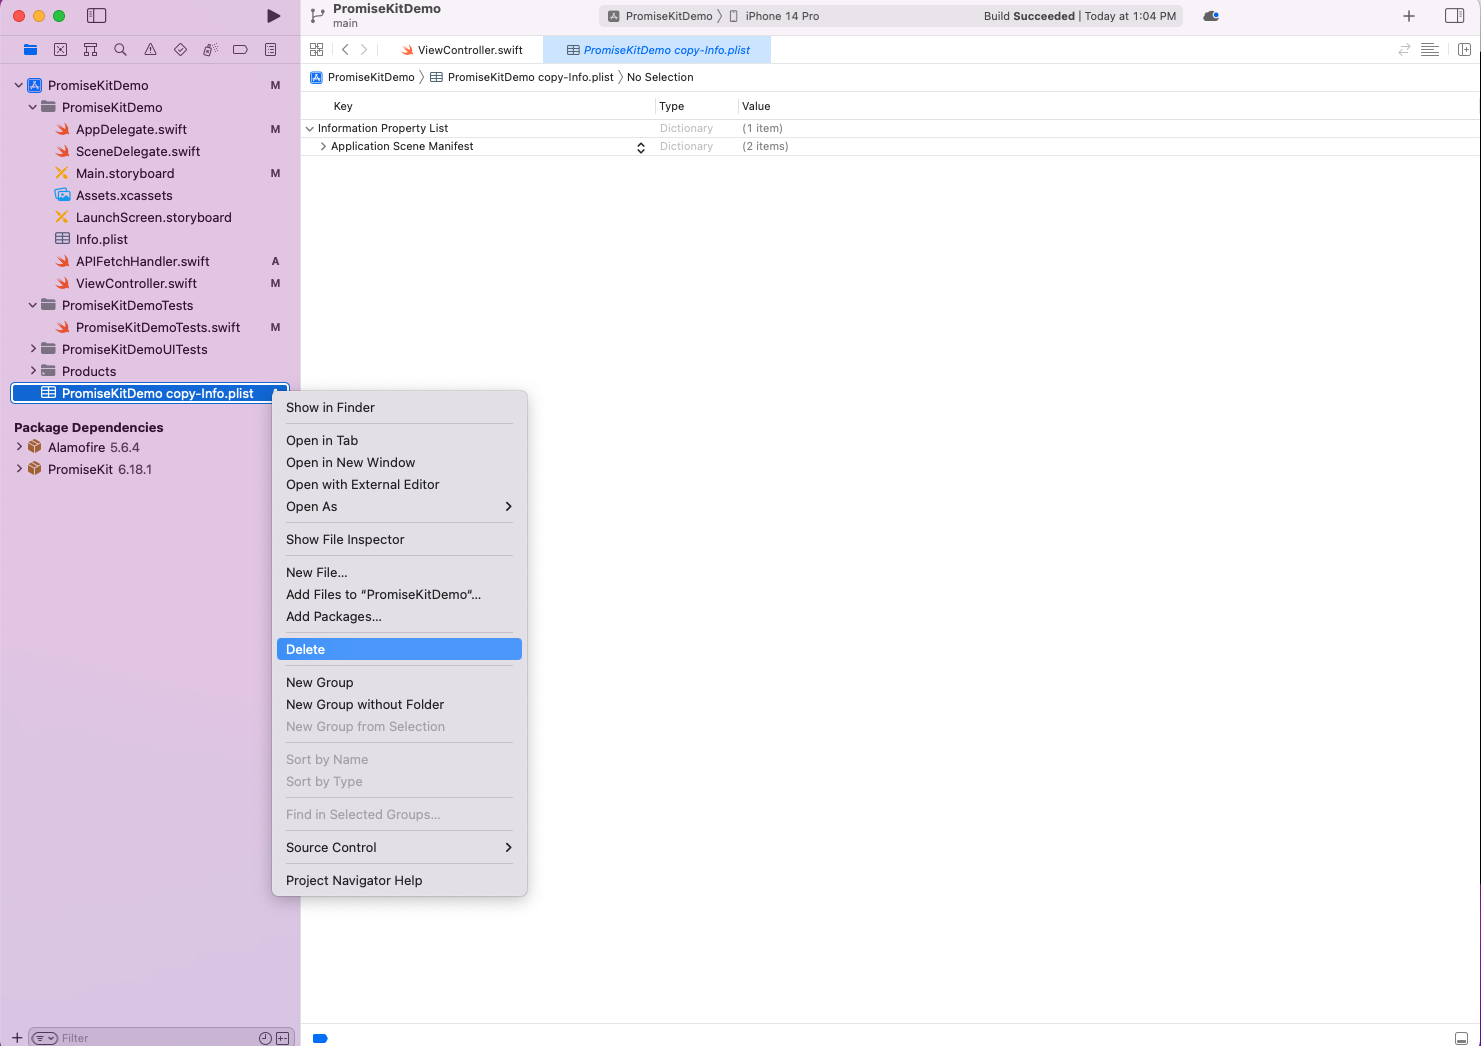
The wrong Info.plist file will be created, so we need to right-click on it and delete it.
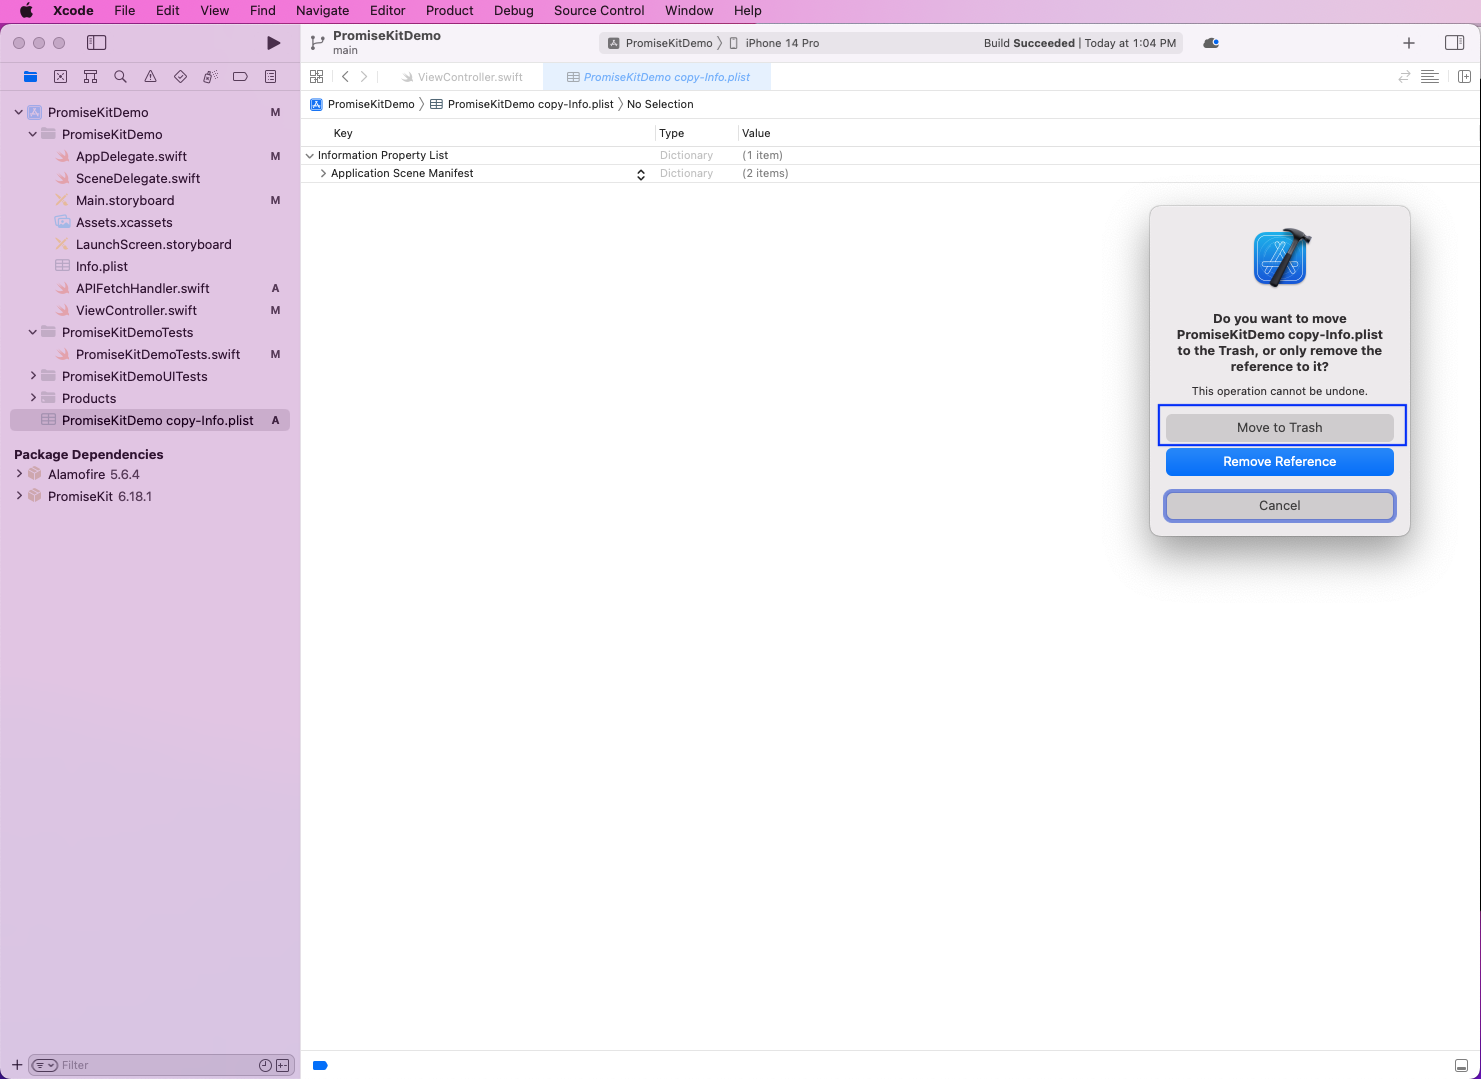
Make sure to click on the Move to Trash button to delete it.
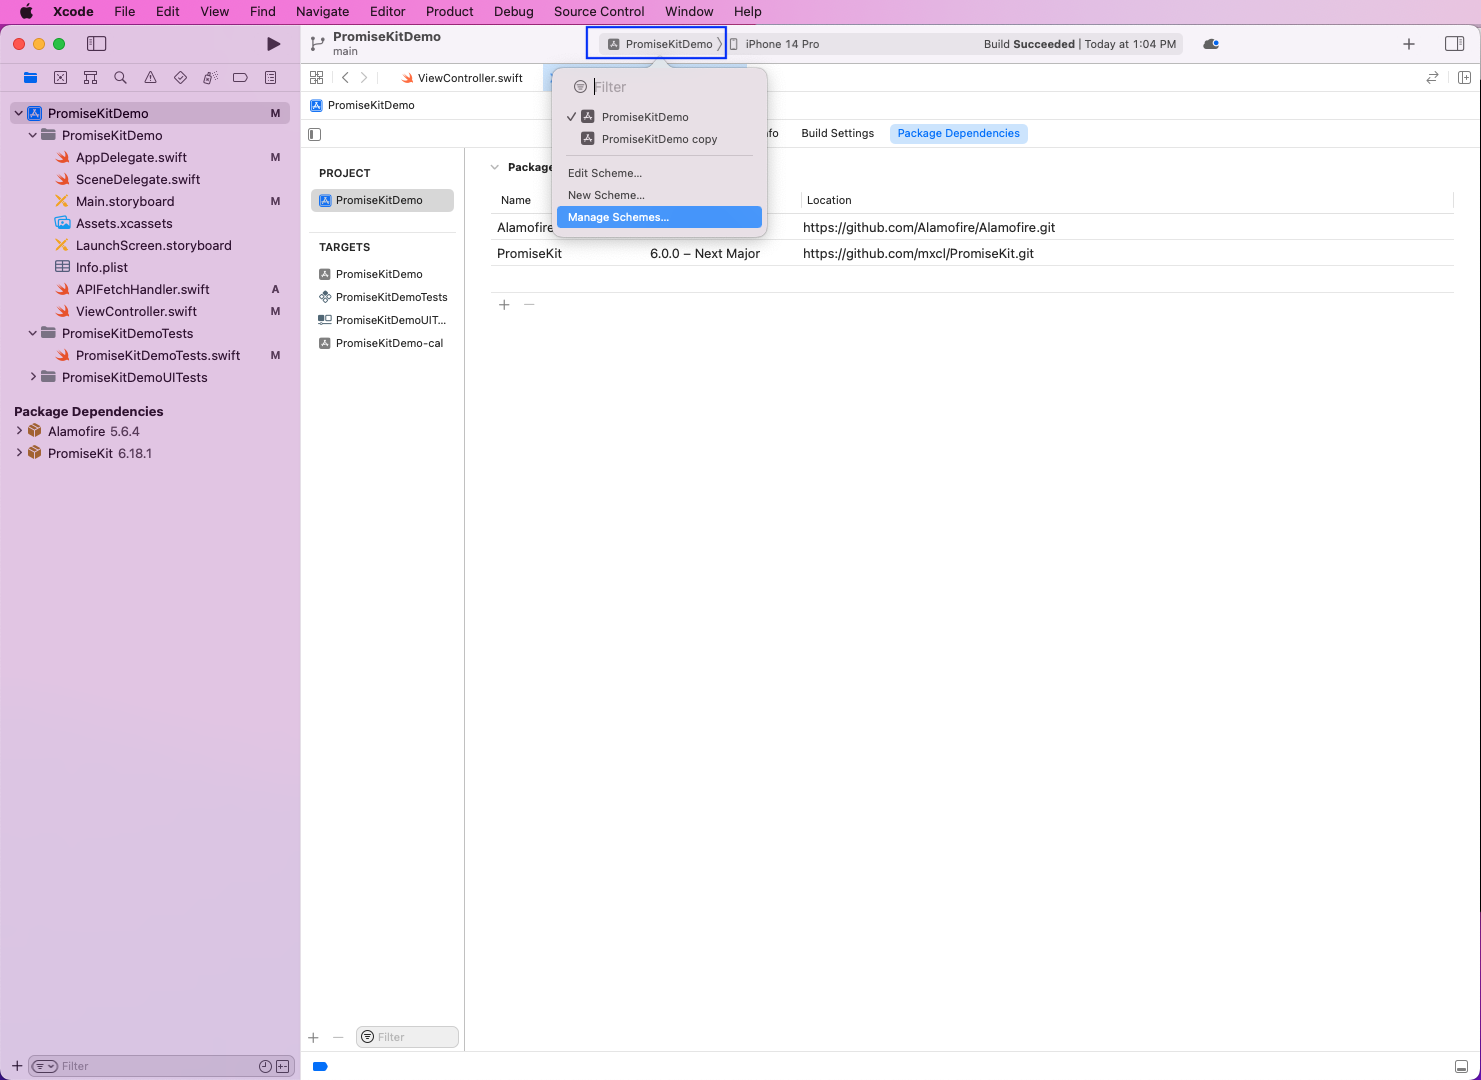
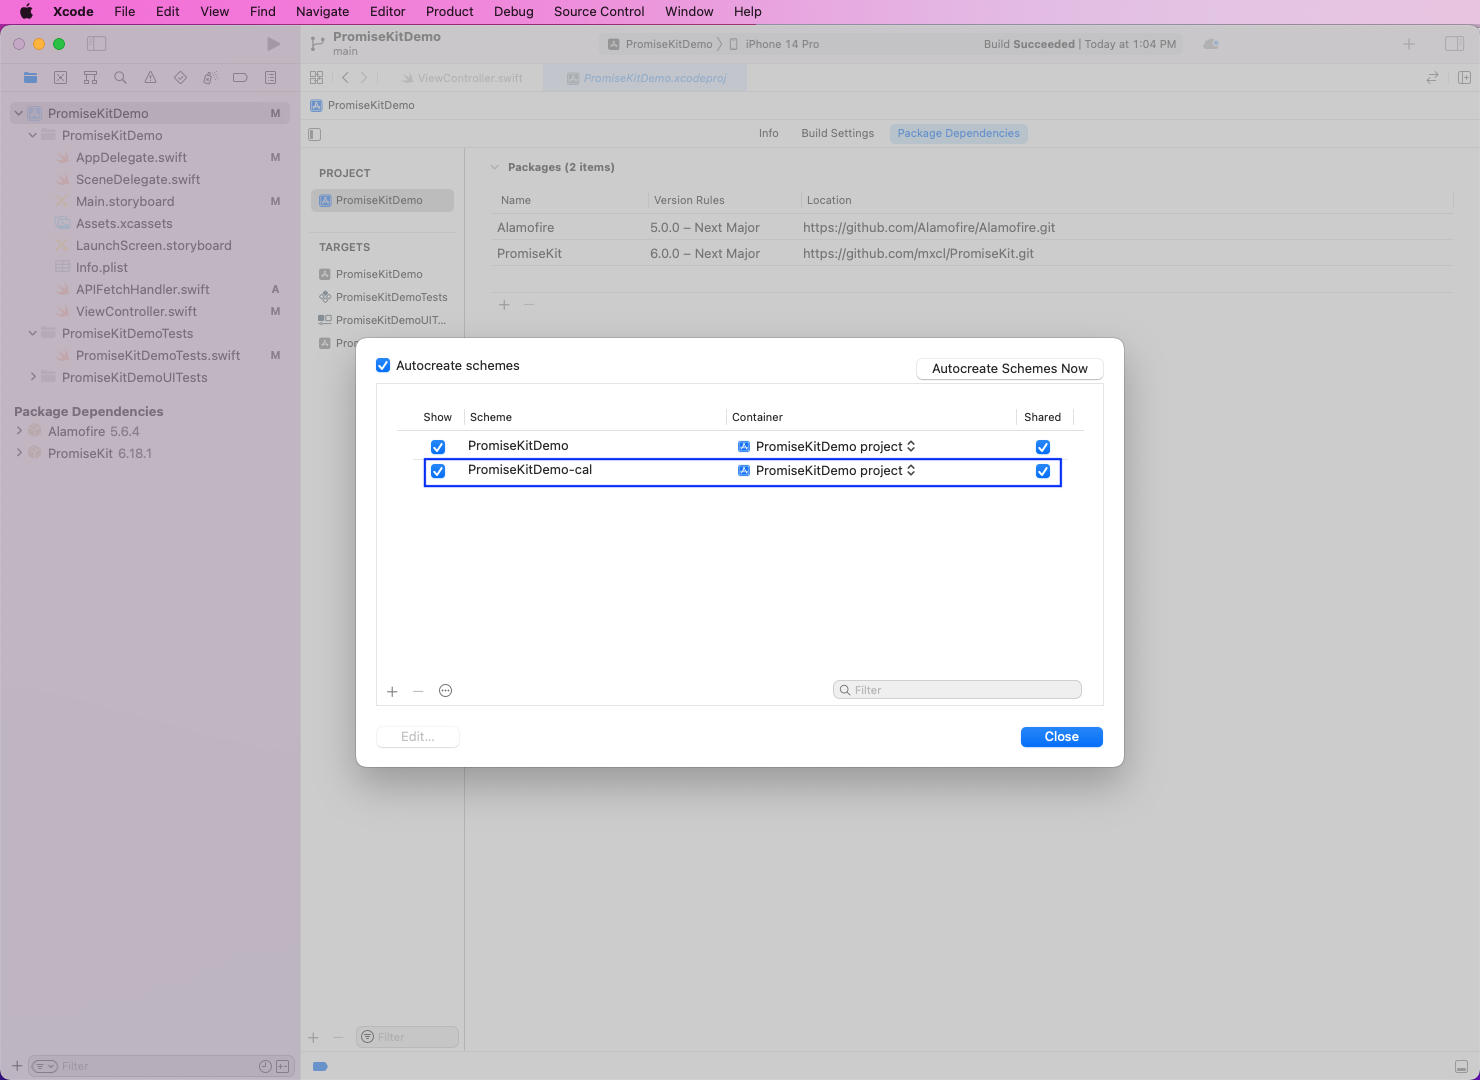
Next, click on the project name, which is PromiseKitDemo in our case. After that, click on Manage Schemes.
In the next pop-up, we need to make the scheme name correct. In our case, it's PromiseKitDemo-cal.
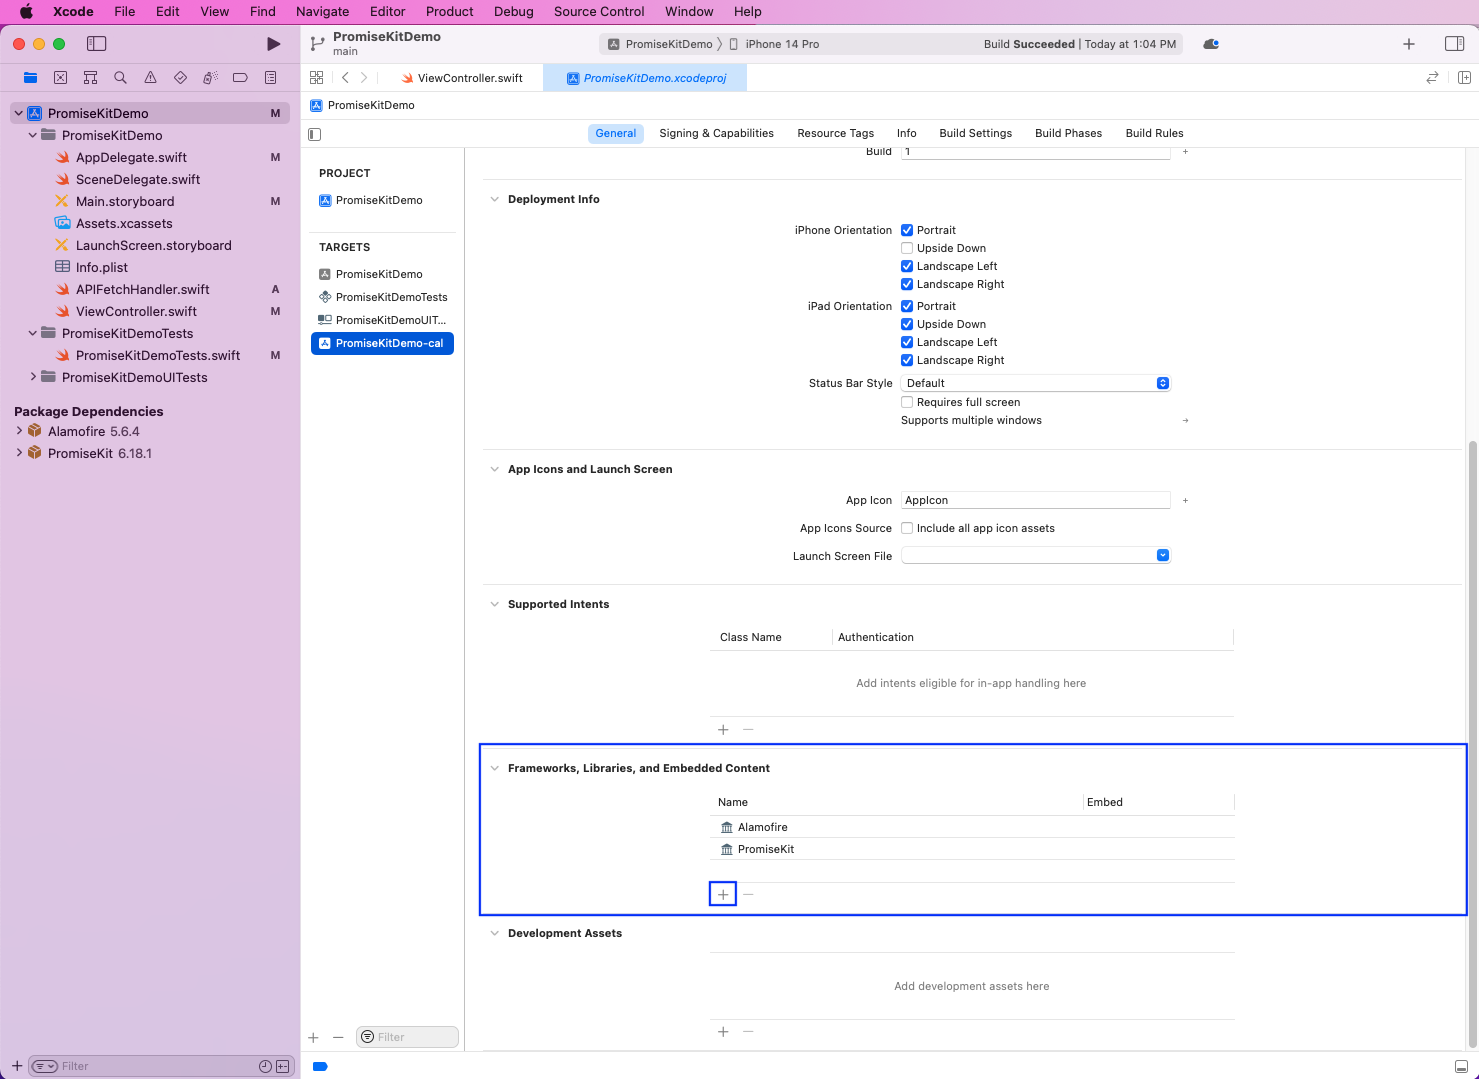
Now, back in the PromiseKitDemo-cal target, go to the Frameworks, Libraries, and Embedded Content section. Here, click on the + icon.
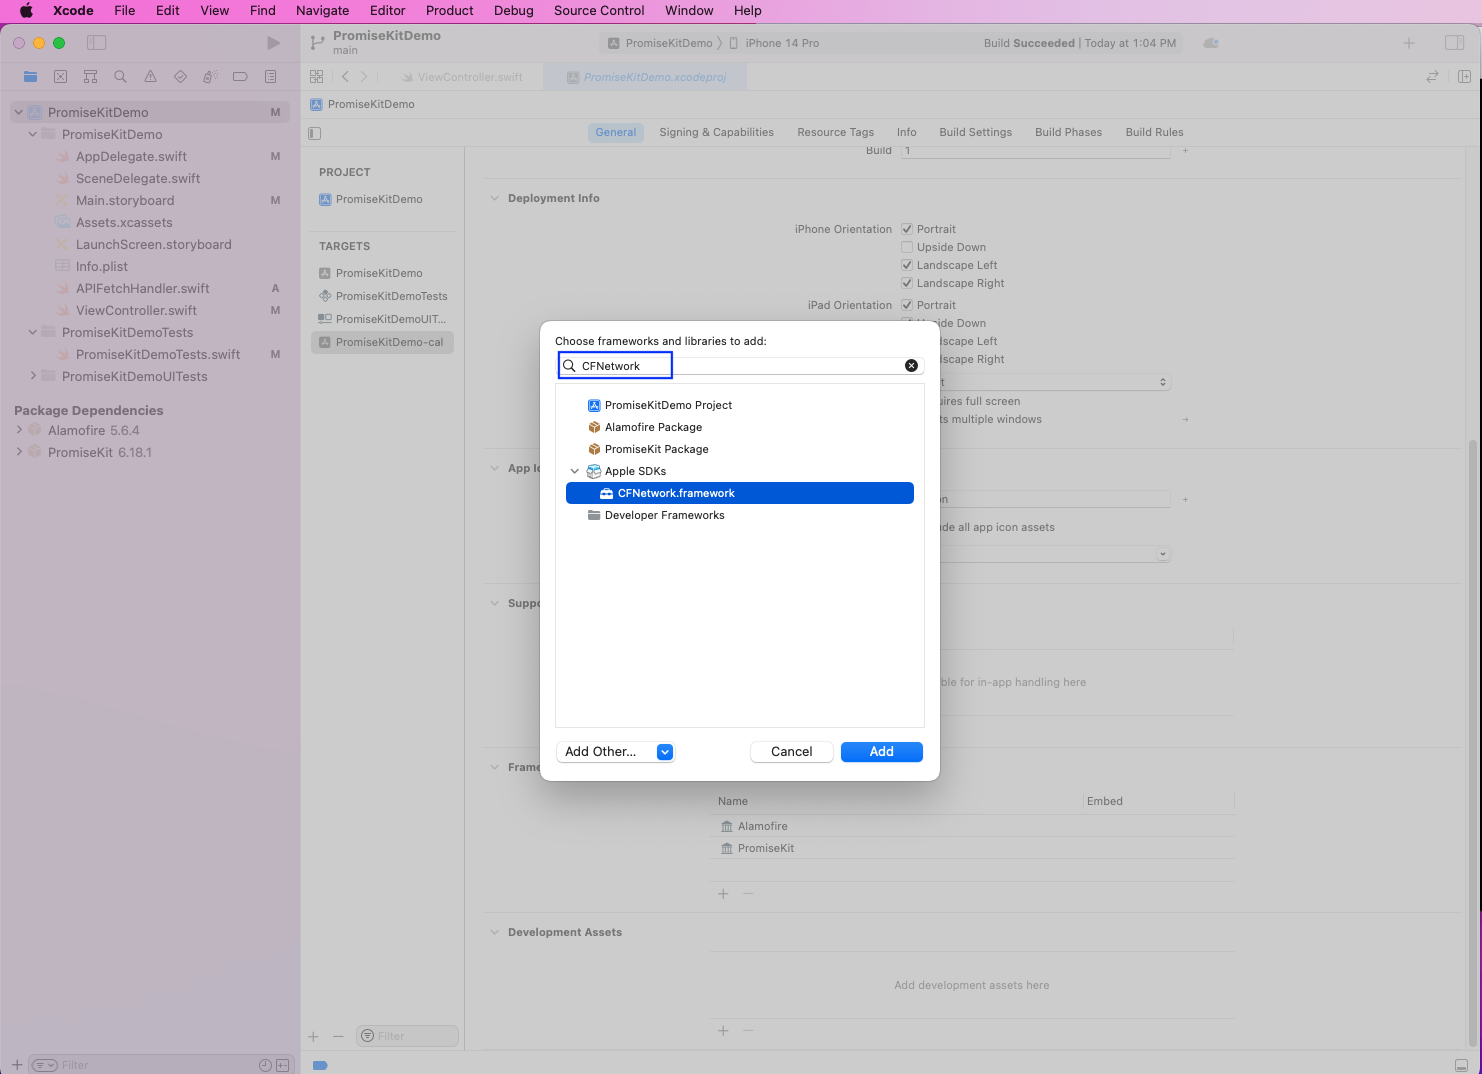
In the pop-up, search for "CFNetwork" and add CFNetwork.framework.
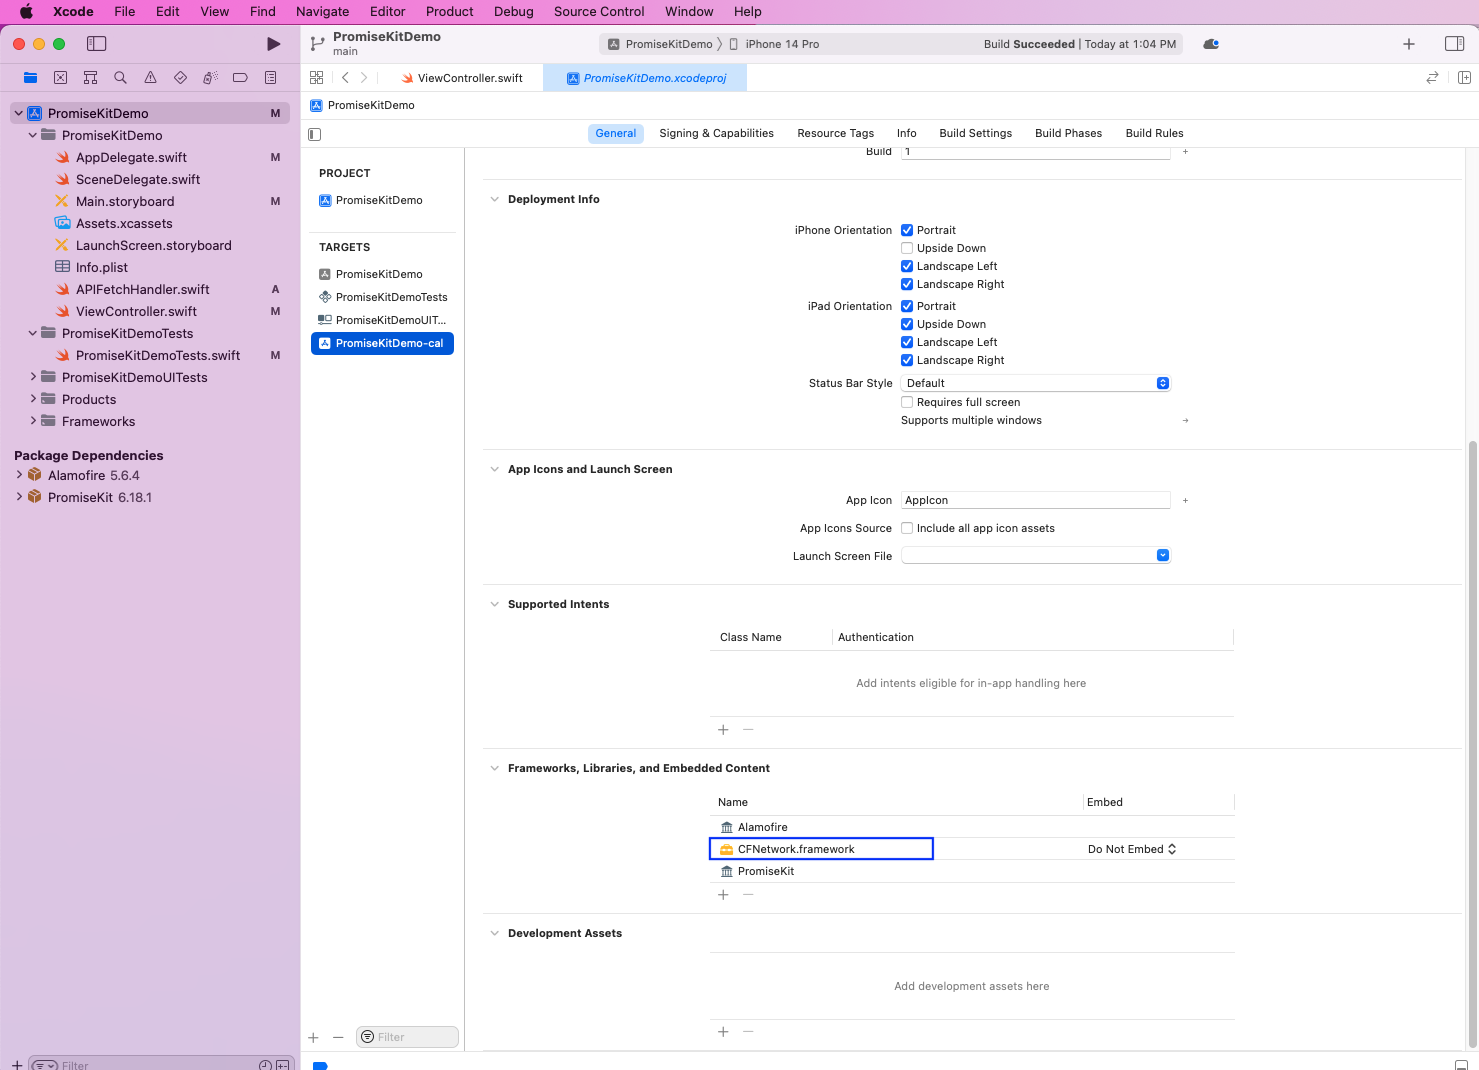
Now we will see that this new package has been added.
Adding the Calabash Framework
Next, give the below command in the project directory to install calabash-ios in it. We're giving the full path of calabash-ios, and it will add the calabash.framework folder in it.

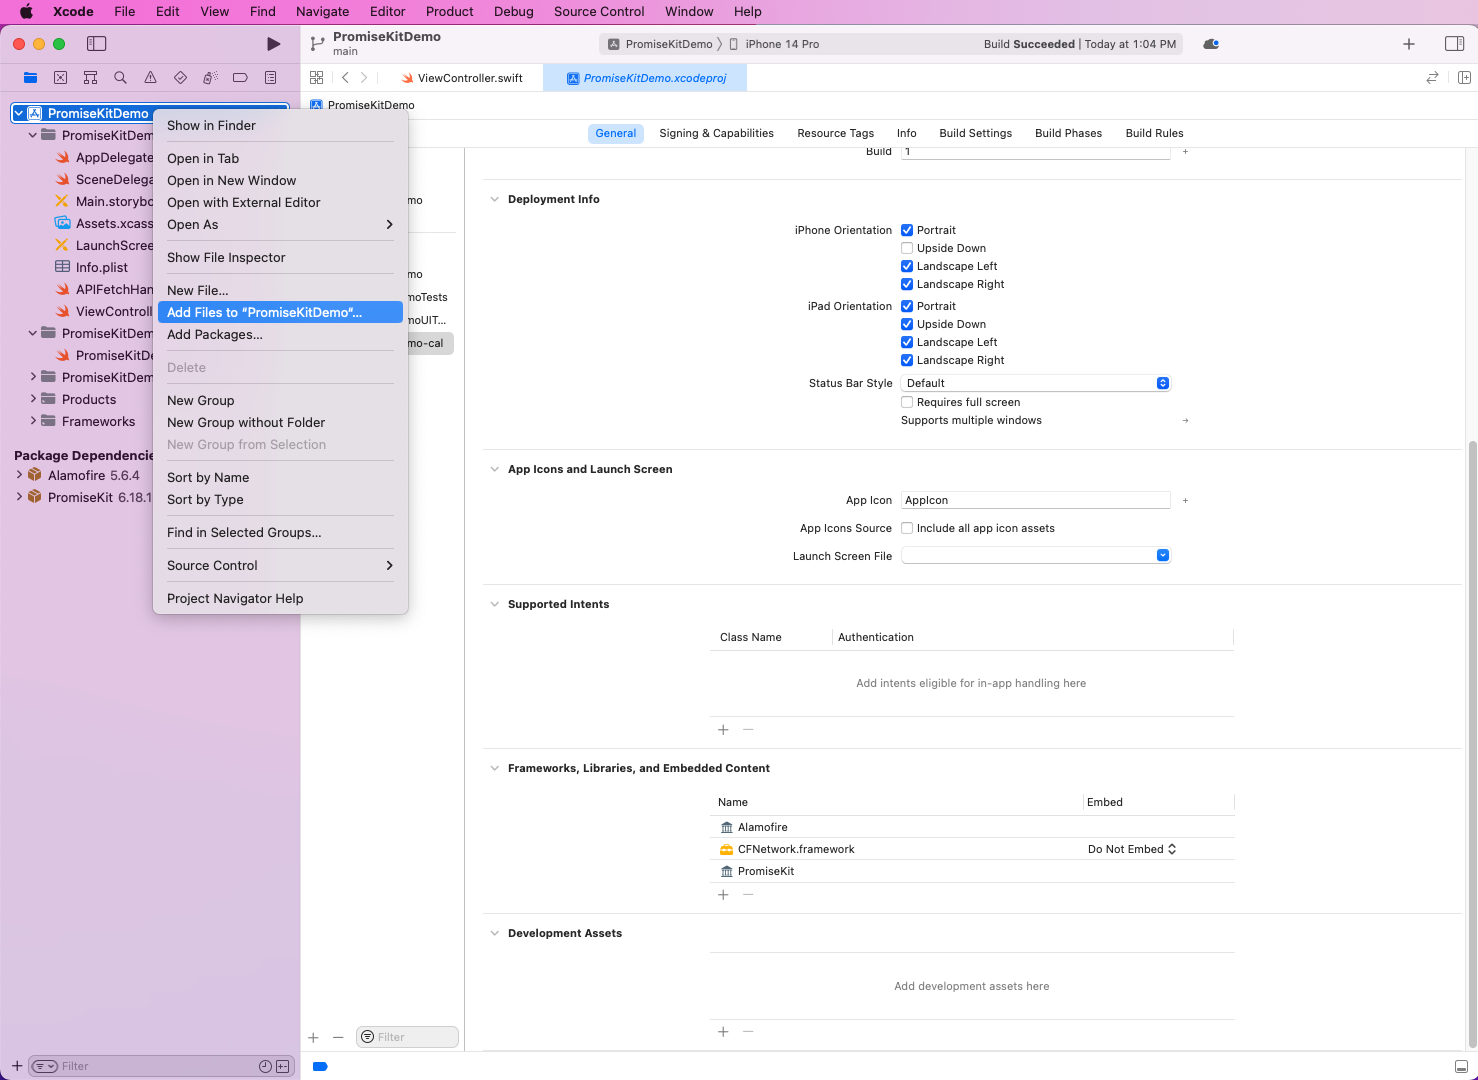
Finally, we need to add the dependency of the calabash.framework to our project. So, right-click on the root of the project and click on the Add Files to "PromiseKitDemo" link.
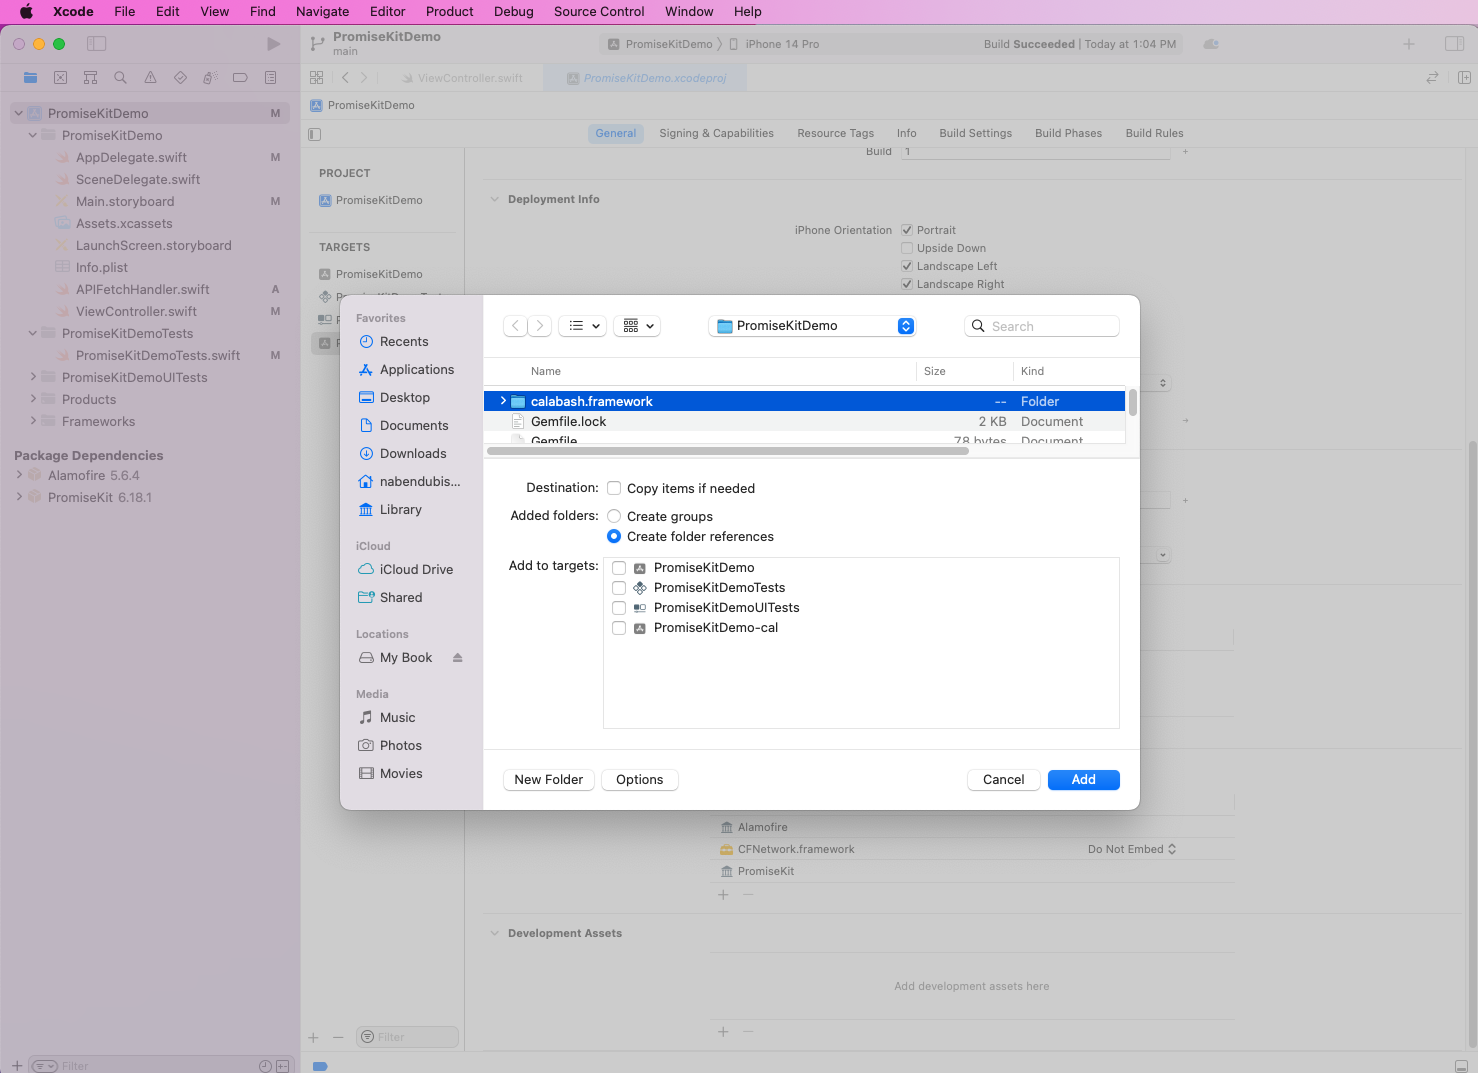
In the pop-up, select the calabash.framework folder. But make sure no targets are selected in the Add to targets section.
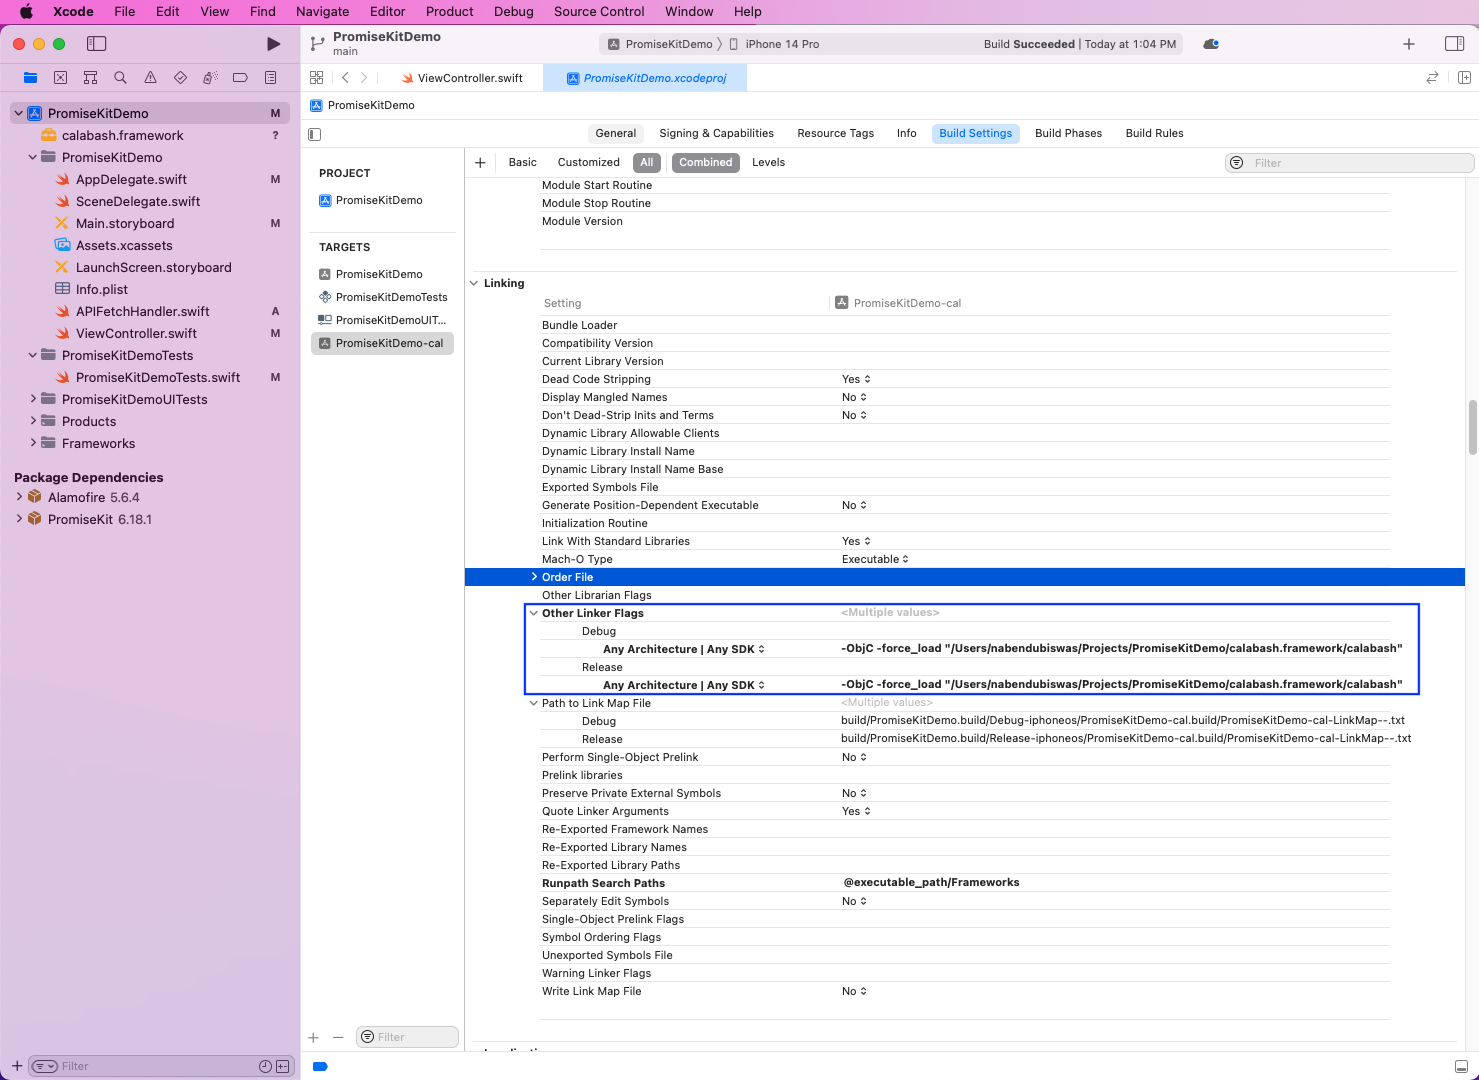
Back in the root of the project, select the ProjectKitDemo-cal target. Then in Build Settings, go to the Linking part. Under Other Linker Flags, change both Debug and Release to link to the calabash.framework path. Once we run the app, we will find that everything is working fine.
Test Cases Using Calabash
To start writing tests, we need to generate a features folder and a Gemfile. This folder will contain all of our tests and steps. For this, give the below calabash-ios command:
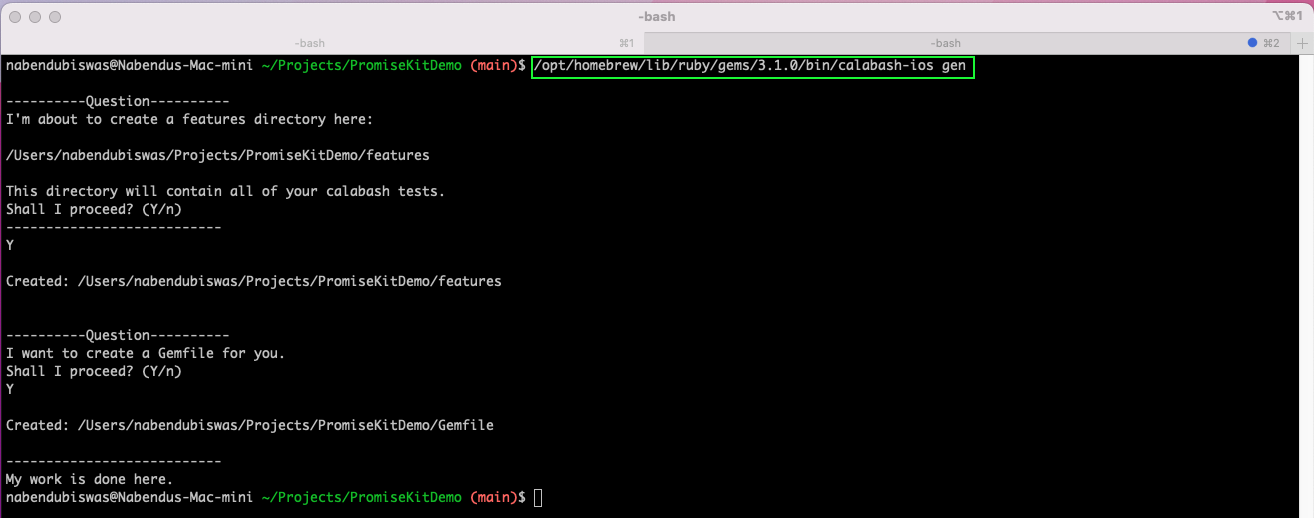
Now our project contains a Gemfile and a features folder.

The Gemfile is created in the root of our project with the below content:
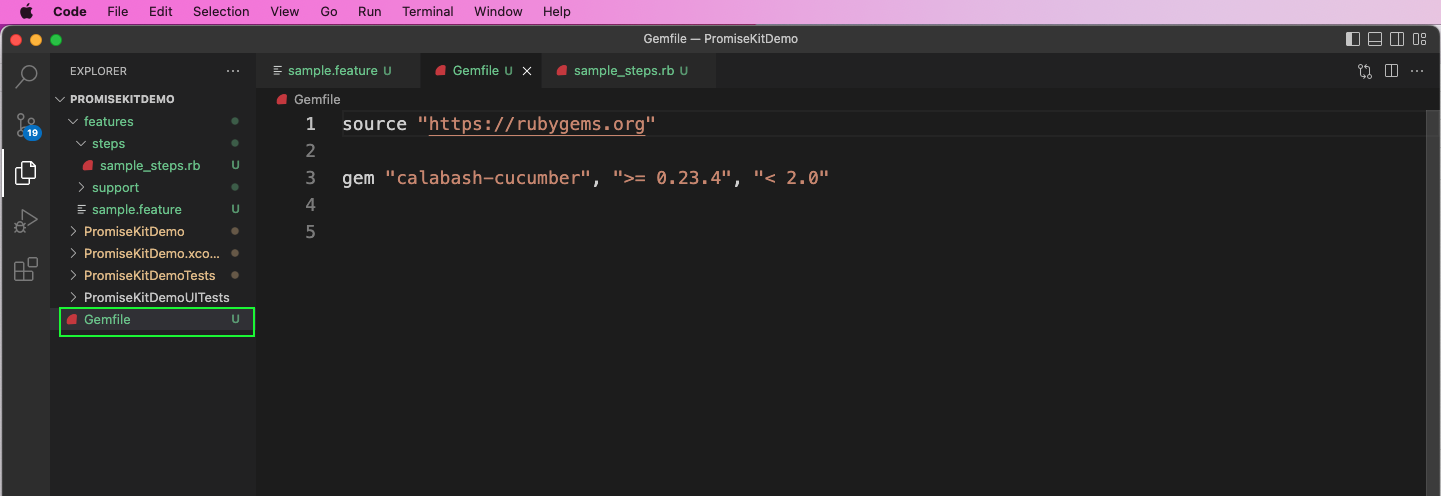
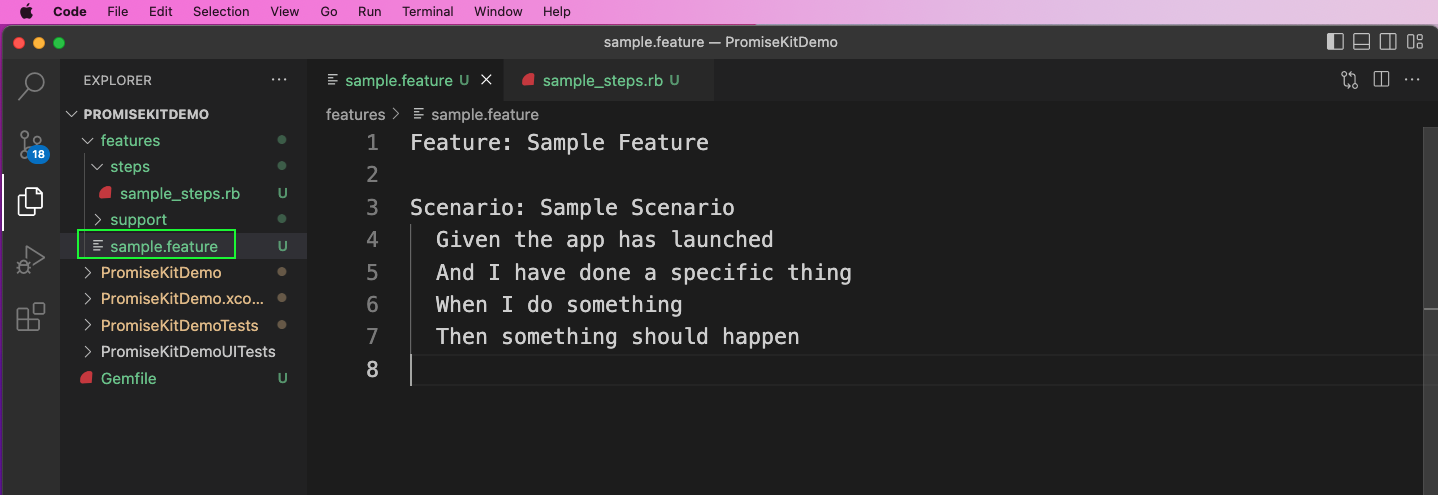
The sample.feature file is where we write our tests. By default, a simple test is already there, and we can see that it's in plain English.
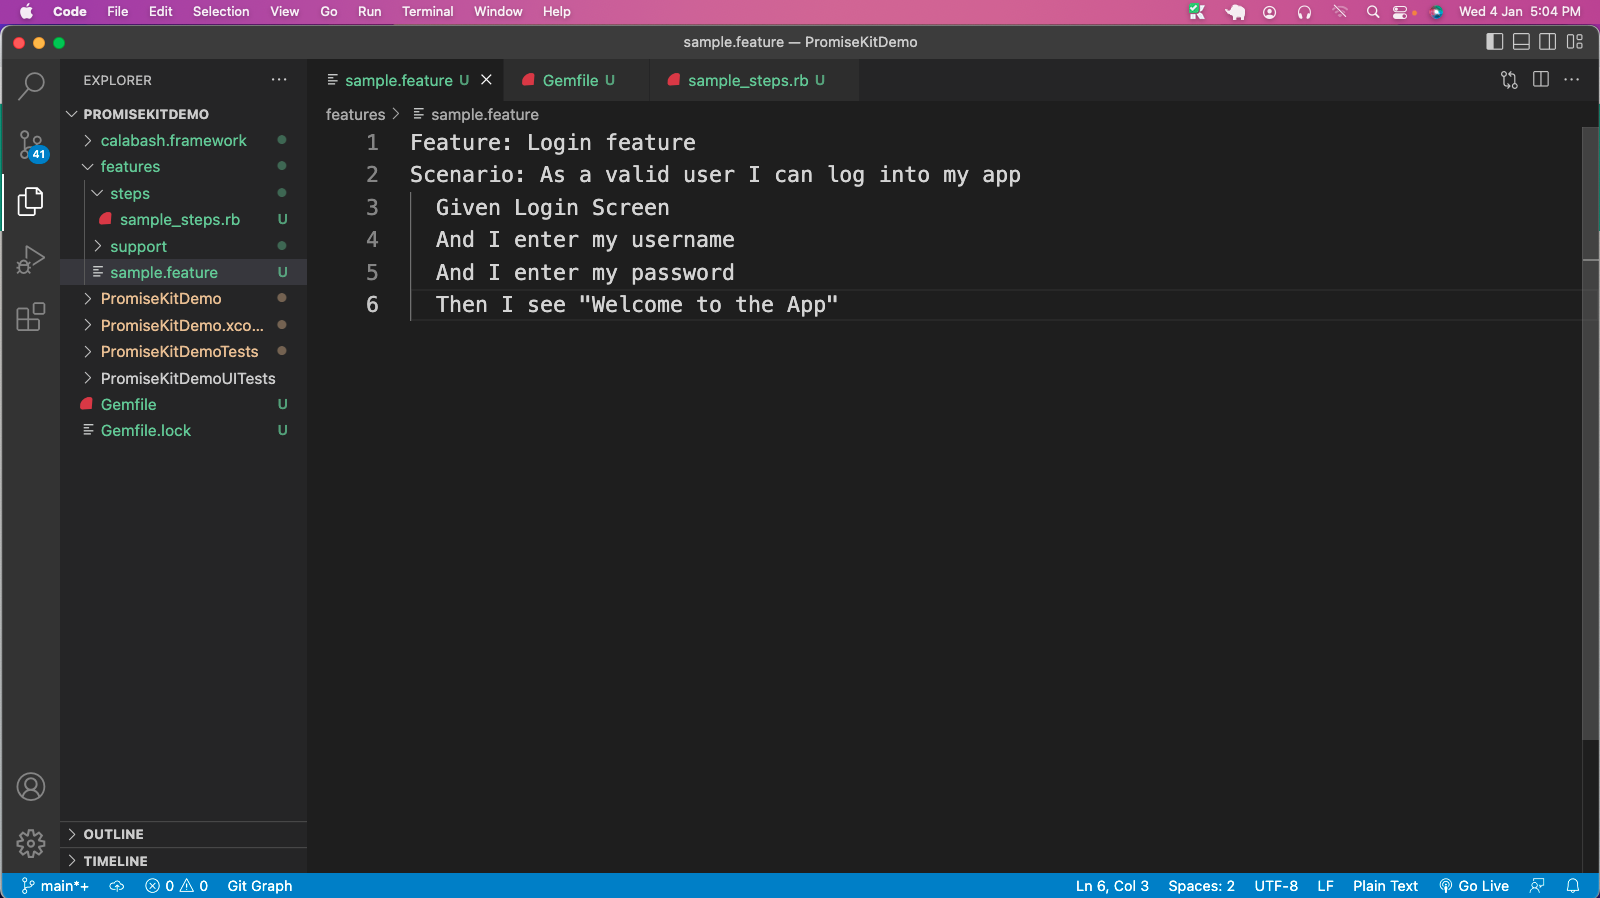
From the terminal, give the cucumber command. The app will be launched in the simulator, and we will get a success message. But we can also update our test as we did in our Calabash Android post. We will write a login test as below in the sample.feature file:
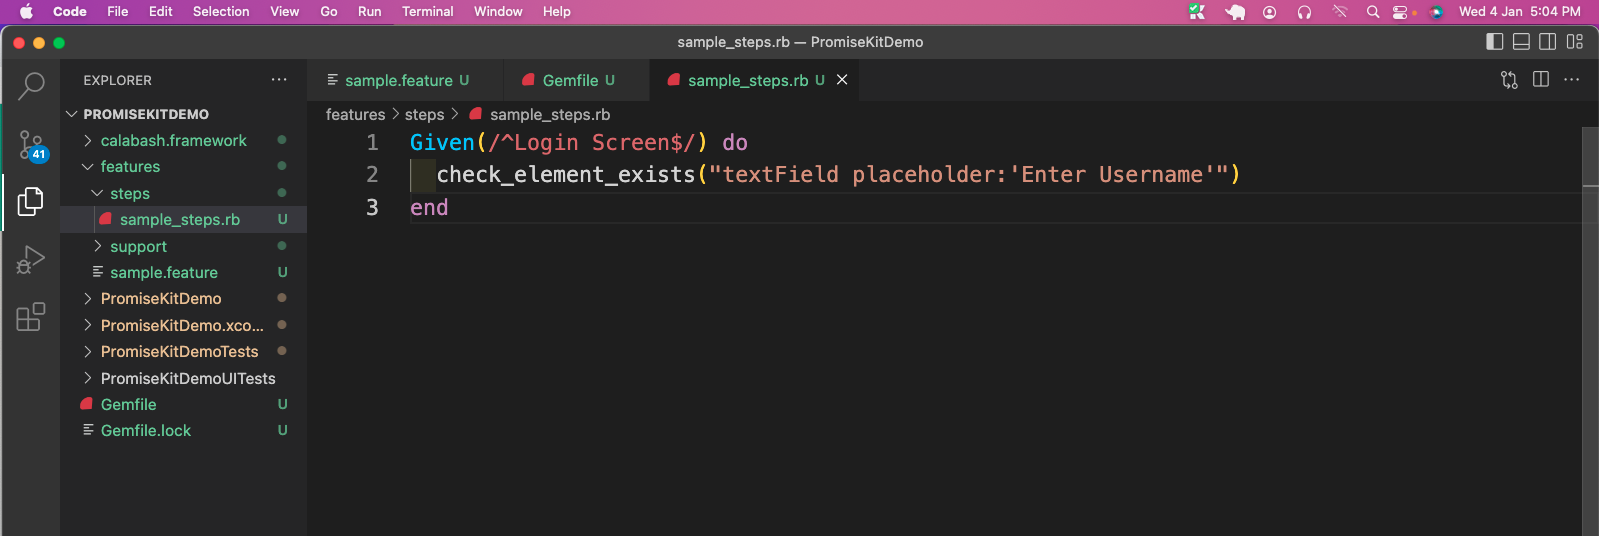
We also have a sample_steps.rb file, which contains steps written in Ruby. By default, it creates dummy content.
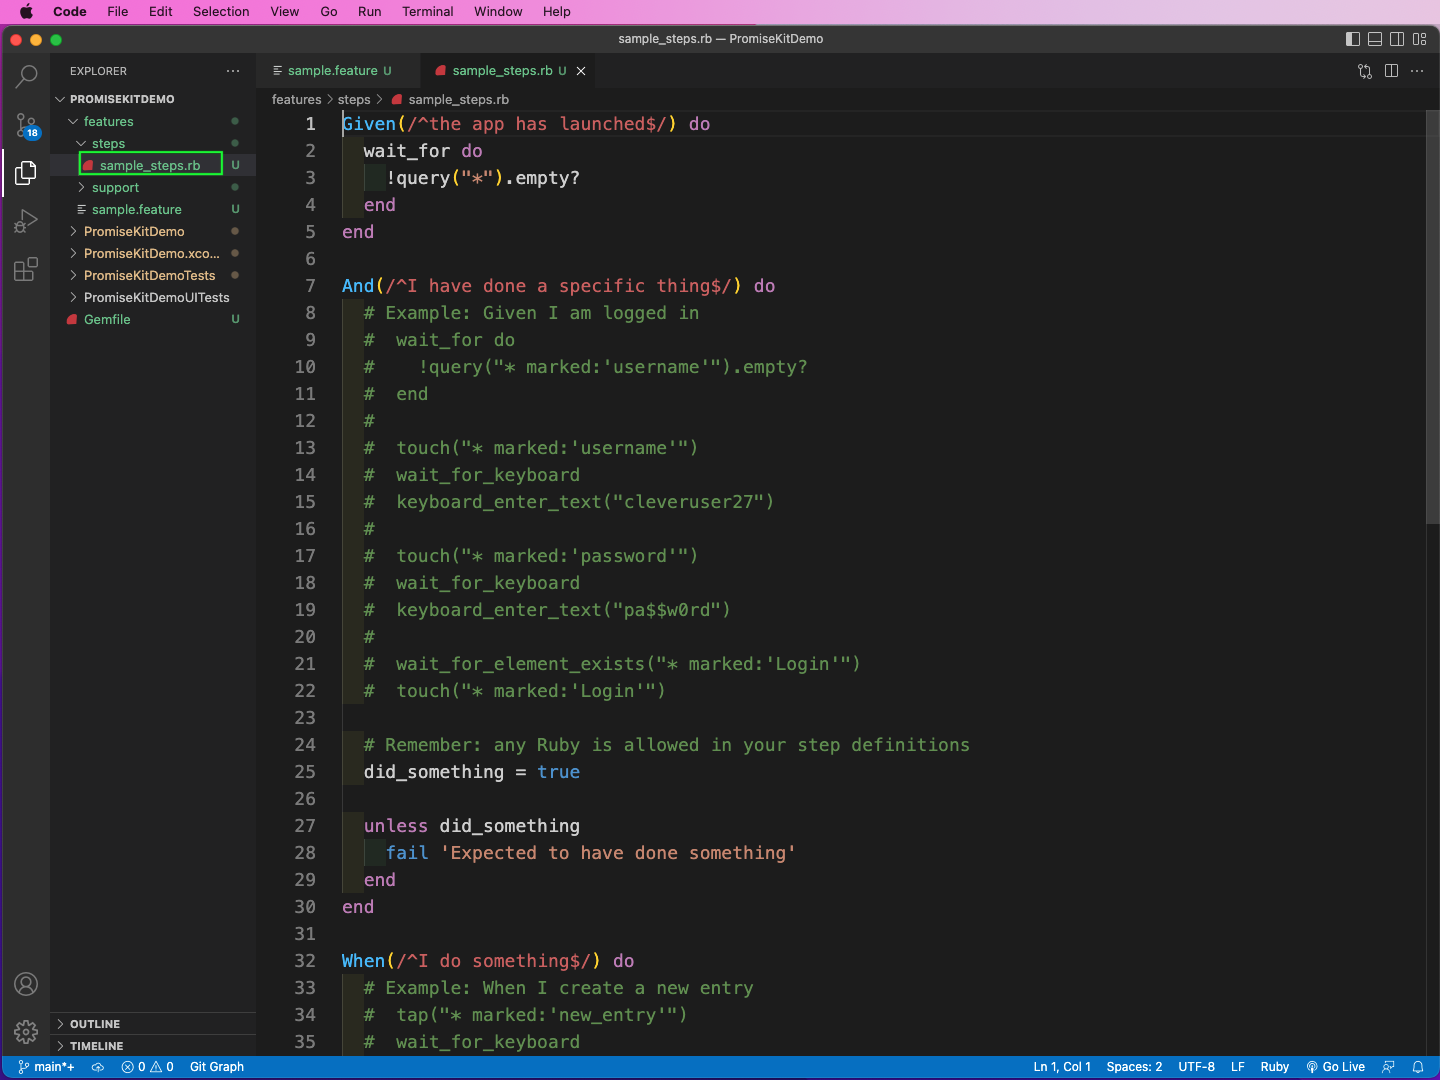
We can update it to check if some fields exist. Here, the given Login Screen should be the same as the feature file. After that, we are checking if there's placeholder text called Enter Username.
Here again, we will give the cucumber command, and we will get the result below:
Alternatives to Calabash
As per the official documentation, Calabash iOS is no longer supported by Microsoft. As with all top open-source projects, Calabash had the backing of a large corporation. But now the support is gone, which is why they suggest alternatives.
As per the official link, they recommend several testing frameworks for mobile apps:
- Espresso for native Android apps
- Xamarin.UITest for cross-platform apps written in Xamarin
- XCUITest for native iOS apps
- Appium for all types of mobile apps
Out of these, Appium is the most general purpose because it can test native iOS apps written in Swift/Objective or Android apps written in Kotlin/Java. Even cross-platform apps written in React Native, Flutter, and Xamarin can be tested easily. You can start with Appium by following the steps in our guide for Appium on Windows.
You can also check out the differences between Appium and Espresso and the differences between Appium and Calabash.
What We've Covered
In this post, we talked about the BDD framework of Calabash in iOS. We first did the setup on a Mac in Xcode. After that, we added Calabash to an existing iOS project and did basic testing on it.
But the setup was very complicated, Calabash is no longer supported actively, and we need to use alternative frameworks, which we also explored.
Instead of all these, try Waldo, where you only need to provide an APK or IPA file. Then, just interact with the mobile app by pressing the button or swiping. Waldo will automatically generate test cases and email you the results.
Automated E2E tests for your mobile app
Get true E2E testing in minutes, not months.


