


Introduction
It's important to thoroughly test applications because testing offers many benefits. Giving users of an application a seamless experience is one of the many advantages of having an application undergo end-to-end (E2E) testing. But extensive testing requires a lot of effort and time. As a result, it's not a good approach to do these tests on applications manually, i.e., by hand. Because as the application grows, testing will become a difficult task.
In order to make E2E testing simple and easier, several testing software tools have been developed over the years. One of them is Appium, an open-source test automation framework for use with native, hybrid, and mobile web apps.
In this guide, we'll discuss the steps and processes required to install Appium on the Windows operating system. We'll also go through simple configuration of the Appium Desktop app. If you've asked these questions:
- Can I install Appium on Windows?
- Can Appium run on Windows?
Then this guide is for you.
Can Appium Run on Windows?
Appium is a platform-independent solution. Thus, you can install and run Appium on the following operating systems:
.png)
How to Install Appium on Windows
Now that you know that you can install Appium on Windows, let's dive into the installation process.
There are two different ways in which you can install Appium on your Windows computer:
- Using Node Package Manager (npm)
- Downloading the desktop app
In this guide, we'll focus on installing Appium by downloading the graphical user interface (GUI) app called Appium Desktop.
The following are the steps you need to take to download and install Appium Desktop on your Windows computer.
Downloading the Appium Desktop App
- Head over to Appium's GitHub Releases page to download the setup of the latest version. This page contains the various versions of the app that Appium has released.
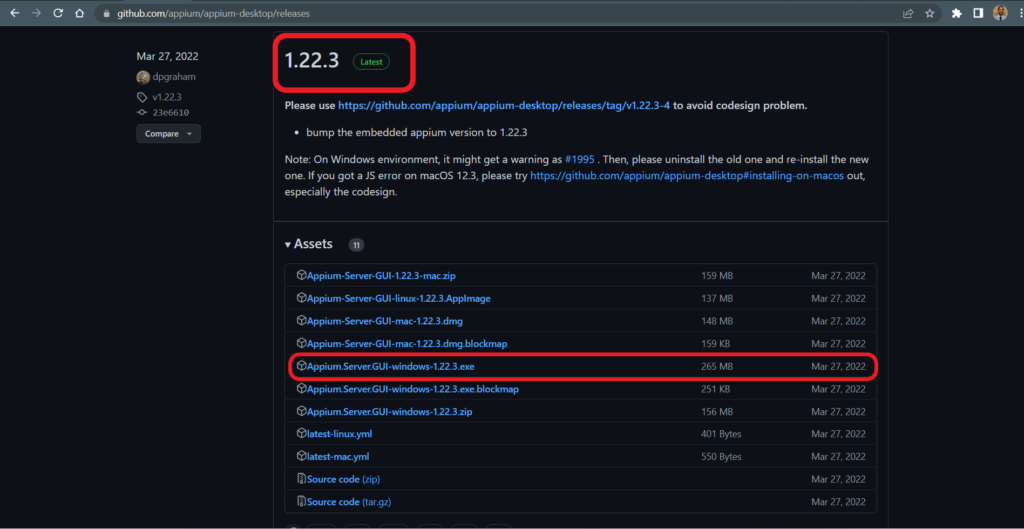
- Scroll down and look for a release version that has the "latest" label beside it.
- Under the latest release, look for the Assets section and locate the Appium-Server setup for Windows, as highlighted in the image above.
- Click on the link to begin the download process.
- Go to your Downloads folder and look for the newly downloaded setup after the setup has finished downloading.
Note: By default in Windows, newly downloaded content is usually located in the Downloads folder.
Running Appium-Server Setup
- Click on the Appium-Server setup downloaded in the previous section to start the installation process. A GUI window should pop up that contains Appium's logo rolling to show that the setup is loading.
- Check the options that suit your needs. Choose whether you want Appium to install for all users or just yourself.
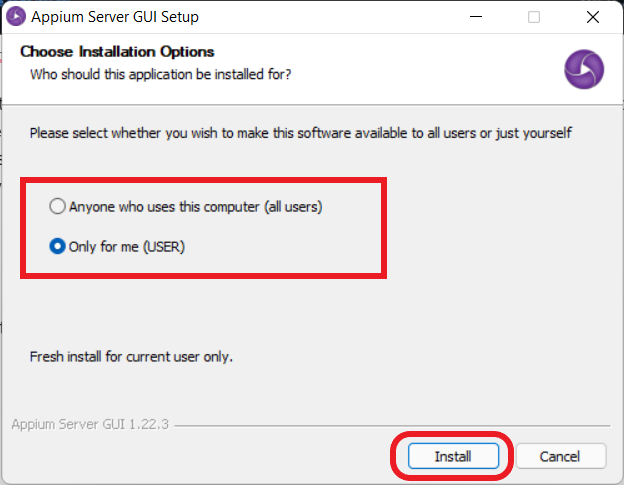
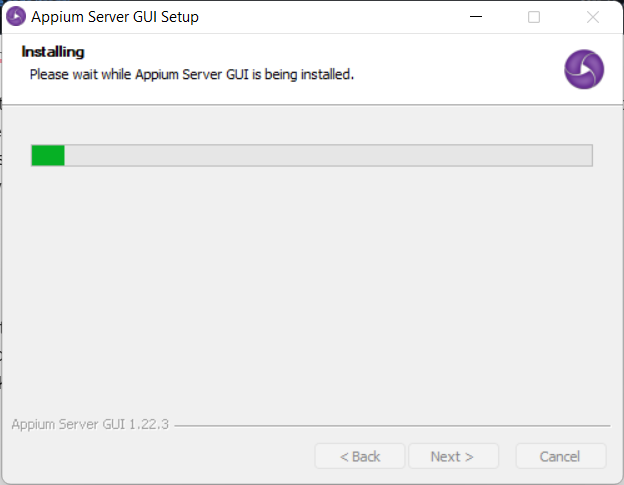
- Click on the Install button. After clicking the Install button, the installation starts, and you should see a window like the one below.
- As soon as the installation process is complete, click on the Finish button.
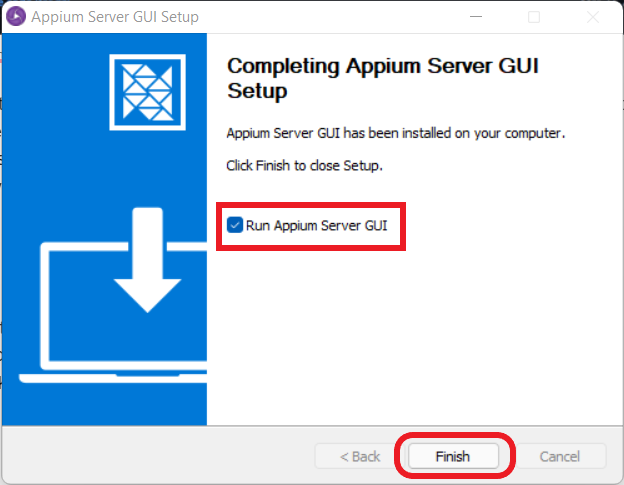
Note: Appium Server will start automatically if you haven't unchecked "Run Appium Server GUI" on the finished page.
Starting Appium on Windows
Now that you've installed Appium successfully on your Windows computer, let's start the Appium Server.
- Open the Appium Server GUI app by clicking on its icon shortcut on your desktop.
Note: After installing the Appium Server, its shortcut icon is automatically placed on your desktop.
- On the newly opened app's window, click on the "Start Server v1.22.3" button.

The Appium Server GUI app shows the host and port number the server will start on. The default value for the host and the port number is 0.0.0.0 and 4723 respectively. Later on, you can change these two values to your preferences. To explain why you may want to change that, let's say another server on your computer is using port 4723; you would need to change the Appium Server port to another available port.
Note: Take note of this port information, as you must instruct your test client to connect to Appium on this port.
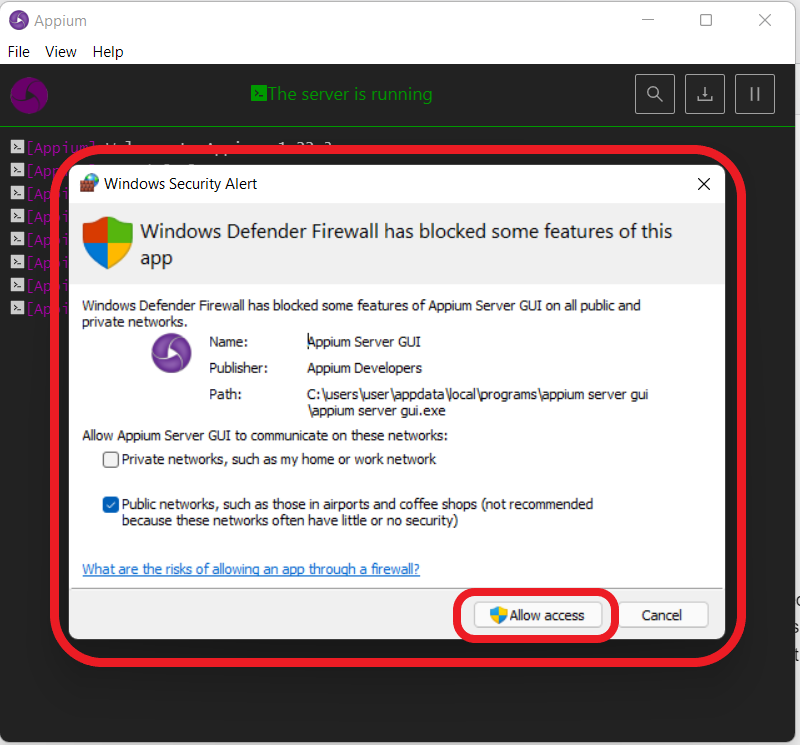
- If you run into the Windows Security Alert saying "Windows Defender Firewall has blocked some features of this app," click on the "Allow access" button to give the Appium app the required permission.
As soon as the Appium Server has all the access needed, the server will start running. The Appium window displays the log output from the Appium Server. Your Appium GUI should look like the image below.
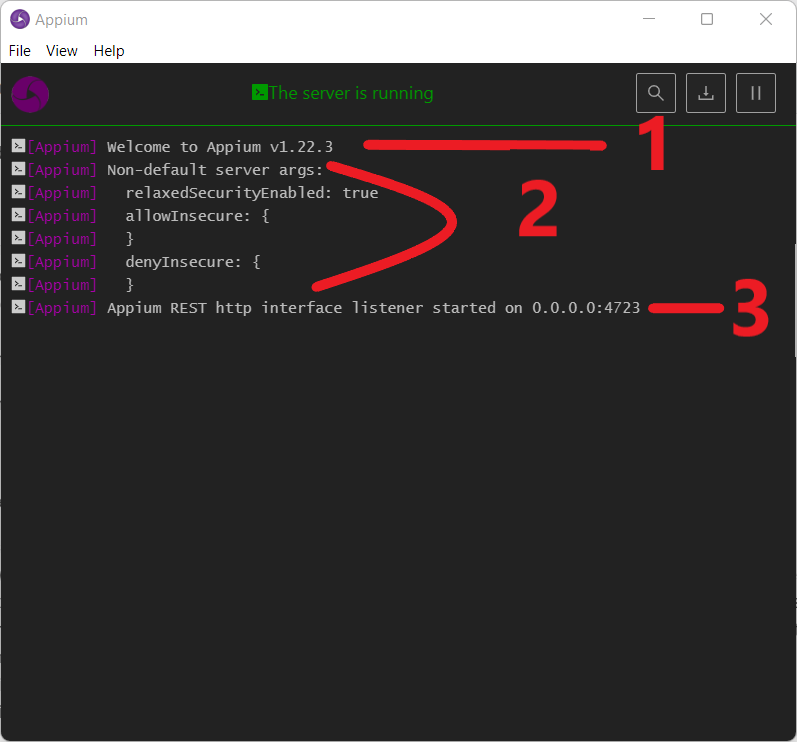
The following is some of the information you can derive from the Appium Server log as highlighted and numbered in the image above:
- The Appium Server version
- Non-default server args
- The host and port the server started on
Configuring Appium
Now that we've downloaded and installed Appium Desktop and have the Appium Server up and running on our Windows computer, let's dive into doing some advanced configuration of the app.
- Open the Appium Server GUI app.
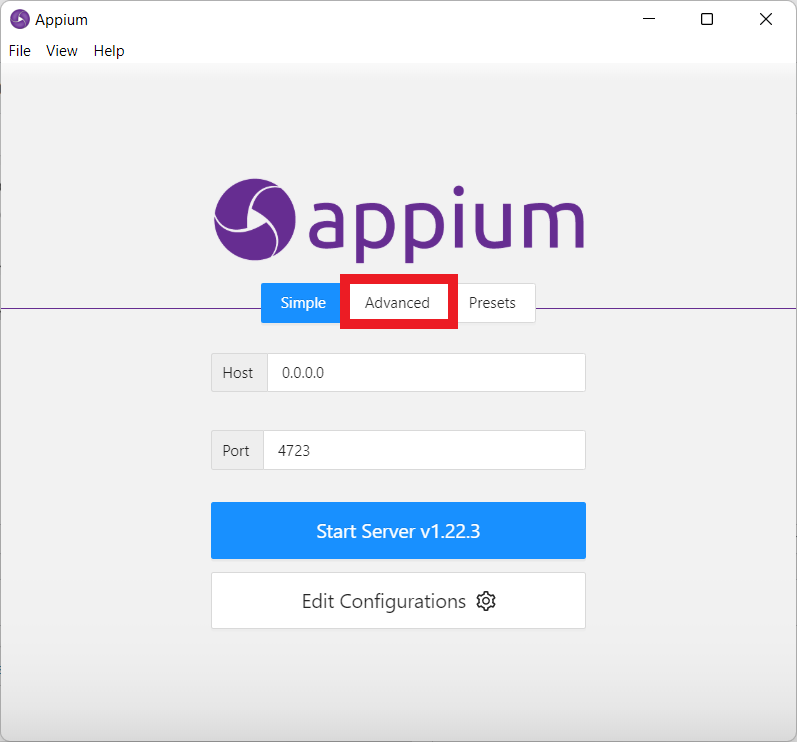
- Click on the Advanced tab on the app's window.
The Advanced tab gives us access to make changes to the app configurations, such as the following:
- the server address and port number
- if the log output should be colored
- whether to allow CORS
- if the timestamp should be included in the log output, etc.
Here is what the Advanced tab looks like:

Saving Configuration Changes as Presets
Let's configure our server to start at port 4000, include the timestamp in the Appium Server output, and also make the timestamp use the local time zone.
- Check the boxes on the left of these settings and update the port field as shown in the image below.
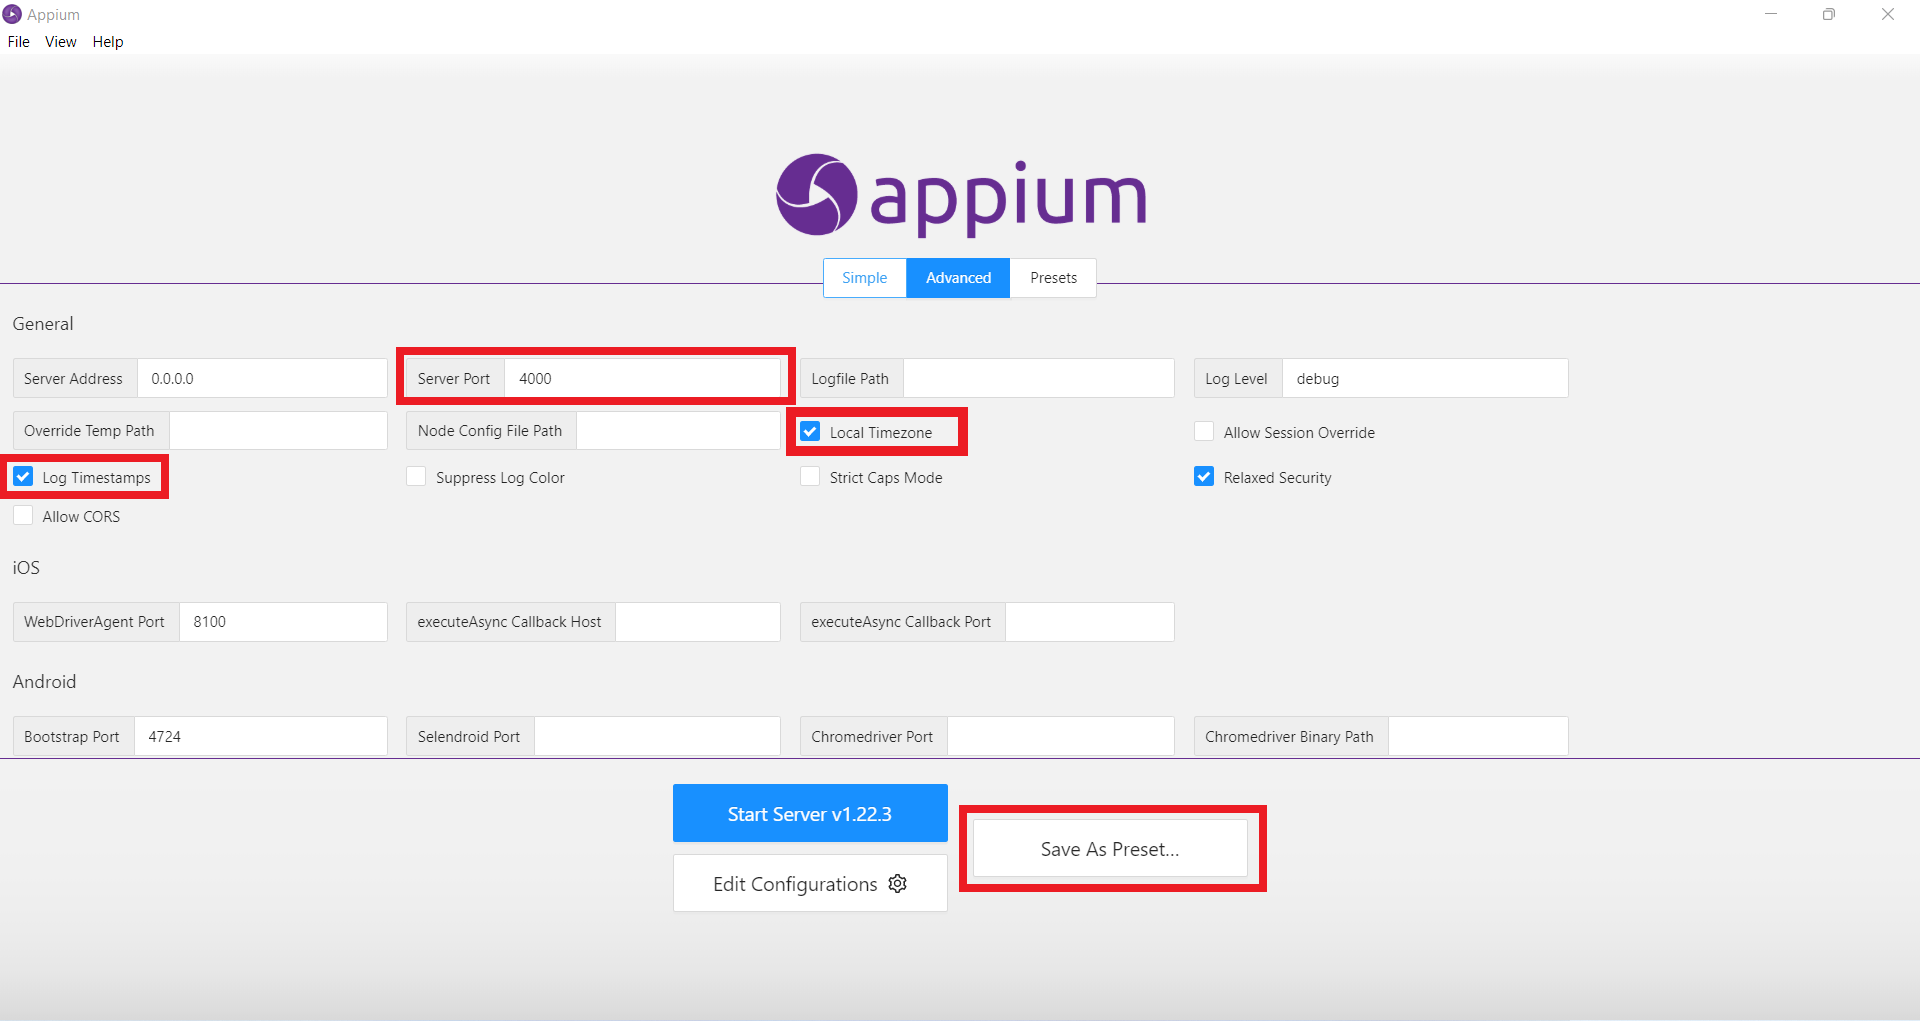
The preset option allows configurations to be saved and even given a name for easy recovery for use.
- If you're interested in keeping the configuration you just made (probably because you want to be able to use it later) without having to access the settings or configuration section, click on the "Save as Preset" button.
After that, a window prompt will pop up asking you to enter the name for the preset.
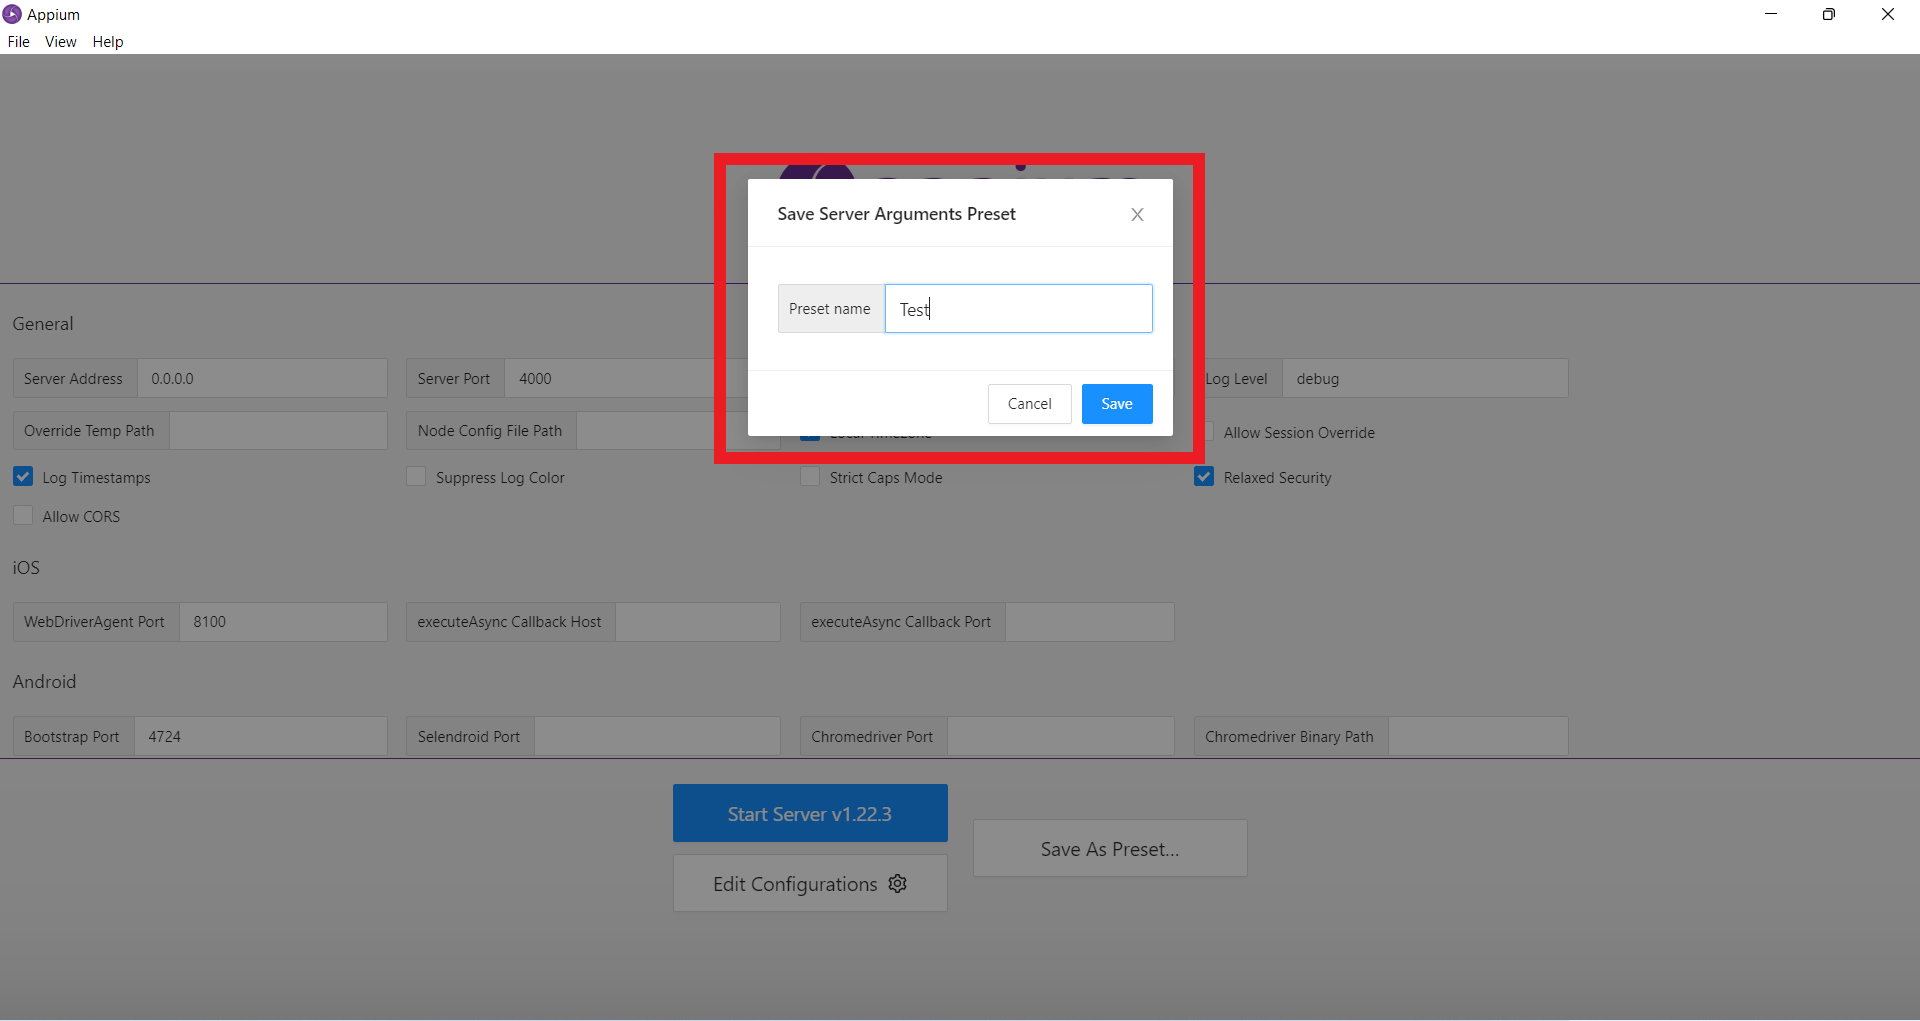
- Enter the name for the preset.
Note: Several presets can also be created.
Accessing Presets
After the configuration has been saved as a preset, click on the Presets tab to access all presets. The Presets tab should look like the one in the image below.

- You can start the Appium Server using the configuration in the preset by selecting a preset from the list and clicking on the "Start Server" button afterward.
- You could also delete the preset if it's no longer needed.
Uses of Appium on Windows
Aside from using Appium to test web apps and mobile applications, Appium can also be used to automate the Windows desktop app.
Appium makes use of the Windows driver in order to make testing Windows applications possible. This Windows driver depends on Windows Application Driver (often called WinAppDriver).
Since you have Appium installed, you don't have to install WinAppDriver separately. It's already part of Appium installed in the earlier section.
However, here are a few things you need to be able to automate a Windows desktop application:
- enable Developer Mode in Windows settings
- have Administrative power
- write tests for Windows driver in your favorite language
Conclusion
In this guide, you got an answer to the question, "Can Appium run on Windows?" In summary, you also learned the following:
- how to install and set up Appium on your Windows computer
- how to start the Appium Server from the desktop app
- how to configure Appium settings
- how to save custom configurations for later use
- uses of Appium on Windows
Now that you know the importance of automation in testing, you should check out Waldo. Waldo helps you automate testing for your mobile apps (iOS and Android), so you can create and run reliable automated mobile tests.
To learn more aboout Waldo's Appium support, click here.
Automated E2E tests for your mobile app
Get true E2E testing in minutes, not months.


