


Testing with Espresso is one of several ways to test your Android application during the development phase. A common method for testing the user interface (UI) of your application is to install it on an emulator or physical device and then manually verify the functionalities by using the app. However, manual testing has its downsides. It's slow and difficult to repeat tests in a consistent way.
Automated testing makes testing your application as easy as writing a few lines of code. Automated tests are fast, consistent, and easy to repeat. You can perform automated tests at different levels. These levels include unit testing, integrated testing, and end-to-end testing. While unit testing verifies a small, singular piece of your code (a method), an end-to-end test verifies an entire flow for a feature or app. Testing with Espresso is part of end-to-end testing.
In this post, you'll learn what Espresso is and how to use it to test your application.
UI Testing for Android
User interface or UI testing in Android is the process of testing the visual part of your application that users interact with.
Android Studio has support for automated UI testing via testing libraries and tools. You can write UI or instrumentation tests in the AndroidTest source sets in your project directory.
Instrumentation tests, unlike unit tests, depend on the Android framework. As a result, you'll need an emulator or physical device to run this type of test. In addition, you'll need a UI testing framework like Espresso or UI Automator.
What Is Espresso?
Espresso is a UI testing framework for Android that provides APIs that make writing UI tests seamless using short human-readable syntax. It offers methods for selecting an element (view), performing actions like clicking or scrolling, and verifying the state and content of views.
How to Set Espresso Up
Setting up Espresso is pretty straightforward. First, you add the required Espresso dependencies to your app-level build.gradle file for your project and click on 'Sync now.' Then you'll be ready to start writing your tests in the androidTest directory.
Now that you know what Espresso is and how to add it to our project, I'll walk you through a tutorial for writing tests using Espresso
Creating Your First Espresso Tests
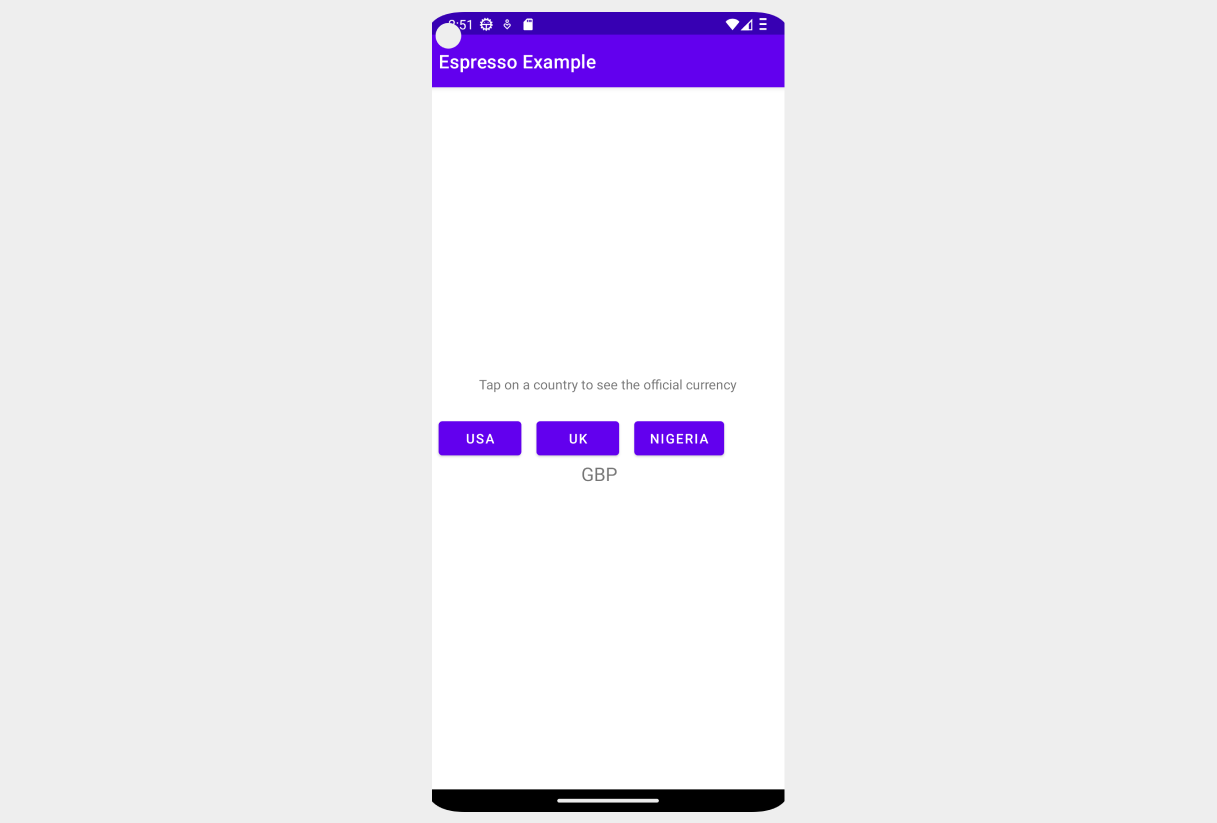
In this tutorial, we'll create an example app with three buttons and a TextView for displaying messages. Once the user taps a button with the name of a country, the TextView will display the currency that country uses. We'll write a test to verify that the correct message is displayed when a button is tapped.
The following screenshot shows what the application should look like:
Prerequisites
In order to follow along better, you should have the following:
- Android Studio
- Android device or emulator installed on your computer
- Basic knowledge of Kotlin
Step 1: Create a Project
First, open Android Studio and create a new project from the welcome screen or by navigating to File > New > New Project.
Next, in the New Project wizard, select Empty Activity then hit Next. Enter your project name in the second screen and hit Finish to complete creating your project.

Step 2: Design App Layout
As I mentioned earlier, the example app will have three buttons and a TextView that displays the currency. To design this layout, open the activity_main.xml layout file and add all three UI elements. We're using a Constraints layout as the parent layout for this example, so make sure to set the necessary horizontal and vertical constraints.
Also, change the value for ID for the first, second, and third buttons to button_usa, button_uk, and button_ng respectively. Finally, set the ID for the text view to message_textview.
Here's the complete code for activity_main.xml after making the above changes:
Step 4: Code the App Logic
There's one last step before we start implementing the actual test. Write some code to handle the event of the user clicking on a button.
Open the MainActivity.kt file, then create a messageTv field and updateMessage() method. To do that, paste the following code at the end within the MainActivity class:
At this point, if you want, you can run the app and manually test the functionality.
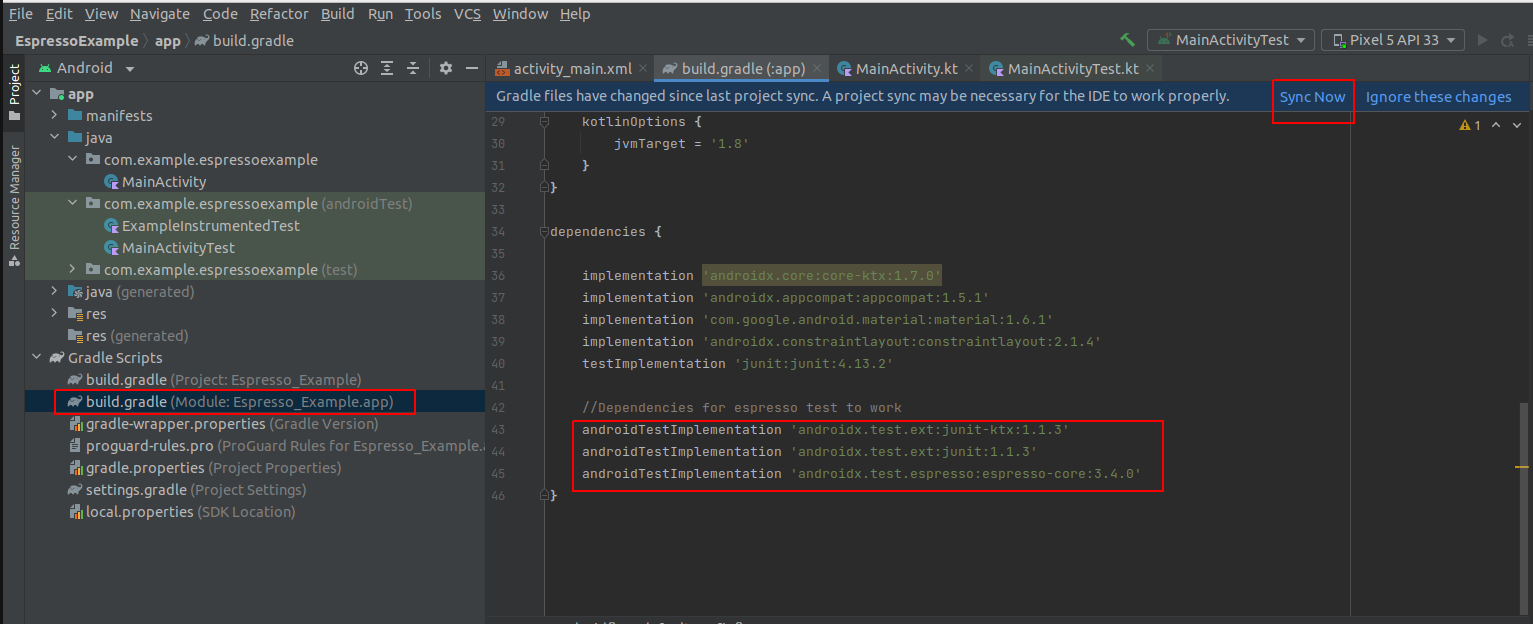
Step 5: Add Espresso Dependencies to Your Project
The first step before you can start writing Espresso tests is to add the required dependencies to your project. The procedure for adding these dependencies is similar to adding other third-party libraries.
Open the app-level build.gradle file and add the following code under the dependencies section:
After adding the code, you should see a prompt at the top asking you to sync gradle. Click Sync Now to accept.
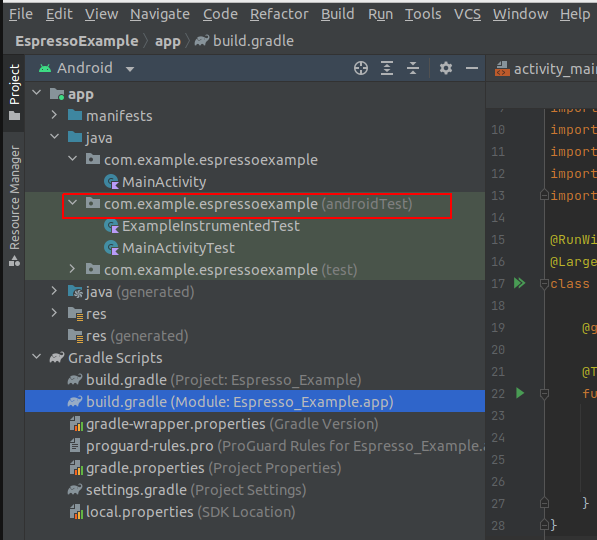
Step 6: Generate Test Class for MainActivity
In automated Android UI testing, you write your tests in a dedicated test class. It's good practice to have a test class test only a specific class for your app.
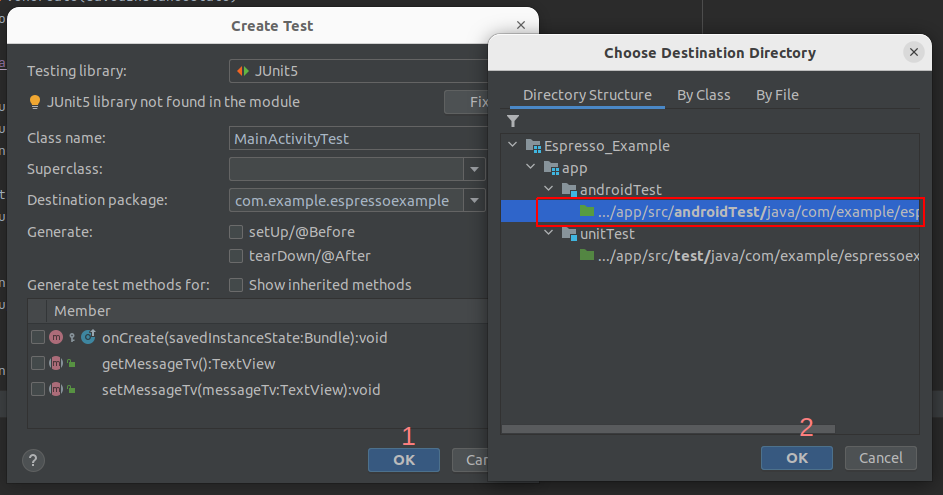
To generate a new test class for the MainActivity class, open MainActivity.kt, right-click the class name, and select Generate > Test. This will open the Create Test prompt. Leave everything as default. Click Ok. Next, select the folder under androidTest as your destination directory.
Now you should have a new MainActivityTest.kt file under the androidTest source set. You can open the file to start writing your first test.
Step 7: Write Your First Espresso Test
If the content of your generated test class contains the following code, you'll need to do some cleanup.
Delete the line with the import statement, then remove the internal keyword from the class declaration. Your test class should look like this after updating it:
Next, annotate the MainActivityTest class with @RunWith(AndroidJUnit4::class) and @LargeTest.
After that, you'll need to create an activity scenario. The purpose of the activity scenario is to start the lifecycle of an activity for the purpose of tests. Hence, we're going to use it to start the MainActivity of our example application.
To start the activity using the activity scenario, add the following code in the test class:
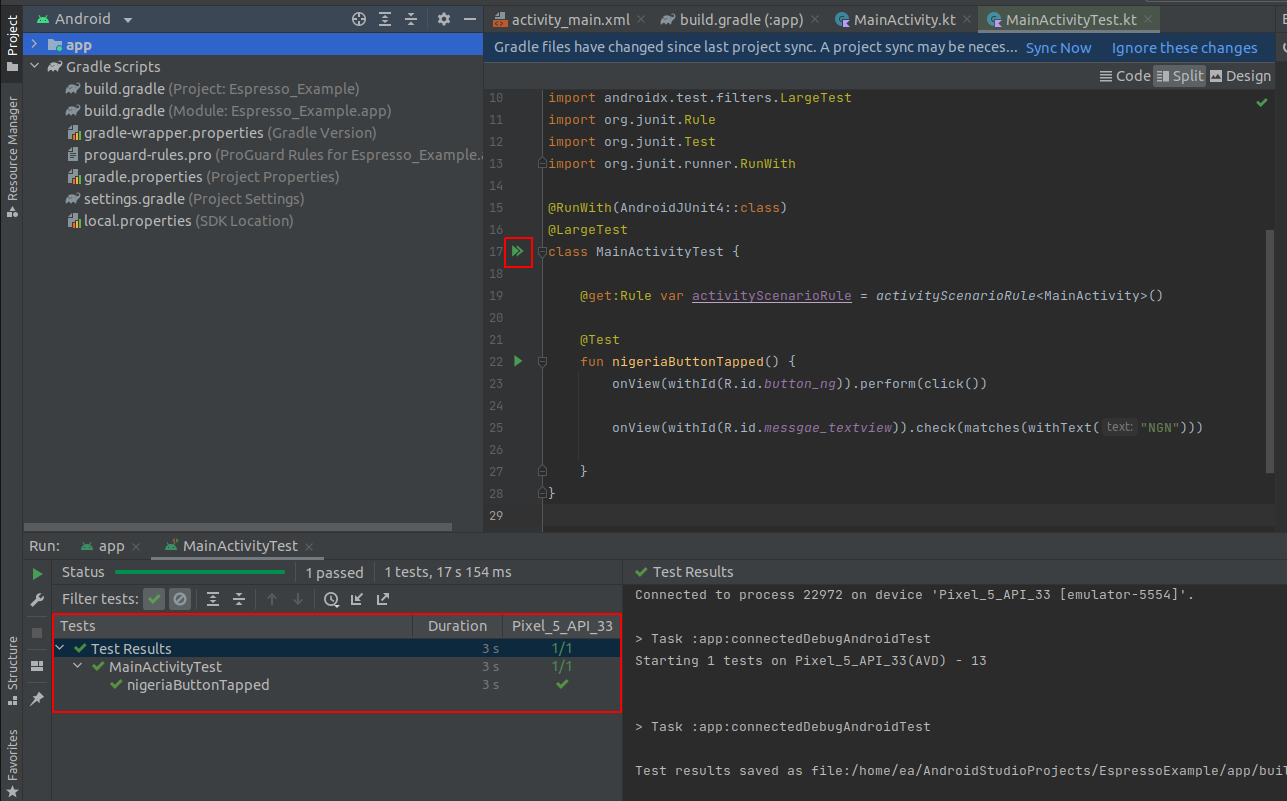
Now create a new test method in MainActivityTest class with the name nigeriaButtonTapped(). In order to tell Android Studio that this method is a test, add the @Test annotation above it. Here's the code for the nigeriaButtonTapped method included in the complete test class code:
So, basically, from the above code, first, we use Espresso's onView() method to locate a view (button), then the perform() method to click on the view. After that, we use onView() again to locate the message text view and then we use the check() method to verify that the text matches our expectation, "NGN."
To run the test, hit the green play button next to the MainActivityTest class. When your test runs, you should be able to see the app running on your emulator or device and actions like clicking happening automatically.
Testing Asynchronous Code
Testing asynchronous code can lead to flaky and inconsistent tests. For example, writing a test that depends on data from a background network request may fail and pass inconsistently due to poor internet connectivity. To reduce this, you can use test doubles or fake data. You should avoid using delays induced by code as this may make your tests unnecessarily slow. Tests with set delays may also fail when the network takes even longer to respond.
You may use IdlingResources to wait for a long-running task to complete. Then continue running your test.
Conclusion
First, you learned that Espresso is a UI testing framework for Android. Then we walked through a simple Android app and performed UI testing using the Espresso framework. In our tutorial, we wrote a test that clicks on a button and verifies that the correct text is shown to the user.
Another way you can perform UI testing on your Android app without writing extra scripts is by using a no-code tool like Waldo. Waldo makes automated testing so much easier that even members of your team who aren't developers can use it.
And you can find the full code for the example app on this GitHub repo.
Automated E2E tests for your mobile app
Get true E2E testing in minutes, not months.


