


Robot Framework is a completely free-to-use and open-source tool. You can use it to do test automation and Robotic Process Automation. RPA is the process of automating repetitive tasks in a software development process. For example, you can use RPA to get the disk space status of all servers at a certain time and email it to different people. These manual tasks can be automated through RPA.
RPA can be easily integrated with other test automation frameworks like Appium. In this post, we'll learn to do that.
What Is Robot Framework Appium?
Robot Framework can be easily added to other automation frameworks, like Appium. You can learn more about Appium in our earlier post on testing React Native apps with Appium. The test cases in Robot Framework are much easier to write than writing in Appium with languages like Python or JavaScript.
So, when we integrate Robot Framework in Appium, we get the ease of writing test cases in Robot Framework. We also get the power of Appium to write automation tests.
.png)
Is Robot Framework Better Than Selenium?
Robot Framework and Selenium are two different things, and they can't be compared. Selenium is an automation framework in which we have to write test cases using other languages, like Python and Java. In comparison, Robot Framework is generally used with other frameworks like Appium and even Selenium.
Generally, Selenium test cases in Python or Java can be hard for testers because they have to learn a new language. In comparison, Robot Framework test cases are like plain English, so testers typically prefer them. And if we integrate Robot Framework in Selenium, we can use this feature.
One more difference is that Selenium can be used to write automated test cases for web apps only. It doesn't work with mobile apps. But we can use Robot Framework to write test cases for mobile apps. In addition, we can use it with Appium, which is a mobile app automation testing framework.
Why Should I Use Robot Framework?
The major benefit of Robot Framework is that the test cases are written in a special keyword style. It isn't a programming language code, and it can be easily understood and written by testers. Plus, it integrates well with Selenium, the top automation framework for web apps, and with Appium, the top automation framework for mobile apps.
The generated test reports are in easy-to-understand HTML. They can also be used with DevOps CI/CD pipelines in Jenkins.
Installation and Setup
To install Robot Framework on Appium, we must install and set up some prerequisites.
.png)
Android Studio and Android Emulator Setup
We must have Android Studio downloaded and the setup completed. The detailed setup steps can be found in our earlier post on running a React Native app through Android Studio. In addition, the post also explains how to add an Android Emulator (virtual device).
Appium Setup
We need to have Appium downloaded and installed on our system. But first, what is Appium? It's also a completely free and open source mobile app testing framework. You can write automated tests using Appium. And these tests can be written in all major languages, including JavaScript, Python, and Java. But these test cases are complicated to write, which is where the Robot Framework comes to our rescue.
Python Install and Setup
We also need to have Python installed on our system. In our earlier post, we have given the steps to install Python on a Windows OS. In this post, we're going to use a Mac. Python comes preinstalled on Macs, but you can also install it following the same procedure. To confirm that Python is installed, use this command:

Robot Framework Installation
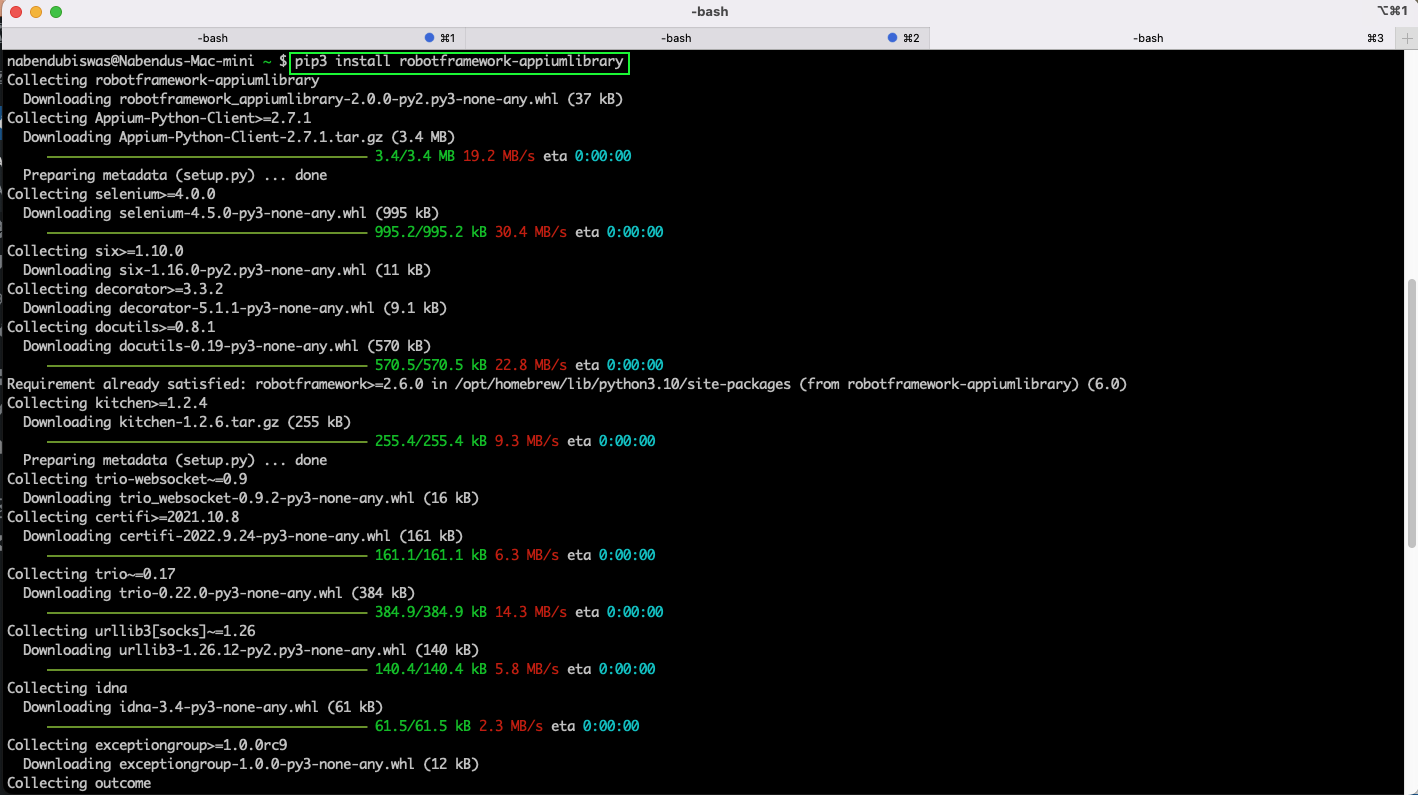
Now, we need to install the Robot Framework through the pip command. pip is the package manager for Python, which is used to add different packages. So, we'll use the following command to add the Robot Framework library:

Robot Appium Library Installation
To use Robot Framework in Appium, we have to use an Appium Library package. We'll install it again through the pip3 command.
Test Setup
Before writing our test cases, we need to have the Appium server running. We also need a physical Android phone or emulator running in our system. We'll be testing the default calculator app on Android. And we have done the same using Java in our earlier post on UIAutomator.
Physical Android Device
We have connected our physical Android device to our Mac using a USB cable. After that, to check if the device is connected correctly, give the following command from terminal:

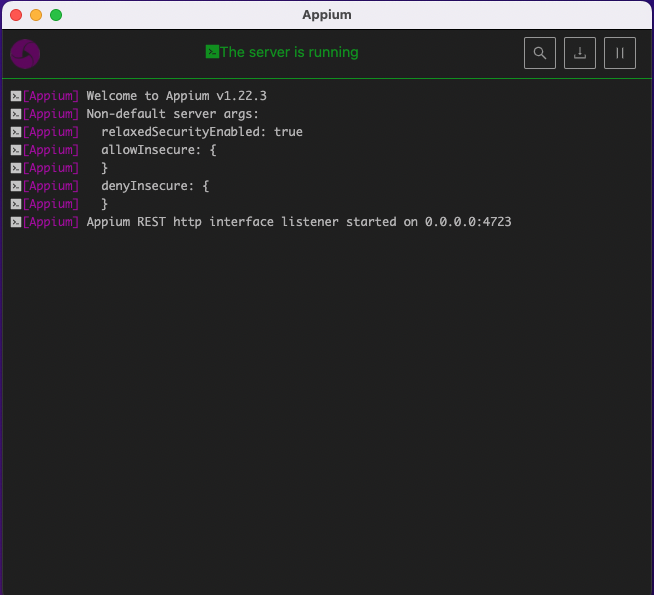
Appium Server
Next, we need to start the Appium server on our system. We started the same through the Appium Server GUI installed on our system.
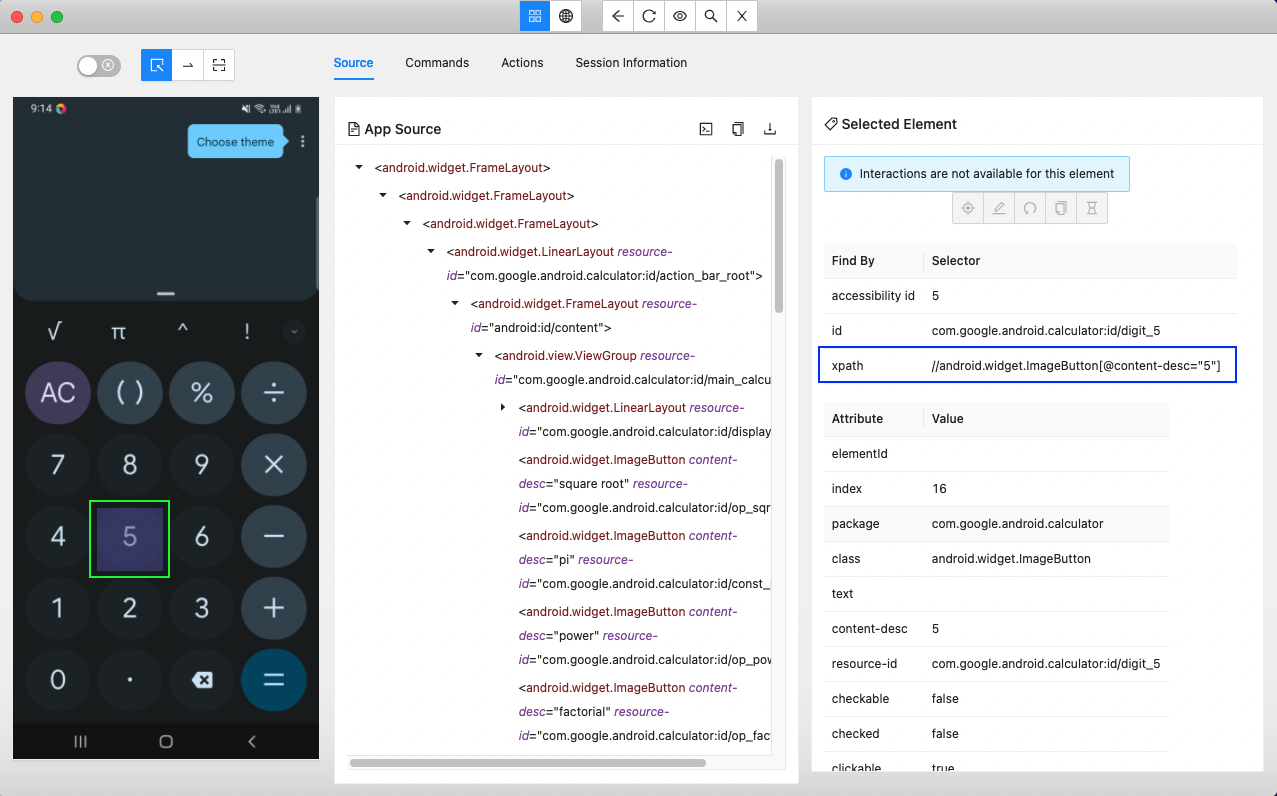
Appium Inspector
Now we need to open the calculator app in Appium inspector. We need to get the XPaths of some of the elements for our testing next.
We've given the desired capabilities in Appium Inspector.

After the "Start Session" button on the above screen, the calculator app will open in Appium Inspector. Now, click on the 5, 3, +, and = buttons and note the XPath for each.
Writing Test Cases
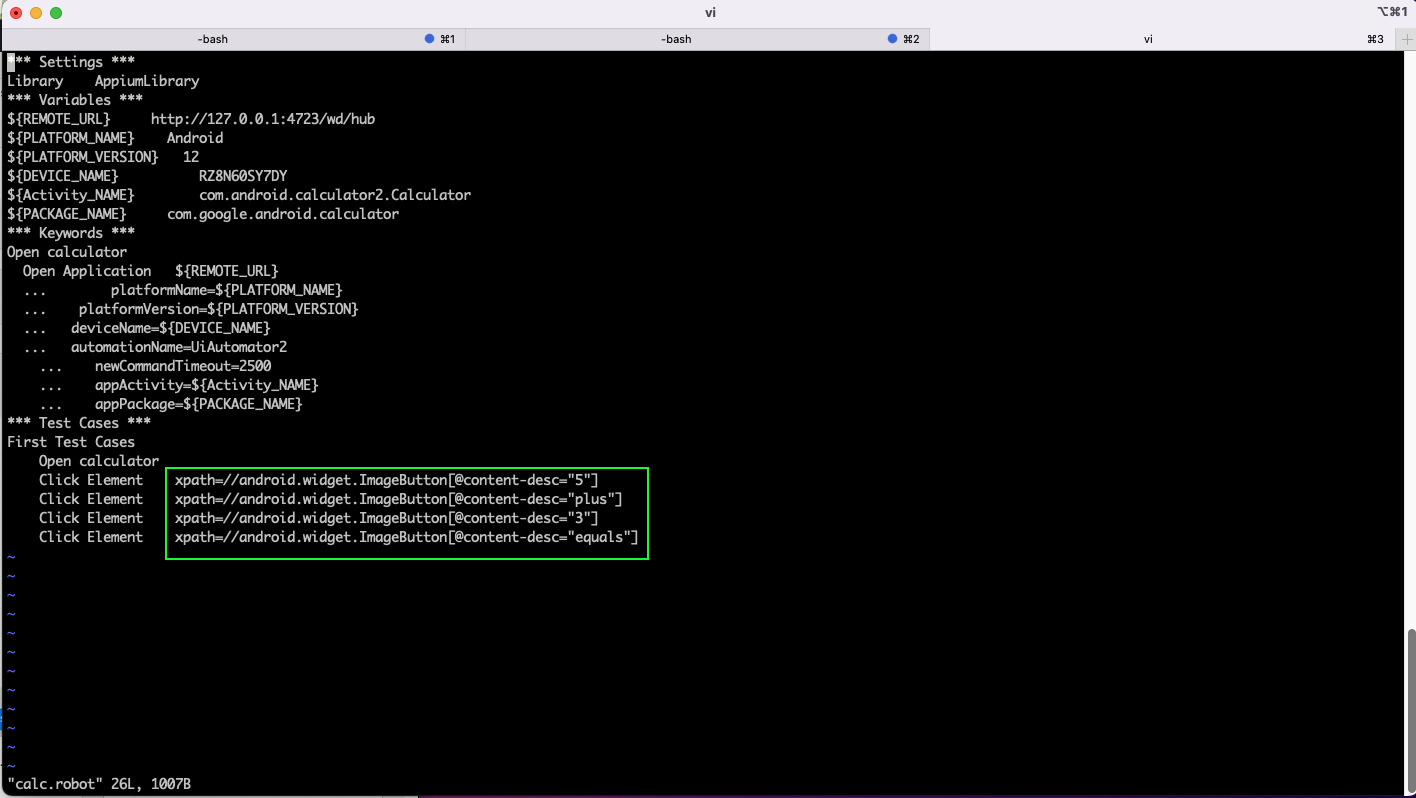
We don't need any special Integrated Development Environment (IDE) to write test cases with Robot Framework. So, we've just created a new folder, robot-tests, and then created a new file, calc.robot, using the built-in vi (visual editor). You can use Notepad or any other simple editor.

Now we'll write the test case in the calc.robot file. Here, in the Variables, we need to give all the correct details used while connecting through Appium Inspector.
After that, the test case is simple English-language statements. Here, we have first opened calculator, followed by various click elements. Note that we need to give the correct XPaths noted earlier.
Now, to run this test file, give the below command from the directory where the script is located. It will give the output that the test passed. Also, it will run the automated test in the connected device.
robot calc.robot

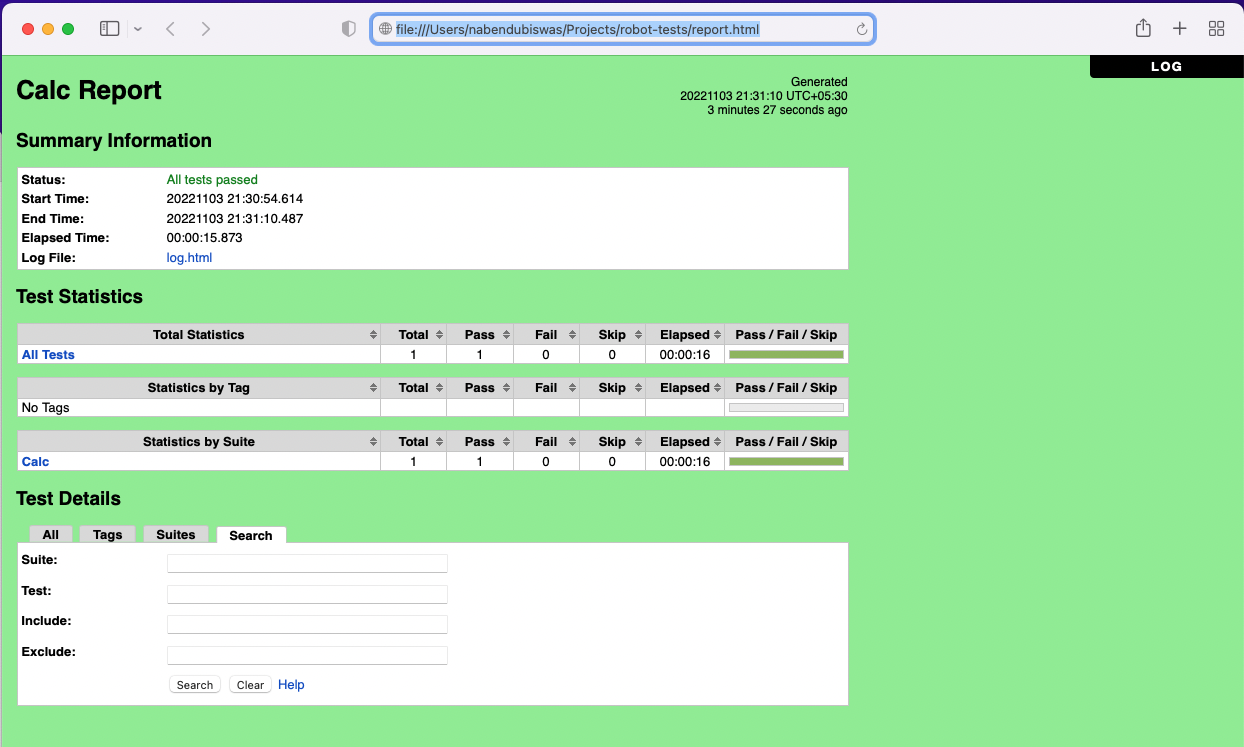
We'll also get various reports generated in the same folder. Here, click on the report.html file.
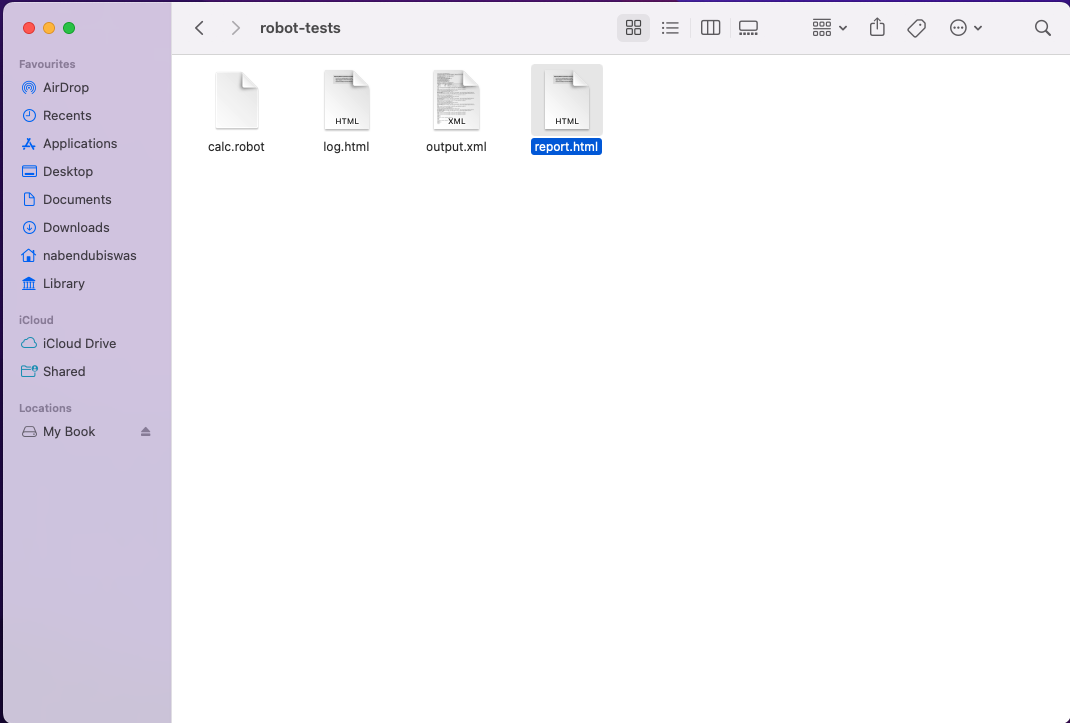
The report.html file shows all the details of the test in a nice tabular format.
Conclusion
In this post, you've learned about Robot Framework and how to integrate it with Appium and write automated tests. But there's a lot of setup required. Although the test cases are easy to write, you still have to write them.
Why not get an APK or IPA file and try Waldo? With this testing tool, you can avoid writing test cases and all the setup that comes with Robot Framework and Appium.
Automated E2E tests for your mobile app
Get true E2E testing in minutes, not months.


