Waldo sessions now support scripting! – Learn more
Testing

AppiumLibrary: A Detailed How-To Guide

Eric Goebelbecker
Eric Goebelbecker
AppiumLibrary: A Detailed How-To Guide
October 18, 2022
12
min read

Mobile GUI testing doesn't have to be hard work.

AppiumLibrary makes it easy to drive a mobile app from Python. It lets you drive your apps inside a test script with a simple syntax in scripts that run from inside your IDE or your build pipelines.

Let's look at AppiumLibrary and Robot. We'll go over what these tools are, and then run them against Android sample code.

What is AppiumLibrary?

What is Appium?

Before we can talk about AppiumLibrary, we need to cover the tool it's designed to interface with, Appium, as well as the Robot Framework it connects to.

Appium is an open-source toolkit for automating applications. It can drive web or mobile apps, with support for:

  • iOS web (Safari) and mobile apps
  • Android web (Chrome) and mobile apps
  • Windows desktop apps.

So, you can use Appium with native or hybrid applications.

Appium abstracts the differences between these applications with a client-server architecture, so you can write test code using the same API for all these platforms. More importantly, Appium works on compiled code. You don't have to include extra libraries in your code to test with Appium.

Appium is designed with this philosophy:

Appium is built on the idea that testing native apps shouldn't require including an SDK or recompiling your app. And that you should be able to use your preferred test practices, frameworks, and tools. Appium is an open source project and has made design and tool decisions to encourage a vibrant contributing community.

What's Robot Framework?

Robot Framework is a generic Python framework for automation. You can use it for test automation and for robotic process automation (RPA). Robot's developers made it easy to add extensions, so a library that connects it to Appium makes sense.

Robot scripts are exceptionally easy to write. It uses a human-friendly syntax that's easy to read and maintain. This, combined with a tremendous ecosystem, makes Robot a popular choice for testing.

Robot scripts are exceptionally easy to write. It uses a human-friendly syntax that's easy to read and maintain.

So, What's AppiumLibrary?

AppiumLibrary is a Python library that connects Appium to the Robot Framework. It uses Appium to communicate with Android and iOS applications from Robot's test scripts. So, you can use Robot's simple language to drive mobile apps and verify their behavior.

It's a lot easier to show the tell here, so let's get to work with a few tests.

How Do I Use AppiumLibrary in Robot Framework?

Using AppiumLibrary with Robot Framework is straightforward, if not simple. Let's go over setting up a development environment for testing an Android application.

Android Sample Code

Before we start, you'll need to have Android Studio installed.

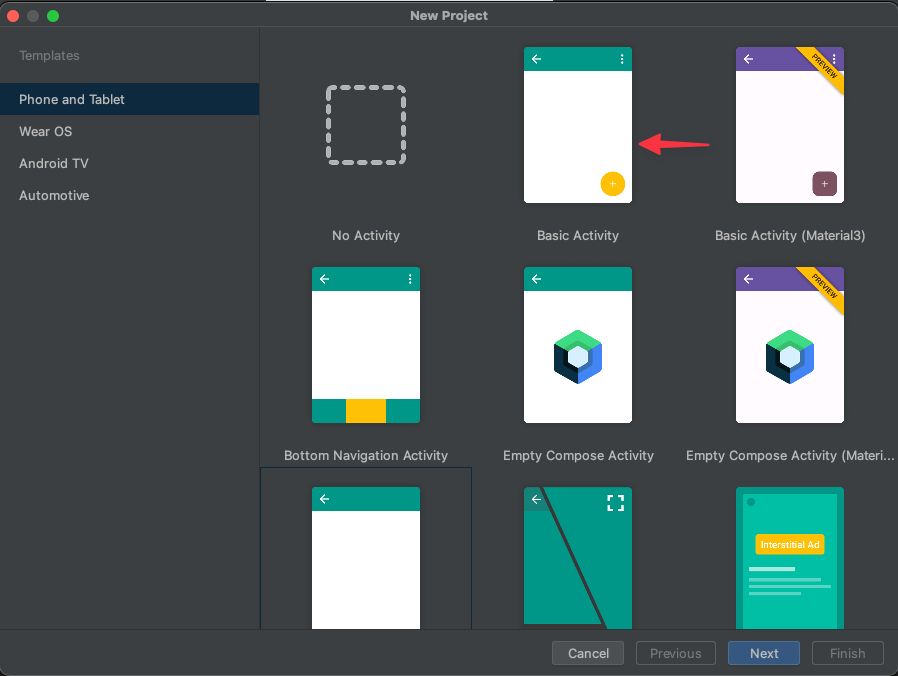
Open the IDE and create a new project. Use the Basic Activity example.

appium robot android sample

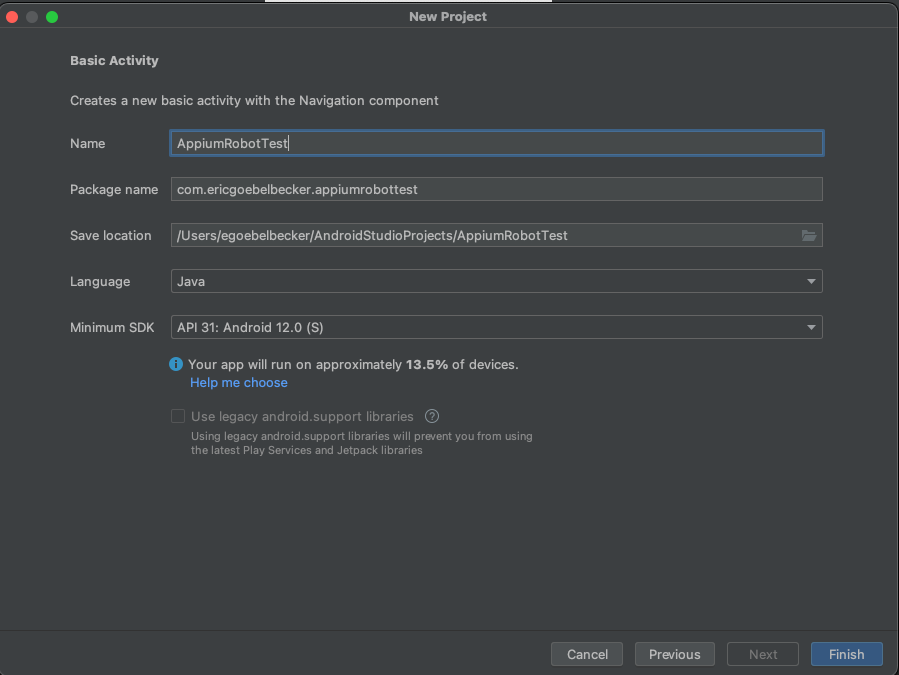
Give your application a name and select the latest library versions.

appium robot android names

Build the app, and set up an emulator to run it. Make sure everything's working before you continue.

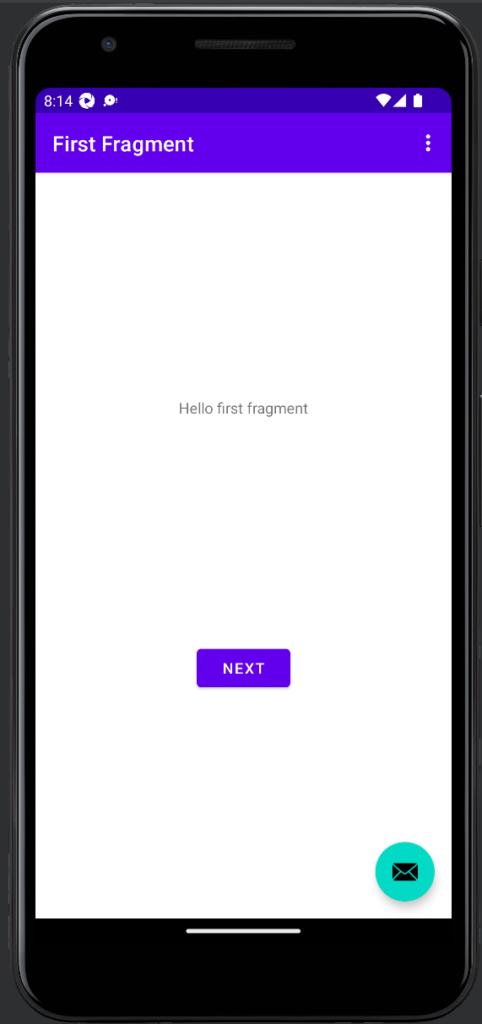
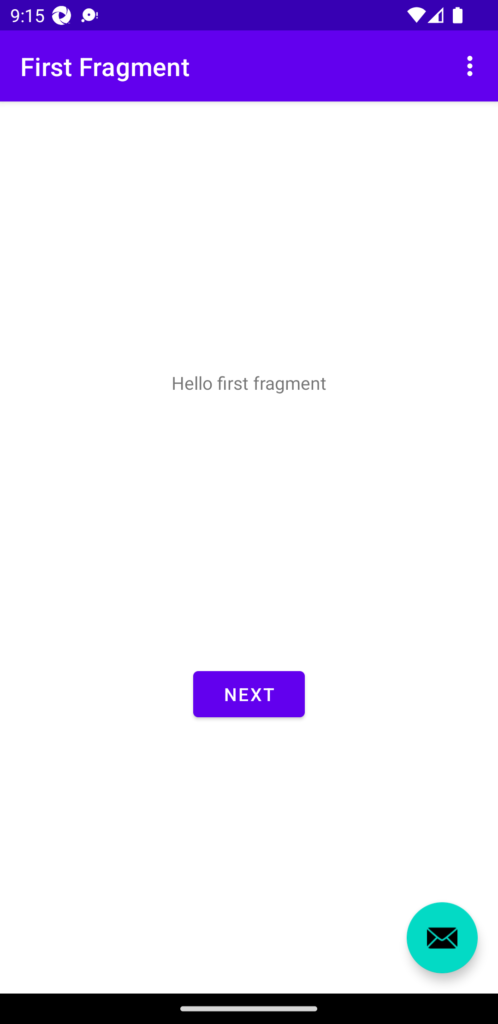
You should see this screen on startup.

appium robot android basic activity

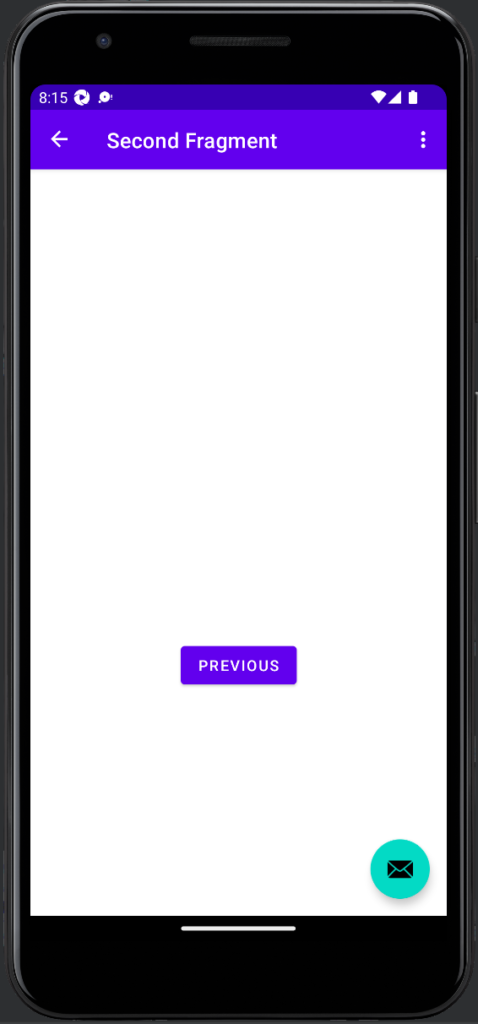
And this is when you click the NEXT button.

appium robot android basic activity

Install and Configure Appium

Before you can run tests, you need to install an Appium server and a driver for the applications you want to test. The server receives requests from the Appium library, and uses the driver to control your application under test.

You can install the server with Appium Desktop or with npm, depending on what's easiest for you.

When you use Appium with Android Studio, you don't need to install a separate driver. Appium will find the Android emulator you have configured for your project automatically.

Create a Virtual Environment

Next, you'll need to install the Python libraries for Robot and Appium. Start with a virtual environment so you can maintain the dependencies for testing separately from your other python applications.

You can install this virtual environment anywhere, but inside the working directory of your Android project is a great place.

This example uses virtualenv, but you can use whichever Python tool you prefer.


% virtualenv -p Python3 robotenv
created virtual environment CPython3.9.13.final.0-64 in 811ms
  creator CPython3Posix(dest=/Users/egoebelbecker/AndroidStudioProjects/AppiumRobotExample/robotenv, clear=False, no_vcs_ignore=False, global=False)
  seeder FromAppData(download=False, pip=bundle, setuptools=bundle, wheel=bundle, via=copy, app_data_dir=/Users/egoebelbecker/Library/Application Support/virtualenv)
    added seed packages: pip==22.2.2, setuptools==65.3.0, wheel==0.37.1
  activators BashActivator,CShellActivator,FishActivator,NushellActivator,PowerShellActivator,PythonActivator

Next, activate the environment before you install any libraries.


(robtoenv) % source robotenv/bin/activate
(robotenv) egoebelbecker@genosha-2 AppiumRobotExample %

Install Robot Framework

Now, install Robot with pip. The library name is robotframework.


(robotenv) % pip install --upgrade robotframework
Collecting robotframework
  Using cached robotframework-5.0.1-py3-none-any.why (639 kB)
Installing collected packages: robotframework
Successfully installed robotframework-5.0.1

Install Appium Library

Finally, install robotframework-appiumlibrary. This library has several dependencies and will take a few moments to install.


(robotenv) % pip install --upgrade robotframework-appiumlibrary

Collecting robotframework-appiumlibrary
  Using cached robotframework_appiumlibrary-1.6.3-py2.py3-none-any.whl
Collecting decorator>=3.3.2
  Using cached decorator-5.1.1-py3-none-any.whl (9.1 kB)
Collecting Appium-Python-Client>=1.1.0
  Using cached Appium-Python-Client-2.7.0.tar.gz (3.4 MB)
  Preparing metadata (setup.py) ... done
Requirement already satisfied: robotframework>=2.6.0 in ./robotenv/lib/python3.9/site-packages (from robotframework-appiumlibrary) (5.0.1)
Collecting selenium<4,>=2.47.1
  Using cached selenium-3.141.0-py2.py3-none-any.whl (904 kB)
Collecting six>=1.10.0
  Using cached six-1.16.0-py2.py3-none-any.whl (11 kB)
Collecting docutils>=0.8.1
  Using cached docutils-0.19-py3-none-any.whl (570 kB)
Collecting kitchen>=1.2.4
  Using cached kitchen-1.2.6-py3-none-any.whl
Collecting Appium-Python-Client>=1.1.0
  Using cached Appium-Python-Client-2.6.2.tar.gz (118 kB)
  Preparing metadata (setup.py) ... done
  Using cached Appium-Python-Client-2.6.1.tar.gz (3.4 MB)
  Preparing metadata (setup.py) ... done
  Using cached Appium-Python-Client-2.6.0.tar.gz (3.4 MB)
  Preparing metadata (setup.py) ... done
  Using cached Appium-Python-Client-2.5.0.tar.gz (3.3 MB)
  Preparing metadata (setup.py) ... done
  Using cached Appium-Python-Client-2.4.0.tar.gz (3.3 MB)
  Preparing metadata (setup.py) ... done
  Using cached Appium-Python-Client-2.3.0.tar.gz (3.3 MB)
  Preparing metadata (setup.py) ... done
  Using cached Appium-Python-Client-2.2.0.tar.gz (3.3 MB)
  Preparing metadata (setup.py) ... done
  Using cached Appium-Python-Client-2.1.4.tar.gz (3.3 MB)
  Preparing metadata (setup.py) ... done
  Using cached Appium-Python-Client-2.1.2.tar.gz (3.3 MB)
  Preparing metadata (setup.py) ... done
  Using cached Appium-Python-Client-2.1.1.tar.gz (3.3 MB)
  Preparing metadata (setup.py) ... done
  Using cached Appium-Python-Client-2.1.0.tar.gz (3.3 MB)
  Preparing metadata (setup.py) ... done
  Using cached Appium-Python-Client-2.0.0.tar.gz (60 kB)
  Preparing metadata (setup.py) ... done
  Using cached Appium_Python_Client-1.3.0-py3-none-any.whl
Collecting urllib3
  Using cached urllib3-1.26.12-py2.py3-none-any.whl (140 kB)
Installing collected packages: kitchen, urllib3, six, docutils, decorator, selenium, Appium-Python-Client, robotframework-appiumlibrary
Successfully installed Appium-Python-Client-1.3.0 decorator-5.1.1 docutils-0.19 kitchen-1.2.6 robotframework-appiumlibrary-1.6.3 selenium-3.141.0 six-1.16.0 urllib3-1.26.12

That takes care of the prerequisites. Let's run some tests.

Testing Android with Appium Library and Robot Framework

So, now you've got an application and the tools to test it. Let's start with a simple script.

Robot Script Setup

Create a directory inside your project to store your test scripts. For this example, I'll use the directory name robot.

For these scripts, we'll borrow from the sample code here for the structure.

This script, stored in a file named resource.robot, sets some default variables for the tests, and declares a function that opens the application under test.


*** Settings ***
Library  AppiumLibrary
Library  BuiltIn

*** Variables ***
${ANDROID_AUTOMATION_NAME}    UIAutomator2
${ANDROID_APP}                /Users/egoebelbecker/AndroidStudioProjects/AppiumRobotExample/app/build/outputs/apk/debug/app-debug.apk
${ANDROID_PLATFORM_NAME}      Android
${ANDROID_PLATFORM_VERSION}   %{ANDROID_PLATFORM_VERSION=13}
${ANDROID_APP_PACKAGE}        com.ericgoebelbecker.appiumrobotexample

*** Keywords ***
Open Android Test App
  [Arguments]    ${appActivity}=${EMPTY}
  open application  http://127.0.0.1:4723/wd/hub  automationName=${ANDROID_AUTOMATION_NAME}
  ...  app=${ANDROID_APP}  platformName=${ANDROID_PLATFORM_NAME}  platformVersion=${ANDROID_PLATFORM_VERSION}
  ...  appPackage=${ANDROID_APP_PACKAGE}  appActivity=${appActivity}

Let's go over each line:

Lines #2 and #3 tell Robot we're using its built in library, along with Appium.

Next, we set five environment variables that are key to running a Robot script with AppiumLibrary.

  • ANDROID_AUTOMATION_NAME - the Appium driver to drive the application under test. UIAutomator2 is the default interface for Android applications.
  • ANDROID_APP - the path to the Android Package (APK) to run for the test. Appium runs compiled code. It will pass this package to the emulator.
  • ANDROID_PLATFORM_NAME - We're running an Android application on the "standard" platform.
  • ANDROID_PLATFORM_VERSION - set the platform version here.
  • ANDROID_APP_PACKAGE - the application package name.

Then, the file defines Open Android Test App to load applications. This function accepts an activity as its only argument and loads it from the application defined in ANDROID_APP.

By storing these variables in a separate file, we can reuse them in scripts. Let's see how.

Initial Test Script

Here's the first test:


*** Settings ***
Documentation  Android Basic Interactions
Resource  ./resource.robot
Test Teardown  Close Application

*** Test Cases ***
Open app, check button text
  Open Android Test App  .MainActivity
  wait until page contains element  xpath=//android.widget.Button[@resource-id,'button_first']
  element text should be  xpath=//android.widget.Button[@resource-id,'button_first']   NEXT
  capture page screenshot  first_test.png

On line #2, we load the first file, so the variables and Open Android Test App function are available to the script. Then we define the default test teardown procedure and start the tests.

A test case starts with a text description, so line #7 explains what this test does:

  • Load .MainActivity from the test application.
  • Wait for a button to load with an id of button_first.
  • Verify that the button text is NEXT.
  • Take a screenshot and save it as first_test.png.

Before we run the test, note something in the file: there are double spaces after the Robot keywords. This helps Robot discern between keywords, which can have spaces in them, and arguments.

Make sure your Appium server is running, and execute the test script with robot.


% robot robot/first_test.robot
==============================================================================
First Test :: Android Basic Interactions
==============================================================================
Open app, check button text                                           | PASS |
------------------------------------------------------------------------------
First Test :: Android Basic Interactions                              | PASS |
1 test, 1 passed, 0 failed
==============================================================================
Output:  /Users/egoebelbecker/AndroidStudioProjects/AppiumRobotExample/output.xml
Log:     /Users/egoebelbecker/AndroidStudioProjects/AppiumRobotExample/log.html
Report:  /Users/egoebelbecker/AndroidStudioProjects/AppiumRobotExample/report.html

One test ran and passed.

Let's look at the screenshot.

appium library screenshot

It's the first and only screen that loaded during the test.

XPath Identifiers

The script used JSON XPath identifiers to specify the button. Let's inspect them before finishing with a more complicated test.


xpath=//android.widget.Button[@resource-id,'button_first']

This statement is built from the following components:

  1. xpath= - Appium uses a few different syntaxes for finding components. This tells them you're using XPath. While it's a little verbose, XPath is very precise.
  2. // - two slashes mean anywhere in the application. If you're using unique component ids everywhere, this wildcard syntax will save you a lot of work.
  3. android.widget.Button - finally we get to the component. This is the Android class name.
  4. [@resource-id,'button_first'] - find a button with a resource id of button_first.

The XPath syntax implemented in Appium is very powerful and can use more criteria than resource ids. Start here to learn more.

More Test Cases

Let's expand on the test.

Unit tests should be granular, so this test breaks down each button click and its result into a specific test.


*** Test Cases ***
Open app, check button text
  Open Android Test App  .MainActivity
  wait until page contains element  xpath=//android.widget.Button[@resource-id,'button_first']
  element text should be  xpath=//android.widget.Button[@resource-id,'button_first']   NEXT
  capture page screenshot  first_test.png

Click button, check button Text
  Open Android Test App  .MainActivity
  click element  xpath=//android.widget.Button[@resource-id,'button_first']
  wait until page contains element  xpath=//android.widget.Button[@resource-id,'button_second']
  element text should be  xpath=//android.widget.Button[@resource-id,'button_second']   PREVIOUS
  capture page screenshot  second_test.png

Click button, Click again, check button text
  Open Android Test App  .MainActivity
  click element  xpath=//android.widget.Button[@resource-id,'button_first']
  click element  xpath=//android.widget.Button[@resource-id,'button_second']
  wait until page contains element  xpath=//android.widget.Button[@resource-id,'button_first']
  capture page screenshot  third_test.png

The click element keyword clicks the button specified by the XPath identifier.

Run this test:


% robot robot/tests.robot
==============================================================================
Tests :: Android Basic Interactions
==============================================================================
Open app, check button text                                           | PASS |
------------------------------------------------------------------------------
Click button, check button Text                                       | PASS |
------------------------------------------------------------------------------
Click button, Click again, check button text                          | PASS |
------------------------------------------------------------------------------
Tests :: Android Basic Interactions                                   | PASS |
3 tests, 3 passed, 0 failed
==============================================================================
Output:  /Users/egoebelbecker/AndroidStudioProjects/AppiumRobotExample/output.xml
Log:     /Users/egoebelbecker/AndroidStudioProjects/AppiumRobotExample/log.html
Report:  /Users/egoebelbecker/AndroidStudioProjects/AppiumRobotExample/report.html

We see each test run and pass.

XPath Magic

While that second test had a lot more going on, it was a little repetitive and relied purely on the button test. Let's take advantage of XPath a bit more.

Here's a modified version of the script:


*** Test Cases ***
Open app, check button text
  Open Android Test App  .MainActivity
  wait until page contains element  xpath=//android.widget.Button[@resource-id,'button_first']
  element text should be  xpath=//android.widget.Button[@resource-id,'button_first']   NEXT
  capture page screenshot  first_test.png

Click button, check button Text
  Open Android Test App  .MainActivity
  click element  xpath=//android.widget.Button[@resource-id,'button_first']
  wait until page contains element  //*[contains(@text, "Second Fragment")]
  element text should be  xpath=//android.widget.Button[@resource-id,'button_second']   PREVIOUS
  capture page screenshot  second_test.png

Click button, Click again, check button text
  Open Android Test App  .MainActivity
  click element  xpath=//android.widget.Button[@resource-id,'button_first']
  click element  xpath=//android.widget.Button[@resource-id,'button_second']
  wait until page contains element  //*[contains(@text, "First Fragment")]
  capture page screenshot  third_test.png

Now, after we click a button, we wait for the text in the toolbar to change:

wait until page contains element //*[contains(@text, "Second Fragment")]

But instead of matching on a Java class name, we're using a wildcard.

  • // - we don't have to specify xpath here.
  • * - any object that matches the following criteria. Be careful!
  • [contains()] - this is an XPath function that will match an object that contains the criteria passed to it.
  • @text, "Second Fragment" - text that matches the second argument.

Run this script and you'll see the same results.

AppiumLibrary And Robot For Powerful GUI Tests

We've set up an Android test environment and used it to run Appium tests via the Robot framework. Then, we saw how easy it is to drive Appium tests from Robot, using a clear and simple test syntax. Finally, we spent a little extra time using Appium's robust XPath implementation to target specific GUI elements and activate them or check their values.

Now that you're familiar with AppiumLibrary and Robot, use them to step up your mobile testing today.

Automated E2E tests for your mobile app

Waldo provides the best-in-class runtime for all your mobile testing needs.
Get true E2E testing in minutes, not months.

Reproduce, capture, and share bugs fast!

Waldo Sessions helps mobile teams reproduce bugs, while compiling detailed bug reports in real time.