


Apple iOS projects can be built from Xcode, which is the default IDE for building iOS apps. But in enterprise projects, we generally have a continuous integration/continuous development (CI/CD) pipeline. These pipelines are often created by DevOps engineers, and they start the build process the moment the new code is merged in Github.
Now, these DevOps practices generally require the build command to be given from the command line. And most of the time, these build commands are contained within a script and executed automatically. But how do we build from the command line? This is where xcodebuild comes to our rescue.
In this post, we'll learn what xcodebuild is. And after that, we'll learn about some of the terms related to an Xcode project, like workspace, target, and scheme. This knowledge is required before we start building our project. After that, we're going to build an already-made project through xcodebuild. And we'll also add those commands into a script file.
.png)
What Is xcodebuild?
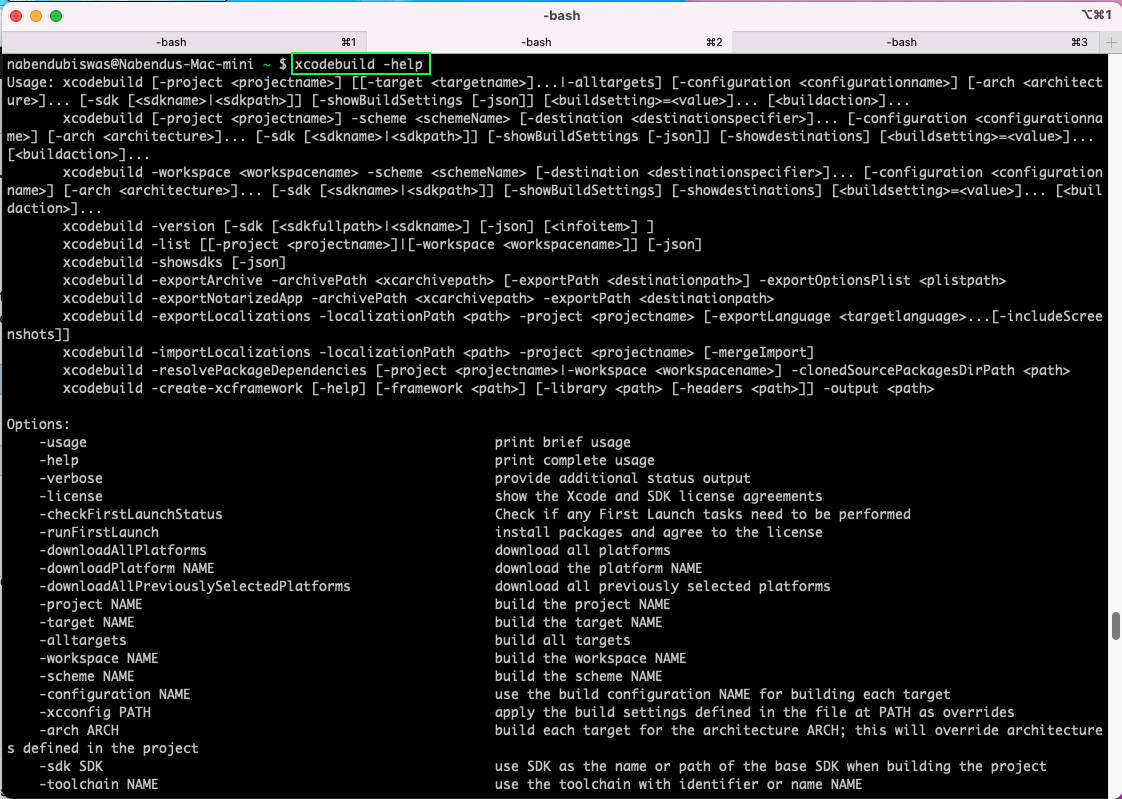
xcodebuild is a set of commands through which you can build an Xcode project. As mentioned earlier, they're particularly useful in CI/CD pipelines, where they can be a part of a script. These build tools come built-in with the Xcode IDE and help us build from a terminal. We can check if they're installed by going to the terminal and issuing the below command:
If you find the tool is not installed, then give this command to install it on a Mac:
Now, we'll look into different terms in an Xcode project.
Important Build Terms
As mentioned earlier, we'll look into different Xcode terms before writing xcodebuild commands. Let's discuss the following terms:
- iOS project file
- Target
- Scheme
- Build configuration
- Certificate, identifier, and profile
iOS Project File
This file is the main pbxproj, which links everything in the project. It contains references to the source files and resources like images. And it also contains the different libraries used in the projects, which can be internal or external, like Alamofire and SwiftyJSON.
It also contains the different targets, about which we're going to learn next, and the build configurations.
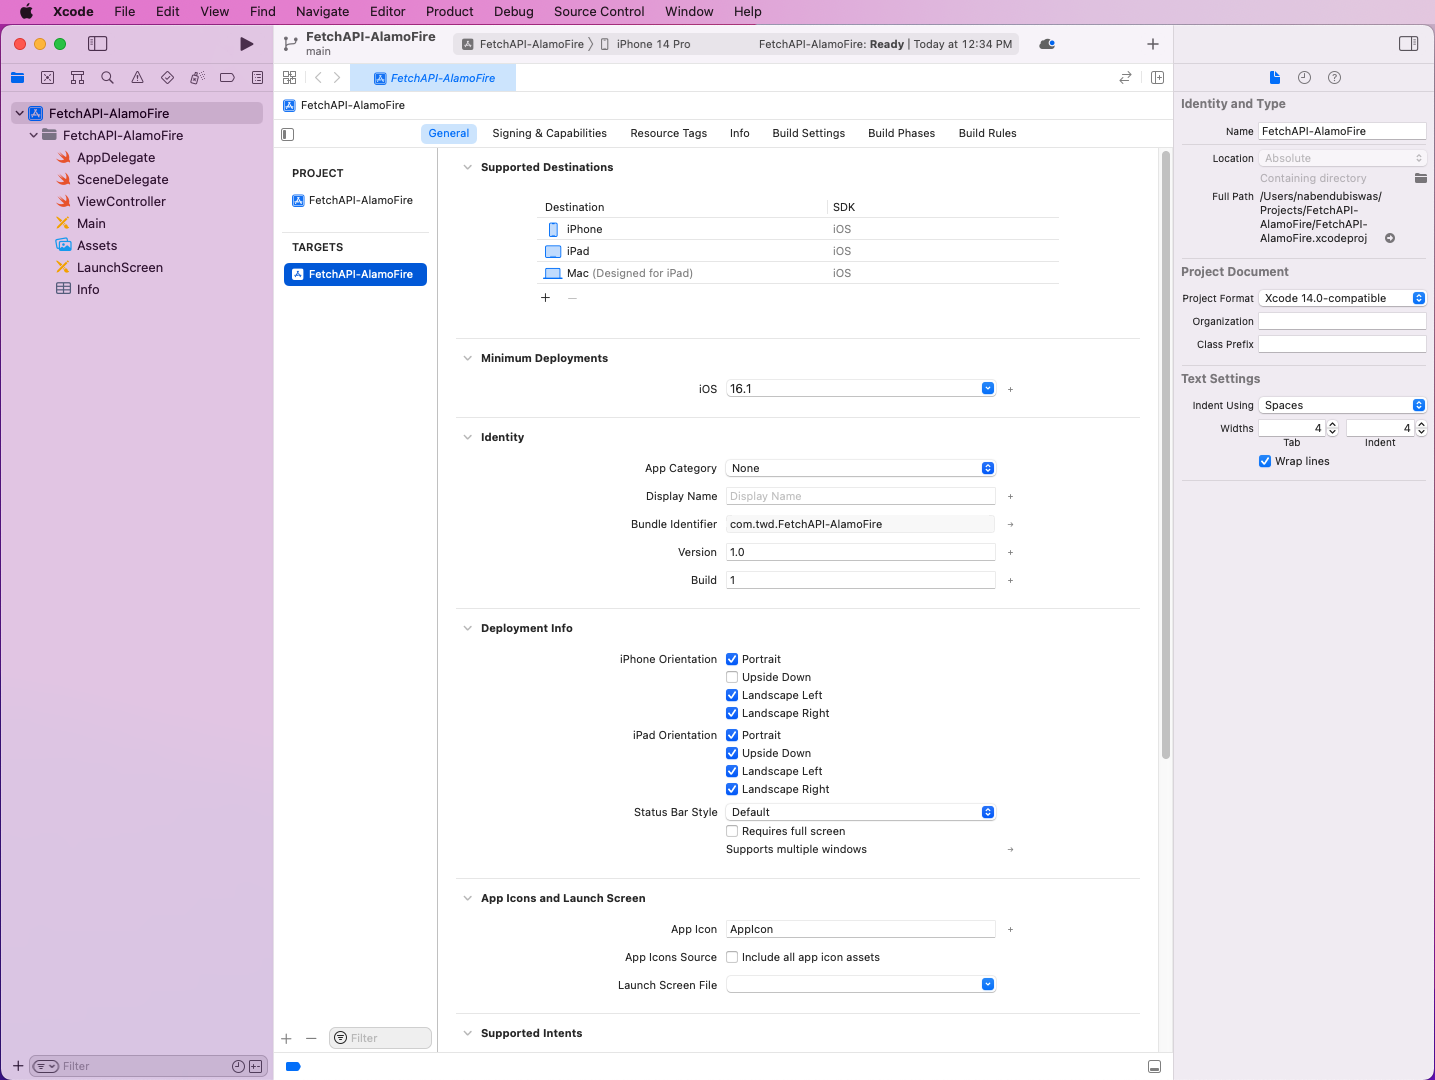
Target
Target defines the product which is built from the Xcode project. A project will always have at least one target, as we've shown in our Alamofire post.
But it can have multiple targets, like in our SwiftyJSON project. Here, we have two testing targets, because we included tests in this project while creating it.
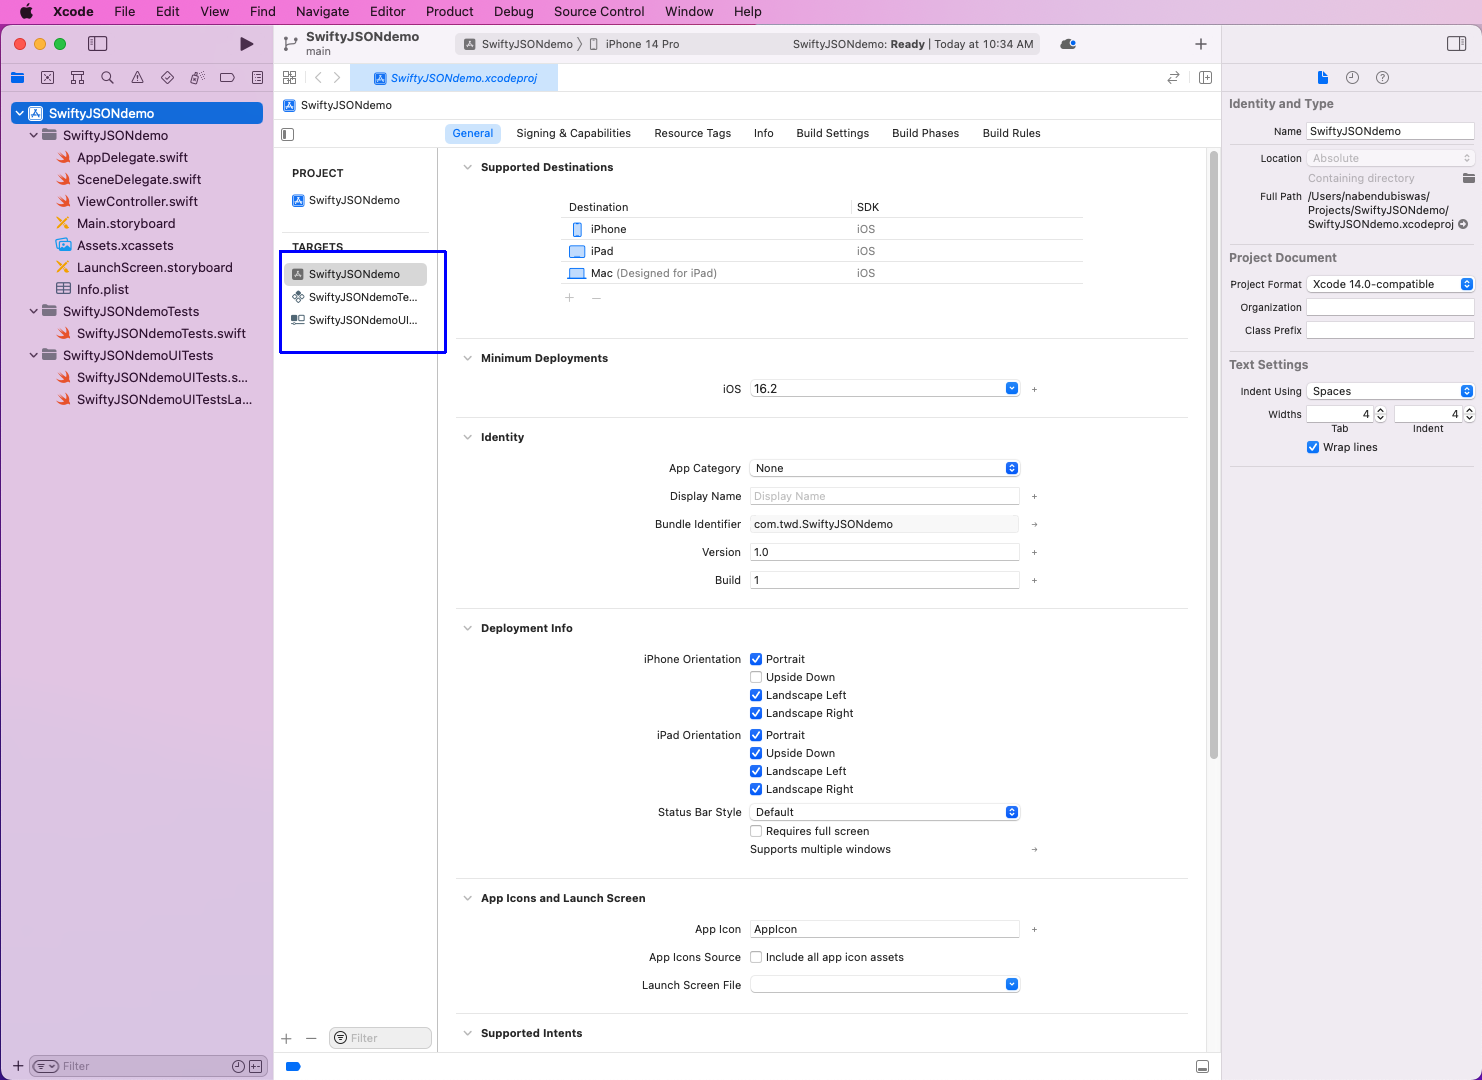
Each target gets its own build settings, but it also inherits the project's build settings. The instructions for building the target can be found in Build Settings and Build Phases.
Scheme
Scheme is often confused with target because the name is the same as target. But scheme defines how the operations are performed on each target. Now, these operations are Build, Run, Test, Archive, Profile and Analyze.
Each target is required to have at least one scheme, but it can also have more than one scheme. In the scheme, we need to provide the destination on which the app will run. This destination can be a physical device or a simulator.
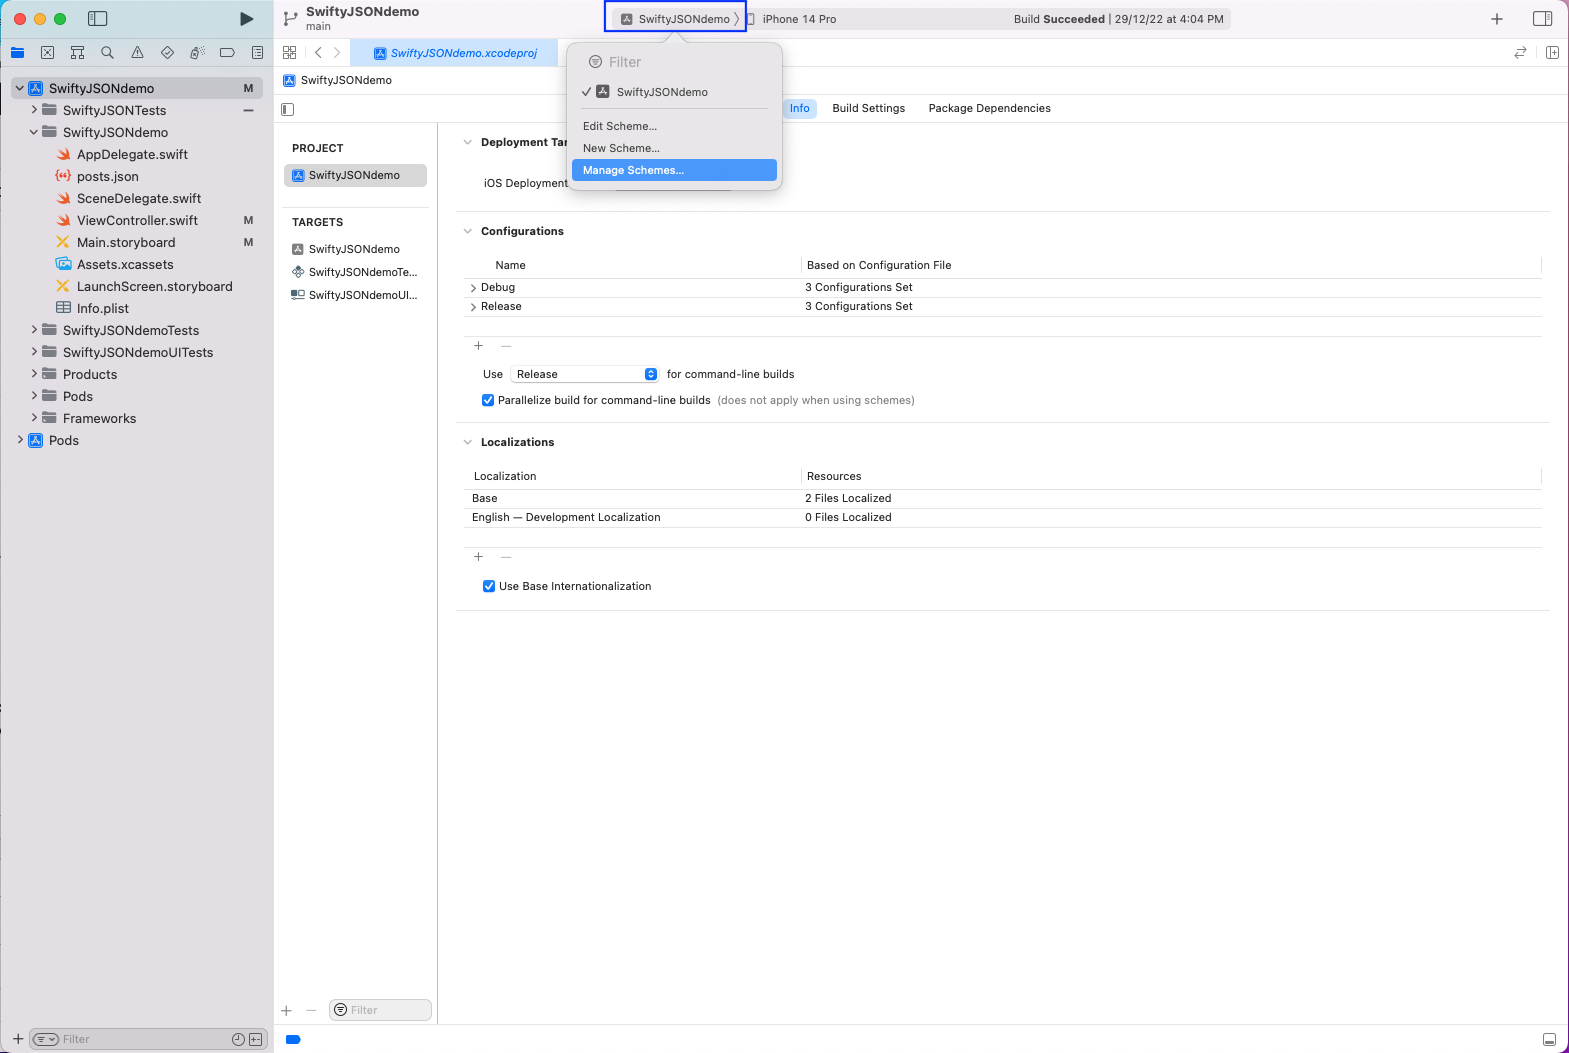
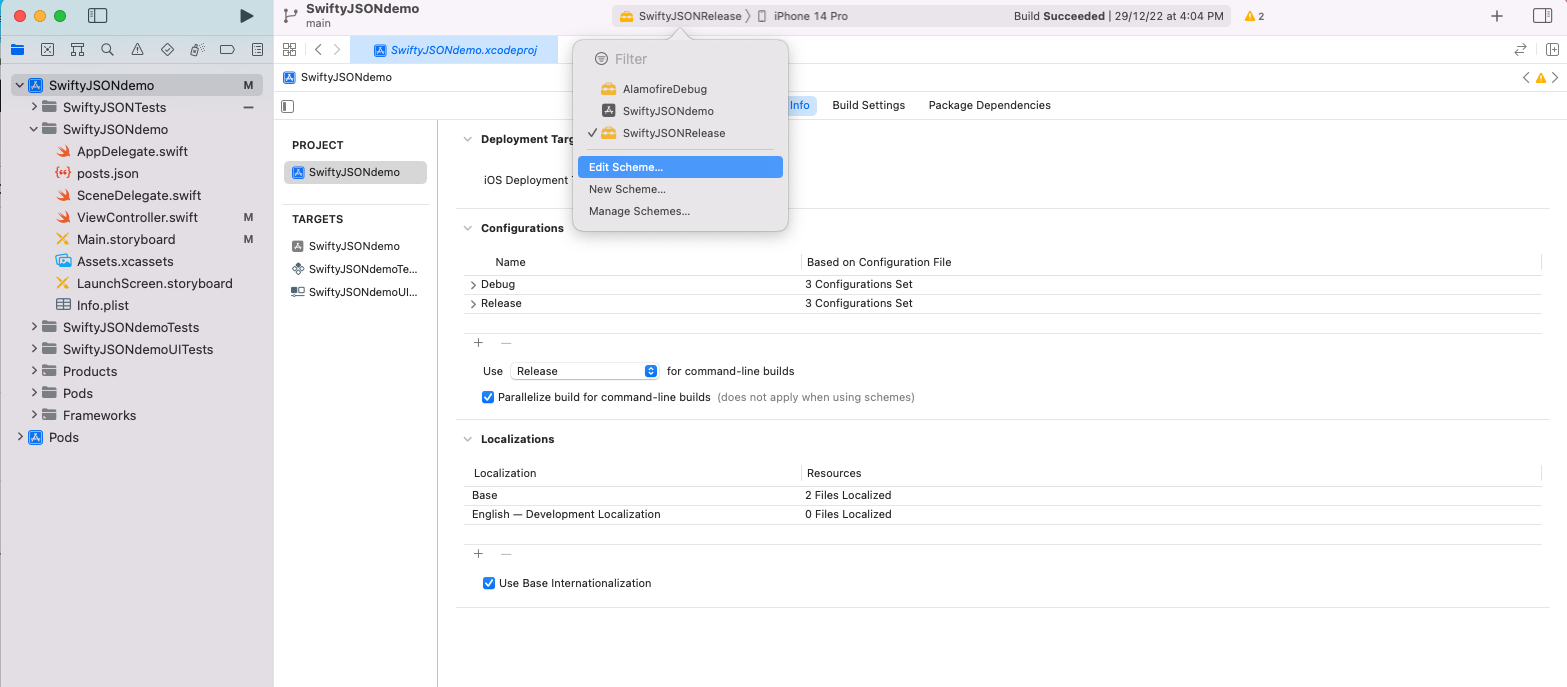
To see all the schemes, click on the name of the scheme. That'll open a pop-up, and you can click on Manage Schemes.
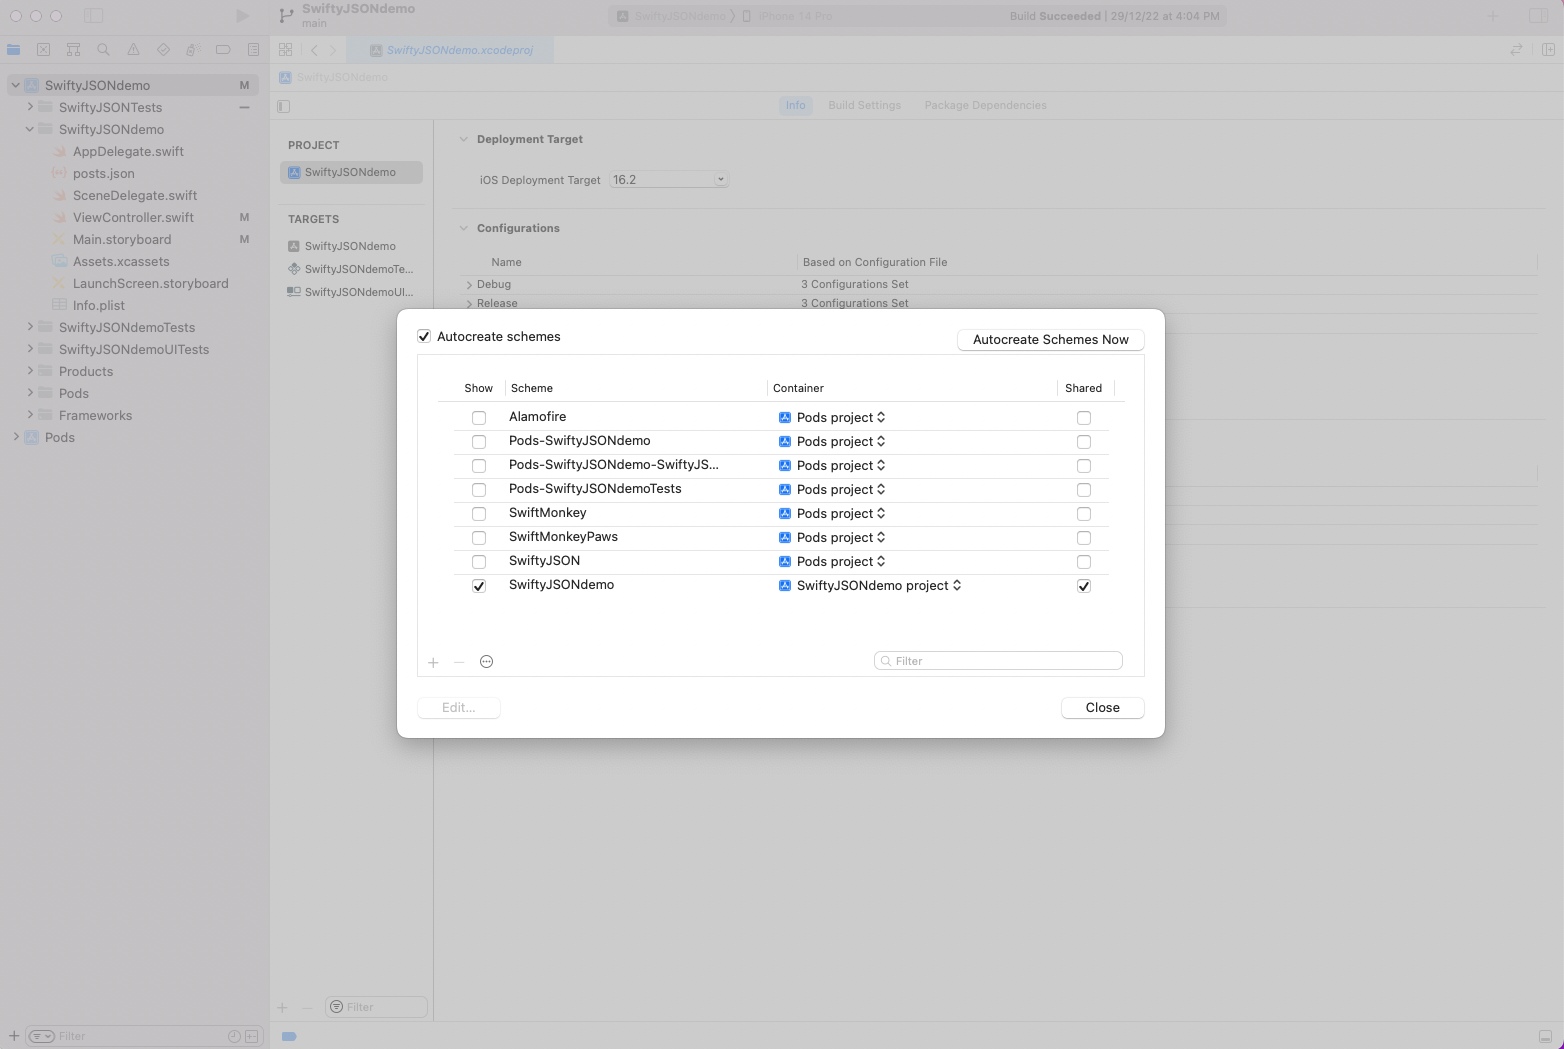
In the next pop-up, we'll see all the schemes, with the ones used when selected.
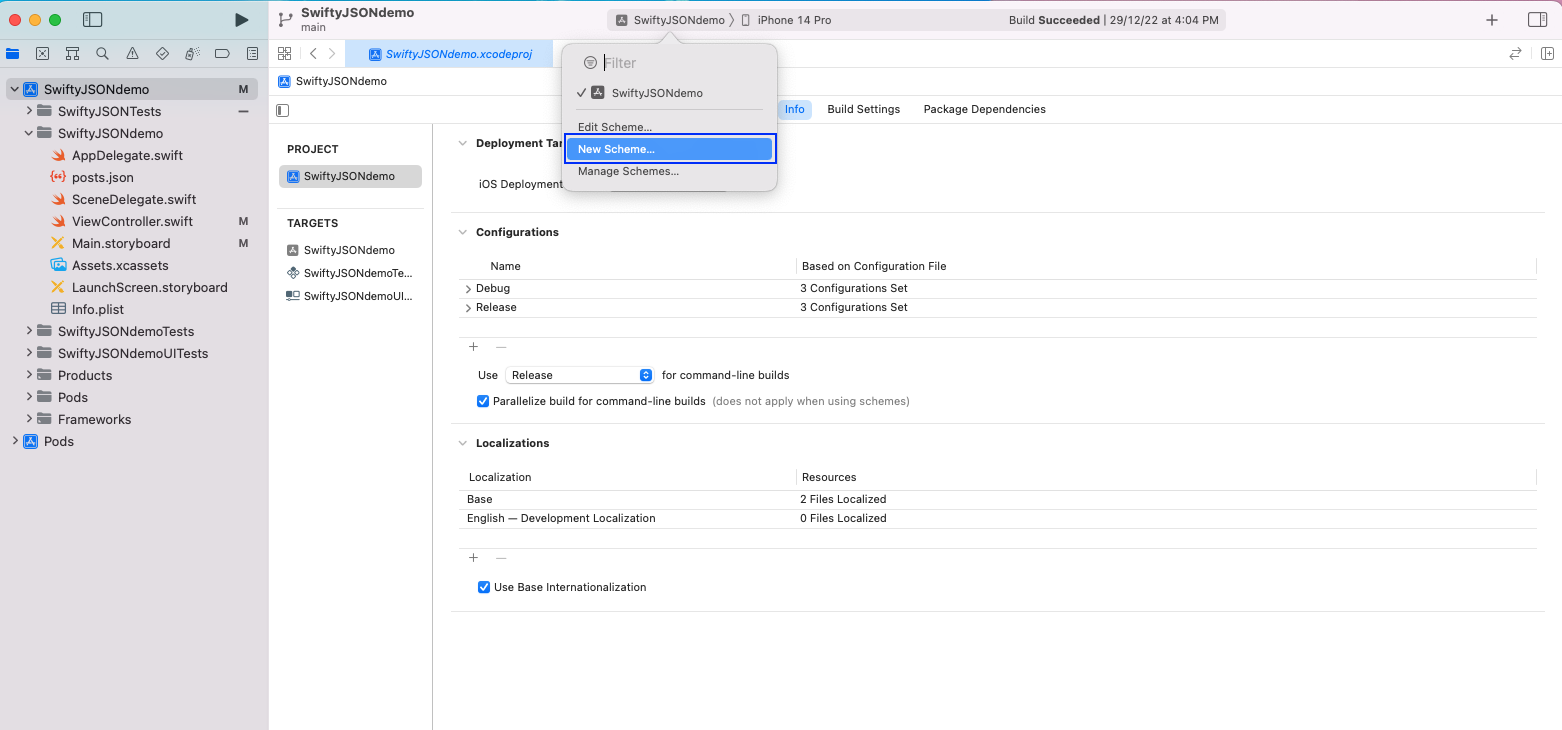
To create a new scheme, click the name of the scheme. In the pop-up, click on New Scheme.
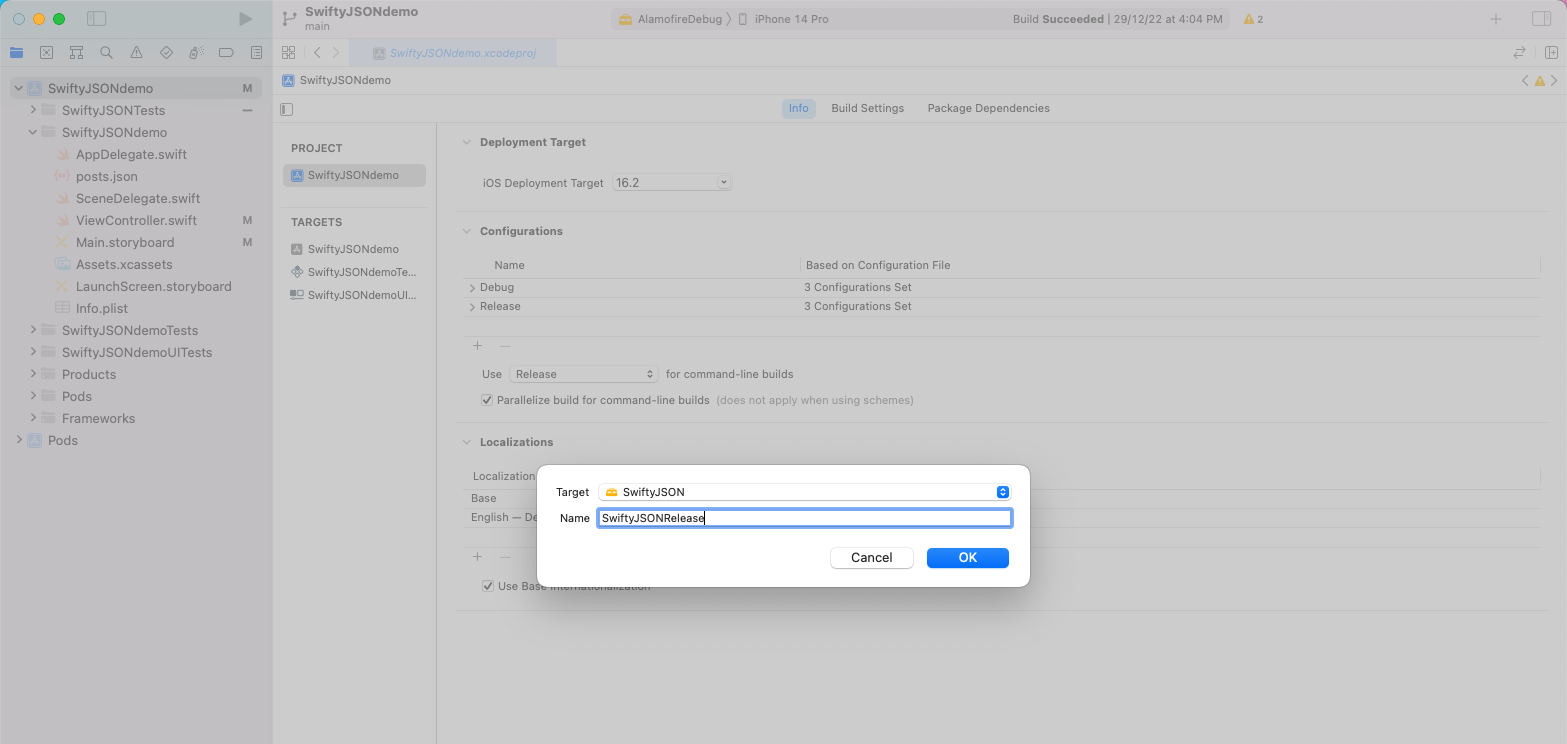
In the next pop-up, give the scheme a new name, which is SwiftyJSONRelease in our case.
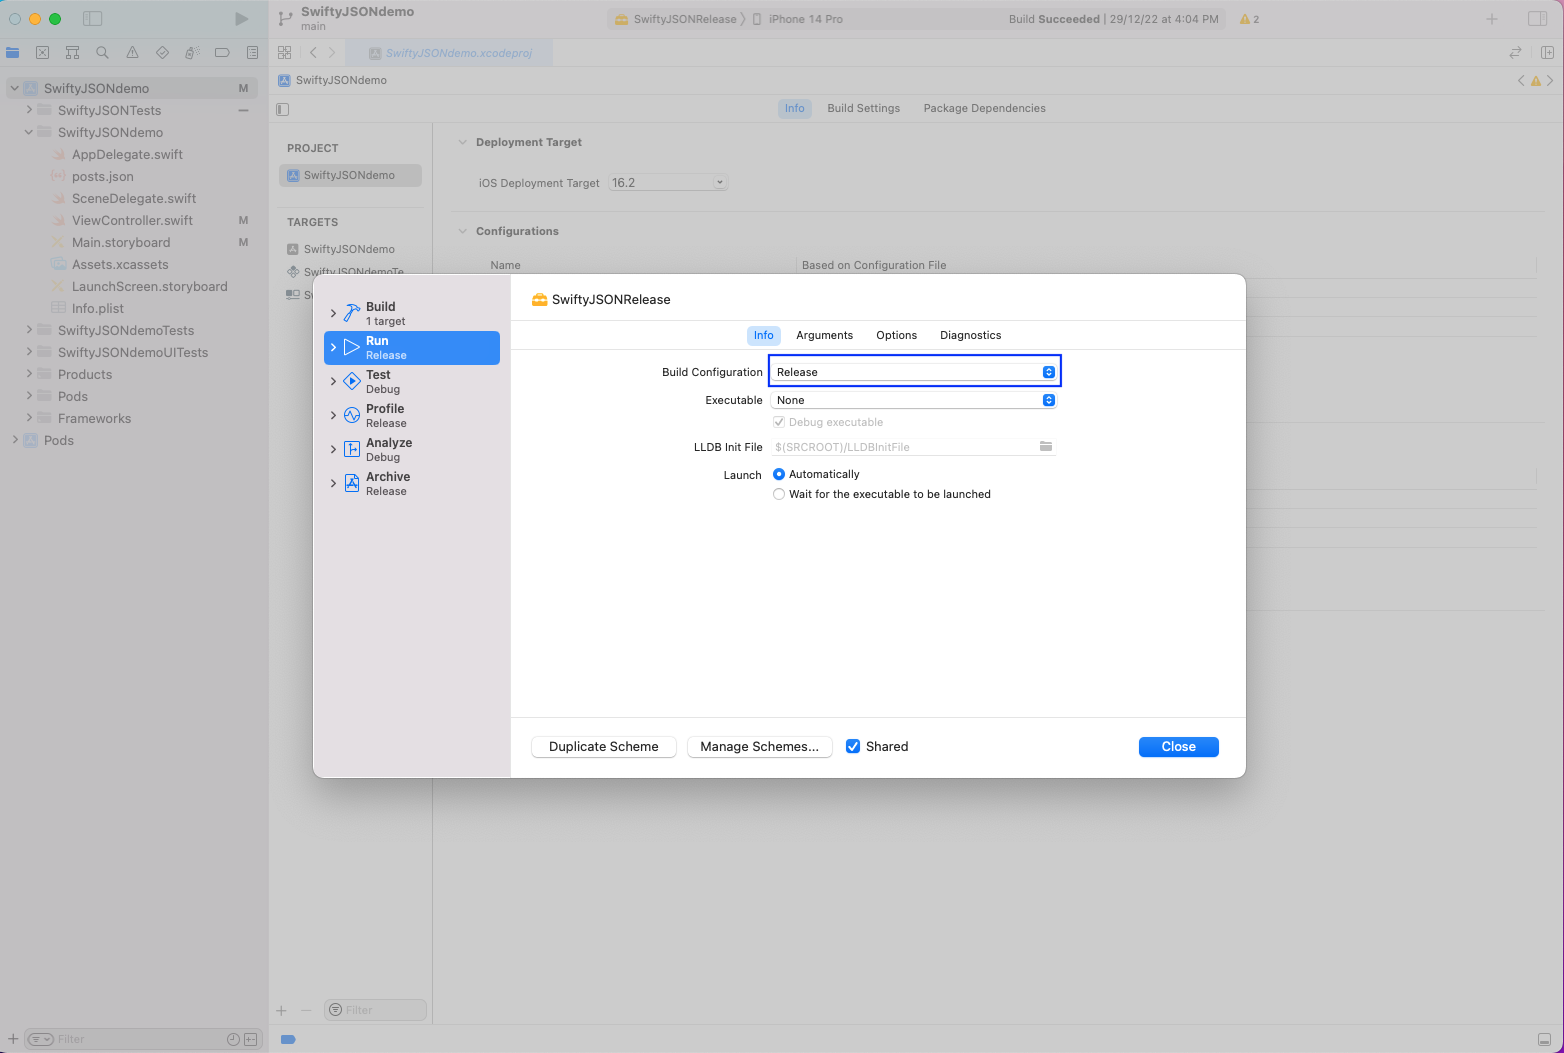
The new scheme will be created, and you can click on the name of the scheme to edit it. To do so, in the pop-up, click on Edit Scheme.
As mentioned earlier, we've different operations for a scheme, which are Build, Run, Test, Archive, Profile and Analyze. Note that these can be configured separately. Here, we're making the Build Configuration as Release, instead of the usual Debug. We'll learn about Build Configuration in the next section.
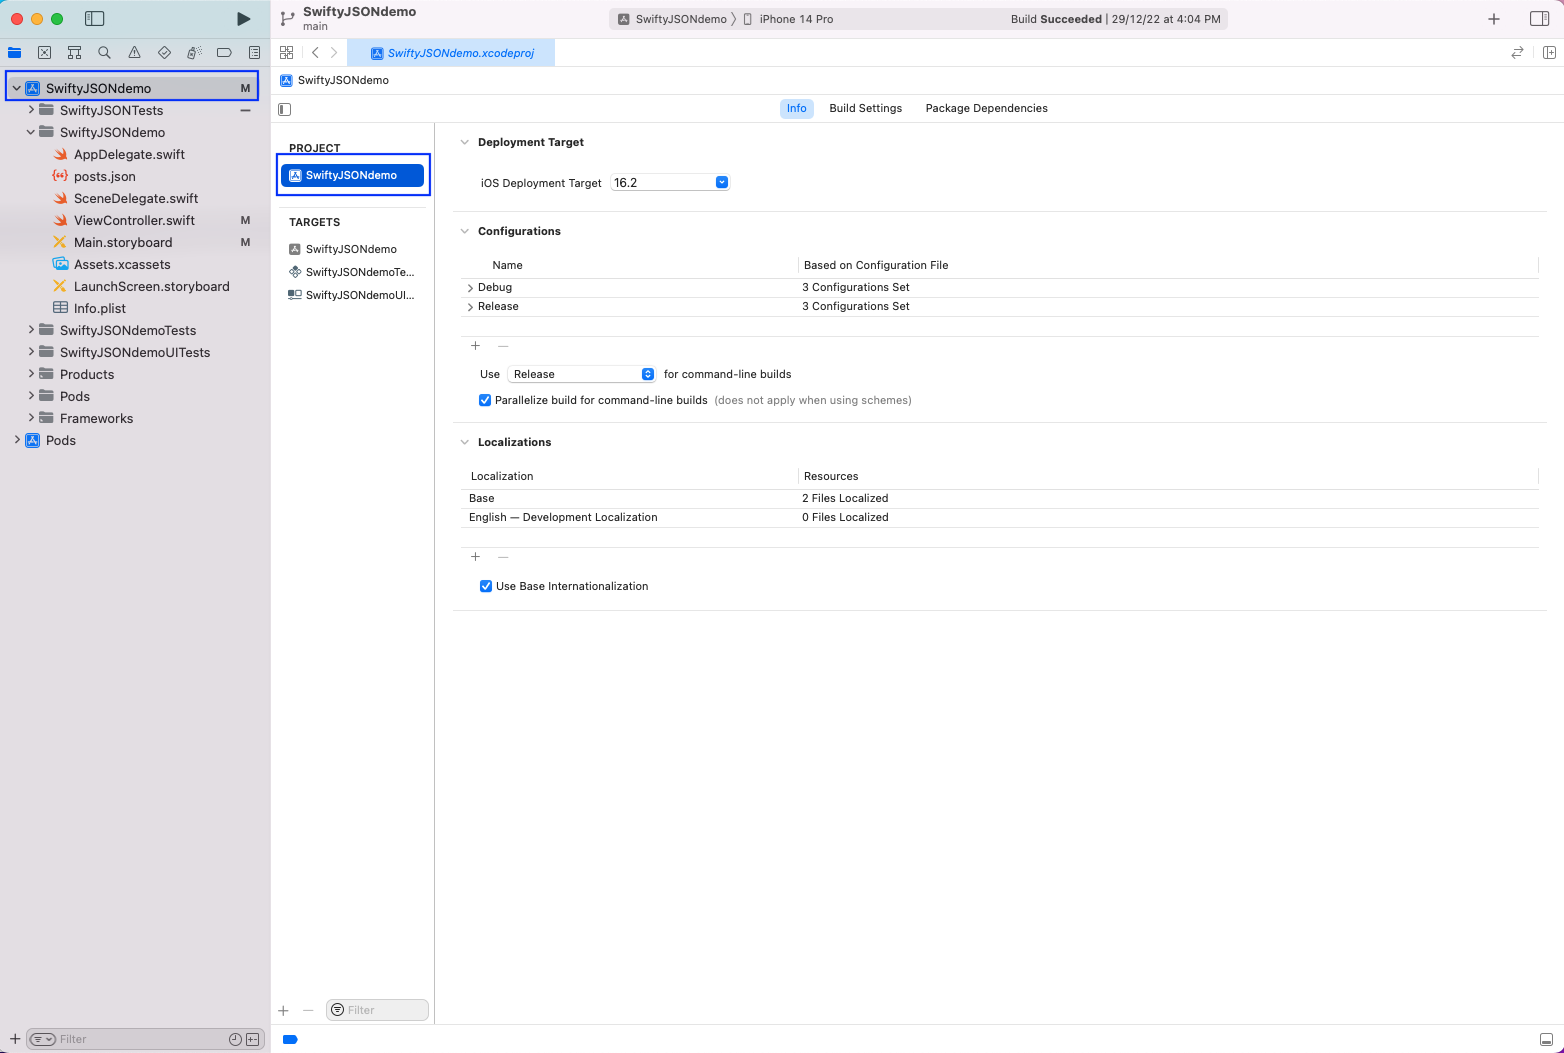
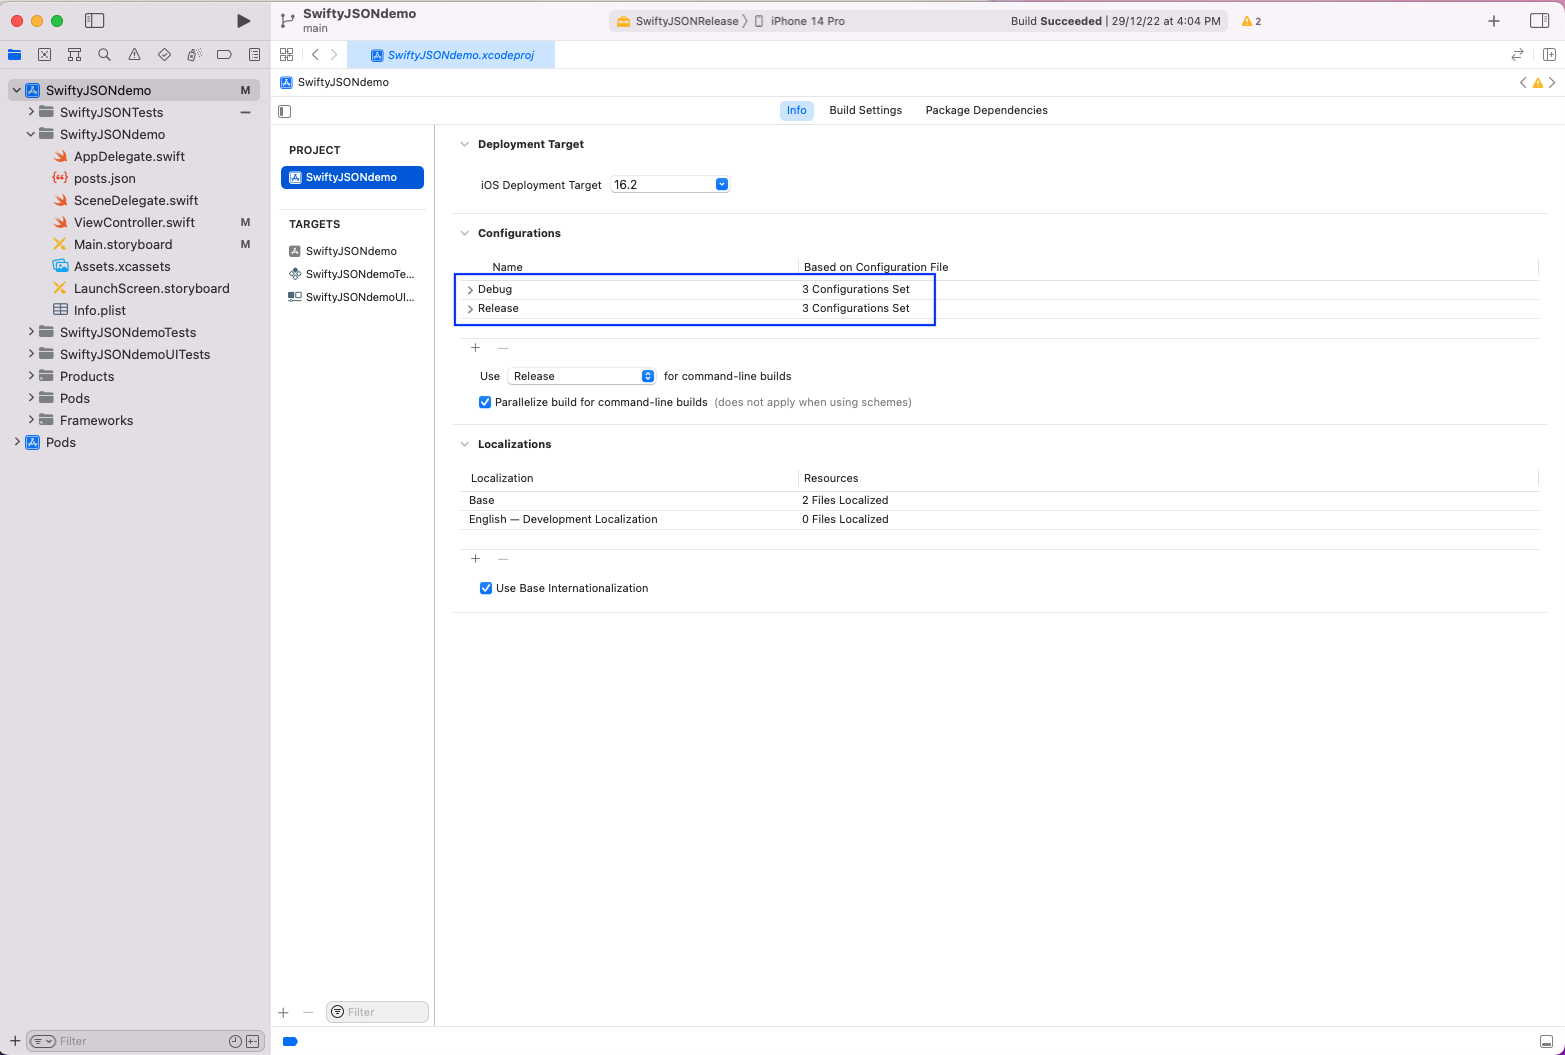
Build Configuration
There are two build configurations in Xcode. One is Debug, and the other is Release. We're again at the root of the project, and we can see both configurations.
Now, the Debug configuration should be used while doing development, as it'll give us all the error information in case of an issue. The Release configuration should be used in case of release to the App Store. This is an optimized production build, with a minimally sized bundle. It'll also not show any debug information in case of an error.
Certificate, Identifier, and Profile
Once the initial version of an iOS app is completed, we need to archive it. This archive is shared with the QA team, or it can be published in the App Store. Now, we require three things for that:
- Signing Certificate - Apple requires us to provide a signing certificate when we submit the app to the App Store. This signing certificate identifies the developer, and also that the content hasn't been updated after signing.
- Identifier - This is the unique ID given by the developer, which is used to identify the app.
- Provisioning Profile - This is the combination of the signing certificate, identifier, and the device on which the app will run. Suppose the app will run on iPhone and iPad both, then it'll have two provision profiles.
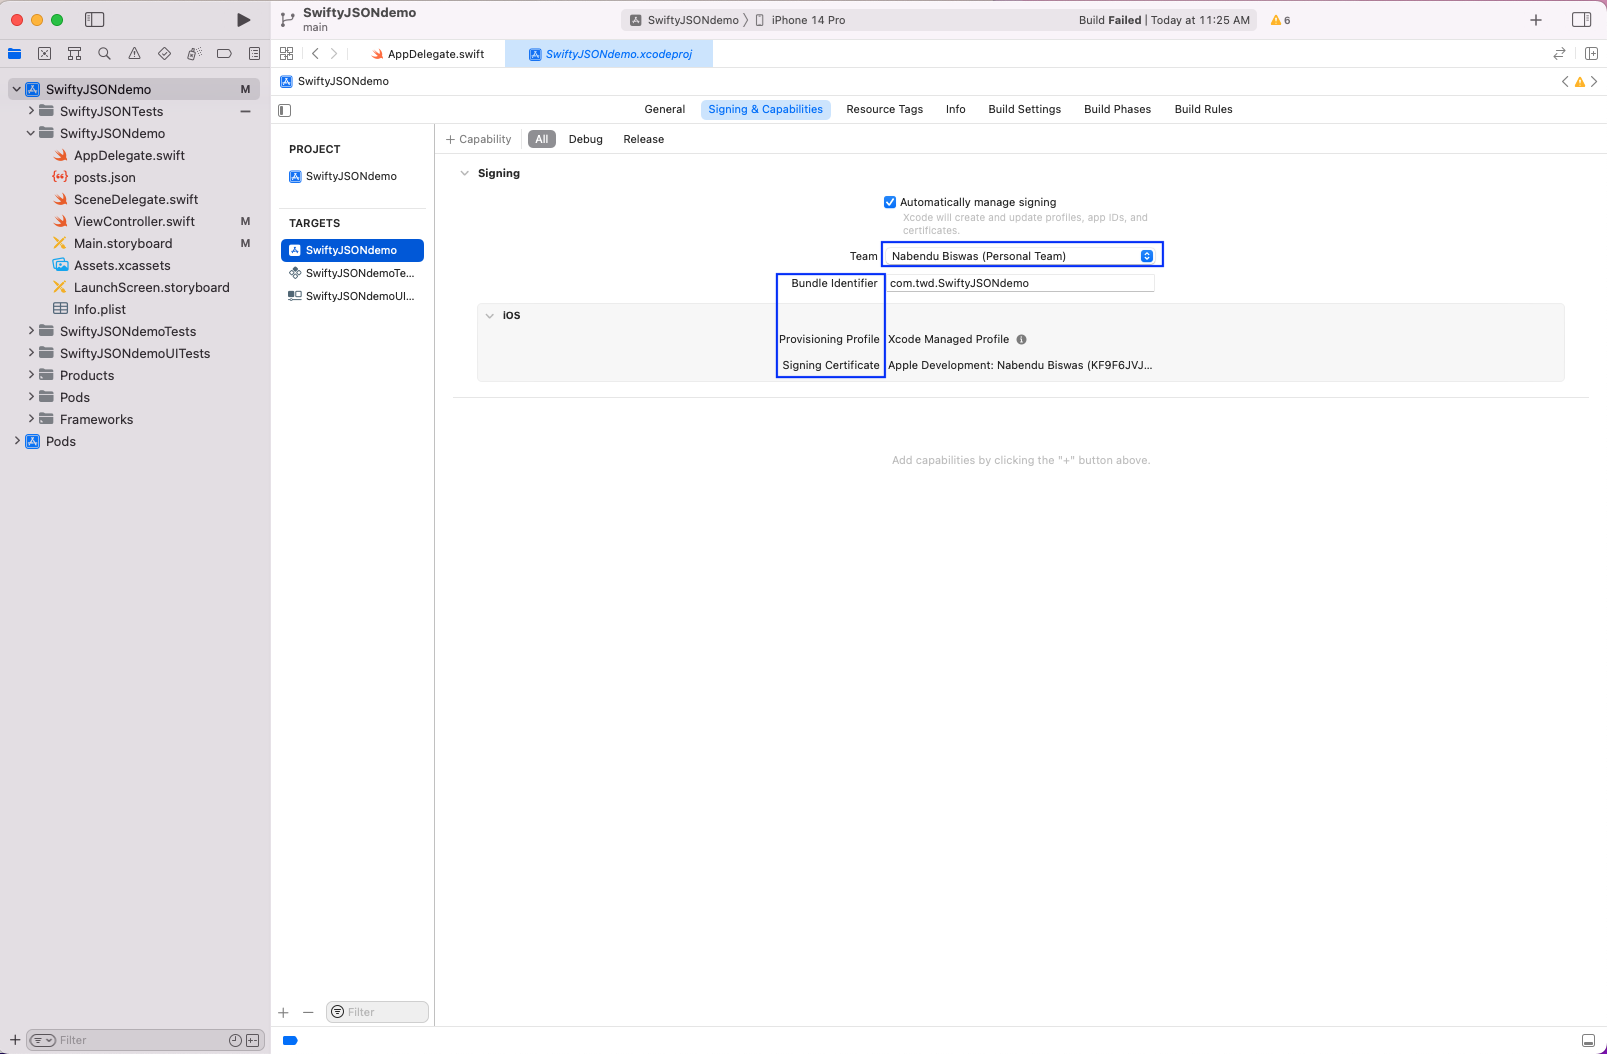
We need to go to Target and then click on Signing & Capabilities tab. Here, we'll see all the three things discussed earlier.
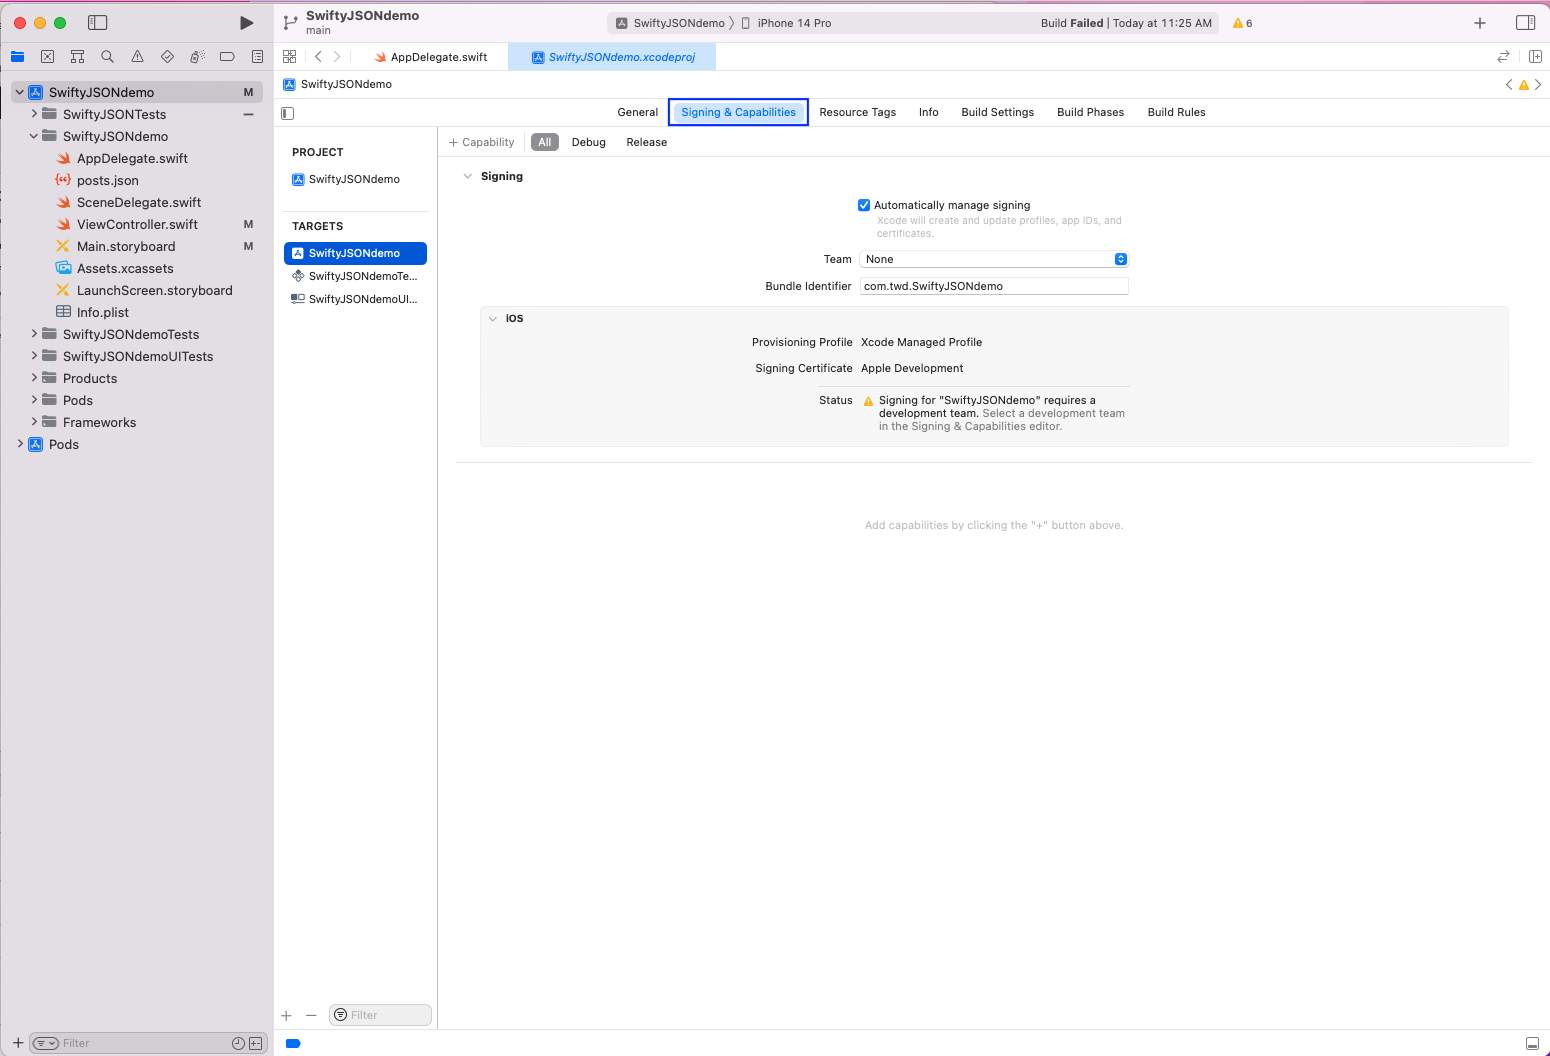
Change the Team to the team for Xcode, and you'll see the warning go away.
Building an App with xcodebuild
The first step in the build process is to create an archive of the project. To do this, we need to be in the correct directory containing our xcproject file. Once we're in the correct directory of our SwiftyJSON project, we can confirm with the ls command, and it shows the SwiftyJSONdemo.xcodeproj file.

Creating the Archive File
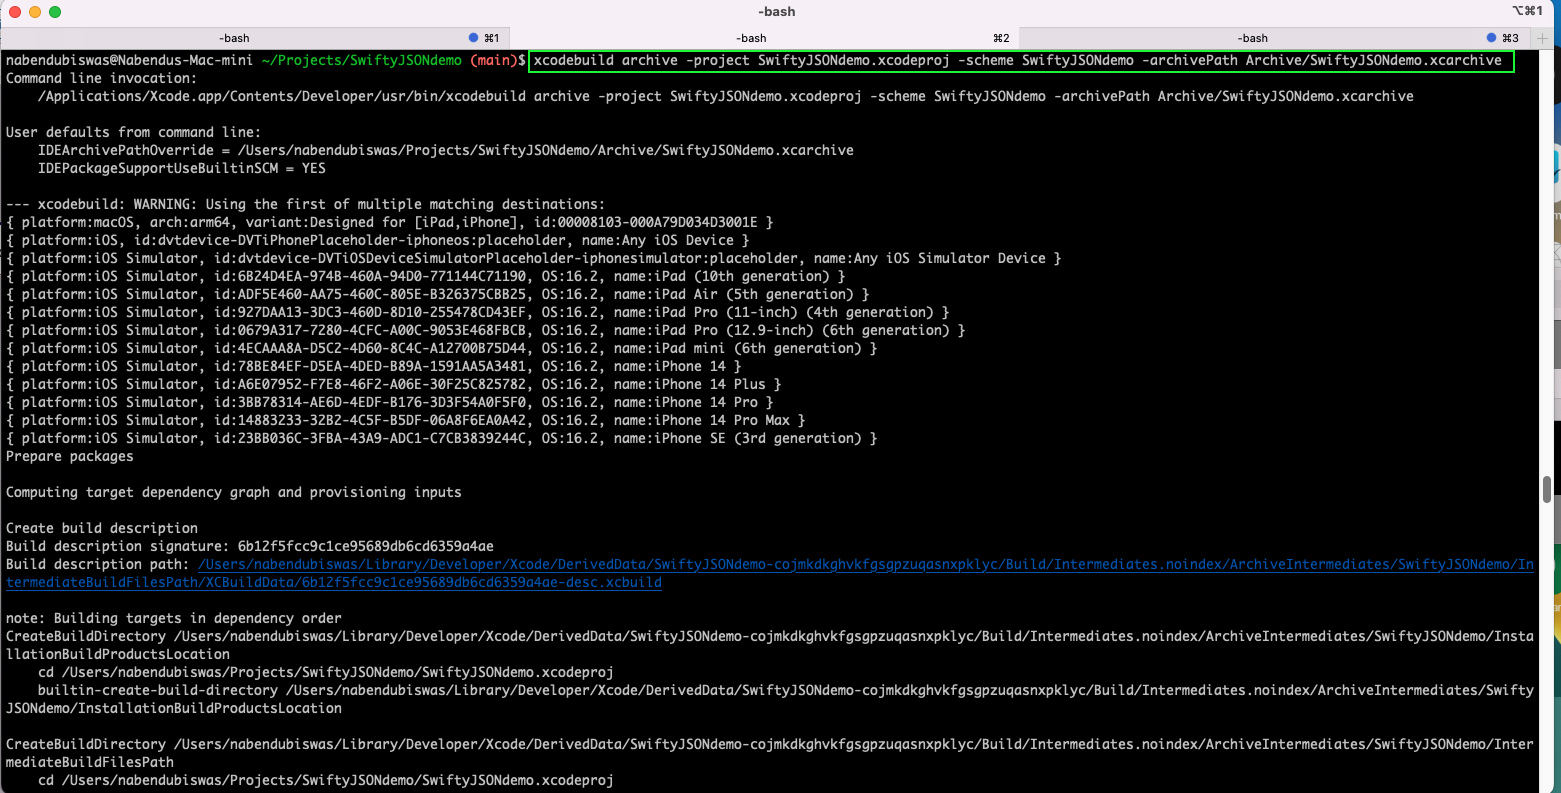
Now, to build the archive file, we need to give the below xocodebuild command. Here, we're first mentioning the project file with the -project flag, which is SwiftyJSONdemo.xcodeproj in our case. Then we're mentioning the scheme with the -scheme flag, which is SwiftyJSONdemo in our case.
Lastly, we're mentioning the archive path with the -archivePath flag, which is Archive/SwiftyJSONdemo.xcarchive in our case. This is the location in which the archive file will be created.
Once the archive is created from the above command, we need to create the iPhone App (IPA) file. This file is only deployed in the App Store or sent to the QA team for testing. But before giving the command to create an IPA file, we need to create a plist file.
Creating the IPA File
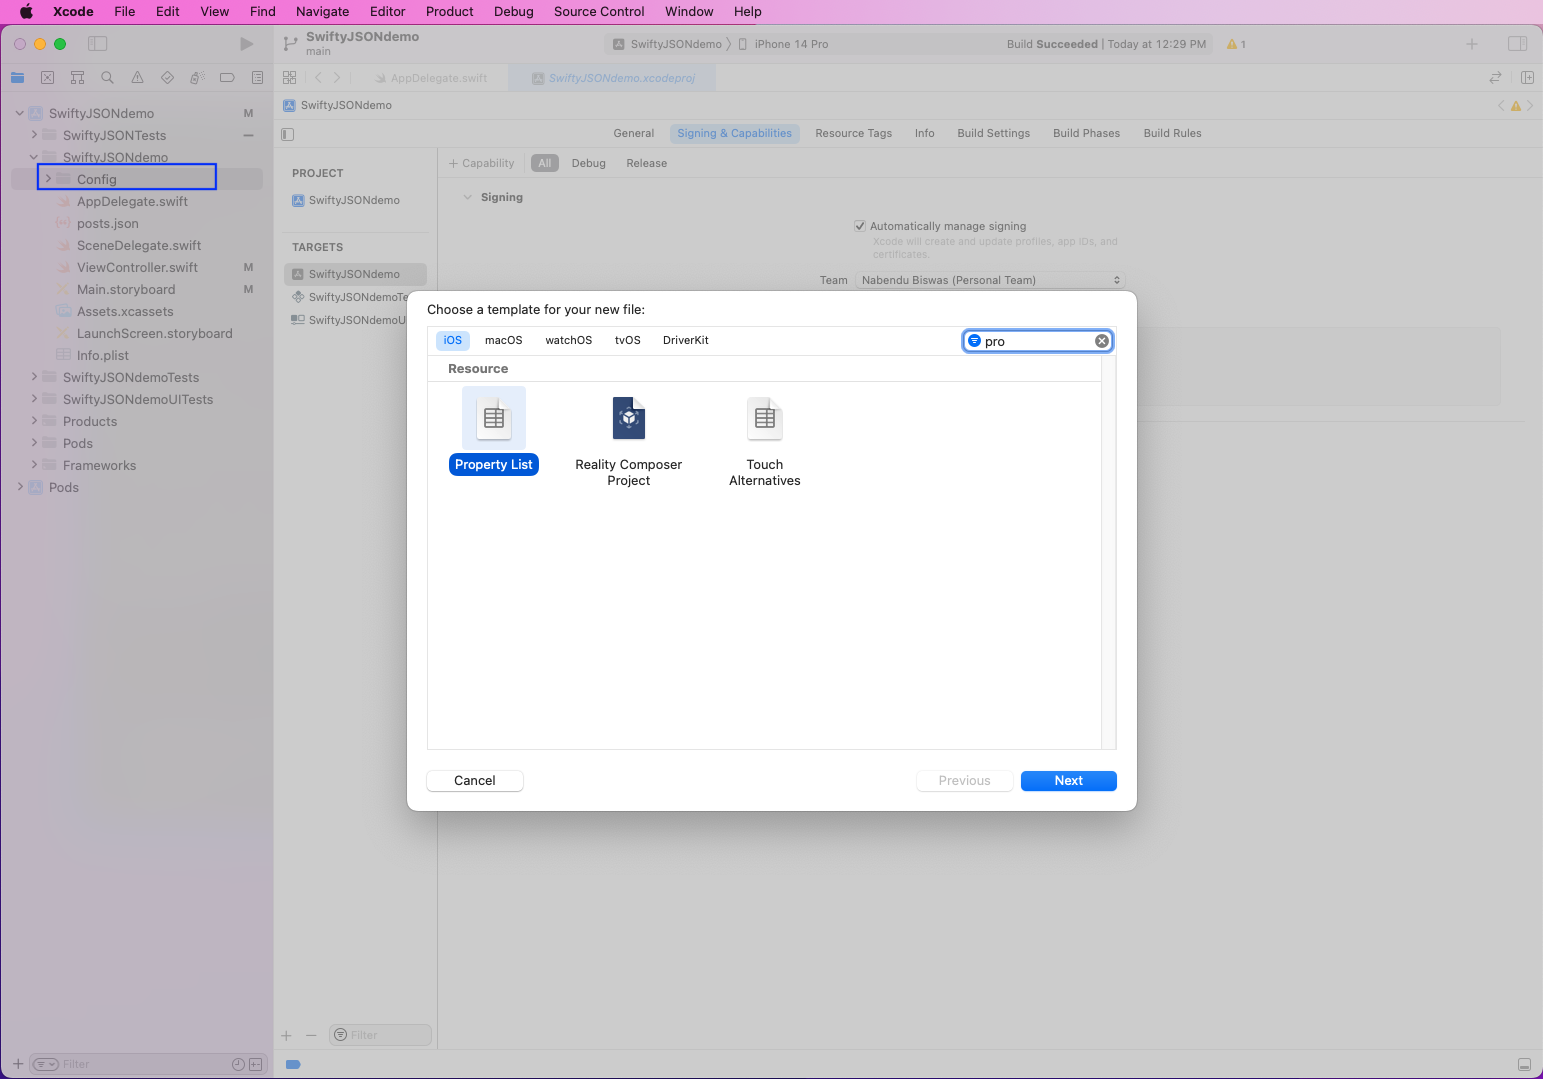
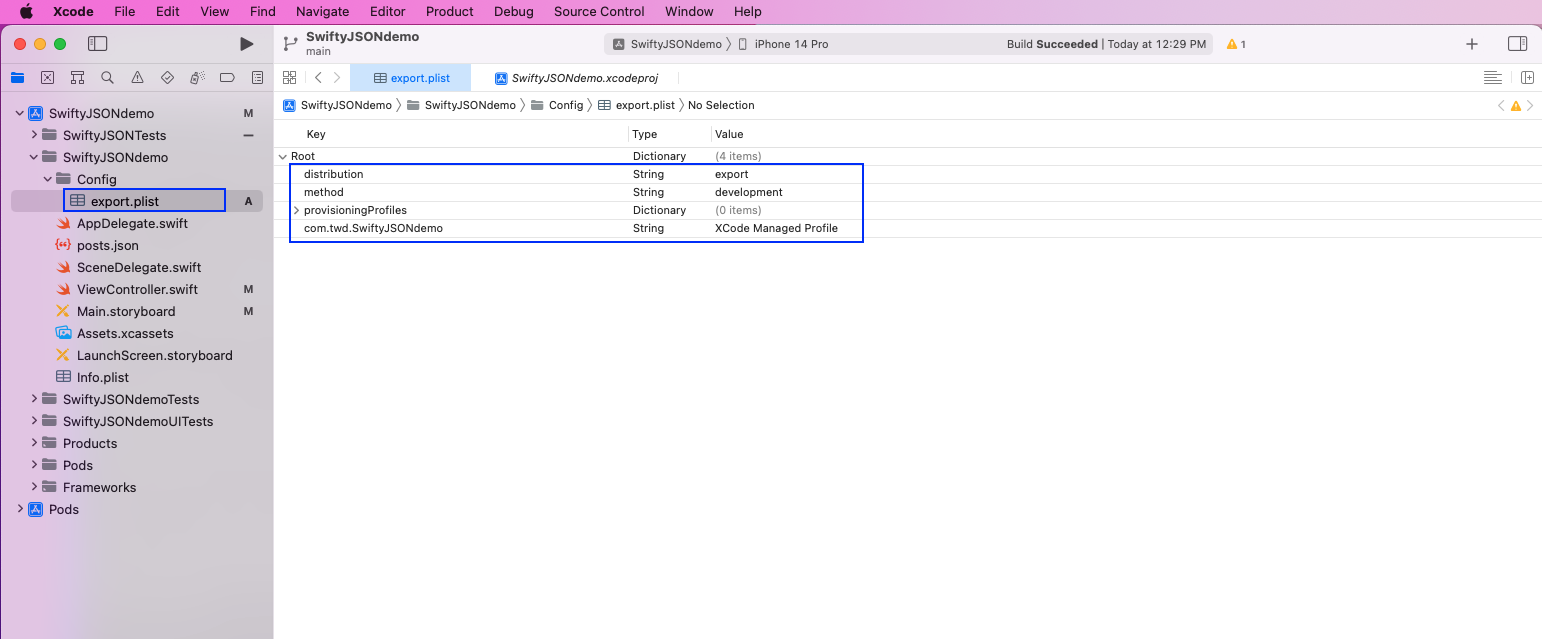
So, in the project folder, SwiftyJSONdemo first creates a folder Config. Inside this, we need to create a new Property List file.
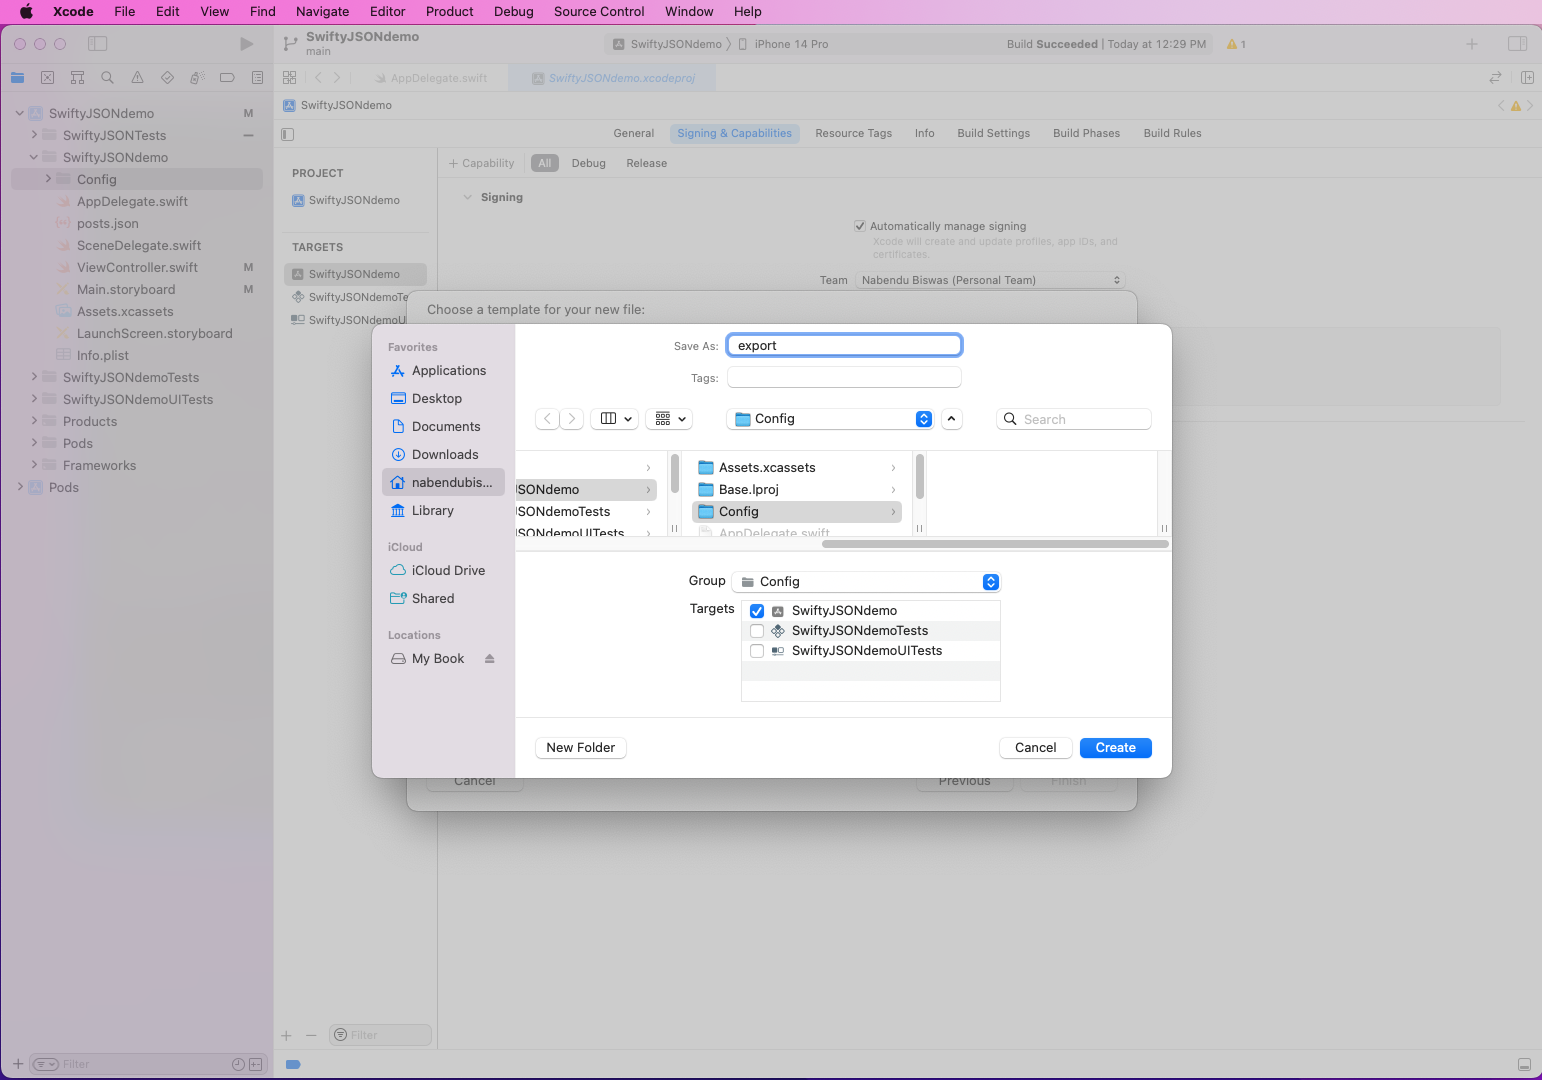
We're giving this file the named export in the next pop-up.
Now, in the export.plist file we need to give the distribution as export. The method should be development. And in the provisioningProfiles, we need to put the Bundle Identifier equal to the Provisioning Profile. Both of these can be taking the Signing & Capabilities tab, mentioned earlier.
Now, we'll give the below xcodebuild command to create the IPA file. Here, we've given the archive path containing the archive file with -archivePath flag. Then we're giving the export path for the IPA file with the -exportPath flag, which is output in our case. Lastly, we're giving the path to the export.plist file created earlier with the -exportOptionsPlist command.

Once the command is successful, we'll get the IPA file.
Running the Build as Part of a Script
Most, of the time, these two commands are part of a script, which runs when new code is pushed into the repository. We'll create a simple script to run both commands next.
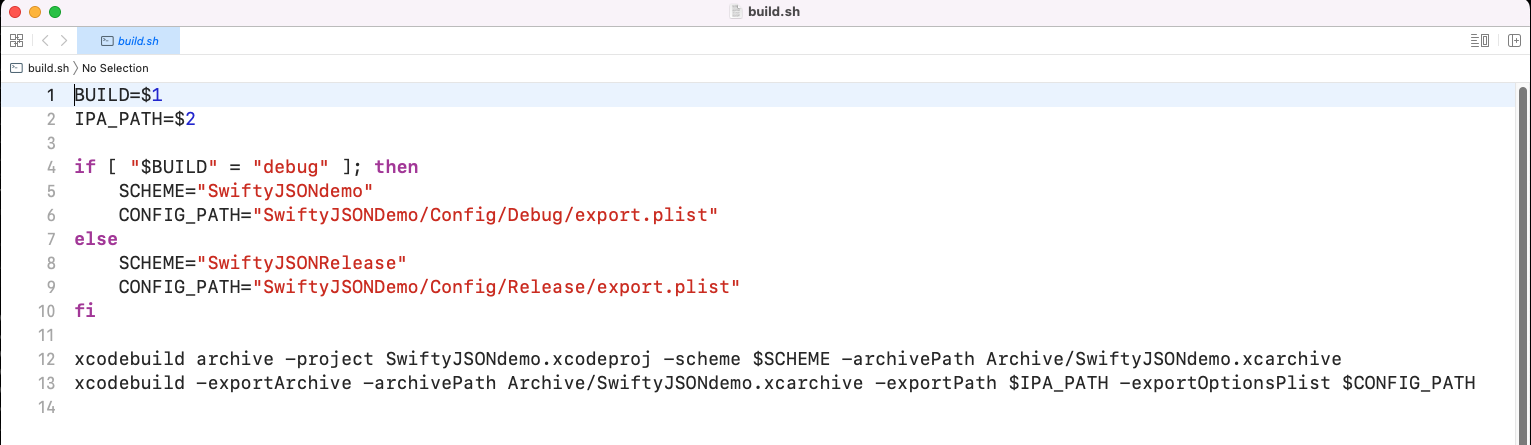
So, first we'll create a build.sh file through the command line with the touch command. Then we'll make it executable with the chmod command. And finally, we'll open it in TextEdit with the open command.

In build.sh, we're first mentioning two parameters of BUILD and IPA_PATH. Now, these need to be supplied while running the file. Next, we have a simple if statement, which will take a different scheme and config path depending on the first parameter passed.
We've updated our archive and export archive commands with the passed scheme, IPA path, and config path.
Now, to build the IPA file for debug scheme, we'll give the below command:

And to build the IPA file for the release scheme, we'll give the below command:

What We've Covered
In this post, we talked about an easier way to build an Xcode project through the command line using xcodebuild. Here, we've also learned about different terms like iOS Project, target, scheme, and build configuration before doing the build. Finally, using the command line, we generated the IPA file for an already-built SwiftyJSON app.
But writing test cases for this app can be very difficult, and knowledge of Swift is required. As we already have the IPA file, you could use a tool like Waldo to test easily. With it, you can just interact with the mobile app by pressing the button. Waldo will automatically generate test cases and email you the results.
Automated E2E tests for your mobile app
Get true E2E testing in minutes, not months.


