


Appium is an open-source and free-to-use mobile automated testing framework that consists of an Appium server. It can be run from the command line, or it's also available as a desktop app. Appium supports a variety of programming languages for writing test cases. Once written, the automated tests are run on connected devices or simulators. All of this is covered well in our post titled "Appium Architecture, Explained."
And Appium comes with a lot of features and additional tools to add to its functionality. These tools include Appium Doctor and Appium Inspector.
Today, we're going to learn to set up Appium on macOS. We'll write automated tests in Java in Eclipse IDE. Finally, we'll run the test cases on an iPhone simulator. A Mac is required to develop iOS apps and run iOS simulators. Android apps can be created and tested on Windows system. Refer to our earlier post of testing with Python and Testing React Native app to learn about Android testing.
.png)
Basic Setup
We need to do the proper setup even before running our tests on Mac. Here, we're first checking if Java is properly installed on the system by giving commands on the terminal.

We should also have Node.js and npm installed on the system. If you don't have them installed, you can install Node.js from this link.

Xcode is required to run iOS apps, which can be installed from the App Store on Mac. Besides this, we also need Xcode command line tools. And we can install it with the command xcode-select --install.

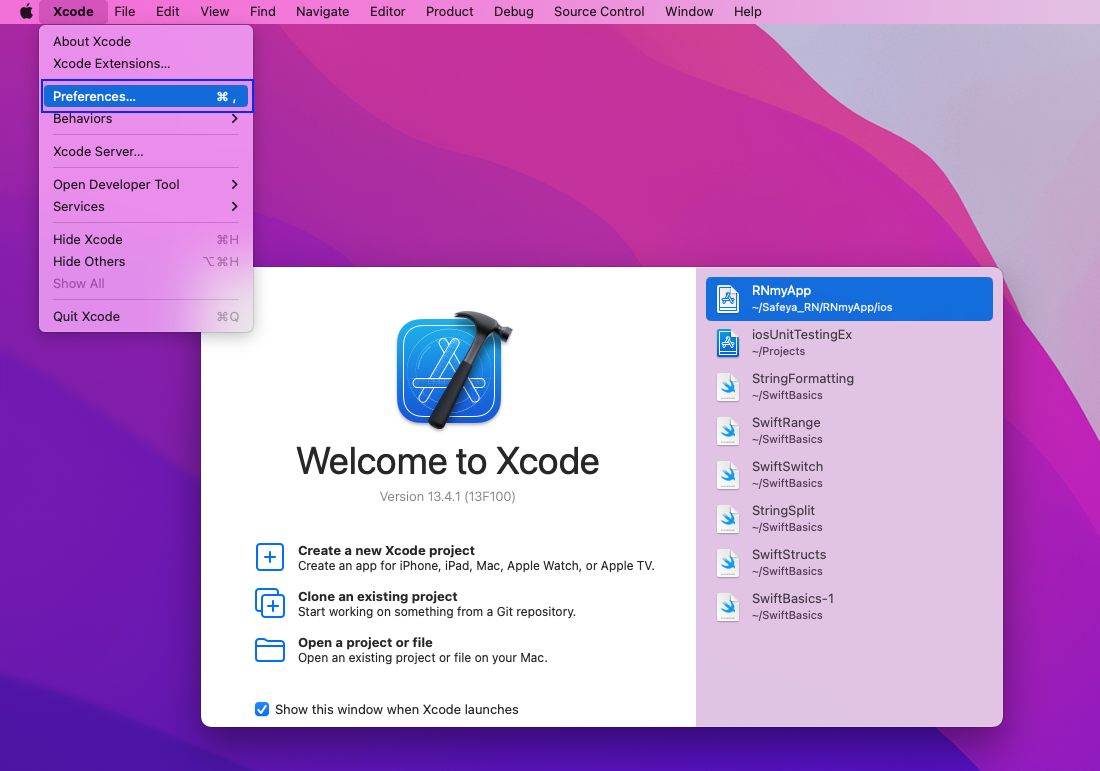
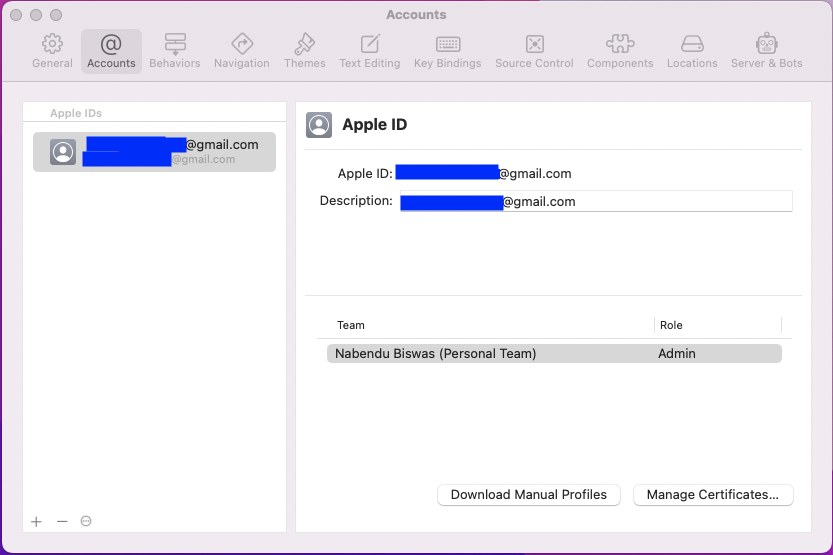
Now, we need to have an Apple ID set in Xcode. So, open Xcode and click on Preferences.
Here, I already have an account added. If you don't have an account added, you can add one by clicking on the plus sign on bottom-left corner of the screen.
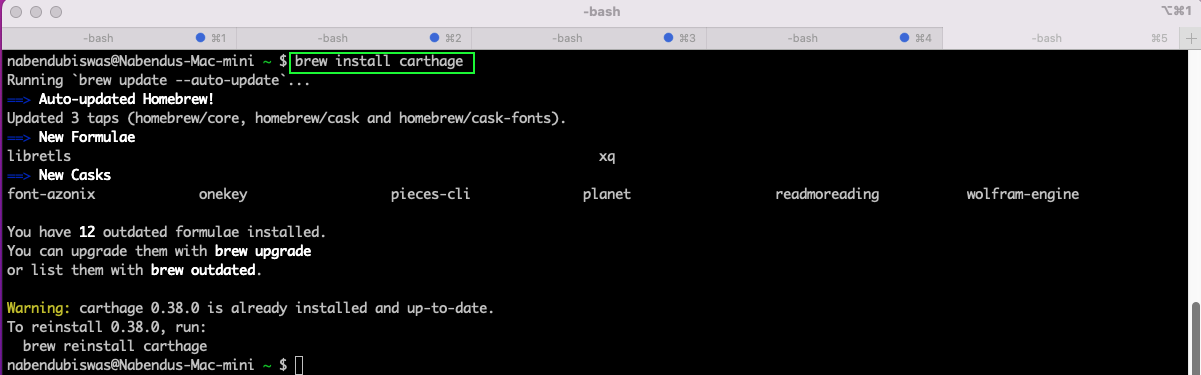
The package Carthage is also required for Appium to run. We can install it using Homebrew, the package manager for macOS, by running the command brew install carthage.
Xcode Setup for Appium
We need to have the Appium Server package or desktop app installed on our macOS system. You can install it with this command:
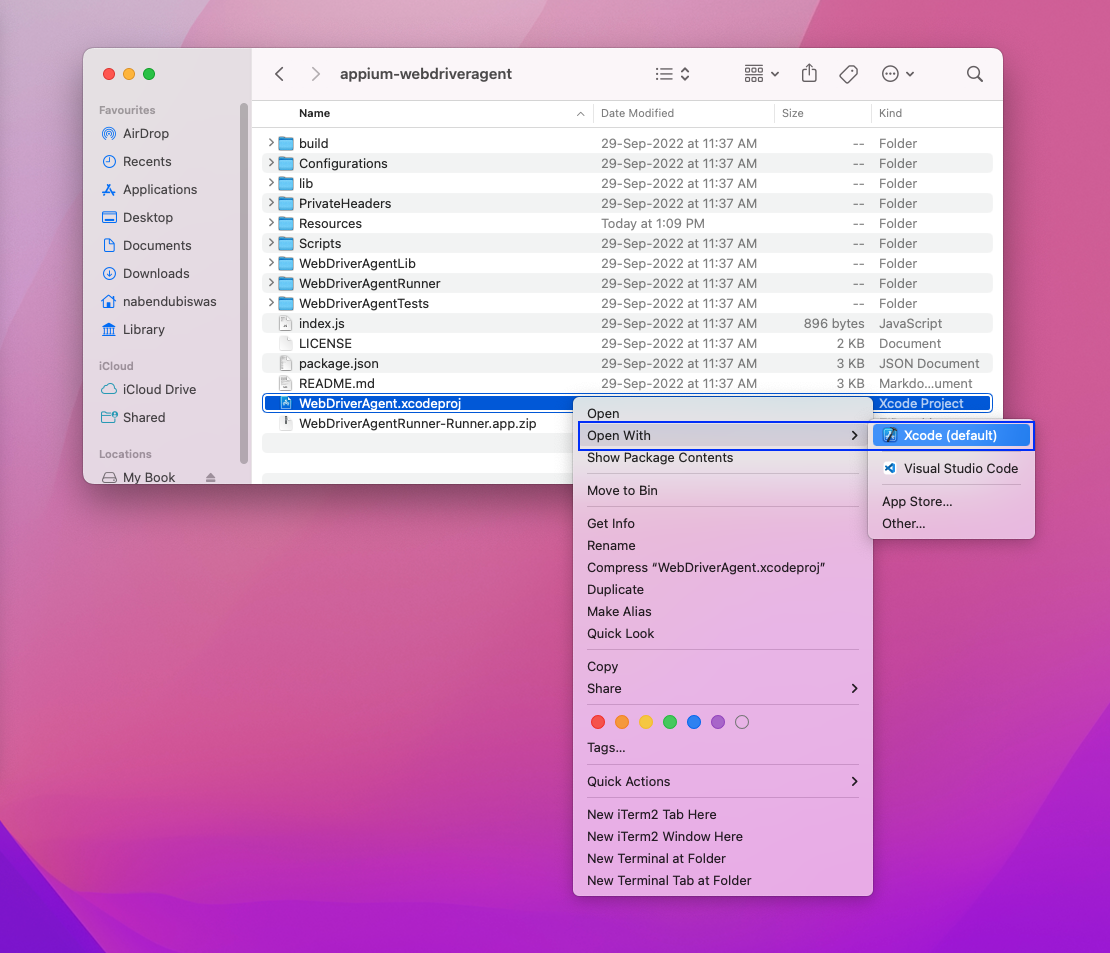
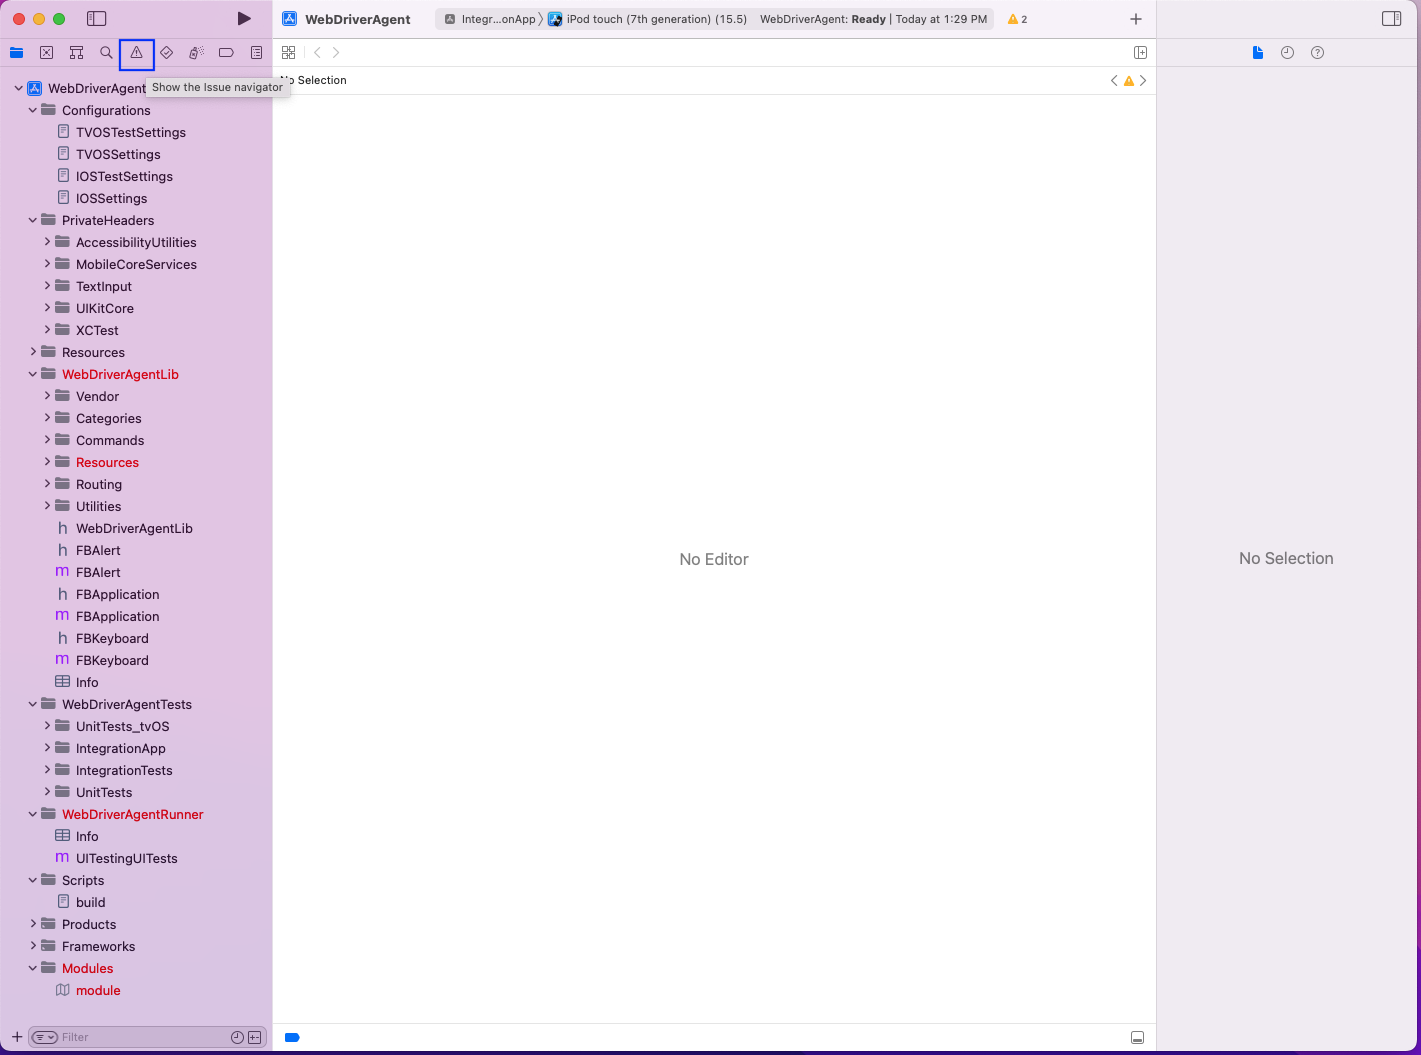
You can also install the desktop app from the Appium site for macOS. Since we've installed Appium Server using npm, we need to go to the below path and open the WebDriverAgent.xcodeproj with Xcode:
Once you've opened the file WebDriverAgent.xcodeproj, click on the issue navigator.
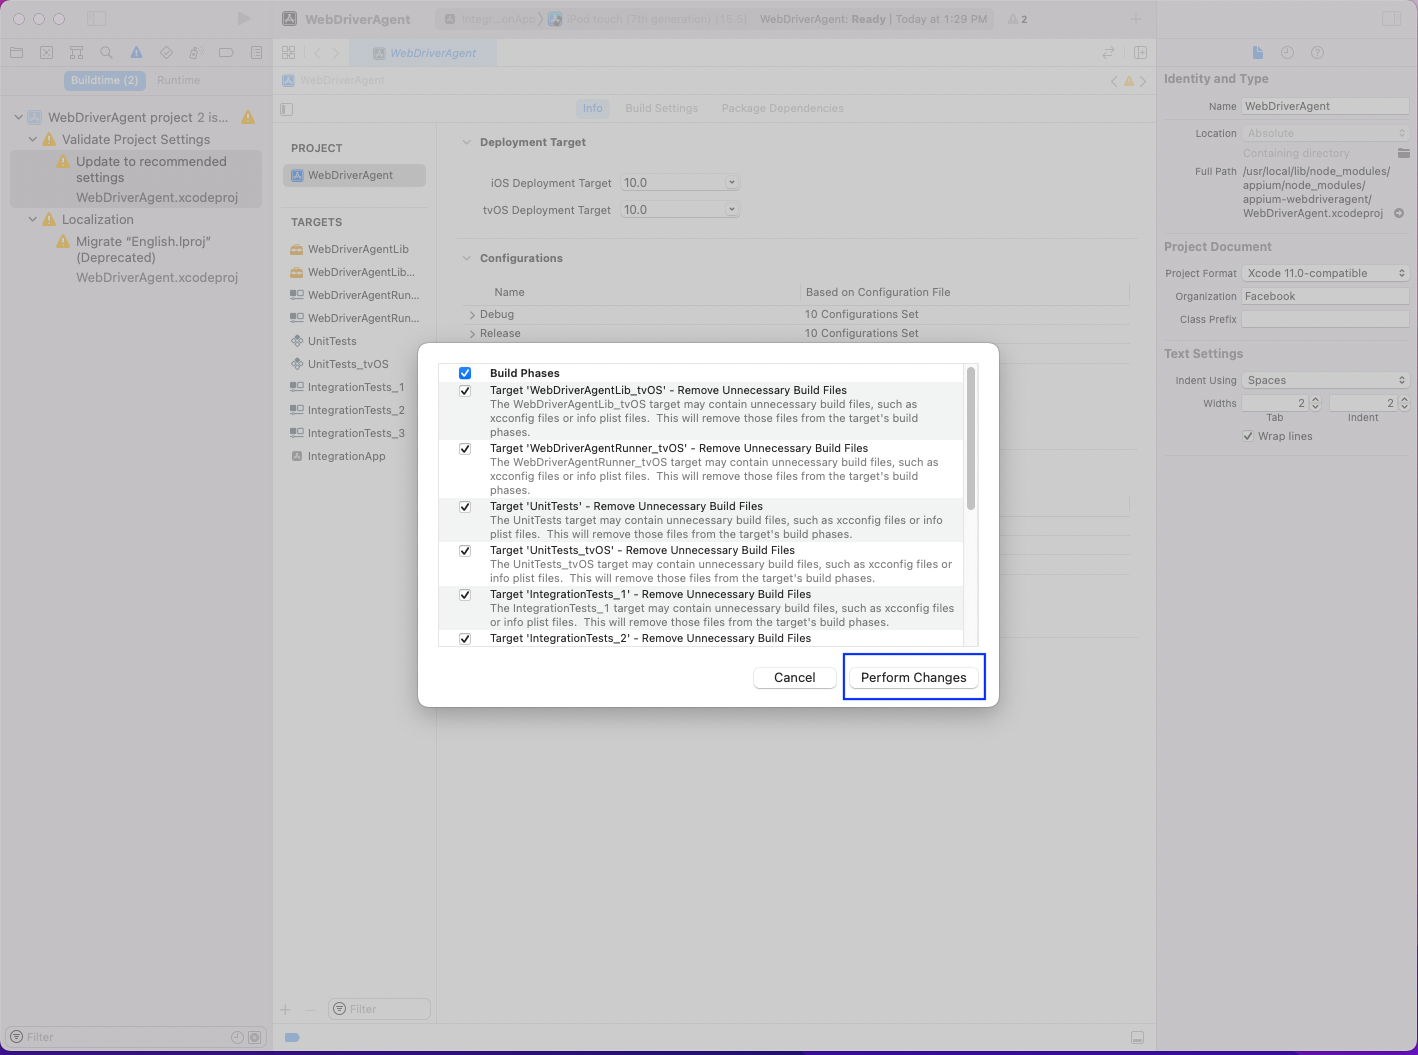
Here, click on any warning and it will open a pop-up. We need to click Perform Changes to fix all issues.
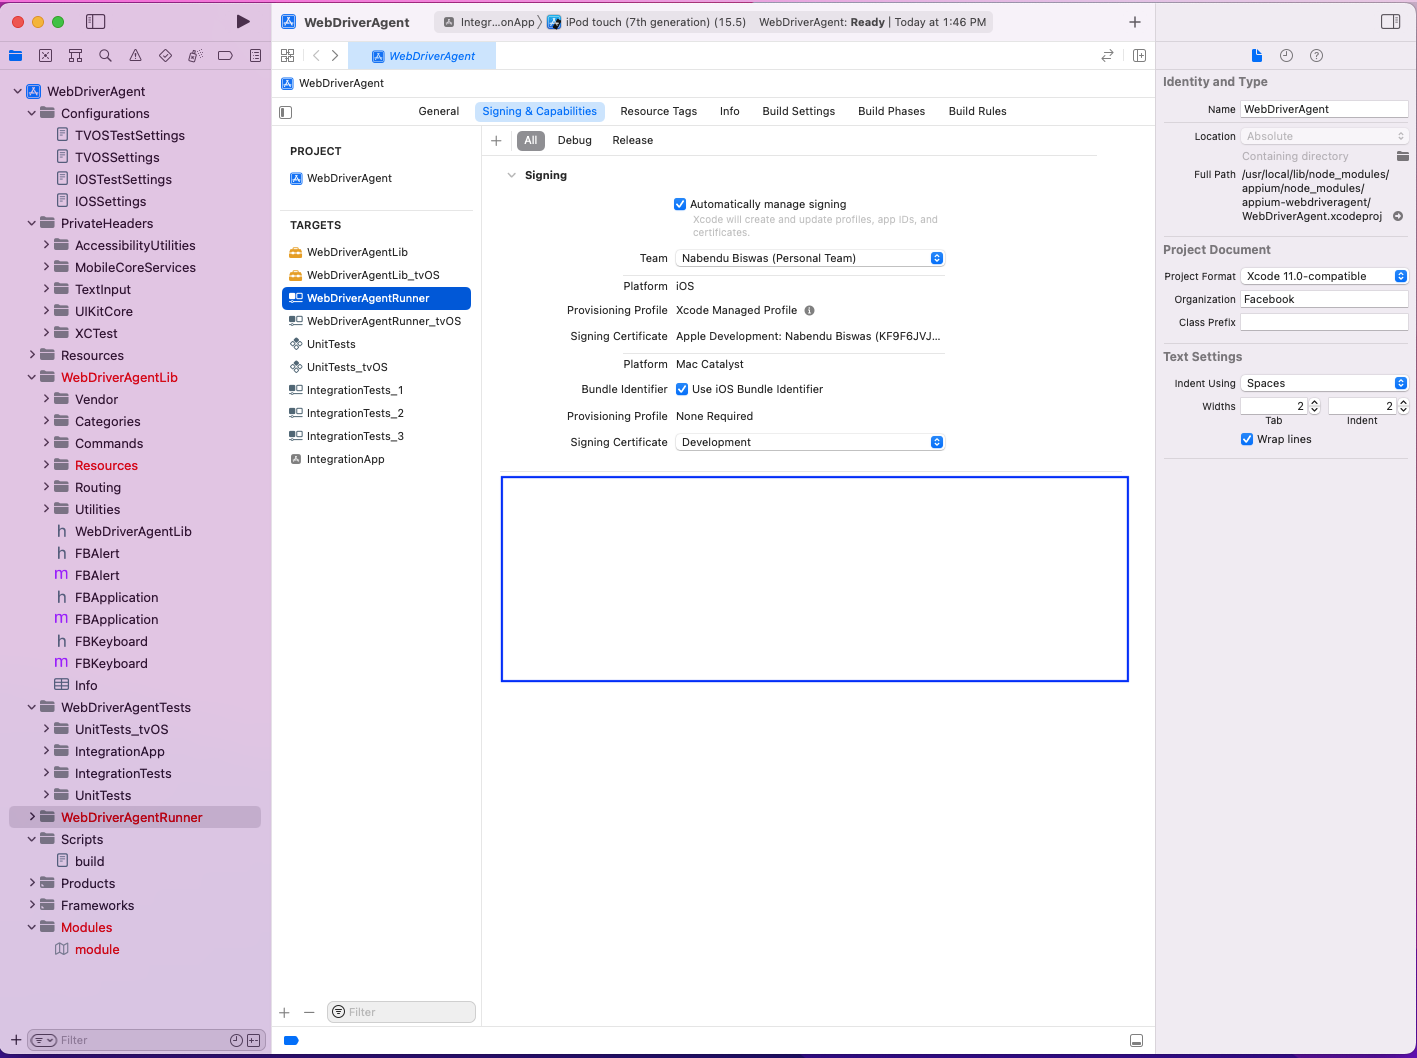
Next, click on WebDriverAgentLib in the Project Explorer. Once it's open, we again need to click on WebDriverAgentLib in TARGETS.

Now, click on the Signing & Capabilities tab. Here the checkbox for Automatically manage signing should be checked. Additionally, the Team should be any team we have.

Next, we're going to do the same for WebDriverAgentRunner. Here, again the Automatically manage signing checkbox and Team should be as per WebDriverAgentLib. But notice that we have some warnings.
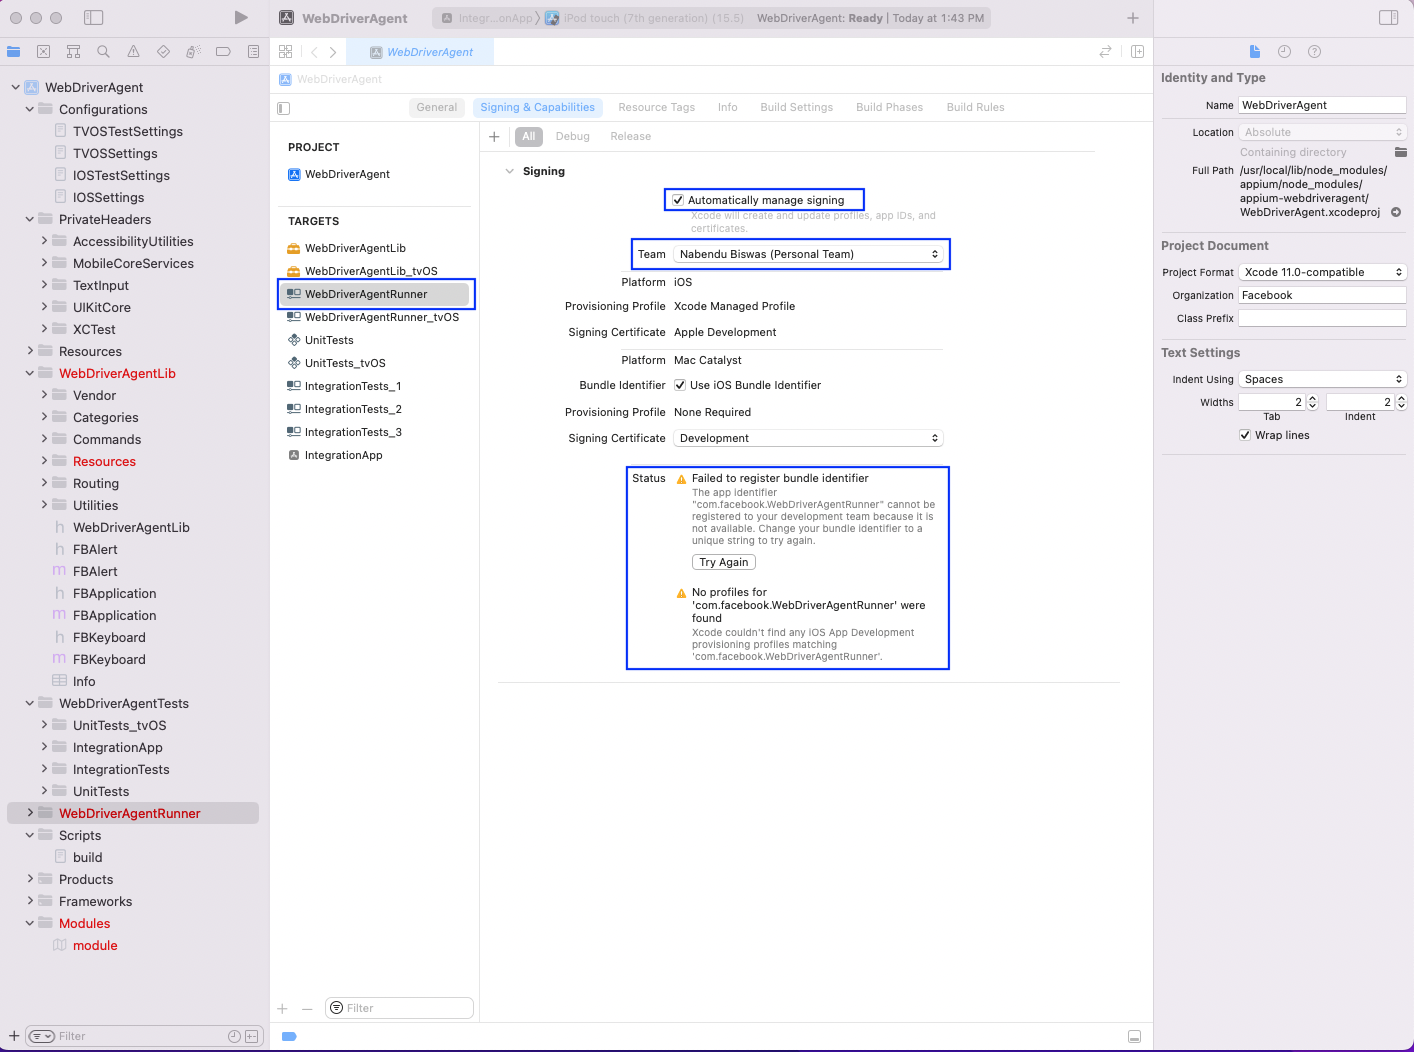
To fix the warnings, go to the Build Settings tab. Here, update the Product Bundle Identifier to something unique.
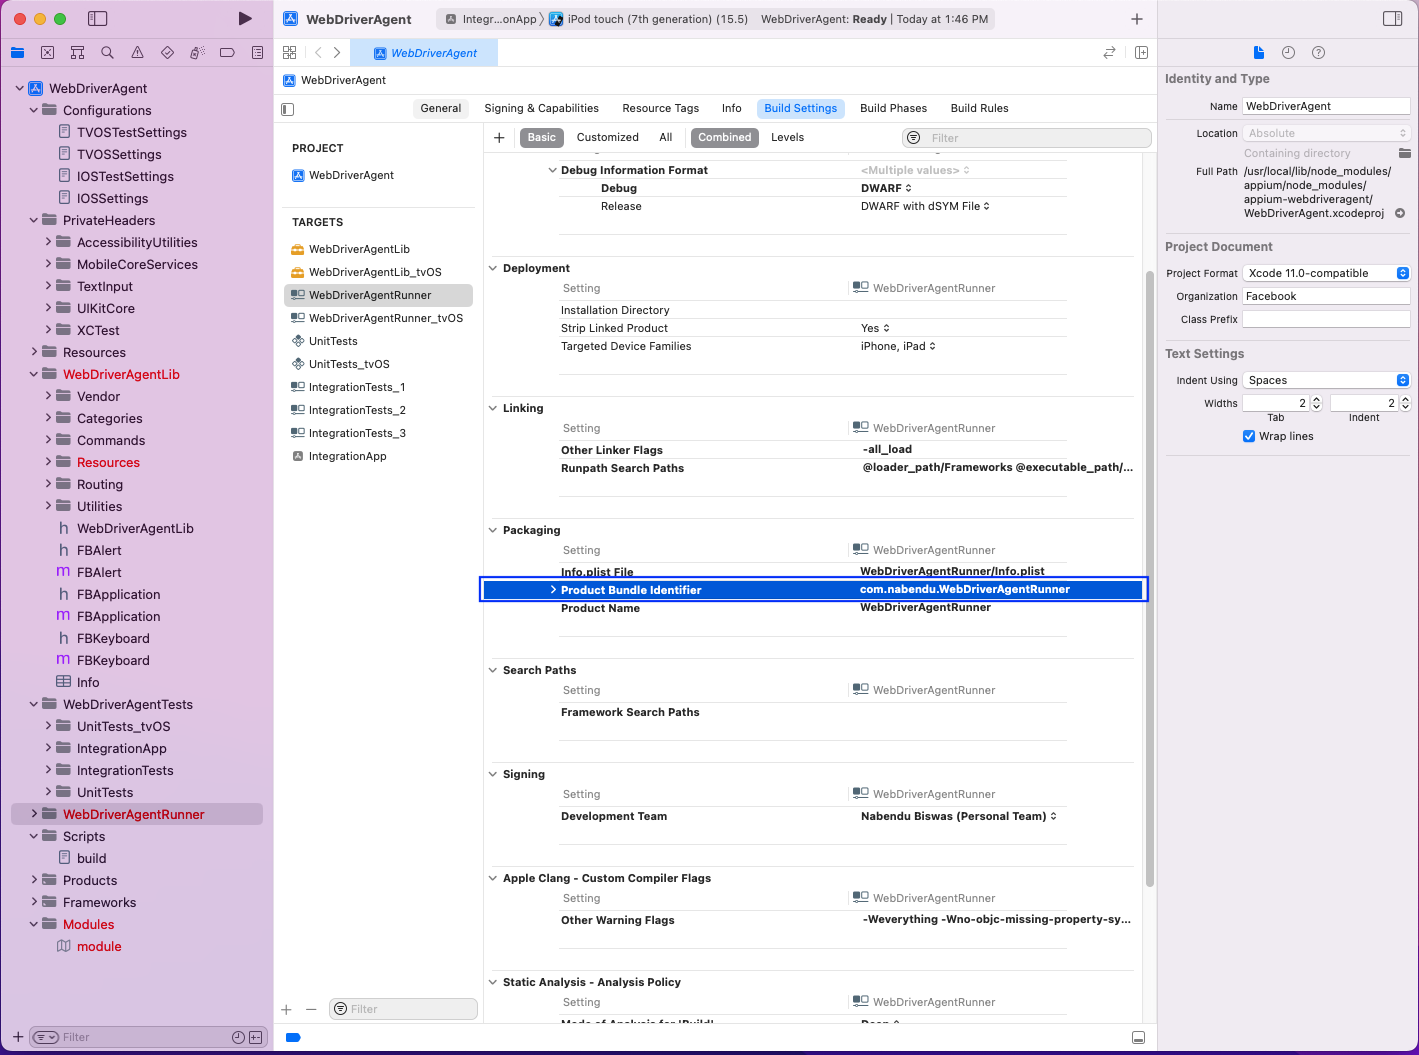
Now, go back to the Signing & Capabilities tab. You'll find that all warnings are gone.
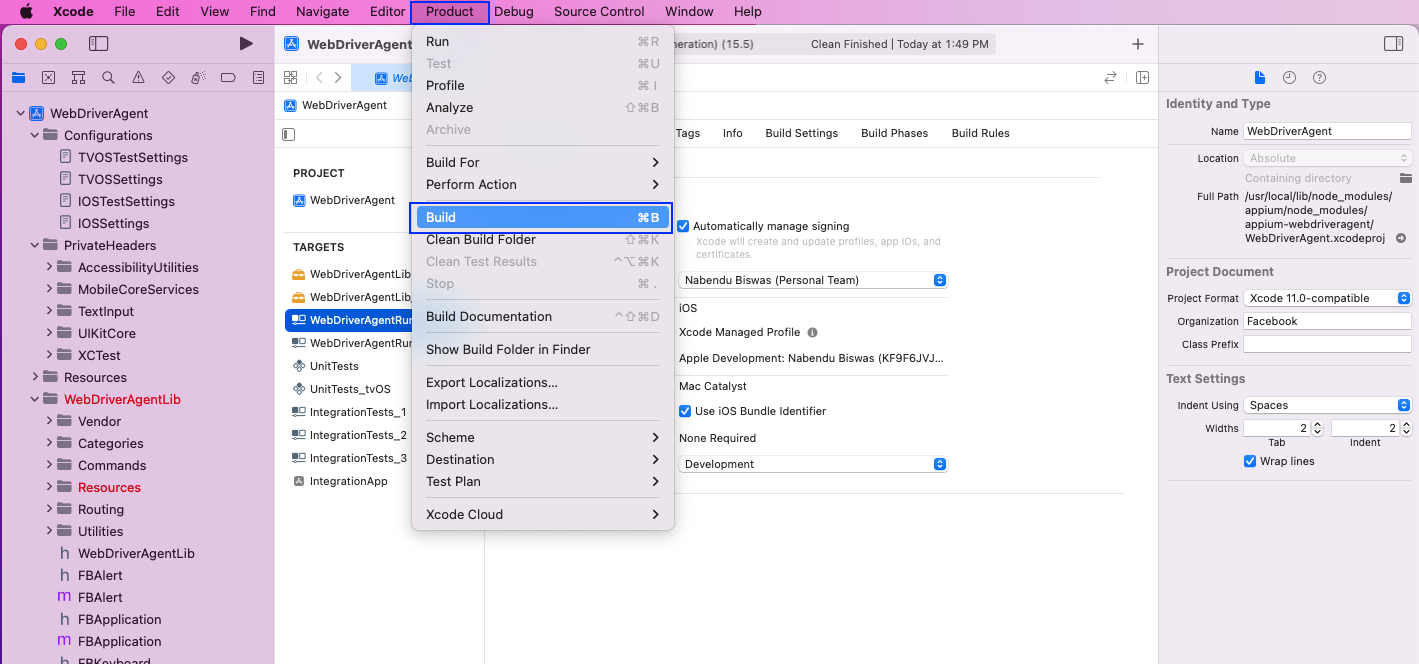
We'll clean the project now by clicking on Product, and then clicking on Clean Build Folder.

Once, the cleaning is done, click on Product again. Then, click Build.
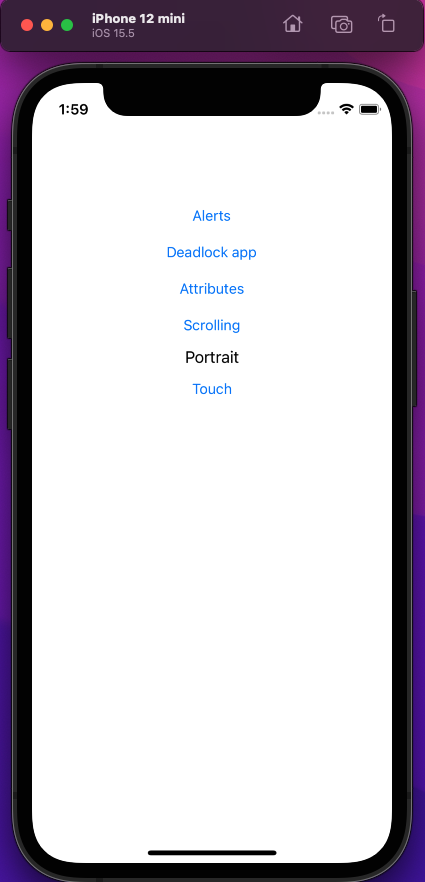
Once the build is done, click on the play icon to run the project.

The project will run on an iOS simulator and show the demo project. This also means that our setup was done properly.
Now that our demo project has confirmed we properly set up Appium on Mac, let's do a different test case.
Project Setup for Test Cases in Eclipse
We'll write our test cases in Java, so we require an IDE. I'm using Eclipse, but you can use any other Java IDE.
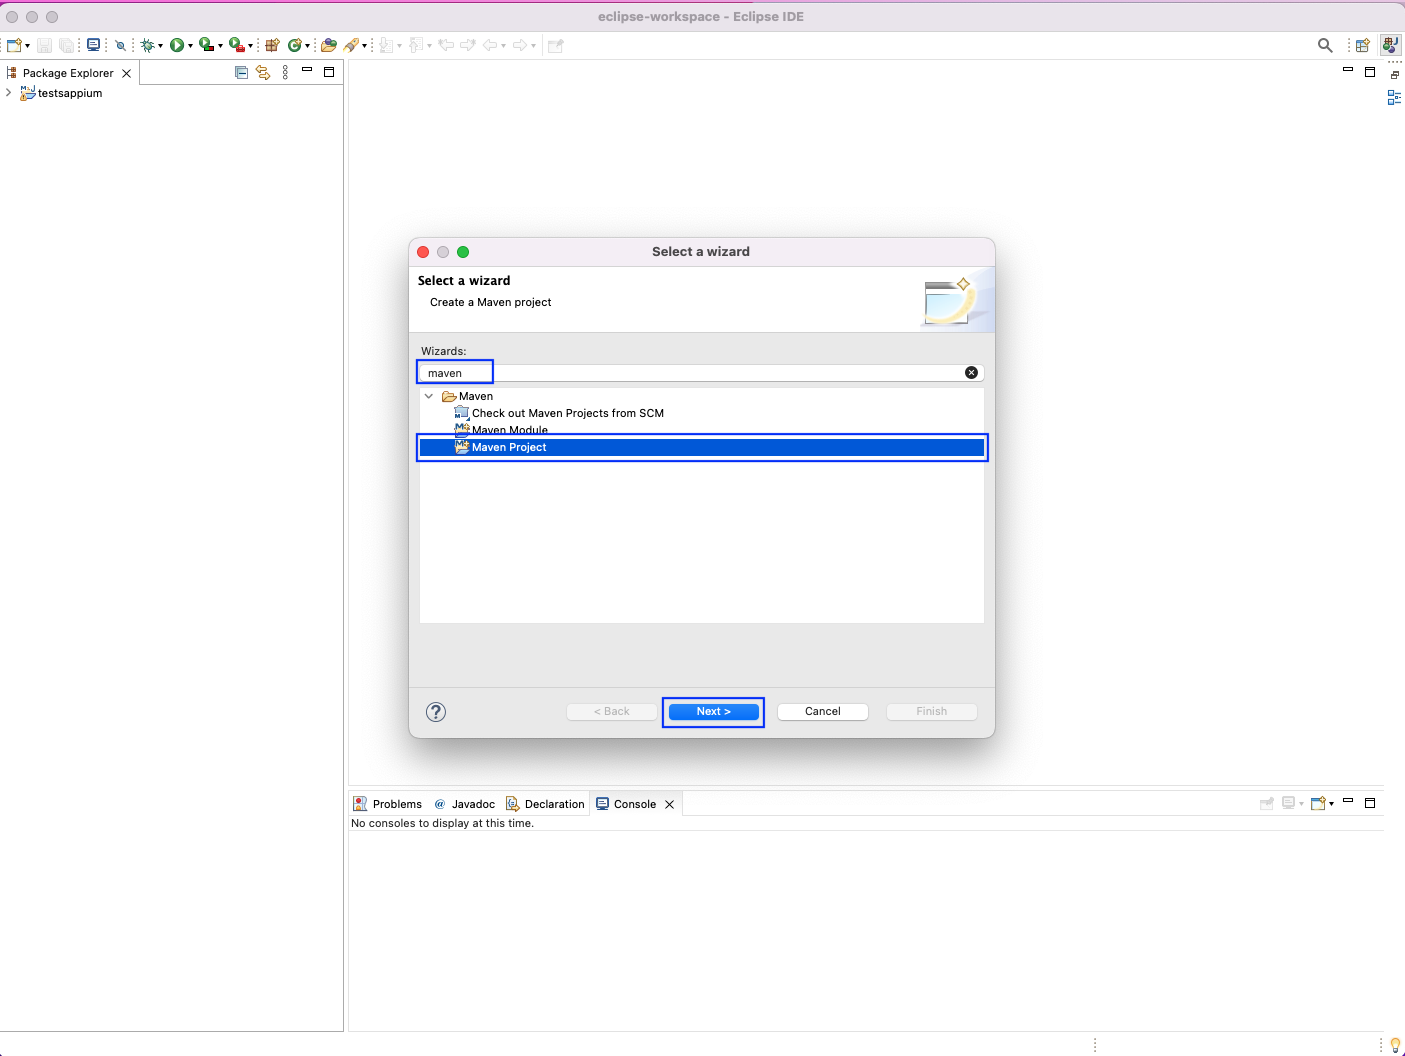
After opening Eclipse, create a new file. The file type will be Other.

Next type maven in Wizards search box. Then, select Maven Project and click on the Next > button.
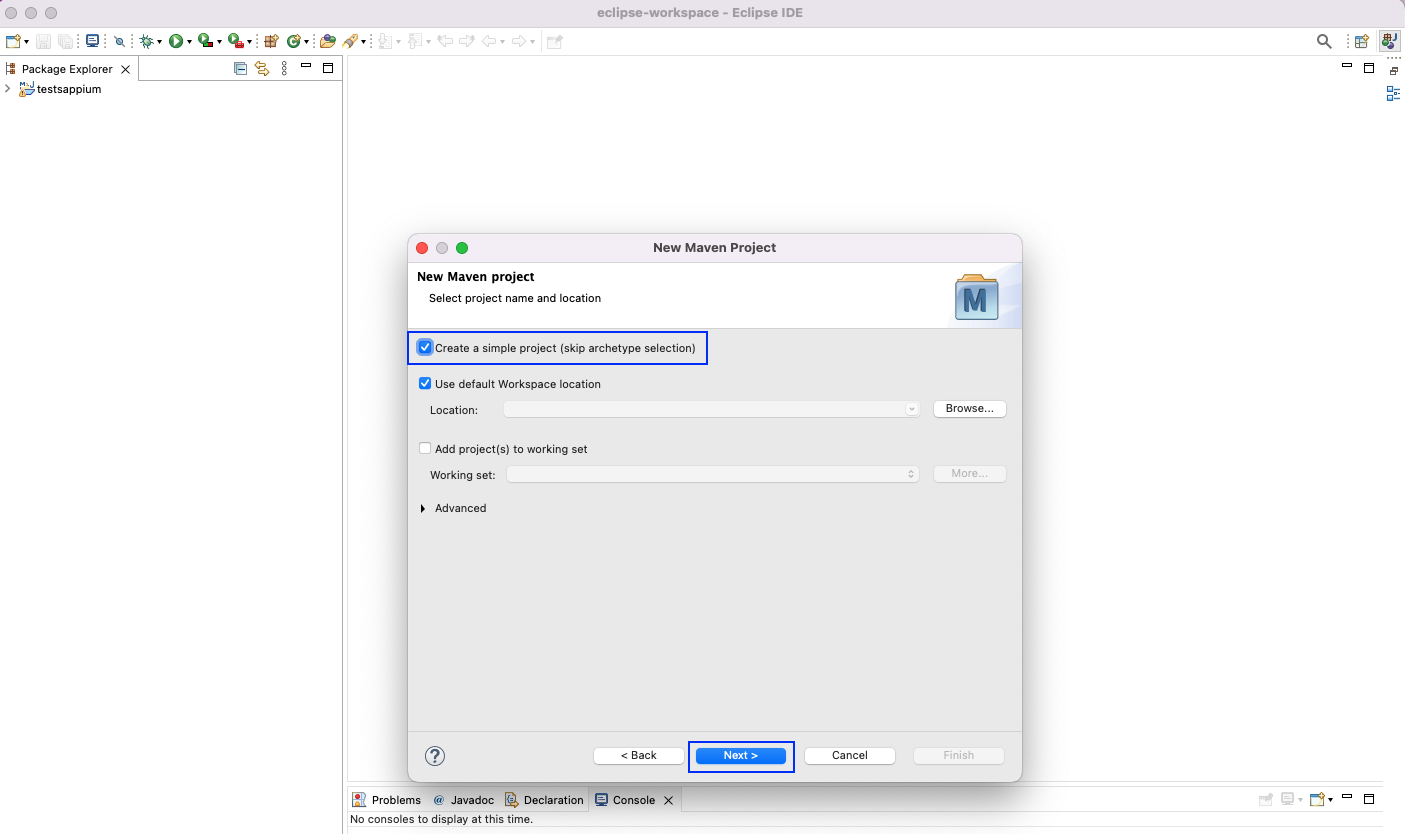
In the next screen, the first checkbox is clicked, which is for a simple project. Click on the Next > button.
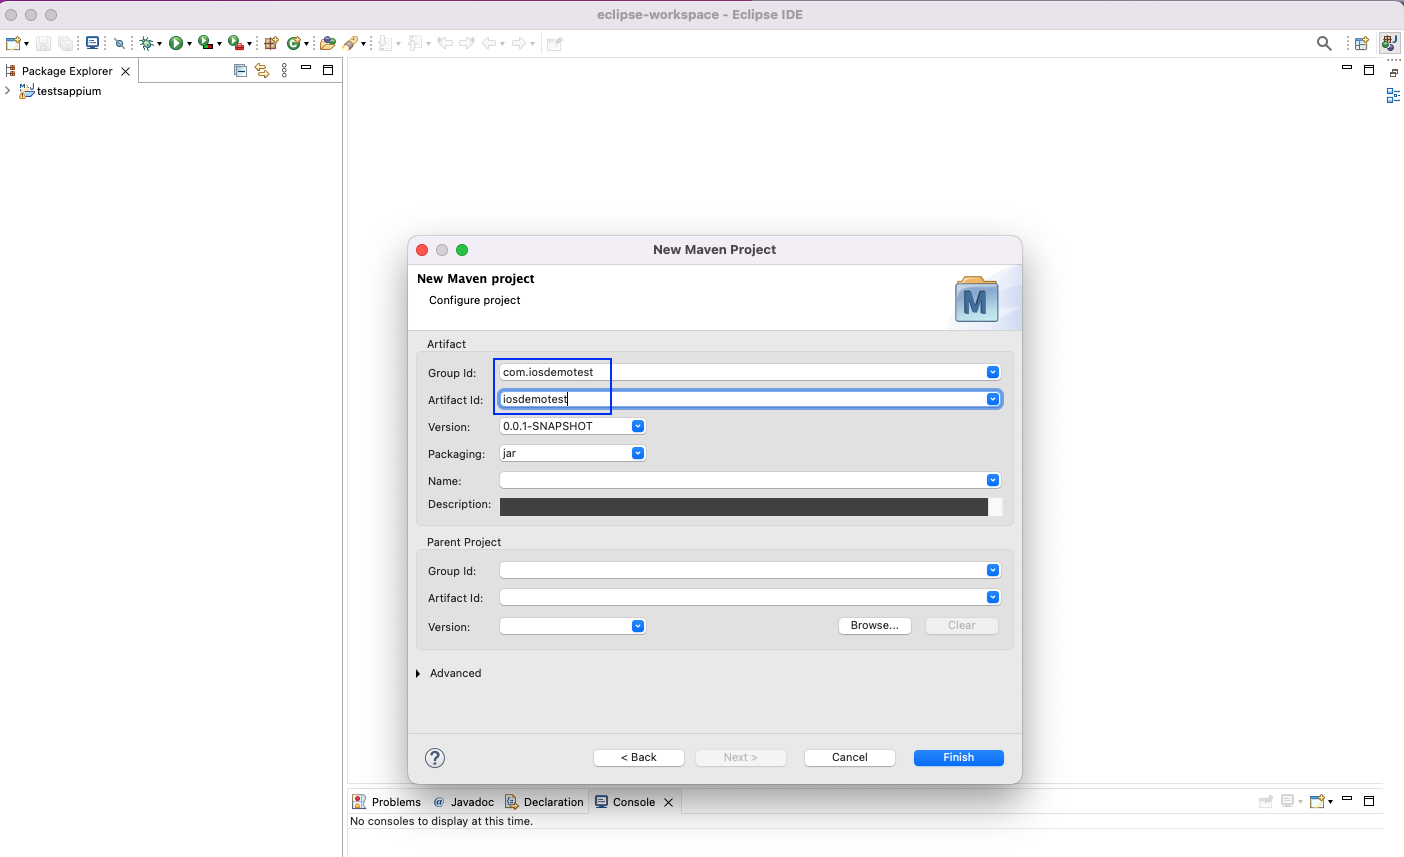
In the next pop-up, give the Group Id and Artifact Id. After that, click on the Finish button.
Our project will be opened now. Here, we'll see our pom.xml, which contains the requirements of the project.

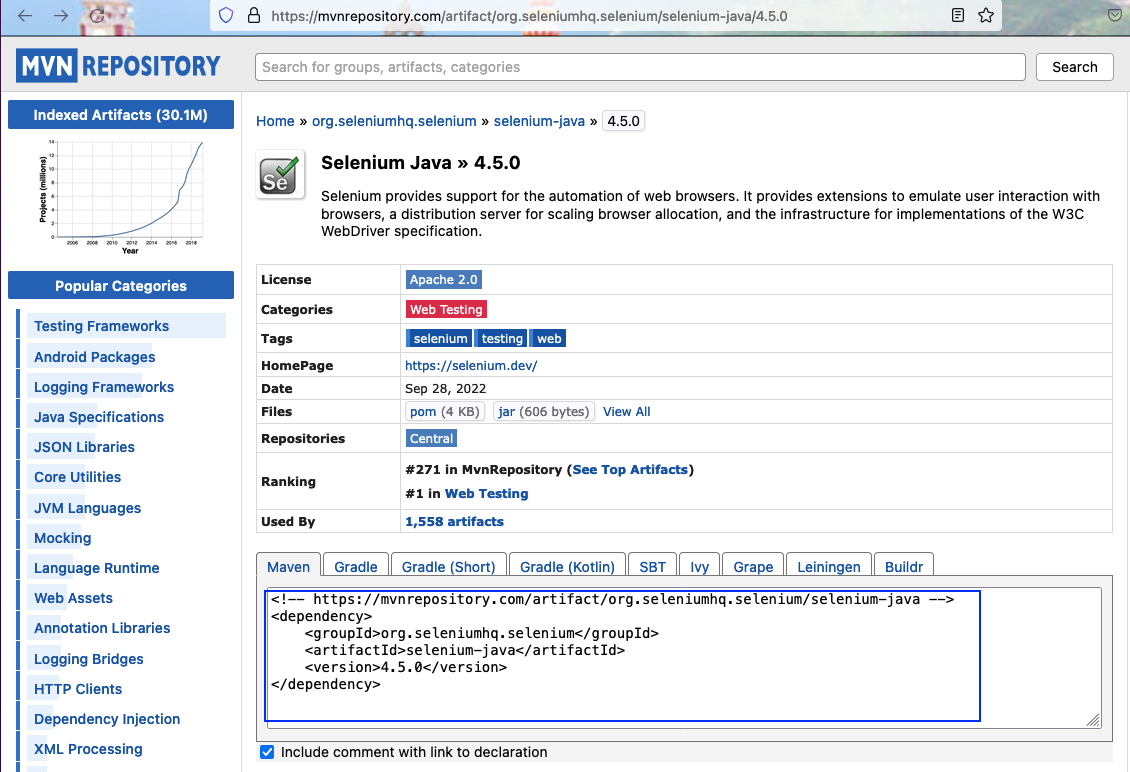
Now, we need to add the references for Selenium Java and Appium Java client from the MVN repository. First, search for selenium java. It'll show up as the first package.

Now, copy the code for Maven and keep it somewhere.
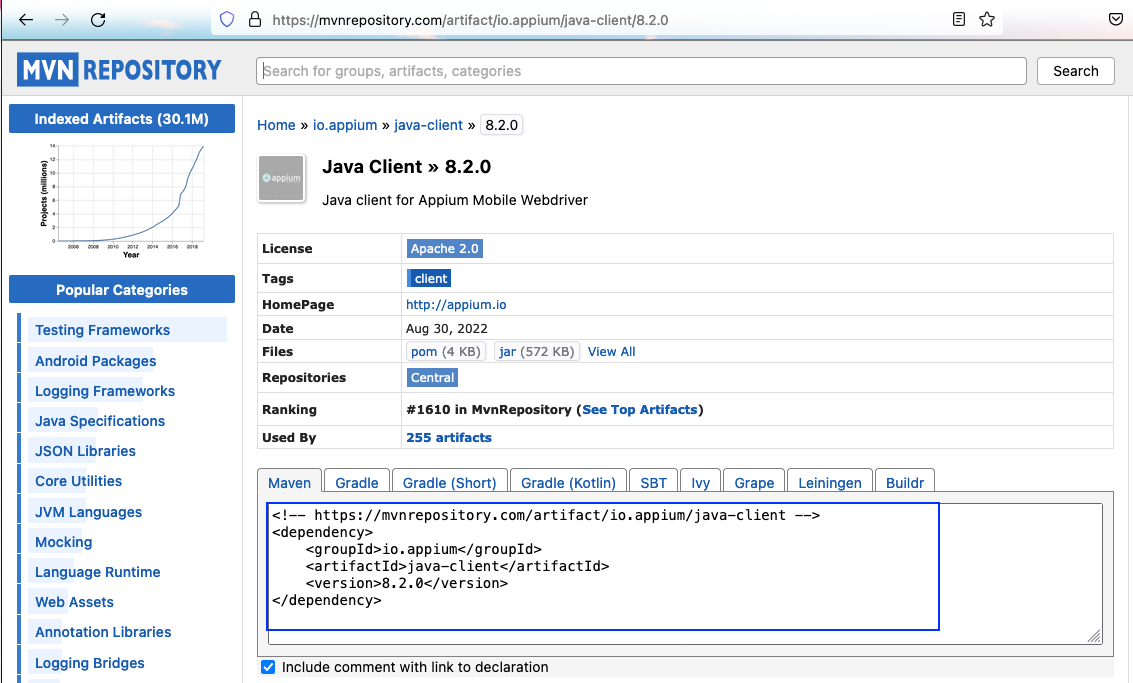
Next, we'll search for appium Java client for our project. Again, search for it in the MVN Repository. It's the second package here.

Again, copy the code for Maven and keep it.
Finally, add both code blocks in your pom.xml file inside dependencies.

Writing Test Cases
We'll first create a new test file. Right-click on src/test/java, and then click on New. After that, click on Class.
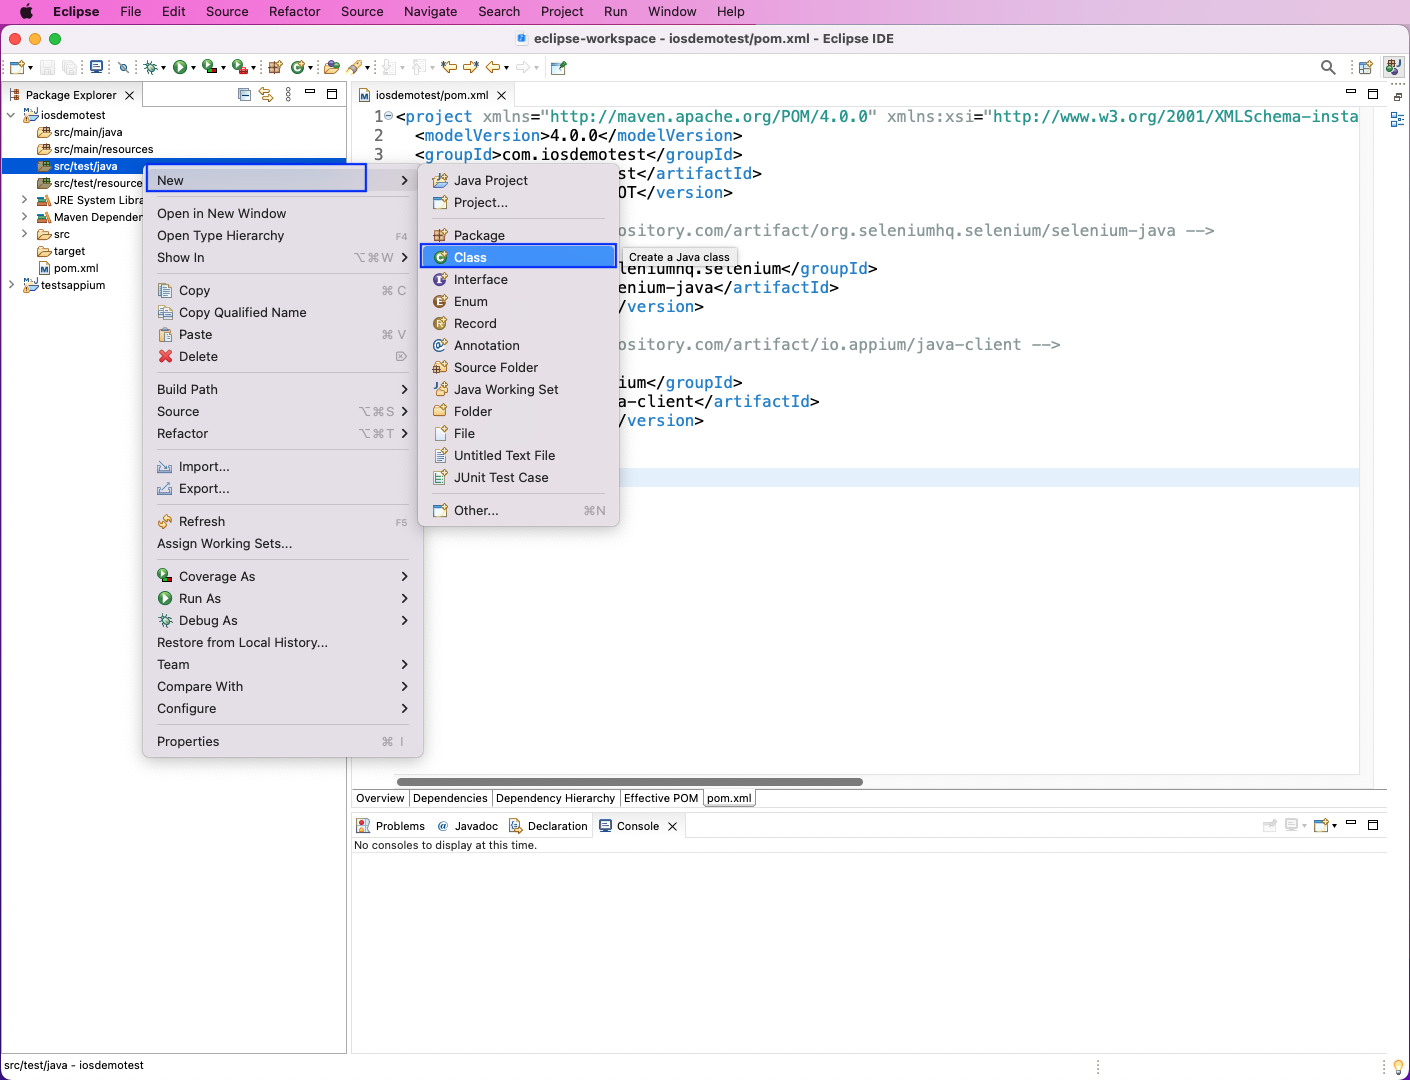
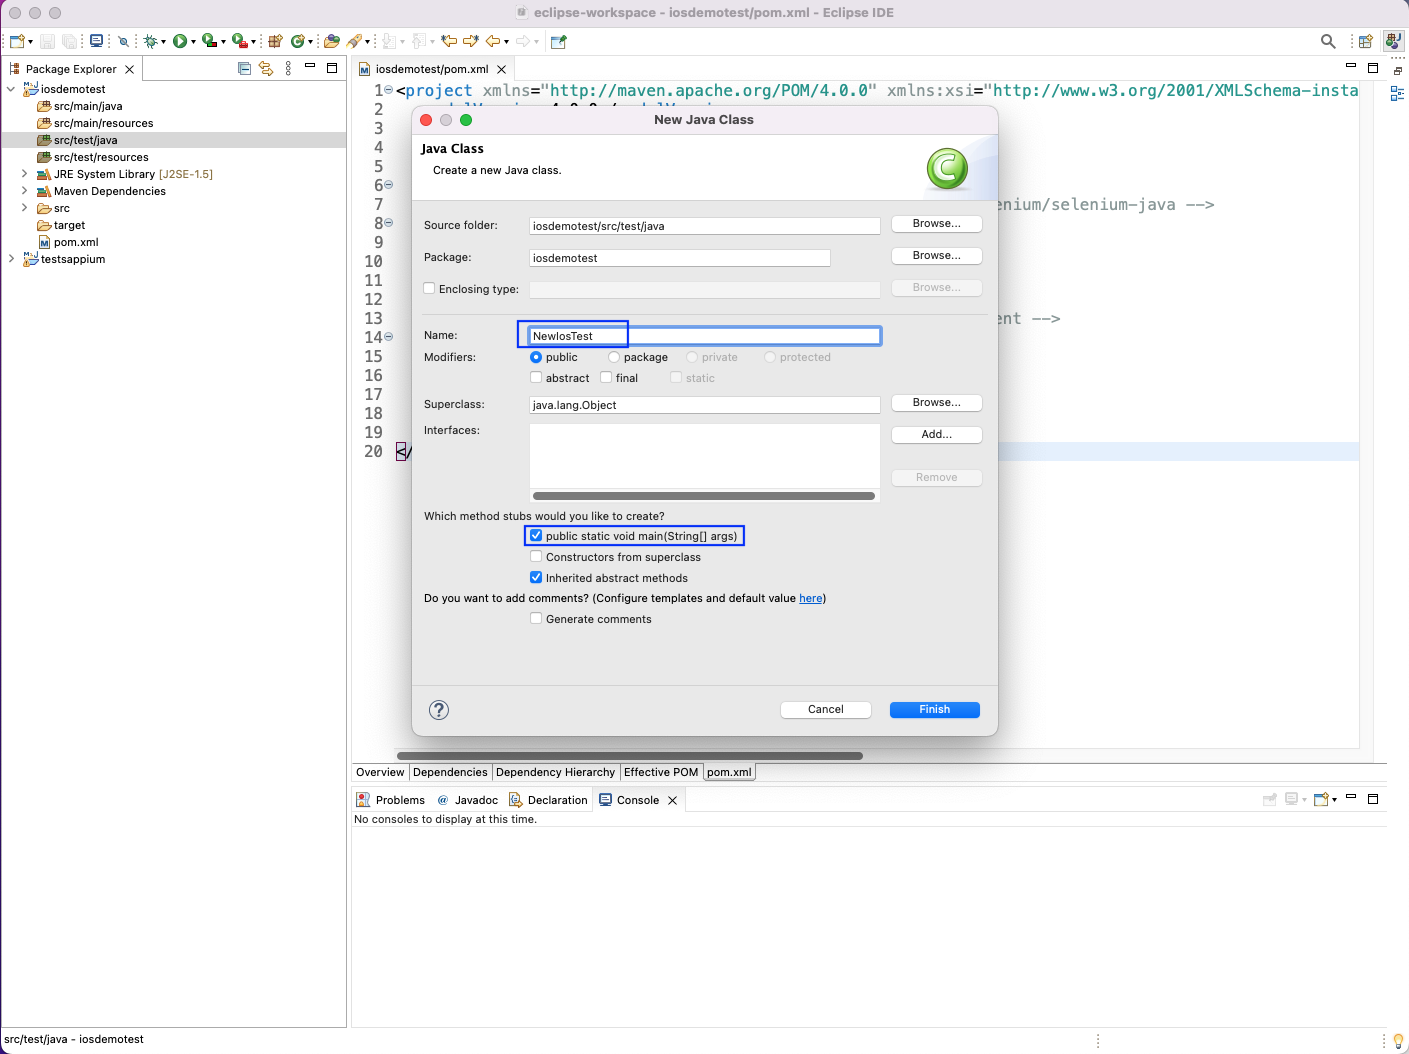
In the next pop-up, give the test file a name, in the Name textbox. Also, click on the checkbox to create a main method.
Before writing the test case, we need desired capabilities for Appium.
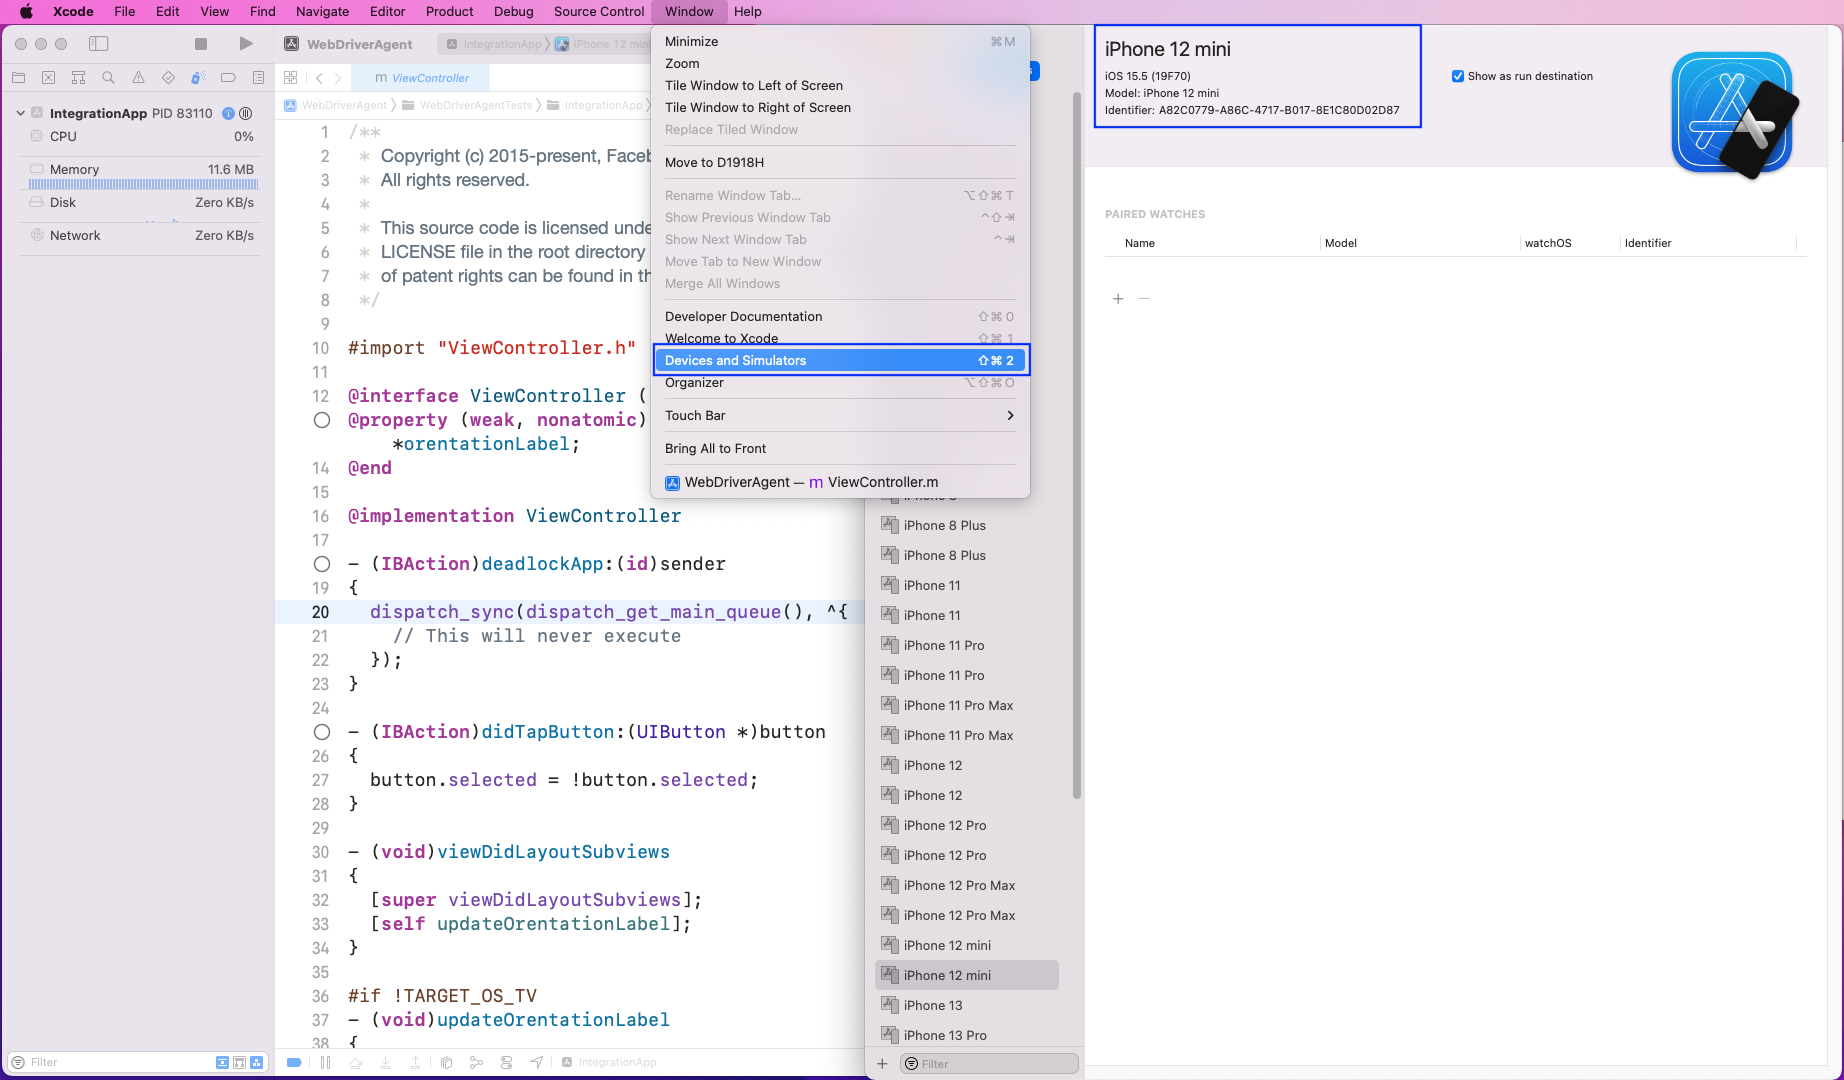
In Xcode, click on Window and then on Devices and Simulators. Here, in a new pop-up we'll get all the devices. Note down the different parameters from the simulator you intend to run the application on.
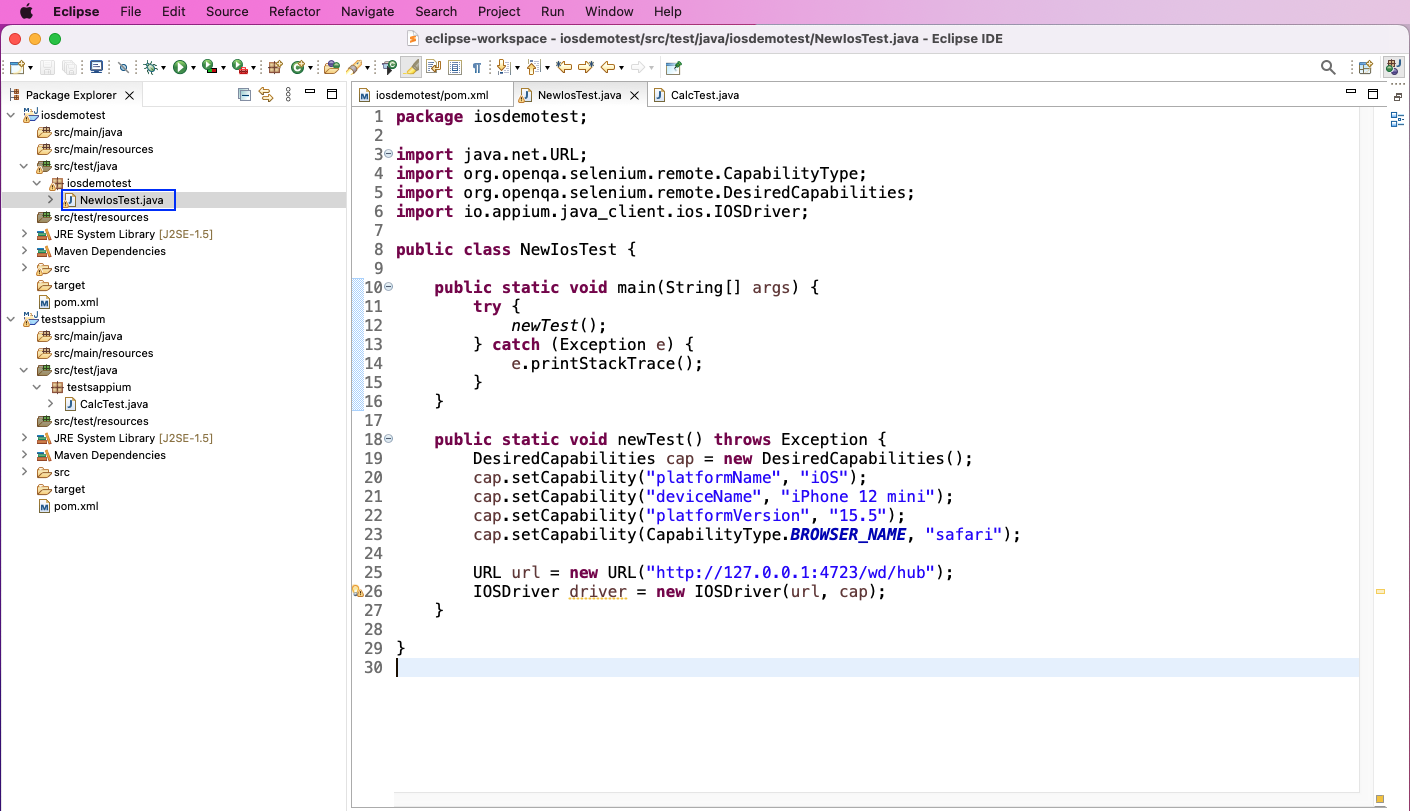
Open the newly created NewIosTest.java. Here, we've imported the required packages first. Then, from the main() method, we're calling the newTest() method. Inside newTest(), we have to give the desired capabilities first for Appium. Here, we've given the device name, platform name, and platform version from the earlier step.
We'll be running our simple test on Safari, so we'll give the capability type as well. After that, we've given the URL for the Appium Server. We're connecting to the iOS driver by passing the URL and capabilities.
Running Test Cases
To run the test cases, we should have Appium Server running. Since we've configured Appium from a Node.js package, we'll run Appium from the terminal.

Now, we've added a log. Right-click on the code System.out.println("Started the Application");. Then, run it as a Java application.

Since everything was set up correctly, we'll get the correct logs. Also, the mobile Safari app will open automatically on our connected mobile device.

Conclusion
In this post, we've set up Appium on a macOS machine. Then, we set up Xcode for Appium. Finally, we've created our automated test in Java using Eclipse IDE and ran it successfully in iOS simulator.
This all seems to be very complicated. So, we can just get the APK or IPA file and try Waldo. APK files are the file for the app which is deployed in Android Play Store. And IPA file is deployed in Apple App Store. Most of the time testers gets this file to test the app instead of the code.
With Waldo we can avoid writing test cases and learning a new language like Java in the process.
Automated E2E tests for your mobile app
Get true E2E testing in minutes, not months.


