


.jpeg)
On-screen keyboards are an essential part of any mobile application. They help users enter data in various forms, such as login or registration forms. However, when we have a long form, like a registration form that requests several personal details, the keyboard may obstruct the view of most of the form. When this happens, it's very annoying and difficult to fill out the form.
In this post, we're going to look into the issue on-screen keyboards cause with a long form. You'll learn to use React Native's built-in module, KeyboardAvoidingView, to solve this issue. To follow along, you need to have basic knowledge of React Native.
Create a React Native Project
In this project, we'll use the React Native CLI. We'll be using the iOS emulator on a Mac system. If you don't already have this set up, follow the instructions in the official docs.
Once you're all set up with the React Native CLI, we need to create a new React Native project. In the terminal, give the command npx react-native init <project-name>. We're calling our new project ViewProject, so give the below command in terminal:
Since I'm using a Mac running an M1 chip, it requires additional setup. This setup is not required on any Intel-based Mac, Windows, or Linux system. Run the below commands in the project directory:

Run the Project
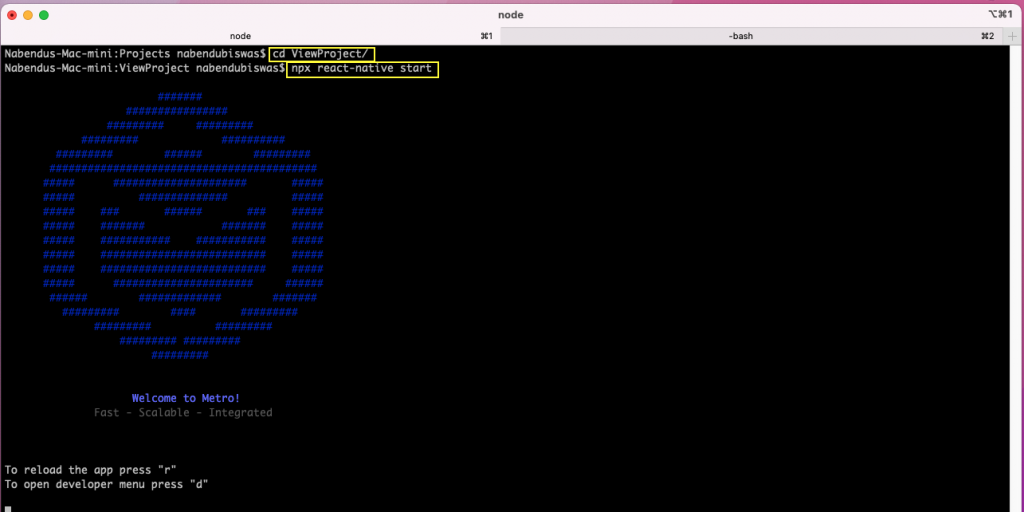
To start the project, run the command npx react-native start from the project directory. Here, we're also changing to the directory first from our terminal. It will show us this screen:
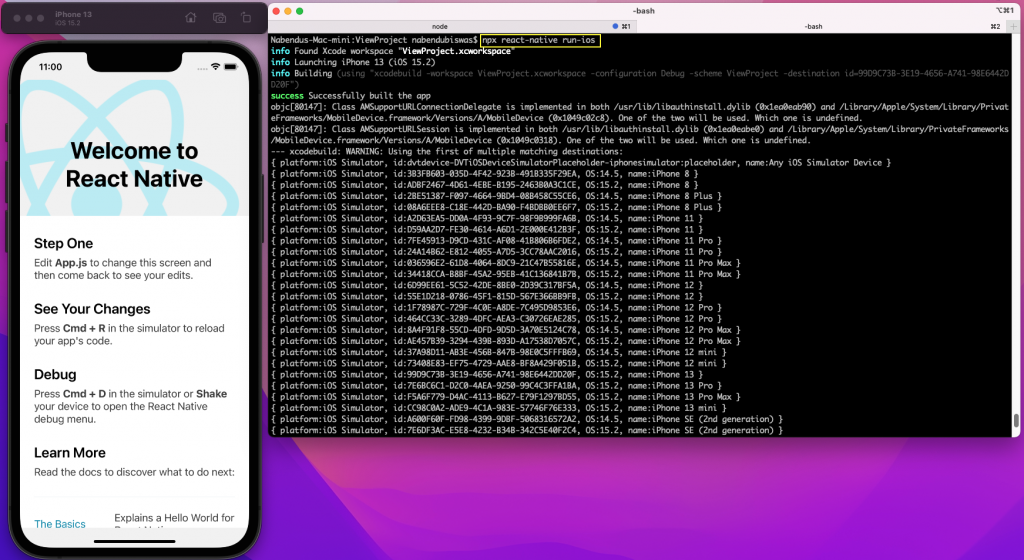
To start the project, we also need to run the iOS simulator. So, from another terminal in the project directory, run the npx react-native run-ios command.
Create the Initial Components
Now that we've set up our React Native project, we'll create two initial components: HeaderText and ButtonComponent.
We'll first create the header text component for our project. In the root directory, create a components folder. Inside it, create a file called HeaderText.js. Now, put the below code in it.
Notice that the code contains a text field with the text "Keyboad Avoiding View." We also have some styles specified for this text field. In these styles, we're making the font size larger and bolder. Also, we're aligning the text to the center and adding vertical padding.
Now, we'll also have a ButtonComponent.js file inside our components folder. Here, we are passing the props of name, buttonStyle, and onPressHandler to it. We've created a styled button using TouchableOpacity in it.
Notice that we're only styling the button text here. In the styles, we've made the button's text center aligned. We've also made the text white, increased the font size, and made it bold.
Add the Components to the App.js File
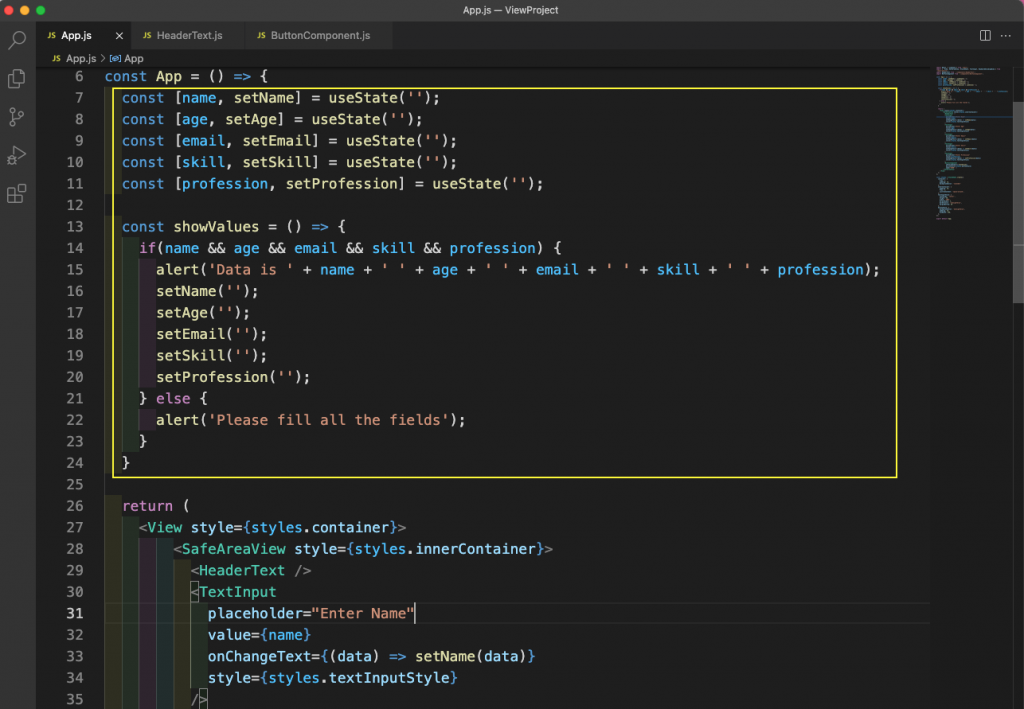
We'll use these two components in our App.js file. First, remove all the content from App.js file and add the below content in it. We're first importing the required import like React and the useState hook from React. After that, we're importing View, SafeAreaView, StyleSheet, TextInput, and KeyboardAvoidingView from React Native. We're going to use these soon. Lastly, we're importing the HeaderText and ButtonComponent that we created in the previous section.
After that, inside the return statement, we're showing the HeaderText and ButtonComponent components. We've wrapped these components inside a View and a SafeAreaView component. These will make our component display properly on our mobile device.
After that, we've given the styles for the View and the SafeAreaView, using Flexbox. We've also given style for Text and Button inside the styles.
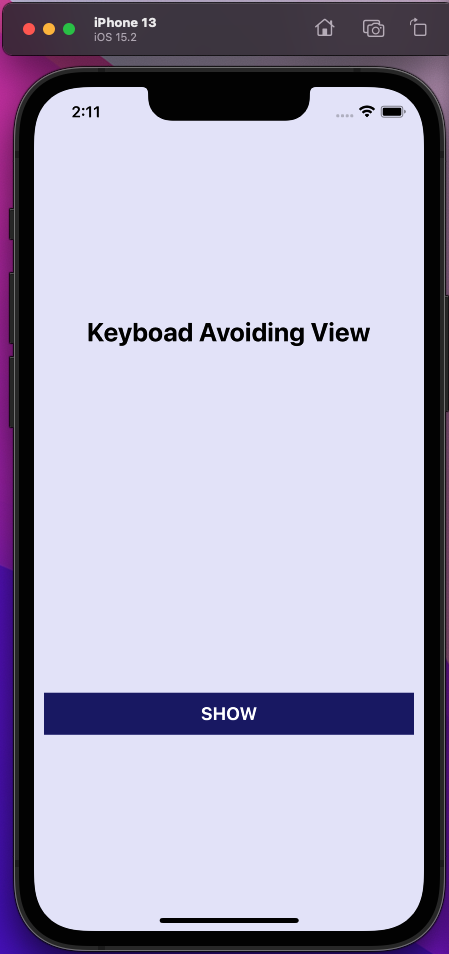
Now, the initial app on iOS simulator should look like this:
Add TextInput
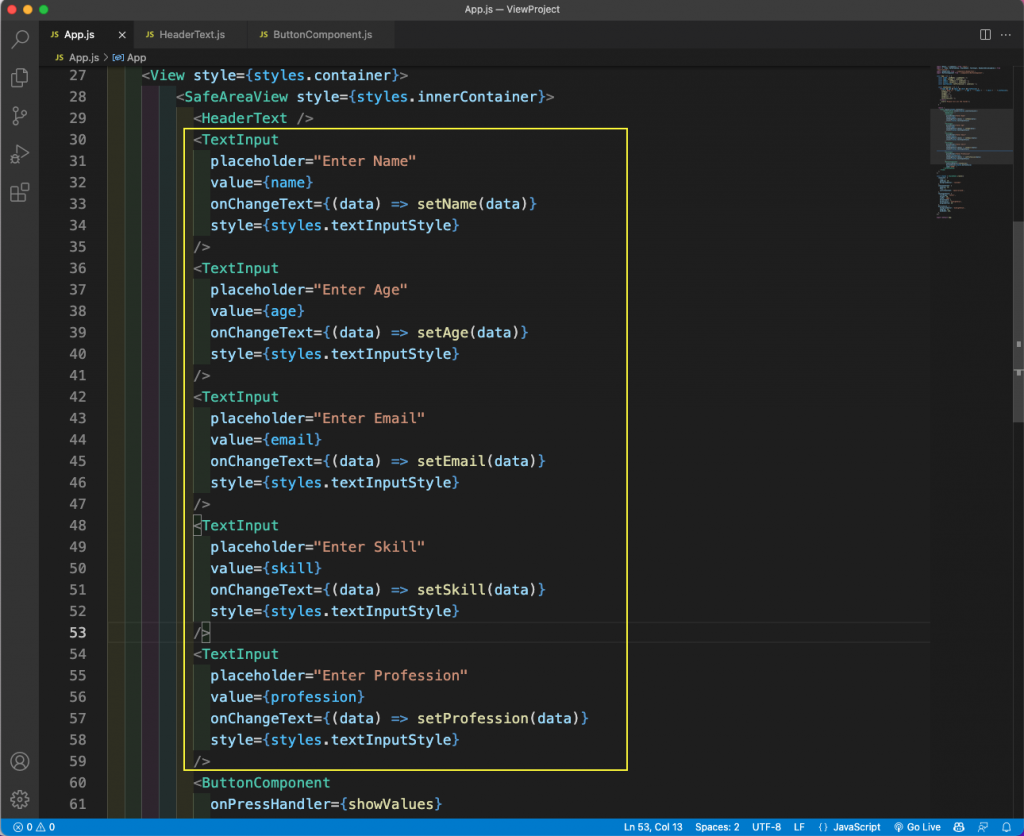
Now, we'll add a lot of TextInput in our app. Here, we're adding enough TextInput to occupy the whole screen. We need to add these between the components HeaderText and ButtonComponent:
The placement of the new code is also shown in the screenshot below.
We also need to add the state variables for the newly created TextInput using useState hook. Here, we'll also set up the code to show values when user clicks on the SHOW button.
Place the above code after const App = () => {, as shown in the below screenshot:
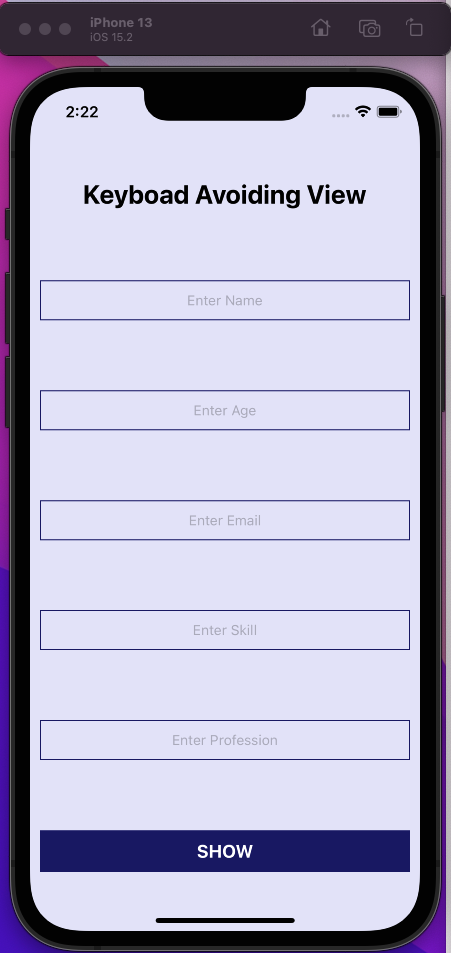
The newly added code will cause the TextInput to occupy the whole screen. Also, the button will be shifted to the end. The app should now appear as it does in the iOS simulator below:
The Problem
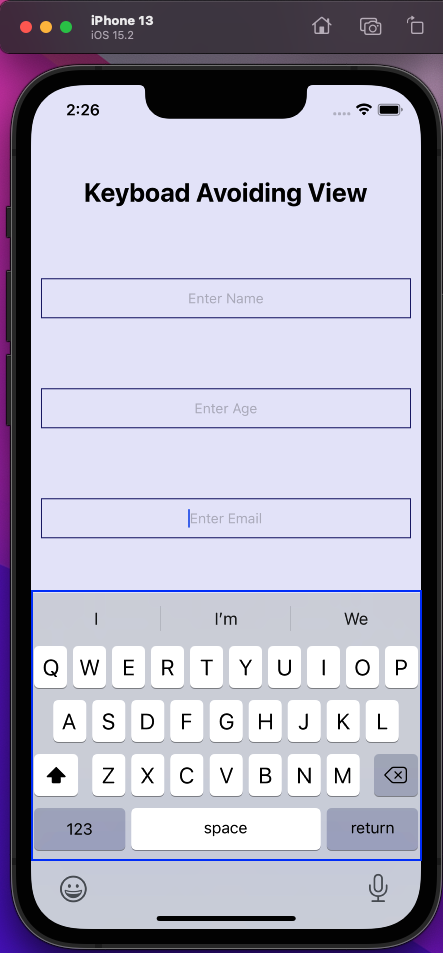
Now, click on any TextInput and the on-screen keyboard will hide the last two fields: skill and profession. The on-screen keyboard is also covering the button. This is a bad user experience because the user can't see the data entered in the last two fields. Additionally, to click the button, users need to dismiss the keyboard.
The Solution
Now, to solve this issue we'll wrap our whole app with KeyBoardAvoidingView. We also need to pass a props of behavior as padding here. The updated code is highlighted in yellow in the screenshot below.

Now, start typing in the fourth or fifth field. The keyboard will be shown, but it won't hide the fourth or fifth field. It also won't hide the SHOW button.
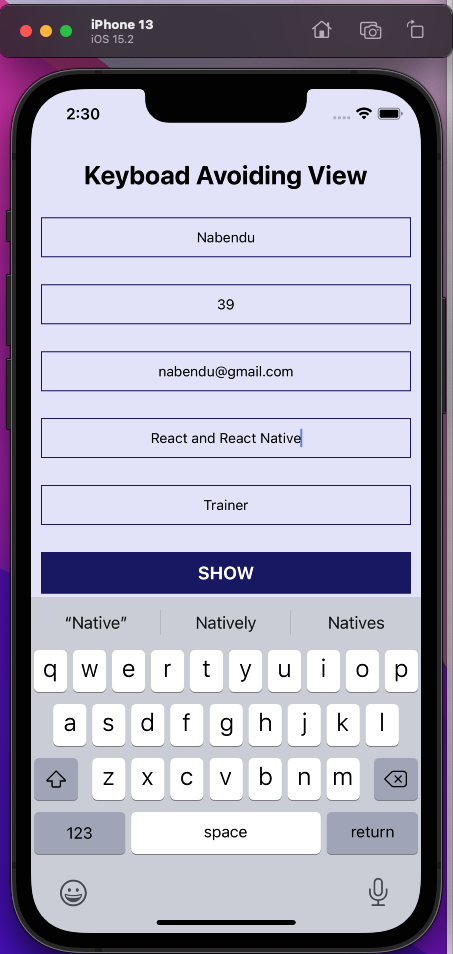
We're also able to click on the button, which will show an alert with our entered values.

Unit Test the App
Testing is a mandatory part of most development cycles. So, let's test our app using unit testing.
We'll be using the built-in framework Jest to test our app. With the Jest framework, we can perform a variety of tests, including snapshot and unit tests.
First, in the __tests__ folder remove the file App-test.js, as we're going to write our tests. Now, add two files inside it: HeaderText-test.js and ButtonComponent-test.js.
Next, in the HeaderText-test.js file, we're using a simple snapshot test. The test checks whether the tags match those rendered on the iOS emulator:
In the ButtonComponent-test.js file, we're using a somewhat complicated unit test. Here, we have two test cases. In both tests, we are first finding the button TouchableOpacity. Then, in one case we're checking whether the font size is 18. In the other case we're checking if the font weight is bold.
Next, we need to run npm run test from the command line. It will run all three test cases written in both files.
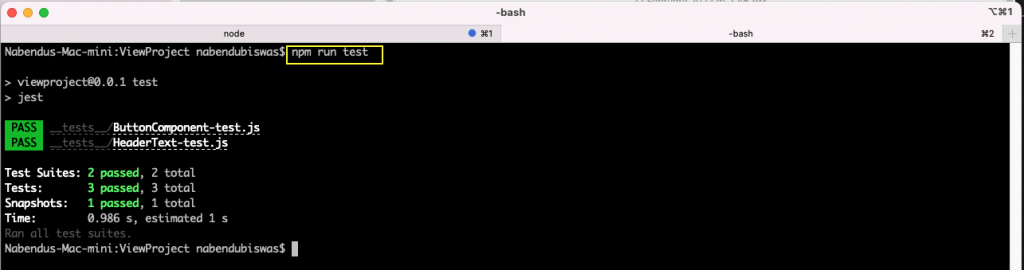
All of our test cases ran successfully. But there's a better way. To write the tests above, we had to learn a new kind of language. Also, the button test cases were more complicated.
Instead, we can use Waldo to test our application without writing test cases manually. We just need to generate the APK or IPA file and upload it to Waldo's platform. After that, we can do all kinds of testing in Waldo, including user interactions. Give Waldo a try by creating a free account here.
Conclusion
In this post, we've learned to solve the issue of an on-screen keyboard obstructing text fields. We created a small project with lot of TextInput. However, our on-screen keyboard blocked the TextInput fields and the button. So, we used the built-in package KeyboardAvoidingView to resolve this issue.
We also tested our app by writing test cases using Jest. But a much easier way to test your app is by using Waldo. So, give it a try.
Automated E2E tests for your mobile app
Get true E2E testing in minutes, not months.


