Waldo sessions now support scripting! – Learn more
Testing

How to Get Started Using Detox to Test a React Native App

Paul Oloyede
Paul Oloyede
How to Get Started Using Detox to Test a React Native App
December 20, 2022
19
min read

The emergence of the React Native framework has since been a huge win in building cross-platform mobile applications for iOS, Android, and the web platform from one codebase.

One of the significant highlights of React Native is that it allows for a quick mobile applications development process for a product. While this is good, it's important to note that applications built without testing to reduce bugs in production to keep errors at their barest minimum and prevent mistakes that could easily be avoided will lead to a bad user experience. Proper test coverage of your React Native apps guarantees high-level confidence when your product is in production.

Testing React Native applications is achieved with a number of tools and frameworks that exist in the software development ecosystem. One such tool is Detox. Detox is a cross-platform testing tool for mobile applications built with React Native. According to the documentation, Detox is a gray box end-to-end testing and automation framework for React Native applications.

While testing frameworks such as Appium and Jasmine exist to perform unit tests, component tests, and integration tests, Detox is good for enhancing the developer experience with the ability to implement end-to-end tests for their codebases.

This article will examine the usage of Detox to test React Native applications with the aim to equip developers with the knowledge required to start testing with Detox.

Detox has a set of APIs that you can access within your project to execute end-to-end testing

What Is Detox?

Detox is an open-source automation tool for writing and executing end-to-end tests and is designed to work in the Simulator (for iOS) or Emulator (for Android) when testing your React Native apps.

Among many other testing frameworks, Detox shines well with implementing tests that are important for visualization of the flow of your application, observing behaviors with interaction, and reducing the probability of damaging your app in production.

As an automated end-to-end test framework, the Detox framework can imitate users' interactions, replicate experiences and behaviors similar to a physical device, and verify usability from the user's standpoint. Detox has a set of APIs that you can access within your project to execute end-to-end testing.

Furthermore, Detox was built by the mobile development team at Wix. The test framework was created as a mobile software solution to solve the challenges of writing automated end-to-end tests in mobile applications built with React Native.

Ever since its creation, Detox has seen large adoptions in usage for testing in React Native apps.

Testing With Detox

In the quest to understand how Detox works, we shall be seeing an example application built with React Native.

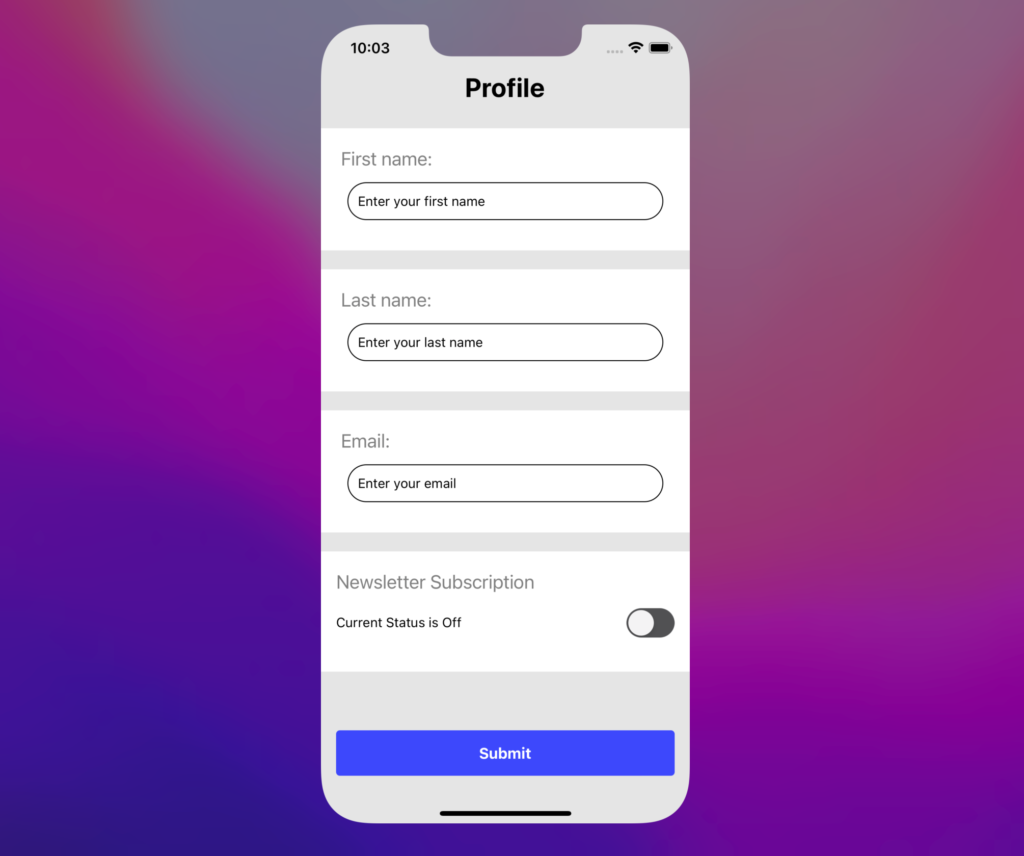
The sample application built in this section displays an array of input fields that take user input, allow users to fill in their personal information, and permit them to click the submit button when done inserting those details. The test suite will ascertain that the application behaves as expected when the user engages with the app.

Global Environment Setup

First, you'll have to set up your environment to follow along with creating the app and writing the test cases.

Afterward, install the following tools on your computer to have Detox work properly:

  • Install applesimutils. Use the command brew tap wix/brew;brew install applesimutils.

Creating A New App

Initialize a React Native app using the terminal, and enter the command npx react-native init rnTestExample:


npx react-native init rnTestExample

                                                   
               ######                ######               
             ###     ####        ####     ###             
            ##          ###    ###          ##            
            ##             ####             ##            
            ##             ####             ##            
            ##           ##    ##           ##            
            ##         ###      ###         ##            
             ##  ########################  ##             
          ######    ###            ###    ######          
      ###     ##    ##              ##    ##     ###      
   ###         ## ###      ####      ### ##         ###   
  ##           ####      ########      ####           ##  
 ##             ###     ##########     ###             ## 
  ##           ####      ########      ####           ##  
   ###         ## ###      ####      ### ##         ###   
      ###     ##    ##              ##    ##     ###      
          ######    ###            ###    ######          
             ##  ########################  ##             
            ##         ###      ###         ##            
            ##           ##    ##           ##            
            ##             ####             ##            
            ##             ####             ##            
            ##          ###    ###          ##            
             ###     ####        ####     ###             
               ######                ######               
                                                          

                  Welcome to React Native!                
                 Learn once, write anywhere               

✔ Downloading template
✔ Copying template
✔ Processing template
✔ Installing Bundler
✔ Installing CocoaPods dependencies (this may take a few minutes)

  
  Run instructions for Android:
    • Have an Android emulator running (quickest way to get started), or a device connected.
    • cd "rnTestExample" && npx react-native run-android
  
  Run instructions for iOS:
    • cd "rnTestExample" && npx react-native run-ios
    - or -
    • Open rnTestExample/ios/rnTestExample.xcworkspace in Xcode or run "xed -b ios"
    • Hit the Run button
    
  Run instructions for macOS:
    • See https://aka.ms/ReactNativeGuideMacOS for the latest up-to-date instructions.

Running the above command will generate a new React Native application with the output immediately after the command. rnTestExample is the project name, so ensure you're able to create it without any errors on the terminal.

Running the Application

To run the app, follow the steps below.

Start the metro bundler using this command:


   yarn start

Then open another tab on your terminal to compile and build for the iOS app:


   yarn ios

You should see an output looking like this:

react native welcome screen

Setting Up Detox

It's important to install some packages as dev dependencies before you're able to compile and build your test suites.

In line with setting up the test suites, the detox-cli should be installed as a global package as specified in the documentation. Here is the command to achieve that:


   yarn global add detox-cli

The next thing is to add Detox as a dependency in your project. In the root of the project on the terminal, write the following command:


 yarn add detox -D && detox init

The yarn add detox -D command would install detox into the React Native project, while detox init would generate the following files:


   Created a file at path: .detoxrc.js
   Created a file at path: e2e/jest.config.js
   Created a file at path: e2e/starter.test.js

If you observe your project tree structure, you'll see the files created in your project folder as specified in the terminal.

Run the command below to bump jest to a higher version in the package.json. This is because jest@27 or higher is required to execute the test suites:


 yarn remove jest && yarn add jest -D

Running the command above would uninstall jest from your project and install a higher version of it

After that, you have to add the following dependency to your project:


   yarn add jest-circus -D

Navigate to the e2e/jest.config.js file in your code editor. Inside, add testRunner: 'jest-circus/runner' to the configuration object like so:


   module.exports = {
      //...truncated for brevity
      
      testRunner: 'jest-circus/runner',
      };

Additionally, inside the .detoxrc.js file, contained in it are the configurations and global variables Detox uses to compile the test suite. Right in your .detoxrc.js file, replace the MY_APP value with the name of your application, rnTestExample. Do this everywhere in the file.


   module.exports = {
      testRunner: {
      args: {
      $0: 'jest',
      config: 'e2e/jest.config.js',
      },
      jest: {
      setupTimeout: 120000,
      },
      },
      apps: {
      'ios.debug': {
      type: 'ios.app',
      binaryPath:
      'ios/build/Build/Products/Debug-iphonesimulator/rnTestExample.app',
      build:
      'xcodebuild -workspace ios/rnTestExample.xcworkspace -scheme rnTestExample -configuration Debug -sdk iphonesimulator -derivedDataPath ios/build',
      },
      'ios.release': {
      type: 'ios.app',
      binaryPath:
      'ios/build/Build/Products/Release-iphonesimulator/rnTestExample.app',
      build:
      'xcodebuild -workspace ios/rnTestExample.xcworkspace -scheme rnTestExample -configuration Release -sdk iphonesimulator -derivedDataPath ios/build',
      },
      //...code truncated for brevity
      };

Building the Demo App

The first step here is to import libraries and packages in the App.js file that are useful for implementing the UI and writing the functionalities for the screen.

Also, App() is updated with the code to enhance usability and interaction within the application. In there, you'll see some variables declared with the aim of keeping track of the activity state in the app.

Next, newsLetterSwitch() and updateProfile() are instantiated to update slide toggle values upon click and to display the success message upon clicking the submit button respectively.

In your App.js, replace the code in there with this:


   import React, {useState} from 'react';
   import {
   View,
   Switch,
   StyleSheet,
   Text,
   StatusBar,
   TextInput,
   Pressable,
   ScrollView,
   } from 'react-native';
   
   
   const App = () => {
   // declare component state variables
   const [isNewsLetter, setIsNewsLetter] =useState(false);
   const [firstName, setFirstName] =useState('Enter your first name');
   const [lastName, setLastName] =useState('Enter your last name');
   const [email, setEmail] =useState('Enter your email');
   const [isProfileUpdated, setIsProfileUpdated] =useState(false);
   
   // Function to update the isNewsLetter variable
   const newsLetterSwitch=()=>
   setIsNewsLetter(previousState=>!previousState);
   
   
   // Function to update the isProfileUpdated variable
   const updateProfile=()=> {
   setIsProfileUpdated(true);
   };
   //...code truncated for brevity
   };
   
   
   export default App;

Paste the code inside the App() block, immediately after the updateProfile():


   return (
      <ScrollView style={styles.container}>
        <StatusBar barStyle="dark-content" />
        <View style={styles.header}>
          <Text testID="profile" style={styles.headerText}>
            Profile
          </Text>
        </View>
  
        <View style={styles.itemContainer}>
          <Text style={styles.label}>First name:</Text>
          <TextInput
            testID={'inputFirstName'}
            style={styles.input}
            onChangeText={setFirstName}
            value={firstName}
          />
        </View>
  
        <View style={styles.itemContainer}>
          <Text style={styles.label}>Last name:</Text>
          <TextInput
            testID={'inputLastName'}
            style={styles.input}
            onChangeText={setLastName}
            value={lastName}
          />
        </View>
  
        <View style={styles.itemContainer}>
          <Text style={styles.label}>Email:</Text>
          <TextInput
            testID={'inputEmail'}
            style={styles.input}
            onChangeText={setEmail}
            value={email}
          />
        </View>
  
        <View style={styles.itemContainer}>
          <Text style={styles.optionText}>Newsletter Subscription</Text>
          <View style={styles.subOptionContainer}>
            <Text>Current Status is {isNewsLetter ? 'On' : 'Off'}</Text>
            <Switch
              trackColor={{false: '#767577', true: '#81b0ff'}}
              thumbColor={isNewsLetter ? '#f5dd4b' : '#f4f3f4'}
              ios_backgroundColor="#3e3e3e"
              onValueChange={newsLetterSwitch}
              value={isNewsLetter}
              testID="isNewsLetterSwitch"
            />
          </View>
        </View>
  
        {isProfileUpdated && (
          <View style={styles.message}>
            <Text>Profile Updated Successfully</Text>
          </View>
        )}
  
        <View style={styles.btnContainer}>
          <Pressable
            onPress={updateProfile}
            style={styles.pressable}
            testID={'submitButton'}>
            <View style={styles.btnTextWrapper}>
              <Text style={styles.btnText}>Submit</Text>
            </View>
          </Pressable>
        </View>
      </ScrollView>
    );

Noticeably, the Text, TextInput, Switch, and Pressable elements receive the testID props as a parameter.

You can access elements via the testID props in your test suites.

Next is to style the app by using the StyleSheet API; therefore, paste the code below in App():


   const styles = StyleSheet.create({
      container: {
        flex: 1,
        backgroundColor: '#E5E5E5',
      },
      header: {
        paddingTop: 50,
        justifyContent: 'center',
        alignItems: 'center',
        marginBottom: 16,
      },
    
      headerText: {
        fontSize: 28,
        fontWeight: 'bold',
      },
    
      optionText: {
        fontSize: 20,
        color: 'gray',
      },
      itemContainer: {
        justifyContent: 'space-between',
        paddingHorizontal: 16,
        paddingVertical: 20,
        backgroundColor: '#FFFFFF',
        marginVertical: 10,
      },
      subOptionContainer: {
        alignItems: 'center',
        flexDirection: 'row',
        justifyContent: 'space-between',
        paddingVertical: 16,
        backgroundColor: '#FFFFFF',
      },
      input: {
        height: 40,
        margin: 12,
        borderWidth: 1,
        borderRadius: 50,
        padding: 10,
      },
      label: {
        fontSize: 20,
        marginBottom: 1,
        marginLeft: 5,
        color: 'gray',
      },
      message: {justifyContent: 'center', alignItems: 'center'},
      btnContainer: {
        justifyContent: 'center',
        marginTop: 52,
        paddingHorizontal: 16,
      },
      pressable: {
        borderWidth: 0,
        flexDirection: 'row',
        alignItems: 'center',
        justifyContent: 'center',
        borderRadius: 4,
        width: '100%',
        height: 48,
        backgroundColor: '#3C48FC',
      },
      btnTextWrapper: {justifyContent: 'center', alignItems: 'center'},
      btnText: {
        fontWeight: 'bold',
        fontSize: 16,
        lineHeight: 24,
        color: 'white',
      },
    });    

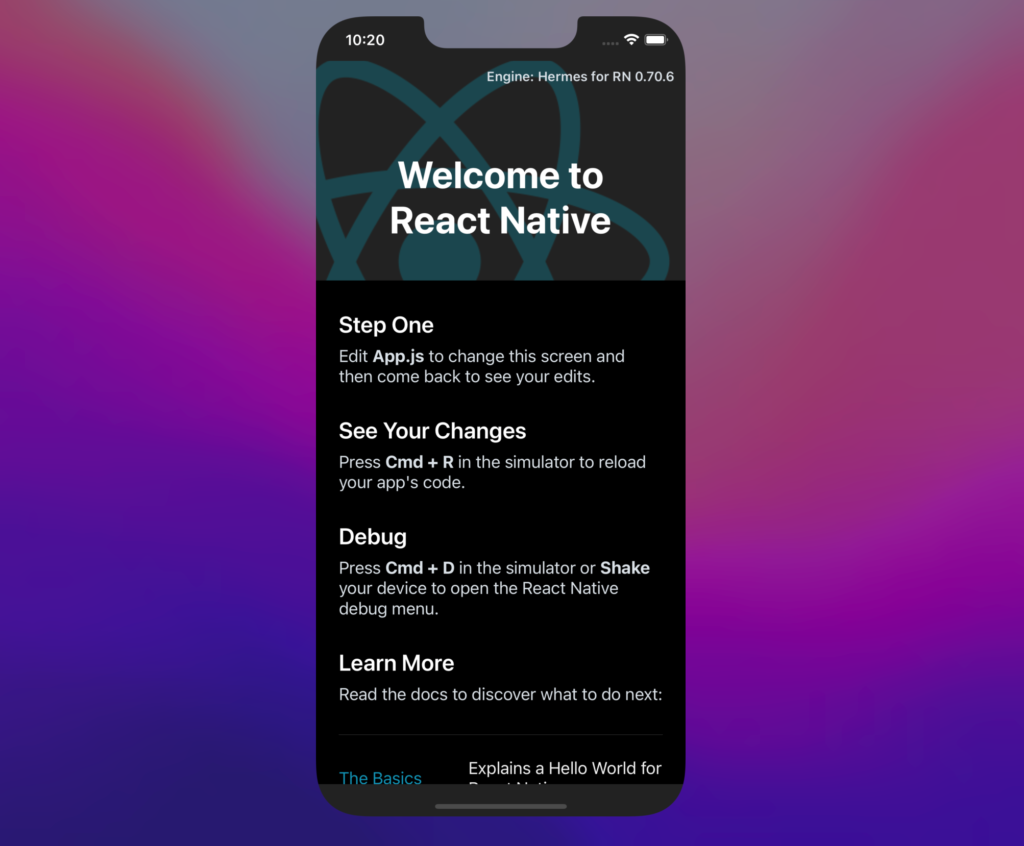
Next, start your application, and this is what the screen looks like:

profile screen

Writing Test Suites

In this section, you'll write test cases to cover interacting with applications.

The test suites will cover the following scenarios:

  • ensure the user can interact with the input fields
  • ensure the user can click on the newsletter toggle slider
  • ensure the user can click on the submit button when done filling out the form
  • check for flakiness and flaws in the application

To begin, proceed to e2e/starter.test.js to write the test suites.

Inside e2e/starter.test.js, replace the code with the below:


   describe('Profile', () => {
      beforeAll(async()=> {
      await device.launchApp();
      });
      
      it('should have welcome screen', async()=> {
      await expect(element(by.id('profile'))).toBeVisible();
      });
      
      it('should type in the first name in the input box', async()=> {
      await element(by.id('inputFirstName')).clearText();
      await element(by.id('inputFirstName')).typeText('Paul');
      });
      
      it('should type in the last name in the input box', async()=> {
      await element(by.id('inputLastName')).clearText();
      await element(by.id('inputLastName')).typeText('Waldos');
      });
      
      it('should type in the email in the input box', async()=> {
      await element(by.id('inputEmail')).clearText();
      await element(by.id('inputEmail')).typeText('devuser@waldos.com');
      });
      
      it('toggle the newsletter switch', async()=> {
      await element(by.id('isNewsLetterSwitch')).tap();
      });
      
      it('should click the submit button', async()=> {
      await element(by.id('submitButton')).tap();
      });
      });        

Running the Detox Suites

Firstly, you have to build the app using detox like this:


   detox build --configuration ios.sim.debug

After that, enter the command below:


   detox test --configuration ios.sim.debug

Basically, the detox build --configuration ios.sim.debug command will build the app for debug mode, while the detox test --configuration ios.sim.debug command will instruct the React Native compiler to execute the test cases via the iOS Simulator.

This article has covered the steps to writing and executing Detox test suites in a mobile application

Summing Up

You want to make sure you don't deploy apps with bugs into production that could give a bad user experience, irrespective of the timeline set for delivery. Be the first to encounter errors and bugs that could deter the app from having a flawless user experience.

Moreover, it's very important to perform automated end-to-end test scenarios to affirm that the app behaves as expected in production.

This article has covered the steps to writing and executing Detox test suites in a mobile application. Also, you were introduced to what Detox is all about and how it works with the aid of a sample application.

The act of performing an automated test for your React Native application can be made simple and void of ambiguous setup with the offerings from Waldo.

Waldo has exceptional testing capabilities with a great addition to enhancing usability and detecting flakiness in your mobile application. Take a look at using Waldo for your automated end-to-end test in your React Native application. You can also start a free trial to have a look at how to perform your automated end-to-end testing on the platform.

Automated E2E tests for your mobile app

Waldo provides the best-in-class runtime for all your mobile testing needs.
Get true E2E testing in minutes, not months.

Reproduce, capture, and share bugs fast!

Waldo Sessions helps mobile teams reproduce bugs, while compiling detailed bug reports in real time.