


Appium Doctor is a very useful tool from Appium. It’s a command line tool that helps solve a lot of issues with Appium. Let’s learn about the uses of Appium Doctor in the next section. You’ll also learn to install and use it in a Windows and in a Mac system.
The post expects you to have basic knowledge of Appium. If you don’t, you can learn from our post titled Appium Architecture, Explained.
What Are Some Uses of Appium Doctor
Now, as the name suggests, Appium Doctor is a doctor for Appium. It’s is actually a command line tool that helps detect problems that might arise when running Appium. You can install it before or after you install the Appium Server GUI tool. We described the steps to install the Appium Server GUI in our earlier post titled Automated Testing with Appium and Python: A How-To Guide.
Appium requires a connected physical device, an Android emulator, or an iPhone simulator. In addition, you must have the Java, Android Studio, or XCode tool installed, depending on your device. All these tools requires a lot of setup which can sometimes confuse users.
Appium Doctor checks for all the required and optional components needed to run it properly. Next, let’s look at the Appium Doctor installation and usage for both Windows and Mac.
.png)
Command Not Found
Before starting with Appium Doctor, you need to give the below command from your Windows or Mac terminal to find out whether it’s installed on your system.
If Appium doctor is not available, you get the error “Command not found.” Follow the steps in the next part to install it for Windows or Mac.

Appium Doctor Installation for Windows OS
You’ll first learn to install Appium Doctor on a Windows machine. The Appium Doctor is an open-source command line tool, available as an npm (Node Package Manager) package. You can find it here.
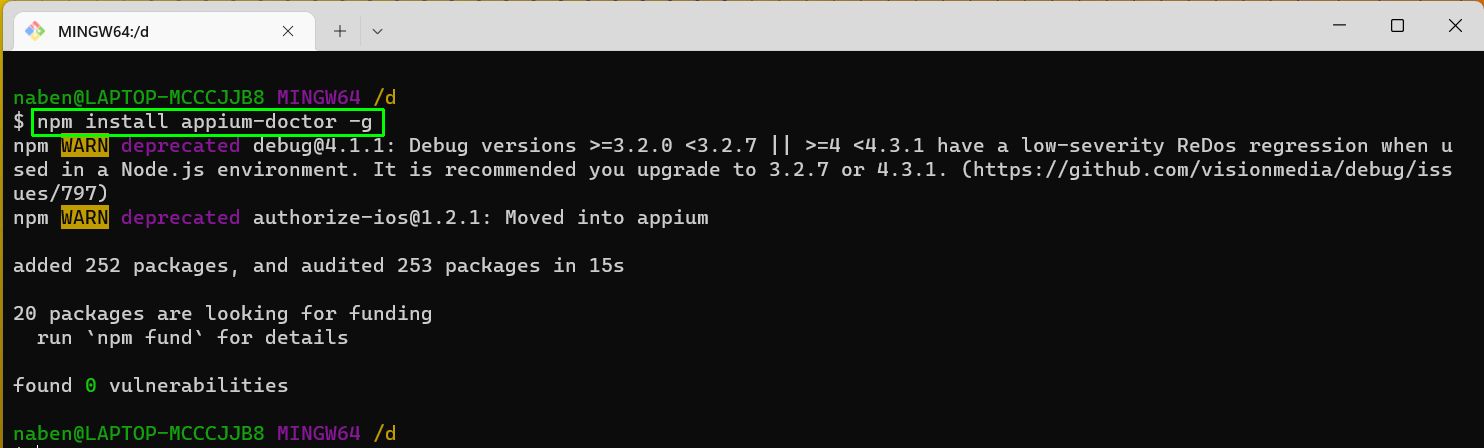
Open a command line or Windows terminal and run the below command. Note that Node and npm also needed to be installed on the system. If you don’t have Node installed, please install it from this link. It will automatically installs npm as well.
The -g flag at the end indicates that this package is installed globally and you don't have to install it individually in each project. This flag is important in our case, because it means you can run Appium doctor from anywhere.
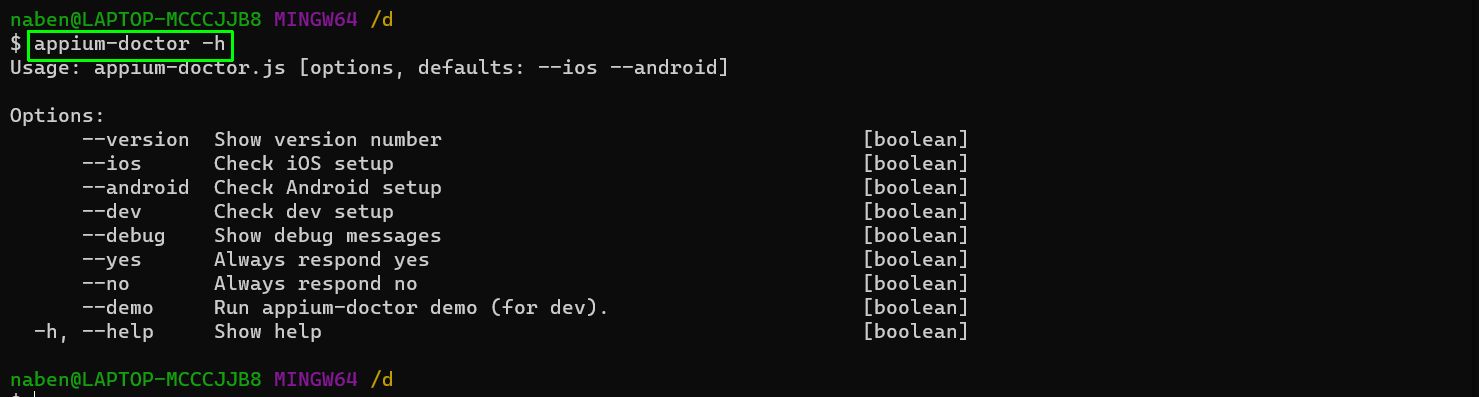
After the installation, run the below command to see the different options in Appium Doctor.
How to Run Appium Doctor in Windows
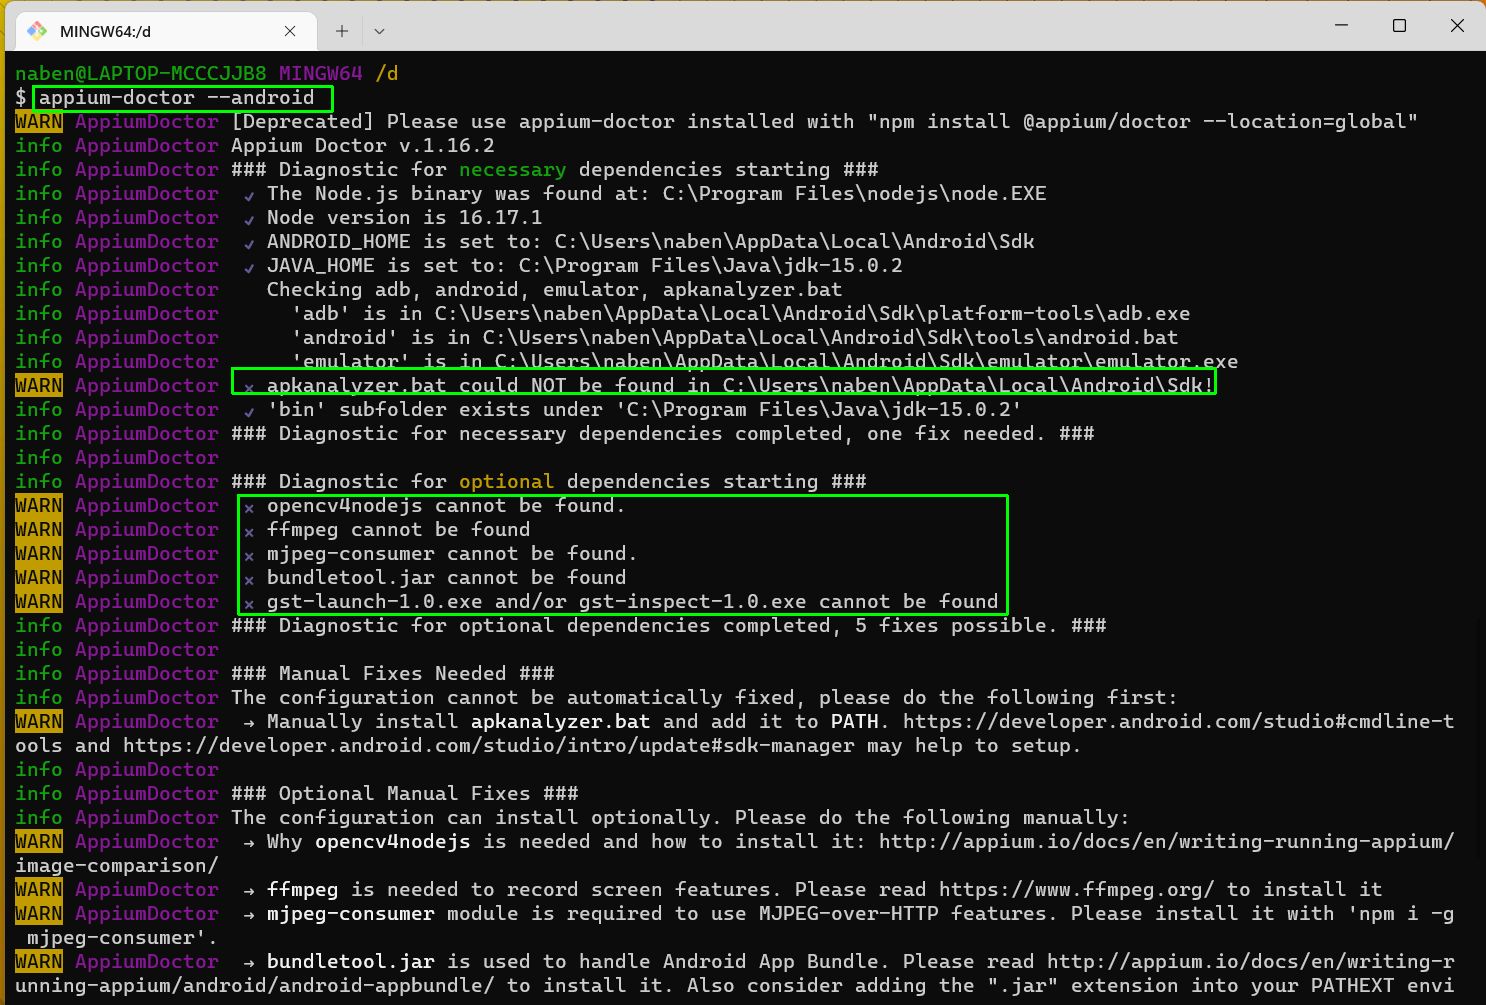
Since a Windows operating system runs Android apps but not Apple apps, we can run the Appium Doctor command for Android only. To run an iOS app, you need the XCode editor, which in turn requires Mac OS.
In the Windows terminal, give the below command.
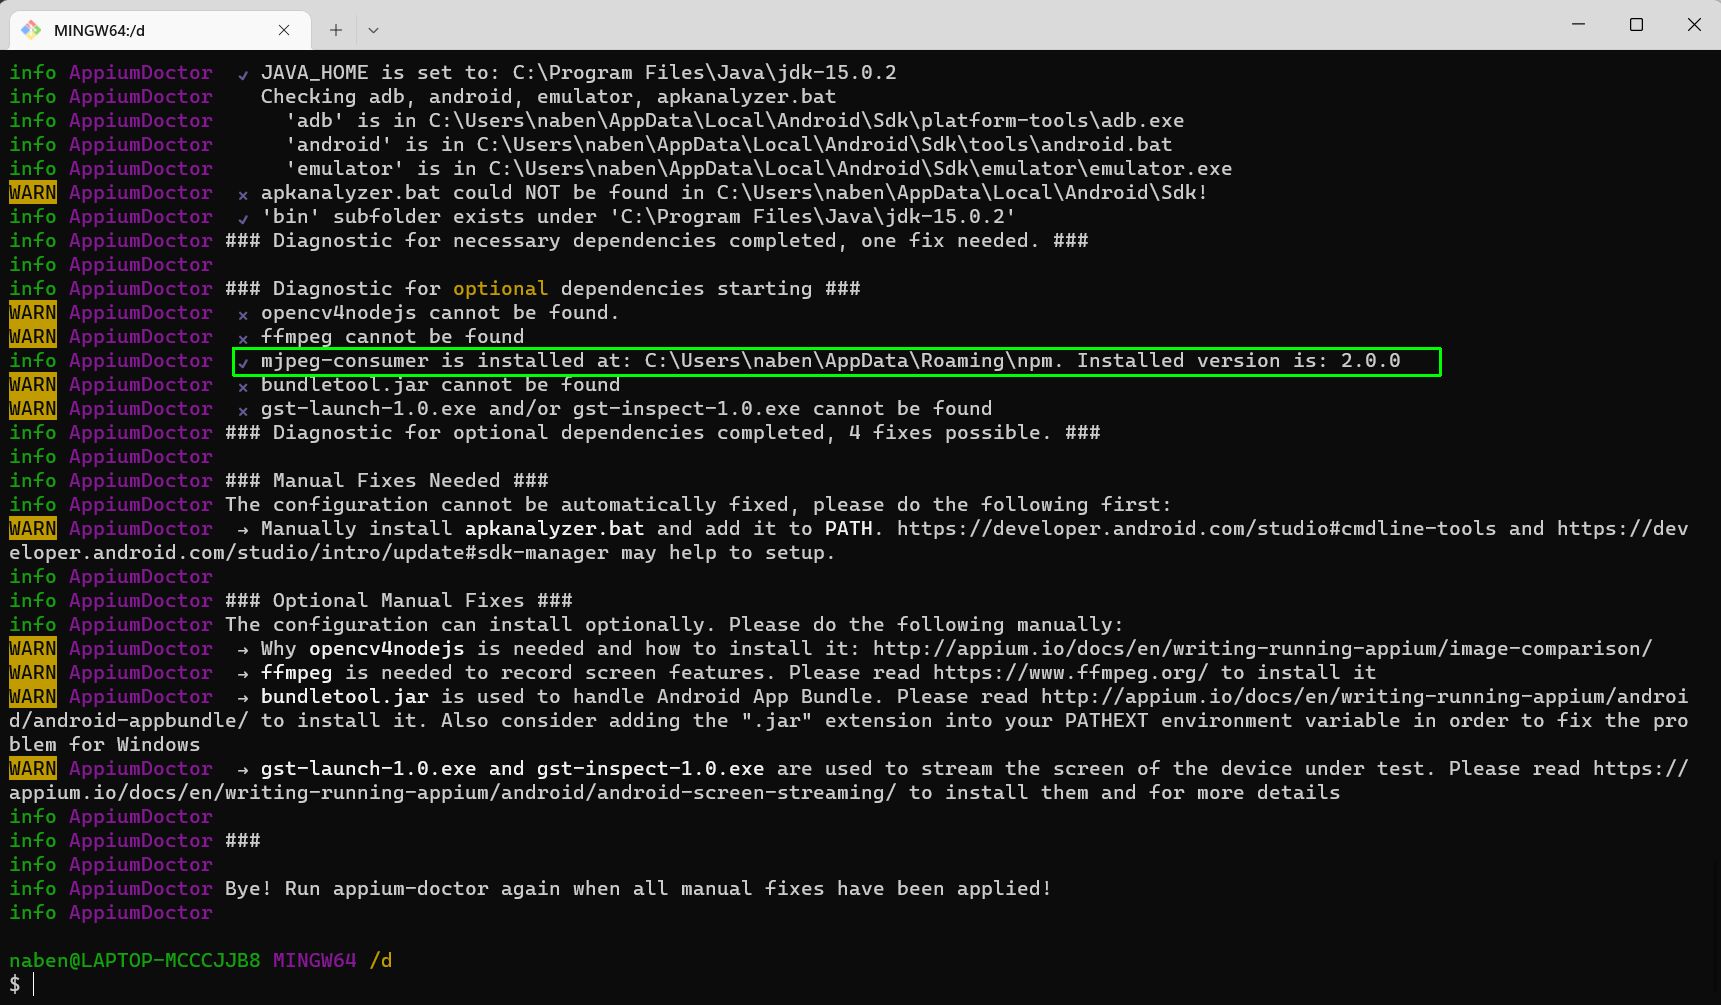
Here, we can see quite descriptive output, that showing us all the tests for necessary and optional dependencies. We have some dependencies missing, shown with a cross (x).
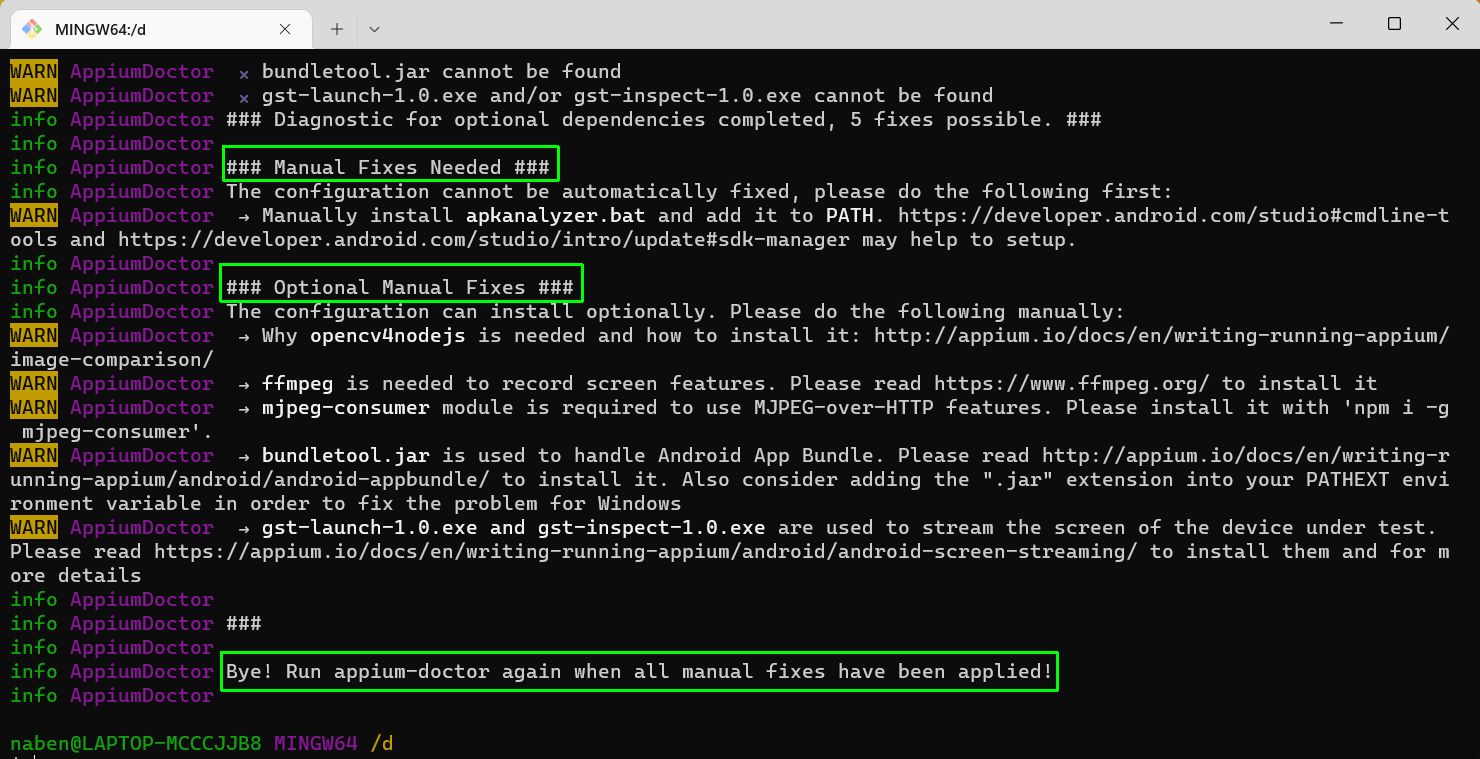
On scrolling a bit down, you’ll find the document references to fix the errors.
Fixing Errors in Windows
After referring to the doc, install an mjpeg-consumer package globally.

Now again, open the terminal and give this command.
Here, we can see the mjpeg-consumer package gives no errors and shows a "correct" tick, indicating that the mjpeg-consumer package was found and working properly.
Appium Doctor Installation for Mac OS
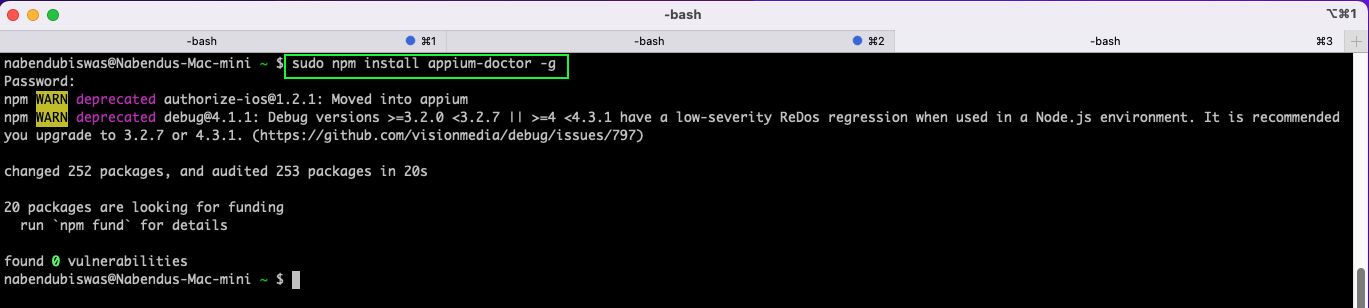
On a Mac machine, you also need to install the Appium Doctor globally using the npm. But on Mac we need to give sudo before the npm command for global installation.
This command will ask us for a password. Here, you have to give your Mac root password. You also need Node and npm installed on the system. If Node is not installed, please install it from this link.
How to Run Appium Doctor on Mac for iOS Apps
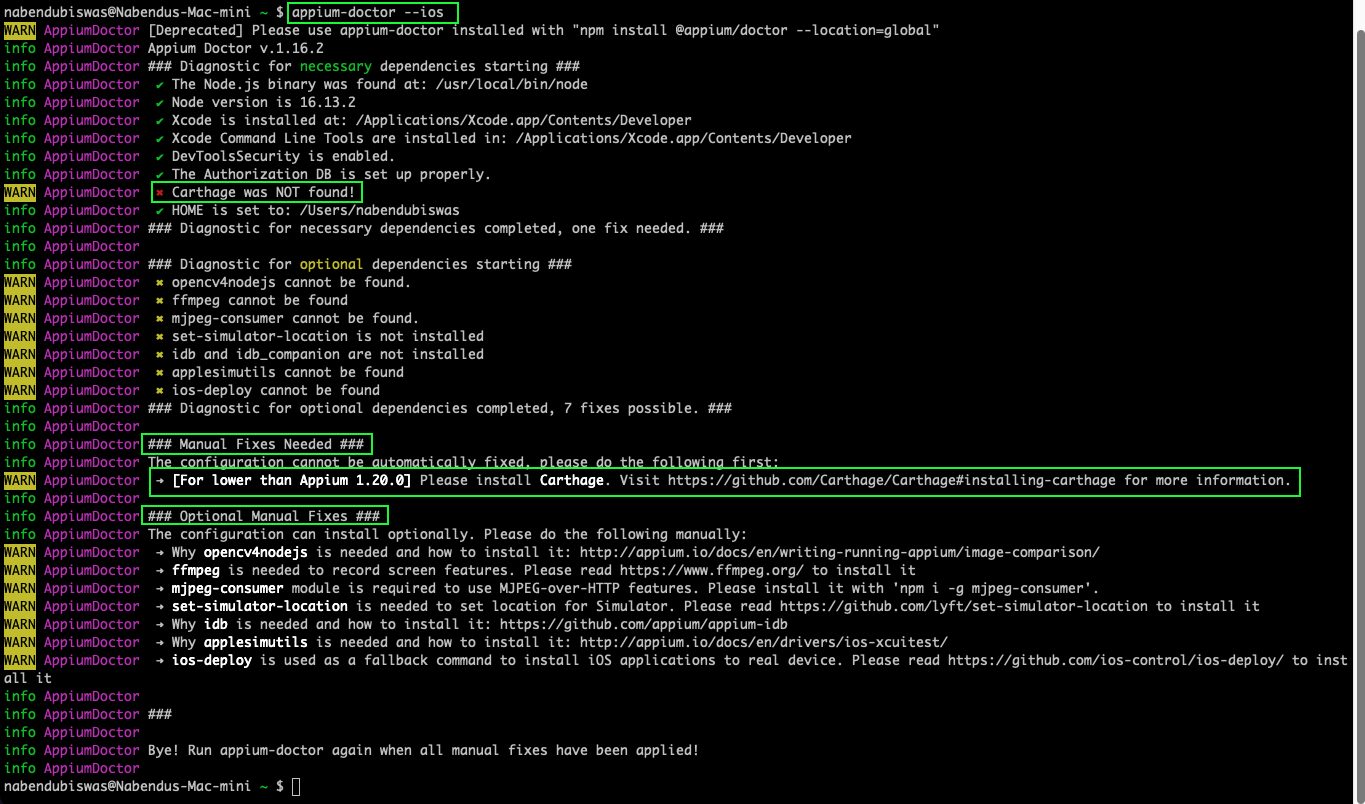
Since Mac OS can run both Android and IOS apps, we’ll look into both of them. First, run the below command to check if all settings to run iOS apps are correct.
In the output you can see that one necessary and some optional dependencies are not set. Further down, you’ll see the docs to fix all issues.
Fixing Errors on Mac for iOS Apps
On opening the doc, you see different ways to install the missing tool carthage. You’ll use the Homebrew option for this. Homebrew is the package management system on Mac, through which you can easily install any package.

See below for the command to update Homebrew, as recommended in the above document. This is required because most users generally don't update homebrew frequently.
brew update
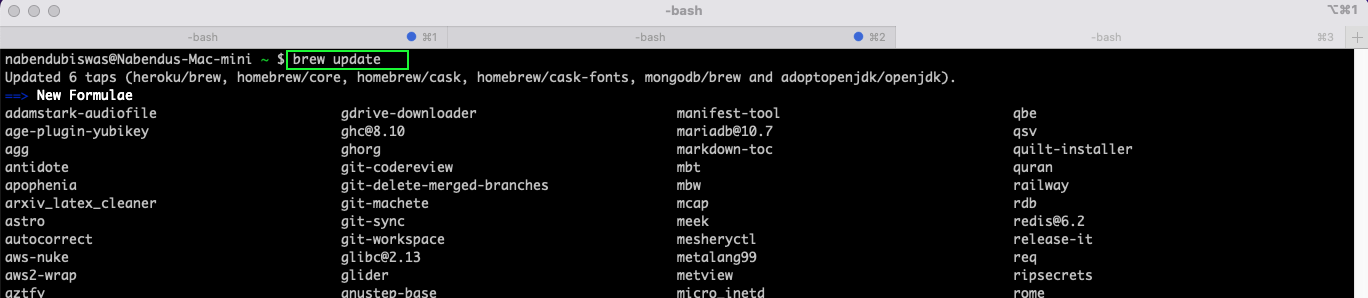
On scrolling down a bit, you’ll see that a lot of packages are not upgraded, so it asks you to run brew upgrade command, which updates all the packages.

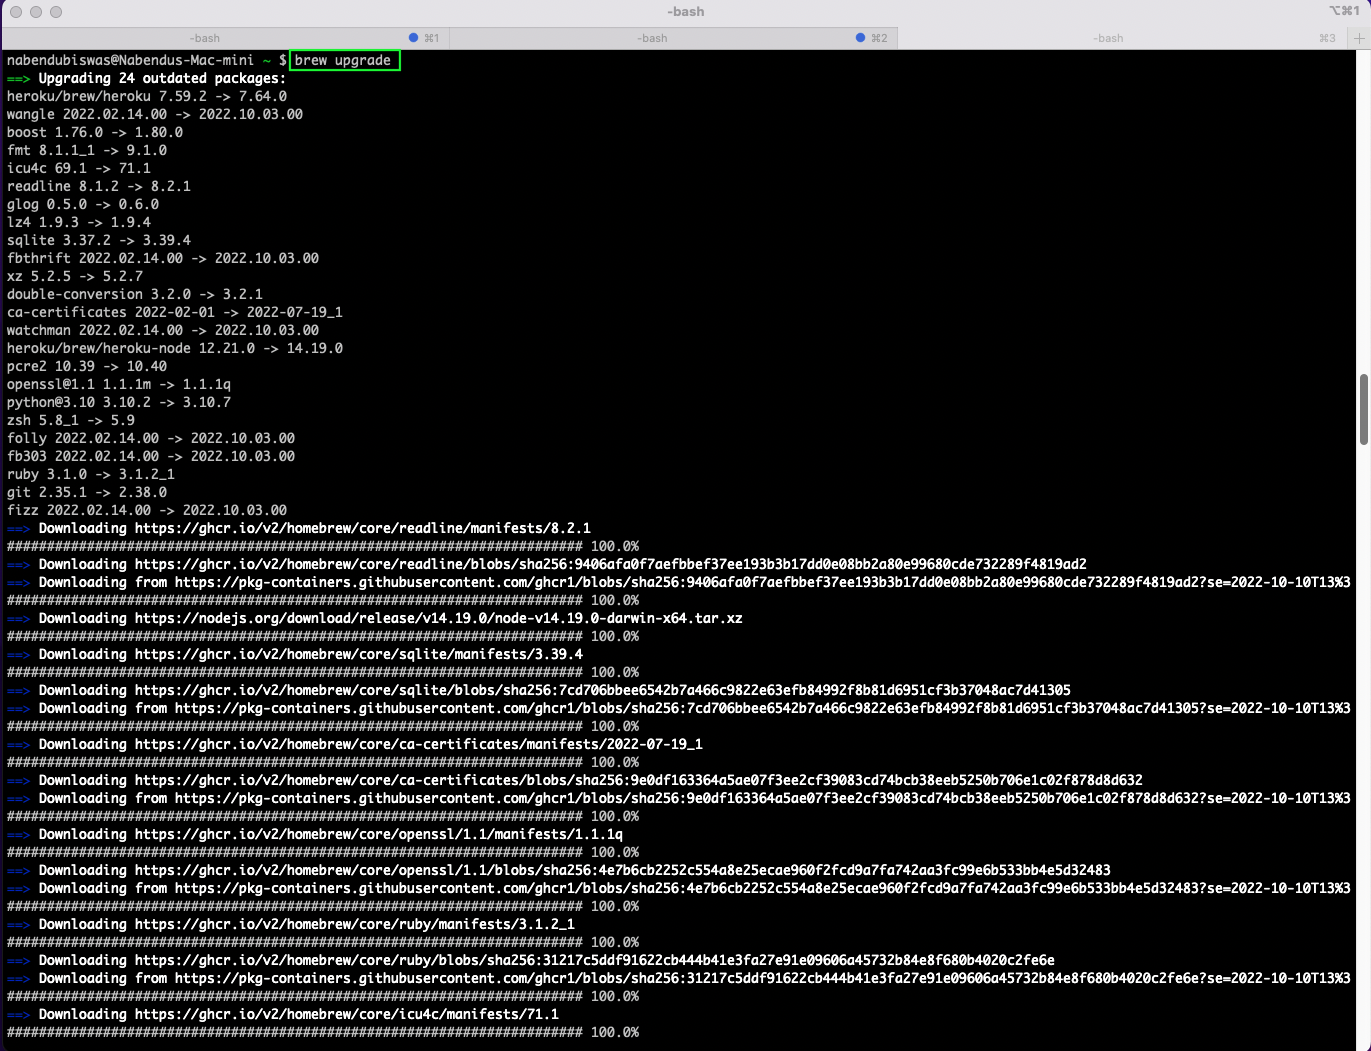
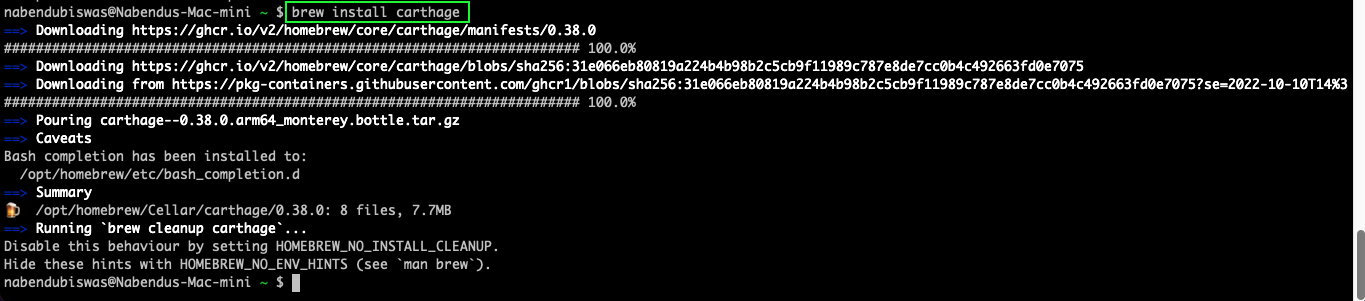
After that, you can finally install carthage with the command brew install carthage.
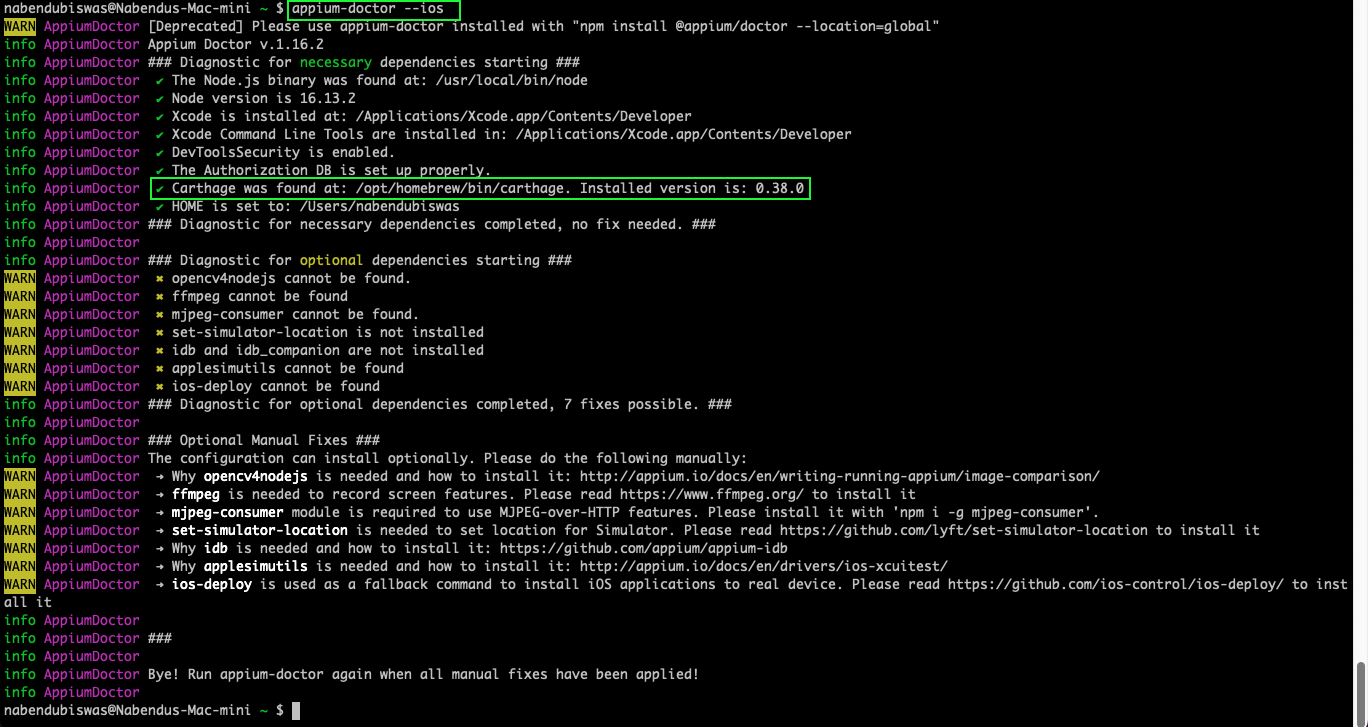
Now, running the appium-doctor --ios command will show the package carthage if it’s installed.
How to Run Appium Doctor on Mac for Android Apps
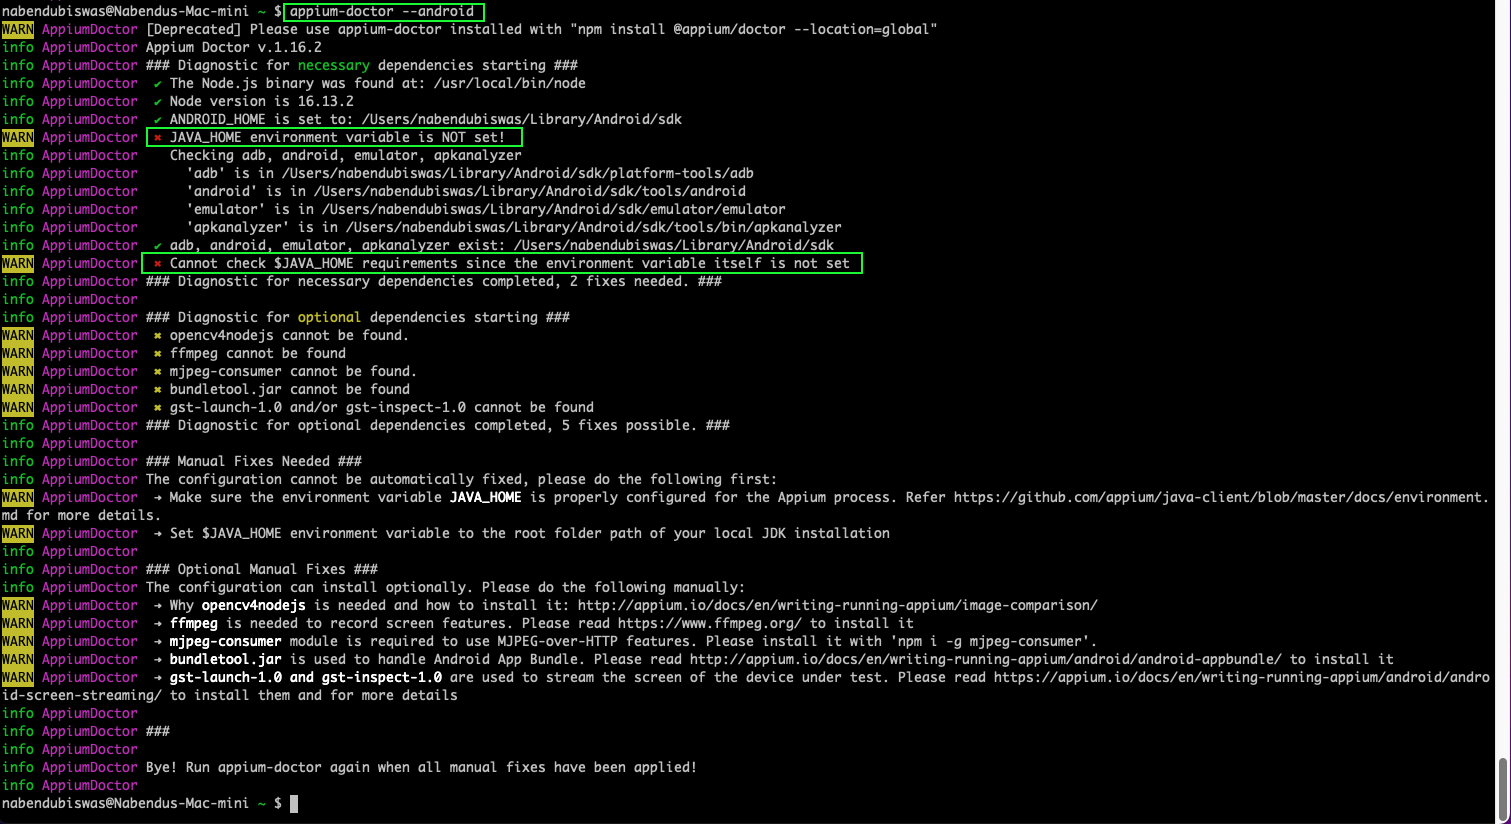
Now, run the below command to check if all settings to run Android app are correct.
In the output you can see that two necessary and some optional dependencies are not set. Further down, you’ll see the docs to fix all issues.
Fixing Errors on Mac for Android Apps
The main error is that JAVA_HOME is not set. On opening the doc, you see that you need to first know which shell you’re using. The command to find out the shell is echo $SHELL. On finding out the shell is bash, check its content with the command cat $HOME/.bash_profile. You’ll find that the JAVA_HOME deceleration is not there.

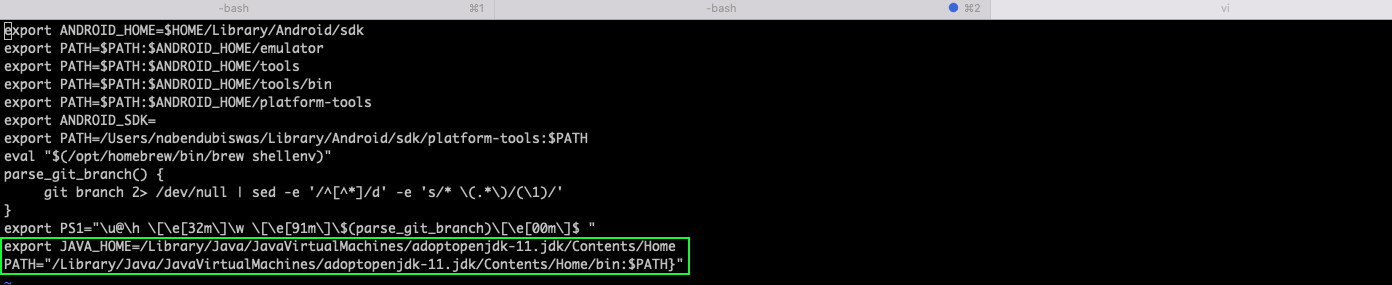
To set that environment variable, open the file .bash_profile using the below command.
After that, add the path to JAVA_HOME to the file.
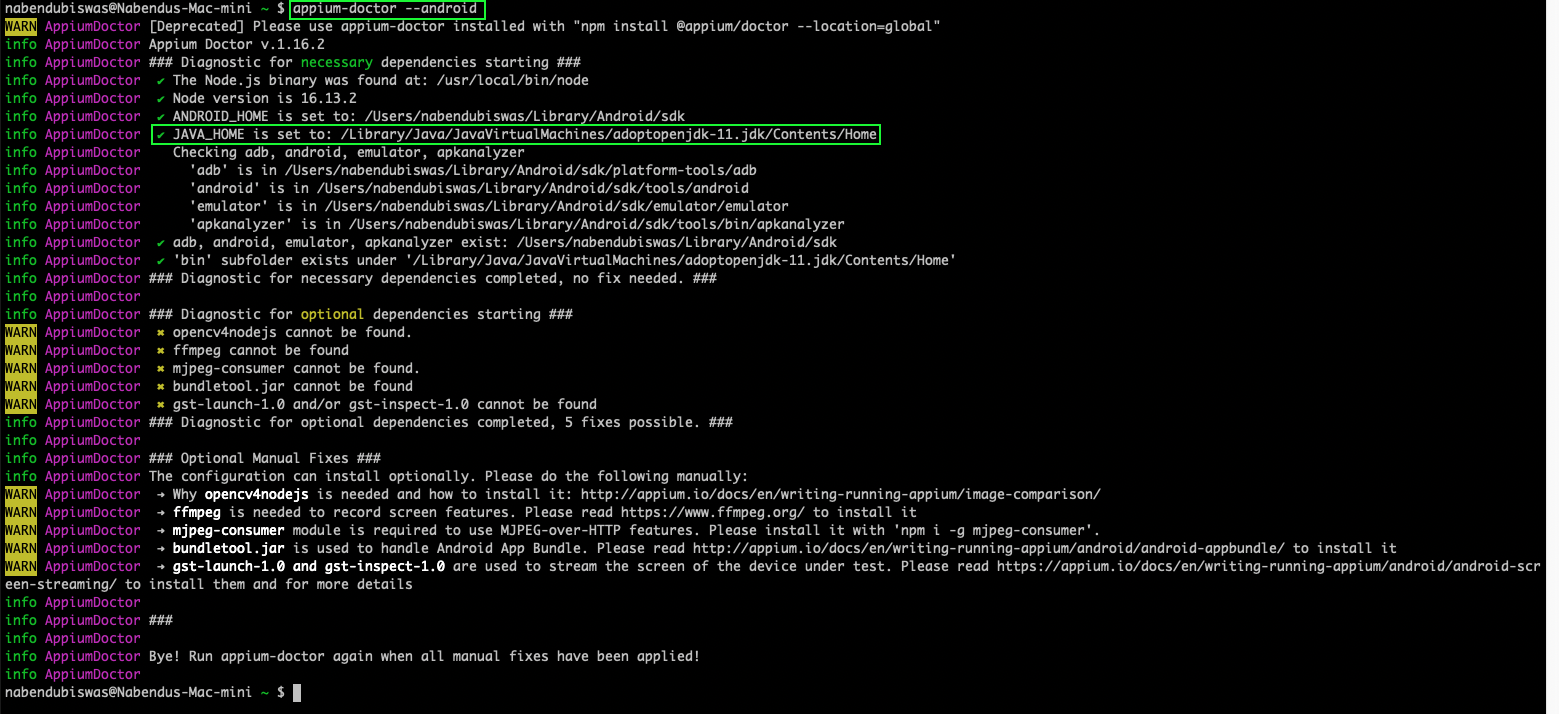
Now, run the appium-doctor --android command again. You’ll find that the JAVA_HOME is now set.
Conclusion
In this post, you've learned about Appium Doctor. First you learned the uses of Appium Doctor. Then you learned to install Appium Doctor for Windows, including running and fixing errors. You also learned to install Appium Doctor for Mac, including running and fixing the errors.
After installing Appium successfully, you can use it to test mobile apps. In our earlier post titled How to Test React Native Apps With Appium you learned how to test React apps.
But you can test your apps more easily with Waldo and avoid going through the hassle of installing and configuring all of this.
Automated E2E tests for your mobile app
Get true E2E testing in minutes, not months.


