


In SwiftUI, navigation is handled by the NavigationView, which is the foundational controller for your application. This is one of the most important components of all SwiftUI apps.
In this article, we'll explore the SwiftUI NavigationView by creating a practical example in Xcode.
We'll briefly discuss navigation in SwiftUI and understand the NavigationView in detail. We'll then give you some practical code examples, implementing the SwiftUI NavigationView on an iOS project with Xcode. Additionally, we'll provide you with some of the best practices regarding implementing a NavigationView on your projects.
So fire up Xcode, and let's get into it.
Navigation in SwiftUI
We've come a long way from Objective-C's .xib files and storyboards. If you were an Apple developer back in the day, navigation was one of your constant sources of pain and confusion.
Creating a robust and reliable navigation experience for your users was a significant headache. It didn't help that the team at Cupertino was not very clear with their vision of the ideal navigation workflow.
Thankfully, with the introduction of SwiftUI in 2019, it became much clearer that a better future was ahead.
No longer were iOS developers the pariahs of comprehensive UI workflows. Instead, they were brought to the forefront.
The SwiftUI NavigationView
As mentioned above, NavigationView is one of the most critical components of SwiftUI development. It allows for seamless navigation by quickly pushing and popping screens, delivering information in a straightforward, hierarchical way.
A NavigationView is a component for presenting a stack of views or other components, and it handles the navigation between these elements. If you come from UIKit, its equivalent would be the UINavigationController.
Navigation in the modern iOS development world refers to the navigation flow between screens in a stack-based manner, where a screen is pushed to what is known as the "navigation stack" and popped out when leaving it. In simple terms, it's a stack of screens that displays only the screen at the top. And much like any other stack, pushing and popping is the way to move.
Alright, enough theory. Let's see it in action.
.png)
Implementing a SwiftUI NavigationView
If you haven't already, create a new iOS app project and name it whatever you want.
Once inside your new application, check out the default structure that greets you.
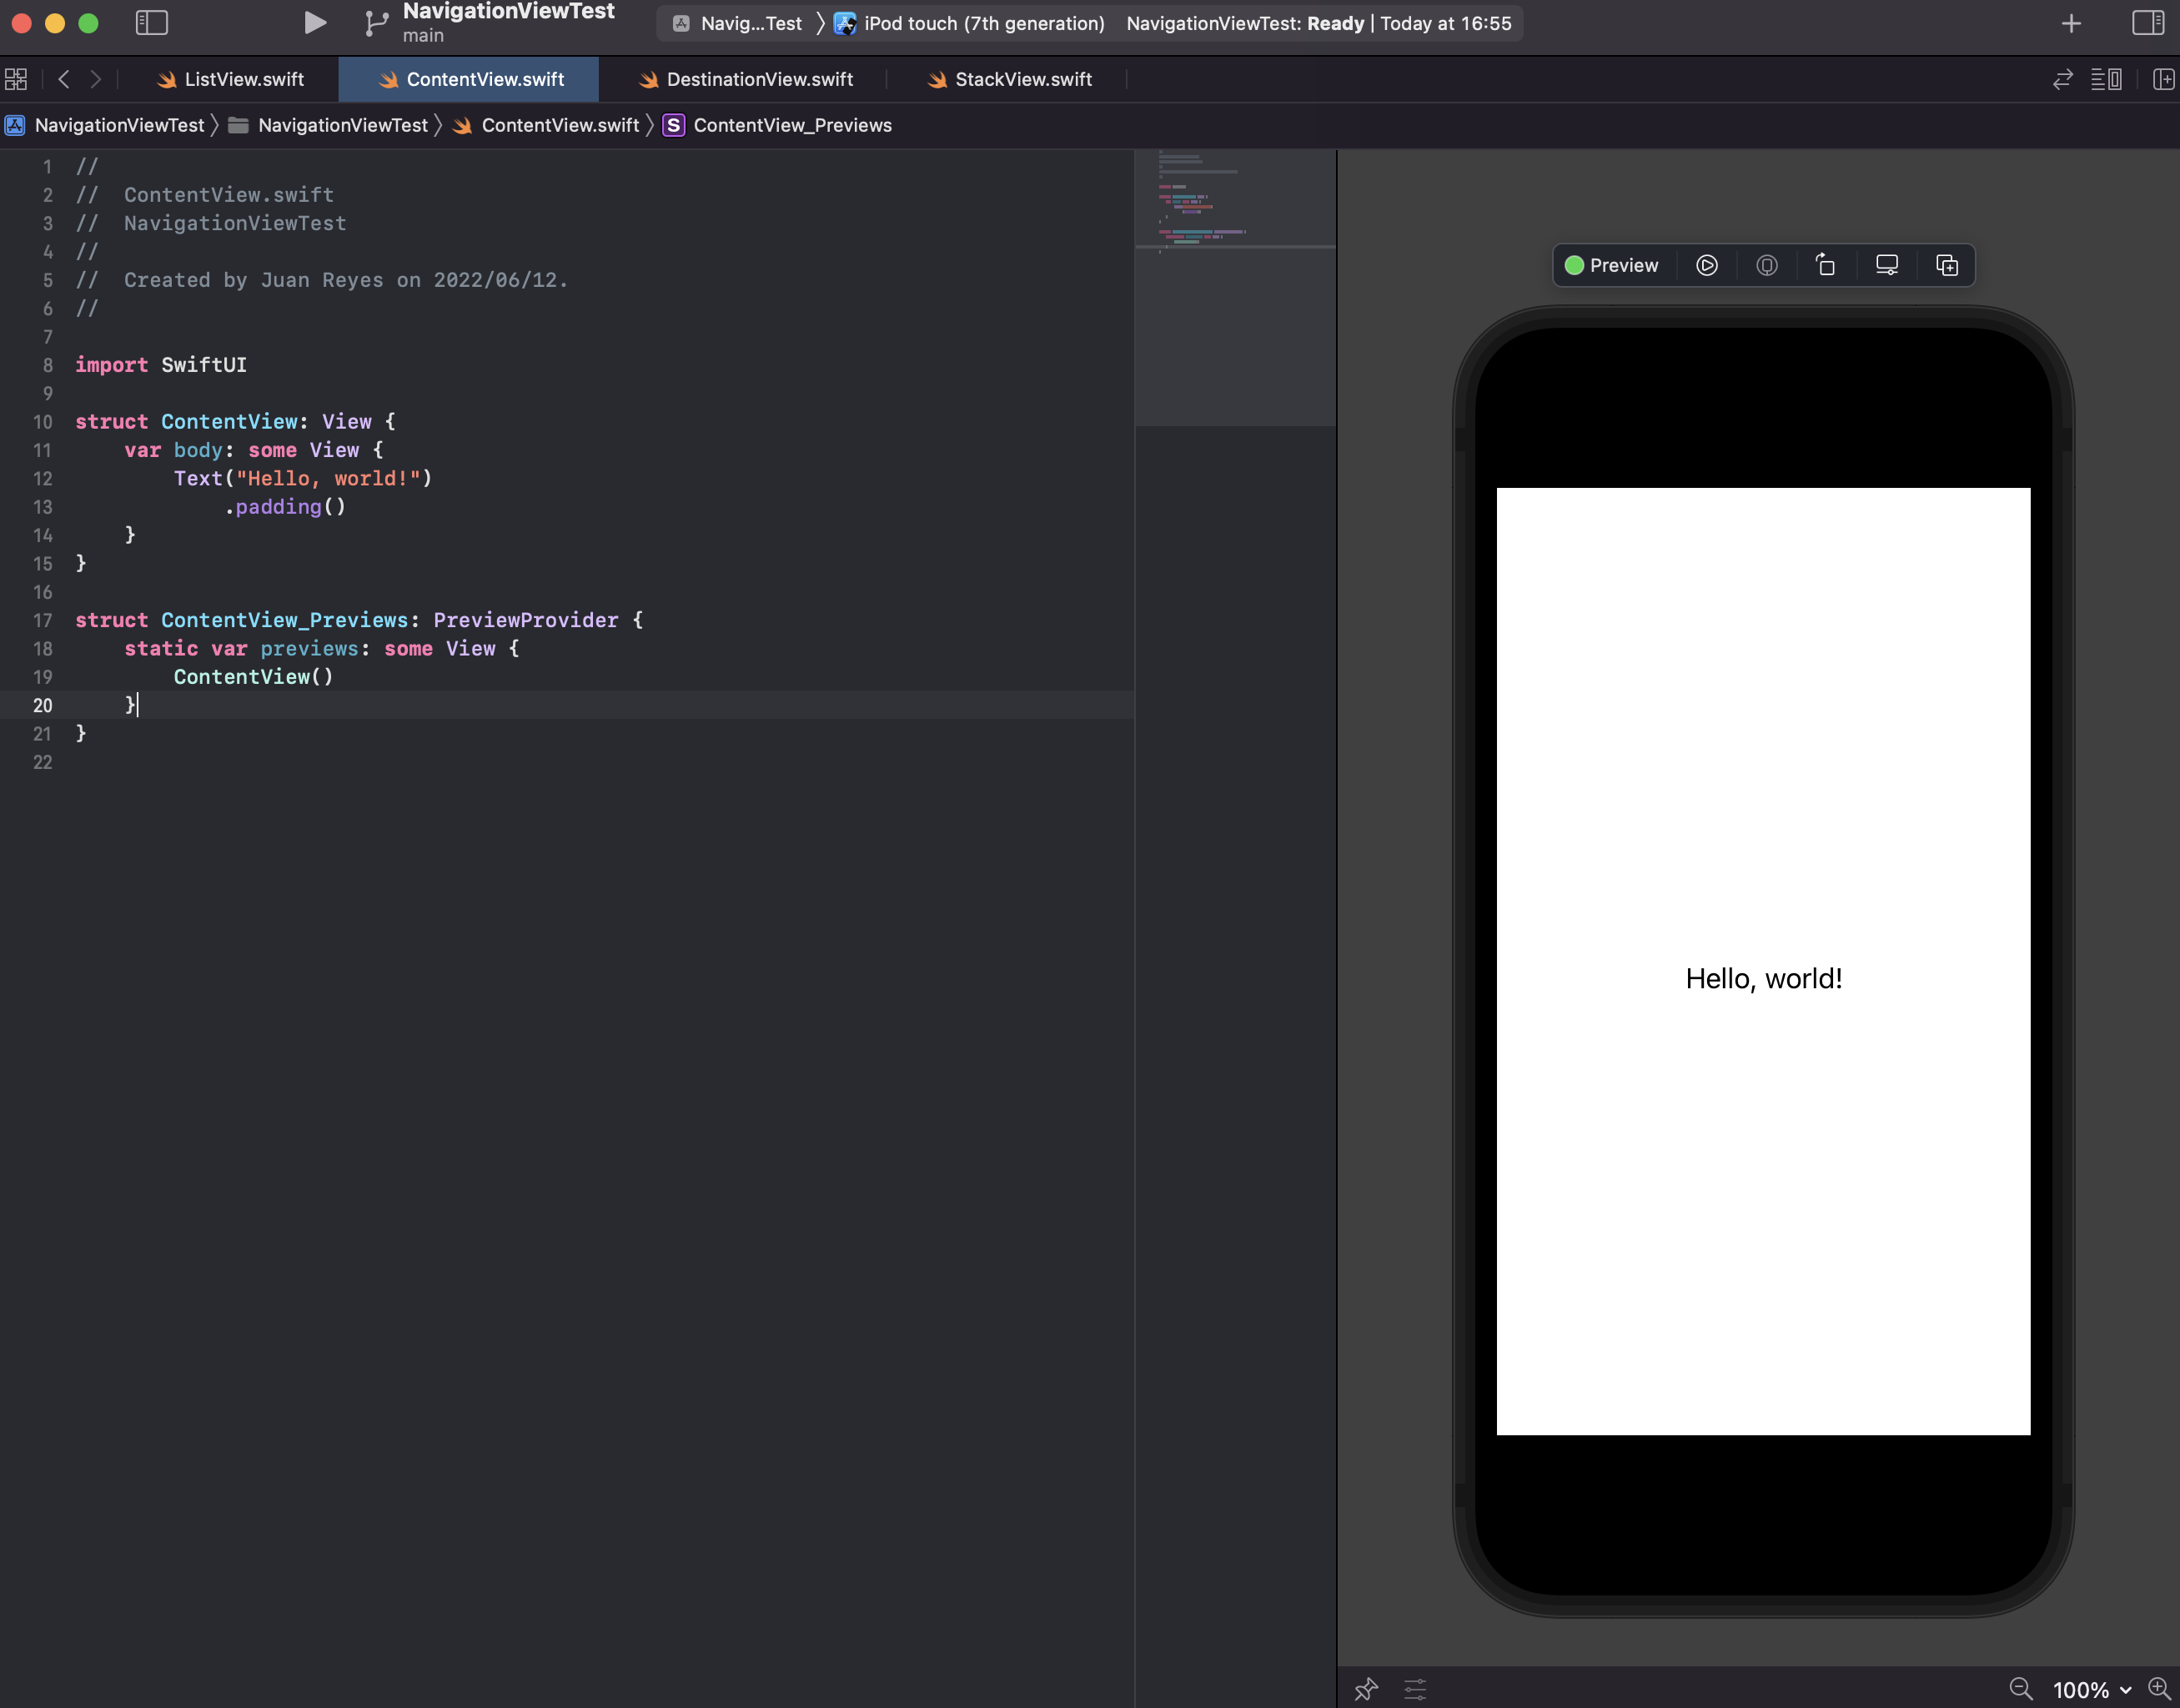
Let's add a List and some Text elements to make it more like a basic app layout.

Now, we can add a NavigationView right into the body structure and see that, well, it doesn't do much.
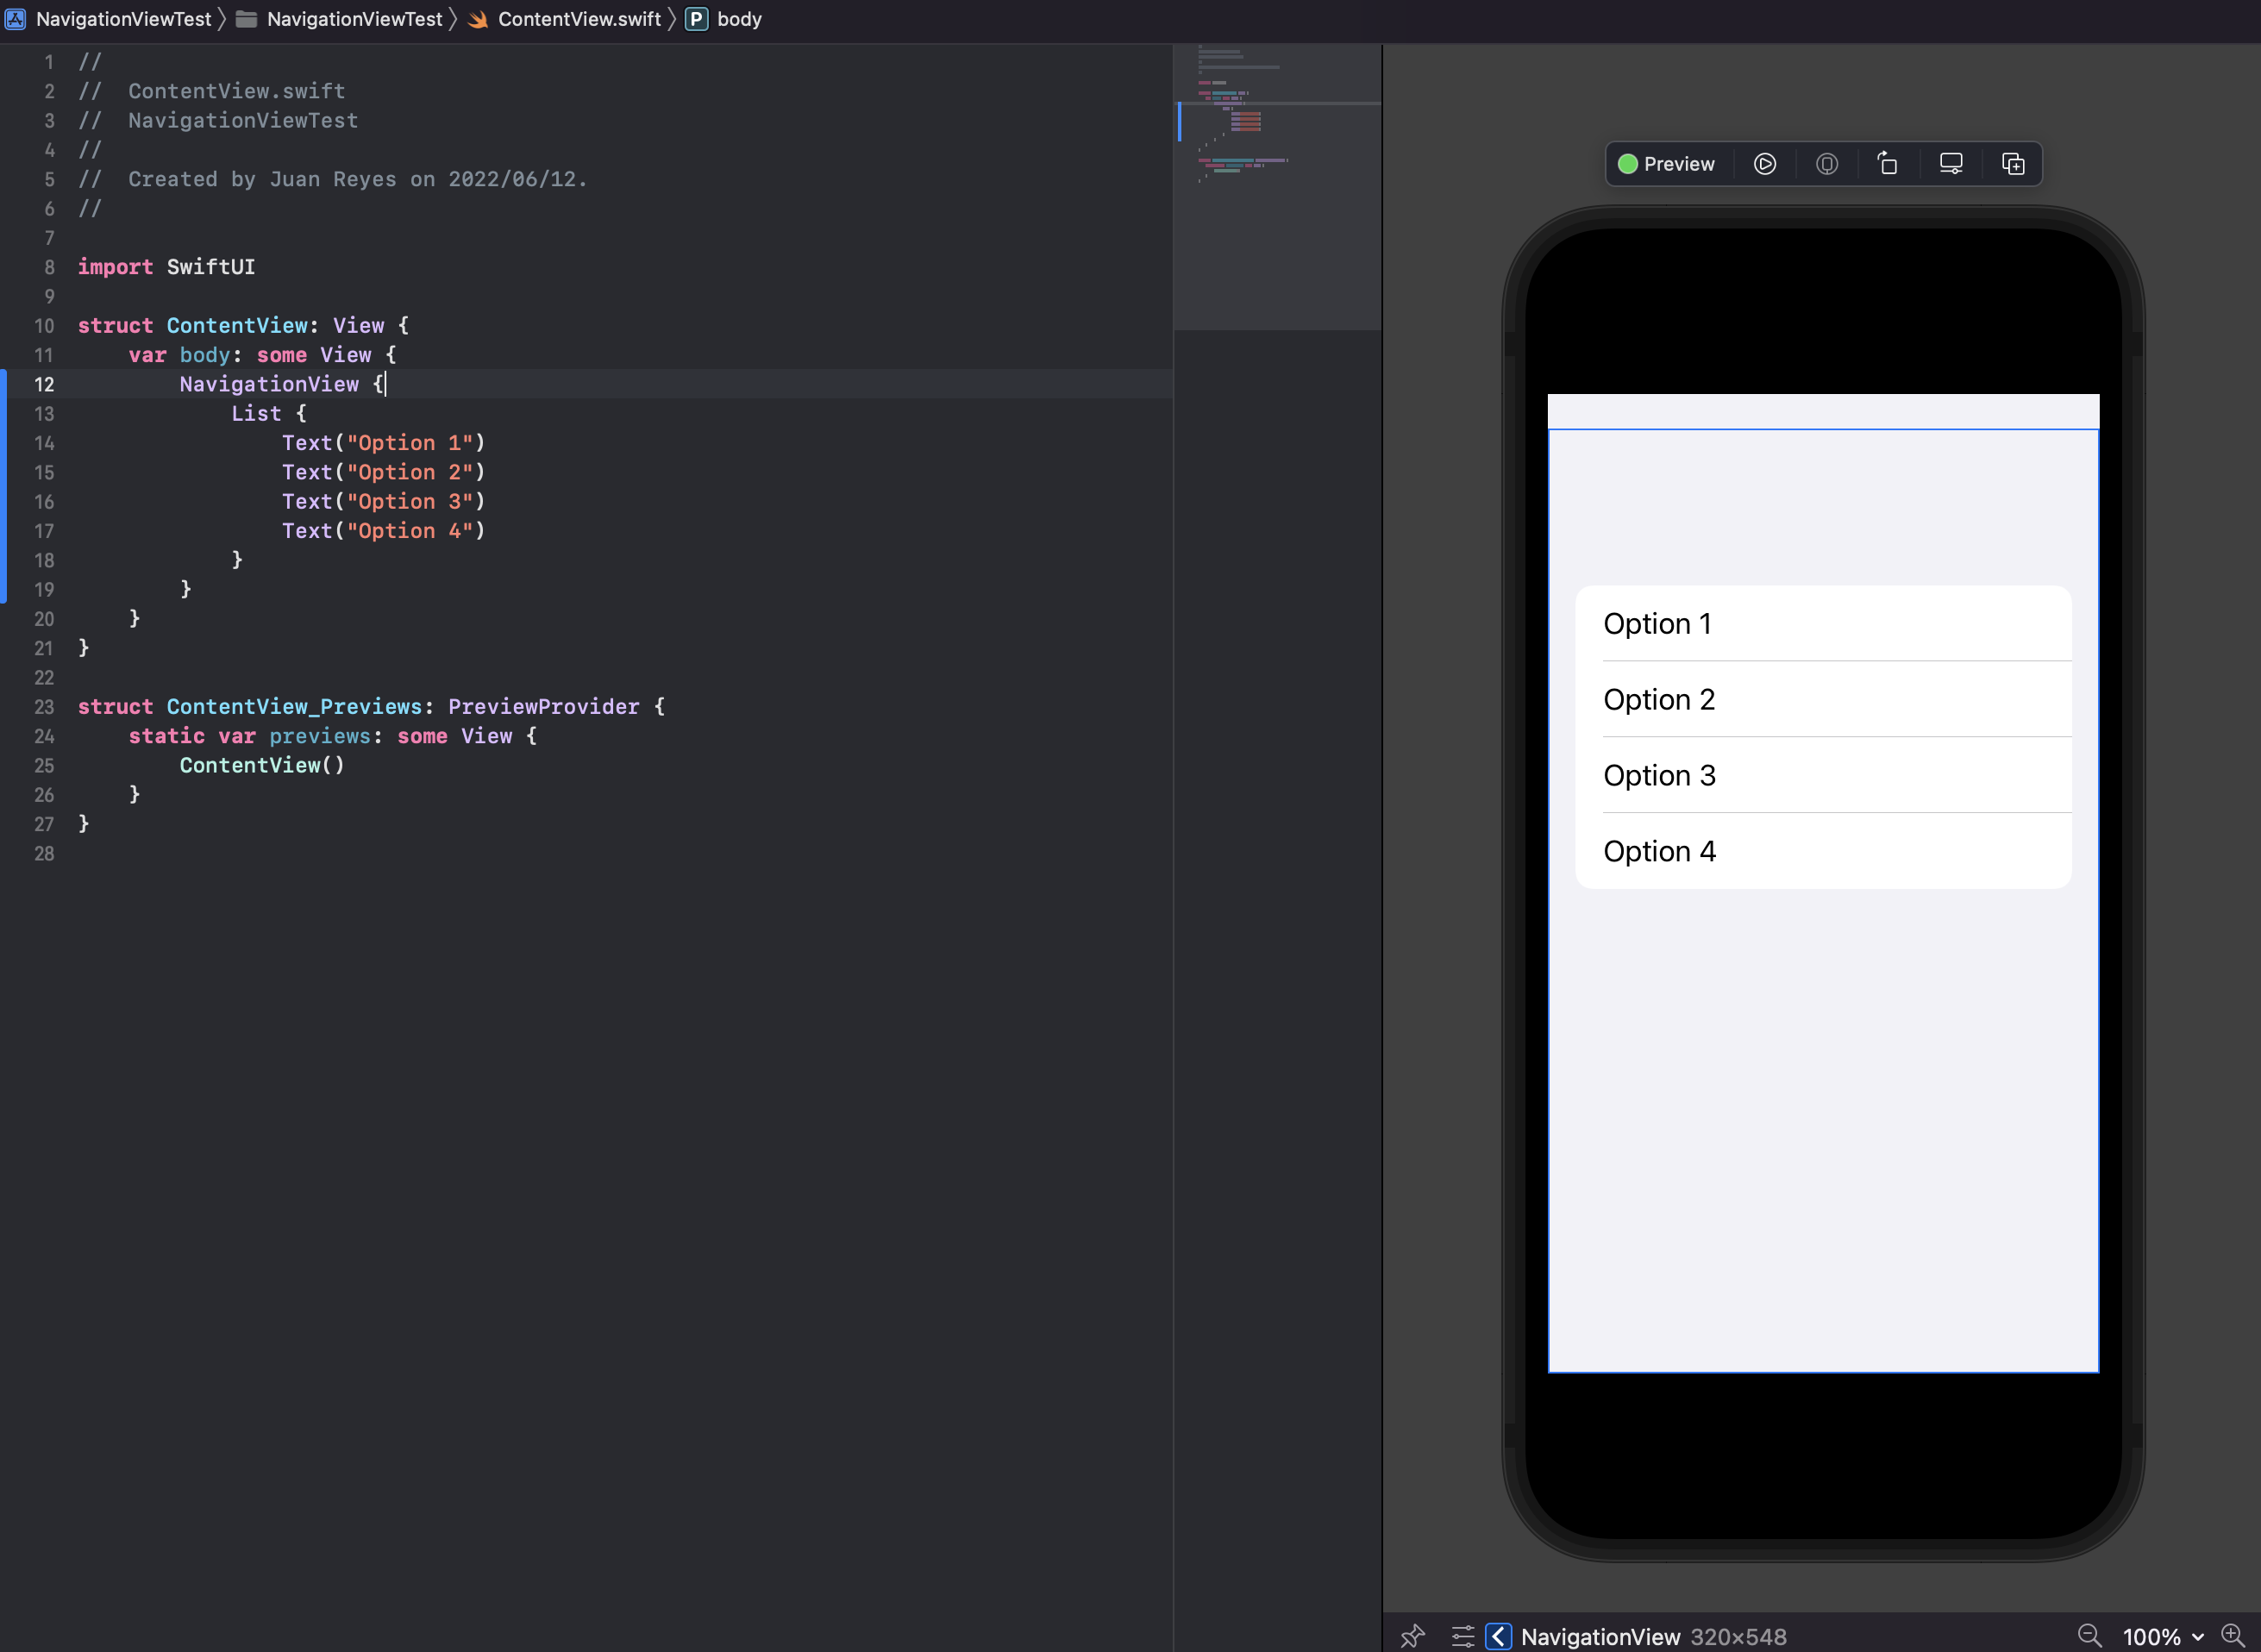
It seems like it just made the content smaller. But in reality, it's doing a lot more behind the scenes.
This NavigationView creates a stack mechanism and puts the current view at its bottom. All you have to do now is indicate the possible navigation threats and their destinations. We'll do that in a minute, but for now, let's make it look more like an actual app.
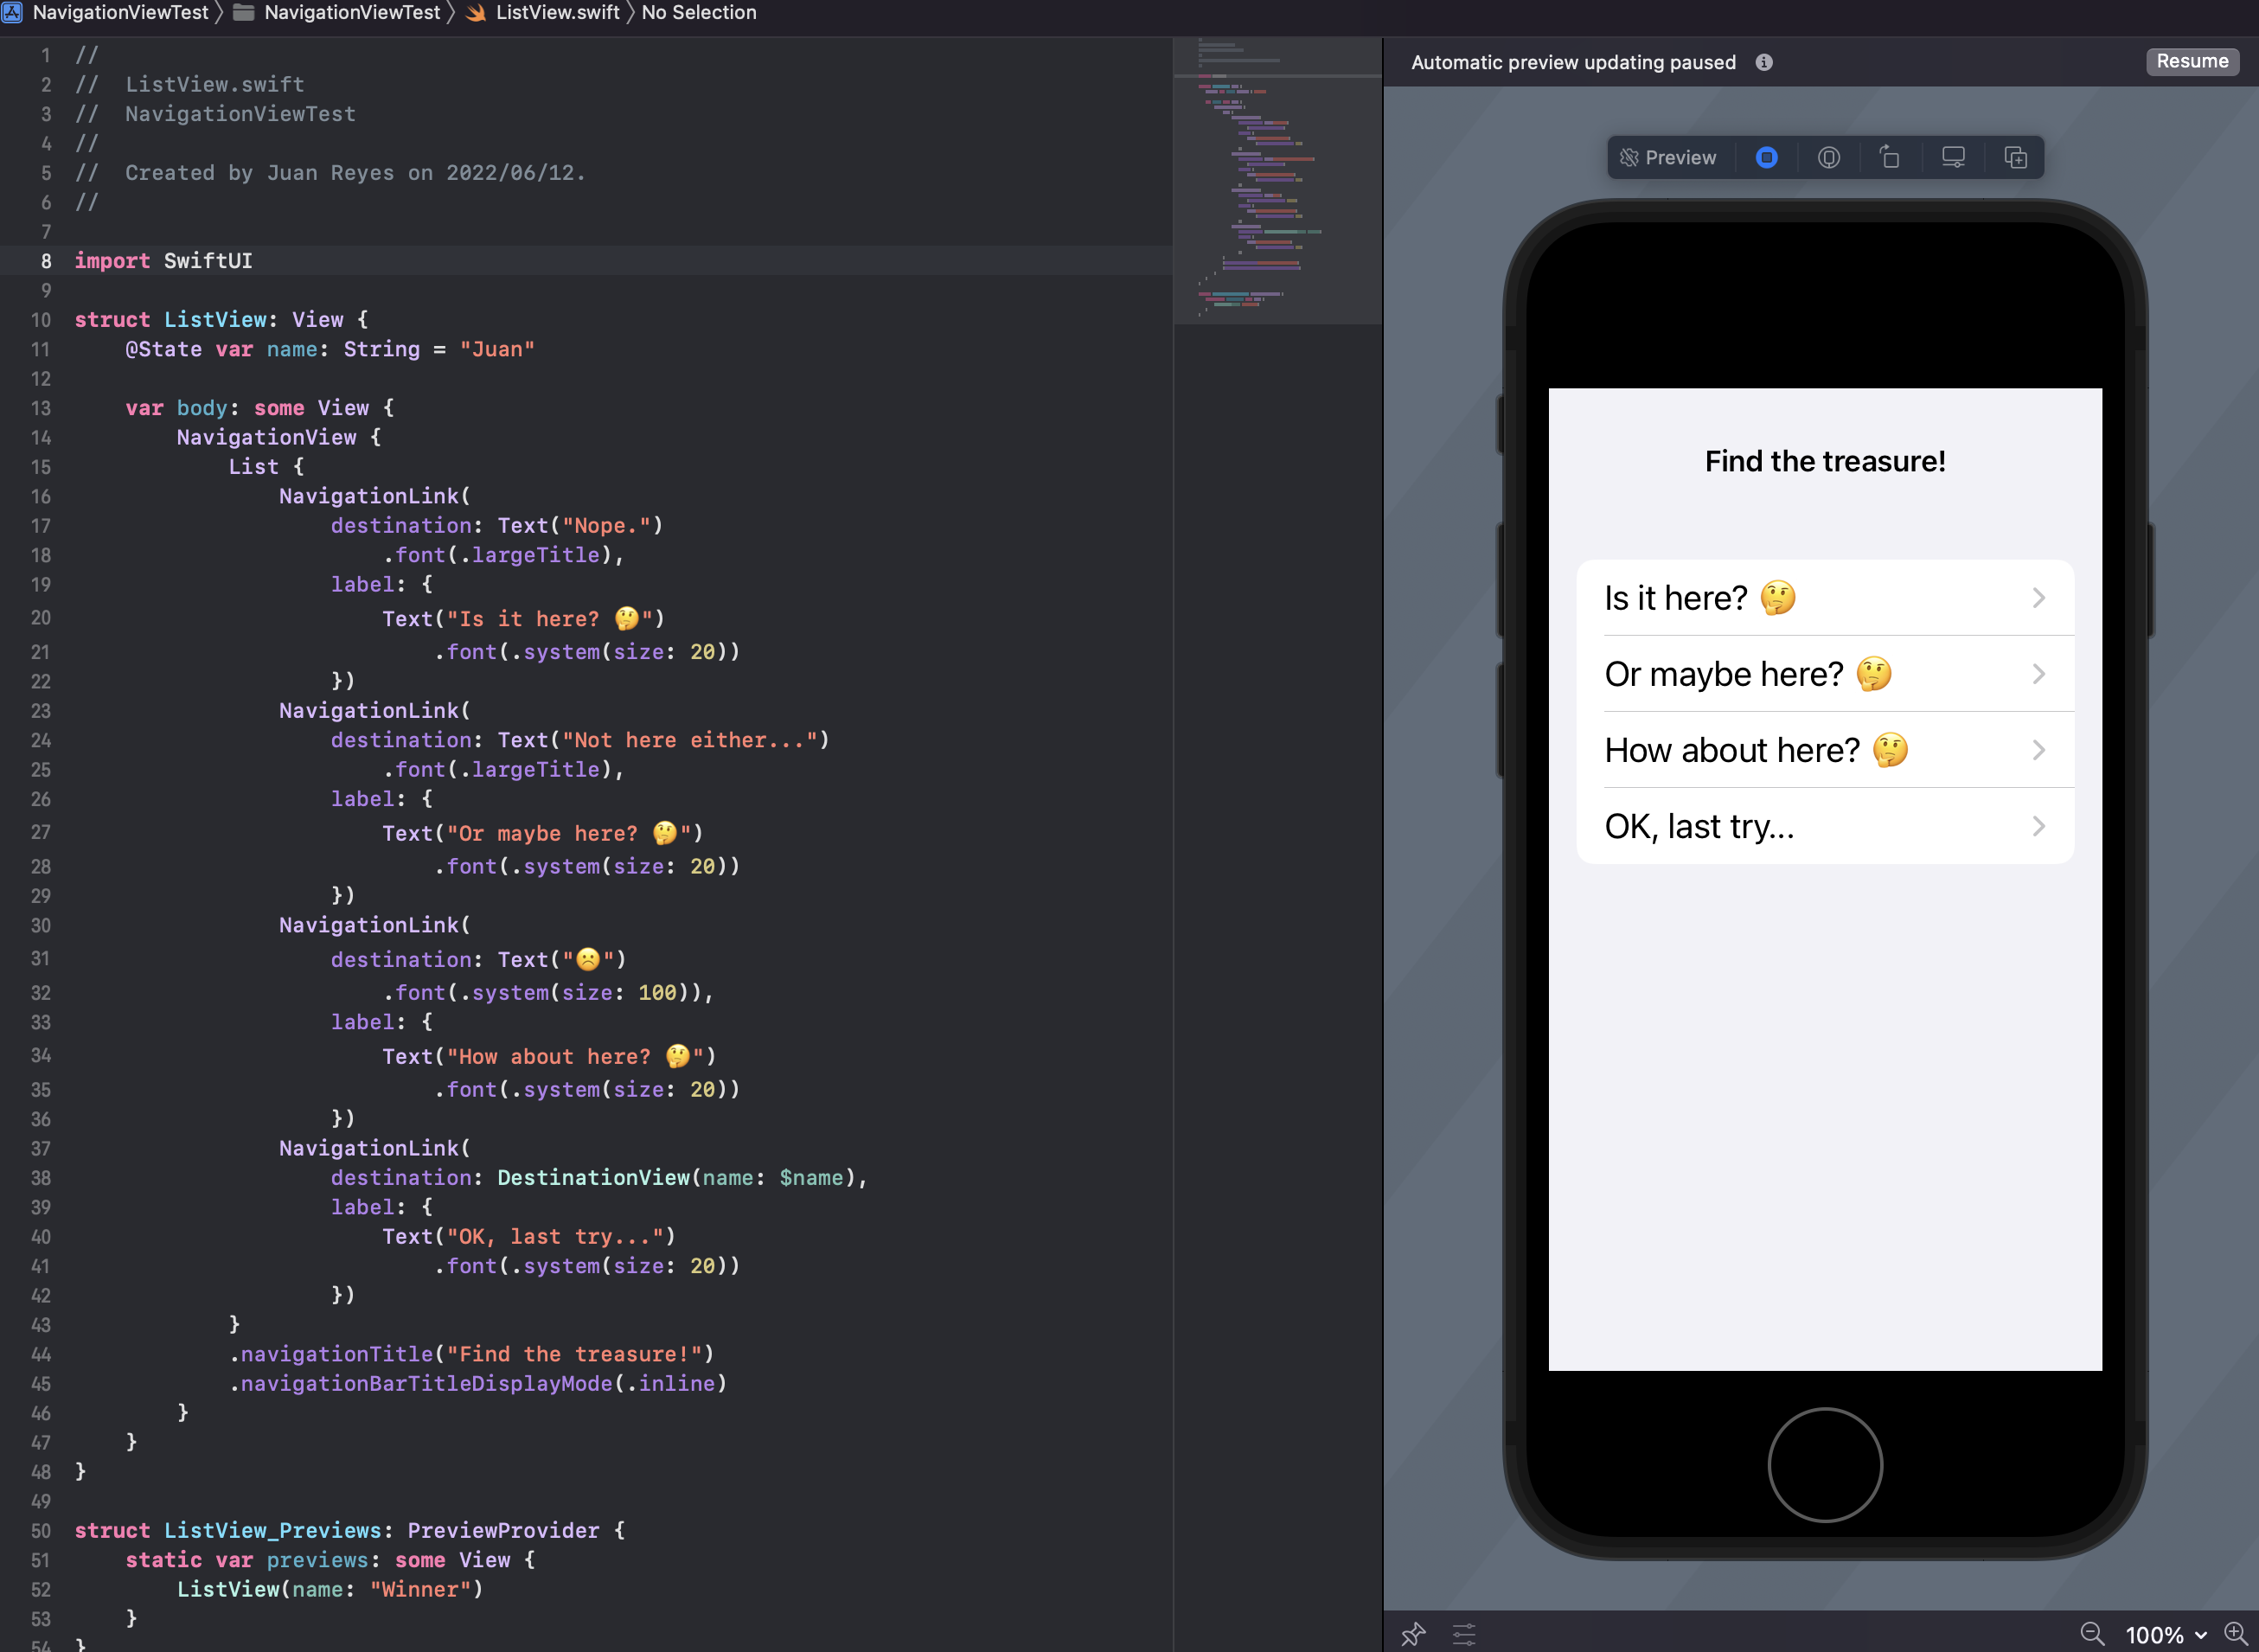
Add the modifiers seen in the screenshot below to the NavigationView to showcase the navigation header.
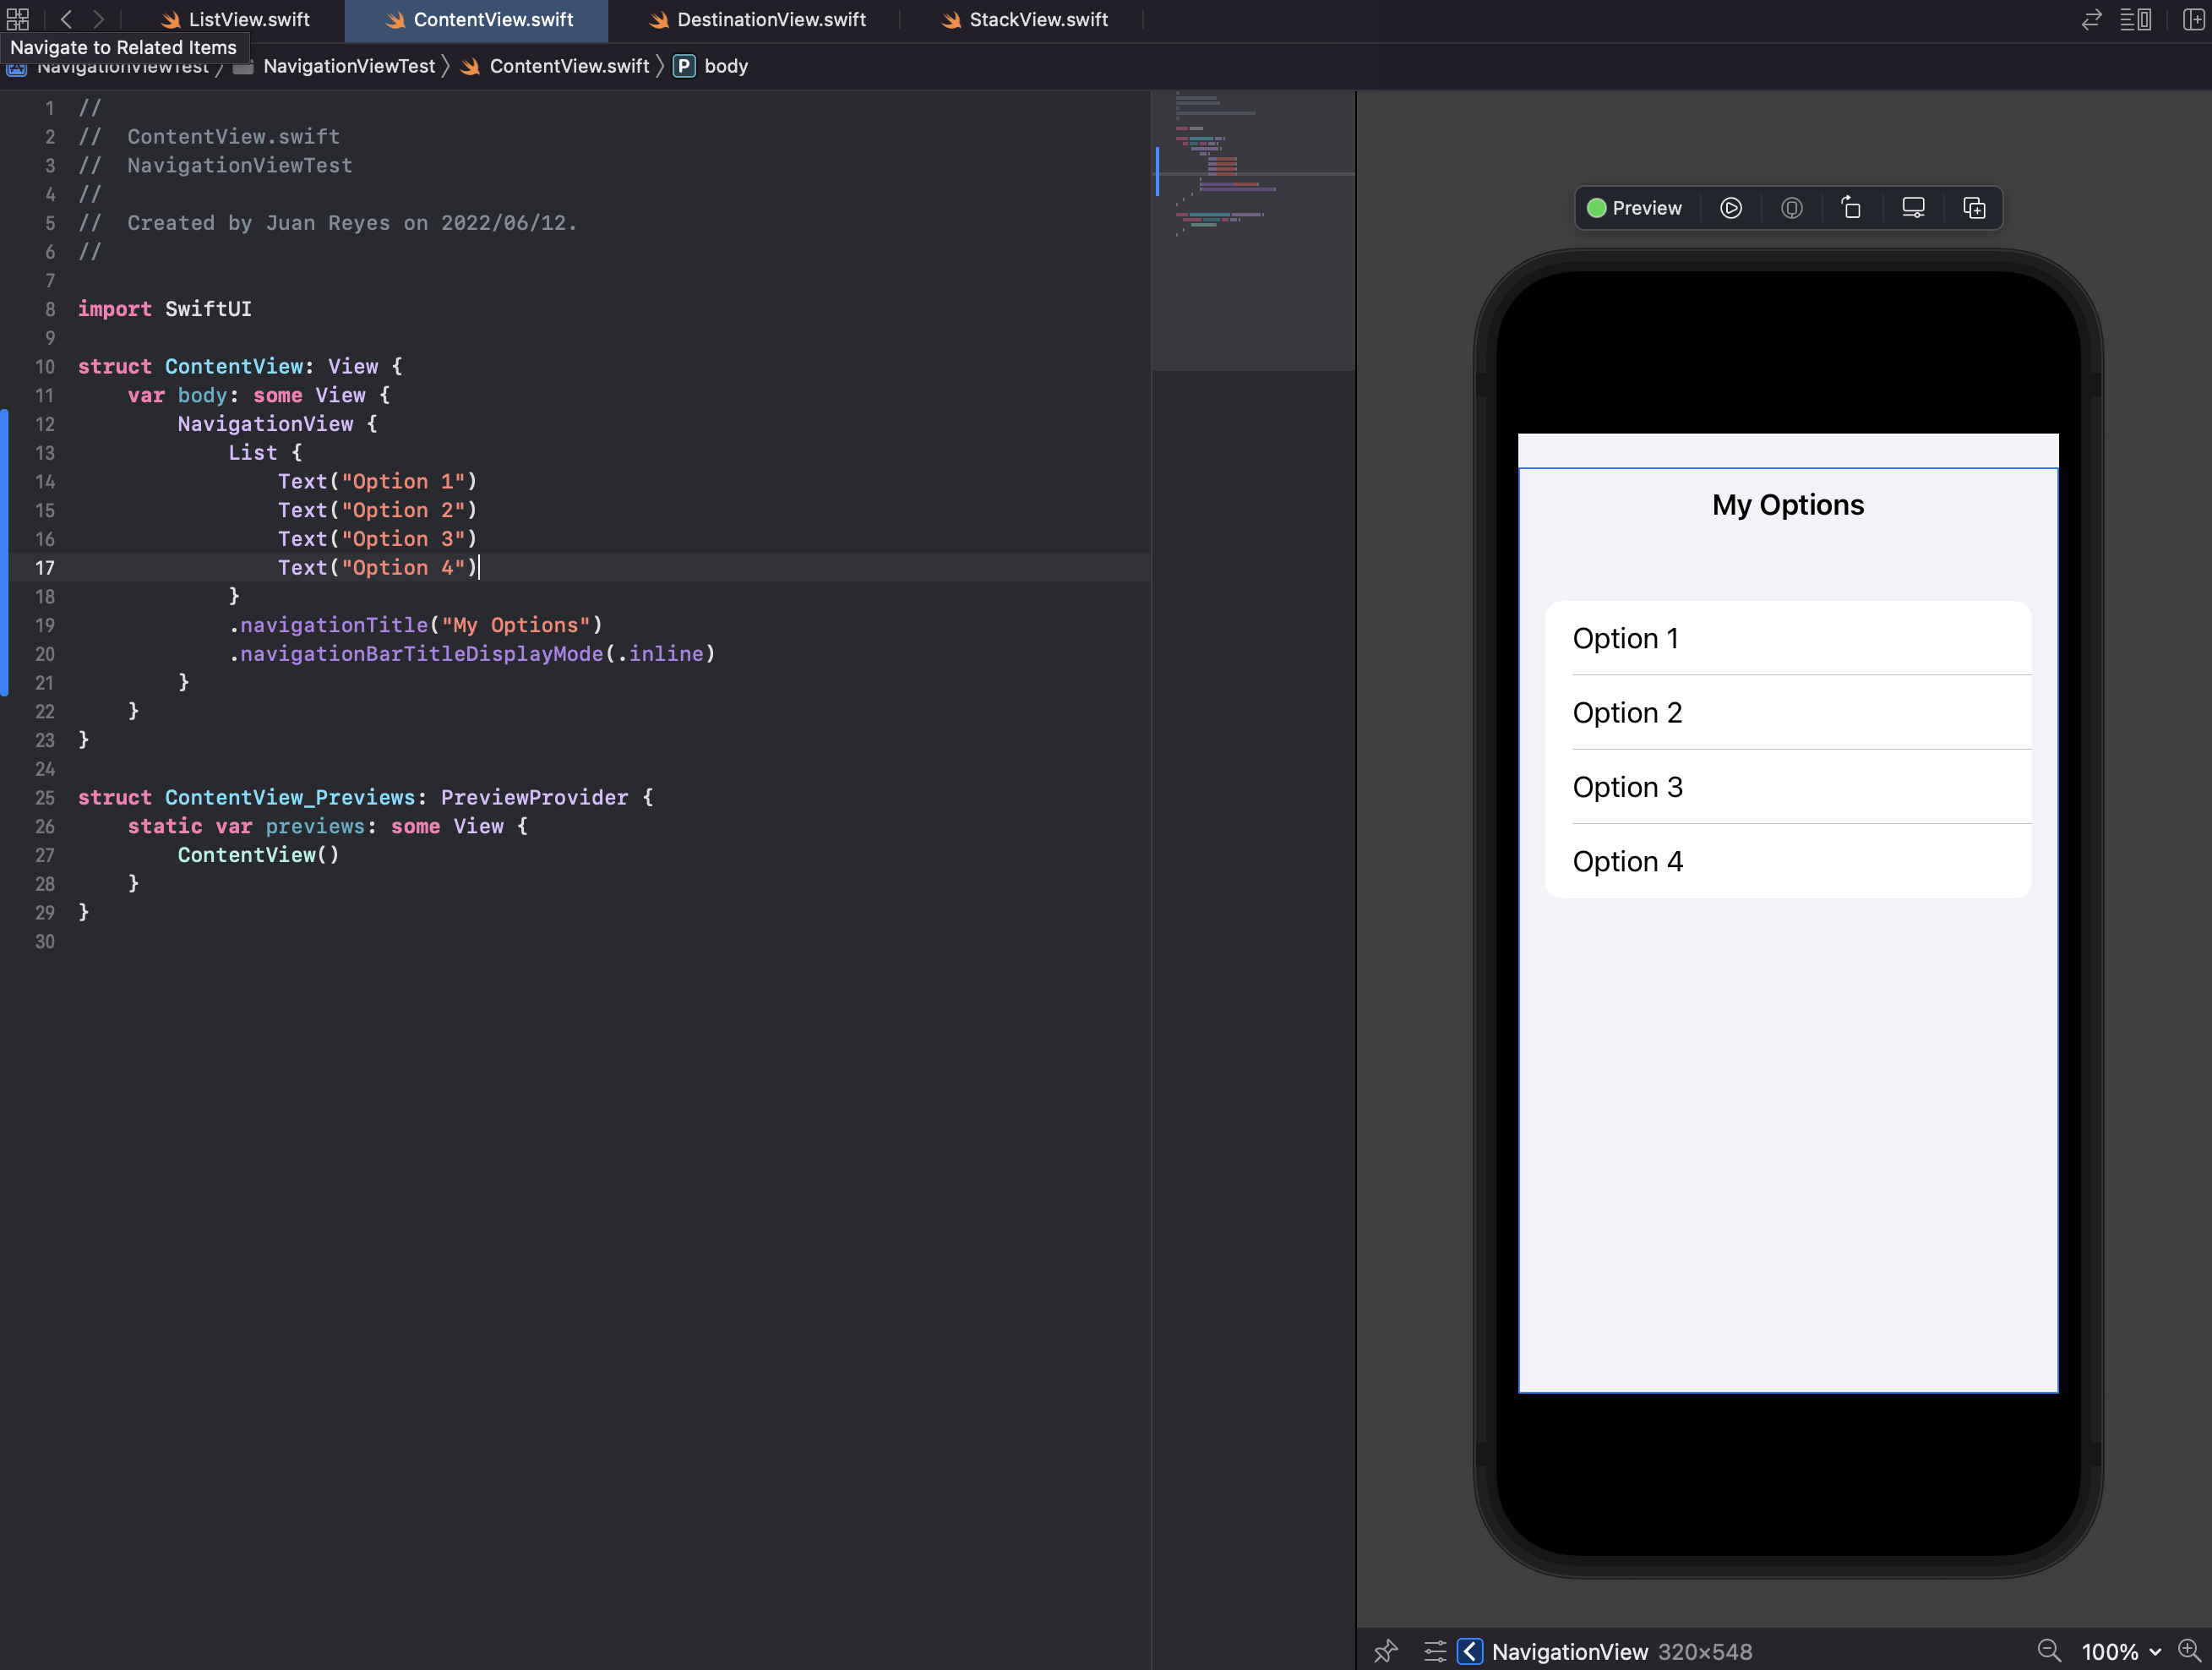
Alright, now we can see that the screen looks more like your average settings screen. However, if you click on the options, it does nothing.
Navigating Between Screens
For actual navigation, you need to use a component known as NavigationLink. This component tells the NavigationView where to move you when interacting with it. It's basically a directive for the NavigationView as to what to push into the navigation stack.
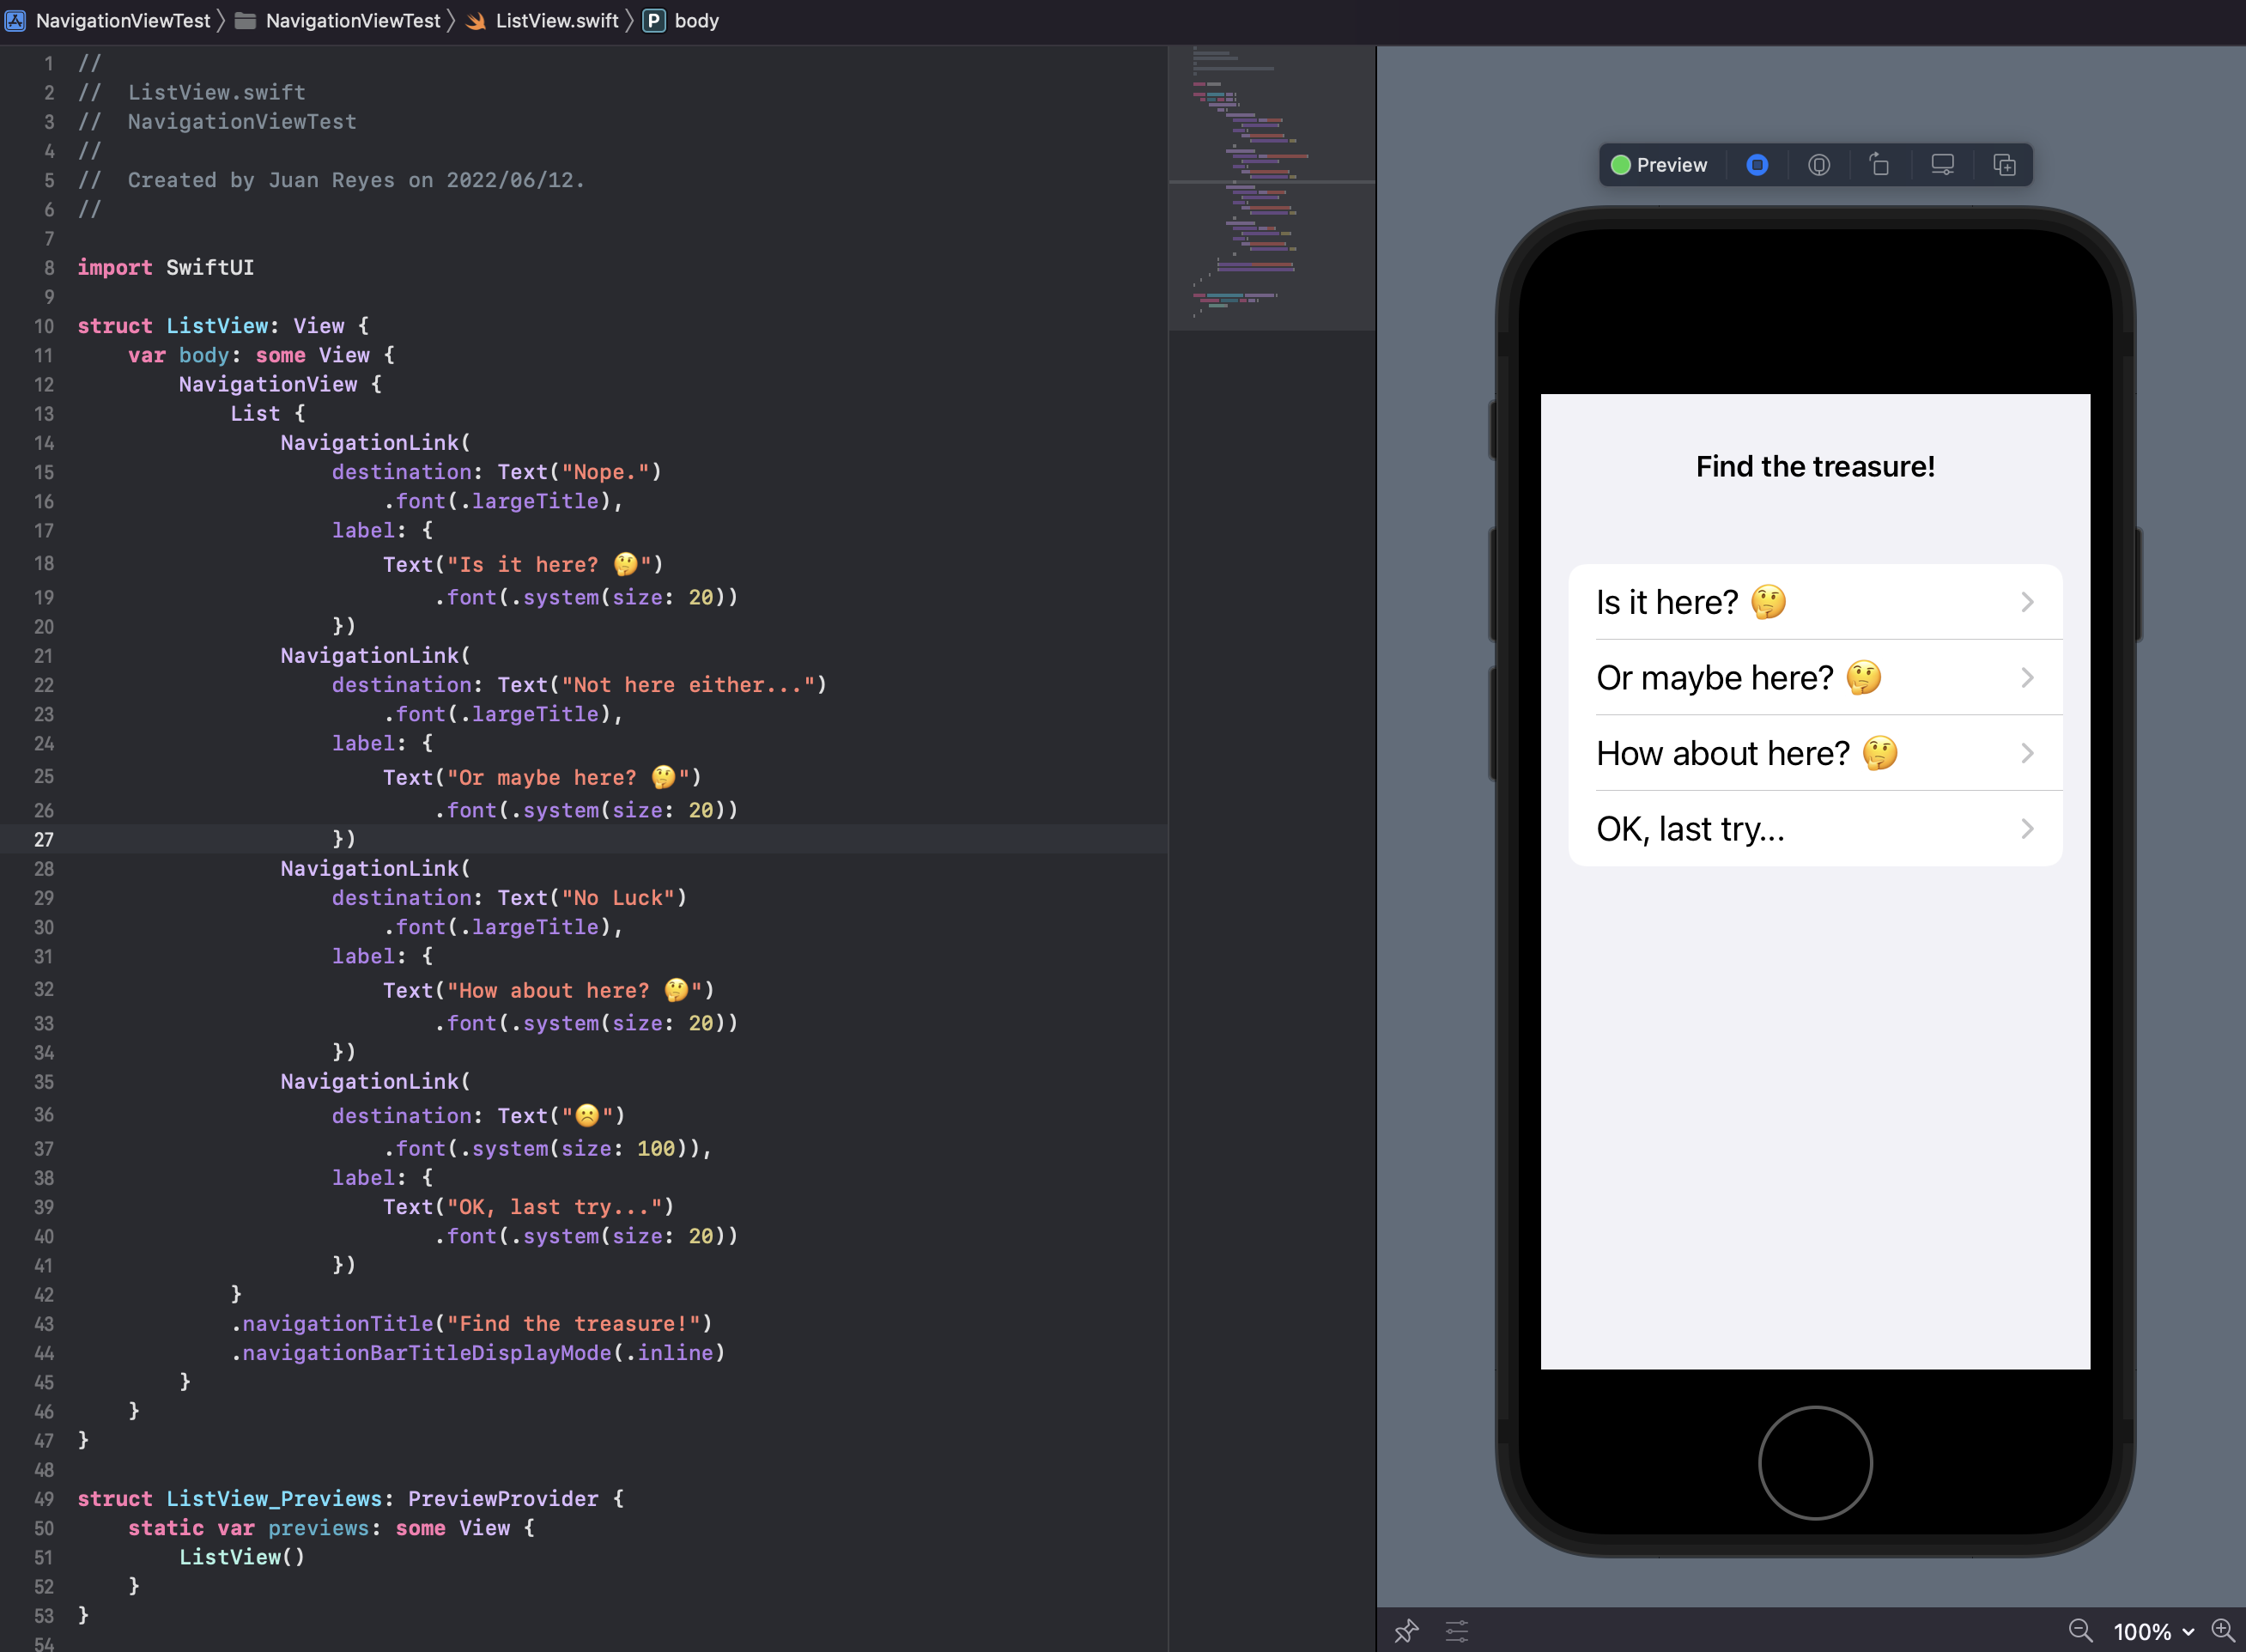
To add the NavigationLink, you must provide a destination view and a label view. Doing so will yield the view seen below.
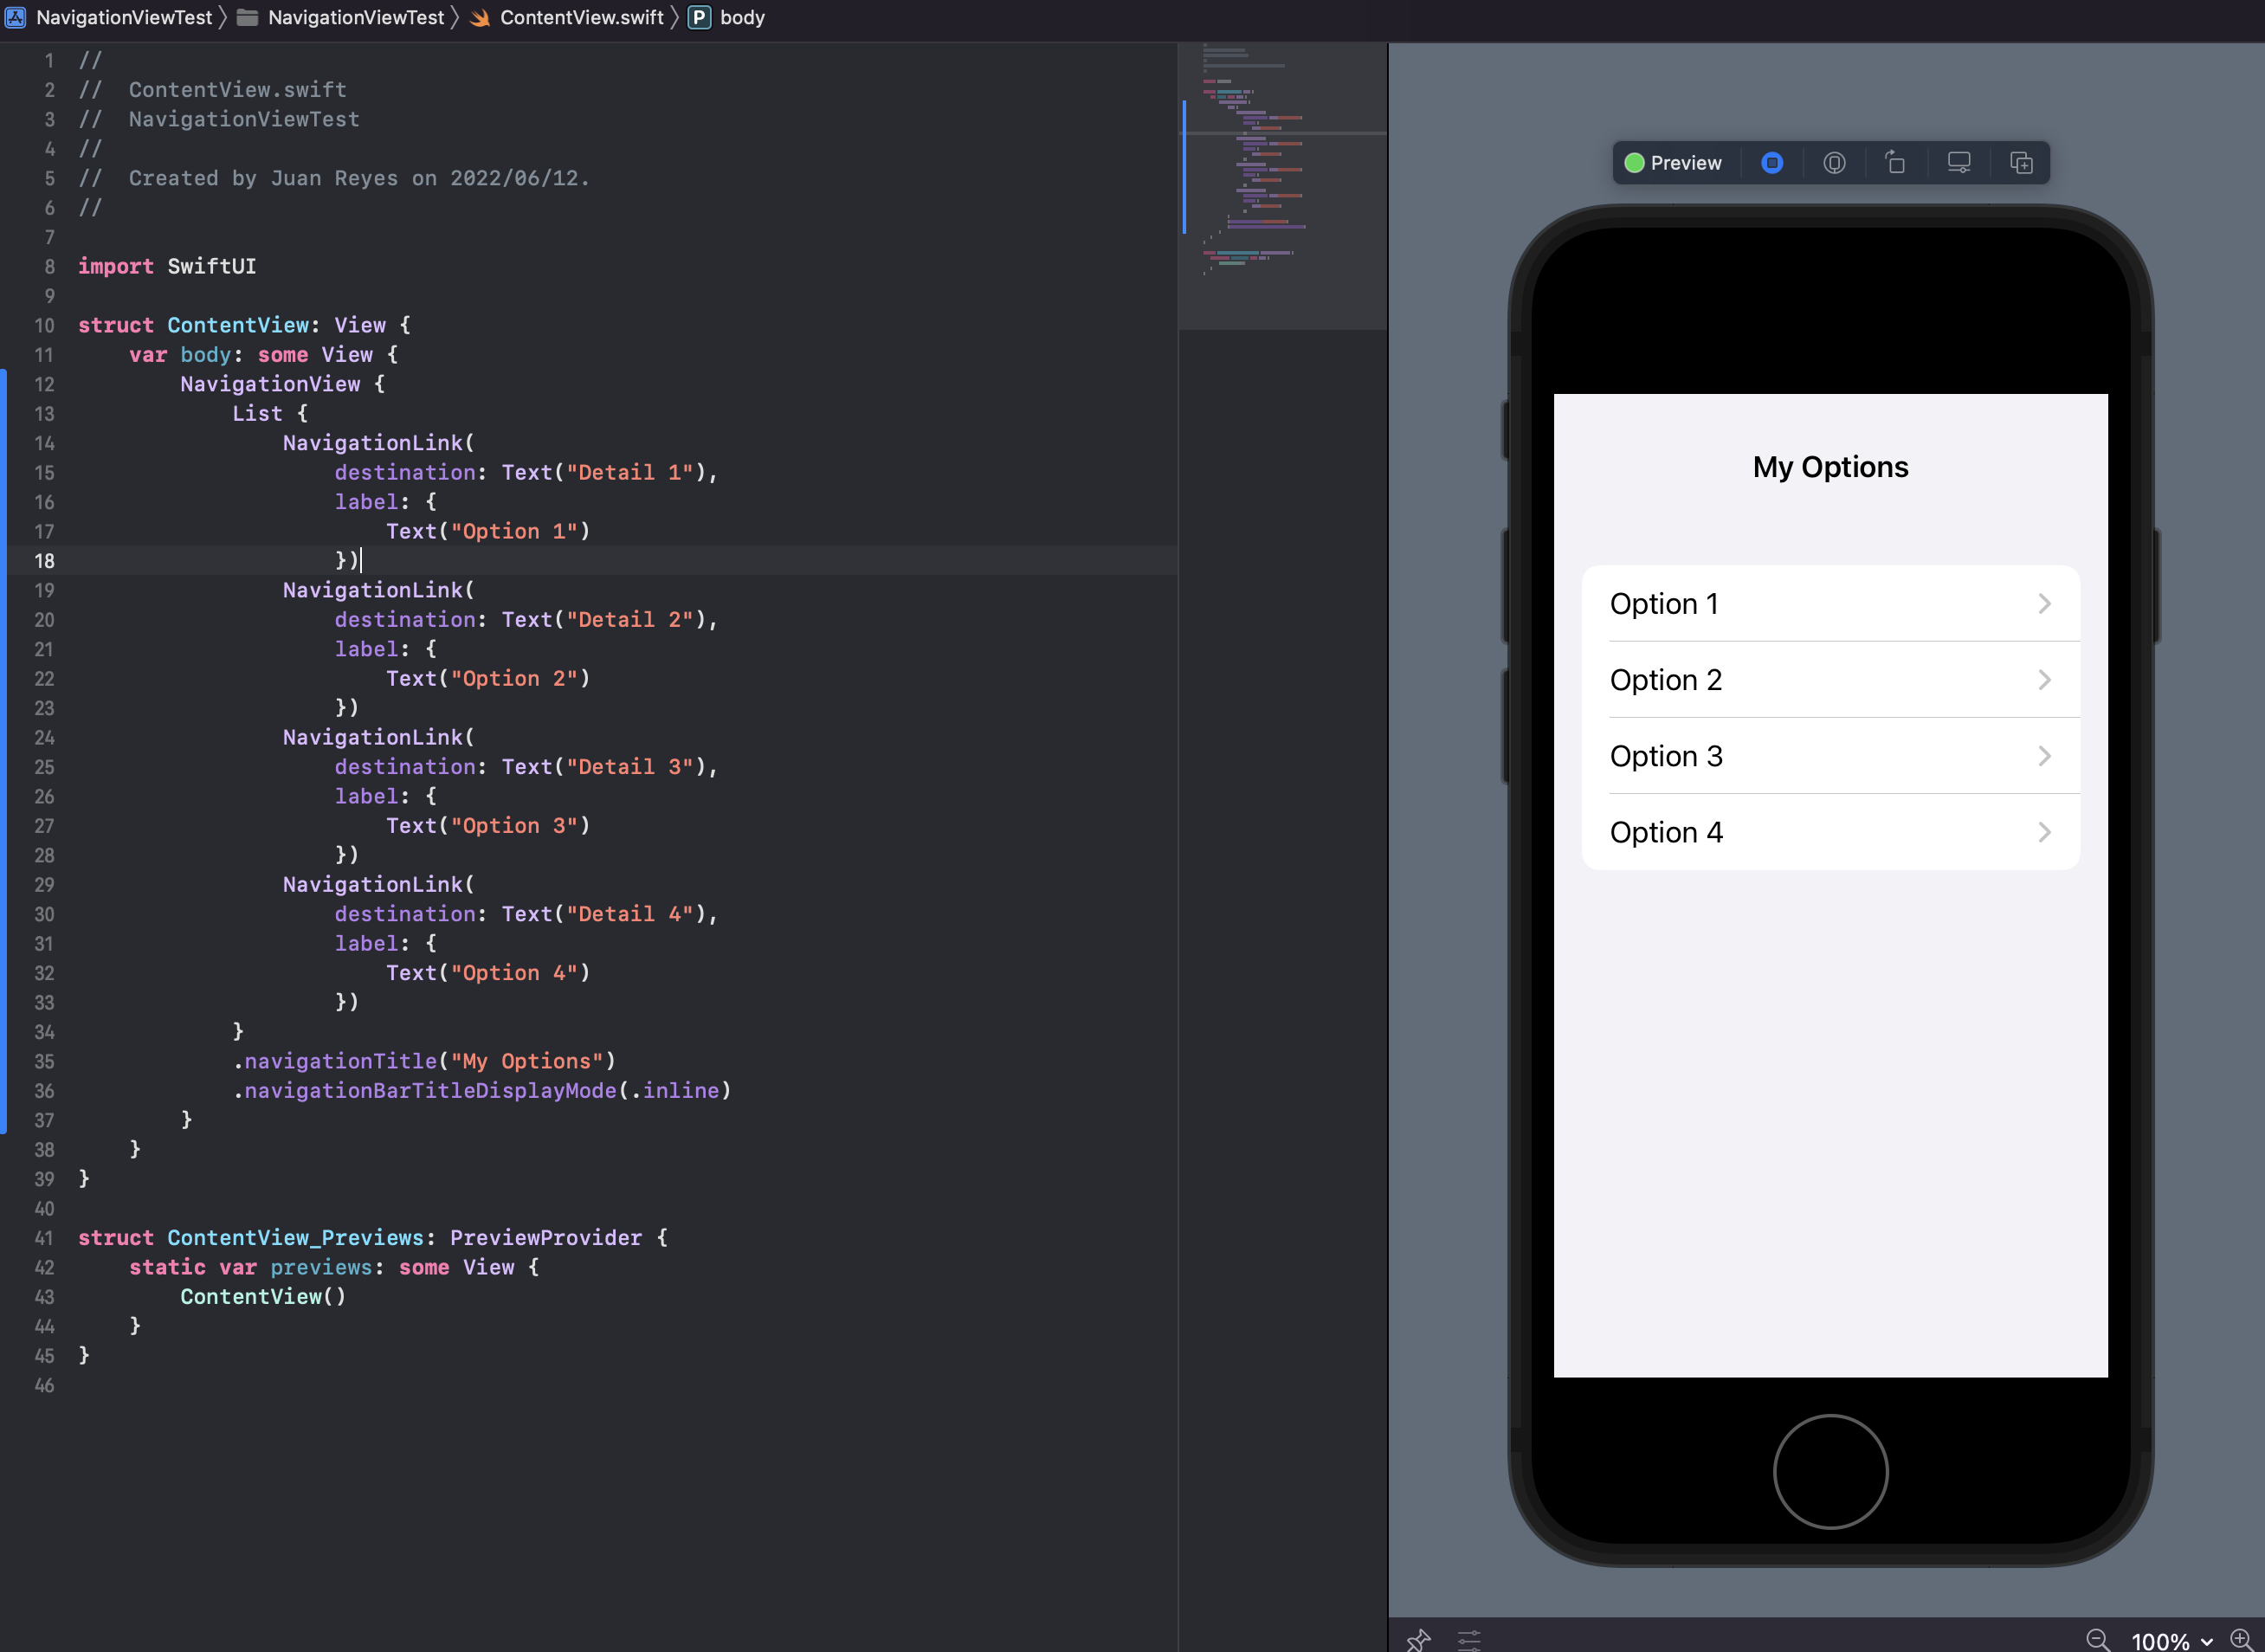
Notice that now the options have a chevron arrow at the right and are interactive. If you click on any of them, the NavigationView will navigate you to a second screen containing the Text element in the destination property.
It's that simple.
Let's modify the components to make it more fun.
Alright! Now we're talking.
But what about navigation between different classes?
Obviously, you can't have all your application's navigation handled in just one Swift class file. That would be ridiculous, unless your app was highly simplistic.
Well, thankfully, SwiftUI makes it dead simple to navigate between files. All you have to do is reference it in the destination, and the NavigationView will handle it for you.
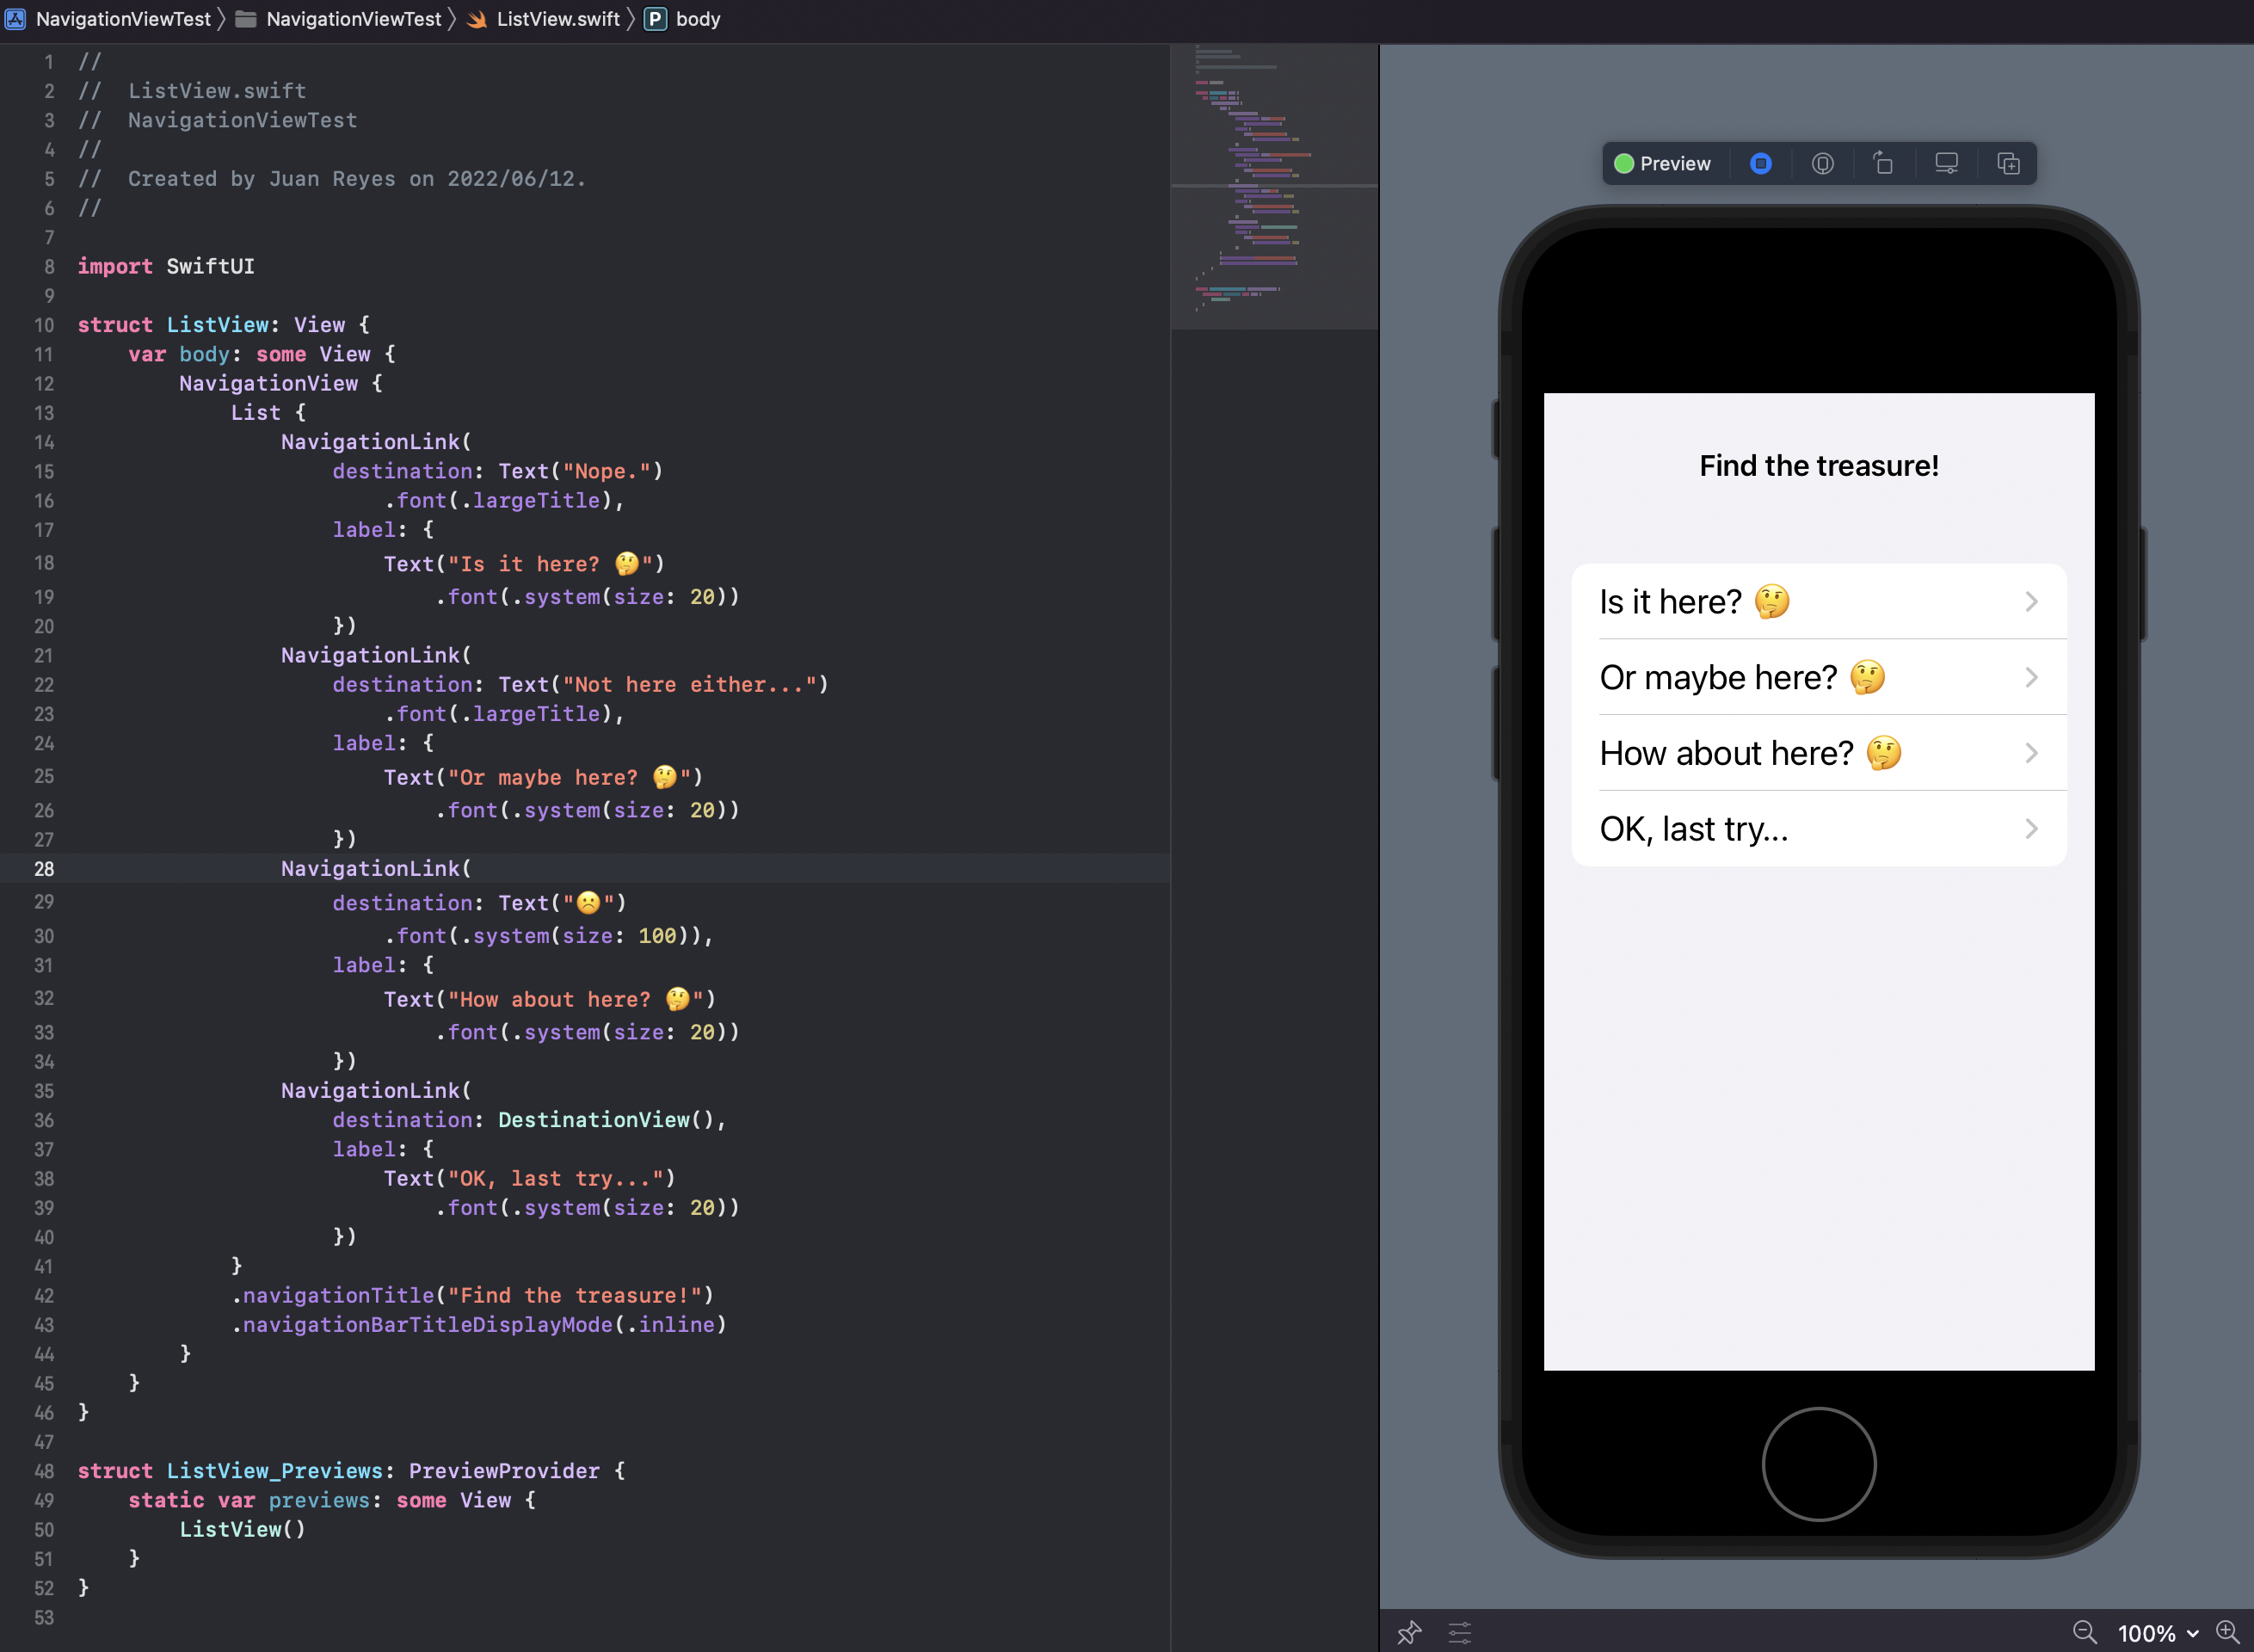
And we see what happens below...
It's that simple.
But what if you want to pass information between views?
Again, it's a straightforward task. All you have to do is declare a @State variable on the destination class and pass it on the parent class invocation. Make sure that you also specify a default value for this variable on the preview constructor of the destination class at the bottom.

And there you go!
SwiftUI NavigationView Best Practices
It's important to mention that, despite this working and being a viable solution for these specific requirements, you would be better off binding the variable's state between the different classes.
To achieve this, you must replace the @State directive with @Binding on the destination class and add a @State variable on the parent class. Now, set the value on the parent class and pass the variable to the destination class prefixed by a $ character, which indicates to SwiftUI that you are passing a binding. Finally, add a default value to both previews, and voilà!
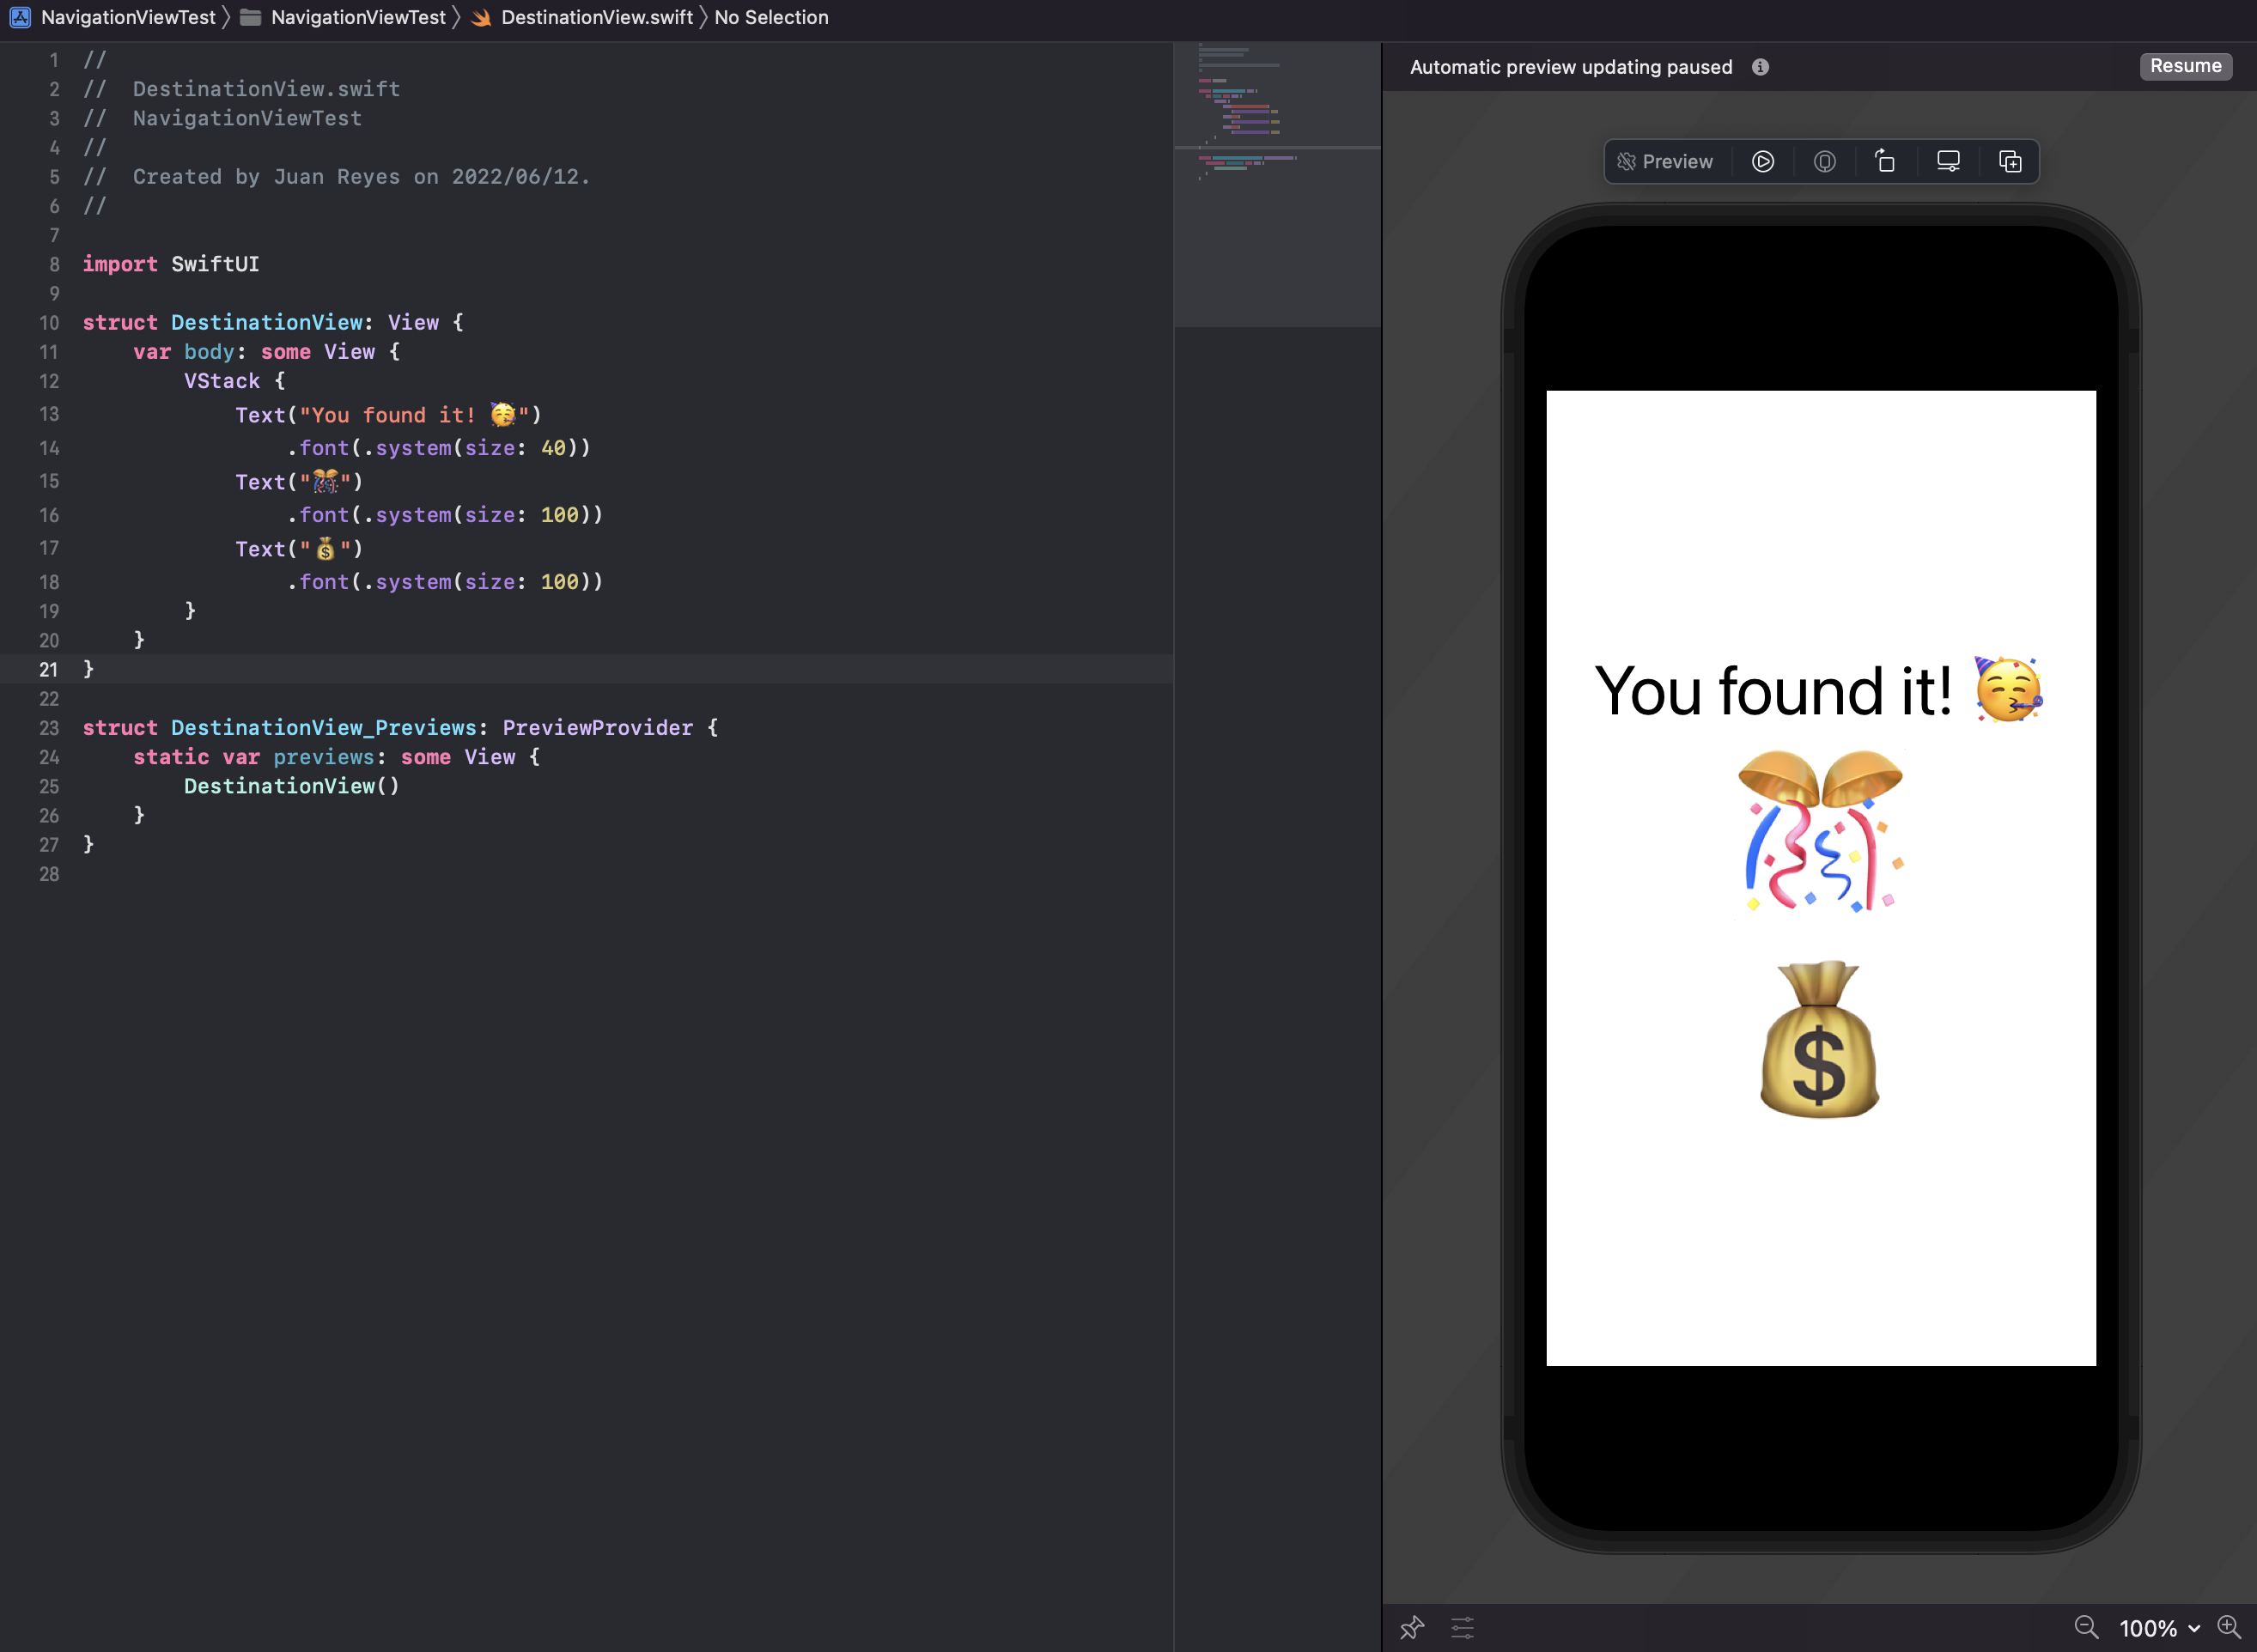
And in the destination class, we see what happens in the below screenshot...

Finally, we want to mention that the NavigationView component has already been discontinued and is now being replaced by the much more flexible NavigationStack.
Moving On
Navigation is the structural foundation of mobile applications. Without it, your application would be a mess of unrelated screens loosely related to each other without cohesion. Navigation allows the user to consume and interact with your application effectively. It gives context to an otherwise senseless collection of views and elements.
For developers, understanding the basics of navigation and user flow is the foundation of building a robust product. And, in this day and age, not applying the fundamental concepts and taking advantage of the modern tools available is a death sentence for your product.
.png)
Beyond having a robust and cohesive application, it's vital to ensure that your work is bug free and reliable. Despite being a pain to develop and maintain, testing is the most reliable way to ensure the quality of your work. This is why we recommend using a reliable testing workflow like Waldo's code-free testing workflow solution.
And the best part about Waldo's solution is that there is no need for complex and cluttered testing workflows. Just set it up, and you're good to go. You can learn more about it here.
Automated E2E tests for your mobile app
Get true E2E testing in minutes, not months.


