


Sound in any mobile application is a pleasurable user experience. It’s a must in gaming applications, but also used in a variety of other applications. It also enhances the user experience when we play a small sound on the press of a button or when receiving a notification.
In this post, we’ll create a small xylophone app, which will play different sounds when a user presses different buttons. We’ll use the simple expo-av package to play sound in our project. There’s another popular package called react-native-sound, but it’s not as stable as the expo-av package.
Basic Setup
First, we’ll create a new React Native app using the Expo CLI. To do this, we need the Expo CLI to be installed globally in our system. To install it, run the below code. If you’ve already installed the Expo CLI, then skip this step.
After Expo is installed, we’ll create a new React Native project. For this, we need to navigate to any folder in the terminal and use expo init followed by the project name.
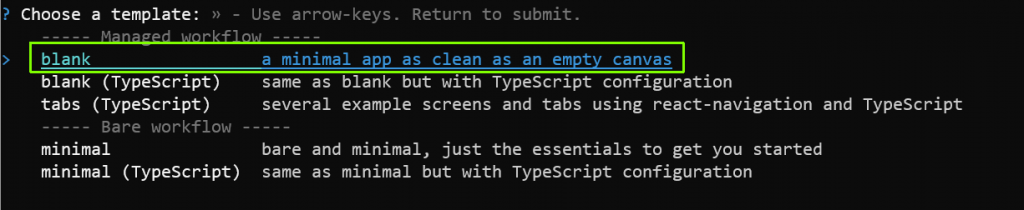
Now, we’ll be asked to choose a template. Don’t change anything and press the enter key, as we need a blank template.
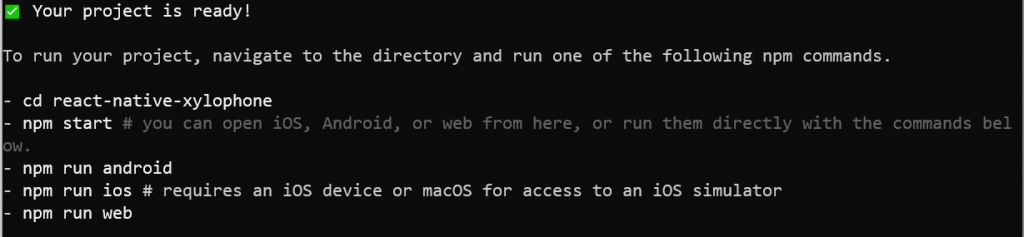
Our project is now ready to use as we’ve received the success message.
Start Xylophone Project
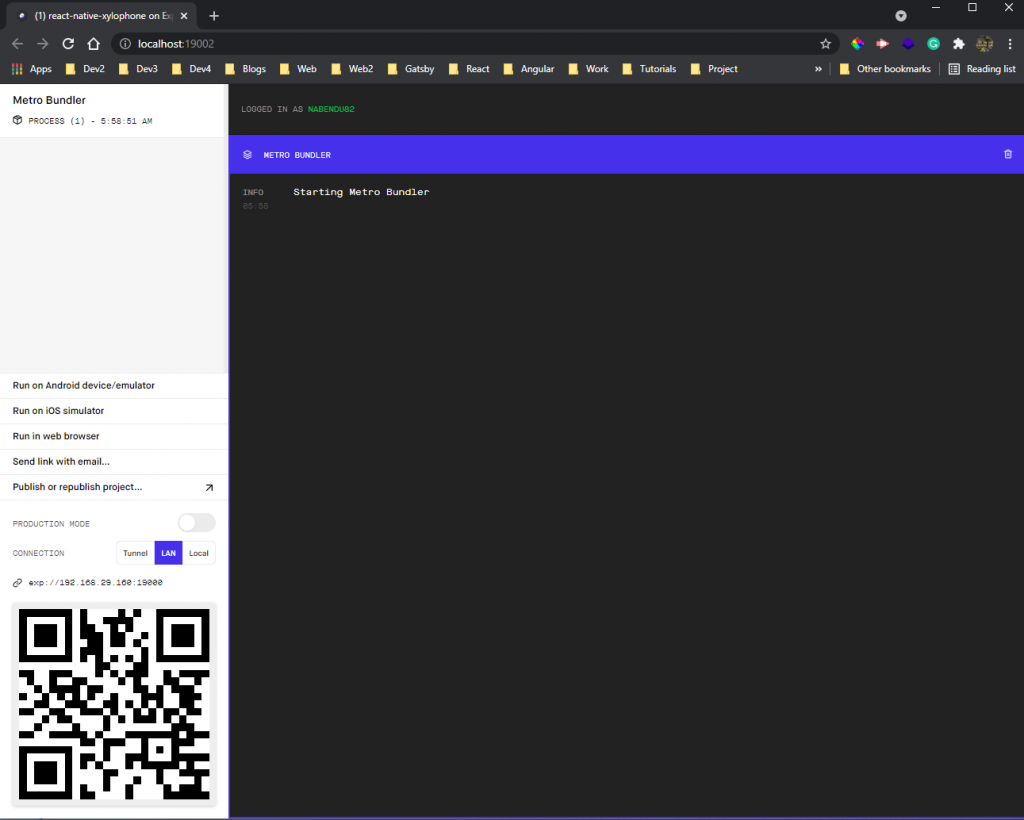
To start a React Native project, we need to navigate to the directory and run npm start. The process is shown below.

It will start the Metro bundler application in http://localhost:19002/. We get different options for how to run our application. The app can be run in Android Emulator or an iOS emulator. We can even run it in the web browser, which shows the web version of the app.
However, running the app on an emulator is a very resource-intensive task and requires a high configuration system. I generally run the app on a physical device, which is faster.
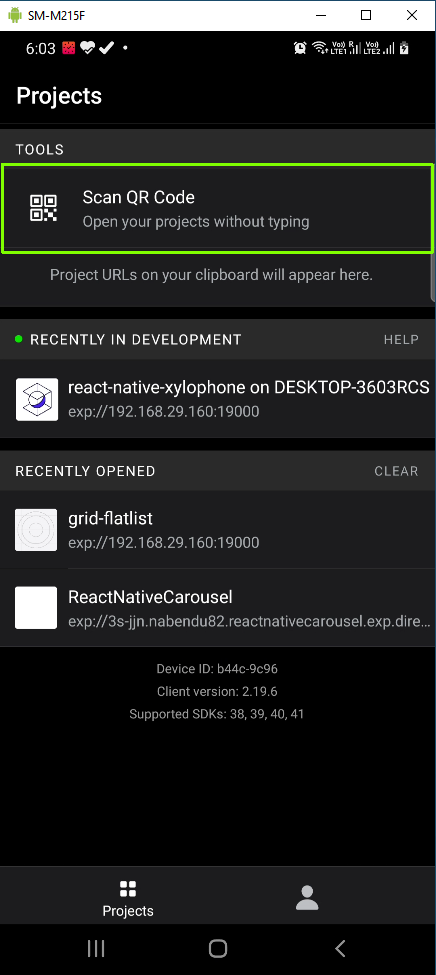
Next, we’ll scan the QR code in http://localhost:19002/ through a mobile application called Expo Go. This application is available in both the App Store and Google Play Store.
Open the Expo app on your mobile device, and click on the “Scan QR Code” tool.
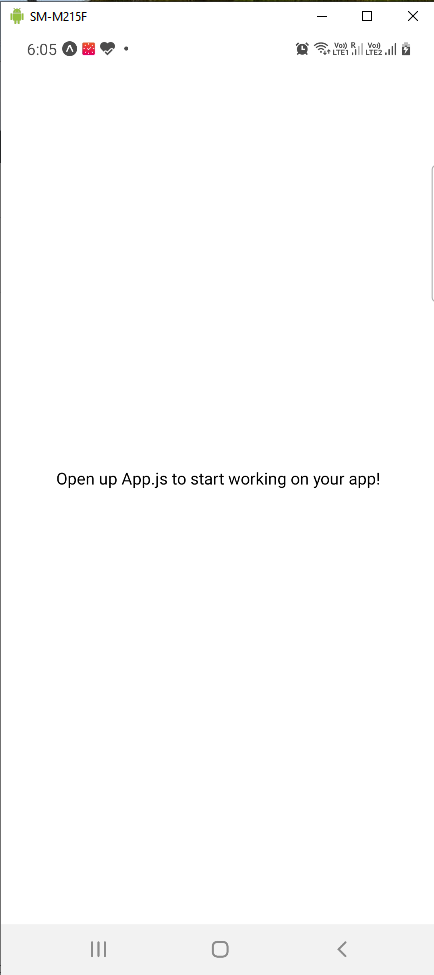
If the app is loaded successfully, it will show the default text “Open up App.js to start working on your app!”
Setting Up
As mentioned earlier in this post, we’ll use the expo-av package in our project. It allows us to play audio files in our app.
Open your terminal and add the package using the command below:
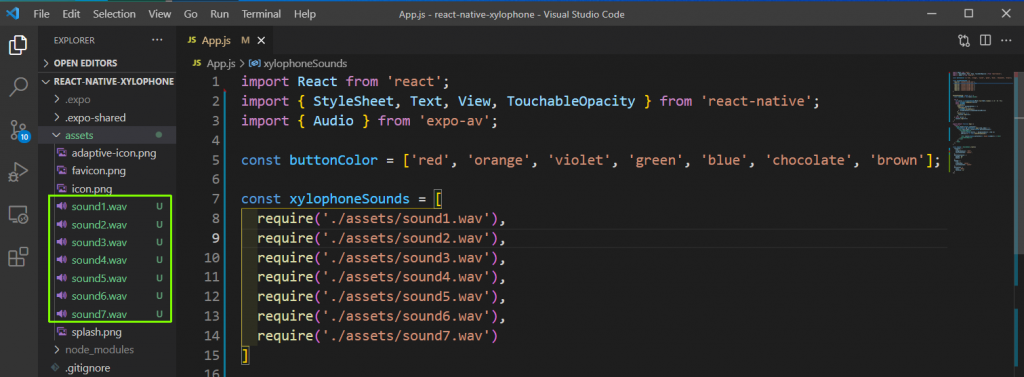
Now, we’ll open the code in Visual Studio Code, and in the assets folder, we’ll add seven sound files. You can add any small sound files. We’re also adding the required imports in our App.js file. Two constant variables buttonColor and xylophoneSounds are created.
The buttonColor variable contains seven colors, which we’ll be using on our buttons. The xylophoneSounds variable contains imports to all of our sound files in the assets folder.
Building the User Interface
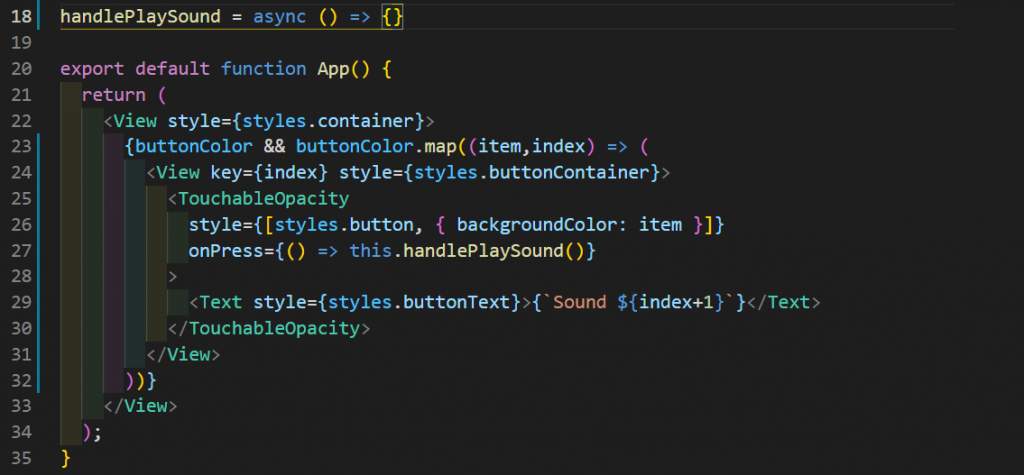
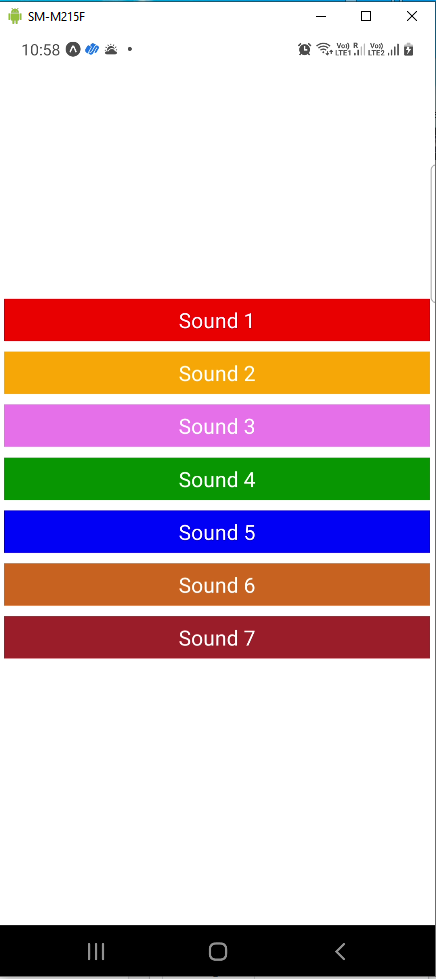
Now, we’ll build our user interface. So, inside the return statement, we’ll wrap everything with a View, which contains a container style. Next, we’ll be mapping through the buttonColor array declared earlier. Here, again, we have a View first, which has a style and key.
Inside the View, we have a TouchableOpacity, which contains the style as an array. So, with this array, we’re showing common button styles and the specific button style. We get the specific button style from the buttonColor array.
The onPress handler will call the handlePlaySound function, which is now empty. Next, we have a Text field, which shows the word “Sound” with a number. The number is taken from the index by adding the number 1 to it.
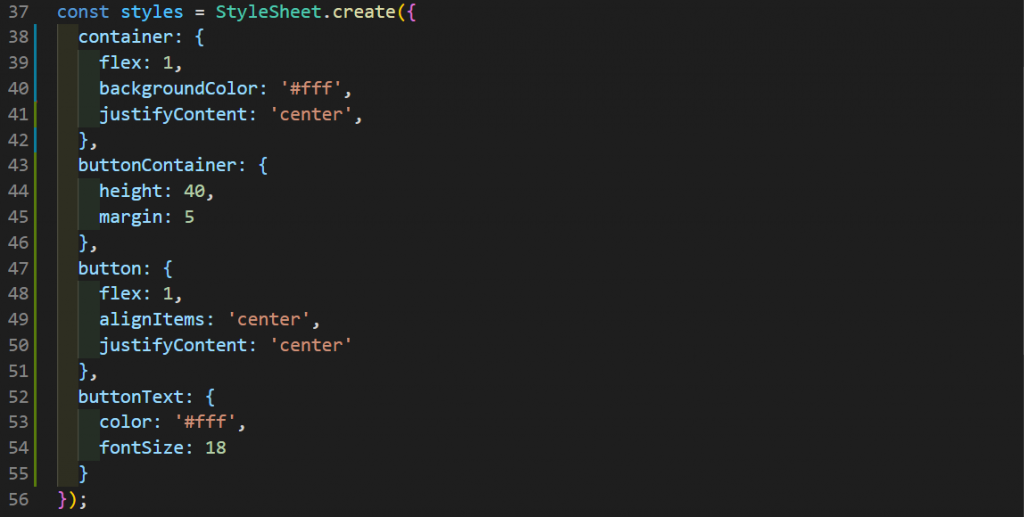
It’s time to add styles in the StyleSheet for all the styles we created above. We have simple styles for the container, which shows it in the center. The buttonContainer and the button styles are also self-explanatory.
Now, our app interface is complete, and it looks like the below.

Play Audio Files
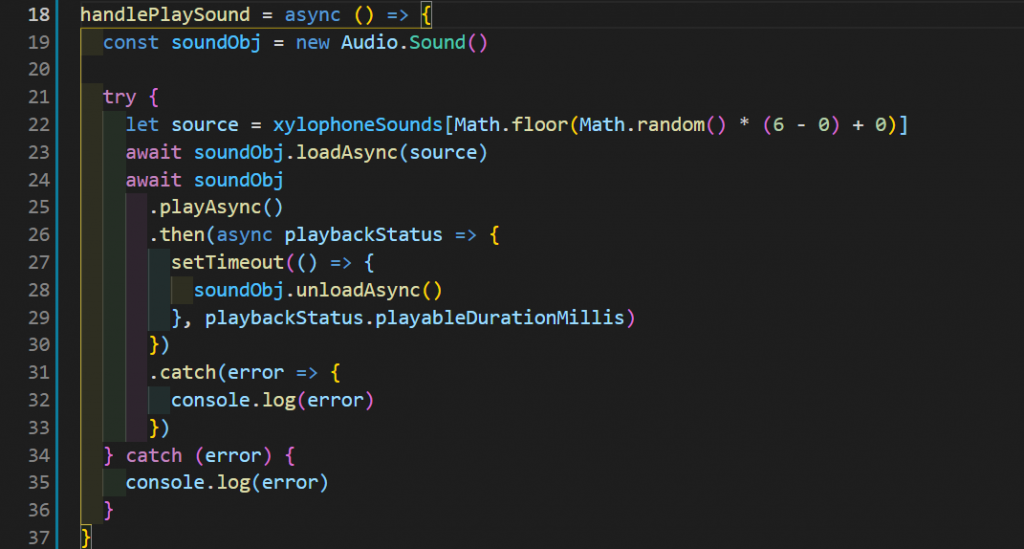
To play audio files, we need audio calls from expo-av. We already imported this earlier. Now, we’re calling a function handlePlaySound() on the click of any button. The logic to play the sound is in this function, so we’ll check it now.
The function is async because we’re using await inside it for the asynchronous task of playing an audio file. Inside the function, we’re first creating a new sound object, soundObj. Then we’ll do the asynchronous task inside a try/catch block.
We’re getting the source from the xylophoneSounds array. Here, we’ll be passing a random number from 0 to 6, using the Math.random logic. So, every time we click a button, a new random index will be passed. Suppose we get the random number 1 from Math.random logic; then we’ll call xylophoneSounds[1], and it will return equire(‘./assets/sound2.wav’).
Now, we’ll use a loadAsync and pass the source. It’s an await because it takes a fraction of a second to load this file. After that, we’re playing the file using the playAsync method, and it will return a promise. We’re getting the playbackStatus method in the then statement. It’s used to unload the media file from the memory once it’s played.
We’ll use the unloadAsync method on soundObj to unload the media file. The setTimeout value depends upon playableDurationMillis, which is the duration of the audio file.
Now, our app is complete and playing different sounds upon the pressing of the buttons.
Building Our React Native Sound App
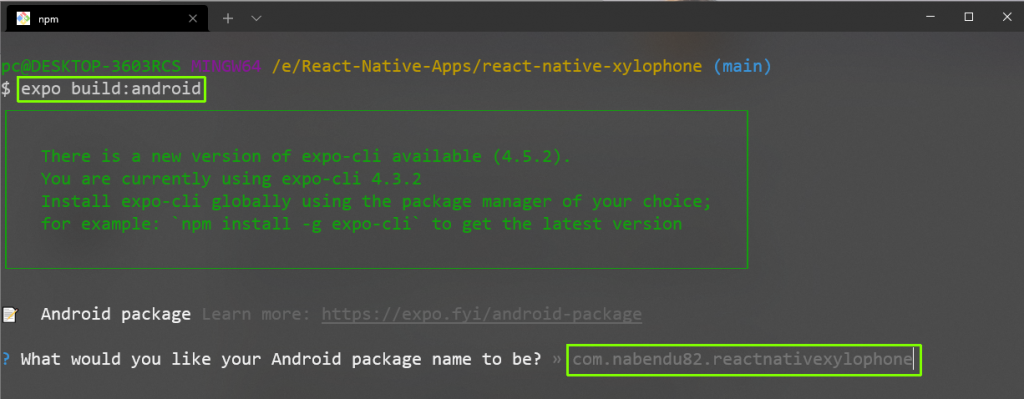
The APK or IPA file is required to deploy our app in both app stores. It’s also required for testing, which we’ll cover in the next section. To create an APK file with Expo is very easy, in comparison to the React Native CLI. We’ll follow the instructions, which are in the official docs.
First, open your terminal and run the below command from the folder containing the project.
Next, we need to give the Android package a name. It’s best to use the default suggested by Expo and press enter.
On the next screen, also leave the default option of “APK” and press enter.

Next, we’ll be asked to upload a keystore or generate a new one. Leave the default option as “Generate new keystore” and press enter.

The APK build process will start, which will take a good 10 to 20 minutes to finish. Once it’s finished, we’ll get a link to our build.

Copy the link, open it in a browser, and save it on the local disk. Now, we’re ready to test the app.
No-Code Testing
The easiest way to test our code is Waldo’s no-code testing platform. We’ll use the APK file saved on our computer from the previous step.
But first, we need to create a new free Waldo account here. Then we’ll need to upload the APK file.
For existing accounts that already have a build, click the + icon and then click “Upload a new build.”
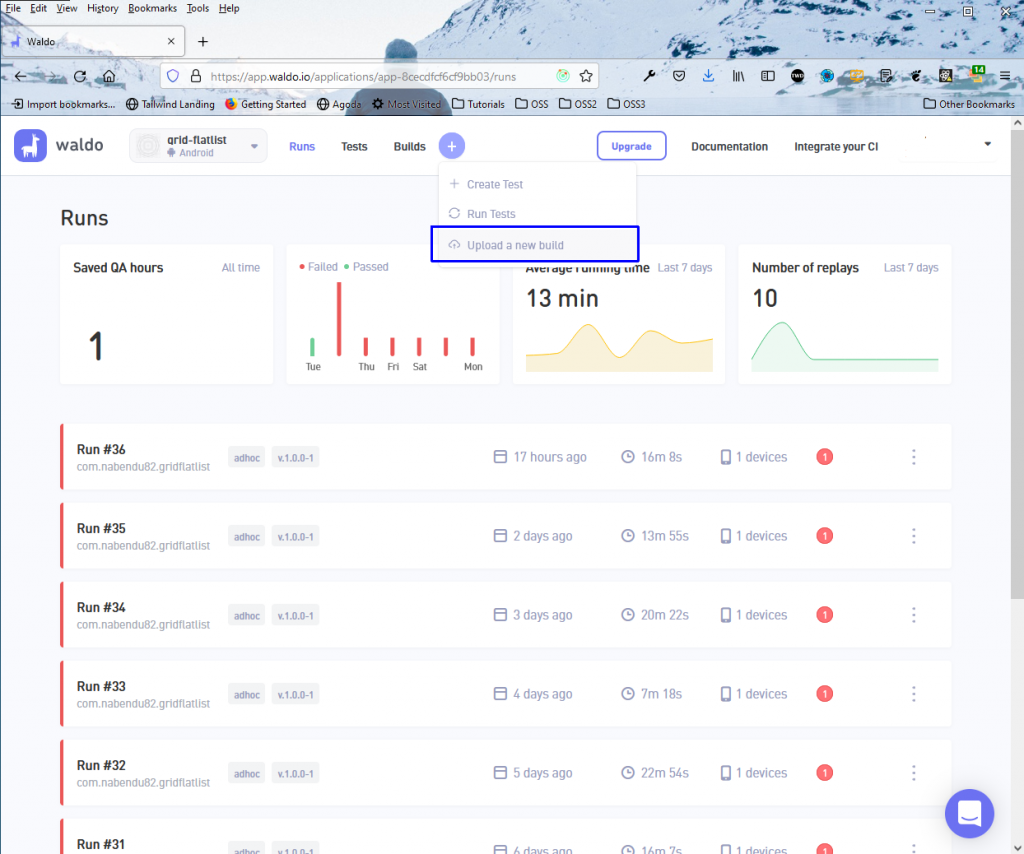
We’ll get a pop-up to upload the APK file.
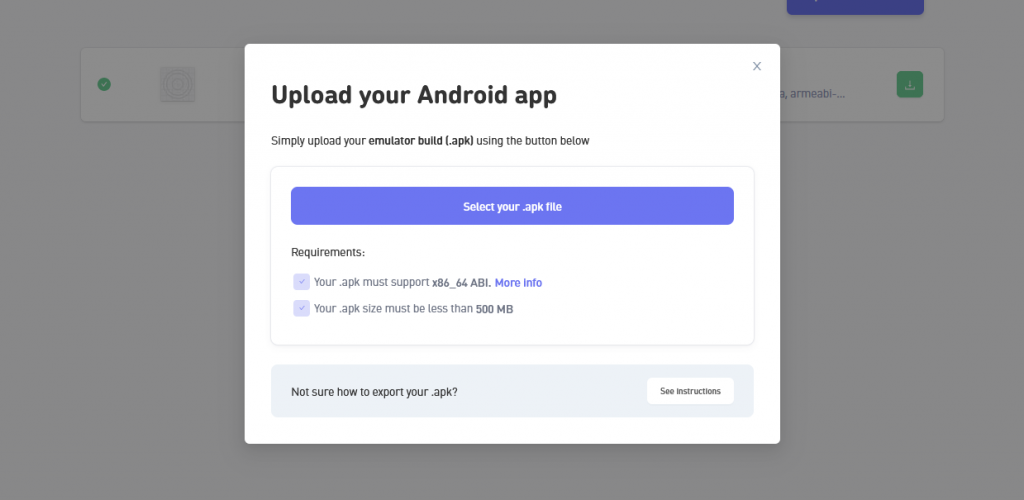
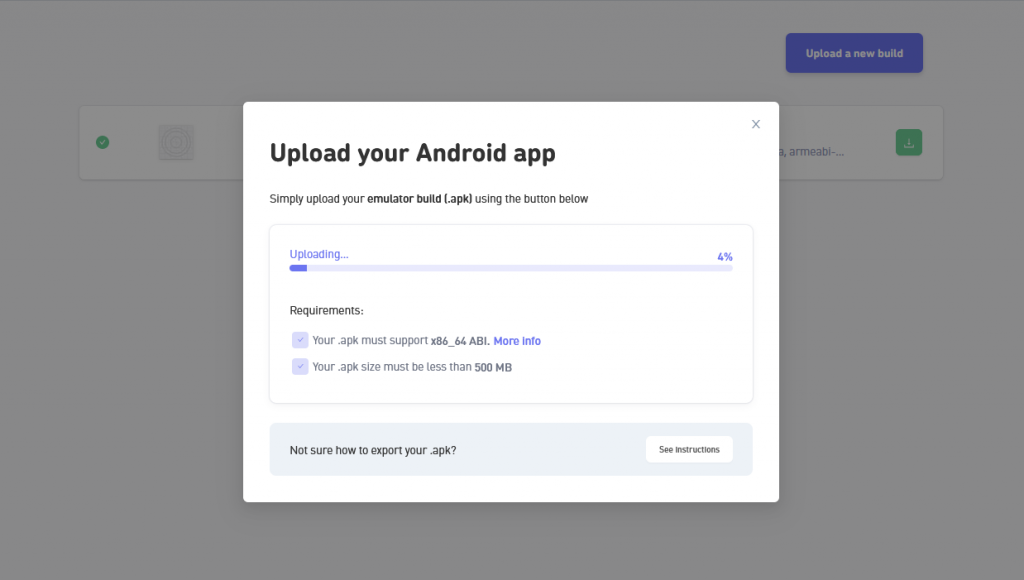
The process to upload an APK file is very fast and takes two to three minutes. Our app will also be verified after that.
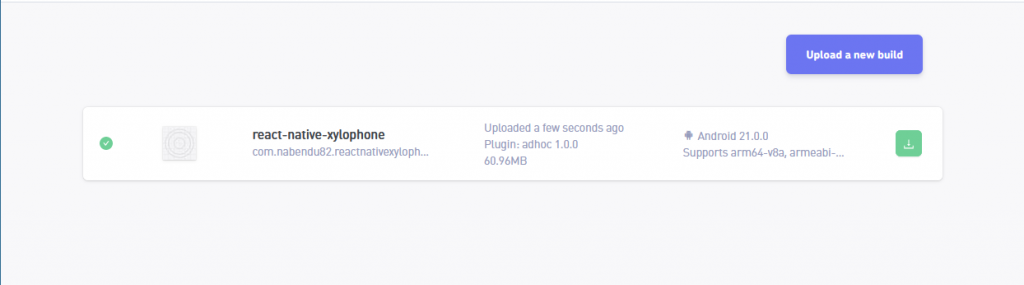
We’ll see our successful builds on the next screen. So then select the build that we want to test.
We’ll enter the interaction for our app on the next screen, which will emulate a user’s interaction with our app.
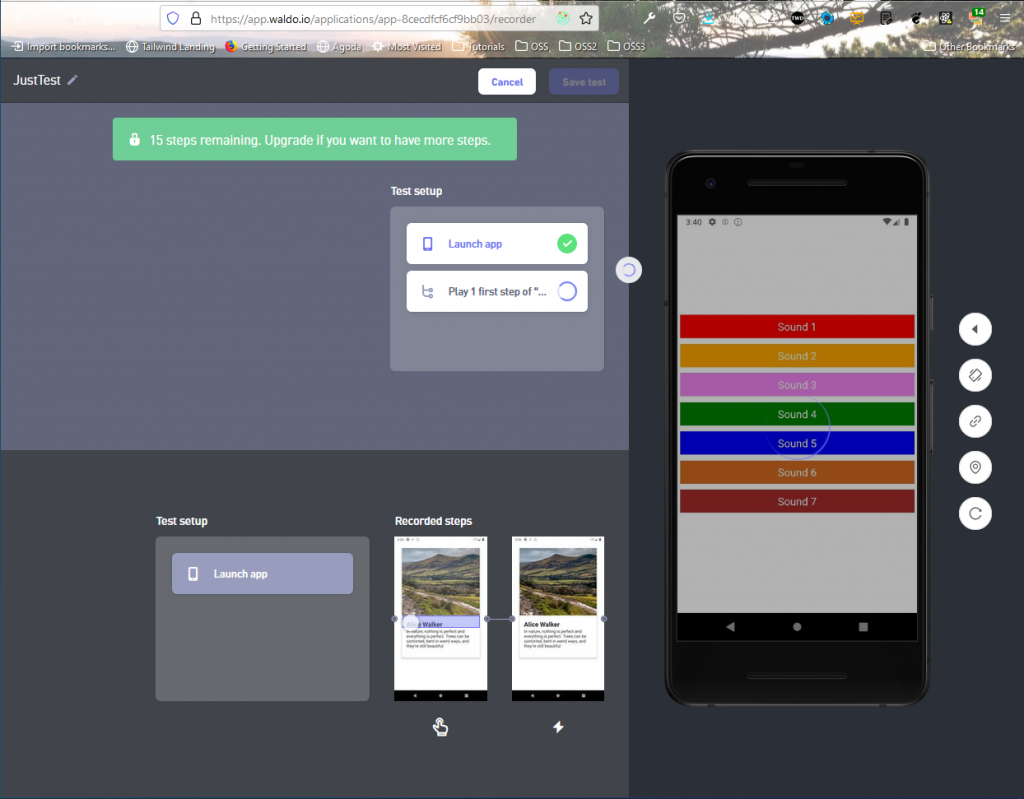
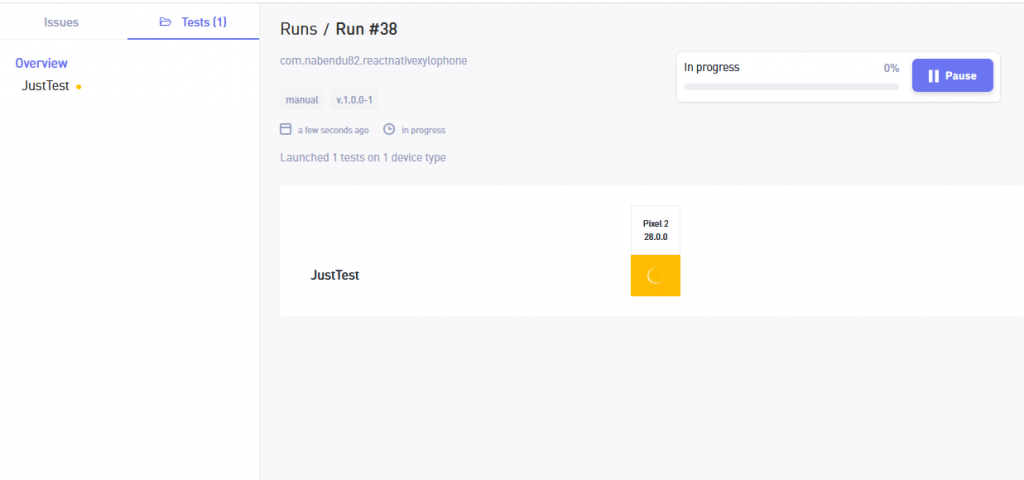
Our test will run when we click on the “Save test” button.
Conclusion
We’ve learned to implement sound in a React Native application in this post. We implemented the sound easily using the expo-av package in React Native.
Next, we learned to create an APK file using Expo. We also effortlessly conducted testing using the no-code platform offered by Waldo.
If you’re looking for an easy, codeless way to test your mobile apps, we encourage you to give Waldo a try for free.
Automated E2E tests for your mobile app
Get true E2E testing in minutes, not months.


