


We need to access locally stored data from our phones for a variety of reasons. For this, we can use the awesome react-native-fs package. Now, this package is a bit difficult to install and use, so we are going to look into the issues, as well as the ways to fix them.
In this post, we are going to create a small app in React Native. We are going to add the feature to write, read, and delete a file using react-native-fs. We will be using a Mac with an M1 chip and an iOS emulator for this project. The errors and the steps to fix them will be different for other platforms.
Initial Setup
We'll be using the React Native CLI. Here we are using Xcode. The steps for the environment variables and Android Studio are documented in the official docs.
First, we'll create a new React Native project. Go to any directory in the terminal. Use the command npx react-native init <project-name> to create a new project.
React Native fs: How to Use fs to Read and Write Files
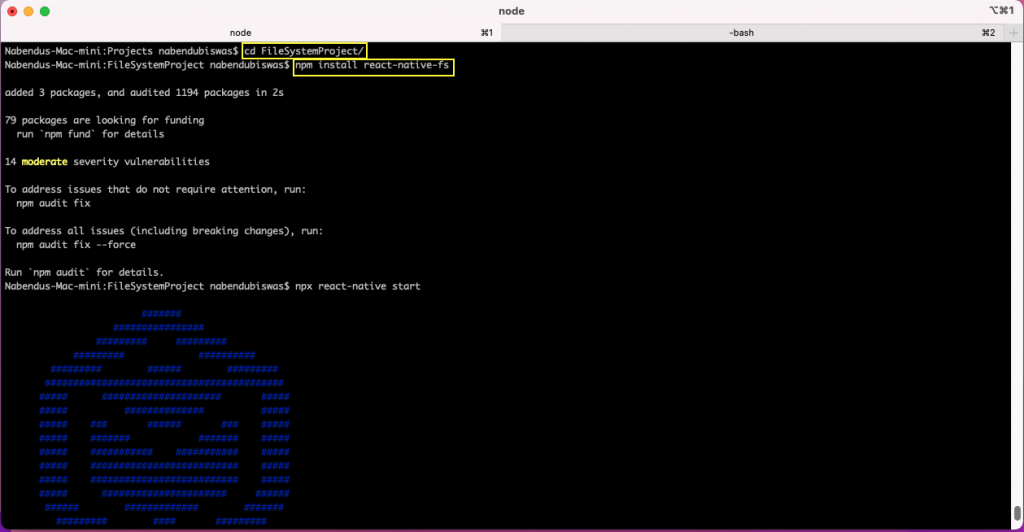
We will also install the react-native-fs file system package in our application with the below command:
Running the File System Project
We need to first navigate to the folder containing the project in the terminal. After that, we need to run the command npx react-native start.
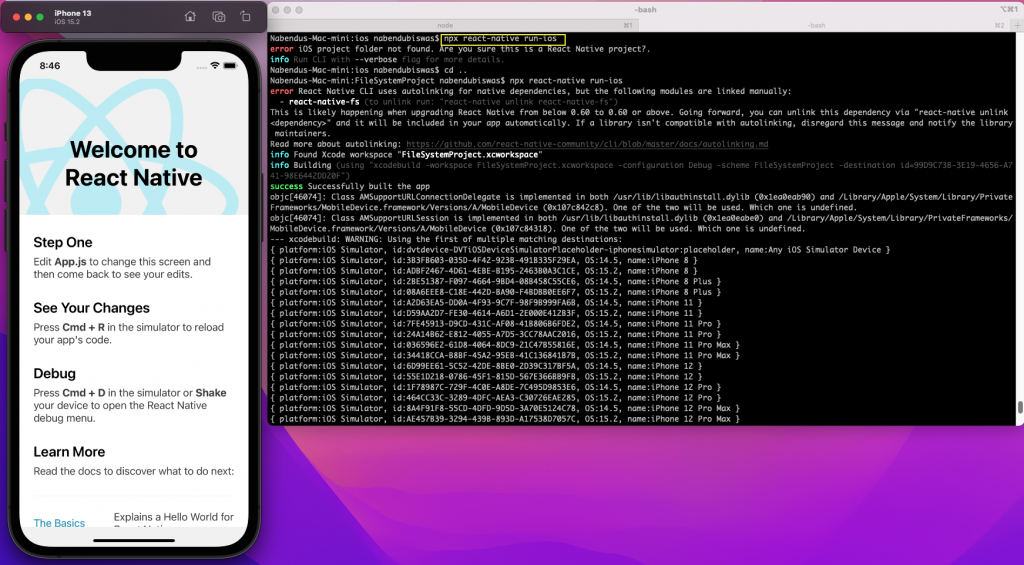
Now we need to run the npx react-native run-ios command in another terminal. It will also open the basic app on the iOS emulator.
More Setup
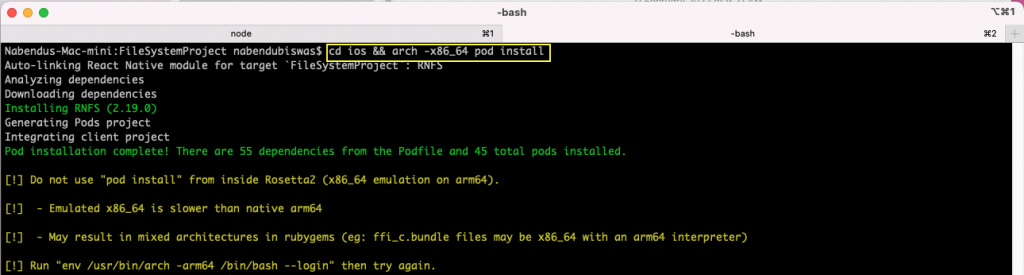
We need to do more setup through the command line. In the project directory, run the below command. This command automatically does the manual setup for react-native-fs.

The Mac M1 requires additional setup for every project in React Native. So we need to run these below commands in the project directory:
Initial Code
We will first create two components, which we are going to use in our project. Create a components folder in the root directory. Create a file ButtonText.js inside it and put the below code in it. It contains a Text field with a props of name. The props of name is shown in the Text field.
Now also create a file AppText.js inside the components folder. It contains a styled Text component. We are using the children props here.
Using Components
Now we will use the newly created components in our App.js file. Remove all the content from the App.js file and add the below content in it. We are first importing the required things, which includes the RNFS module.
Here we have created the buttons using TouchableOpacity. Inside the buttons, we are using the component of ButtonText to show the Text. We will also use the AppText component to show the Text.
Main Logic
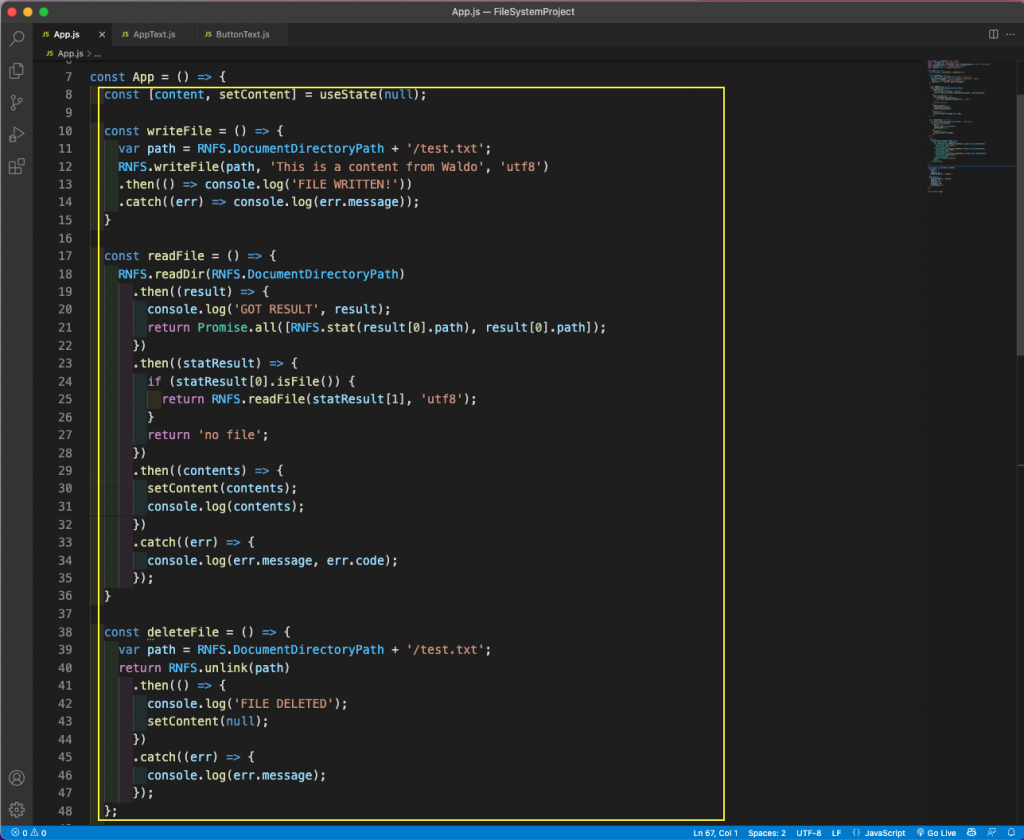
Now we will add the main logic in our app to use the RNFS. We have to first create a state variable of content. After that, in the writeFile(), we are using RNFS.writeFile to write content in the test.txt file.
Next, in readFile(), we are using RNFS.readDir to read the content from the device. If we are getting the file, we are printing in the then statement. We are also using setContent(contents) to set it in the state variable of content. This will also re-render our component, and the data will be shown on the mobile device.
In deleteFile(), we are using RNFS.unlink to delete the file. After deleting, we are doing setContent(null), which will make the content disappear from the mobile screen.
We have to add the above code inside the app, as shown below:
Running the App
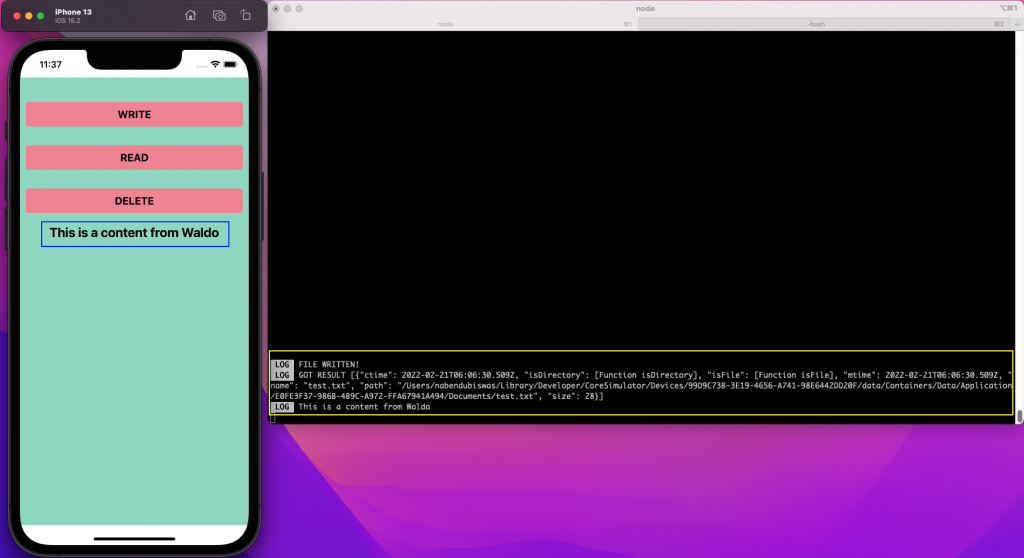
With this code, our app is complete. Now click on the WRITE button in the iOS emulator, and it will show the log of FILE WRITTEN.
When we click on the READ button, it will show as the log and also the content on the screen.
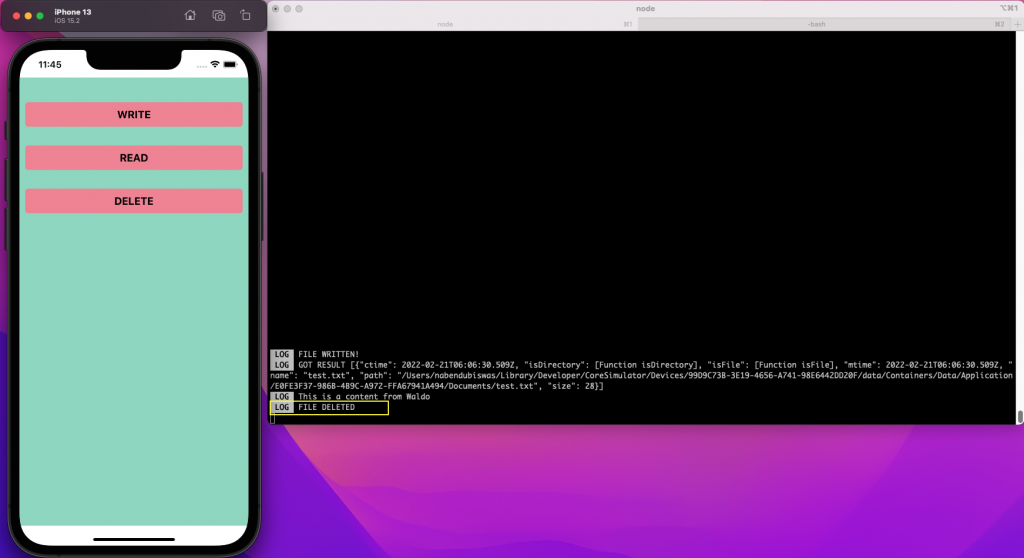
Clicking on the DELETE button will delete the content from the mobile device. It will also show us the log of FILE DELETED.
App Testing
In most companies, it's mandatory to test your apps. Testing helps us catch errors during development and fix them. There are many ways to test our app, some of which are complicated.

We will be using the snapshot way to test our app. The best thing about creating apps with the React Native app is that it comes with a built-in Jest framework. The Jest testing framework is used for writing automation testing and many other types of tests.
In the __tests__ folder, remove the earlier App-test.js file. After that, add two files inside it: ButtonText-test.js and AppText-test.js.
Next, in the AppText-test.js file, we will add the below content. We are using a simple snapshot test to check whether the tags match with those rendered on mobile.
In the ButtonText-test.js file, we will add the below content. Again, we are testing the mobile layout to see if it matches our code.
To run the tests, we need to run npm run test from the command line. This will run all the test cases written in both files.
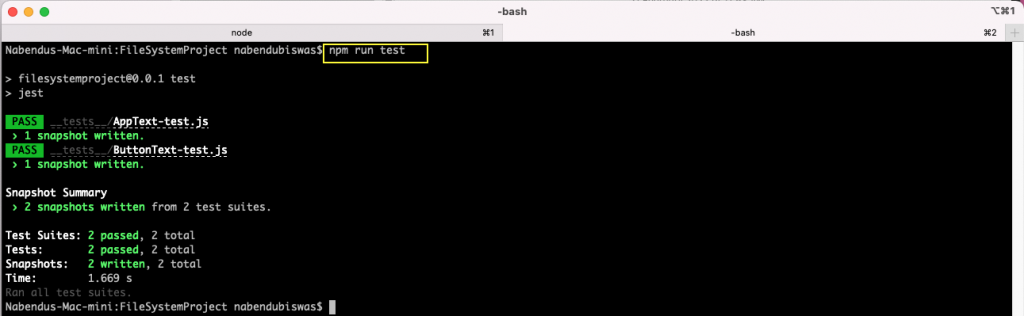
In the above screenshot, we can see that all of our test cases ran successfully. As we can see from writing these simple test cases, we have to learn a new kind of format. And we also need to write a lot of code. If we add React Native file system (RNFS) to the testing, the test cases will be more complicated.
But instead of going through the hassle of writing test cases manually, we can use Waldo, the no-code testing platform. For this, we need to generate the APK or IPA file. After that, we can upload it to Waldo. We can do all types of testing in Waldo by just doing user interactions, so go ahead and create a free account.
Conclusion
In this post, we showed how to use React Native file system with a small project and then used the package called react-native-fs to achieve the same. There are some challenges to using the package, and we were able to rectify them.
We also optimized our app to contain smaller components, which helped us write simple test cases using Jest. But there is a much easier way to do the same without writing any unit tests—by using Waldo. Give it a try today.
Automated E2E tests for your mobile app
Get true E2E testing in minutes, not months.


