


In an effort to increase value to your clients, you might shoot yourself in the foot by cramming too much complexity and too many layers of code that cost time and effort to manage in the long run. This can happen when creating robust and feature-rich solutions for your users if you end up bloating your code more than necessary to add these features.
This situation is quite pervasive, specifically concerning state control, widget, and animation control for a platform like Flutter. Thankfully, solutions like Flutter Hooks are now available, which makes the process of handling state changes and animations more accessible and manageable.
In this article, I will examine Flutter Hooks and demonstrate how to implement them in your projects successfully. By the end, you can expect to have a fundamental understanding of what a Flutter Hook is. Additionally, you should be able to implement your own hooks in a simple Flutter sample application. Finally, I will describe custom hooks and how you can take advantage of them.
It's crucial to point out that this article is intended for Flutter developers. Therefore, I am writing under the assumption that you have a basic understanding of Dart and Flutter technology. If you haven't dipped your toes in Flutter or any technology similar to it yet, I recommend that you spend some time in the Flutter Development Learning Center first.
All good? Great.
Onward.
Flutter Basics
Before we jump into creating any Flutter Hooks, I want you to be ready to do some work and implement what I talk about in this article as we go. For that purpose, let's first build a simple Flutter app that you can use and play with. Also, if you don't know if you have your environment ready to start working in Flutter, feel free to jump to the Flutter guide website.
Let's get started.
Creating your first Flutter app is quite simple. All you need to do is make the skeleton for the view and state of the application.
Feel free to use this code:
This code renders the following:
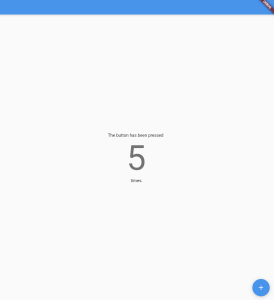
Notice that there is only a button at the bottom and text indicating how many times the button was pressed. For the purpose of this article, I will restrict the code to this structure, but feel free to play with it and modify whatever you want.
Once you feel like you understand what's going on with the view structure in this example, you can continue to the rest of the article.
Now, let's define what a Flutter hook is.
What Are Flutter Hooks?
Flutter Hooks handle state changes on controllers and widgets without needing using the cumbersome and extensive stateful widgets objects. As the dev page of Flutter Hooks states, "Hooks are a new kind of object that manages the life-cycle of a Widget. They exist for one reason: increase the code-sharing between widgets by removing duplicates."
If you come from a web development background, specifically in React, you might find the concepts and features of Flutter Hooks quite familiar. This is because they are analogous to React components and behave in the same way. For example, they allow you to access the state of the widget in the same code and to trigger a rebuild when a state changes.
In essence, the flutter_hooks library provides a powerful and uncluttered way to manage your widget's life cycle by increasing code-sharing between widgets and reducing duplicates in code.
Adding Flutter Hooks
OK, next add Flutter Hooks to your code. Now, it is essential to note that Flutter Hooks is a community library and needs to be added to your project in order to make use of it. Doing so is quite simple. All you have to do is run the following command inside a Flutter project console:
Running this code will add 'flutter_hooks: VERSION' in your project's 'pubspec.yaml' file in the dependencies section.
Alternatively, you can add 'flutter_hooks' into your dependencies section in the same 'pubspec.yaml' file like this:
Just save the file, and Flutter will install the dependency for you.
Now you need to import the flutter_hooks library into your class file.
And that's pretty much it.
Flutter Hooks Example
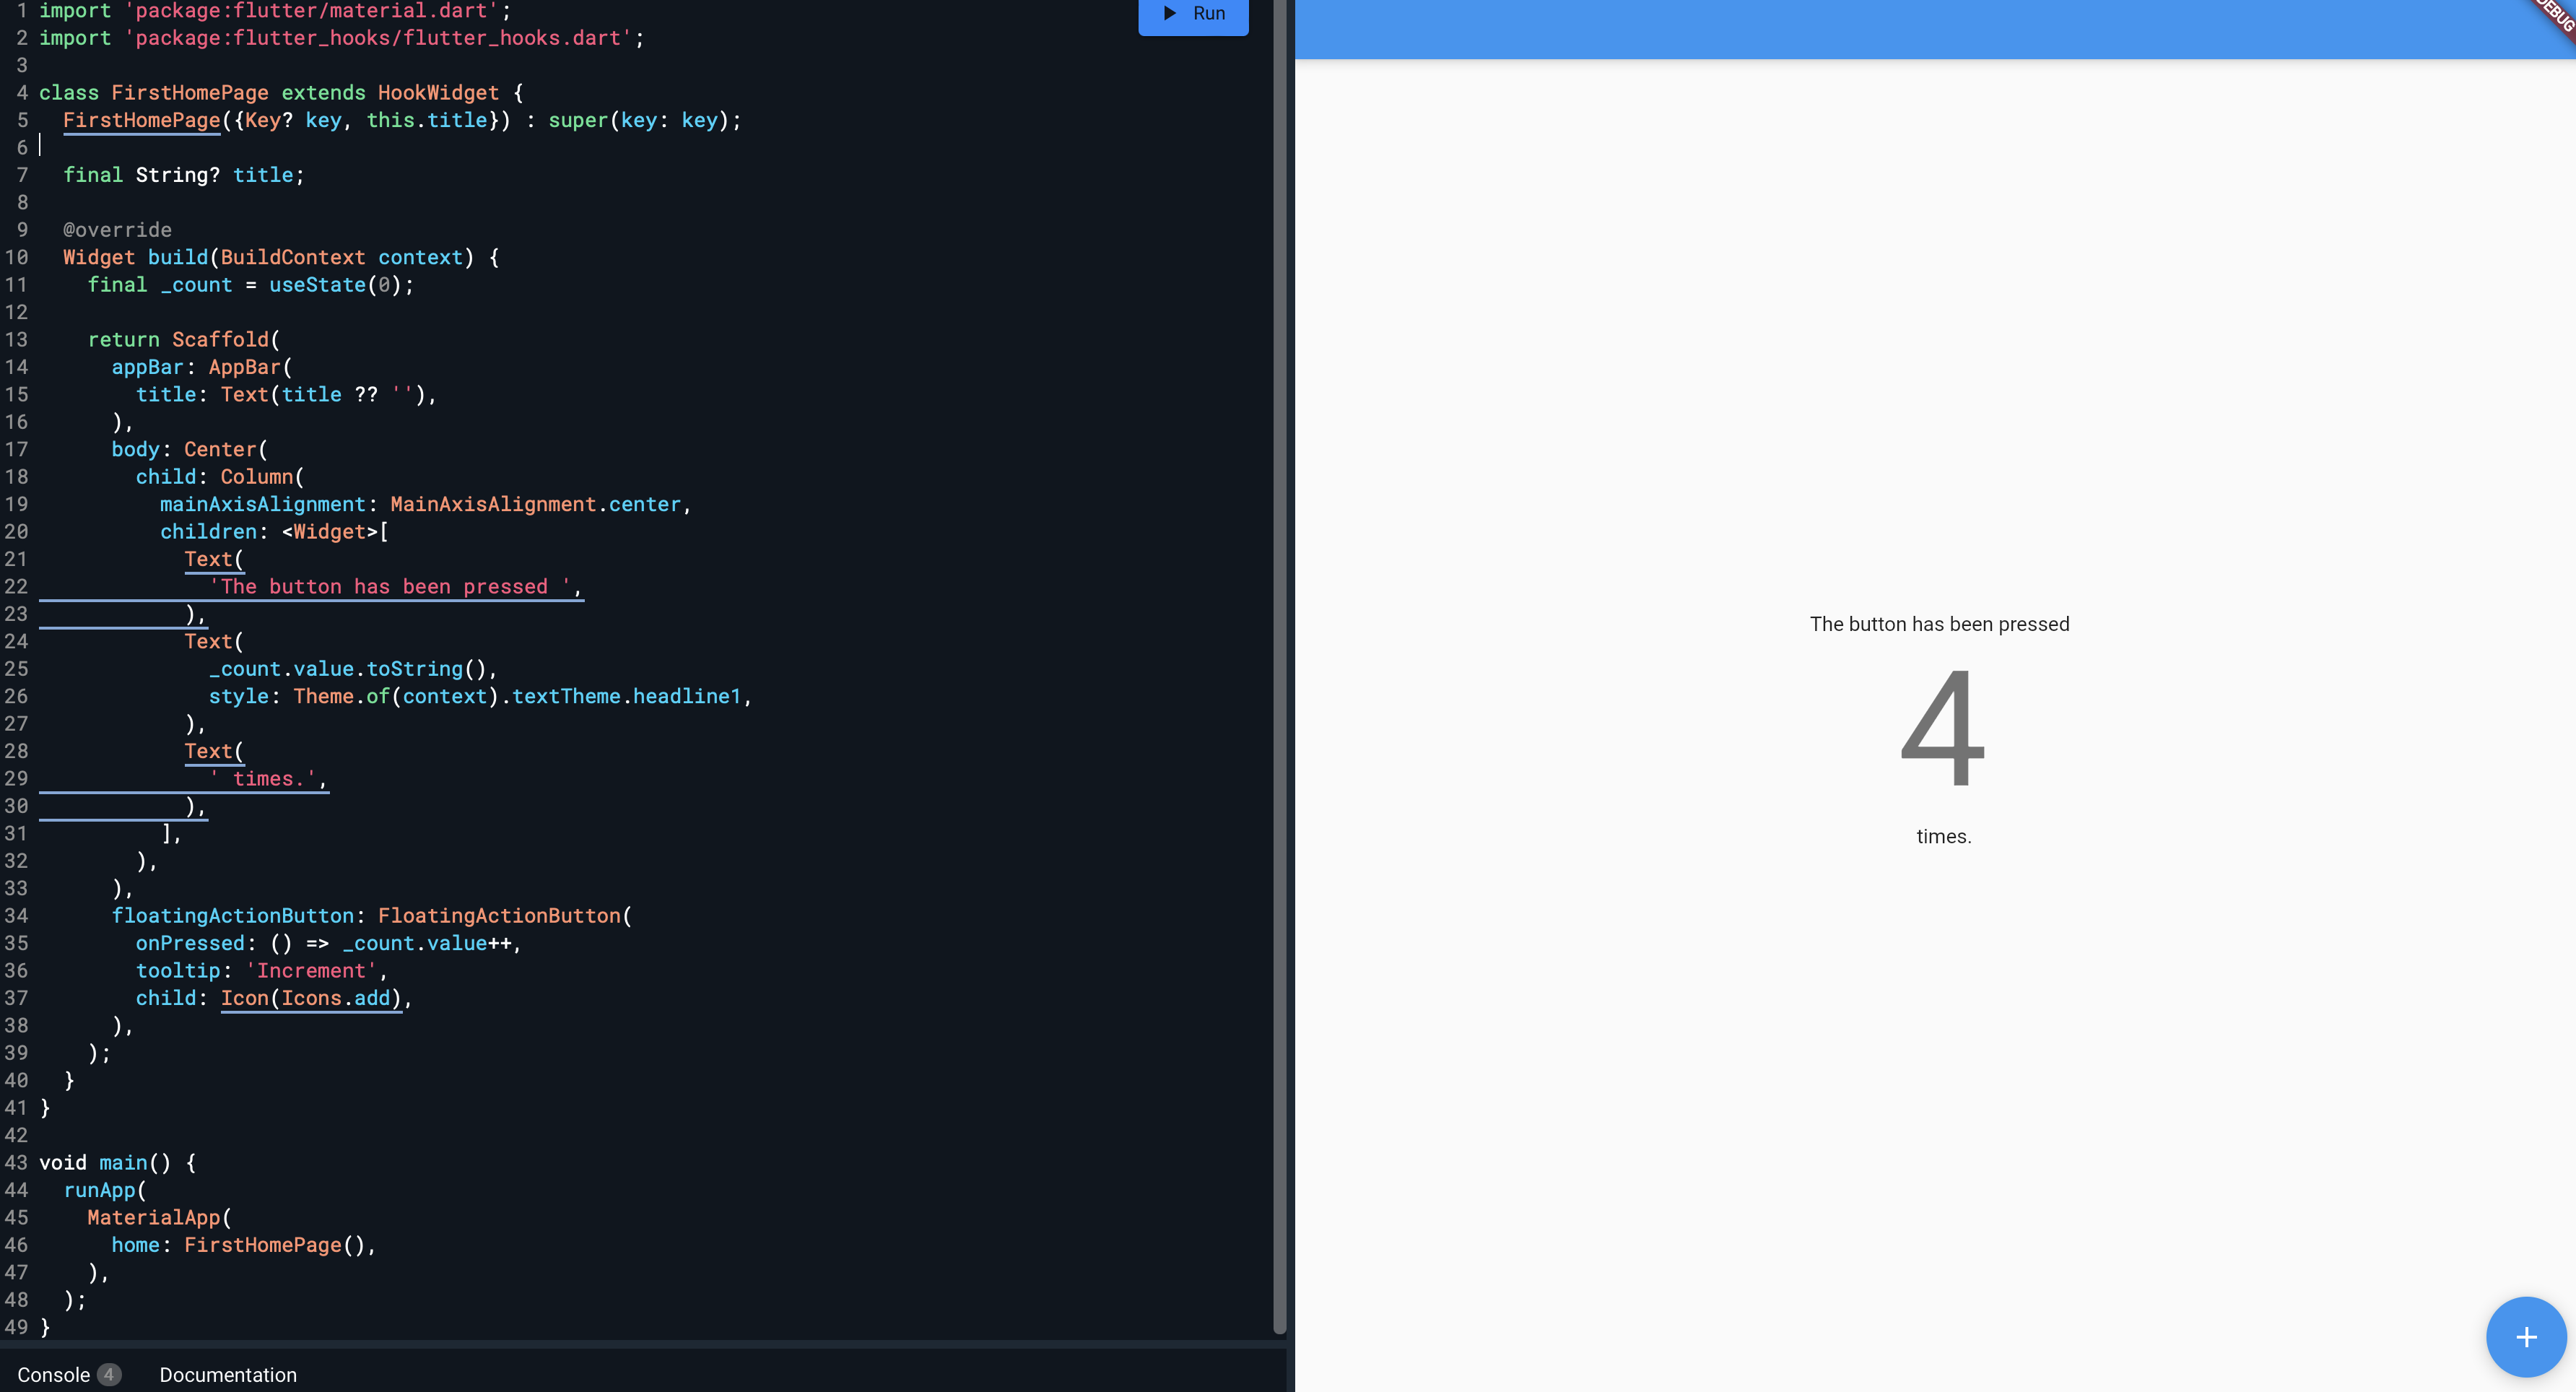
Alright, so to create your first Flutter Hook, update your sample code. In this case, not much needs to be changed in order to make use of hooks other than removing much of the stateful widgets code, which is fantastic since this is the most unmanageable part of the code.
Don't be intimidated by the code. I'll explain what changed.
First, the widget must extend HookWidget. I removed the State extension on the class definition. Next, I removed the 'setState' directive and replaced it with the 'useState' method. This method will provide your object with an updated value on the state. Finally, I added '.value' to the 'count' object. This is because the state is now stored at the .value property of the ValueNotifier. And that's it.
Run your code and notice that the same widgets render and that the same behavior occurs when pressing the button.
Fantastic.
Now, let me explain briefly what the basic hooks do.
useState hook
In essence, 'useState' is a method that subscribes to the state in the .value property. When that value is modified, the 'useState' hook rebuilds the widget and returns the new value.
useEffect hook
The 'useEffect' hook essentially behaves the same way as React's 'useEffect' hook. This hook takes a function callback as a parameter and runs side effects in a widget. An example of this hook would be something like the following:
Custom Hooks
Additionally, you have the option of creating your own hooks with Flutter. The flutter_hooks library provides two ways to create your own custom hooks: a function or a class. This feature is quite useful, primarily if the default hooks don't satisfy your needs.
Now, when creating custom hooks, there are two rules to follow. First, you need to use the 'use' prefix. This approach is a convention that tells developers that the function is a hook. Second, make sure not to render hooks conditionally. It's essential to render only the hooks' results conditionally to avoid state management issues.
A simple example of a function base custom hook would be the following:
This code will print the value of these states every time the state changes.
Quite simple, right?
Testing, Testing, Testing
Now that you know what Flutter Hooks are, understand how to implement them successfully, and extend their functionality, it's essential to make sure your code works as intended and is secure.
Unfortunately, sometimes the cost of development and time to provide the robustness and quality that your clients expect is too great. Therefore, focusing only on producing results for agile teams with limited experience and resources is critical. So in those cases, it's crucial to rely on more sophisticated and reliable testing solutions like Waldo's behavioral replay engine. It's a powerful and intuitive no-code platform that lets even nontechnical members of your team own mobile test automation. Our solution can handle your app's dynamic screen, variations in load time, and other common issues to provide your team with real-time, reliable insights.
Automated E2E tests for your mobile app
Get true E2E testing in minutes, not months.


