


Firebase is a serverless or backend as a service (BaaS) solution from Google. What that means is, with firebase, you worry less about building a backend and focus more on building your mobile app.
To further explain what Firebase is, let’s look at some of the services it provides. With Firebase, you can add features like user authentication, database, file storage, notifications, and more to your app without managing a server.
In this post, we’ll learn about how Firebase is useful and why a Kotlin developer would use it. In addition to that, we’ll take a look at some potential use cases. Last but not least, we’ll walk through the steps to build a Kotlin app for one of the use cases and learn how to test the app we build.

Why Firebase Is Useful With Kotlin
Earlier, we mentioned that Firebase makes building mobile apps easier and faster. And that is because Firebase removes the stress of managing a backend. Firebase is also very compatible with Kotlin. Hence, you get to enjoy all the features of Firebase with ease while writing Kotlin apps.
Kotlin is one of several programming languages and platforms officially supported by Firebase. As such, Firebase offers tons of resources for learning via the official documentation. In addition to that, because the combination of Firebase and Kotlin is very popular, you can find answers to challenging situations quickly with the help of a thriving developer community.
If those are not enough reasons, using firebase with Kotlin lets you quickly test your idea as an app. In fact, you can turn an idea into an app in just one weekend using Firebase and Kotlin. In the next section, we’ll talk more about use cases how you can apply Firebase to your app or idea.
Potential Use Cases for Firebase in a Kotlin App
Here are three potential uses cases for Firebase in an app.
1. Building a Chat App: You can add a chat feature to your app with the help of Firebase Cloud Messaging (FCM). You can also use Firebase Authentication for user identification.
2. Adding Multiple Signing in Options to an App: With Firebase, you can allow users to sign in to your app using multiple channels. Firebase Authentication supports authentication via email and password, phone number, Google account, Facebook, Twitter, and more.
3. Adding a Photo Upload Feature in App: If you wish to allow users of your app to upload a profile photo, the Firebase file storage service has you covered.
4. Storing Data Online With Real-Time Update and Offline Support: Firebase is ideal for storing data that change often, such as a list of recent weather data. Realtime Database and Firestore support real-time sync of data and have offline support.
Adding Firebase to Your App
At this point, we know what Firebase is and have looked at some use cases. Now, let’s see Firebase and Kotlin in action by building an actual app using both.
We’ll be building a chat app (use case 1) that includes a user authentication system (use case 2).
Prerequisites
Before you continue, make sure to have the following:
- Android Studio (Version 4.0+)
- An emulator or physical Android device
- A Google account (Gmail)
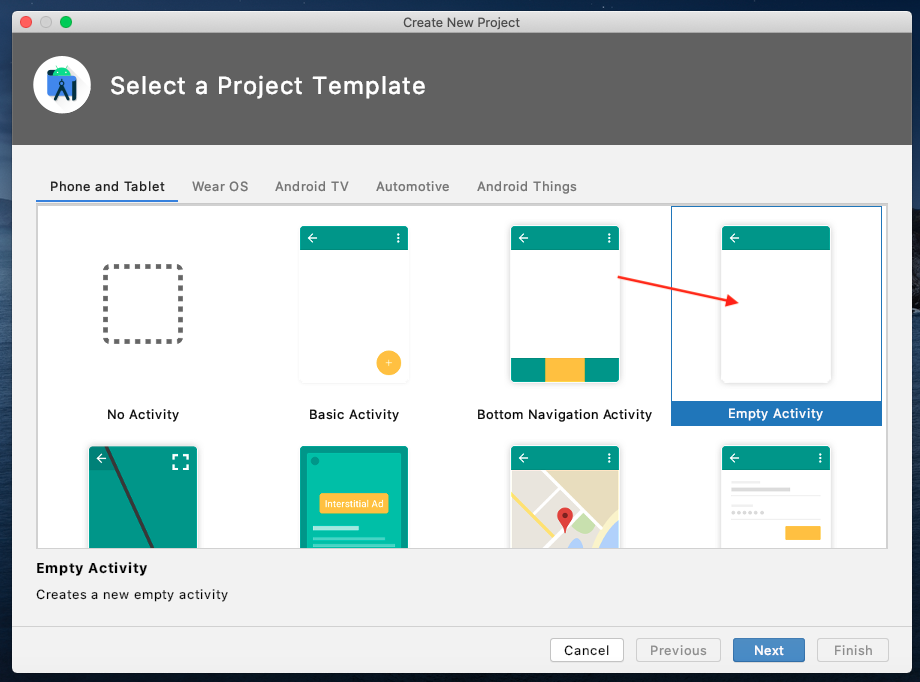
Step 1: Creating a New Android Studio Project
First, we’ll need an Android Studio project. You can create a new project or skip this step and add Firebase to an existing project.
To create a new project, open Android Studio and navigate to File -> New -> New Project. Follow the new project wizard to complete the project creation process.
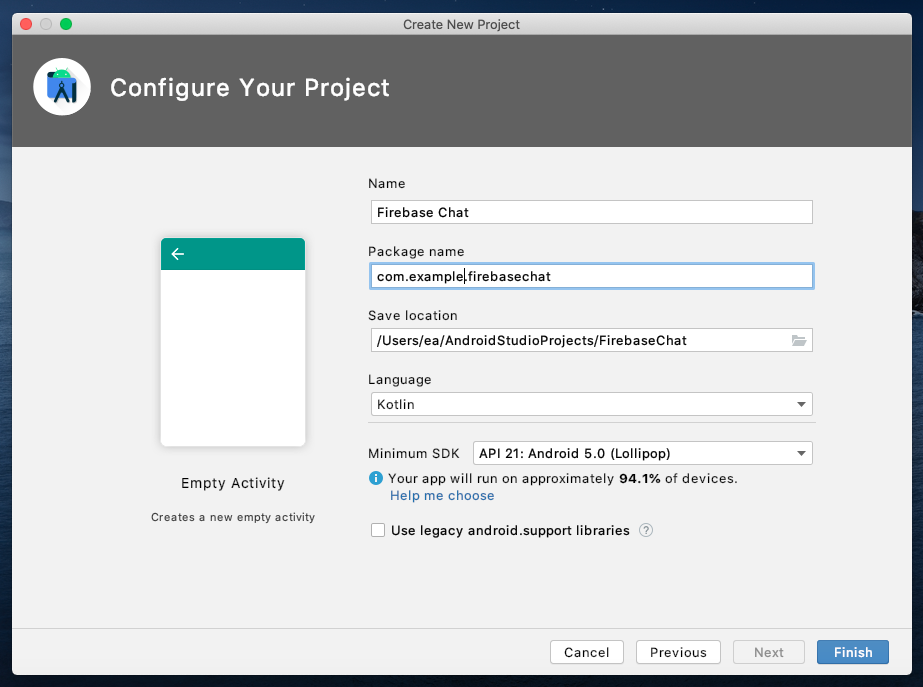
In the new project wizard, select Empty Activity as the project template and Kotlin as the programming language.
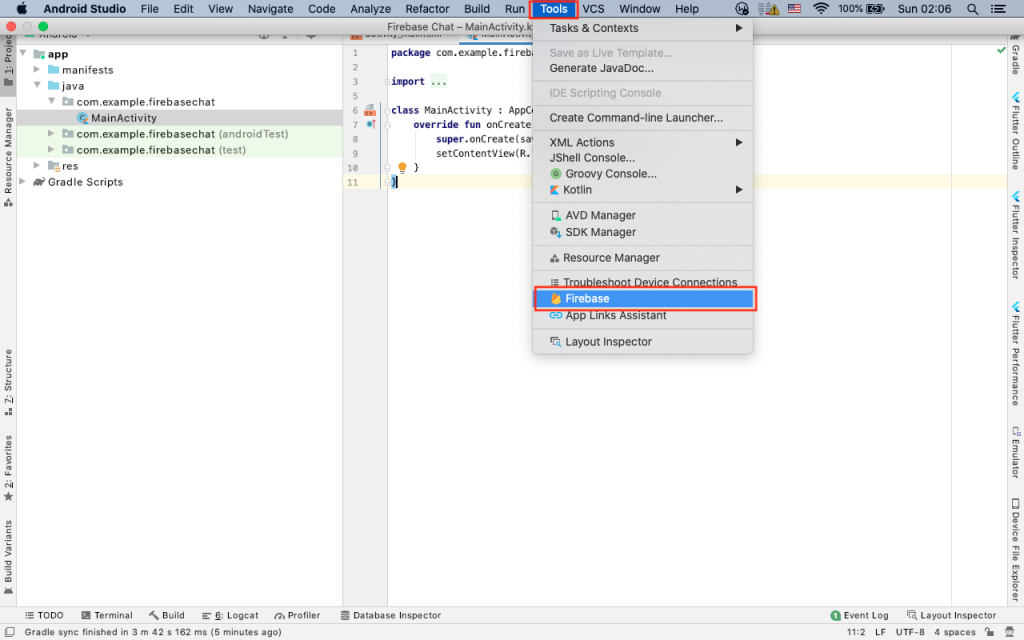
Step 2: Create Firebase Project
Now that we have an Android project, let’s create a Firebase project. Go to Android Studio, and navigate to Tools ->Firebase. This launches the Firebase Assistant pane.
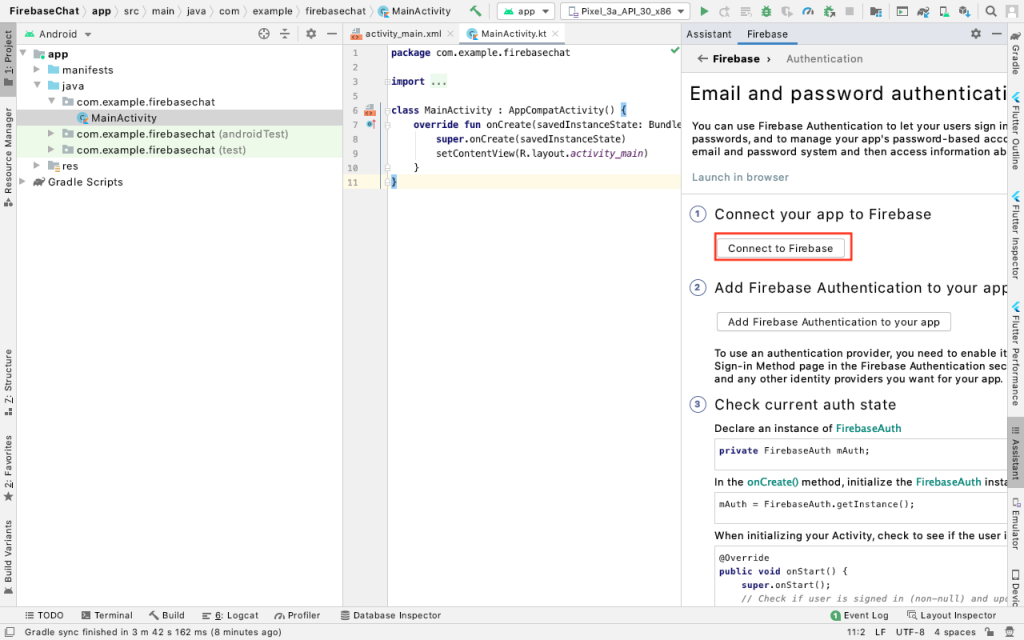
In the Firebase Assistant pane, select Authentication and then click on Connect to Firebase.
The Firebase console will launch in your default browser. From the console homepage, click on Add new or select an existing project.
Follow the new project setup wizard in the Firebase console to complete the process.
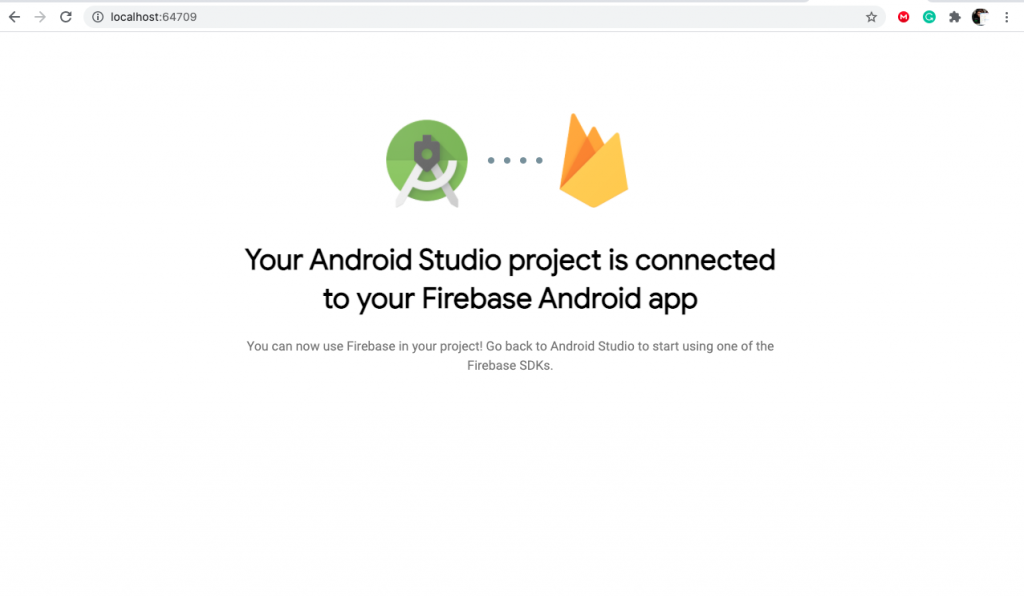
Once you are done, return to Android Studio to continue the project setup.
TIP: If alternatively, you prefer to connect your Android Studio project to Firebase manually, you can follow the official documentation here in place of this step.
Step 3: Enable Authentication
Back in Android studio and in the Firebase Assistant Pane, click on the Add the Firebase Authentication SDK to your app button. This adds the necessary Firebase plugin to your project. Accept the build.gradle edit confirmation dialog to continue.
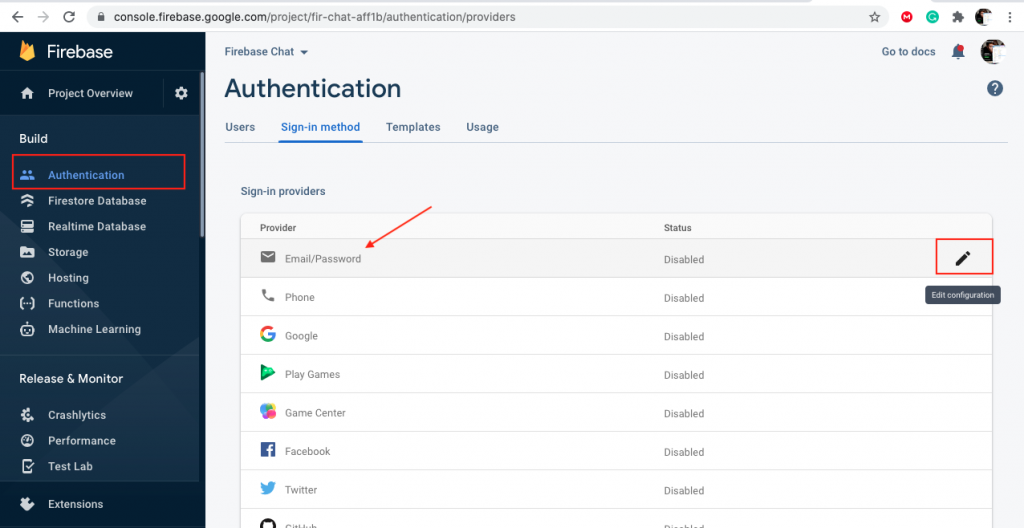
Next, open https://console.firebase.google.com/ in your web browser and select your project. Then, click on Authentication from the left side menu to open the authentication section of your project. Once you are in the authentication section, click on Get Started to reveal the authentication options. Navigate to the Sign-in method tab then enable the email/password option.
Step 4: Adding User Authentication Screens
Now that we have Firebase Authentication enabled for our app, let’s set up user login and signup screens.
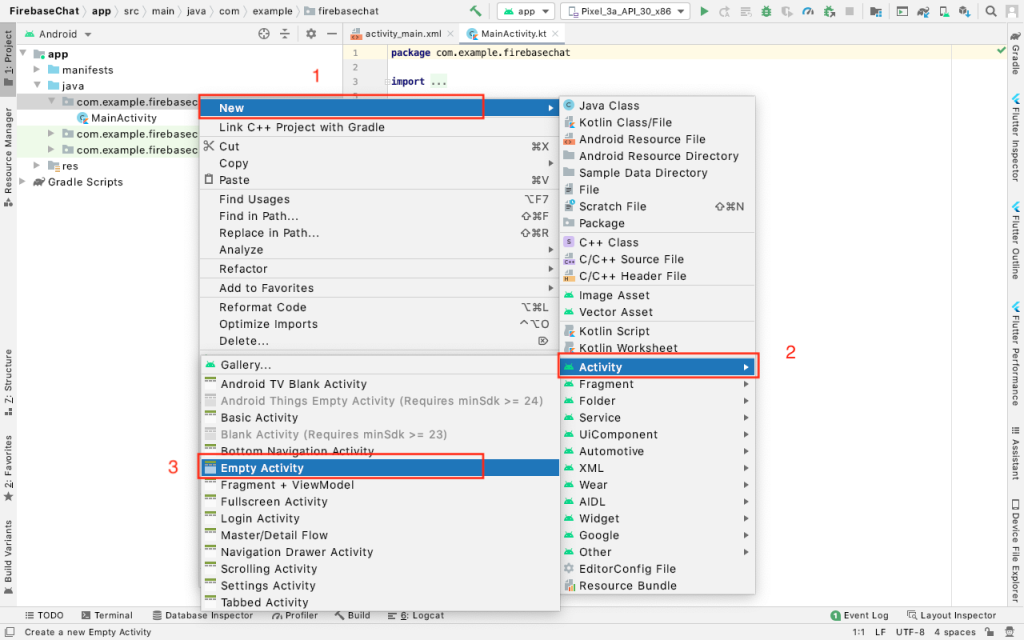
Return to Android Studio. Then, create two new Empty Activities with the following names:
- RegistrationActivity
- LoginActivity
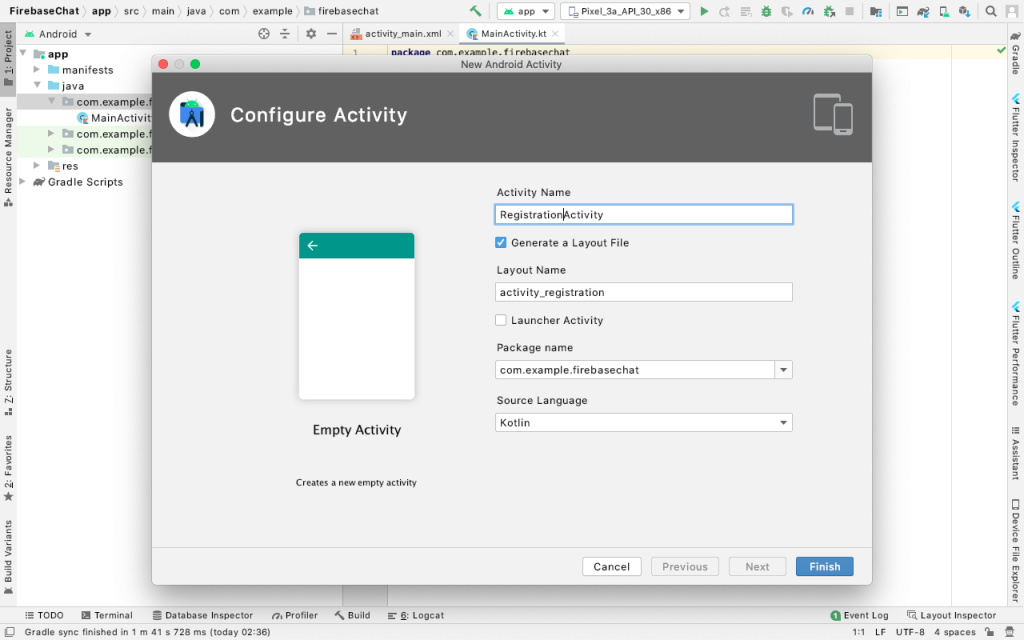
Here’s how to create a new activity: Right-click on the main project package name, then navigate to New-> Activity ->Empty Activity. Enter one of the activity names and hit Finish.
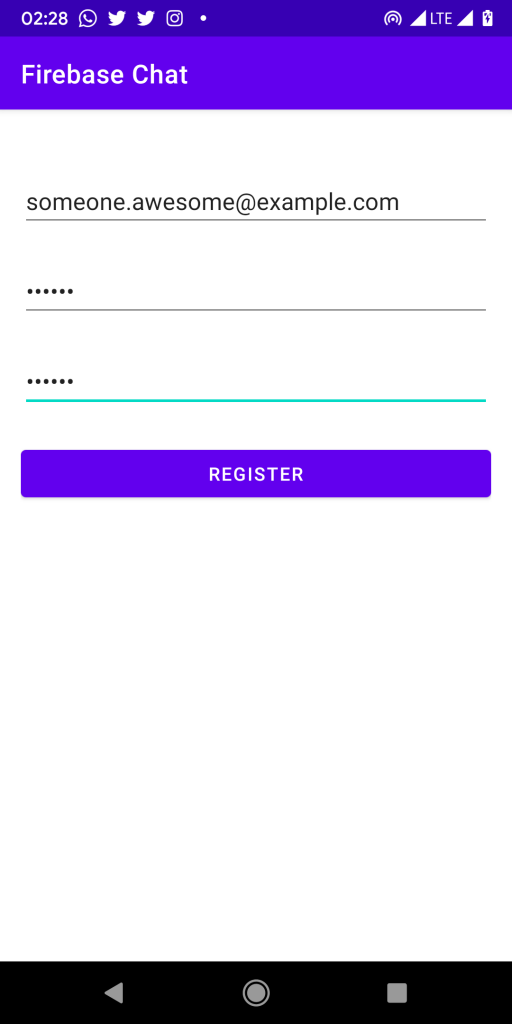
After both activities are created, we’ll add two EditText views and a Button to the activity_registration.xml layout file (located in the res-> layout directory). To do that, open the activity_registration.xml file and update the code to the following:
Next, open activity_login.xml and update that code too:
Step four adds all the required views to the registration and login screens.
Step 5: Connecting the Screens Together
Now that we have all the screens we need for our app, let’s connect them together. Start by deleting the current content of activity_main.xml and replacing it with the following code:
Next, add the following method to MainActivity.kt file (located at app-> java -> your.package.name):
Step 6: Adding Firebase Authentication
Open RegistrationActivity.kt file (located at app-> java -> your.package.name) and add the following code:
The above code creates a method that handles new user sign-up. It calls Firebase Authentication’s createUserWithEmailAndPassword() method, which accepts email and password as arguments. Because we’re using Firebase Authentication, this is all we need to add sign-up to our app. You can find the full code for RegistrationActivity.kt here.
Next, let’s add the login feature to our app. To do that, open the LoginActivity.kt file (located at app-> java -> your.package.name) and add the following code:
This method calls Firebase Authentication’s signInWithEmailAndPassword() method. The complete code for LoginActivity.kt can be found here.
Testing Application
To test your app, connect your Android device to the computer or start an emulator. After that, hit the green play button to run your app. Wait for the app build process to complete. Once the app is running, tap on the Register button to create a new account. If everything works fine, you should be redirected to the chat screen. Otherwise, you’ll be greeted with a message that says “an error occurred.”
Next, test the login feature. To do that, submit the same email and password you signed up with. Once more, if the process is successful, you will be redirected to the chat screen.
Finally, you can also test your app using Waldo, a no-code testing solution. While testing with this tool, you don’t need to worry about manually typing in values. Everything is automated even without writing any extra automated testing code. You can learn how to get started with Waldo here.
Summing Up
Firebase has more features and services. Hence, it’s impossible to cover all of them in a single post. However, in this post, we’ve managed to see how to get started using Firebase with Kotlin.
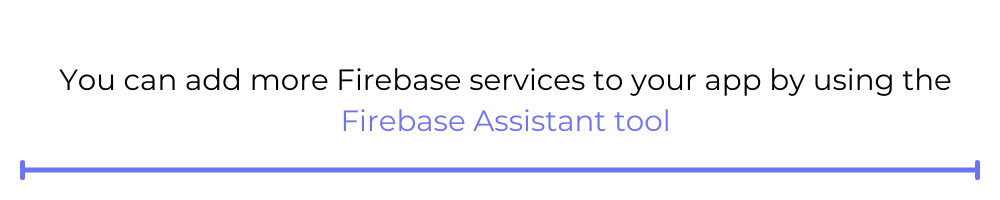
You can add more Firebase services to your app by using the Firebase Assistant tool. Alternatively, you can add services using the Firebase console. You can find the full code for our example app here.
Automated E2E tests for your mobile app
Get true E2E testing in minutes, not months.


