


Splitting a string is a major task for any developer. The method is a bit different in Swift than other programming languages. In this tutorial, we’ll write our Swift code in a playground inside Xcode. A playground is suitable when we want to test some code, but not build an app.
First we’ll go over the basics of strings. Then you’ll learn about NSString, which is the old way to write strings. After that you’ll see some built-in functions in the Swift language to split strings into sub-strings. Lastly, we will look at different ways to split a string into array of substrings.
Playground Setup
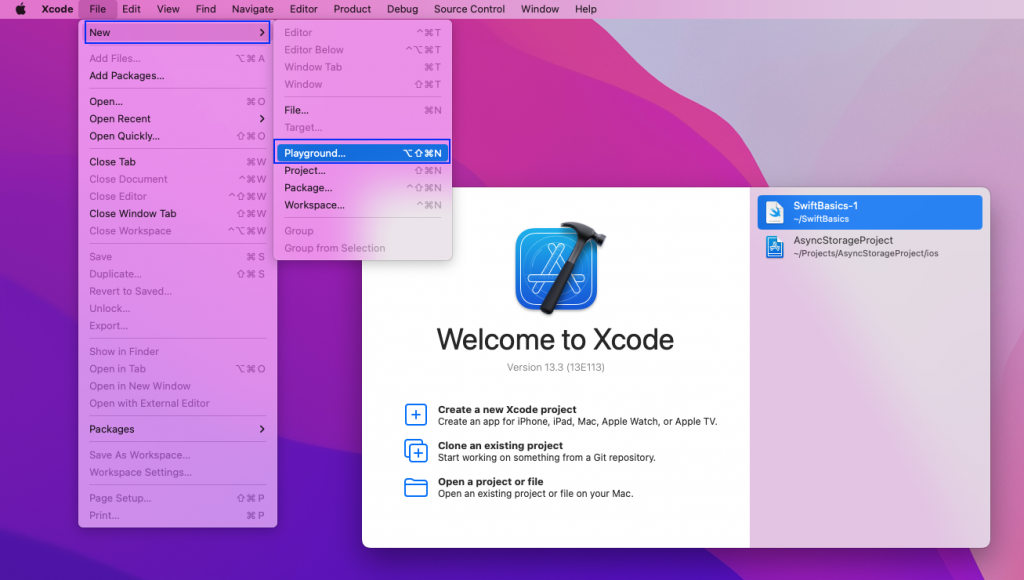
To run Swift code we’ll use Xcode, which is the code editor in MacOS. Open Xcode and then click on File -> Playground.
Keep the default template option (iOS) and select Blank. Then click the Next button.
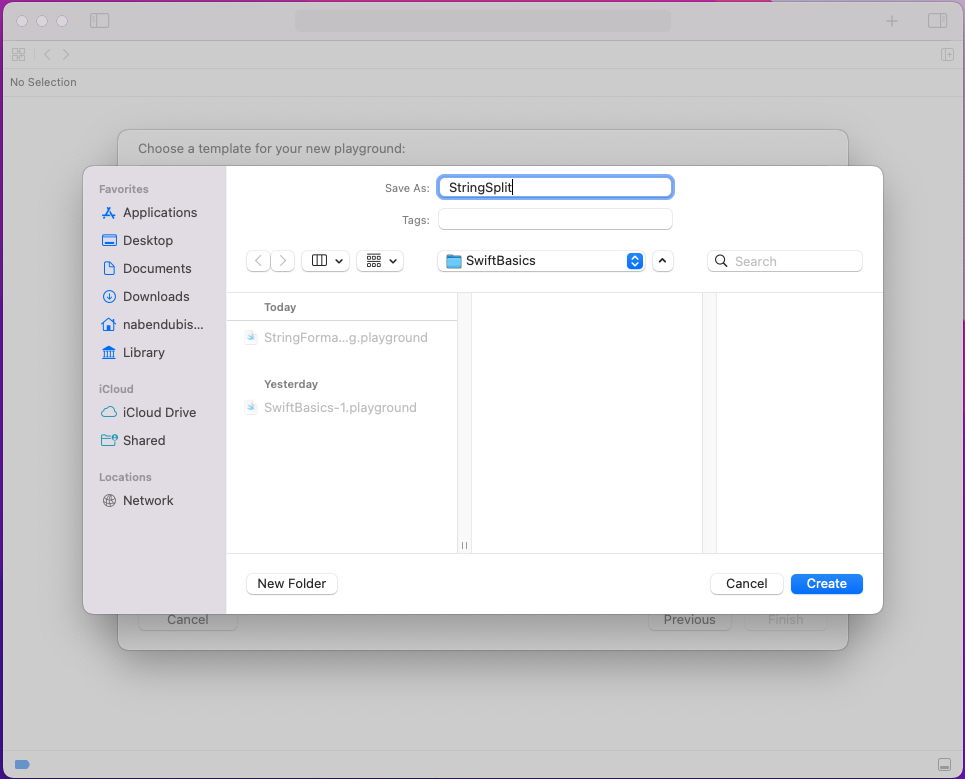
We need to give the playground a name—let’s call it StringSplit. Then click the Create button.
Now, let’s open the playground in which we can write the code.

String Basics
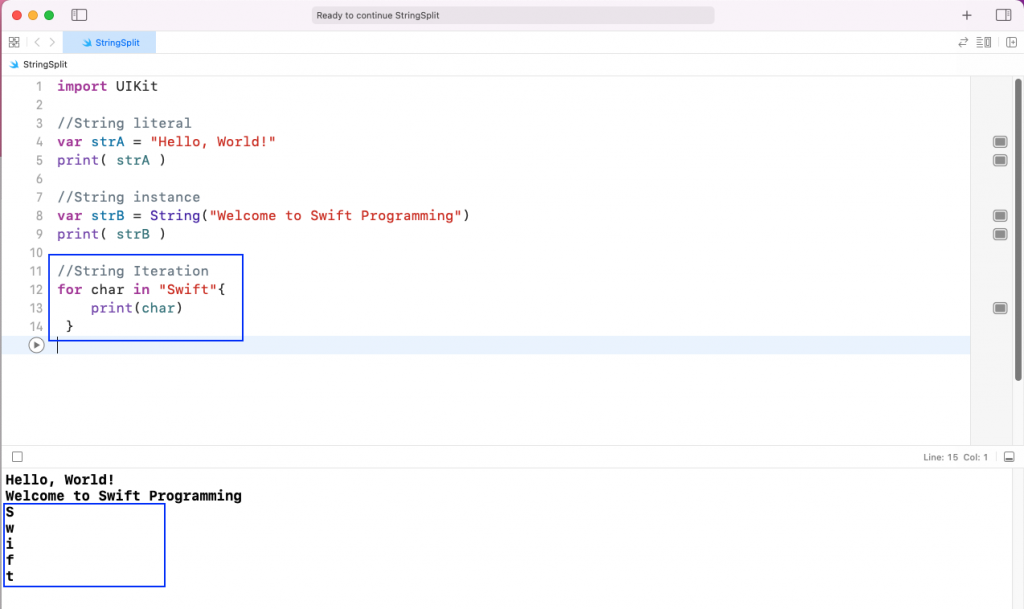
There are two ways to create a string in Swift: you can use a string literal or a string class instance. We’ll create two strings, one as a literal and one as a class instance. After that we will print them in the playground.
For the literal, you put the string inside double quotes. For the instance, you put it inside the String() class.
Next, click on the Run button to see the result in the console.

String Iteration
We can iterate over strings using a Swift for loop. Swift uses a for…in loop, that requires you to provide a temporary variable. Use char for your temporary variable, and you want to print it.
As shown in the output, you get each character back in a separate line.
String Concatenation
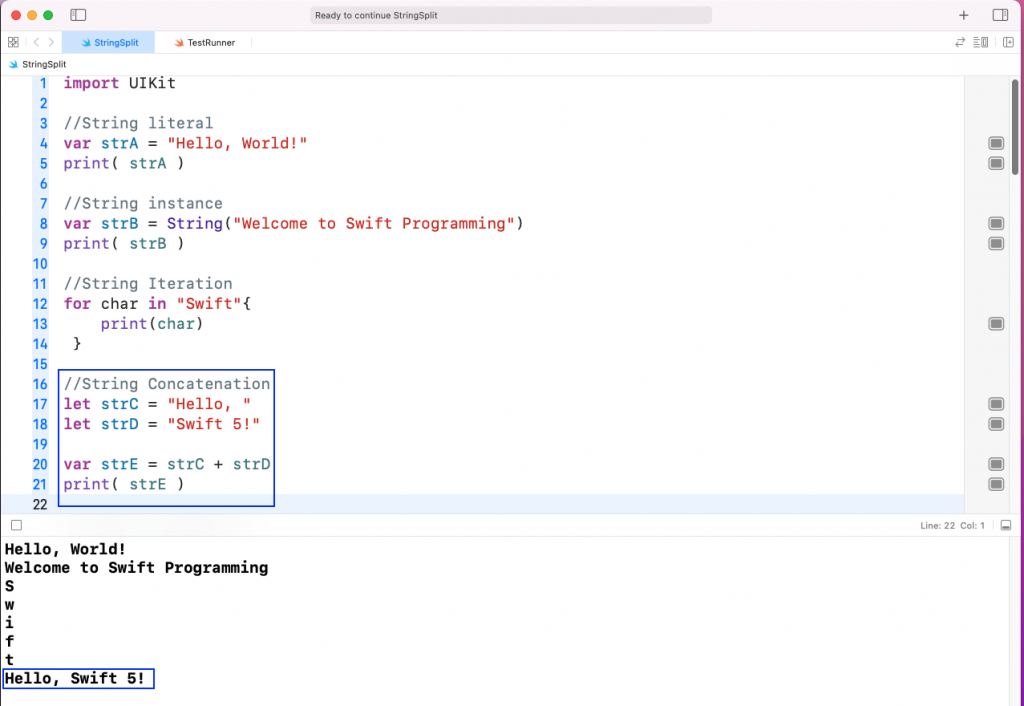
We can join two strings by simply using the addition (+) operator. The example below shows how to concatenate two strings (strC and strD), to the output strE.
And we get Hello, Swift 5! on running the code.
NSString
NSString is an older string format that was used in Objective-C. You can still use it in Swift 5. NSString have built-in support for Unicode format. So, you can show Chinese characters also with it.
But the NSString was a difficult format to use because it required you to give data types, in addition to the variable. For instance, in the example below, there’s a message consisting of name, email, and year. This format cannot be used in Swift and will give an error.
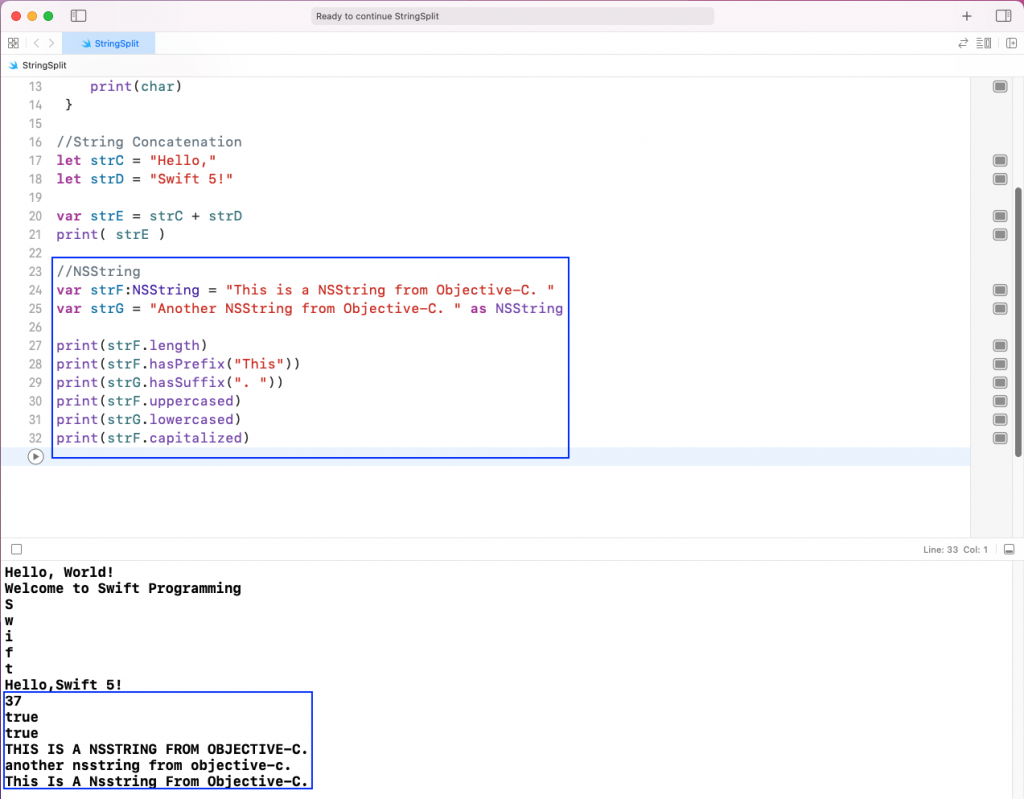
There are two ways to create NSString. The first way is to give the type as NSString. And the second way is to have a String as an instance of NSString. We can also use a lot of NSString method to get useful things.
In the output, you can see that you first get the length of strF. After that, we check if it has the prefix This. We also check if strG has the suffix dot (.). Then we make strF uppercase and strG lowercase. Lastly, we capitalize strF.
Substring With Function
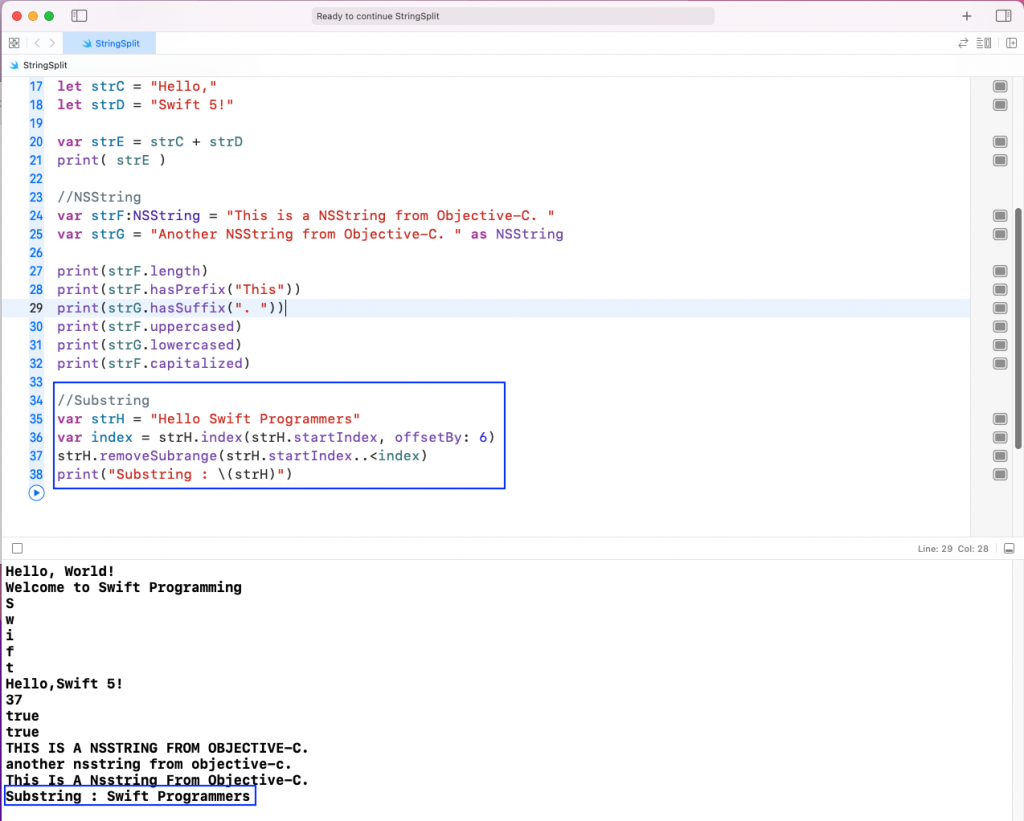
You can get a substring from a string using the removeSubrange() function. In the example below, we have a string with the name strH, which is “Hello Swift Programmers.” Now, we want to extract “Swift Programmers” from it.
Here, we first need to find the index of S using the index function. We pass the startIndex parameter and the offsetBy value, in the index function. After that we use the removeSubrange() function, to remove “Hello” from our strH.
As in the output, we can see the strH now contains Swift Programmers
Substring With Delimiter
You can also get the substring by extracting it from the delimiter. In this method, you first get the index of the delimiter. After that, through an array, we take the string up until we reach the indexed value.
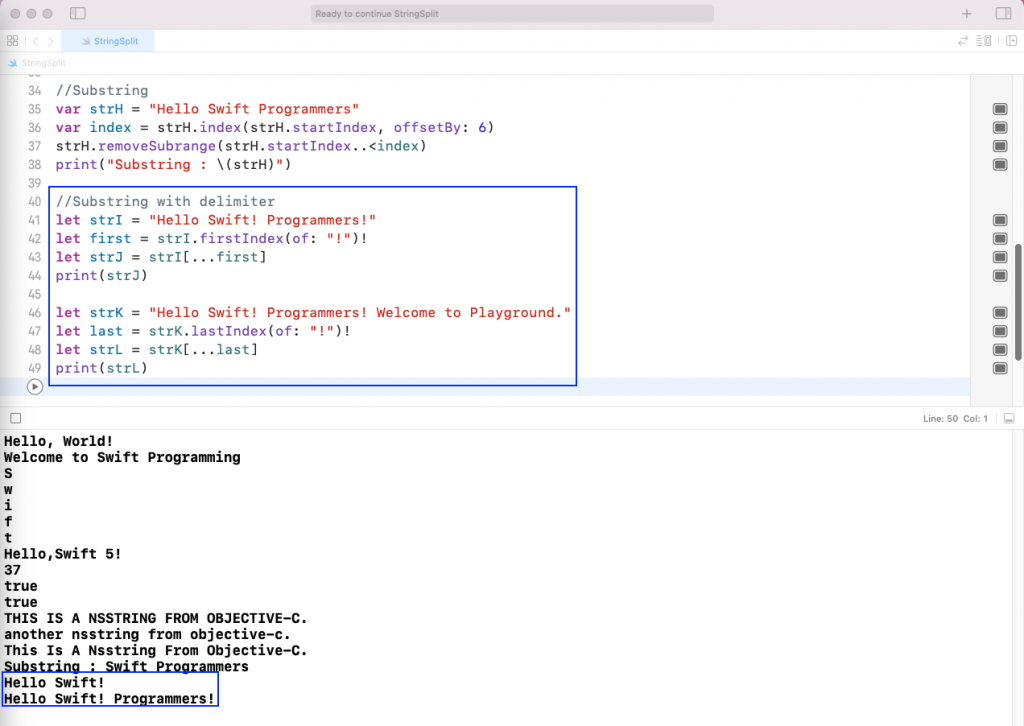
In the example below, we have a string strI, which is “Hello Swift! Programmers!” Now, we get the index of the first !. After that, using the format strI[...first], we get the string “Hello Swift!”
In the next example, we have a string strK, which is “Hello Swift! Programmers! Welcome to Playground.” Now, we get the index of the last exclamation point and then use the format strK[...last] to get the string “Hello Swift! Programmers!”
As shown in the output, strJ now contains “Hello Swift!” and strL now contains “Hello Swift! Programmers!”
String Into Array of Substring
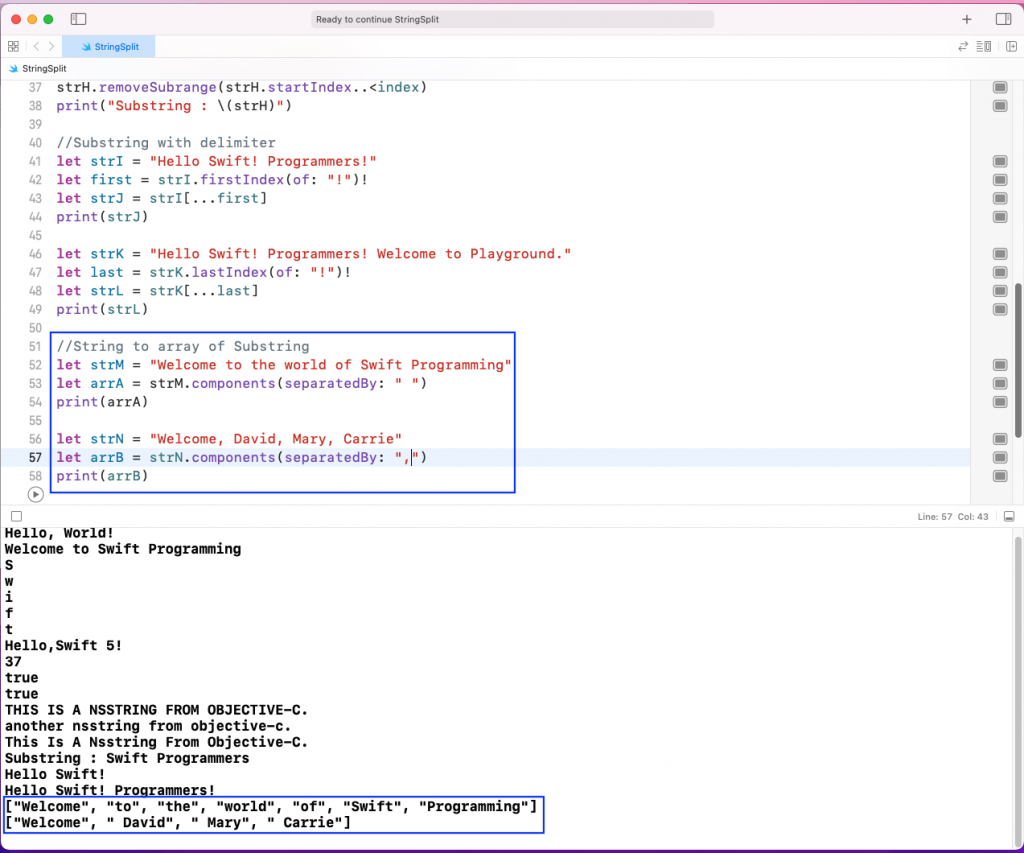
You can convert a string into an array of a substring, using the separatedBy operator. For this, use the components(seperatedBy:) method. Here, we need to discuss the separator, so let’s look at it in two examples.
In the first example, we have string strM, which is “Welcome to the world of Swift Programming.” You can see that all the words are separated by a space, so we’ll give the separator as space ( " ").
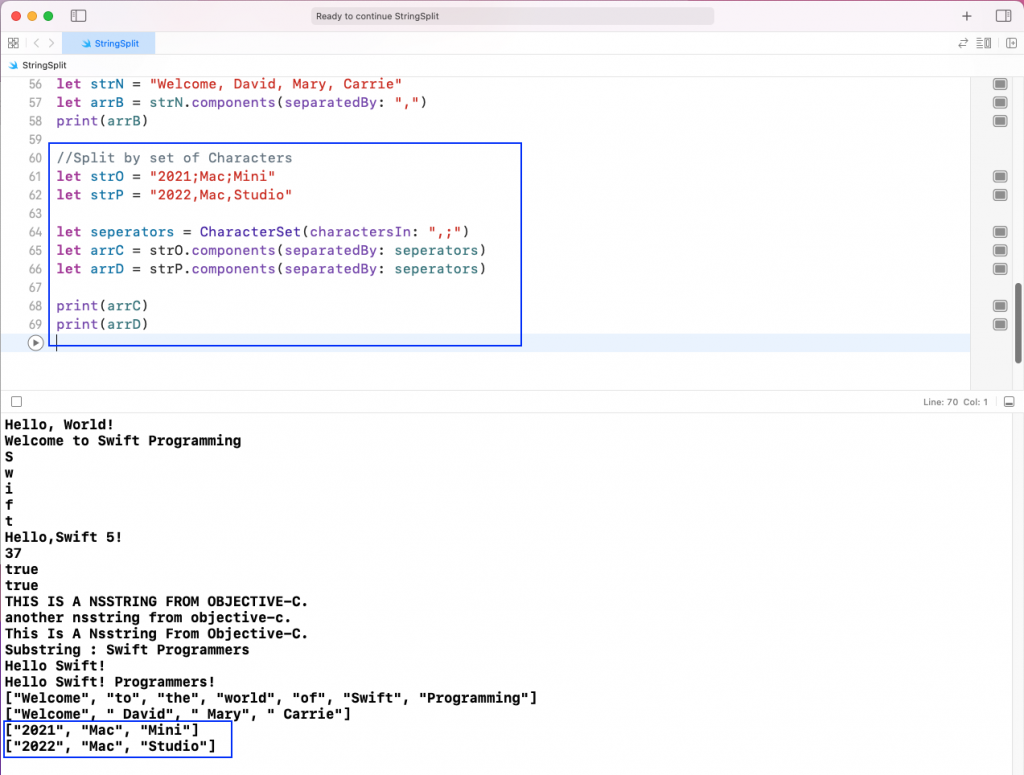
In the second example, we have string strN, which is “Welcome, David, Mary, Carrie.” Note that now all words are separated by a comma. So, we’ll give the separator as comma ( ",").
As shown in the output, arrA now contains ["Welcome", "to", "the", "world", "of", "Swift", "Programming"]. And arrB now contains ["Welcome", " David", " Mary", " Carrie"].
Split by a Set of Characters
You can also give a set of characters as separators while converting a substring into an array. In the example below, we have two strings: strO and strP. One has a semi-colon (;) as the separator, and the other has a comma (,) as the separator.
Now we have a separator variable, in which we give ",;" in the CharacterSet(). We use this in both arrC and addD to convert them to an array.
As shown in the output, arrC now contains ["2021", "Mac", "Mini"] and arrD now contains ["2022", "Mac", "Studio"].
Testing the Code
Now, let’s test our playground code with the XCTest framework.
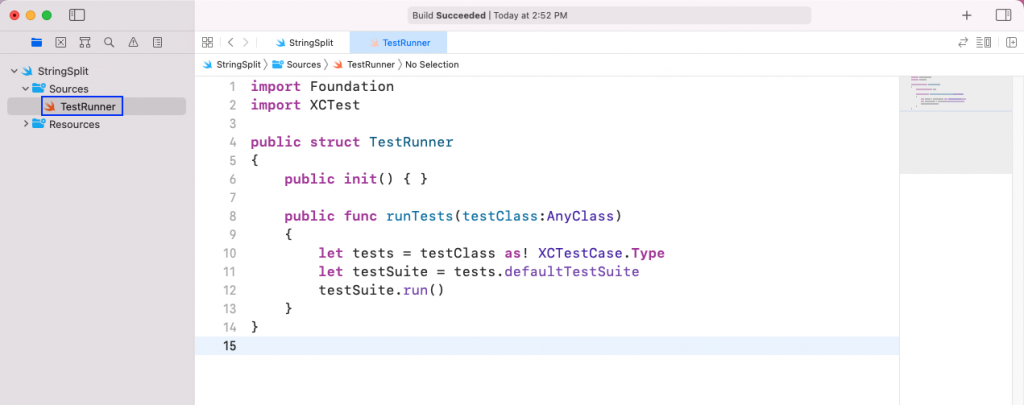
First, create a file called TestRunner in the sources folder and add the code below to it. After executing the required imports, write a structure called TestRunner. Here, the code tells XCTest to run all test suites passed to it.
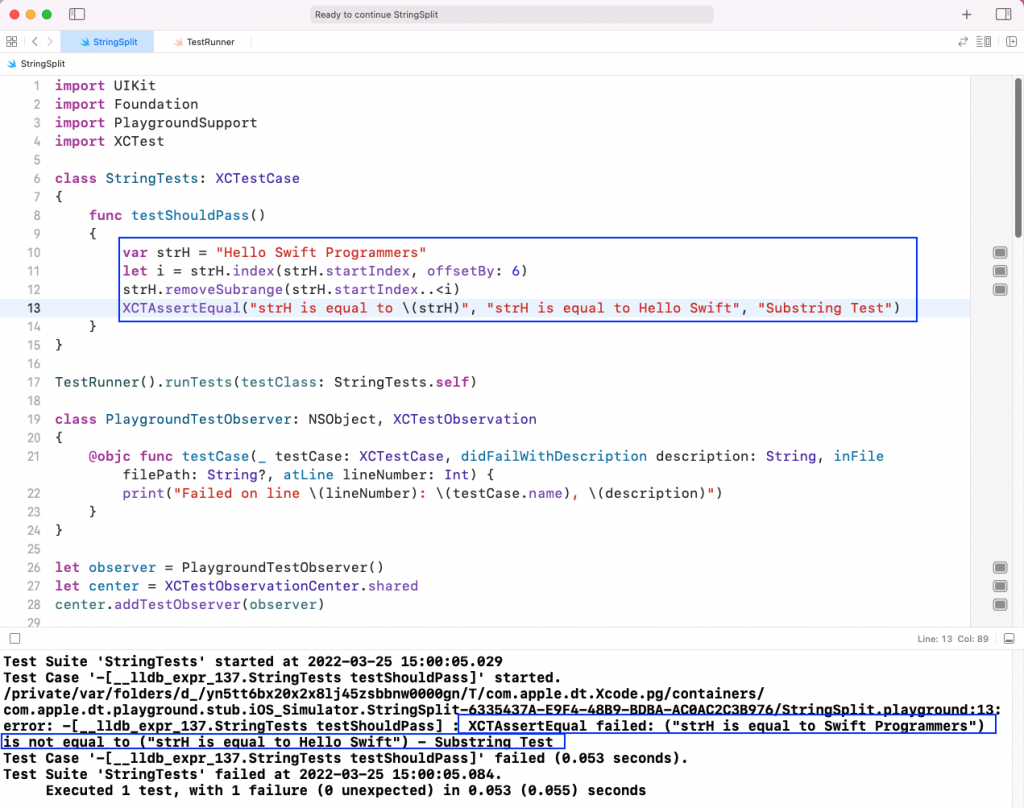
Back, in our StringSplit playground, execute the required imports. Then add class StringTests. Inside the class, you’ll run a simple assert test to check the substring code. This is the same substring with function code, which we have created earlier.
Line 17 runs the runTests() function from TestRunner file. Here, you pass your StringTests class to the runTests function.
You need the PlaygroundTestObserver code to run test cases in playground. The single test case failed because strH is equal to Swift Programmer and not Hello Swift.
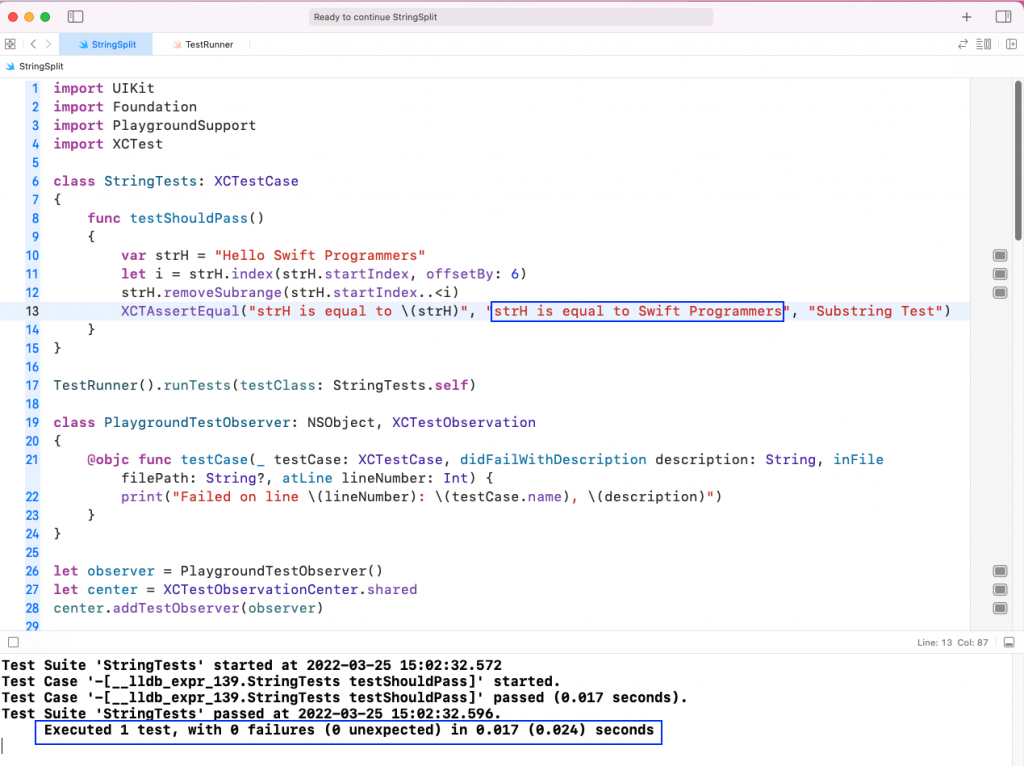
Here we’ve fixed the statement, and now our test case runs perfectly.
Our only test case ran successfully, but try adding more complex test cases, and you’ll need to write more complicated test cases. Instead of going through all that hassle you can use the no-code testing platform Waldo.
In Waldo, you can also do user interactions, like clicking on buttons, which are a common feature in any mobile app. You can create a free Waldo account here and test its features.
Conclusion
In this post, you learned the basic setup of a playground to write Swift code. Next, you learned the basics of creating a string in Swift and about NSString. You saw some functions built in to Swift for splitting strings into substrings and different ways to split a string into an array of substrings. Finally, you tested the code using the XCTest framework, and learned that you can also test the code with Waldo.
Automated E2E tests for your mobile app
Get true E2E testing in minutes, not months.


