


One of the most essential tools developers have at their disposal to create features and handle data is the array. And for most of us working with constraints and limitations, knowing how to properly implement and take advantage of arrays has a tremendous impact on the end product. Given that proper array implementation can be the difference between a robust and responsive solution and a mediocre experience, it's no surprise that employers expect that you have a solid grasp on the matter during the majority of interviews.
In this article, I'll provide you with a solid basis to understand and be comfortable with arrays in Swift. Whether you're a beginner in Swift or a more seasoned developer with years of experience, this article is for you.
Let's start by setting you up with a basic SwiftUI project with a playground. Then I'll briefly explain what arrays are and how to declare an array in Swift. Finally, I'll show you how to get a particular value from a Swift array and the total number of elements in that array.
If you're already comfortable with some of the topics discussed here, feel free to skip ahead.
First Steps on SwiftUI
Alright, so first things first. Let's create a project in XCode.
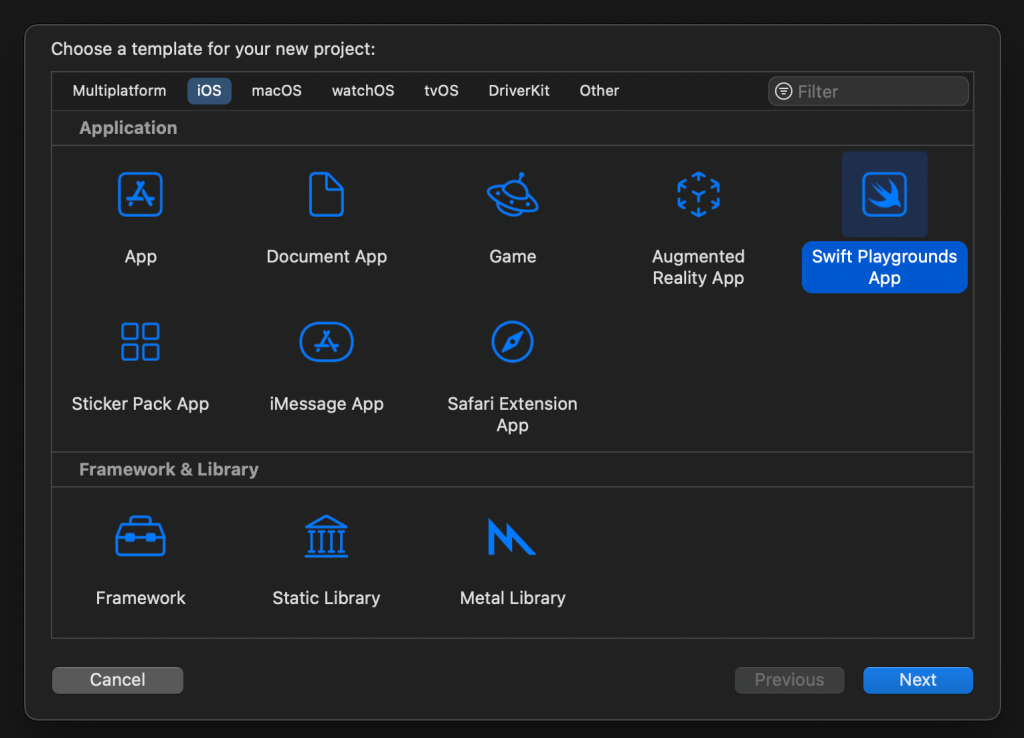
First, click on "Create a New Project" and select the iOS tab as the target platform. Then choose Swift Playground App as the project template and click Next.
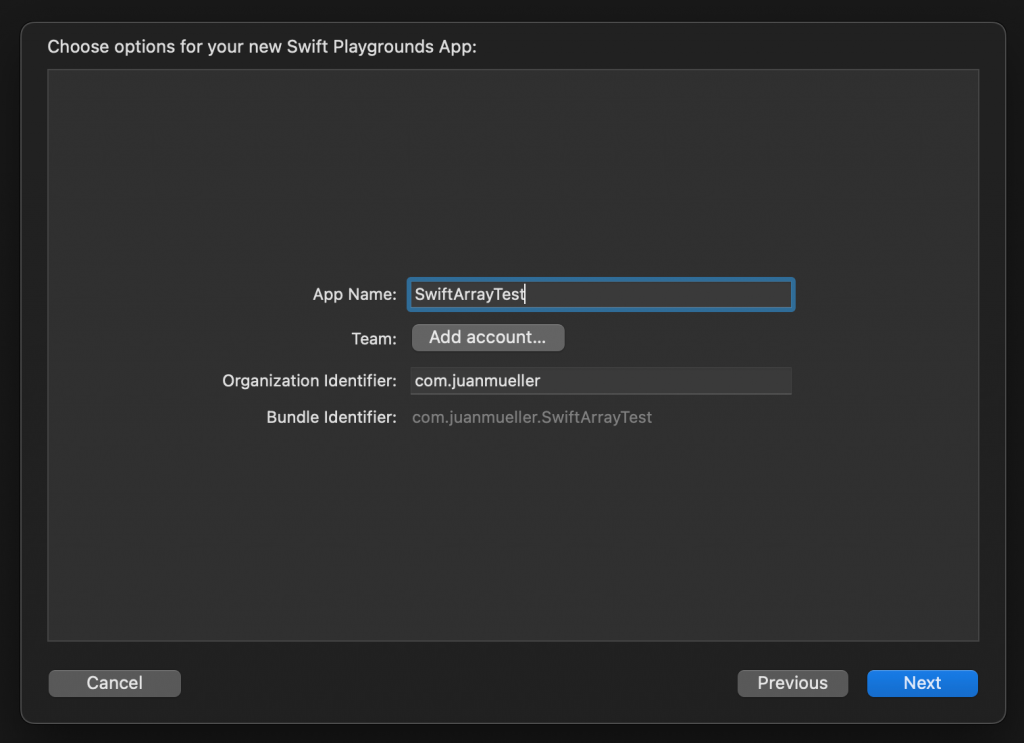
Then provide a project name and Organization Identifier and click Next.
Finally, choose where to save your project.
Once you've done this, you should see the basic SwiftUI Playground in front of you.
When creating a SwiftUI project, you'll see that your project already contains some default class files: a ContentView.swift class file and an <APP_NAME>App.swift class file.
Now it's time to create your own playground. First, right-click on the project directory area and select "New File." Then choose the "Blank Playground" option and give it a name. Finally, you will see your playground where you can add your code.
Great! Let's continue.
Defining Swift Arrays
In simple terms, an array is a data structure that lets you group values or objects together into a collection. Additionally, it allows you to access any value in the collection by its index or position.
The purpose of an array usually revolves around data organization. For example, it's used for sorting data, creating lists, and iterating through items.
In Swift, arrays are capable of holding any type of data—string, integers, objects. Additionally, they're strongly typed, meaning they accept only elements of a single type unless specified otherwise. This behavior helps reduce bugs and unexpected behavior on runtime.
How Do You Declare an Array in Swift?
Creating an array in Swift is easy. Let's say, for example, that you want to create an array containing the numbers between 1 and 5. All you have to do is put your elements together between square brackets and separate them by a comma. This would look something like the following:
Now, to contain that into a variable, you have to follow Swift's declaration structure.
For now, you can ignore the @frozen part.
This structure instructs you to create array variables as follows.
That looks complicated and confusing, right? So let's simplify it a little bit.
In essence, these two statements are pretty much the same. The only difference is that the first one tells Swift what type of data the array is to contain in a more declarative way.
Additionally, if you want to initialize your array with the data, you can do so like this:
Now you can create an array with any other type of data you want.
Or you can do it this way:
Go ahead and add this code to your playground and see what it does.
Notice that Swift is capable of inferring the array type by just checking the data provided before compilation. The same is true with arrays assigned on runtime.
Furthermore, you can explicitly specify the array type in the declaration statement. All you have to do is set the type ahead of the variable name like so:
What if you want to have an array of different types? Or what if you don't know the type of data that will be provided beforehand?
Thankfully, handling this scenario is relatively trivial. All you have to do is set the type of the array as [Any], and Swift will handle the rest for you.

Additionally, you can set the type of an array on assignment by appending "as [Any]" at the end.
How to Get a Particular Value from a SwiftUI Array?
Now that you know how to create arrays in Swift, it's time to explore how you can access the values within them.
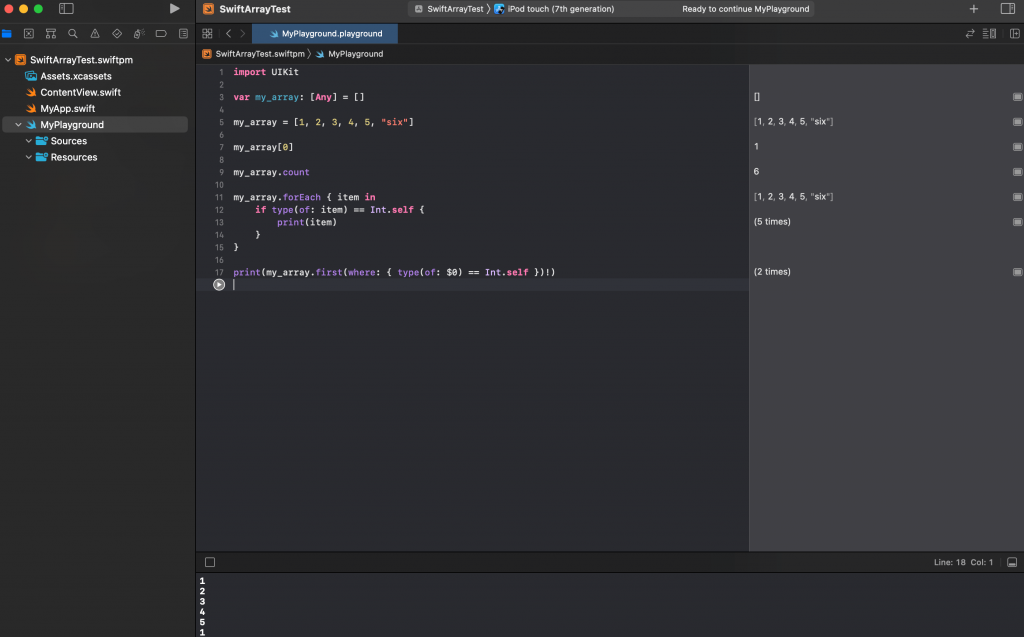
Accessing the values in an array is as simple as indicating the index of the value you want from it.
Notice that array indexes start with 0.
Additionally, if you provide an index out of bounds from the array, the result will be an IndexOutOfBounds error. You can get around this by checking the length of the array beforehand. All you have to do is get the count property of the array.
But what if you don't know the index of the value you want to retrieve? There are several ways to approach this.
First, you could iterate through the array and get all the values.
Then you could add a filter only to do a particular behavior when the correct item is found.
Additionally, you could use the "first(where: condition)" function and provide a condition, and Swift will do the work for you.
Notice that I added a ! symbol at the end. This indicates to Swift that the value is to be unwrapped from its container. This is important because objects that are declared or wrapped as "Any" can be nil, but the print function explicitly requires a non-nil value.
Moving On
Overall, this was a very brief and surface-level introduction to the world of array data structures in Swift. Beyond the topics discussed today, there's plenty of complexity and functionality to satisfy pretty much all requirements for handling and manipulating data. I hope that this introduction serves as a solid starting point for those looking to dip their toes in.
If that's the case, I encourage you to continue looking for more resources that can expand your skillset and experience. And if you're already working on big mobile projects, consider ensuring your application's security and stability with our no-code testing solution at Waldo. With our testing platform, you can ensure that your application is running correctly and that you have no surprises after deployment.
You can learn more about it here.
Automated E2E tests for your mobile app
Get true E2E testing in minutes, not months.


