


This article will teach you how to implement an elegant and responsive progress bar in React Native.
We'll first help you get a basic React Native project set up as a canvas. Then we'll explore the progress bar component in React Native and its different properties. Next, we'll use some of these properties to help you customize the progress bar so that it fits your particular needs. Finally, we'll briefly examine additional progress bar libraries available for you to choose as alternatives in case you need some customization.
If you find it unnecessary to build a new React Native project because you already have your own, feel free to skip the following section.
React Native 101
Setting up a React Native environment for development is relatively easy and only needs a few commands.
You might have already gone through this process if you've read some of our other React Native articles. Nevertheless, here's a brief refresher.
You'll use the Expo CLI Command Line utility, NodeJS runtime, and Visual Studio Code as the development environment.
The first step is to install NodeJS on your system. You can go to the official NodeJS portal and download it or use the package manager that comes with your OS through the command line.
For those using macOS, you can use homebrew by typing the following command on the terminal:
Next, install the Expo CLI tool by typing the following command on the terminal:
Finally, you can install Visual Studio Code for the development editor by going to the official website.
Creating a Project
In order to create your first project, all you have to do is type the following command and let 'expo' know what kind of project you will be working with:
MyProject is just a placeholder. You can change it to anything you want.
Now type the following command, and don't forget to select the target platform to build for:
What you get if you choose web is the following.
You can go to the React Native developer website if you need more information.
Progress Bar in React Native
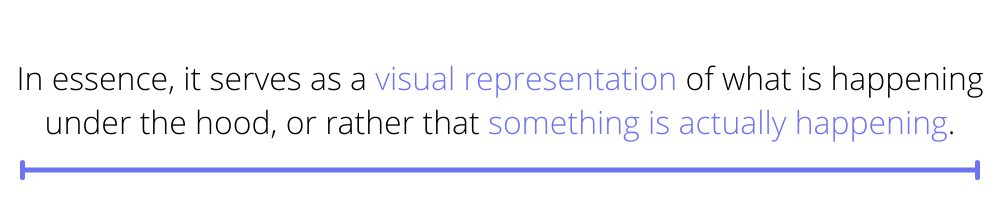
A progress bar visualizes the progress of a particular process or task that is not immediately apparent to the user. In essence, it serves as a visual representation of what is happening under the hood, or rather that something is actually happening. Without it, users might feel like the application is frozen or unresponsive.
Most tasks that use a progress bar are network transactions, background processes, and file transactions.
In React Native, a progress bar is not much different than any other component. However, there is no native progress bar component included in the core of React Native, with the exception of ProgressBarAndroid, which only works with Android. So if you want to implement a progress bar in an iOS app, you have to use a library or build one on your own.
That is precisely what you will be doing today.
Building a Progress Bar in React Native
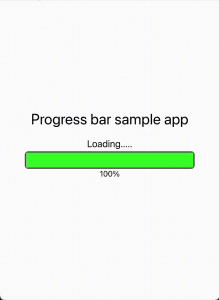
The first thing you must do is create a view that will represent the progress bar itself. You can add the styling necessary to make it match a traditional progress bar as you see fit.
Here's an example.
Additionally, you can add some text to identify the nature of the progress bar and the percentage of progress completed.
The resulting code would be something like the following:
Notice that there's no actual view to display a progress bar moving through the container yet. Let's add it now.
For this case, you'll need a view capable of being animated. First, add the animated view as a child view to the progress bar view and set the following style properties:
This code provides the view style with the 'StyleSheet.absoluteFill' object, which creates an overlay with position absolute and zero positioning. Additionally, color and width are provided to represent a fill status of 50 percent.
Let's now animate this view so that it actually responds to a changing state.
Animating the Progress Bar
We'll simulate a background process running with an interval counter since we don't have a network process or file transaction running. To achieve this in a simple way, we'll use Hooks.
Here's an example of how to implement a counter with Hooks:
This counter will trigger when the view is loaded and add interval increments of ten every second.
You need to use the 'ref' hook to create what's known as an animated value, which is essentially a value that responds to the state of its related animated view using the Animated API.
This code updates the value of the 'counter' variable to the 'value' variable in the animated view in a second.
Next, you need to monitor when the value of the counter changes to invoke this function and stop the interval when it reaches the upper limit (100 percent).
To do that, you'll need the following code:
Notice that this code monitors the 'count' variable for changes by passing it as the second parameter to the hook.
Finally, determine the progress bar's width by interpolating the animation's value with the following code:
By replacing the width style property in the animated child view, you can see the changes happening in the app.
And that's it! You have a functioning progress bar view.
You can take this code and turn it into a proper component that you can reuse on different screens.
Progress Bar Libraries
OK, but what if you want something that looks more elegant and you don't have the time or energy to build it yourself? There are great options available for that too.
One of my favorites is the react-native-progress package, which contains a sleek and stylish selection of progress bars that are multiplatform and customizable.
To install it, all you have to do is run the following command:
Then use the default components to add a simple progress bar view.

Voila!
You can choose between their selection of progress bar components and customize them to your liking with the props they provide. You can learn about all that and more on the documentation website.
Moving Forward
Now that you've seen the many ways you can implement a progress bar in React Native, it's your turn to implement it in your project. First, however, it's crucial to make sure that you introduce no bugs or unintentional changes. Despite this article being straightforward, it's still possible to miss a minor change and create trouble for yourself.
To avoid that, we recommend checking out our zero-code testing solution at Waldo. It's a platform that allows you to create and set up comprehensive and robust testing scenarios for your application without needing to write a single line of code. This is particularly great for lean agile teams looking to maximize output and minimize bugs.
You can check it out here.
Automated E2E tests for your mobile app
Get true E2E testing in minutes, not months.


