


Mapbox is a strong map routing engine. It's one of the greatest alternatives to Google Maps because of its powerful design capabilities, including colors, 3D features, camera angles, and so on. In this tutorial, we'll show you how to make a basic map that you can use in your project to make fantastic apps.
Let's Get This Party Started
To use Mapbox and take advantage of all of its features, you need to have a secret access token. To get this, you must register on the Mapbox platform. After you've completed the steps, log in to your account. Scroll down to view your access token.
.png)
Creating Our Basic Mapbox App
To begin, we'll construct a simple React Native app into which we'll incorporate Mapbox. To accomplish this, I'm assuming you already have a React Native environment set up on your computer. If you haven't already done so, you can use this link to set one up.
To build our simple app for this lesson, I'll be using Visual Studio Code on Windows. If you're using Mac OS, you can also follow along. I'll provide a step-by-step approach you can use to create your own app.
Now it's time to build our first React Native app. I'll open Visual Studio (it's the same on Mac) and type the following code into my terminal.
Now, we'll need to incorporate Mapbox into our newly created app. However, before we do so, we must change our directory to the folder of the newly created app. Type the following command in your terminal to do so.
After we've done that, we can now add Mapbox SDK to our app. To do so, we can type the following code in our terminal:
An alternative way is to type this:
For macOS users, as part of the installation process, Mapbox must be manually configured. To achieve this, add the following code to your POD file.
After you've done that, change the directory to the iOS folder and install the POD file. Type the following command to do that:
Next, change your directory back to the root folder using the following command.
There's lots more information on iOS installation here.
We'll need to change the content in the app.js file now that we've integrated Mapbox SDK into our project. So, in the app.js file, remove the default code and replace it with this.
Setting the Access Token
After that, we need to add our Mapbox access token to MapboxGL. Simply paste your Mapbox access token into this code and then add it to the above one in your app.js file.
Now that we've done that, we need to start adding Mapbox functionality to our app.
Adding Mapview, Camera, and Annotations
Mapview is a component that allows us to integrate a map interface into our application. Applications use it to deliver map information and manipulate map content. You can center the map to an exact coordinate, choose the area you want to display, and style the map's features to meet your preferences.
.png)
Camera
In MapboxGL maps, the camera is the map's field of view. What determines the camera's viewport? That depends on various criteria, including center (which of course you use to view the map's center), zoom level (which determines how near the viewport is to the map's surface), bearing (which determines the map's actual rotation), and so on.
Annotations
Use annotation to define a location on a map. Annotations are graphics in Mapbox that help identify a specific location on a map.
Let's add a Mapview (which is an interface for our map), camera, and annotation. Copy the following code and add it to the above code.
You can decide to test it by typing the following code in your terminal.
To test the above code for iOS, type the following code:
You should have something like this once you've tested it for Android.
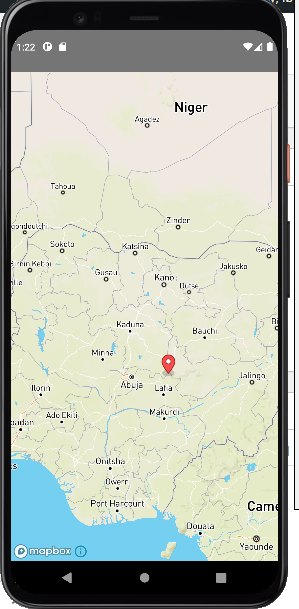
In the above image, we can see that there's an annotation (location symbol) that points at a specific location in Nigeria.
Adding Custom Annotation
Custom annotation is another way to create point annotation based on your own preference. You can modify the annotation to suit your own taste.
After we've defined the custom annotation, we have to call it inside Mapview so we can see the functionality in our map. To call our custom annotation that we just created add the {renderAnnotation()} statement in Mapview.
When called and run using npm run android for Android or npm run ios for iOS, you should see something like this:
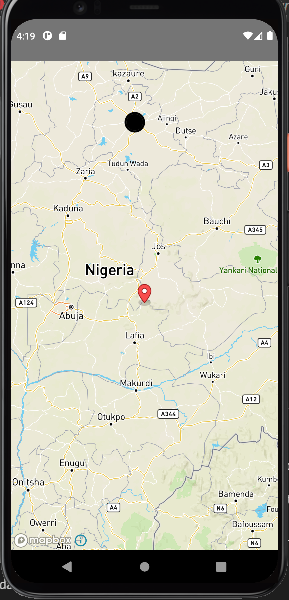
We can see that the above image shows the custom annotation which we just created. The custom annotation is the one with the black round circle.
Adding Polylines, Polygons, and Markview
Polylines and polygons are ways to connect multiple areas in a map. Markview, on the other hand, is a way to provide visual representations of a specific coordinate on a map.
Adding Polylines
Lines that connect two or more points on a map are polylines. They aren't normally included by default in Mapbox, although they are in Google Maps. However, Mapbox does include a component that will assist us in adding polylines to our map.
The components we'll be using are ShapeSource and LineLayer.
ShapeSource is a vector shape content source for maps. (These are shapes that are expandable because they're based on mathematical equations and can be zoomed to a long distance.) The shape may be a URL or a GeoJSON object.
LineLayer is a style layer that you can use to customize the look of polylines.
To be able to build our polyline, we must first define the route to which the polyline will be added.
You'll need GeoJSON format for the route (it's the format for encoding a variety of geographical data structures). We'll add this code to the codes we had before. Refer to the conclusion section at the end of this article to see where to add the code.
The next step is to add the code below to our MapboxGL.Camera.
Here's what you'll see.
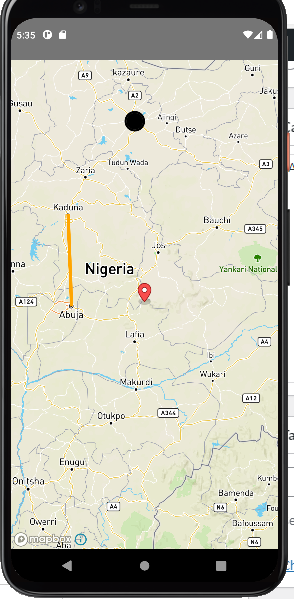
After the application has run, we can see from the above image that the thick orange line is the polyline that connects the cities of Abuja and Kaduna.
Adding Polygons
Polygons are shapes that have at least three sides. It's a geospatial feature (it could be a point, a line, or a polygon) defined by a connected set of latitude and longitude coordinates that forms at least a three-sided area. You can use polygons to connect three or more areas.
To create polygons, just add this to the code we have before. Refer to the conclusion section to see exactly where to place the code.
Then add the following below code inside MapboxGL.Mapview.
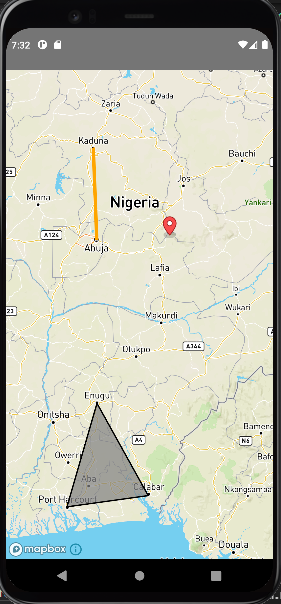
We can see from the above image that the triangle shape is a polygon that connects three places in Nigeria: Enugu, Port Harcourt, and Calabar.
Adding Markview
Markview is a simple way to add markers to a map. Markers are visual representations of a specific coordinate on a map. To learn more about Markview, click here.
Add this to MapboxGL.Mapview to produce a Markview.
Add this code to your style sheet.
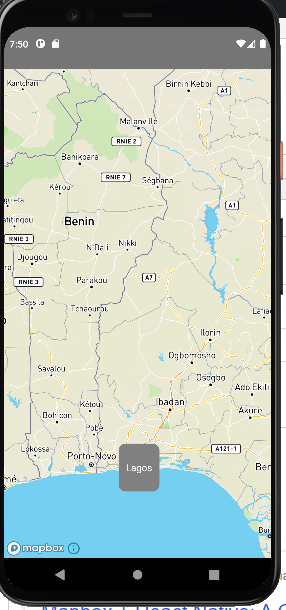
From the above image, we can see that we've added a Markview on the map. The Markview is the square that has "Lagos" printed on it.
Conclusion
Mapbox is a cool tool for making maps that you can quickly integrate into your mobile app. We've completed the development of our basic Mapbox app. If you're interested in learning more about Mapbox's other features, click here.
Now that we've finished developing our app, there's another option for us to test it out. Waldo is a coding-free mobile development testing solution. It's easy to use and doesn't require any complicated setup. Waldo is available for a free trial. To join, simply go to their website and sign up. After that, you can use Waldo to test your React Native app with ease.
The complete source code for the app is below. Thank you for taking the time to read this.
Automated E2E tests for your mobile app
Get true E2E testing in minutes, not months.


