


The process of deploying a new app in the Apple App Store or Google Play Store takes a long time. Especially with Apple, it takes more than a week for an app to get reviewed and added.
After having our app published in both or either of the stores, we'll likely need to make small changes to the app.
Now, with the app store approach, we'd need to create a new release and go through the process again.
For React Native apps, this is where CodePush can help. If we only have a small change in the JavaScript file, such as a title change, we can use CodePush. However, if we've added a new feature, such as a user's location, we need to go through the app store process again.
In this post, we'll learn how to use CodePush to update our app. Our app should already be on the App Store or Play Store for this to work.

Initial Setup
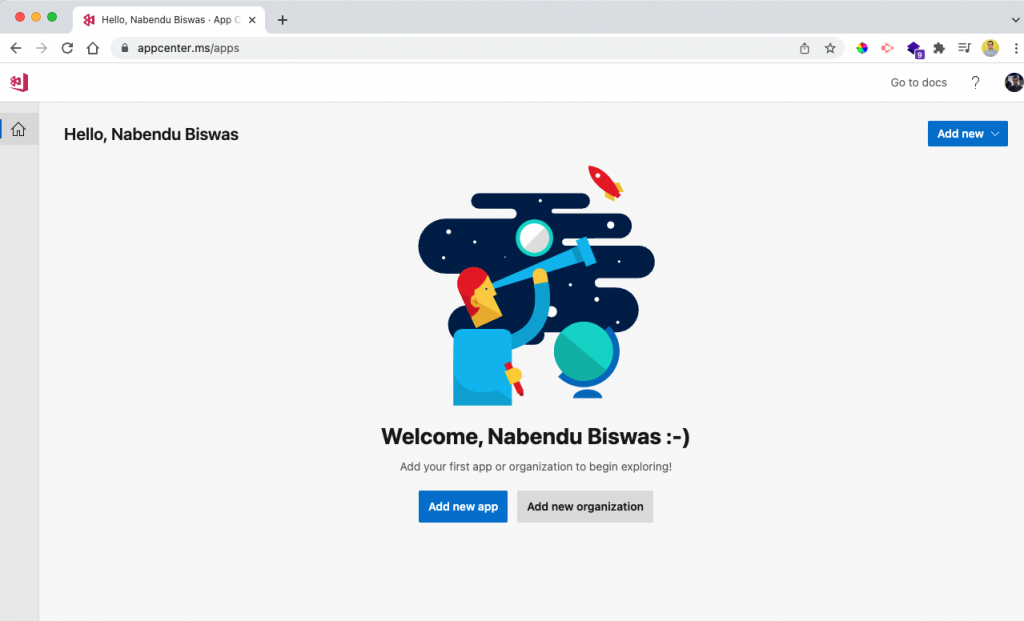
Let's take a look at the initial setup in CodePush. CodePush is from Microsoft, and we need to create an account in the MicroSoft App Center first.
Create an account here. Once logged in, you should see this screen:
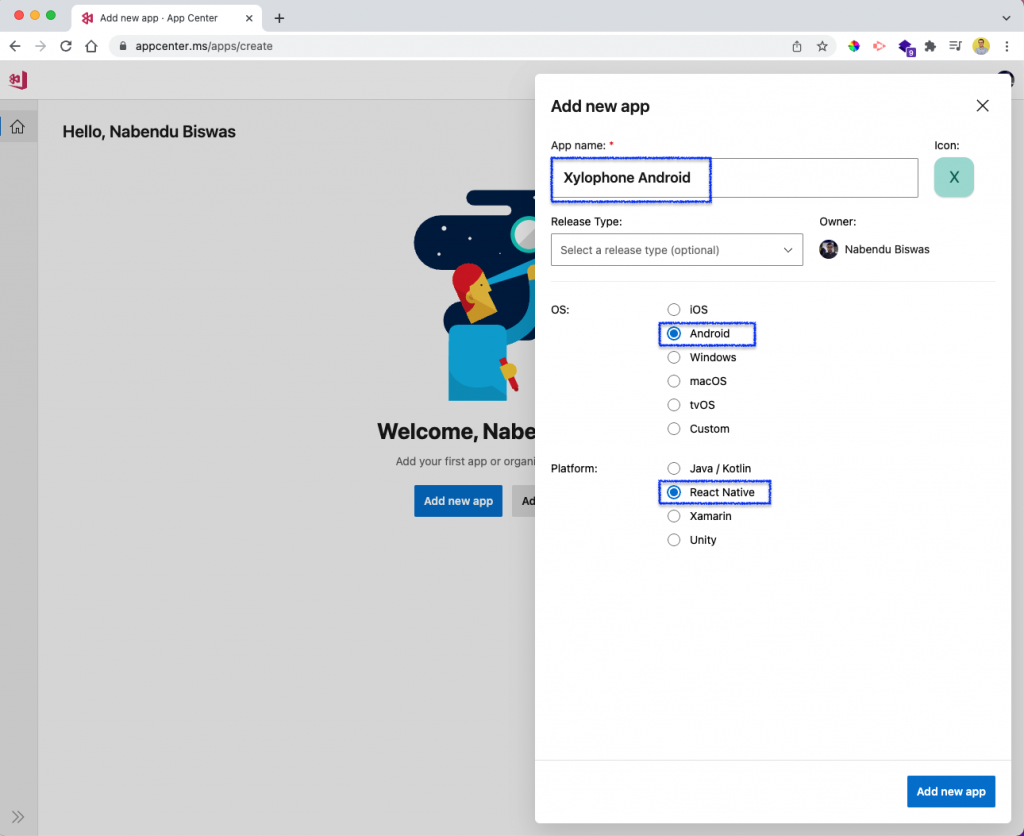
Now, click on Add new app. This should open a pop-up in which we need to give the app name, OS, and platform.
Project Setup
Next, let's set up a new project. After clicking Add new app in the previous pop-up, we'll get this screen:
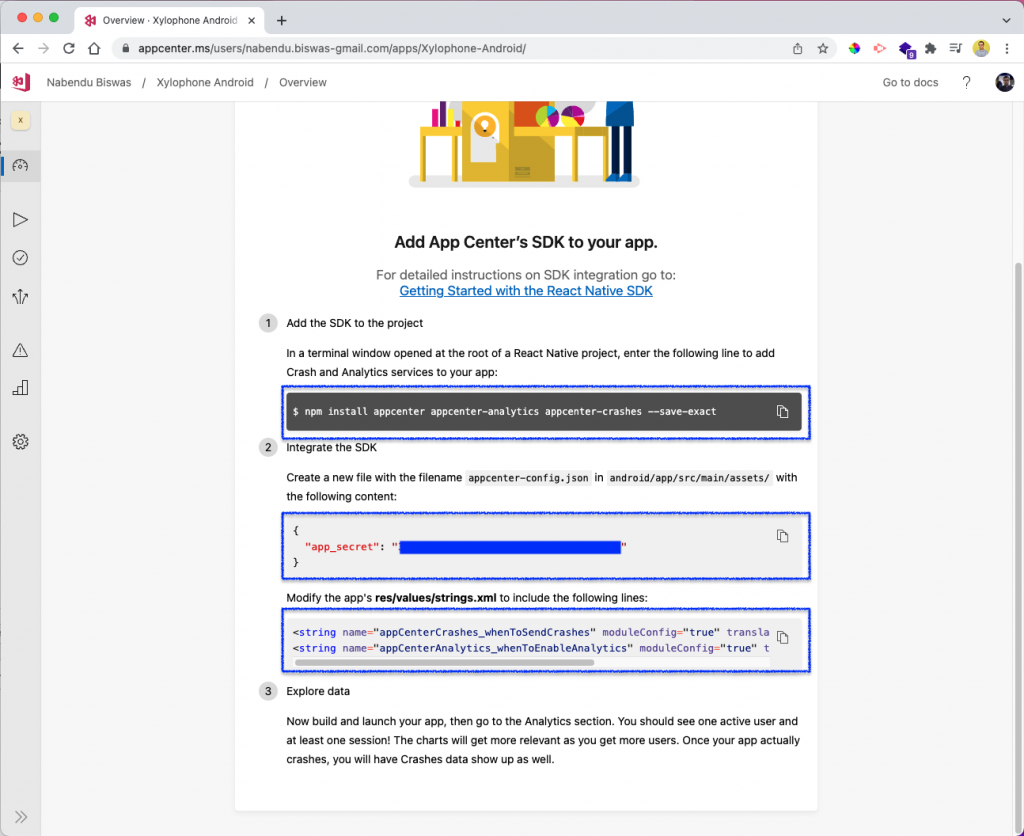
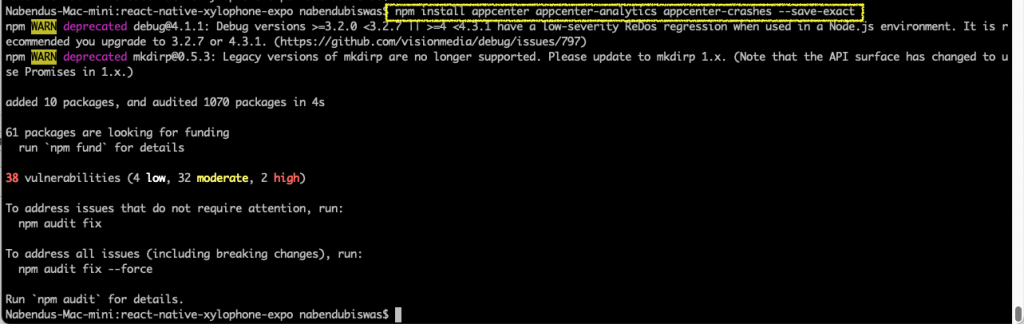
So, as per the instructions, we have installed the required npm packages in our application.
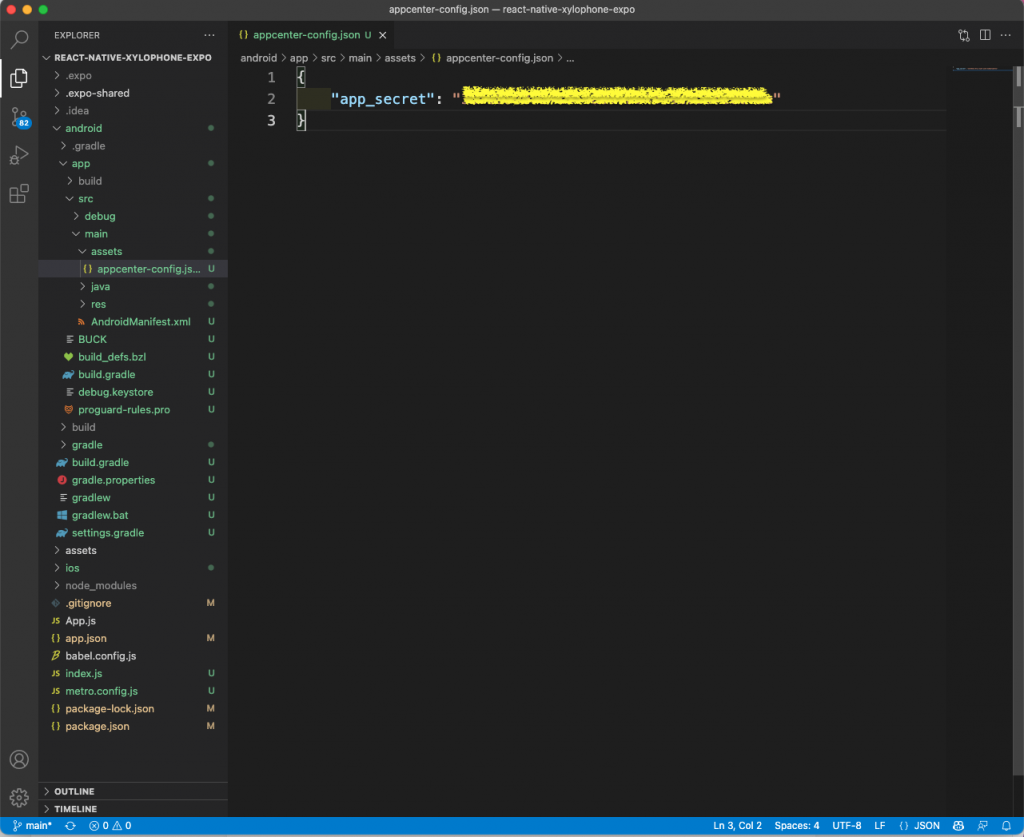
Next, we need to add a new file in appcenter-config.json with our secret key. The path for this is android/app/src/main/assets/.
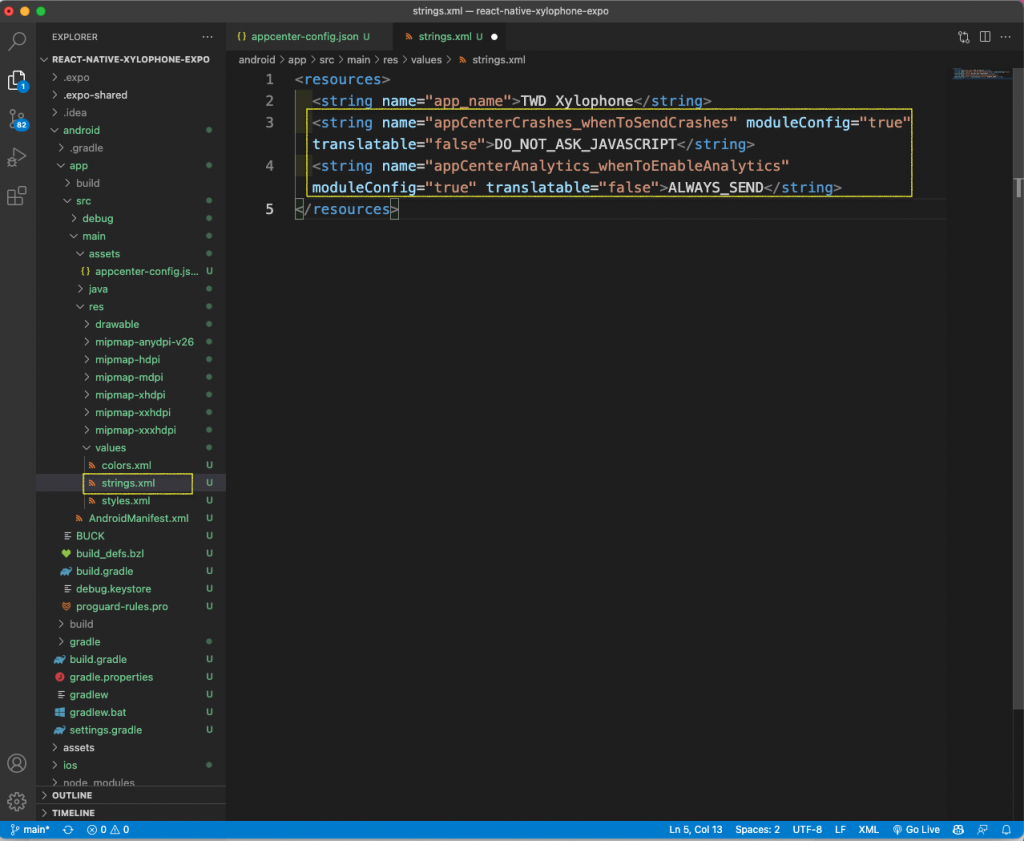
Now, we need to add the given string in the strings.xml file inside the res/values folder.
Distributing the App
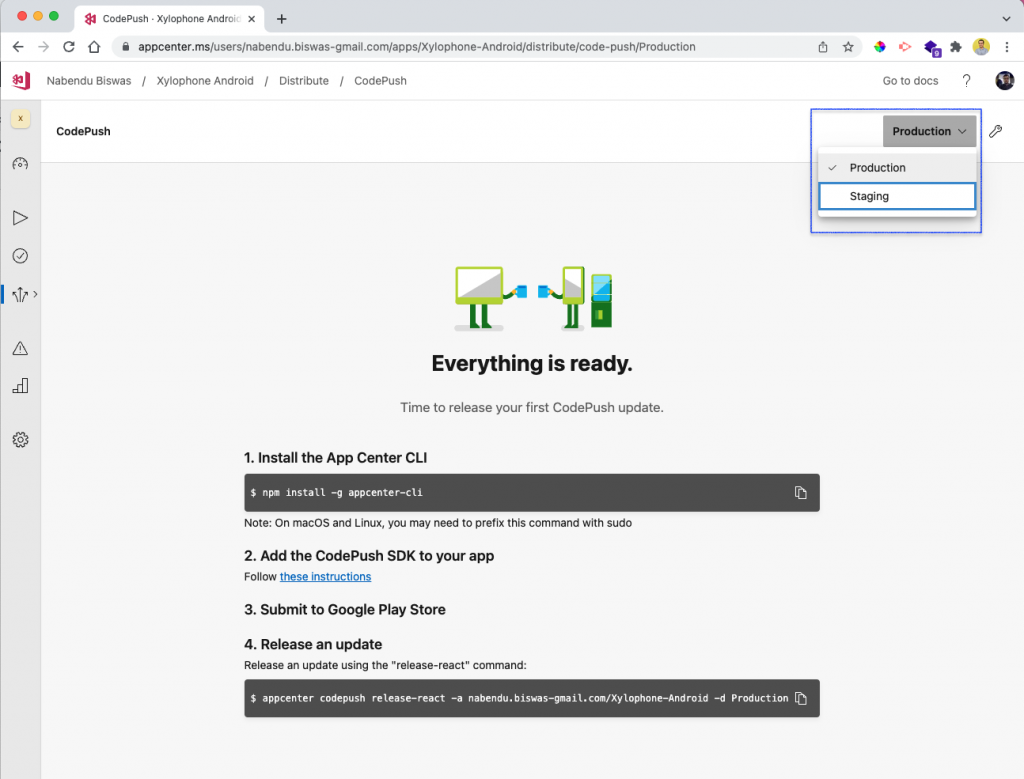
Here's where we'll learn to distribute our app through CodePush. To distribute our app, we need to go to Distribute > CodePush on the panel to the right. Then, click on Create standard deployments.

Then, we need to change the environment to Production from Staging.
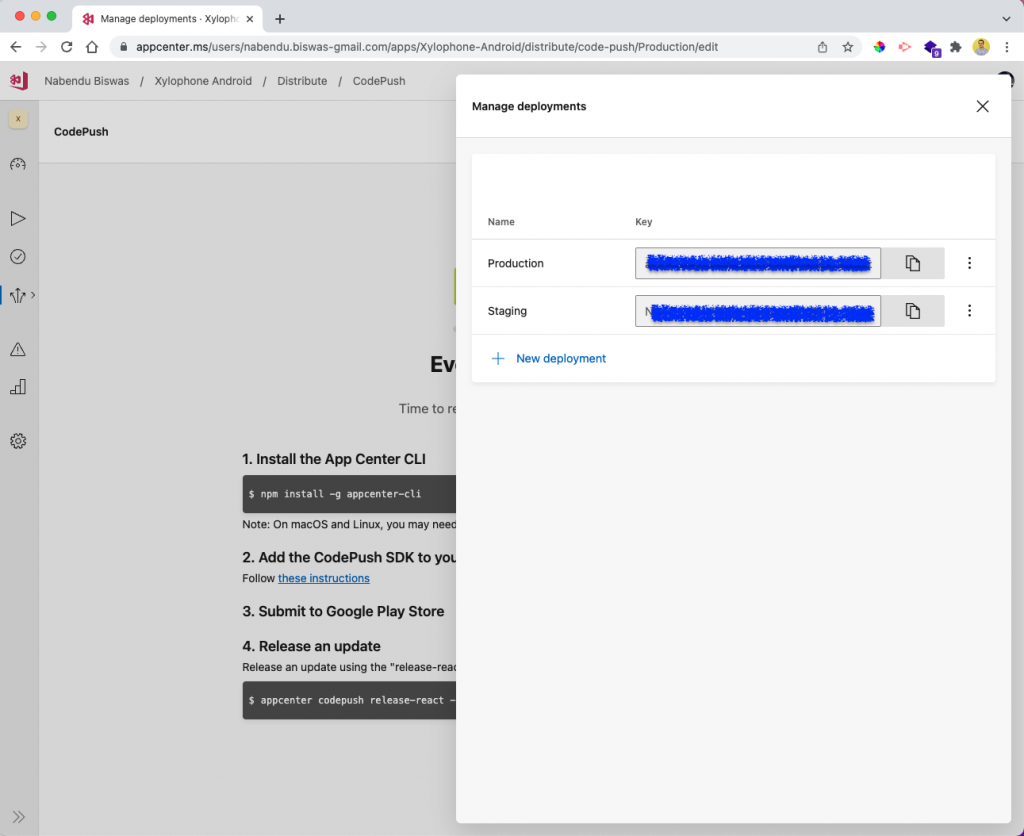
Next, we need to click on the Settings icon next to the dropdown. This will expose our keys, which we need to take note of.
React Native CodePush in Project
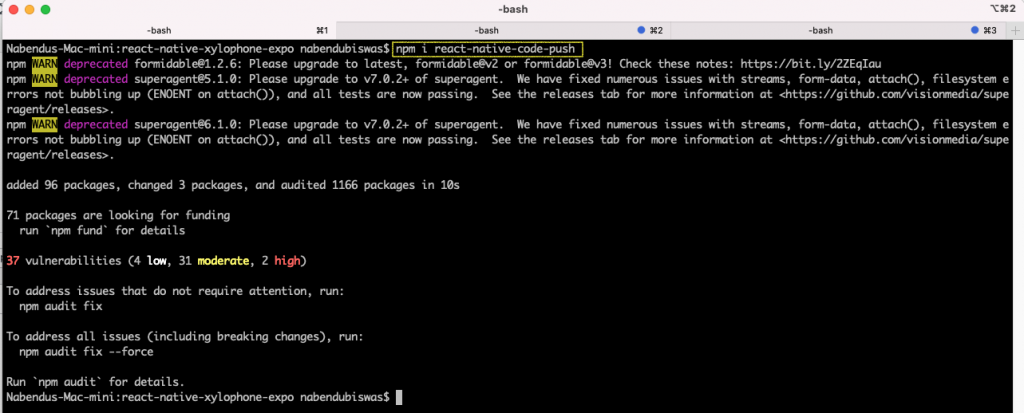
Let's install React Native CodePush in our project with the command below. For this, we need to install the react-native-code-push package. The instructions according to different versions of React Native can be found here.
These instructions are from version 0.60 and above.
In the android/settings.gradle file, add this content:
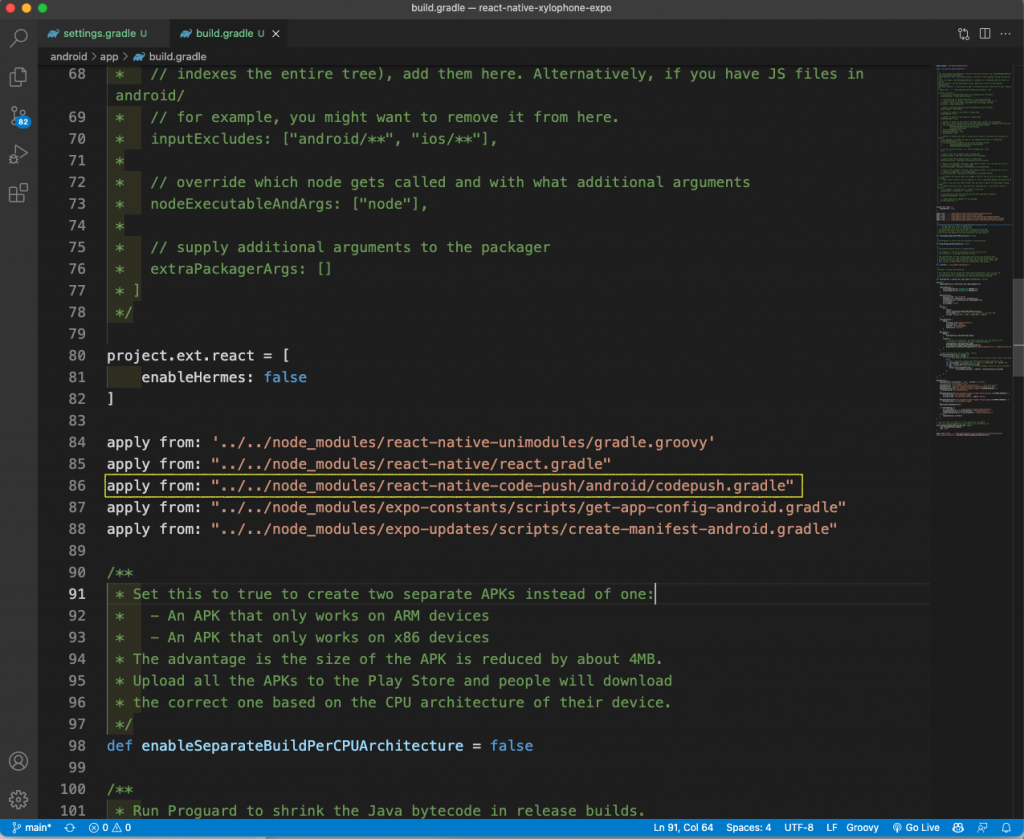
Now, in android/app/build.gradle, we have to add this additional line:
Next, in the MainApplication.java file, first add the import statement.
After that add this content:

Lastly, we have to go to the strings.xml file and add a new line.
Now, we have to provide the production keys that we used in an earlier step:

Getting Security Token
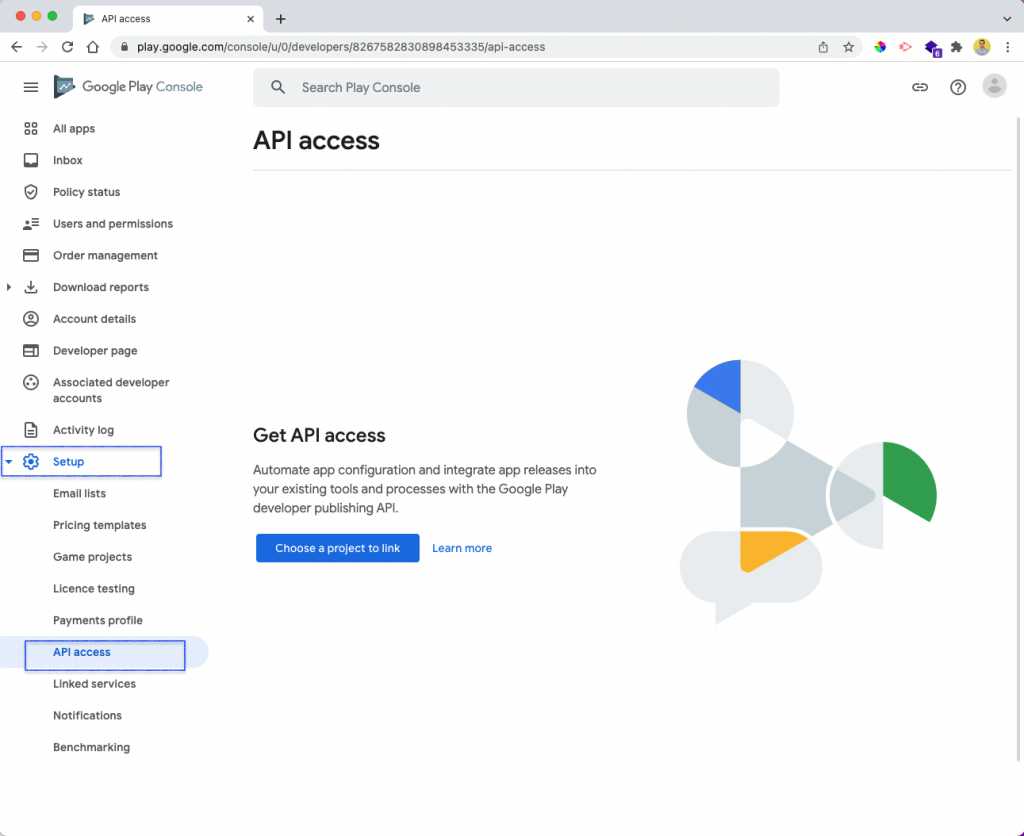
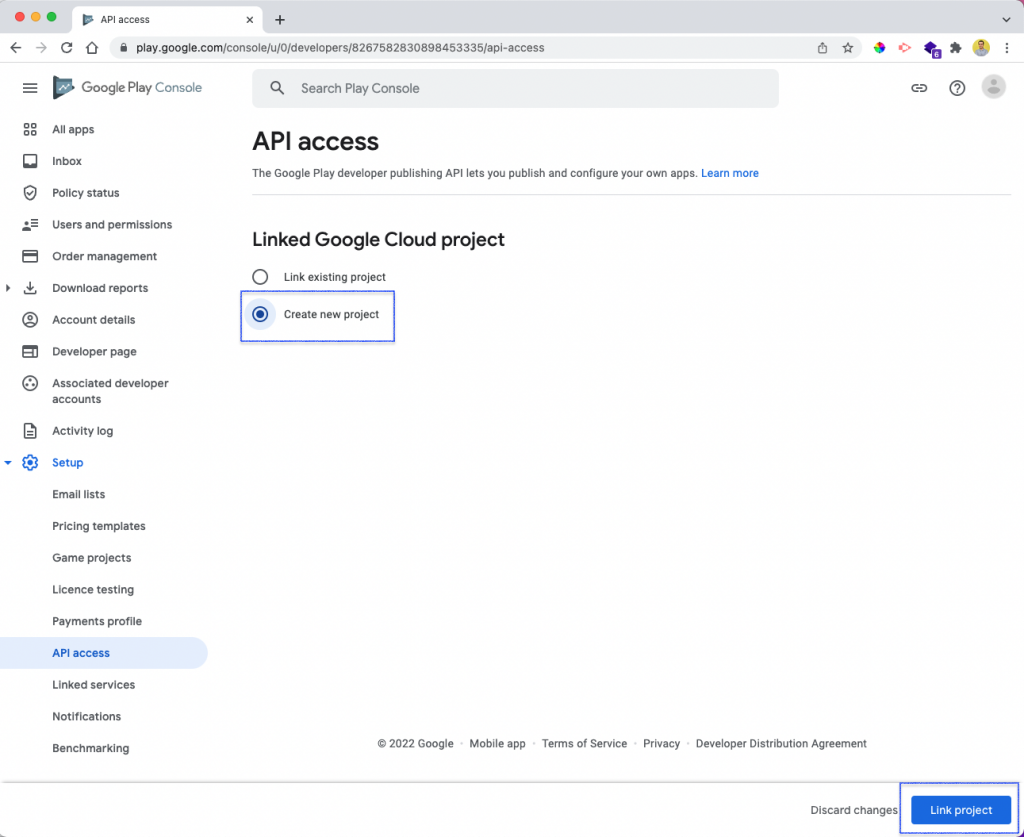
Let's learn how to get a security token, which we'll need to connect the app center with Play Store. So, go to your Google Play console. Then, go to Setup > API access.
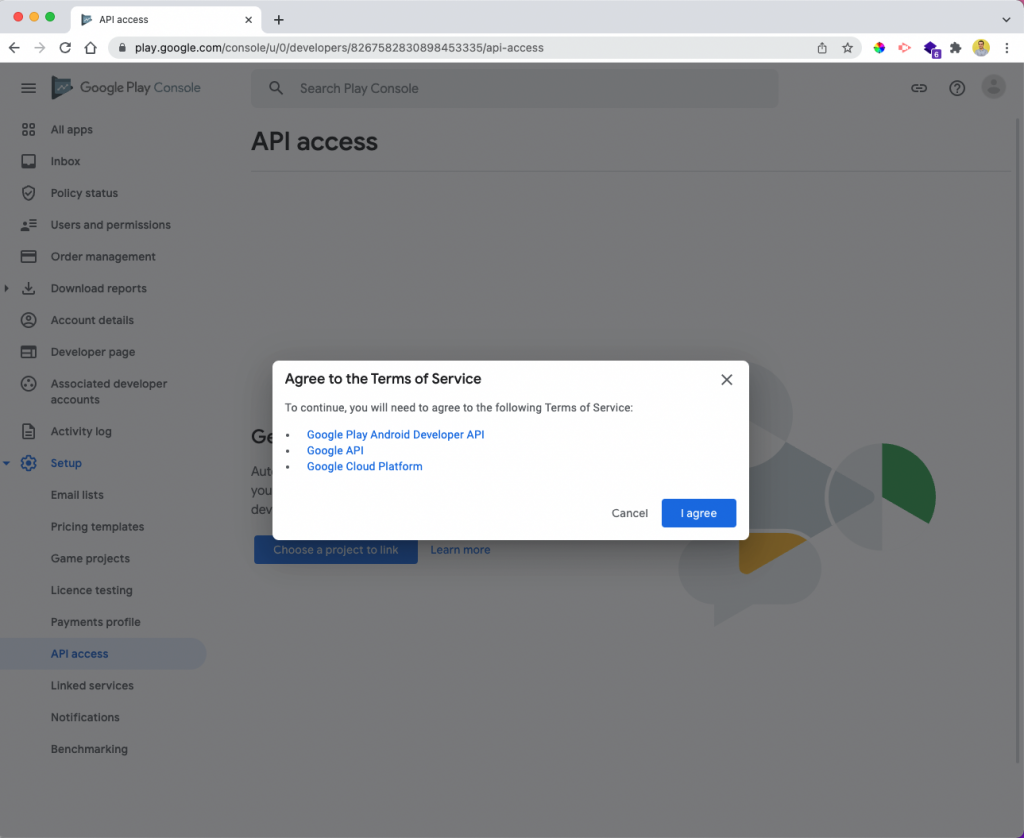
After selecting Choose a project to link, we'll get a pop-up. Here, click I agree.
After that, we'll need to click Link existing project and the Link project button.
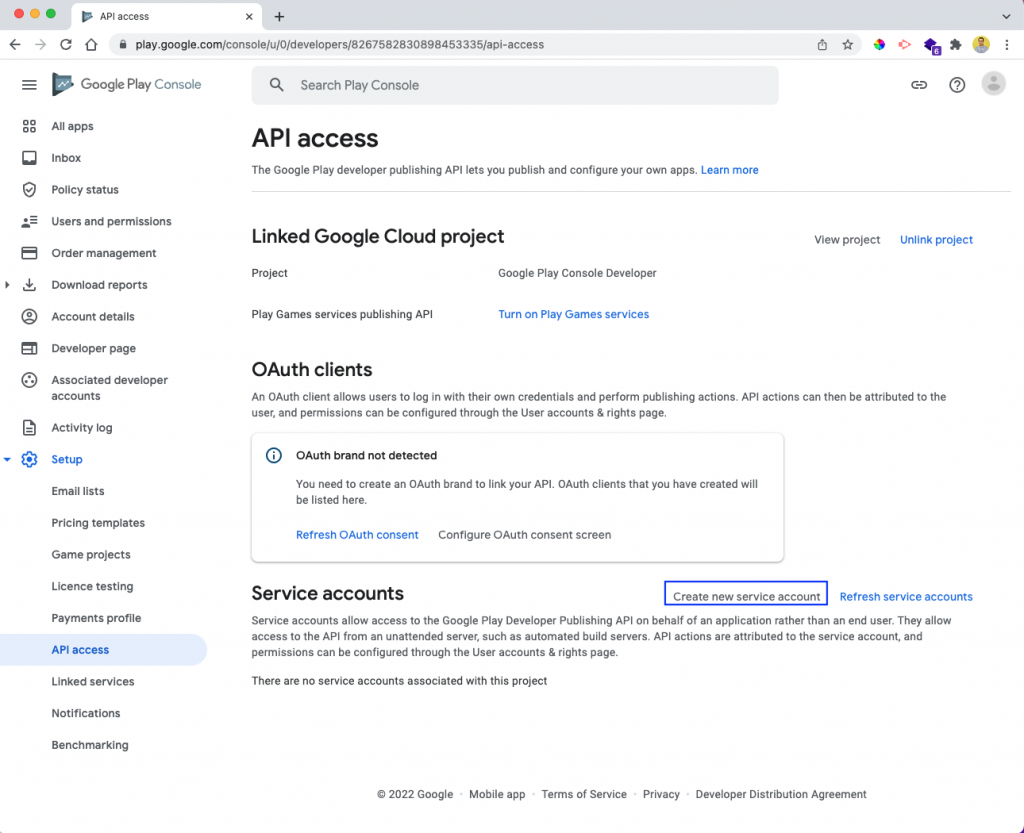
Creating a Service Account
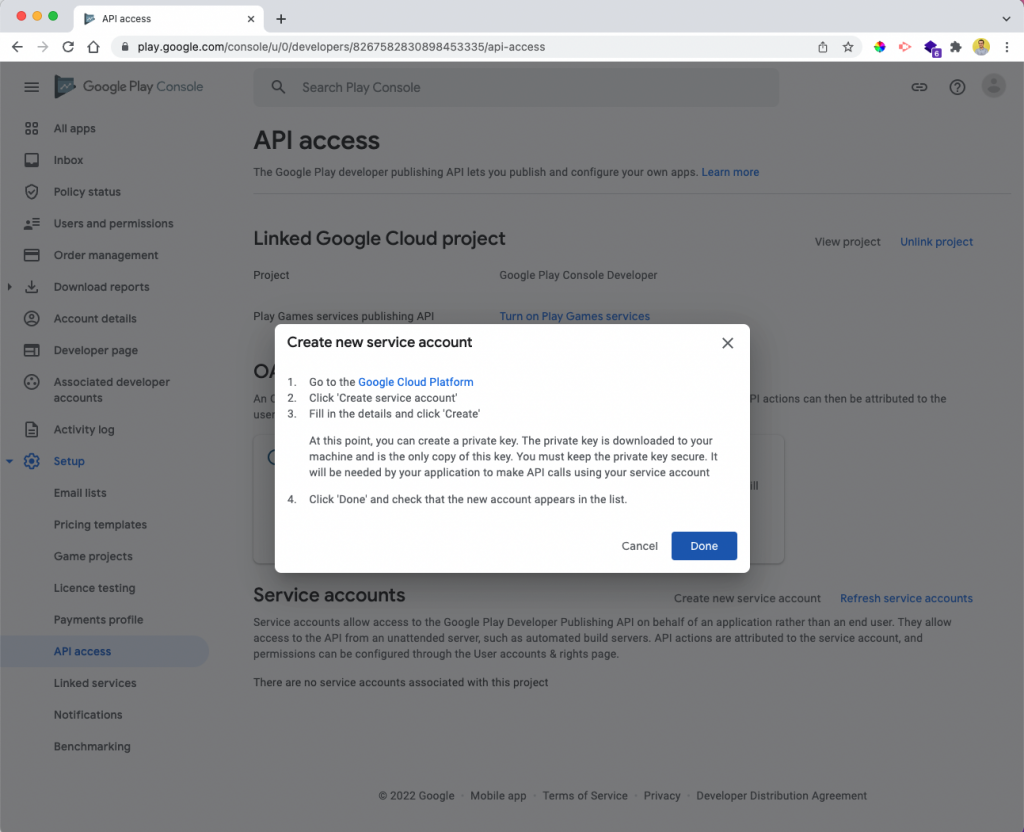
On the next screen, click Create new service account.
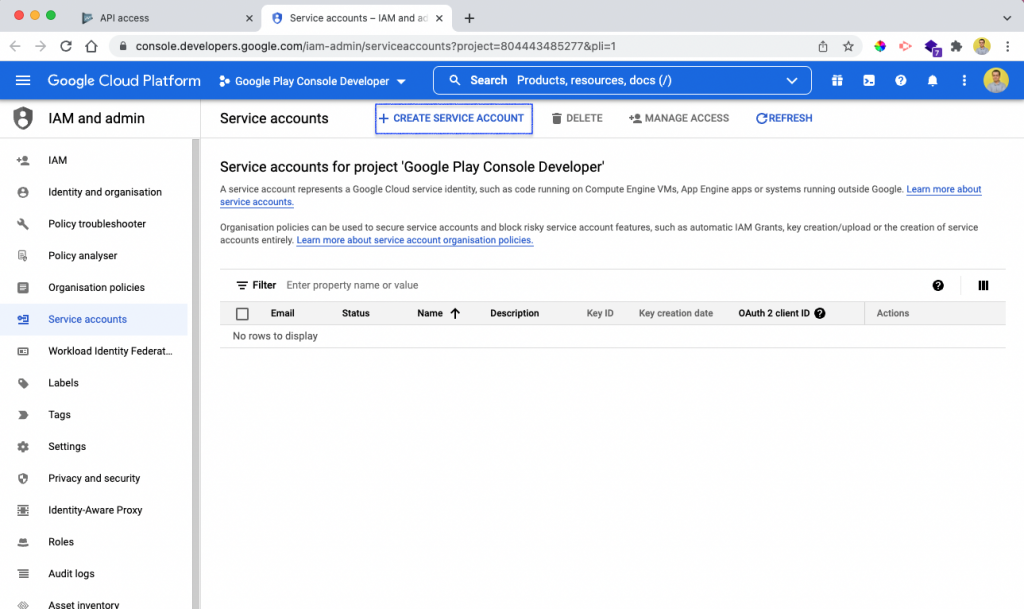
Now, click on the Google Cloud Platform link in the pop-up.
This will open another page, where we can click + CREATE SERVICE ACCOUNT.
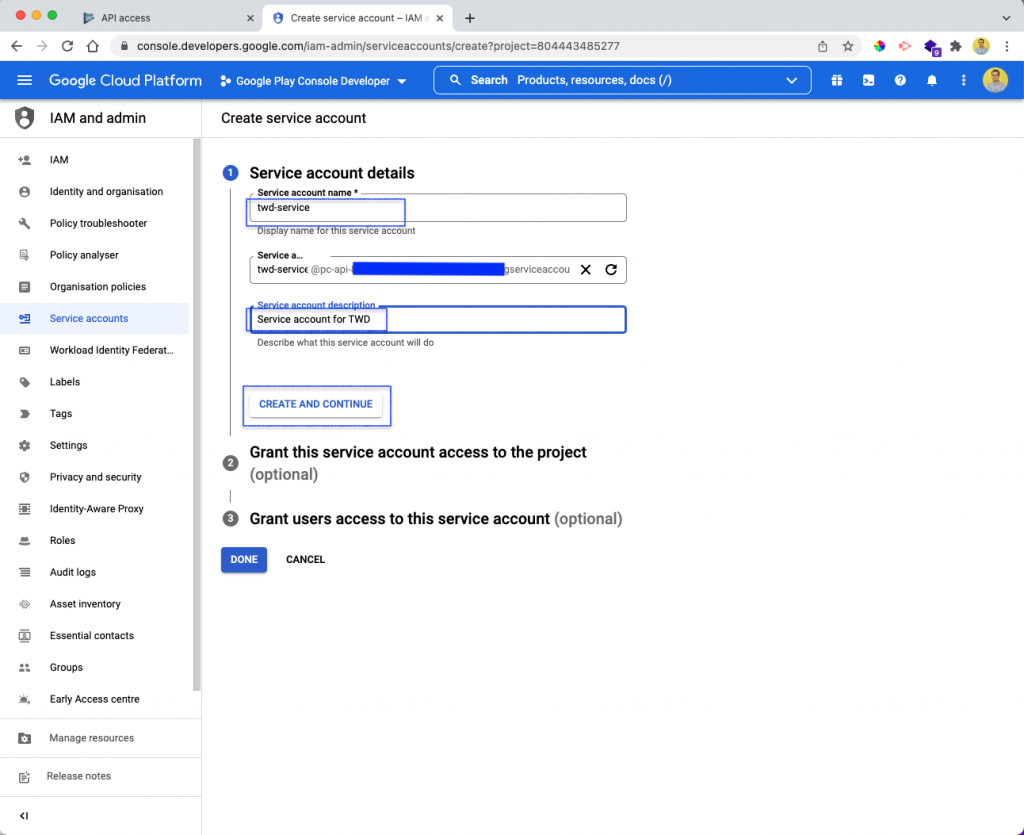
In the next window, give the service account details and click CREATE AND CONTINUE.
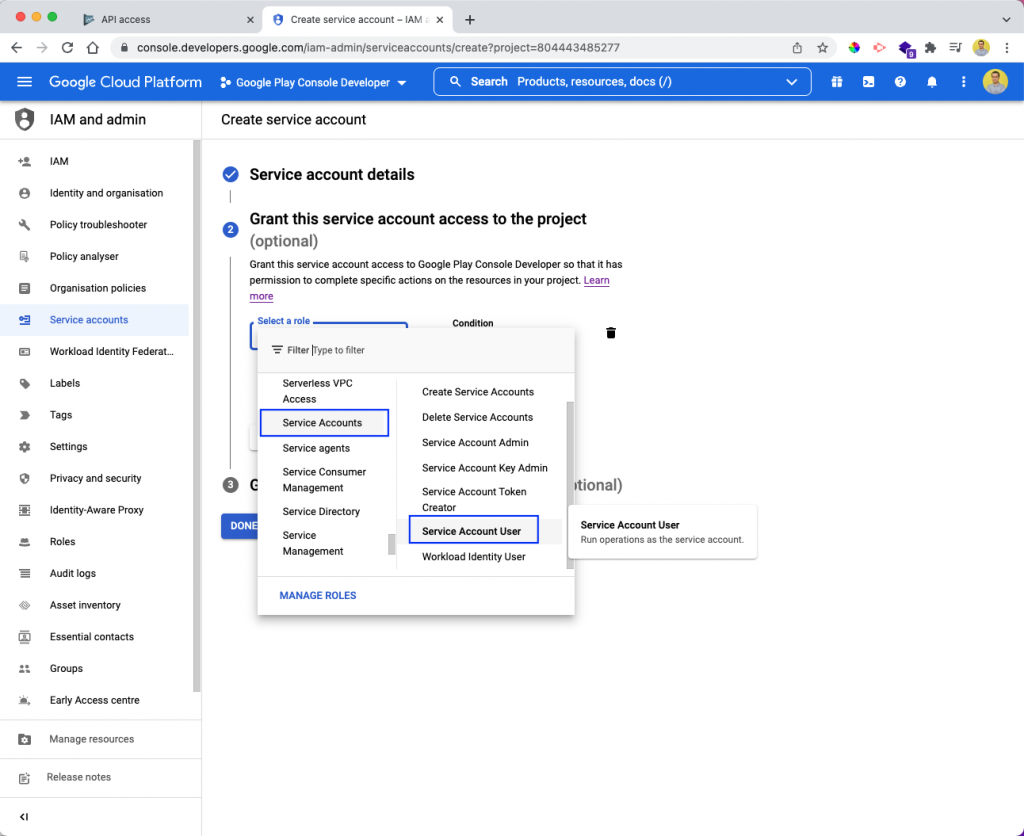
Next, we need to choose Service Accounts and Service Account User.
After that, click on the CONTINUE button.
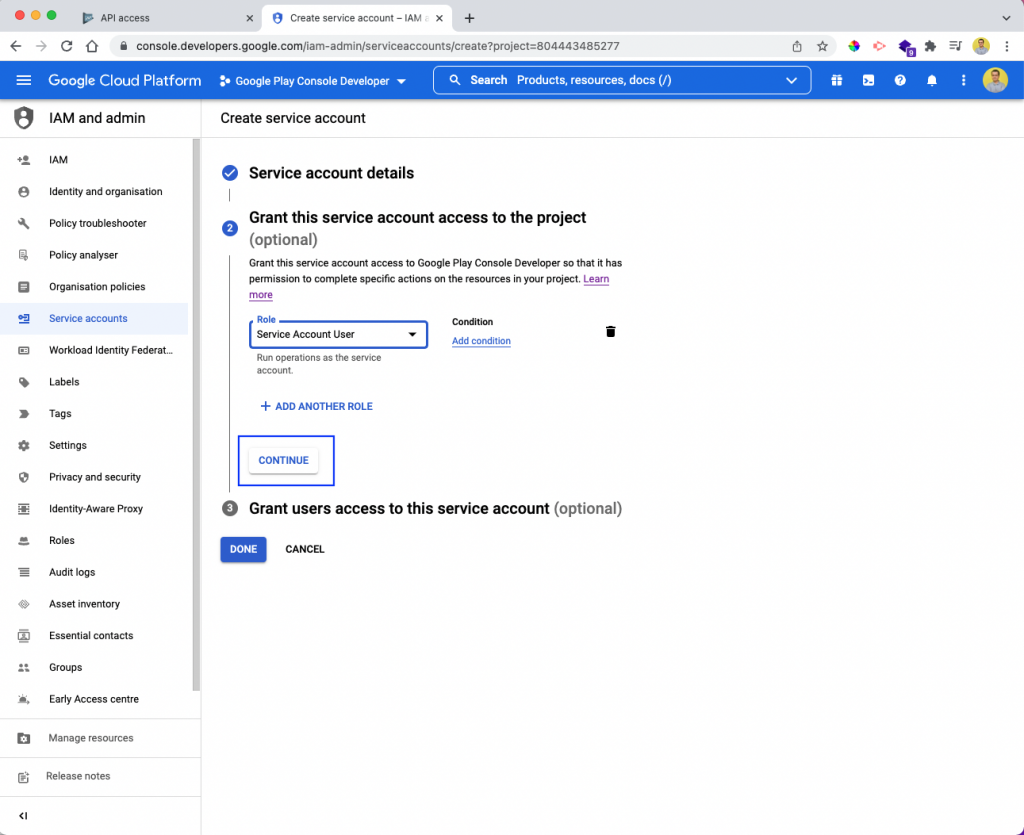
On the next screen, just click DONE.

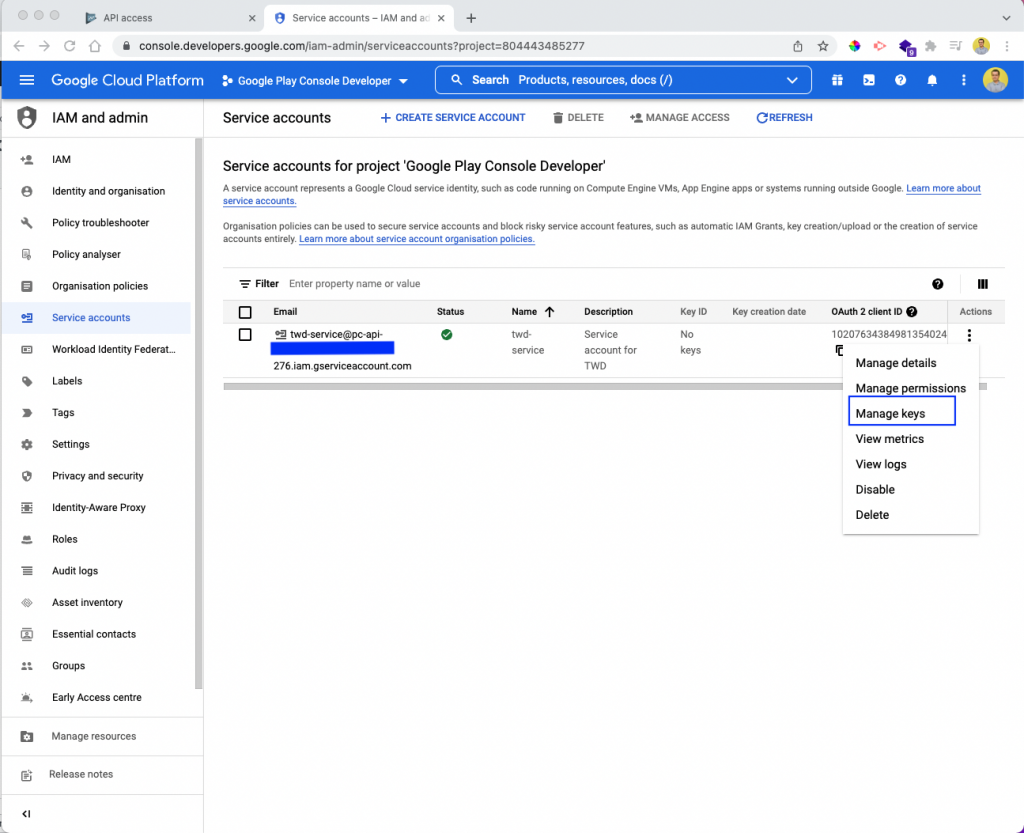
Now, we will see our newly created service account. Inside, click on the three dots under Actions and select Manage keys.
This will take us to the screen below. Here, click on the ADD KEY dropdown and then Create new key.

This will open a pop-up. Here, select JSON and then the CREATE button.
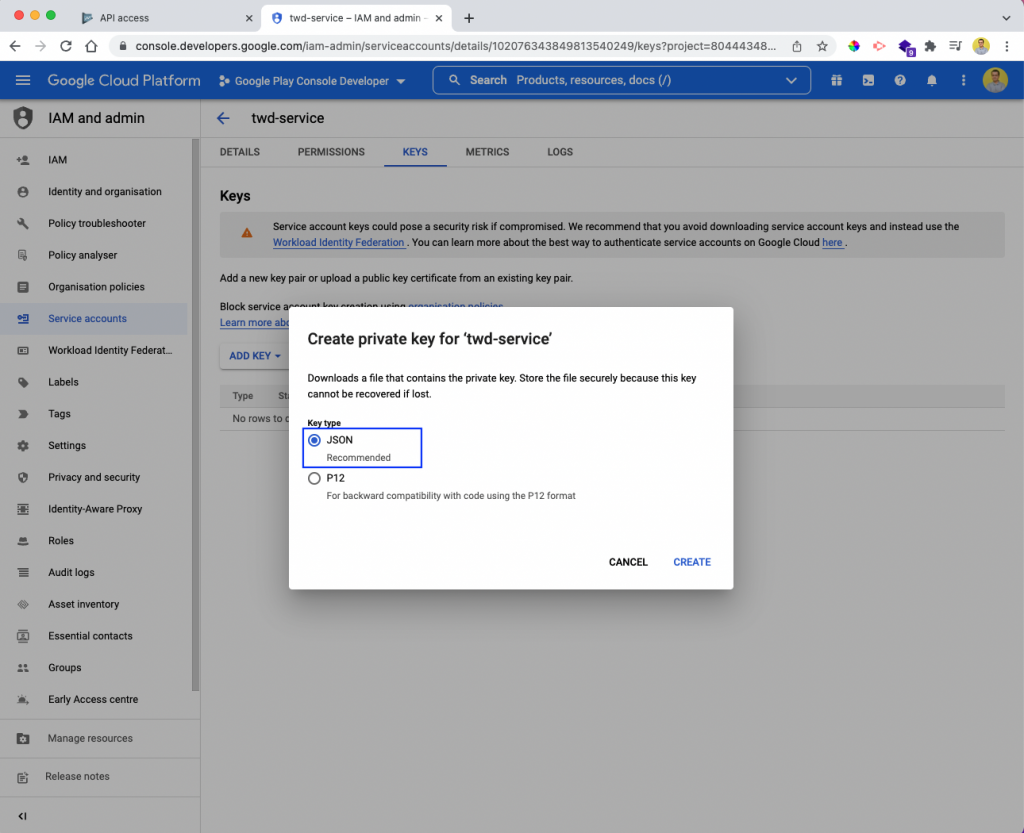
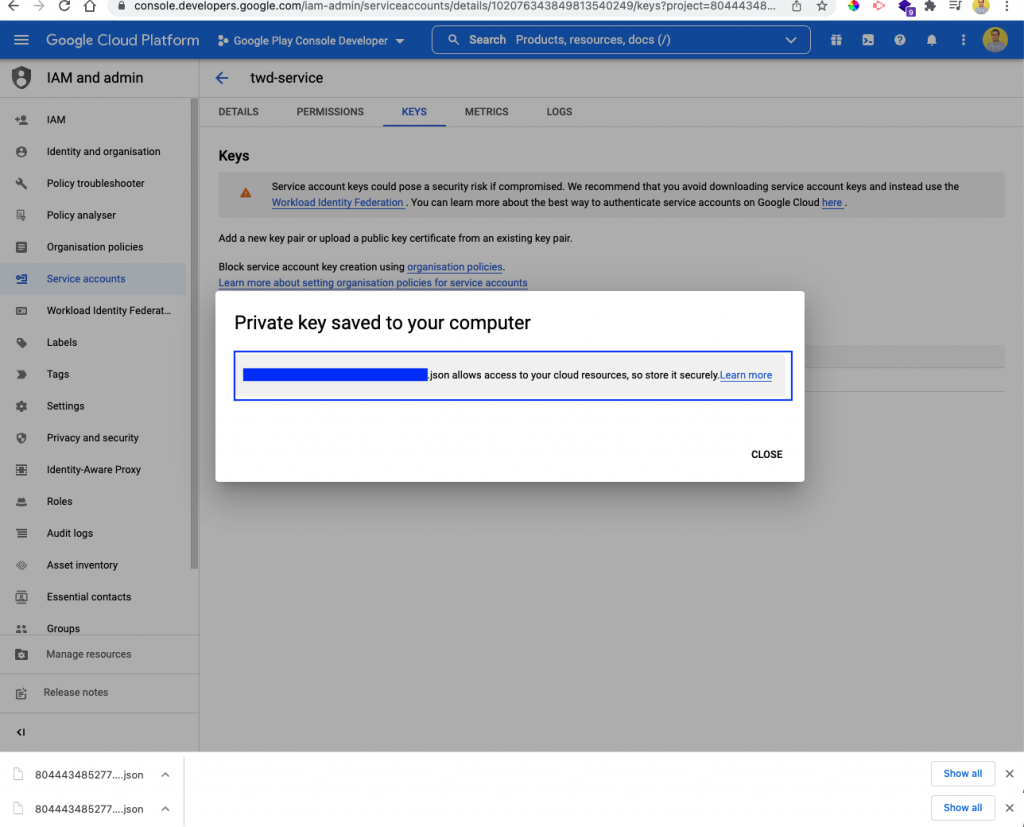
This'll save a file with a .json extension on our local system.
Adding CodePush in the Project
Here's where we'll add CodePush in our project. After adding CodePush, we'll be able to directly distribute our app.
To do so, we need to add it in the App.js file. First, import CodePush. Then we'll use the Effect hook to call CodePush inside the app.
At last, we'll use a Redux-style higher-order component to wrap our app.

Now, we'll also make a minor change to our project by adding a header to our simple Xylophone app.
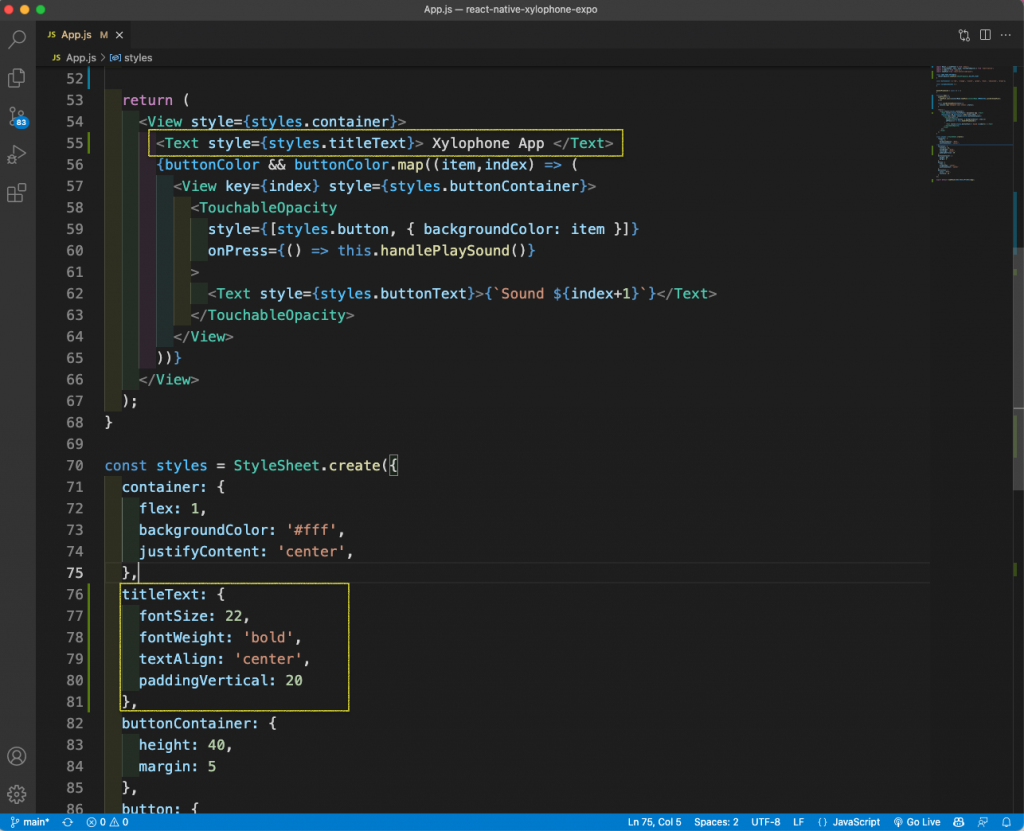
Here's what that'll look like:

Building the APK
Now, let's create an APK file, which we'll need to deploy the next version of the app in the Google Play Store via the app center. We'll also need it for testing with Waldo later on.
Here, we'll also be looking into the steps to create an APK file for the Android store. We'll be following the instructions from this official document.
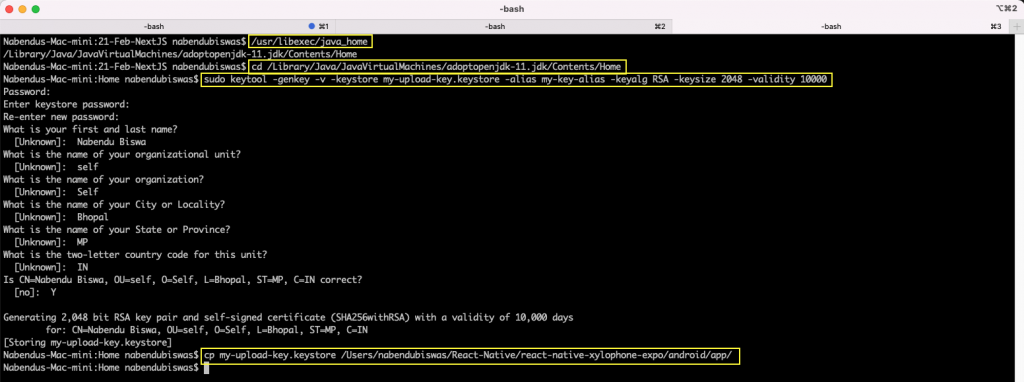
First, generate a signing key using the keytool on a Mac. This tool is in the computer's JDK directory. However, we need to find the JDK path on a Mac first.
After that, change to the directory and run the keytool command.
When we run keytool, it'll ask us some questions, as shown. The main thing is to remember the password we've entered. We're also copying the generated keystore file to our app's Android/app folder.
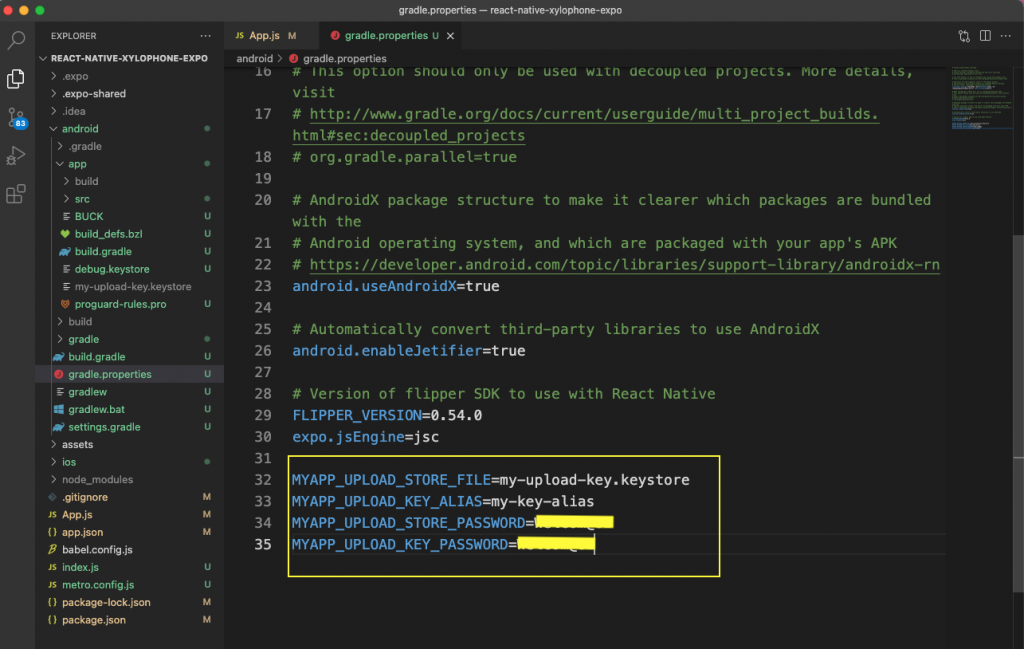
After that, in the gradle.properties file inside the Android folder, we need to add the text below. We also need to enter the correct password here.
Then, we'll add this text in the Android/app/biild.gradle file:

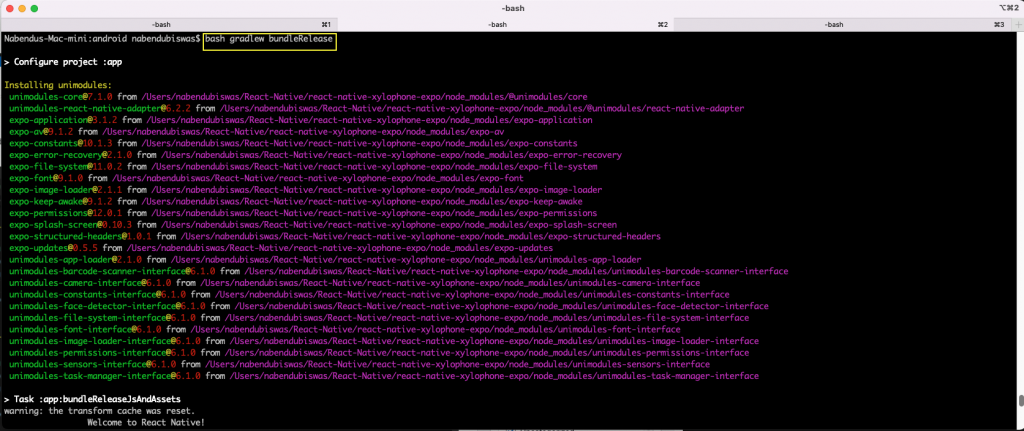
Lastly, we need to run the command bash gradlew bundleRelease from the Android folder.
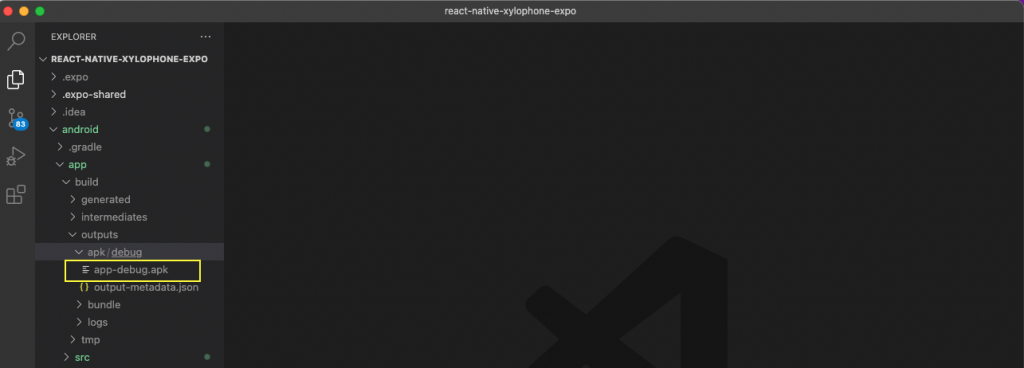
So, the APK file will be generated in the android\app\build\outputs\apk\debug folder.
Testing Our App
It's always a good practice to test our app before deploying it. Instead of writing complicated test cases, we'll use Waldo's testing tool. For this, we'll need the APK file we just created.
Now, create a free Waldo account using your business email.
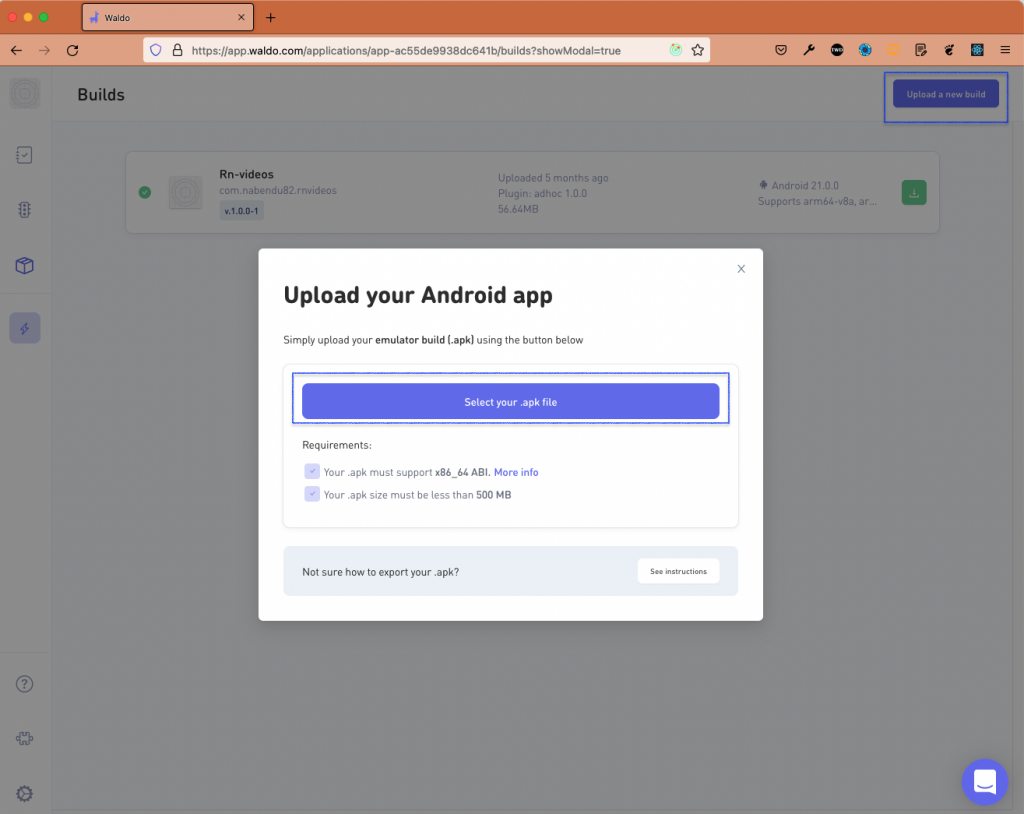
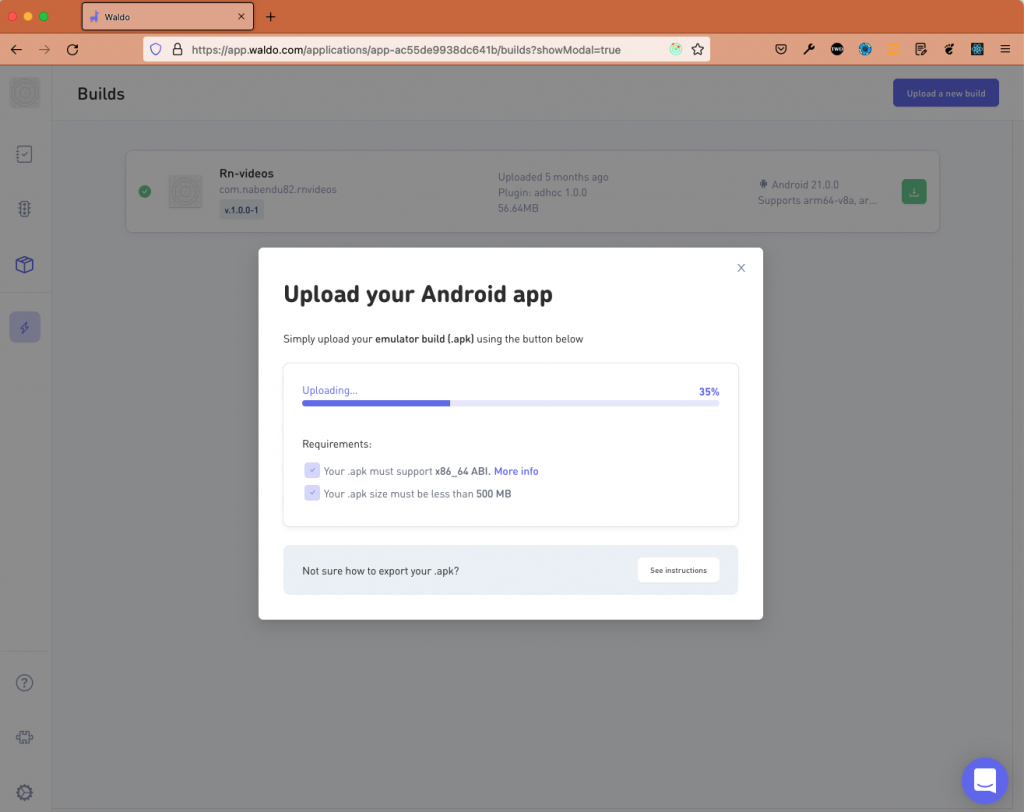
Then, we'll upload the APK file. We have an earlier build in Waldo, so we'll need to click on Upload a new build. After that, click on Select your .apk file.
Upon selecting the APK file created earlier, it'll take two to three minutes to upload. Verification of the APK file will also take place.
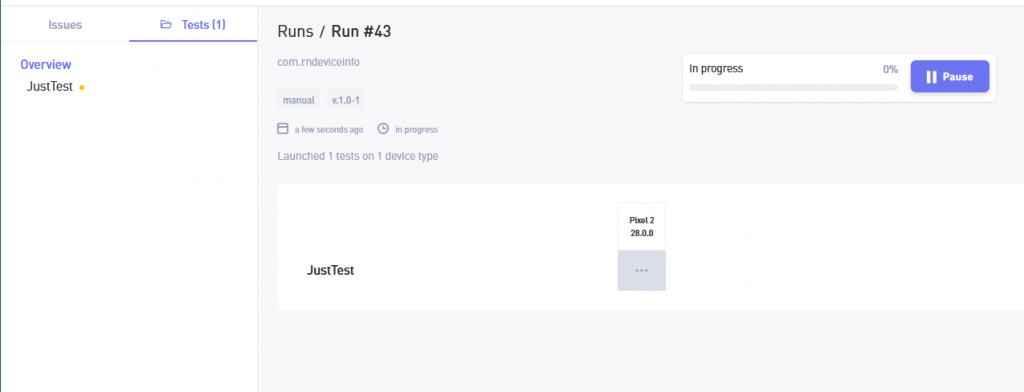
Now, we'll see our build. We need to click on this build to proceed with testing.

To test our app, we need to interact with it. We should interact with the app as if we're interacting with any other app on our phone. After doing this, click on the Save test button, and our test will run.
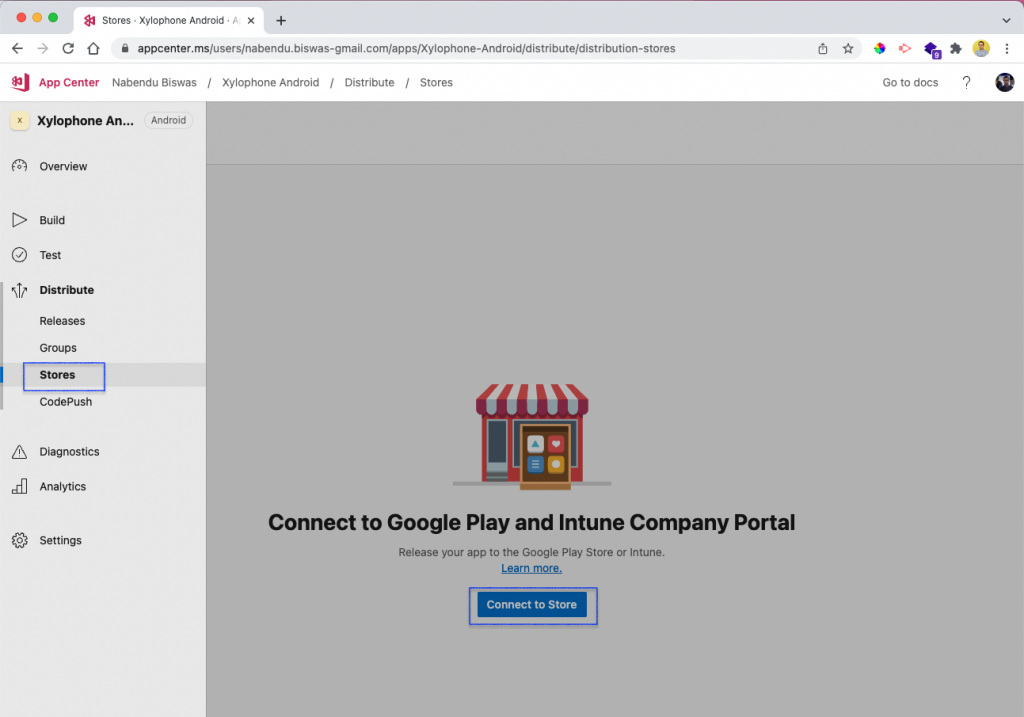
Connect to the Google Play Store
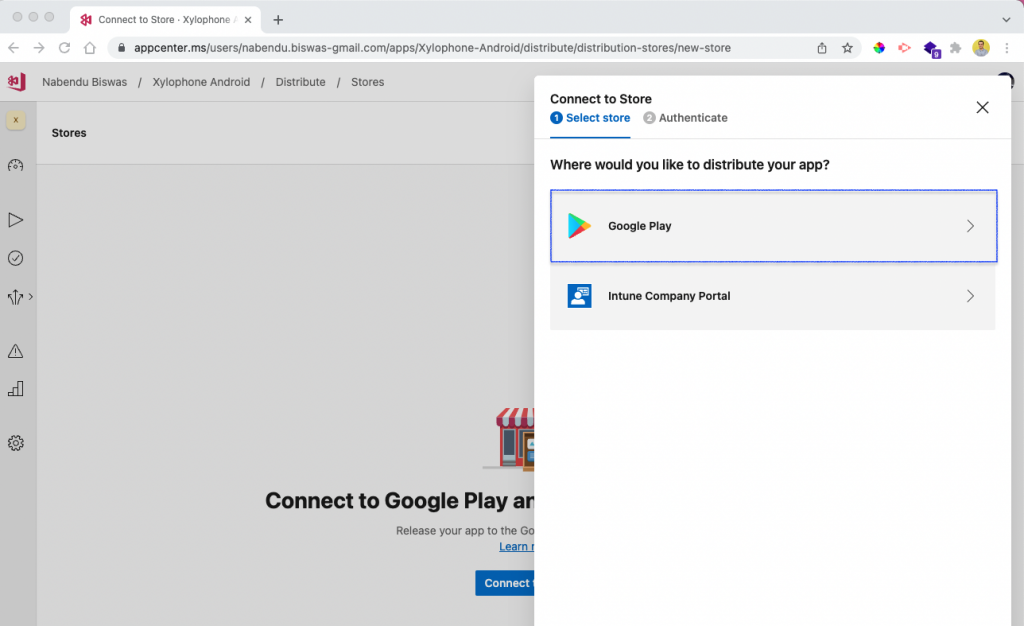
Here's where we'll learn to connect the app center with the Google Play Store. In the app center, click on Distribute > Store. After that, click on Connect to Store.
Next, we need to click on the Google Play tab.
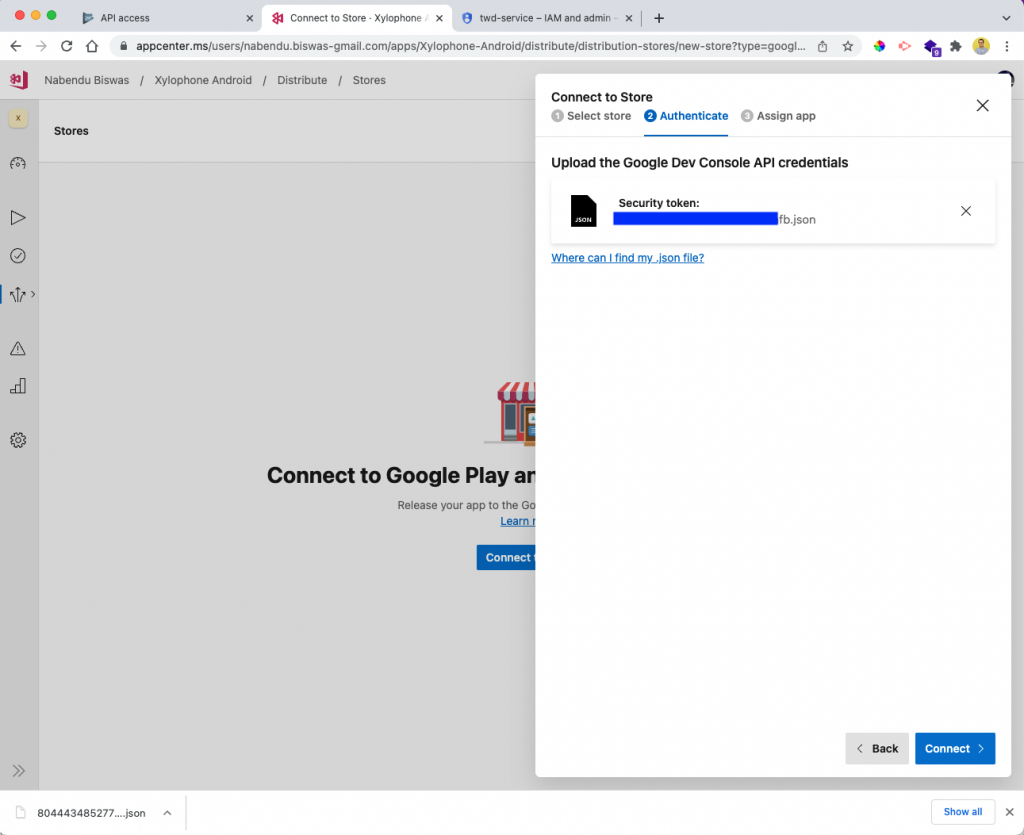
It'll ask for a .json file, and we need to upload the one created earlier.

Now, we'll add the .json file. After that, click Connect.
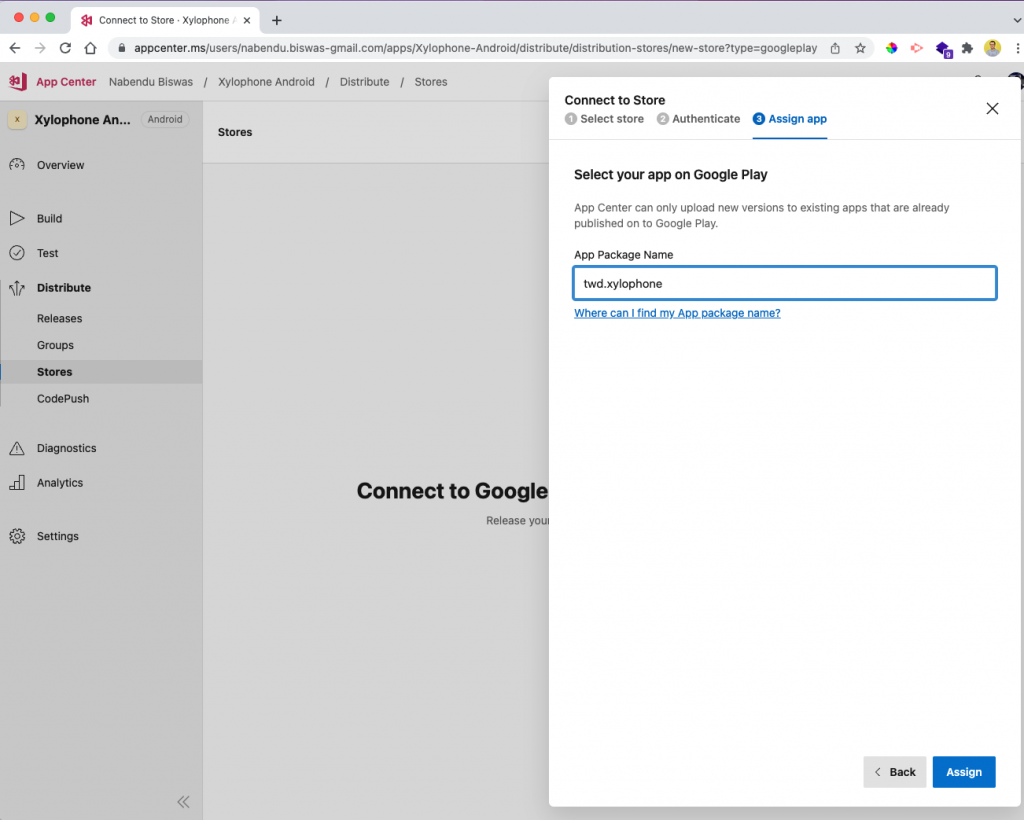
Next, we'll be asked to give the package name of the app. Here, we have to give the exact package name in the Google Play Store. Then, click Assign.
Uploading to the Google Play Store
Finally, let's add the APK file to the app center. This will allow us to distribute our app through the Google Play Store.
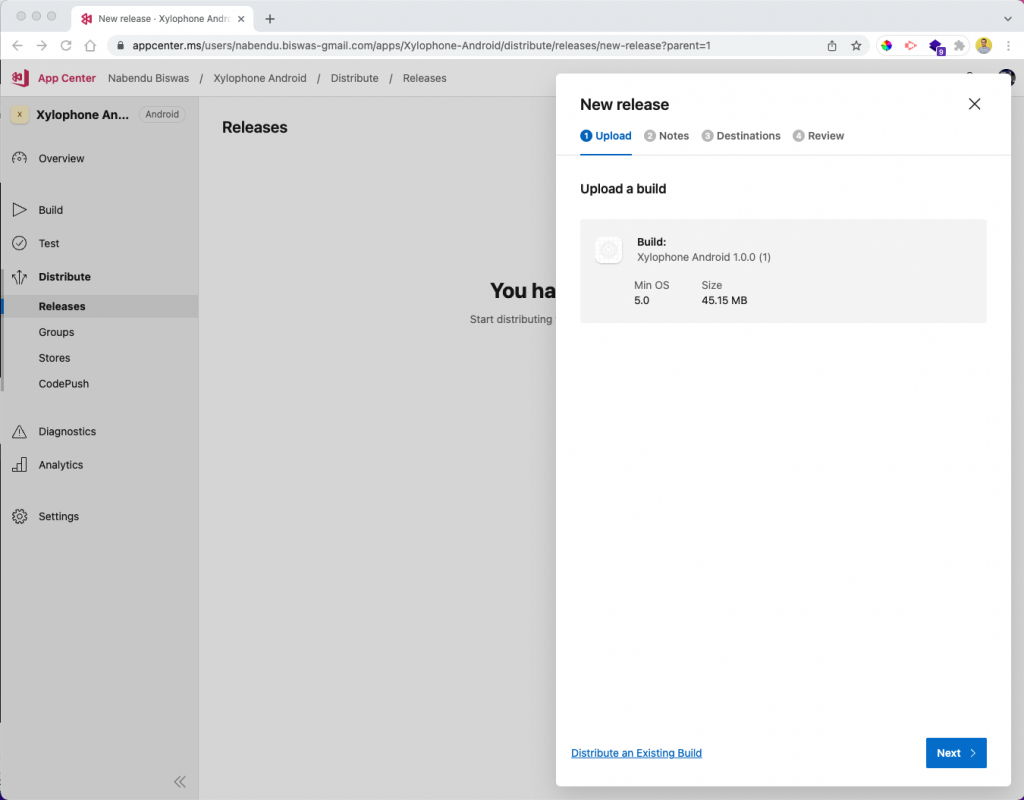
Now, we can upload our new release to the Google Play Store. Click on Releases to the left, which will open a new menu to Upload a build.
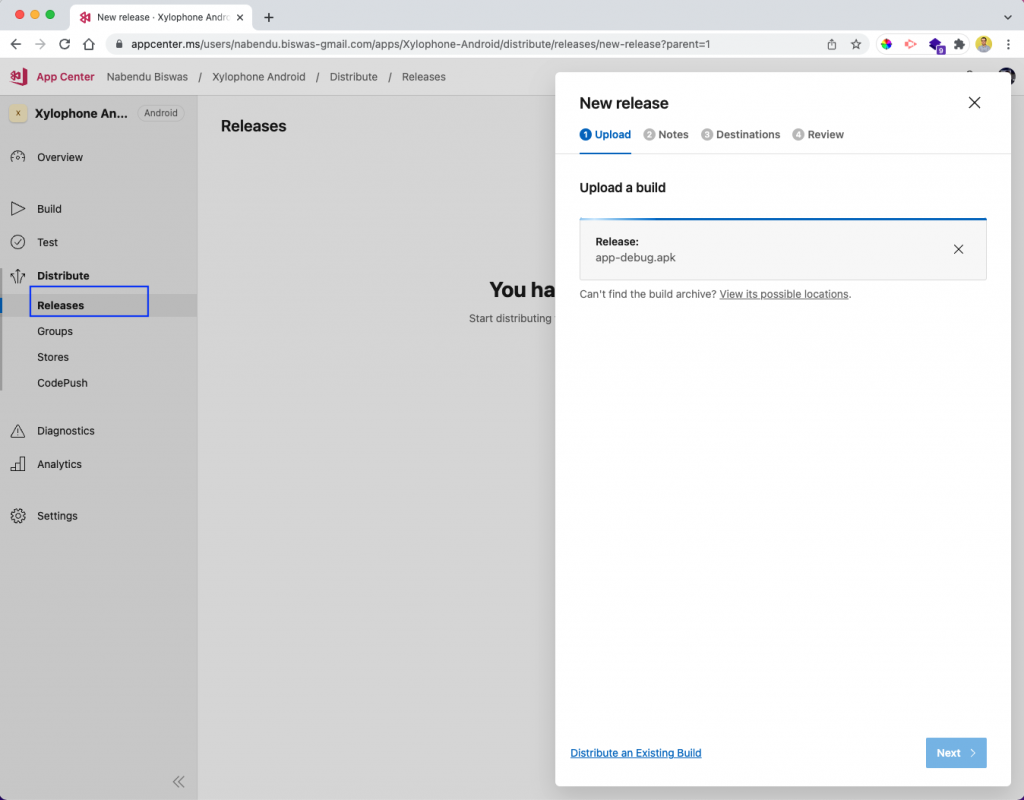
Now, we need to upload the APK file we created earlier.
Next, it'll ask us about the release notes. Here, add an appropriate note and click Next.

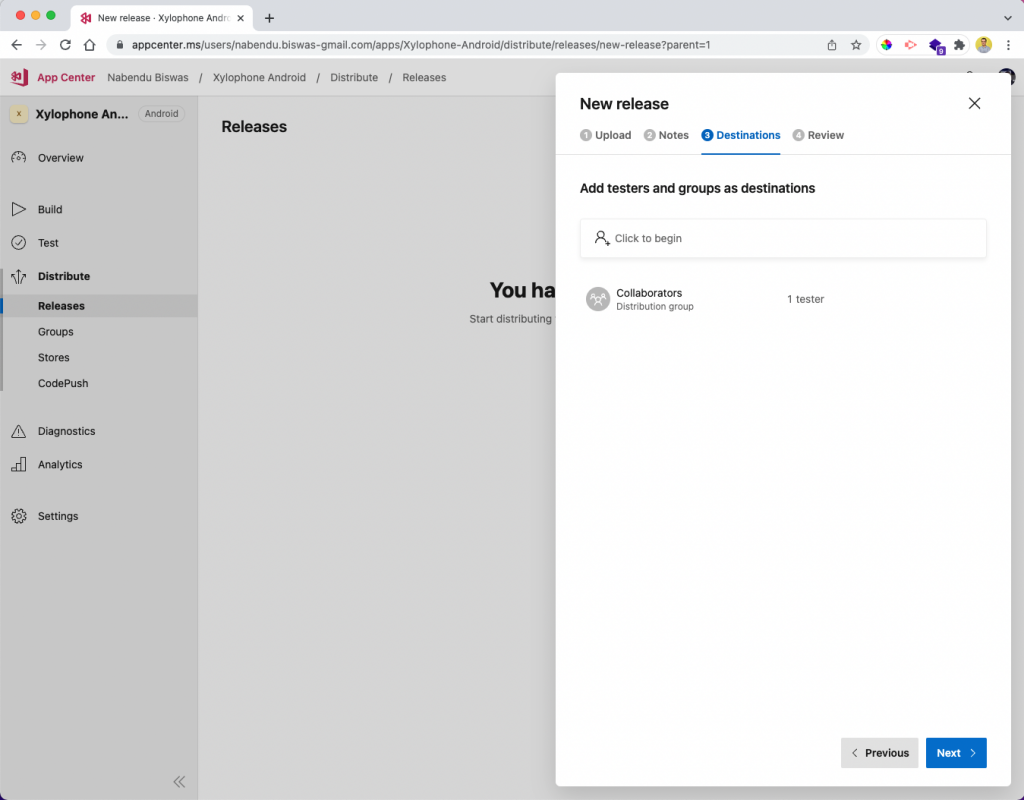
Then, it'll ask for the destinations. Here, we can distribute it to the testers.
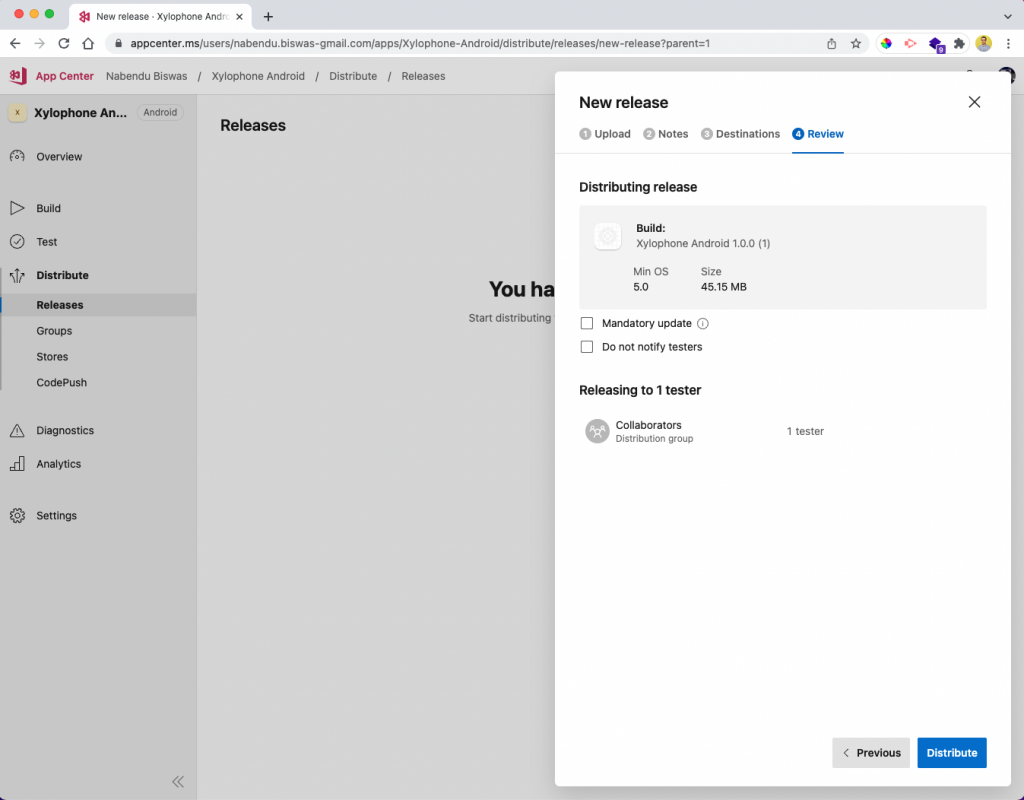
Next, it'll ask for the review. Click Distribute.
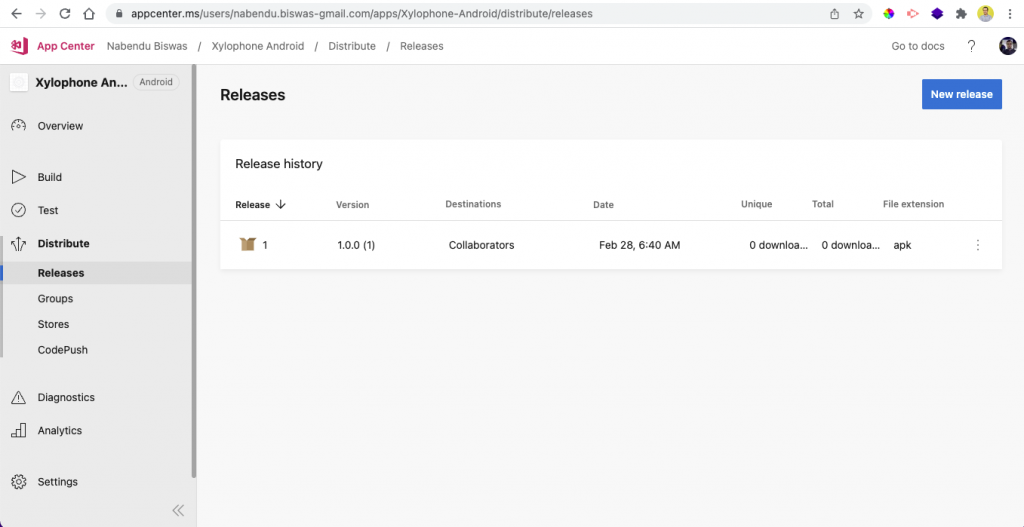
This will show that the app has been successfully released to the tester.
Similarly, we can follow the above steps and publish it to a production track.
Conclusion
In this post, we've learned about CodePush in React Native. This approach helps us reduce deployment time if we're making a small change to an app such as adding a new background color or title.
We learned the initial setup of a CodePush account and how to add an already deployed app to CodePush. We also learned the changes we need to make to an app and created APK files.
Finally, we tested the APK files with the no-code platform from Waldo and learned how to push our app through CodePush to the Google Play Store.
Learn more about Waldo's React Native support here.
Automated E2E tests for your mobile app
Get true E2E testing in minutes, not months.


