


Most unit test frameworks allow you to write parameterized tests, and JUnit is no exception. In this post, you'll learn the what-why-how of JUnit parameterized test. We'll cover their definition, why to adopt them, and how to write them.
As the title suggests, this will be a practical post, and it assumes that you:
- are a Java developer
- are familiar with the concept of unit tests
- have experience writing tests with JUnit 5 (I won't cover JUnit's installation or its definition)
Do you check all of the boxes above? If that's the case, let's dig in.
.png)
What Is a Parameterized Test in JUnit?
In JUnit and other unit testing frameworks, a parameterized test is a way to separate the test structure and logic from the data used in the test. The test method can accept data as parameters, and during the test run, a test will be executed for each set of parameters specified. This allows you to easily test various data sets without writing separate tests for each case.
What Is the Advantage of Parameterized Tests in JUnit?
Most experienced software engineers know about the evils of duplication. When writing unit tests, you'll often end up with identical tests that differ only in their data. Parameterized tests can be your way out of this conundrum.
Instead of writing several identical test methods with different data, you can write a single method and provide the data as parameters. What value does this technique provide?
- Less duplication. If it turns out the test method has a bug, or you need to update it for another reason, you'll have to change a single method instead of several.
- More coverage. Adding a new set of test parameters is easier than adding a new test method. This lower friction incentivizes you to add more parameters, ensuring a higher coverage.
- Better readability. If you use a parameterized test case with well-named parameters, the resulting test code will be cleaner, leaner, and potentially easier to understand.
In short: decoupling test data from test structure results in leaner, cleaner test code that is easier to read and maintain.
How Do You Write Parameterized Tests?
You write a parametrized test much like you would a regular one. The main difference is that the values you use in the test come from parameters instead of being hardcoded in the method itself. Another difference is that you usually use a special syntax to express that a given method is a parameterized test and to define the source of the parameterized data.
In JUnit, we use annotations to express the above. The @ParameterizedTest annotation is what you use to mark a method as a parameterized test. And the @ValueSource annotation is what you use to express the source for the data.
Parameterized Tests in JUnit: Let's Get Started
As you'll see, writing parameterized tests in JUnit is quite easy, and you'll be ready in no time.
Start With the Production Code
We need some code to test, so let's start there. Using any editor or IDE, start a new Java project and add a class called StringCalculator. Paste the following code in it:
The class above is a solution for a coding kata—a programming exercise—authored by Roy Osherov and called "String Calculator Kata." The exercise has the following rules:
- you should create a class with a single method
- the method gets a string containing numbers separated by a comma and returns an int with their sum
- an empty string results in zero
- numbers larger than 1000 are ignored
There are more rules in the exercise, but the ones above are usually enough to use as an example.
Writing a Few Non-Parameterized Tests
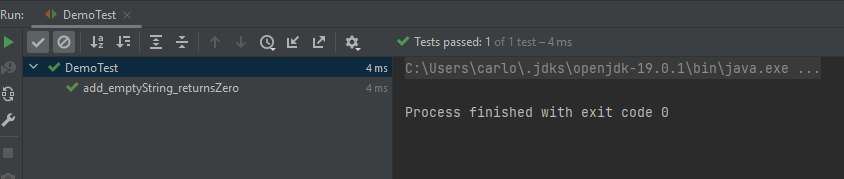
Let's start with a regular, non-parameterized test that verifies the most basic scenario: an empty string should result in zero:
The test passes as one would expect:
Let's add a second test that verifies a white-space string:
This test passes as well. Finally, let's add a third test that verifies whether a string containing nonprintable characters results in zero as well:
This test also passes.
Parameterizing the Previous Tests
As you've seen, the previous tests are redundant. They're essentially the same test; only the input data varies. Let's parameterize the test so we can have a single method. First, you need to add the JUnit Jupiter Params dependency. Check the page for instructions for your dependency manager system.
Then, add the following imports to the top of your testing class:
Next, pick one of the three test methods and change its @Test annotation to @ParameterizedTest. Then, add another annotation (called @ValueSource) right after the previous one:
Here, we're passing three strings as the data sources, which are the same ones from the previous tests. Now, there are just two more steps left:
- rename the method to add_emptyString_returnsZero(String numbers)
- in the body of the method, replace the parameter passed to add() with the argument numbers
- finally, delete the other two tests
The resulting test should look like this:
Finally, let's run the test. This is the result:
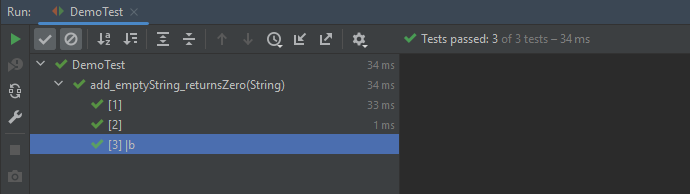
The image depicts the test runner from IntelliJ IDEA showing that three tests were successfully executed.
Writing More Parameterized JUnit Test
With the simplest case out of the way, let's test the scenarios that actually perform the sum using strings with one, two, and three numbers. And now, we face an obstacle: the @DataSource annotation only allows passing a single argument to each method. We want to pass two arguments for this next batch of tests: a string containing the numbers and an int representing the expected result.
Fortunately, there's a solution consisting of a different annotation and an auxiliary method. The code will be slightly more complex, but it will work.
Let's start by first adding another new import:
Then, create the test method itself:
Notice how we're using the @MethodSource annotation. It points to a method that will provide the data for the test. So, the next step is to create the method with the same name defined by the annotation:
The method above returns a Stream of Arguments. Each argument contains a string and an integer, representing the numbers to be added and the expected result. For the code above to work, you'll need to include three new imports:
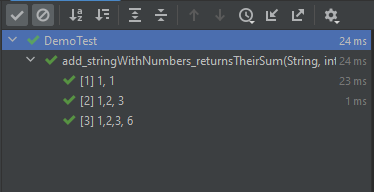
If you run the tests, you'll see that three tests were generated and executed:
If you remember the list of rules for the kata, you know the calculator should ignore numbers larger than a thousand. We still haven't written any tests for that scenario, so let's do that now:
This method's name is a mouthful, but it's descriptive, so let it be. Now, let's create the dataProvider2 method:
Notice the choice of the third number in each argument:
- 1000, to show that it should not be ignored
- 1001, to show that it should be ignored
- 999, to show that it also shouldn't be ignored
Since the number 1000 is a boundary where the behavior of the system under test changes, we must test at the boundary, before it, and after it. That's necessary because off-by-one errors are super common: while implementing the solution, I could've typed ">= 1000" instead of "> 1000", and then a bug would've been introduced.
As the last step, let's change the names of the dataProvider and dataProvider2 methods to something more meaningful, remembering to update the @MethodSource annotation as well. Rename the former tonumbersAndResultProvider and the latter to inputsContainingNumbersLargerThan100AndResultProvider. Again, it's a mouthful, but it's descriptive.
Why Not One Big Test?
At this point, we ended up with three parameterized tests:
- add_emptyString_returnsZero()
- add_stringWithNumbers_returnsTheirSum()
- add_stringWithNumbers_returnsTheirSumAndIgnoresNumbersLargerThan1000()
You might wonder why not have a single big method instead of three. It surely is possible, but I chose another path. This is a matter of personal preference, but I think the three well-named methods are better for legibility and maintainability, as each one of them tests and documents a specific scenario.
.png)
The Parameters of Success
Duplication is bad, not only in production but also in test code. With the help of parameterized tests, you can reduce duplicated code in your tests. More importantly, you can decouple test data from the test structure, resulting in cleaner tests that are easier to understand and maintain.
Where should you go from here?
First, there's plenty to learn on parameterized tests, including powerful options regarding the source of data. It's possible, for instance, to use CSV files to store the data for tests, achieving full data-driven testing (another great topic for you to research.)
Also, remember that there's life beyond unit testing. Though many people—including yours truly—consider it the most important form of testing, it isn't the only one.
Especially in the mobile development world, many forms of automated testing are at your disposal, including functional, codeless testing.
Automated E2E tests for your mobile app
Get true E2E testing in minutes, not months.


