


An HTTP (Hypertext Transfer Protocol) engine is a web server that serves API endpoints. One of the most popular web servers is the Apache web server. But the web server is a broader term and includes HTTP and SMTP servers. At the most basic, the HTTP engine contains HTML pages stored in it, and we request them through our web browsers like Chrome. And then these HTML documents are sent to the browser, where they're displayed.
In this post, we're going to learn about Swifter HTTP engine. For this, we'll create a small project and see various use cases for it. And we're also going to do some basic tests on it.
What Is Swifter HTTP Engine?
Swifter is a small HTTP server engine created using Swift. This package is completely free to use and is open source. It was created for Swift projects and can be easily added through CocoaPods or Swift Package Manager. With Swifter, we can do a lot of HTTP server engine tasks, like loading an HTML String, sharing files, redirecting to a different URL, serving whole HTML files, and also starting WebSockets.
Next, we're going to create an Xcode project with Swifter. Then we'll test it using the in-built Xcode testing framework XCTest.
Project Setup
We'll first create a new project by using Xcode. To do this, in Xcode, click on New > Project.
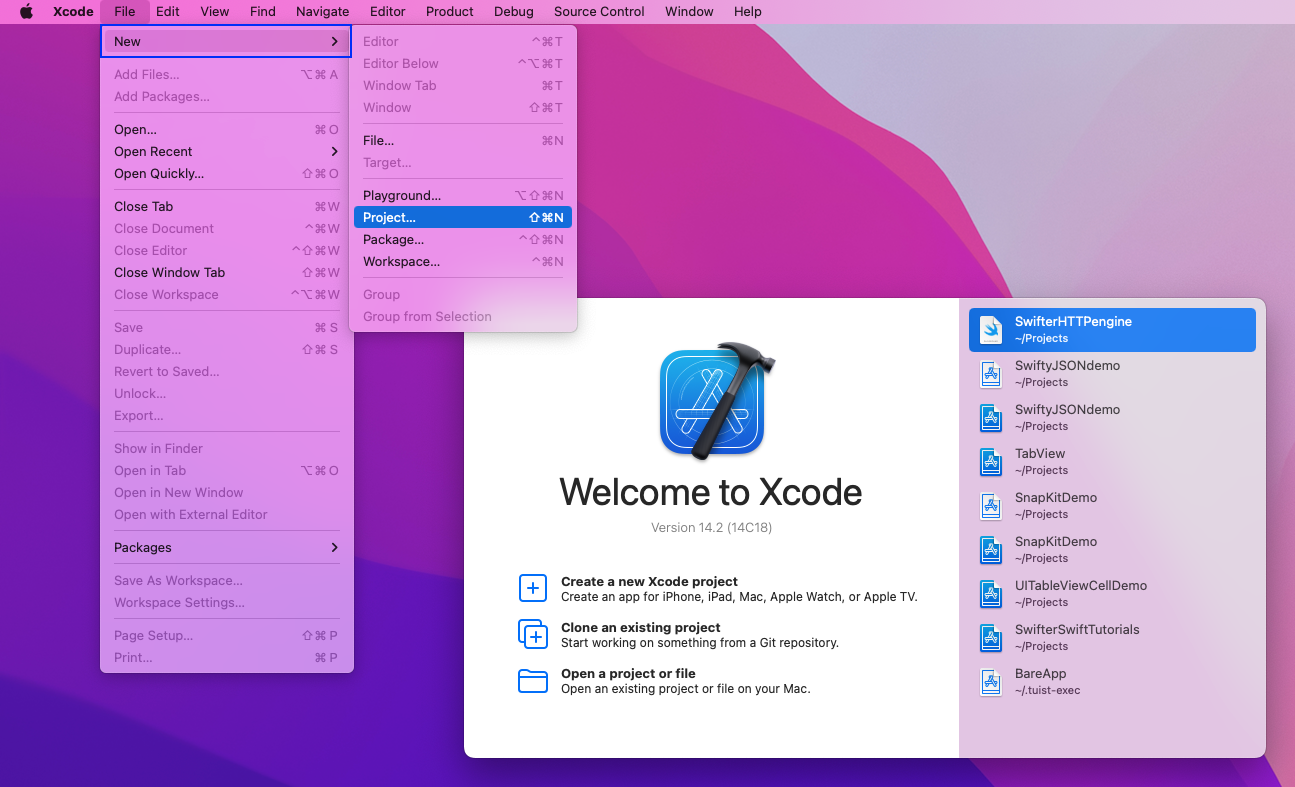
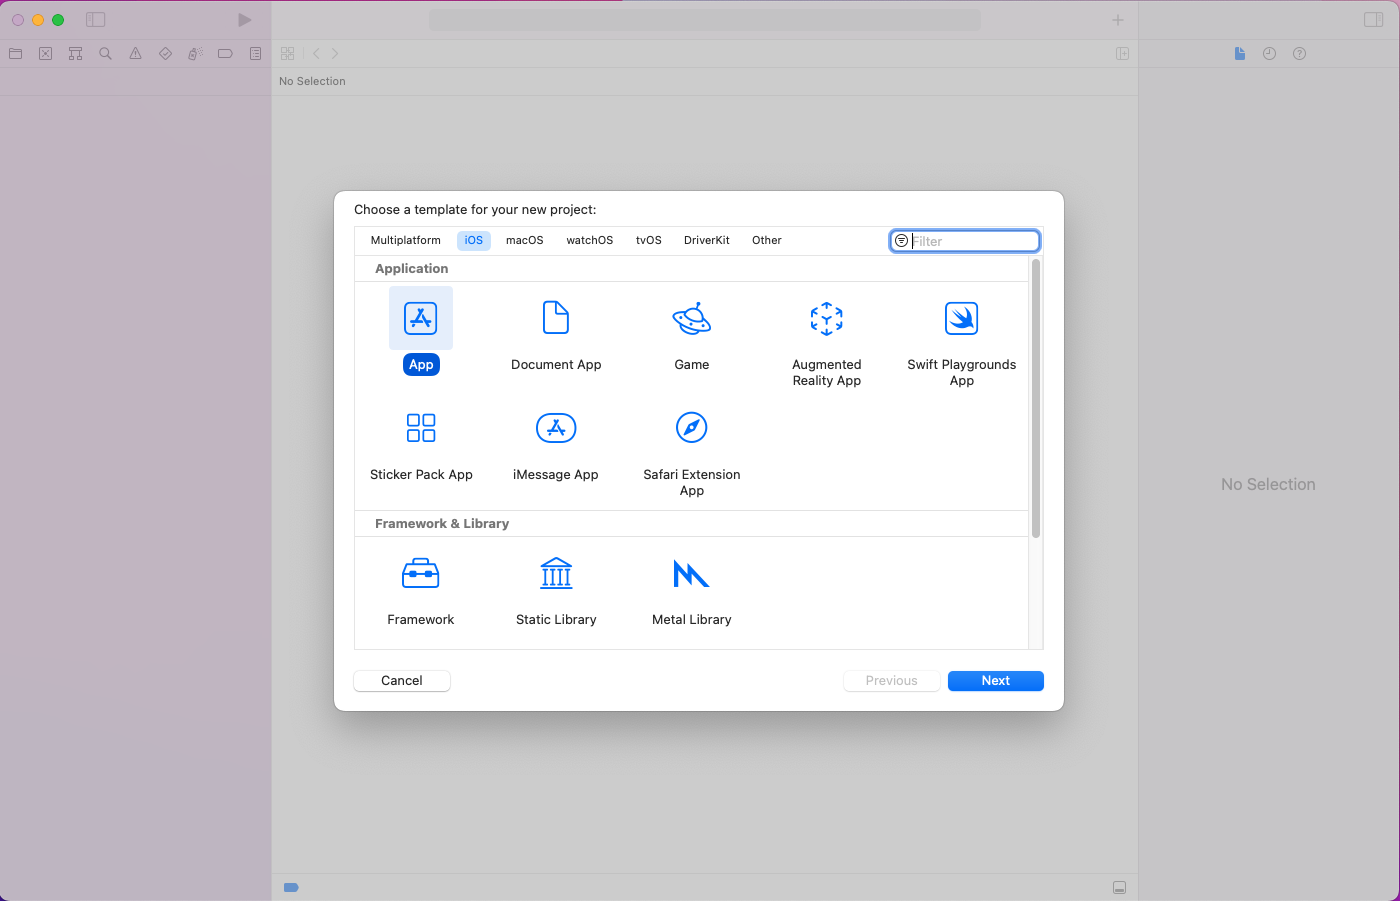
Now, in the next pop-up, click on App and then the Next button.
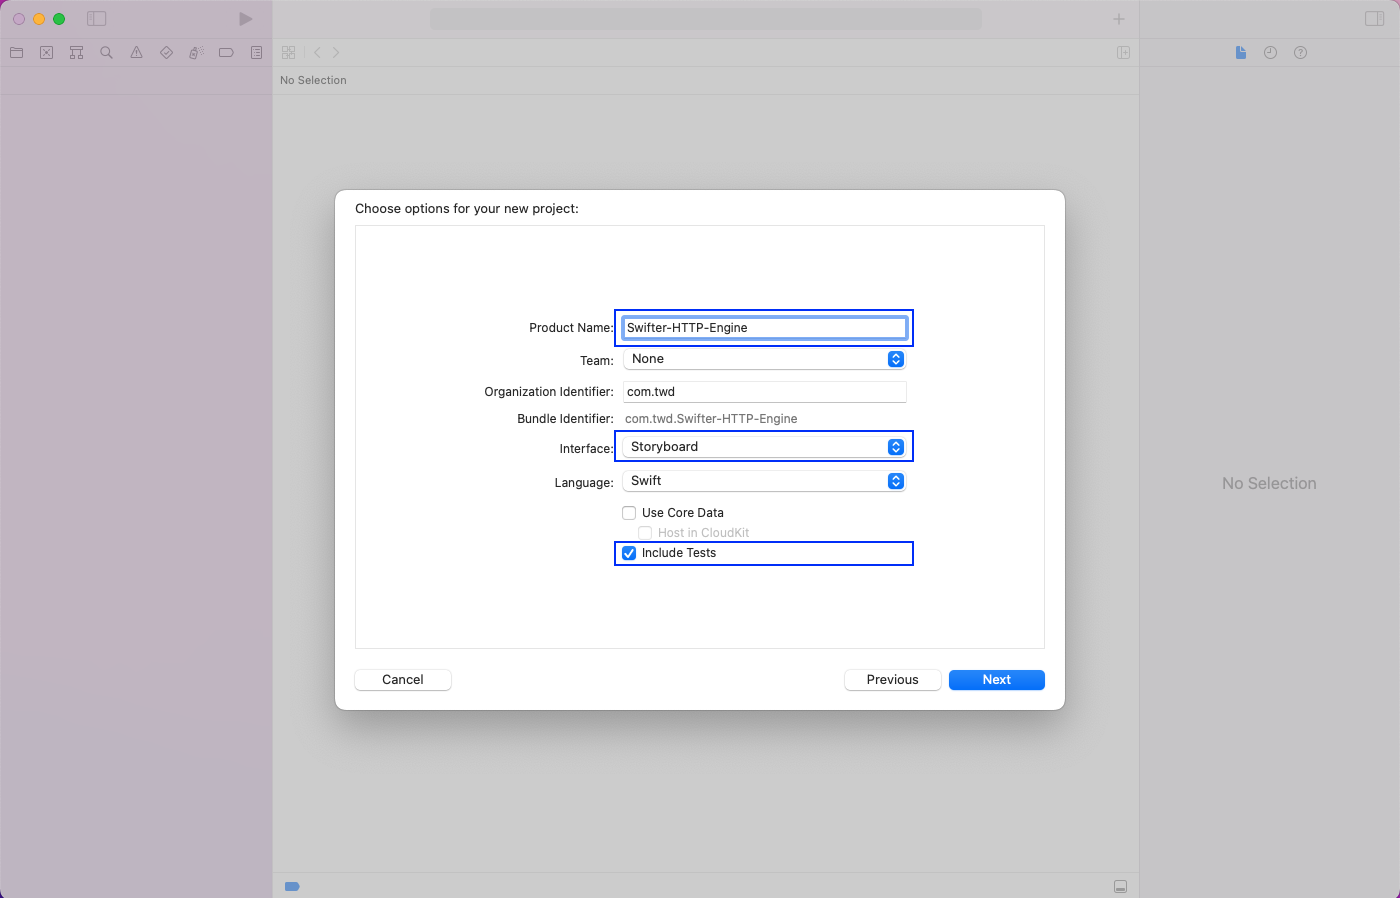
In the next pop-up, we'll give the product a name, which is Swifter-HTTP-Engine in our case. The interface is Storyboard, and we'll also check the box to include tests in our app.
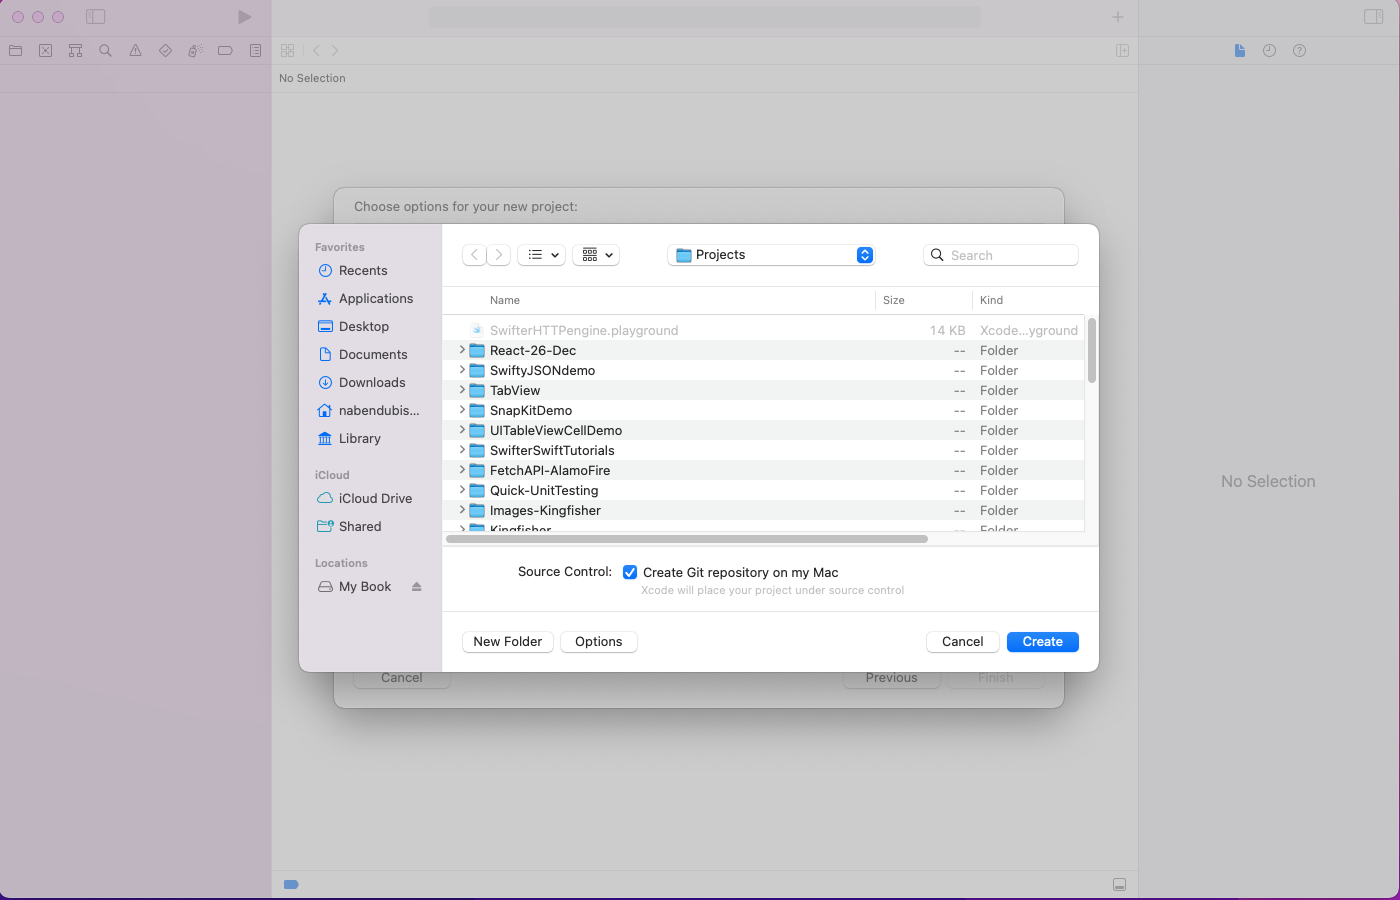
Now, just click on the Create button after choosing a suitable folder.
Our project will now open in Xcode.
Installing Swifter Through Podfile
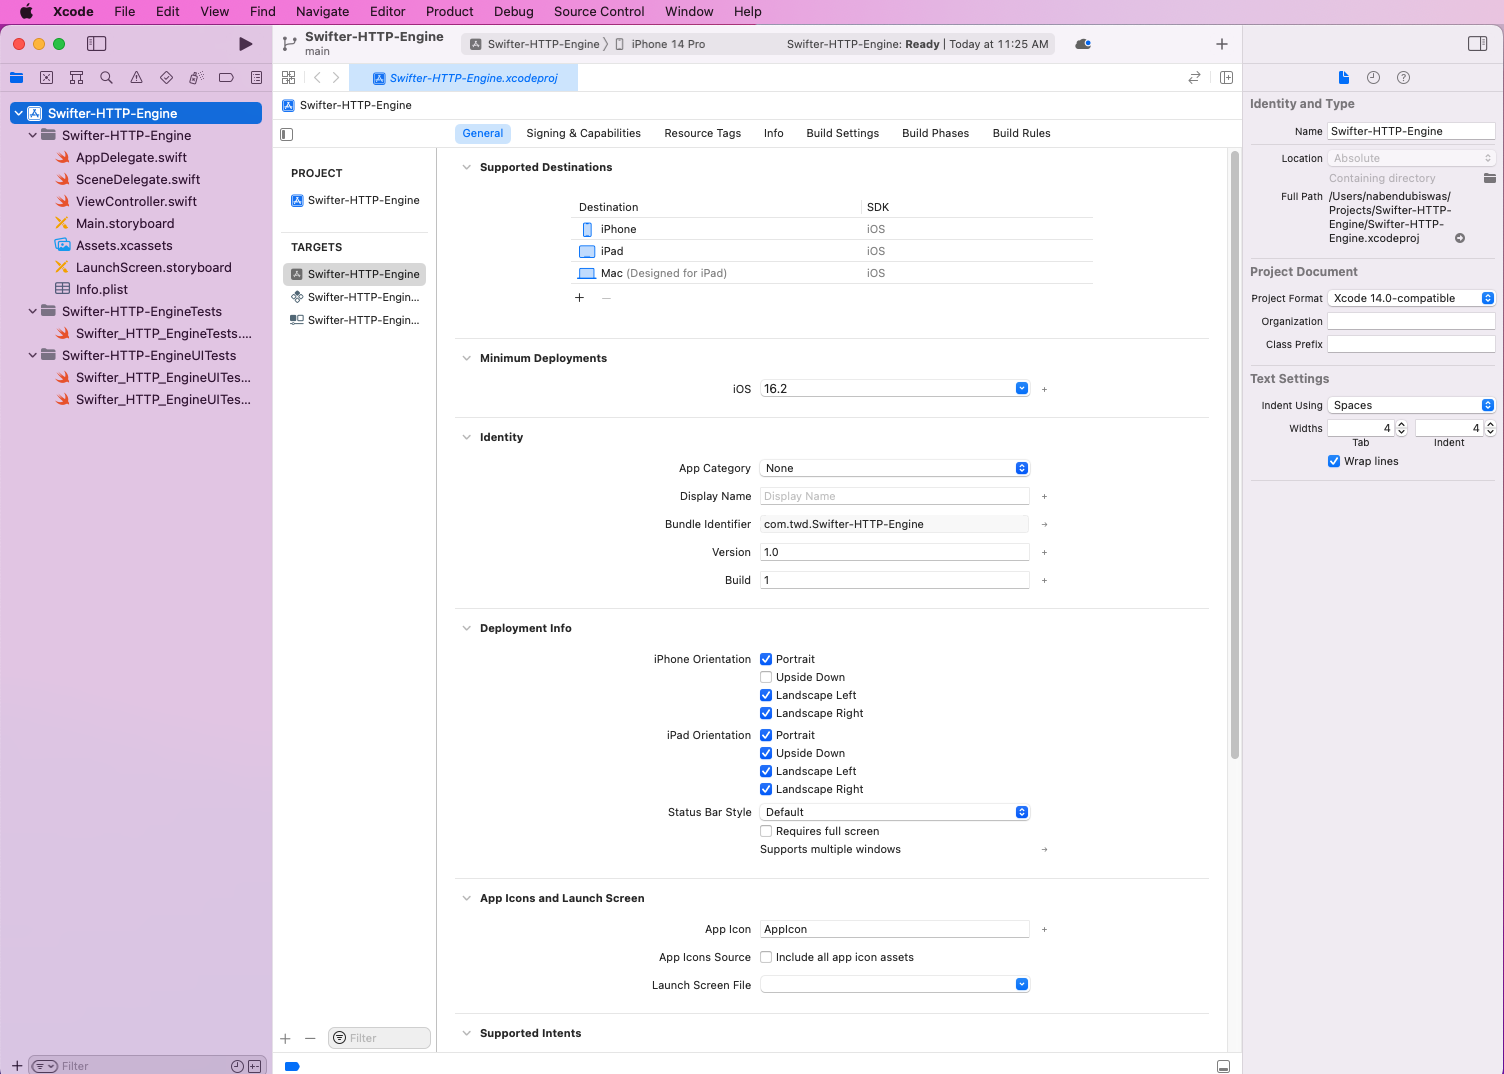
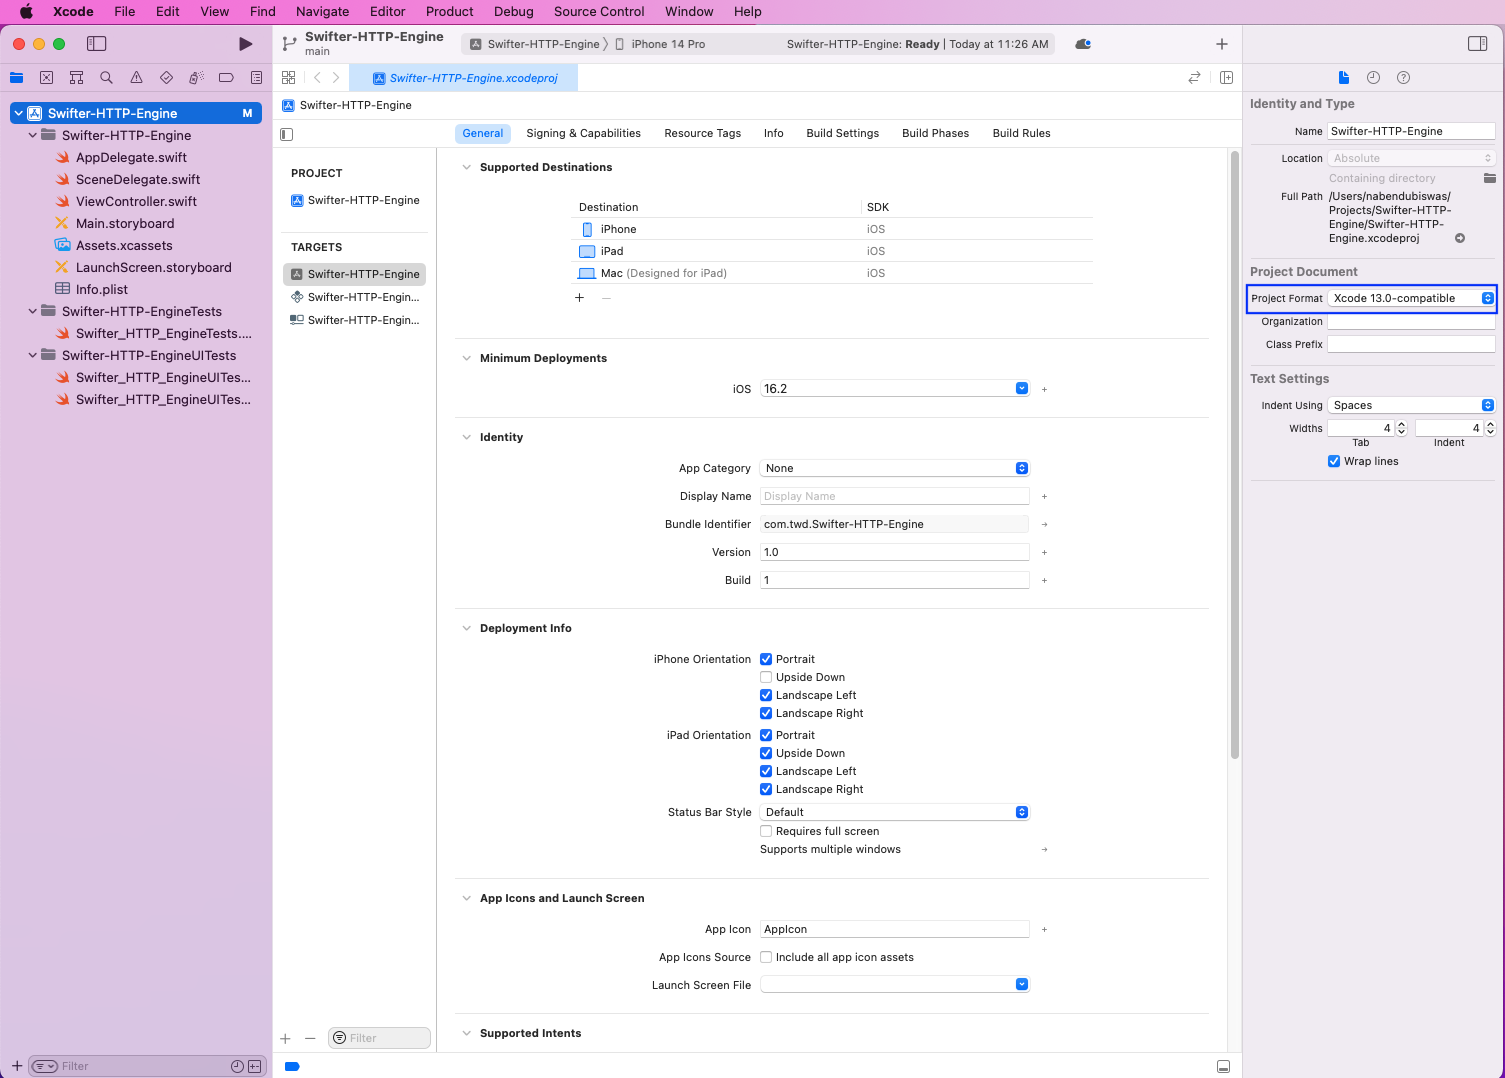
We can install Swifter, like any other package in Swift, through Swift Package Manager. But the best way to install it is through CocoaPods. However, currently, the latest version of Xcode has some issues on the latest Macs running M1 chips. So we need to change the project format to Xcode 13.0-compatible.
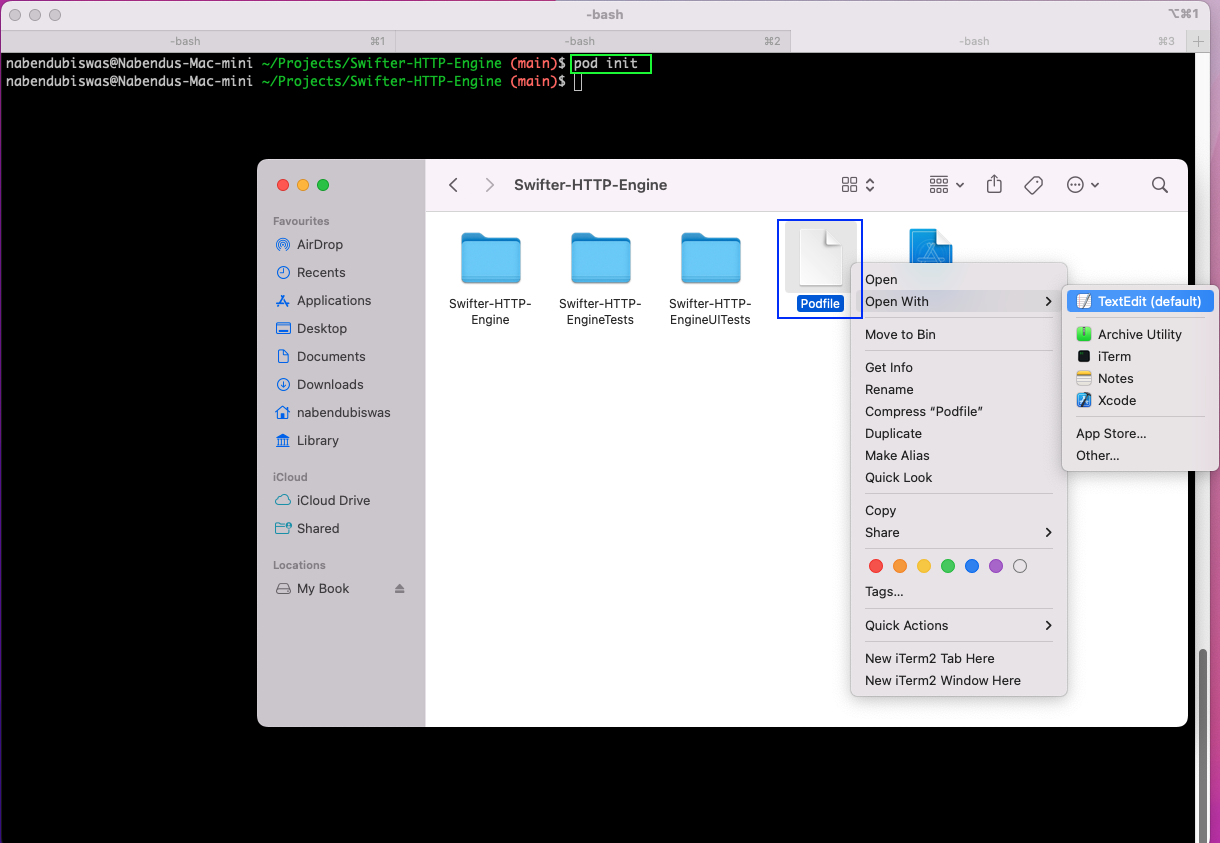
From the terminal, run the pod init command in the project directory. It will create a Podfile, which can be seen in the Finder.
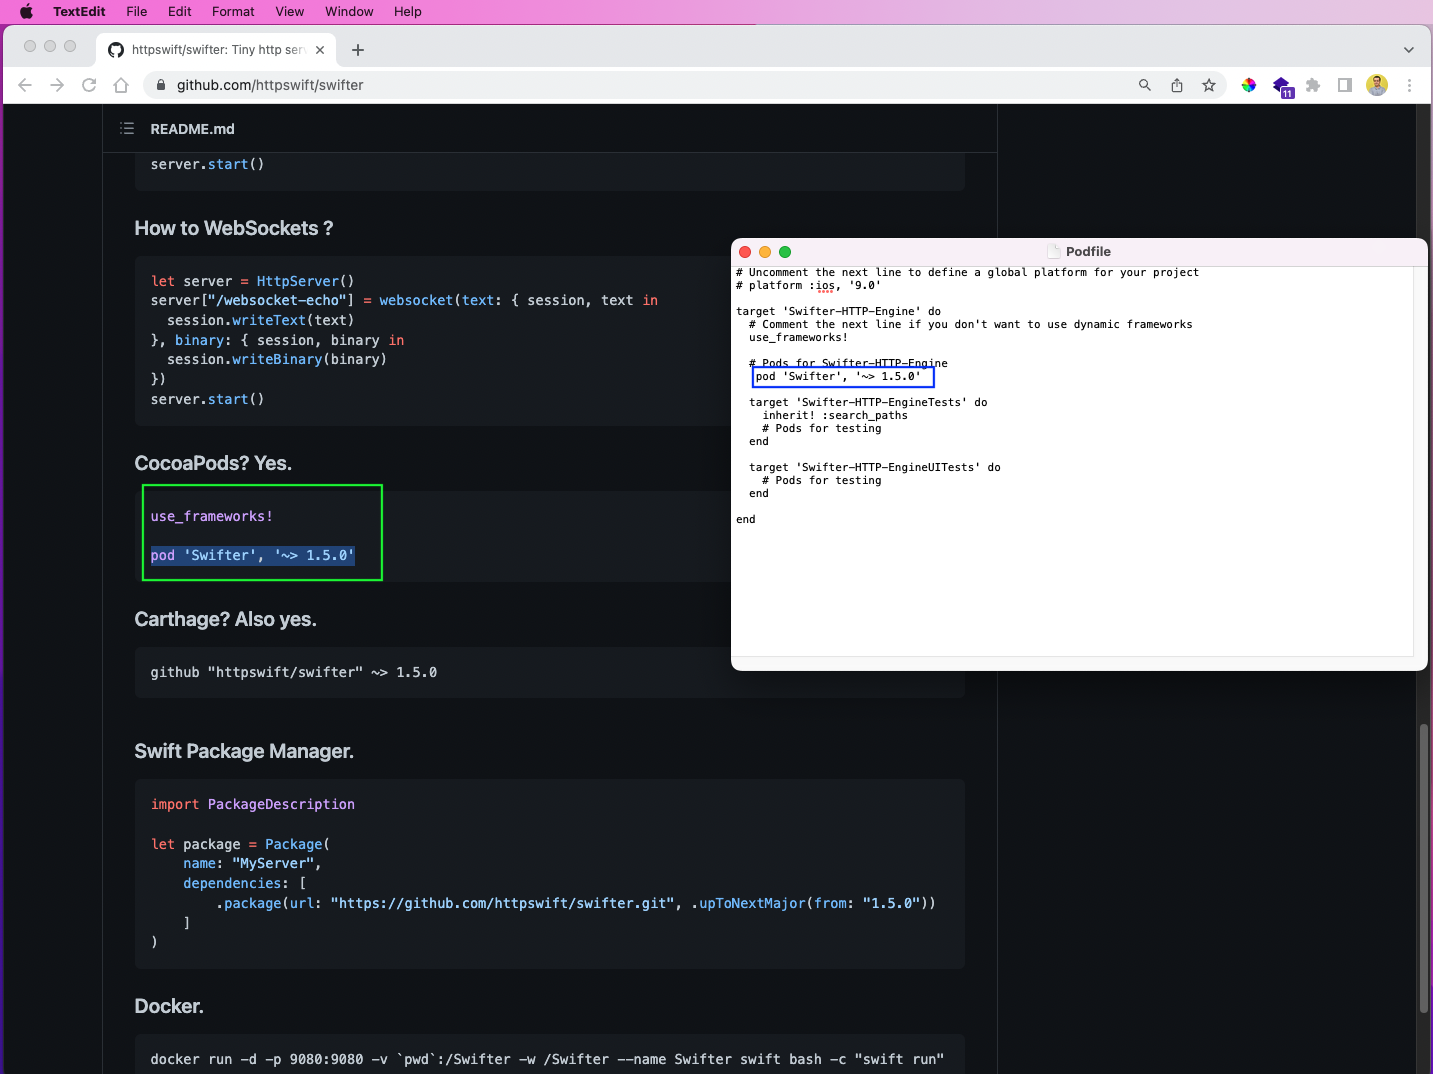
Now, open the Podfile in the default text editor on Mac, which is TextEdit. And add the line pod 'Swifter', '~> 1.5.0' with the correct spaces. The correct command can be found on the GitHub page for Swifter. To save the file, press Cmd + S and then close it.
Again from the terminal, run the pod install command. This command will install Swifter in our project.
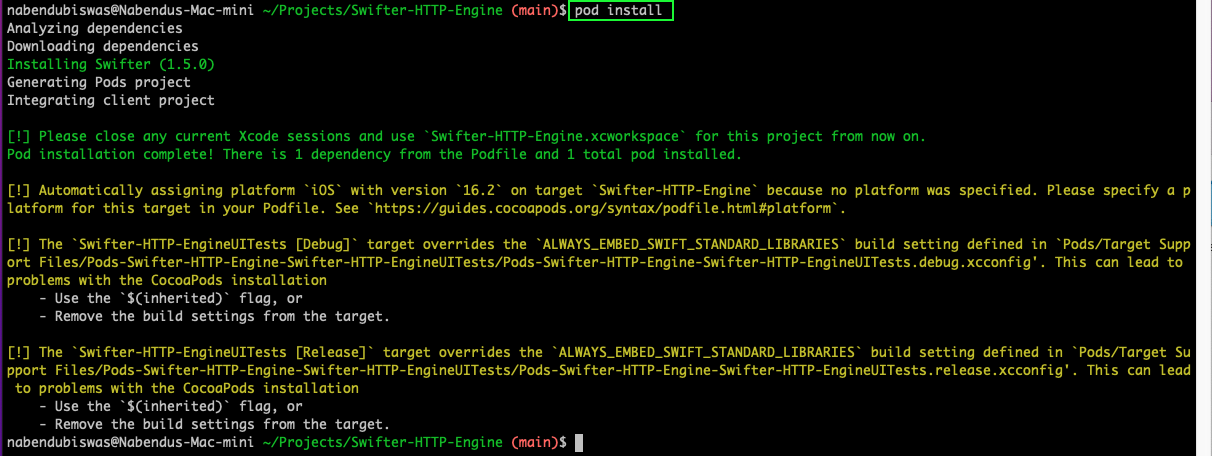
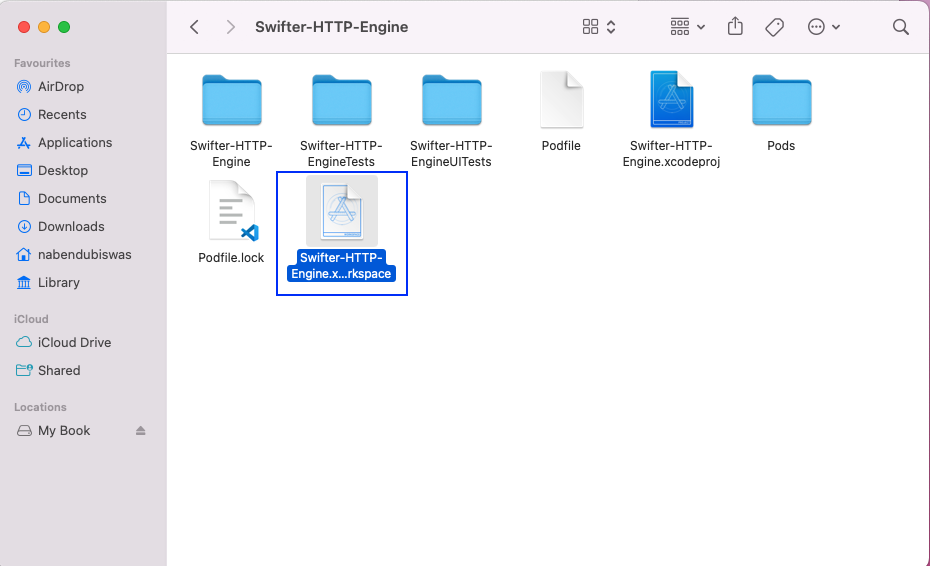
A new Swifter-HTTP-Engine.xcworkspace file with a white background will be created. To use the updated project with Swifter installed, open this new white background file in Xcode.
Using Swifter
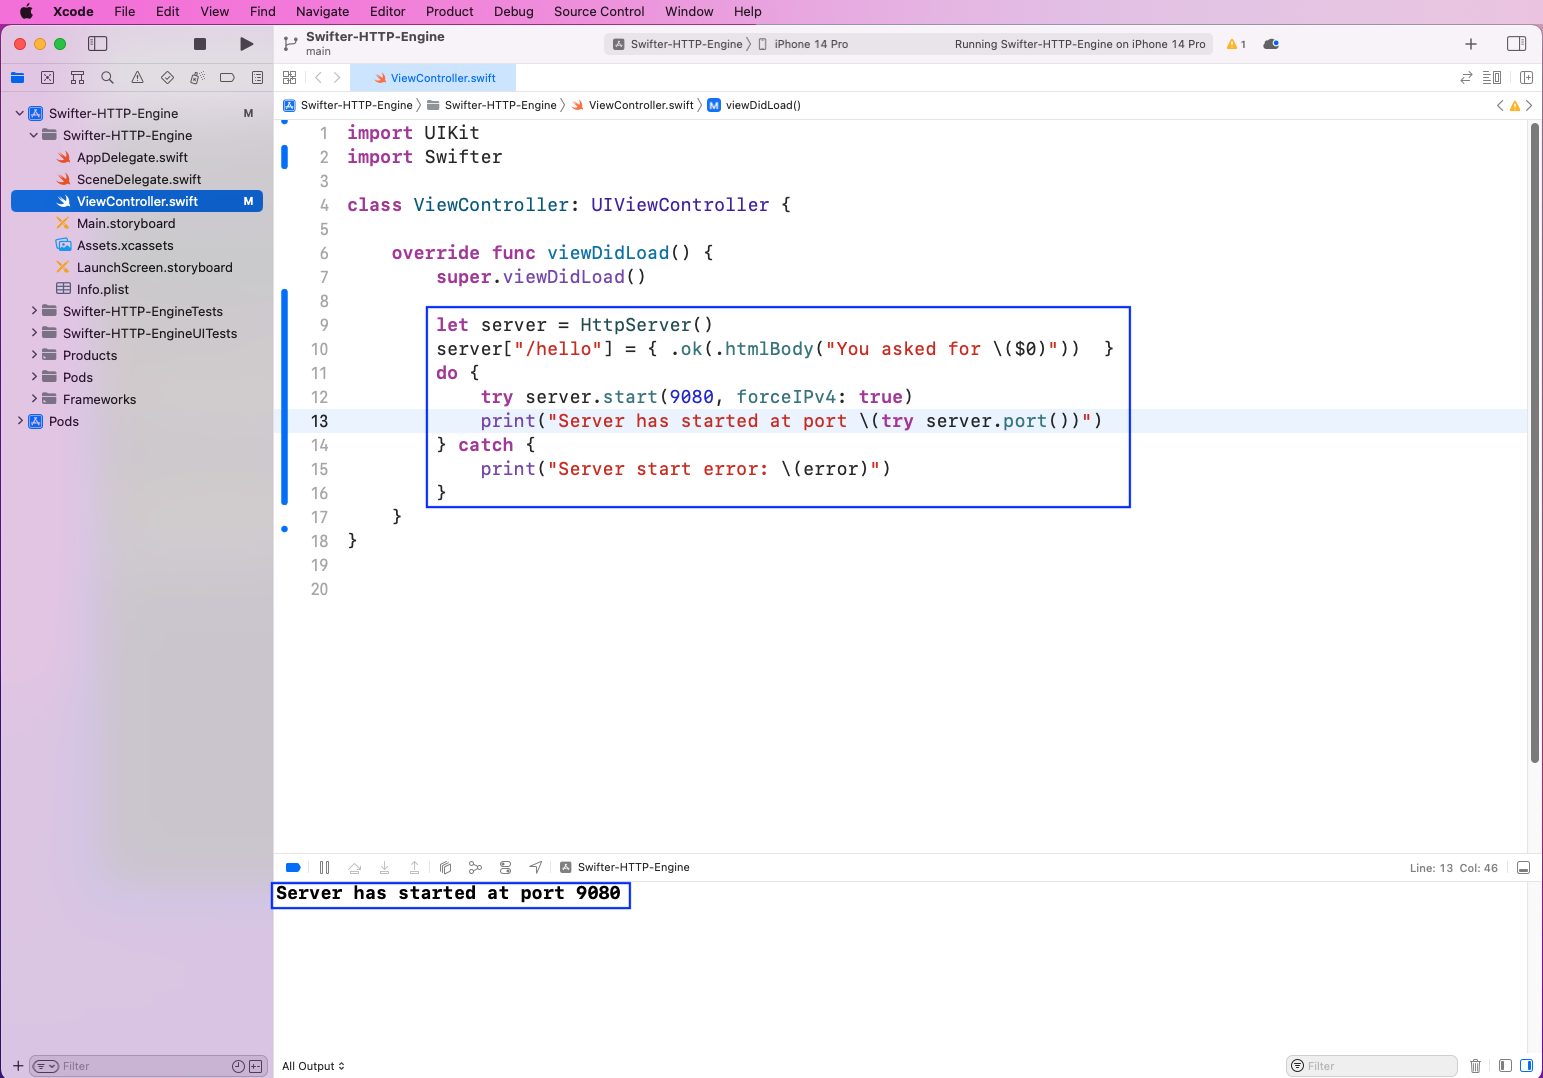
Now, we'll use Swifter to start a simple server. In the ViewController.swift file, we'll add the code in the viewDidLoad() function. This is the starting point of an Xcode project, so this code will run when we run our app.
Here, we first import Swifter, and after that, we'll create a variable server using HttpServer(). Now, with the server variable, we'll first define a hello endpoint, which returns a string. Next, inside a do..catch block, we'll start a server on port 9080 in a do block. In the catch block, any error will be matched.
After this, start the app, and we'll see the success message in the console.
Now, from any browser like Chrome, go to http://localhost:9080/hello, and we'll see the string being served from the HTTP engine.

Next, we'll add another route of /. This is the home route, and if the user reaches here, we're returning HTML text. The HTML text contains a Heading and a Paragraph tag. After this, we can restart the app, and we'll see the success message in the console.
![Highlights code after "server["/"]](https://cdn.prod.website-files.com/62cee6c92b9c3a6e6cab65e3/63c58f8284f4df88291b77eb_13.png)
Now, visit http://localhost:9080 on the browser, and we'll see the h1 and p tags shown correctly.

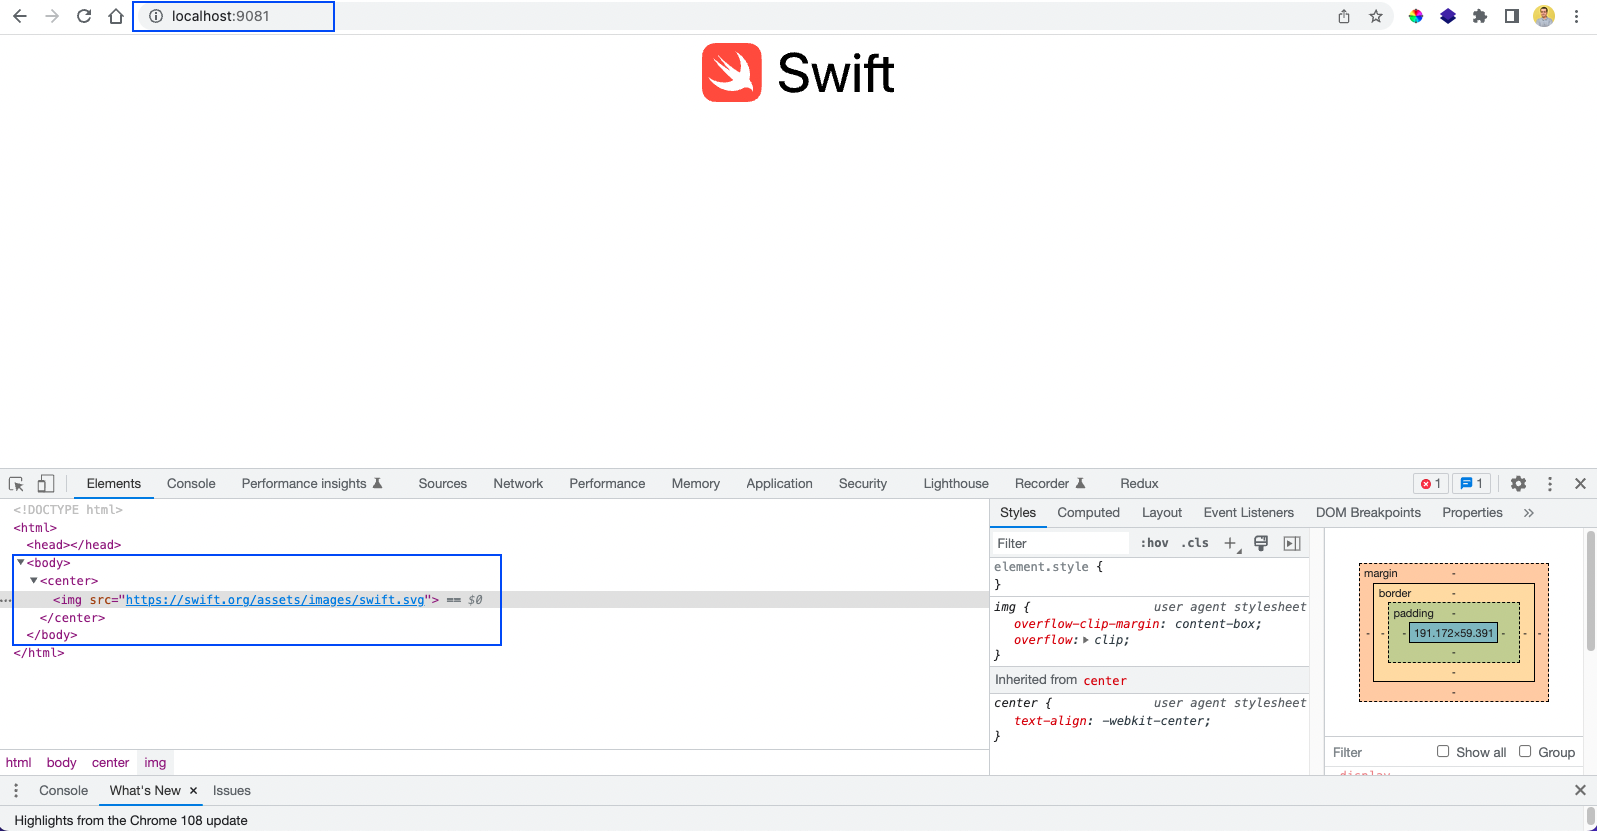
Next, we'll see a bit more involved examples. Here, we'll first import Dispatch and also have an imagesURL. Now, in the root directory, we'll show an HTML document containing an image, which refers to the imagesURL.
For showing an image through Swifter, we must utilize the concept of Semaphore. We'll use it through the DispatchSemaphore function, which gives full access to the thread to show the image. For this to work, we need to use semaphore.wait() in case of success. In case of failure, we need to send semaphore.signal().
For this, we've started the app on a different port, 9081.
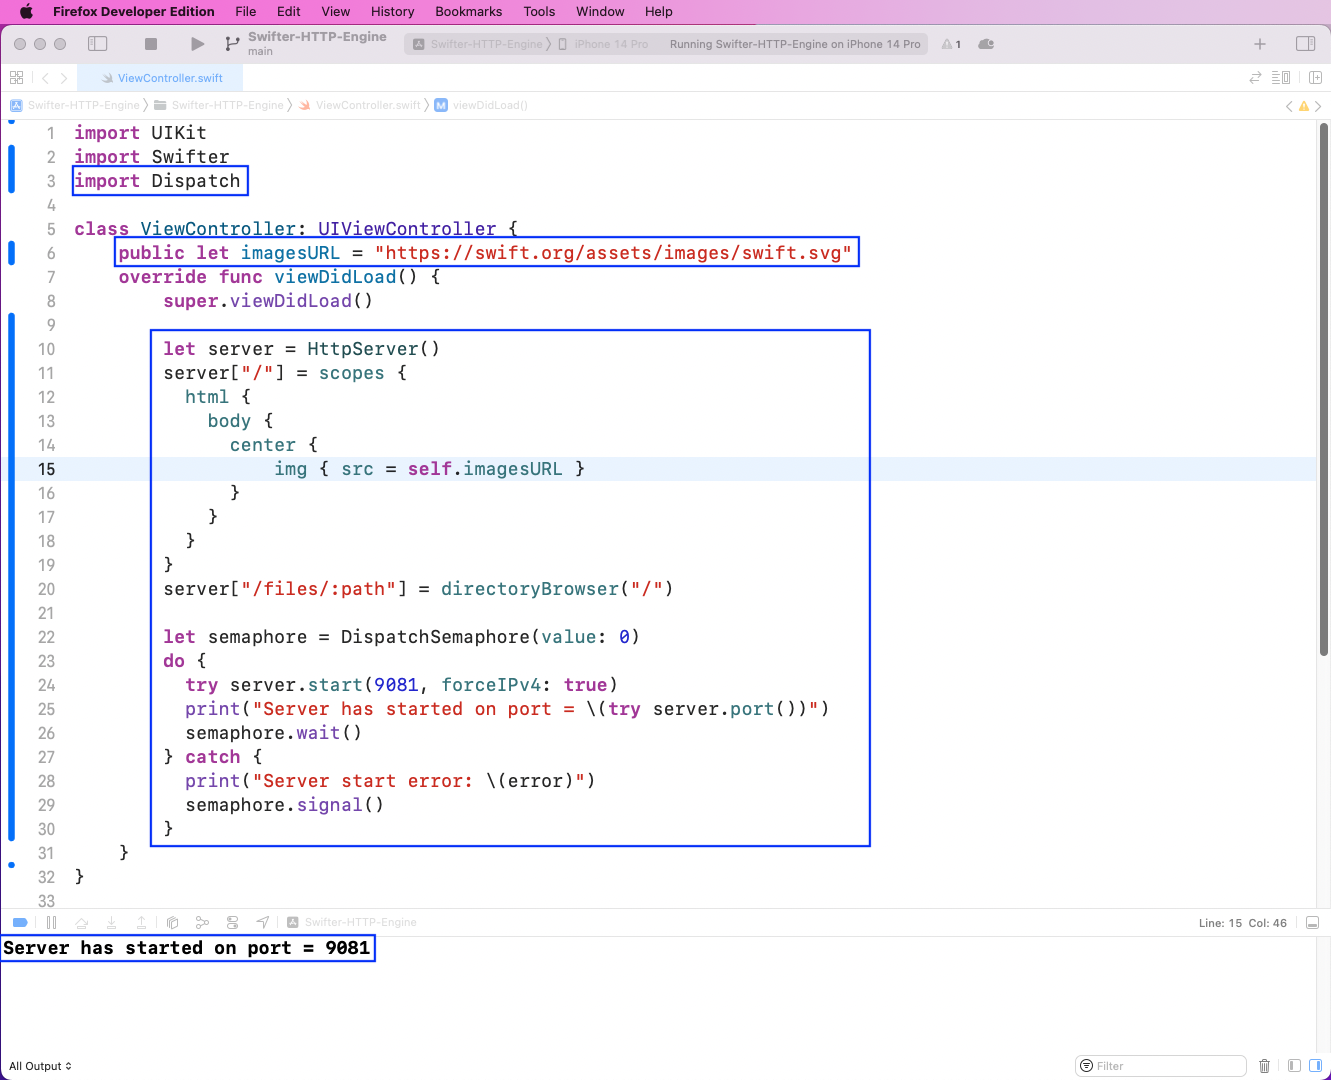
Now, on visiting http://localhost:9081, we'll see a nice Swift image. Also upon inspection, we'll find the exact tags of body, center, and img, which were set in the code.
Testing the App
To test the app, we'll do simple unit testing using the in-built framework of XCTest. We're going to test the imagesURL in the ViewController.swift file.
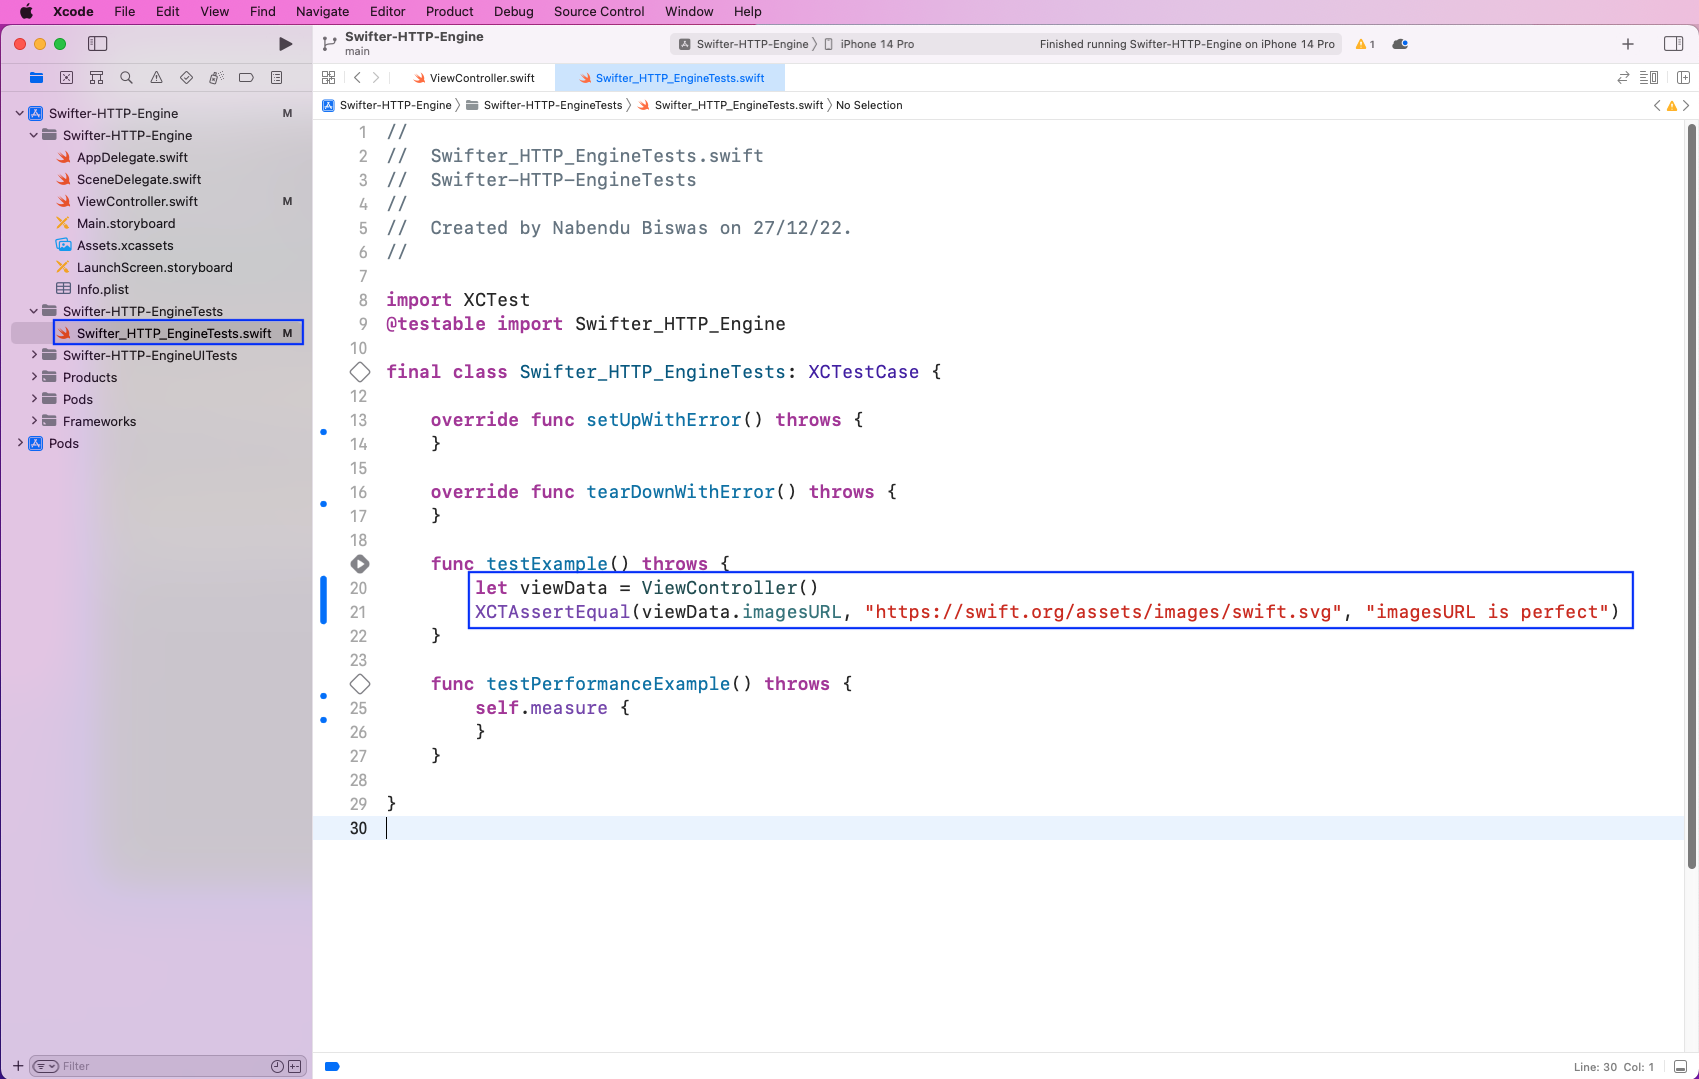
Since we've already included tests when creating the app, we'll directly write our test cases in the Swifter_HTTP_EngineTests.swift file. Here, inside the already existing testExample function, we'll first create an instance of the ViewController class.
After that, check to see if the imagesURL string is https://swift.org/assets/images/swift.svg using the XCAssertEqual function. In the XCAssertEqual function, we'll also show the text "imagesURL is perfect" upon passing the test.
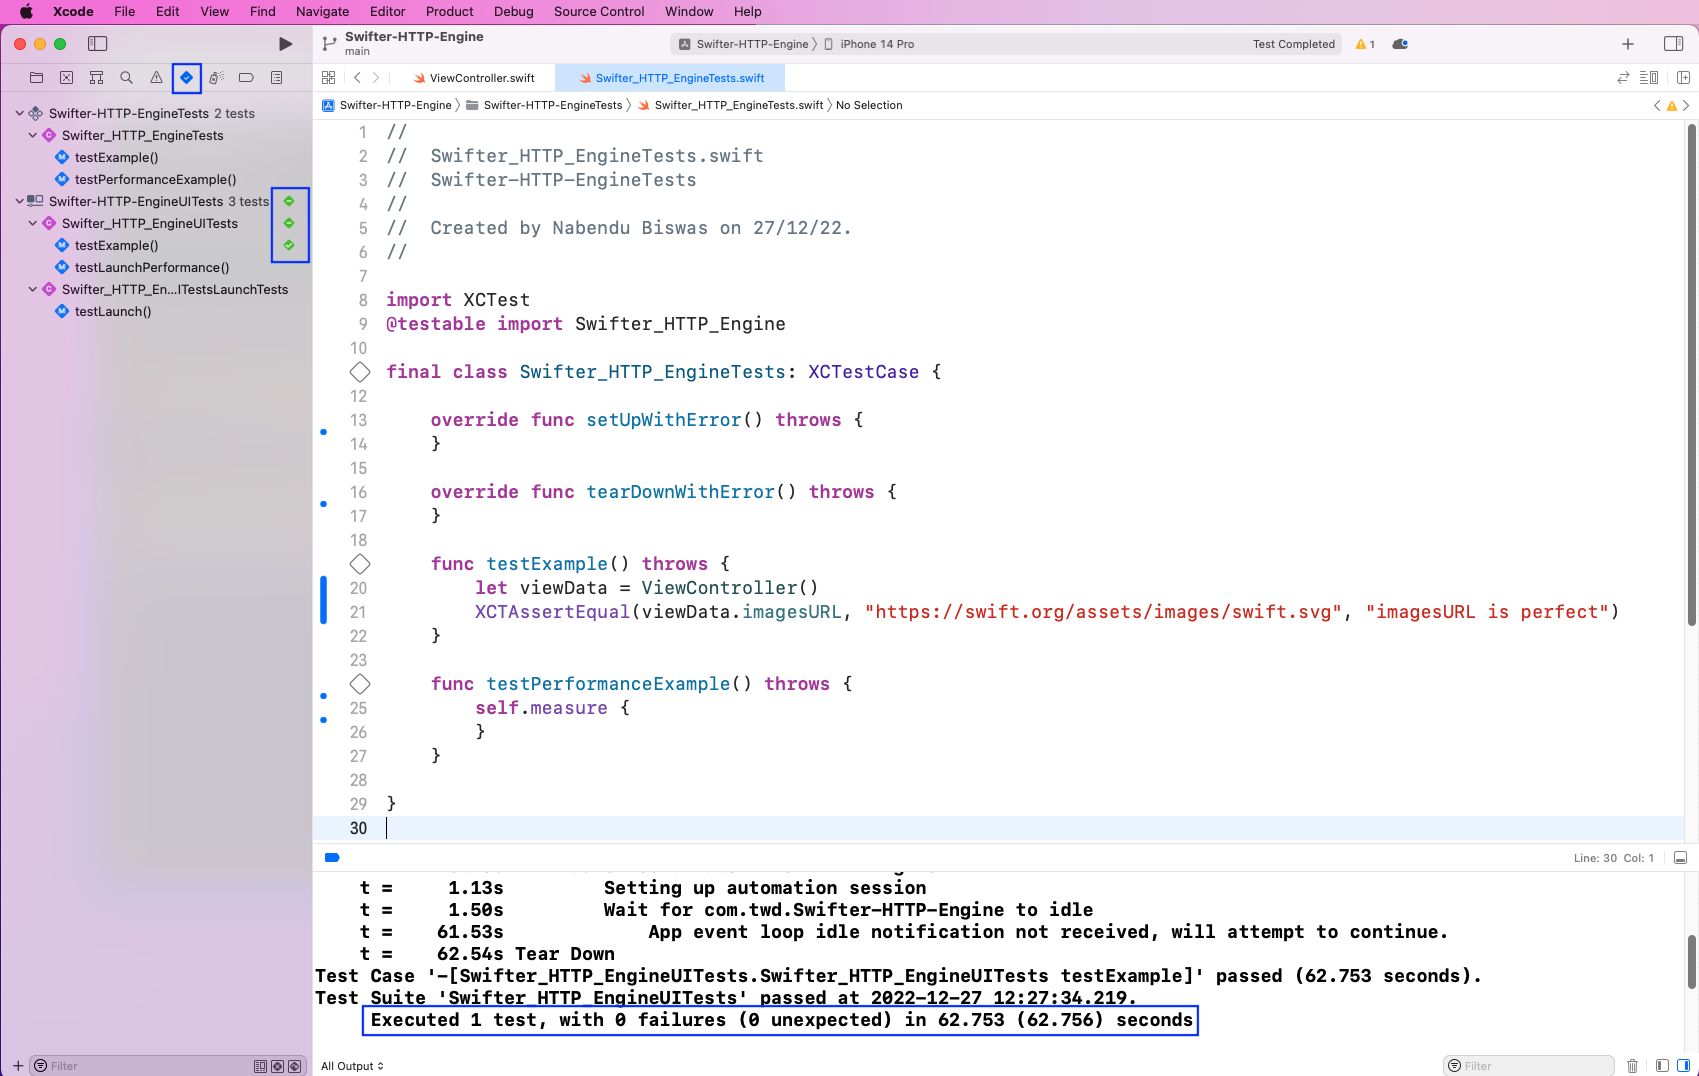
Next, go to the test tab by clicking on the tick icon. After that, click the play button beside the testExample function. Here, we see our only test case passed, and all green ticks are showing. And we are also getting the correct message in the console.
What We've Learned
In this post, we've talked about the HTTP server first. After that, we learned about the open-source package of Swifter, which is used to create a simple HTTP engine in Xcode. We also created a small app with Xcode and then saw three different use cases of Swifter.
In all these cases, we created three endpoints through Swifter, which we accessed using the web browser. Next, we wrote a very simple unit test using the in-built framework of XCTest. Here, we only tested if a string was correct.
However, testing these network calls in an app is a very difficult task. It requires very complex mocking logic code. But instead of all this, we can use Waldo to perform such tests. Waldo is a no-code testing platform, where you're only required to provide the APK or IPA file. These APK or IPA files are always created while uploading the app to the Play Store or App Store. Then just run the Waldo test, and it automatically generates test cases and emails you a nice report.
Check out this article to learn more about SwiftUI testing from Waldo.
Automated E2E tests for your mobile app
Get true E2E testing in minutes, not months.


