Waldo joins Tricentis, expanding mobile testing for higher-quality mobile apps – Learn more
Testing

How to Start Using Spek As a Testing Platform

Nabendu Biswas
Nabendu Biswas
How to Start Using Spek As a Testing Platform
December 20, 2022
10
min read

In this post, we're going to learn about Spek, a test framework for testing Android apps written in Kotlin or Java. The common way to test Android apps is with JUnit. Well, Spek requires JUnit, so it can easily be integrated into the existing setup.

First, we're going to learn about Spek. Then, we'll create a small project in Kotlin and test it using Spek. 

What Is Spek?

Spek is a testing framework written in Kotlin. We can use it to test any Android apps that are written using Java or Kotlin. Spek is known as a specification testing framework, in which the tests are called specifications. The approach to writing test cases in Spek falls under behavior-driven development (BDD).

Since version 2 was released, you can now write test cases in Spek like regular English statements using Gherkin

Now that we understand what Spek is, let's get started using it. 

The Project Setup 

We'll start by setting up an Android app for Spek testing. 

First, open Android Studio and click on New Project. This will open a pop-up window. Here, select Empty Activity and then the Next button.

Image highlights the "New Project" button and the "Empty Activity" selection

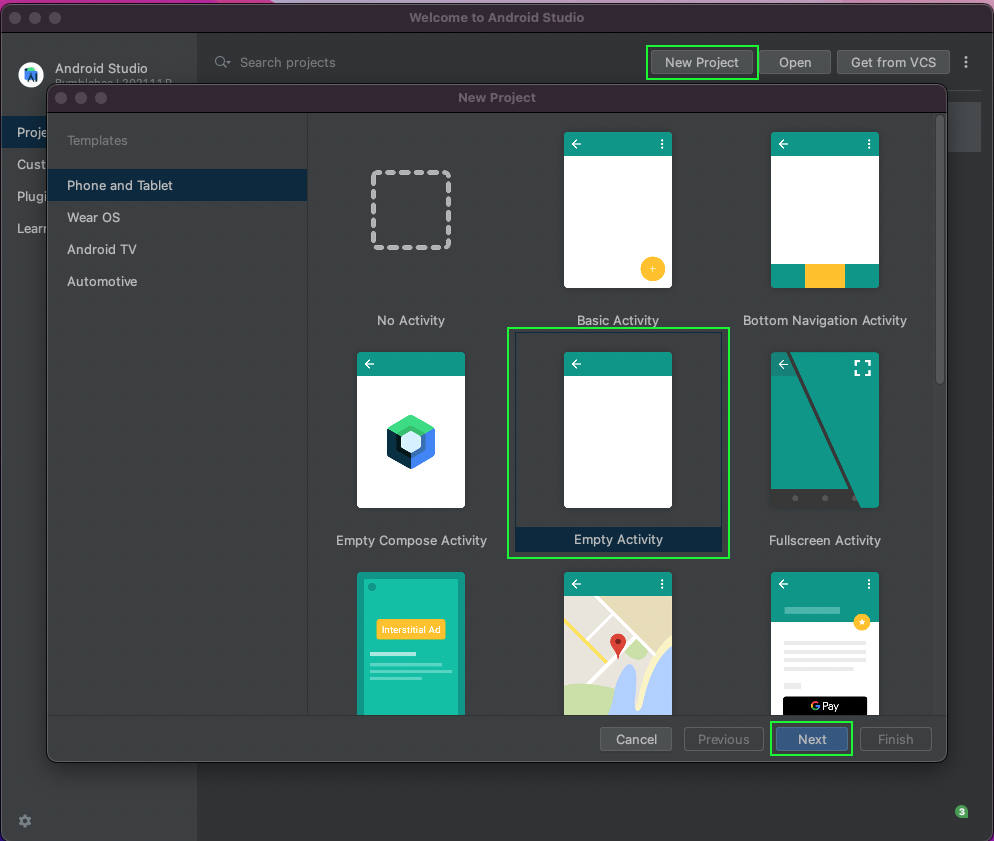
In the next window, give the app a name, which is SpekTesting in our case. Also, make sure the language is Kotlin before clicking on the Finish button. 

Image highlights "SpekTesting" and "Kotlin" as the respective Name and Language

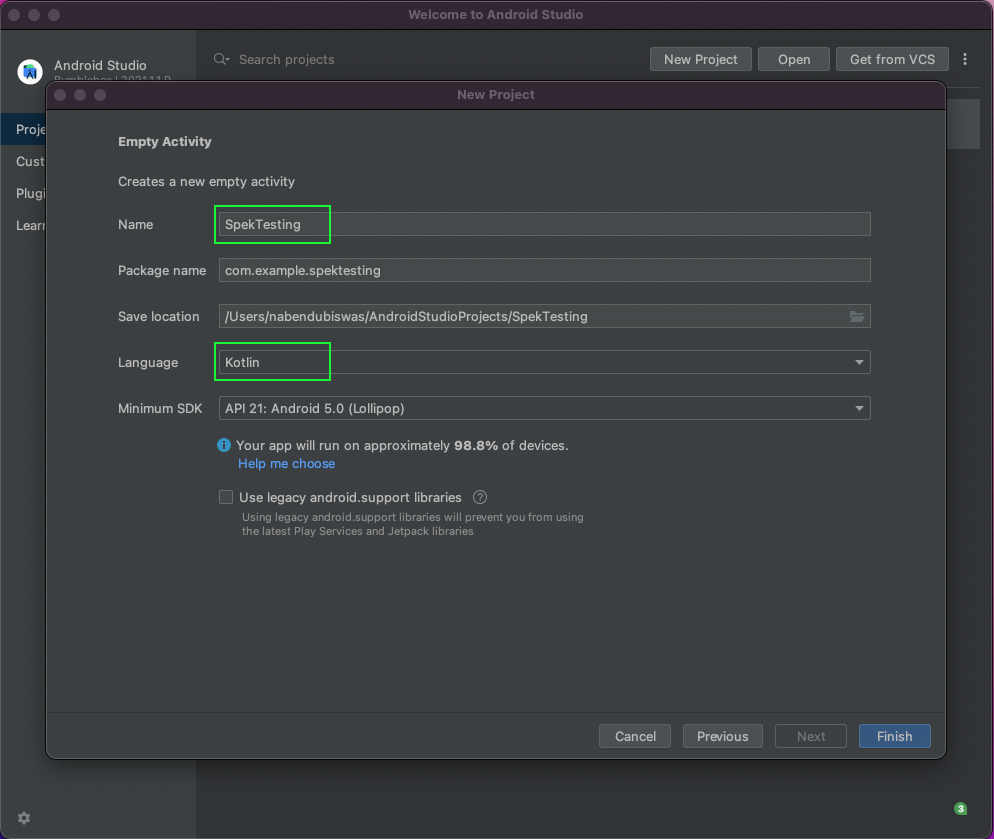
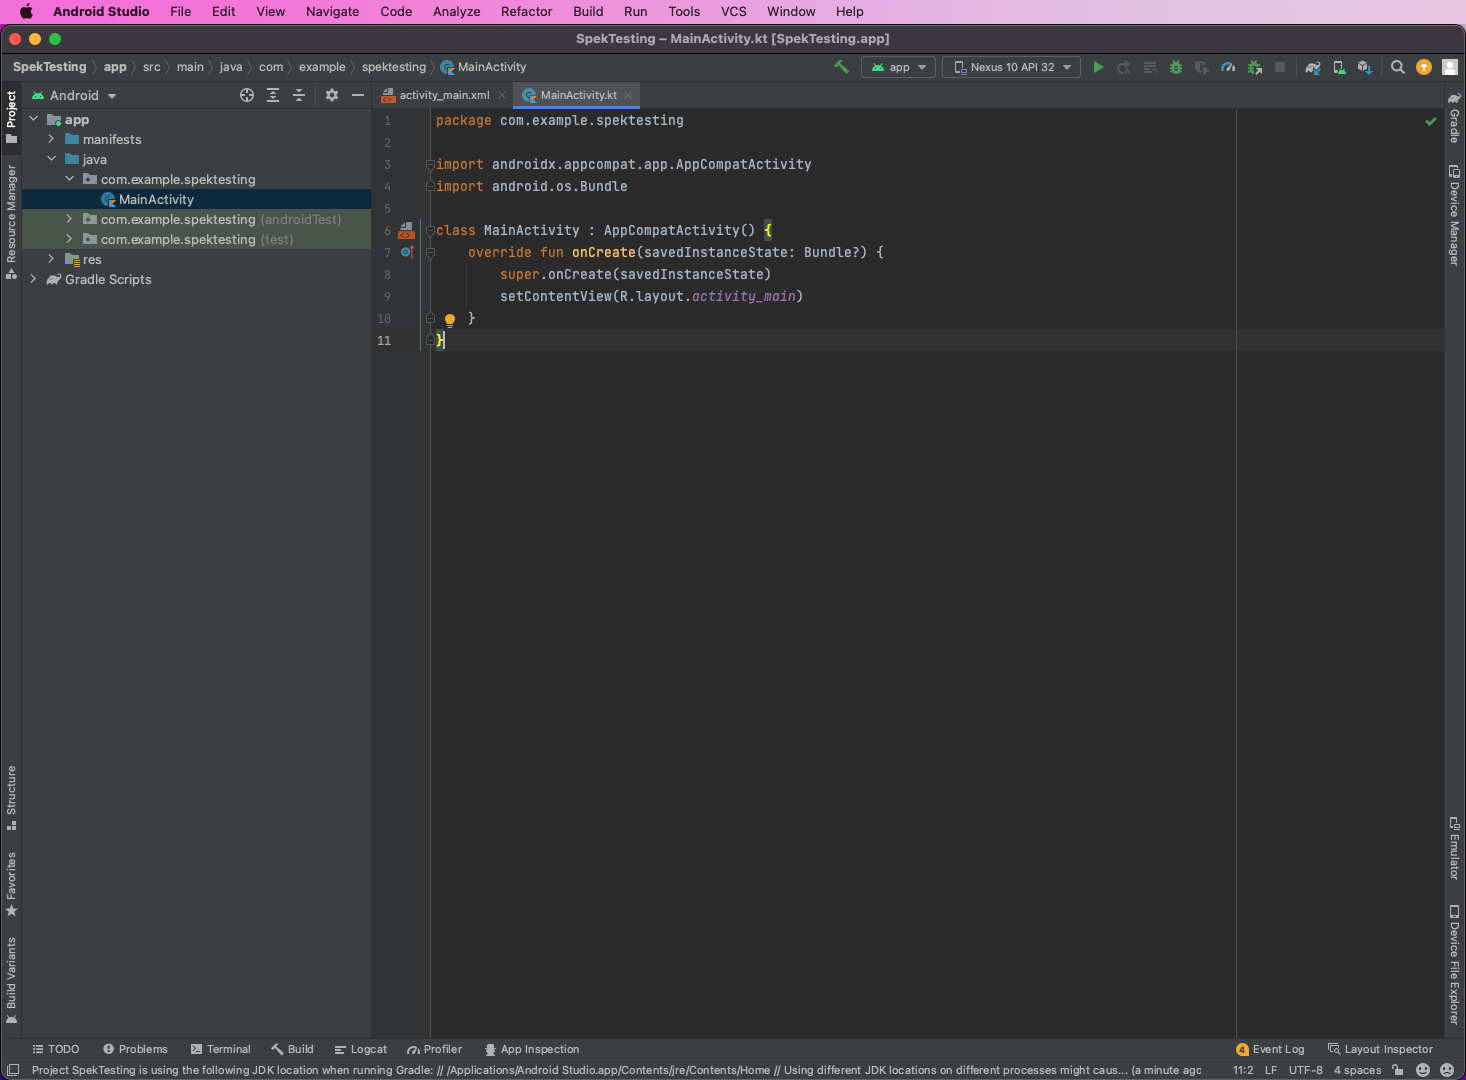
The app will be loaded in two to three minutes, and all dependencies will be installed in it. 

image shows code under "MainActivity"

Creating App Layout

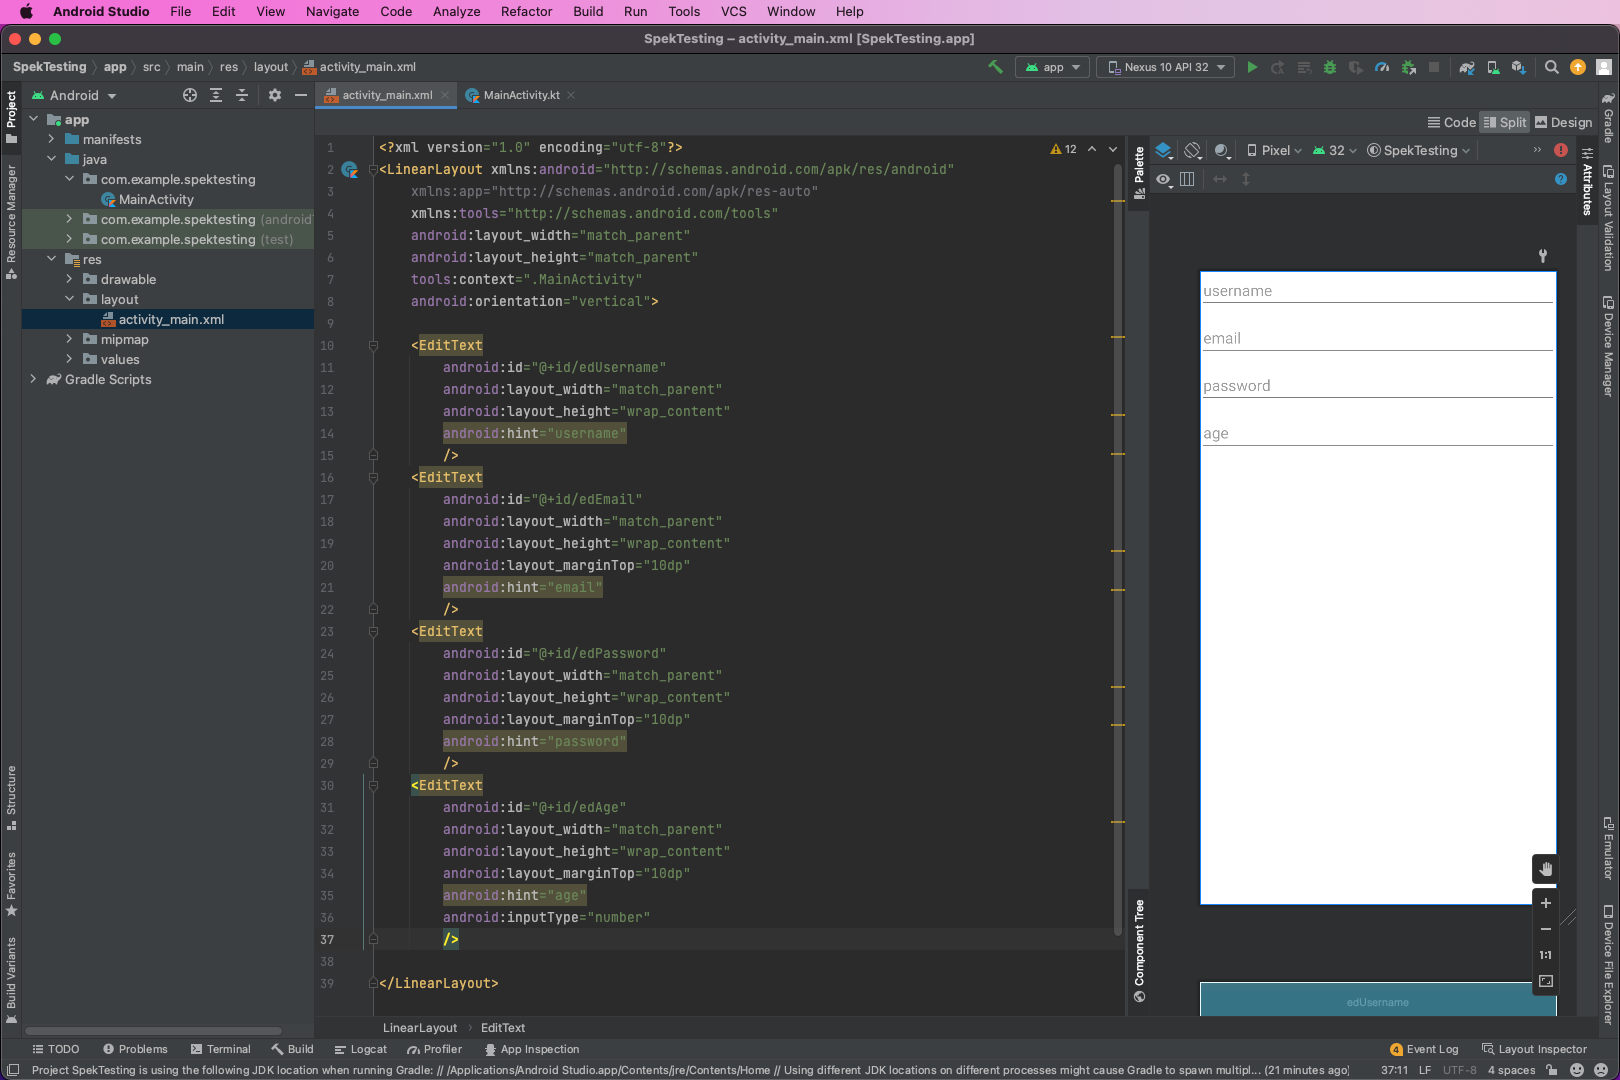
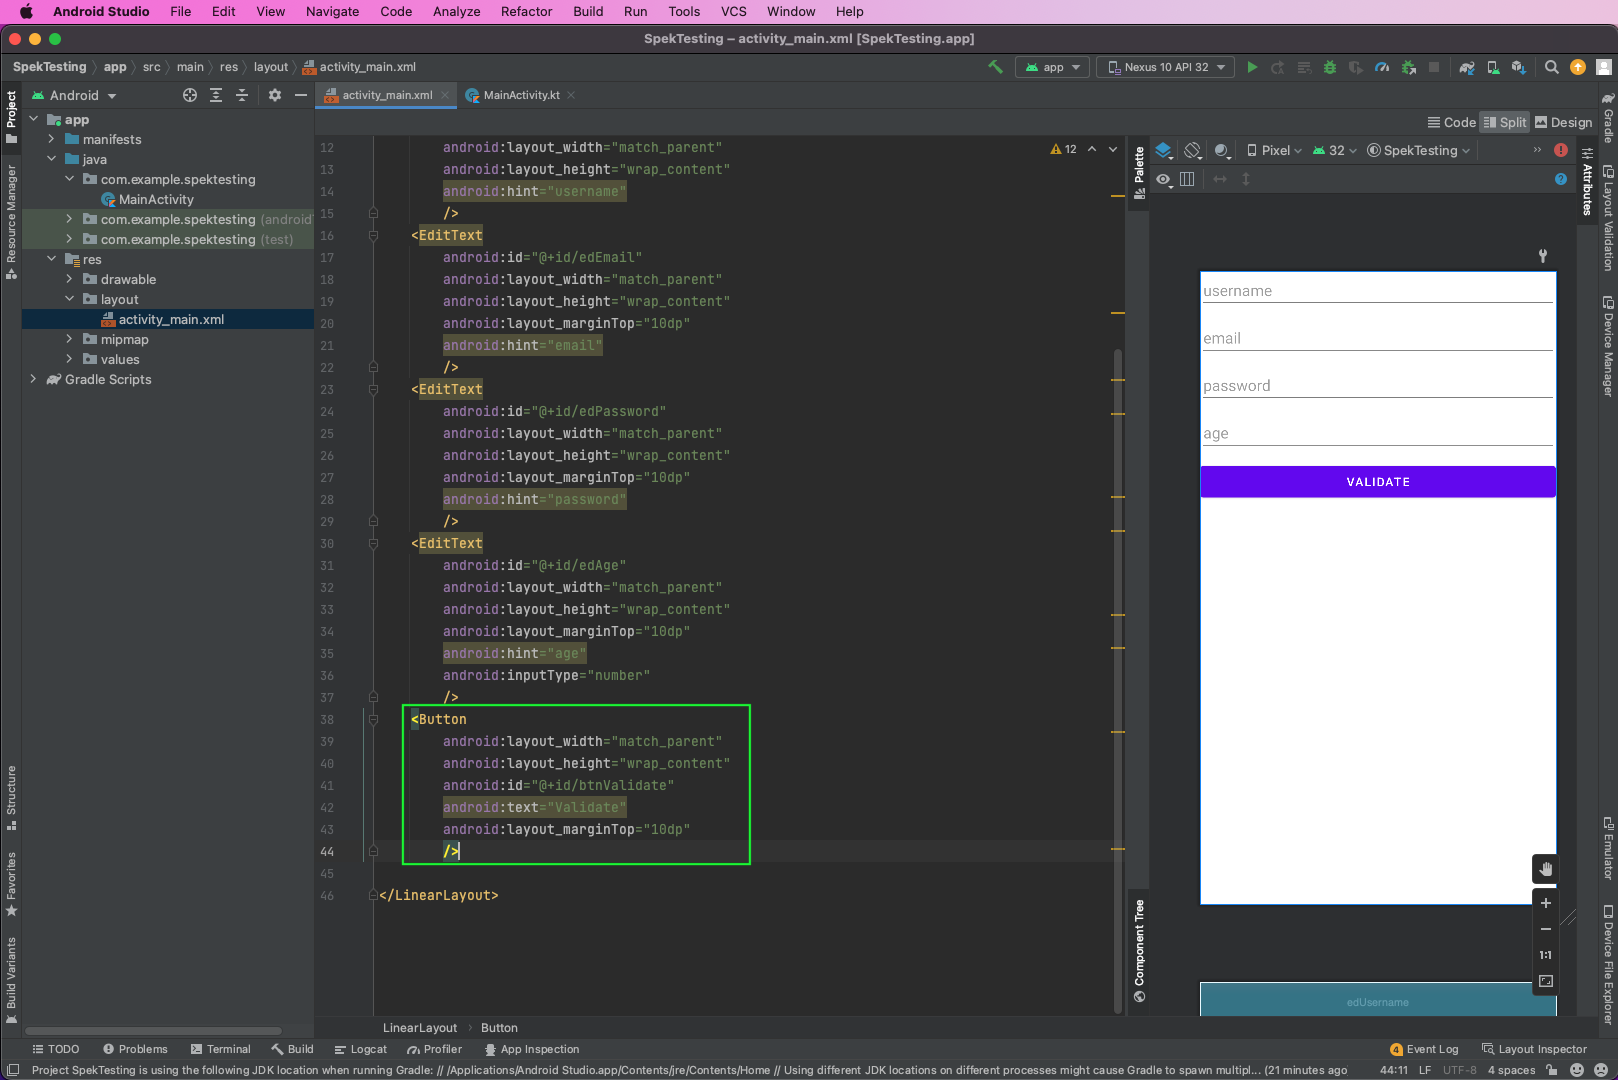
We'll add text fields in our app first. So, in activity_main.xml, put the below code: 


Here, we have a LinearLayout and four EditText fields. Also, notice that the field is reflected in the Design view. 

Image shows code that is written above photo

We've also added a button in activity_main.xml file. And this button is also reflected in the Design view. 


Highlights code for adding a button. Code is the same as code written above

Simple Validation Code 

We'll now create a simple validation code for our newly created Layout elements. So, right-click on com.example.spektesting and click on New. After that, click on Kotlin Class/File

Image shows a menu with "New" and then "Kotlin Class/File"

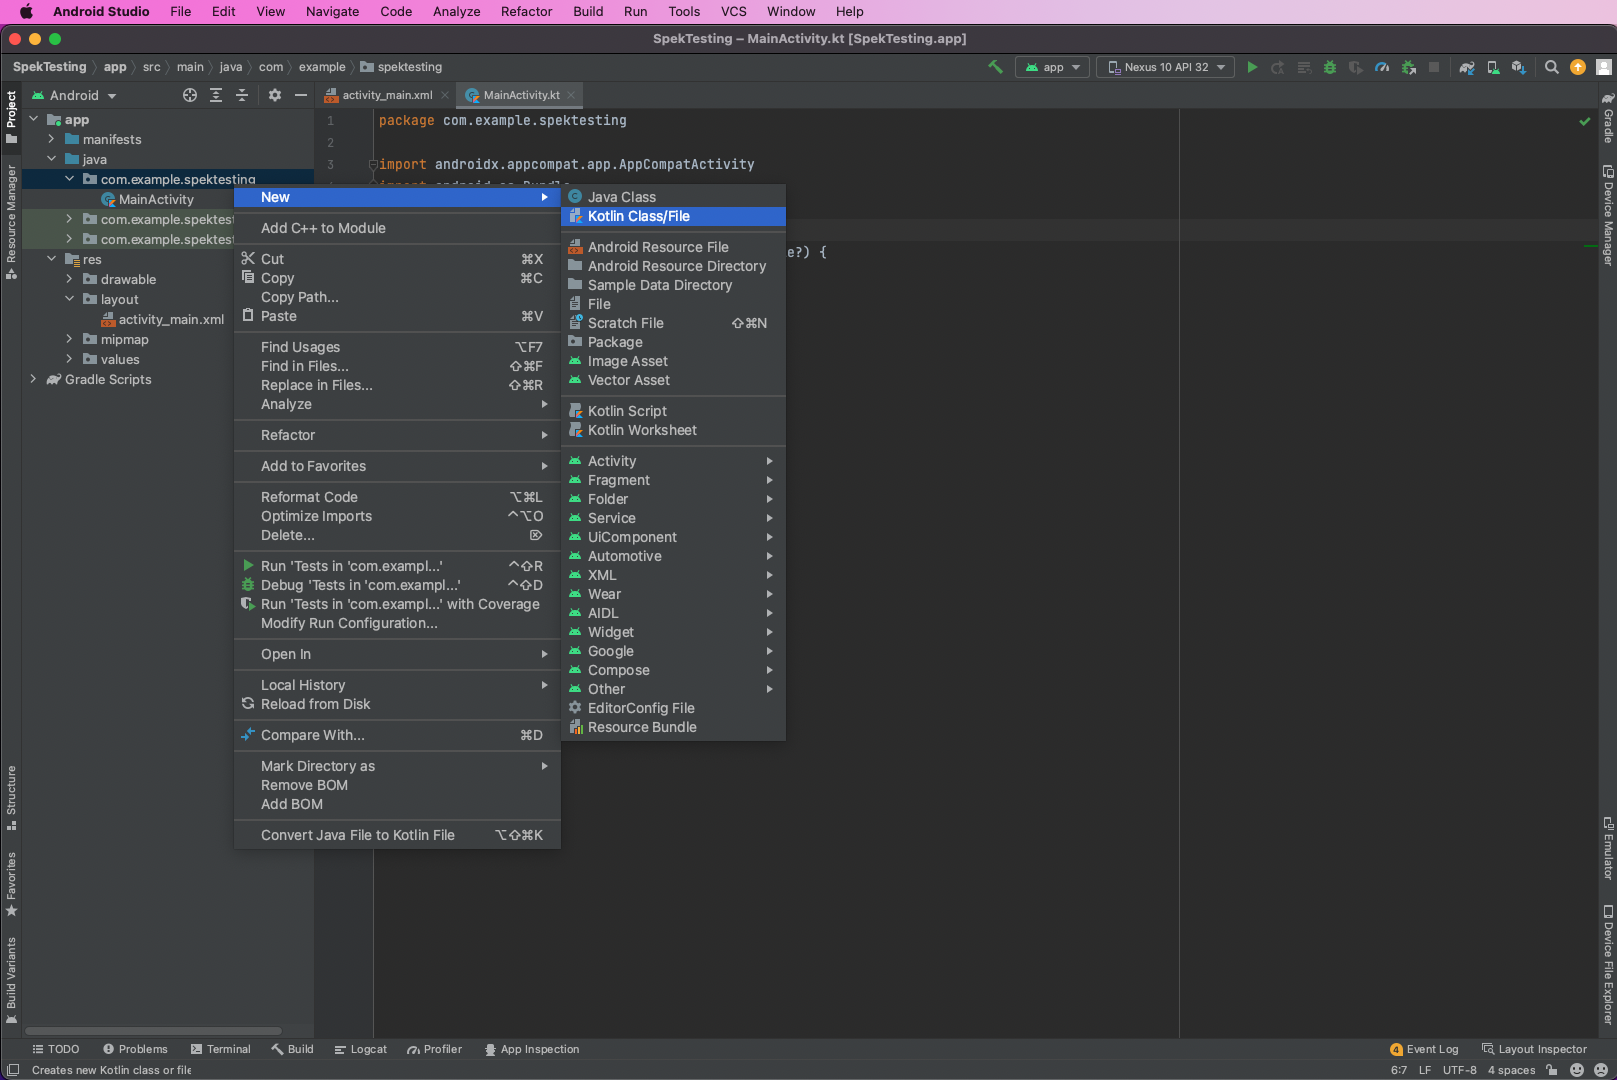
It will open a pop-up that gives the filename, which is LoginUtils in our case. Also, make sure that the Object is selected. 

Image highlights "LoginUtils" and "Object"

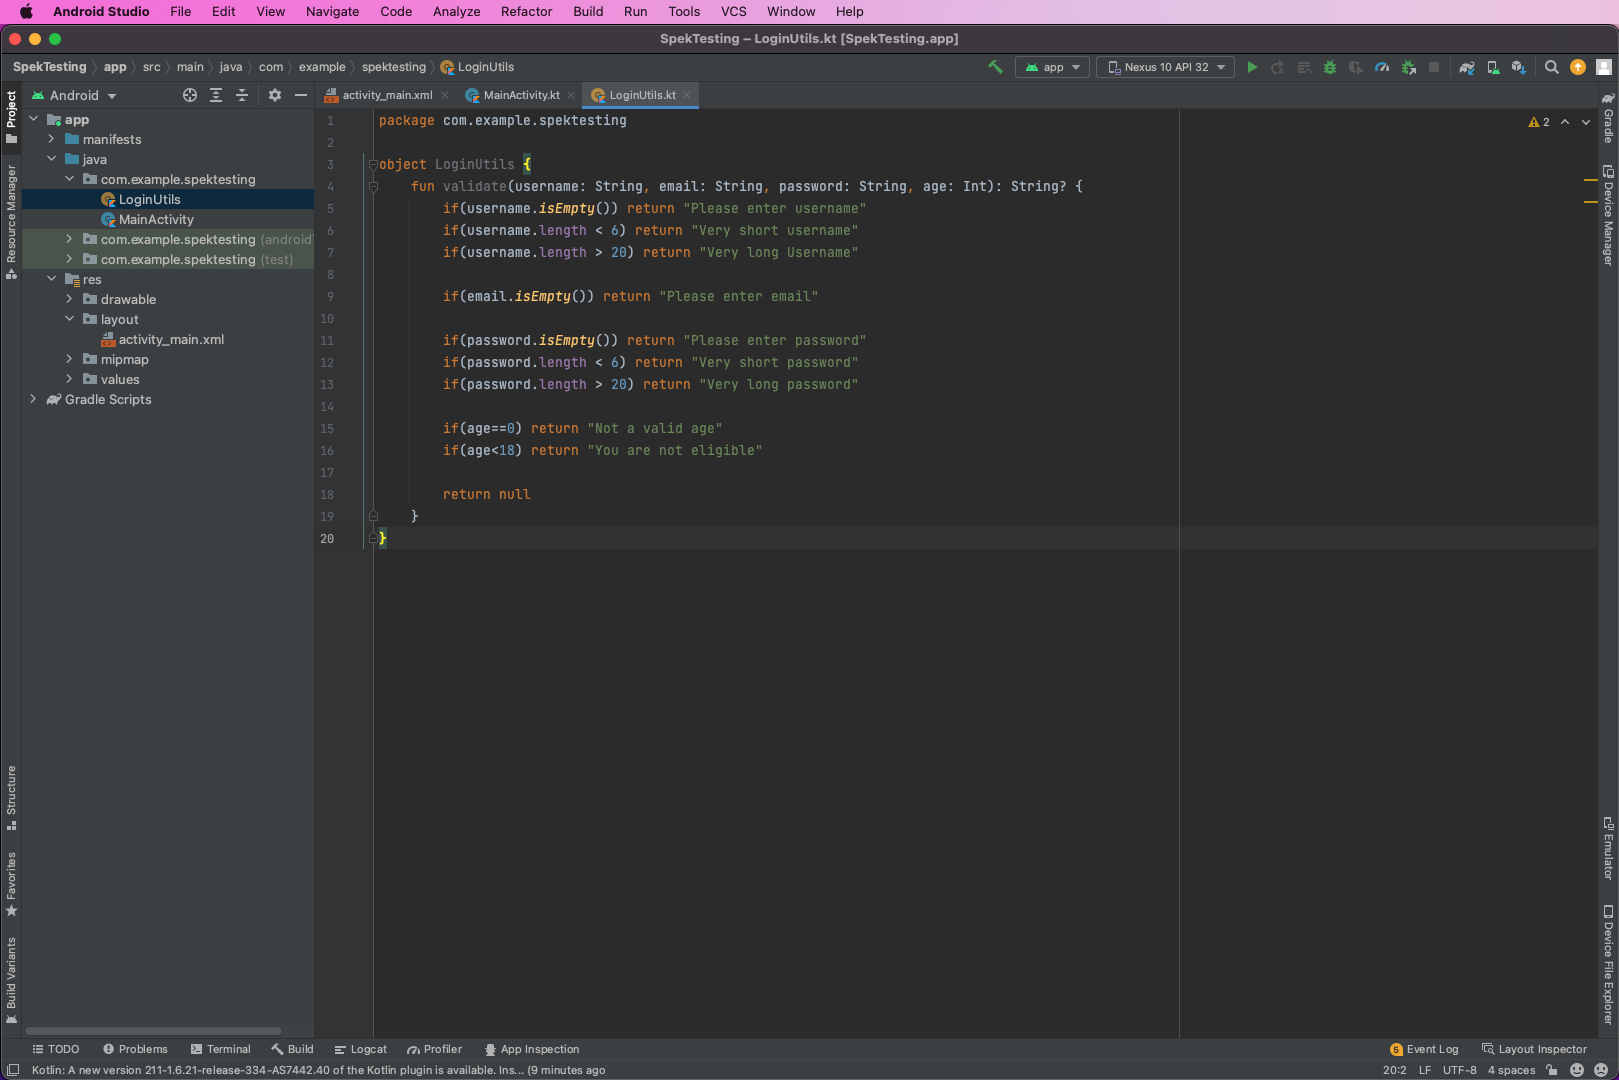
We'll write the code in the LoginUtils.kt file. Here, we have a function called validate inside the LoginUtils object. The function is taking username, email, password, and age as parameters and returns a string. 

Inside the function, we're doing some basic validations from all of the parameters. 


package com.example.spektesting

object LoginUtils {
    fun validate(username: String, email: String, password: String, age: Int): String? {
        if(username.isEmpty()) return "Please enter username"
        if(username.length < 6) return "Very short username"
        if(username.length > 20) return "Very long Username"

        if(email.isEmpty()) return "Please enter email"

        if(password.isEmpty()) return "Please enter password"
        if(password.length < 6) return "Very short password"
        if(password.length > 20) return "Very long password"

        if(age==0) return "Not a valid age"
        if(age<18) return "You are not eligible"

        return null
    }
}

The code in the image shows the same code written above the photo

Spek Setup

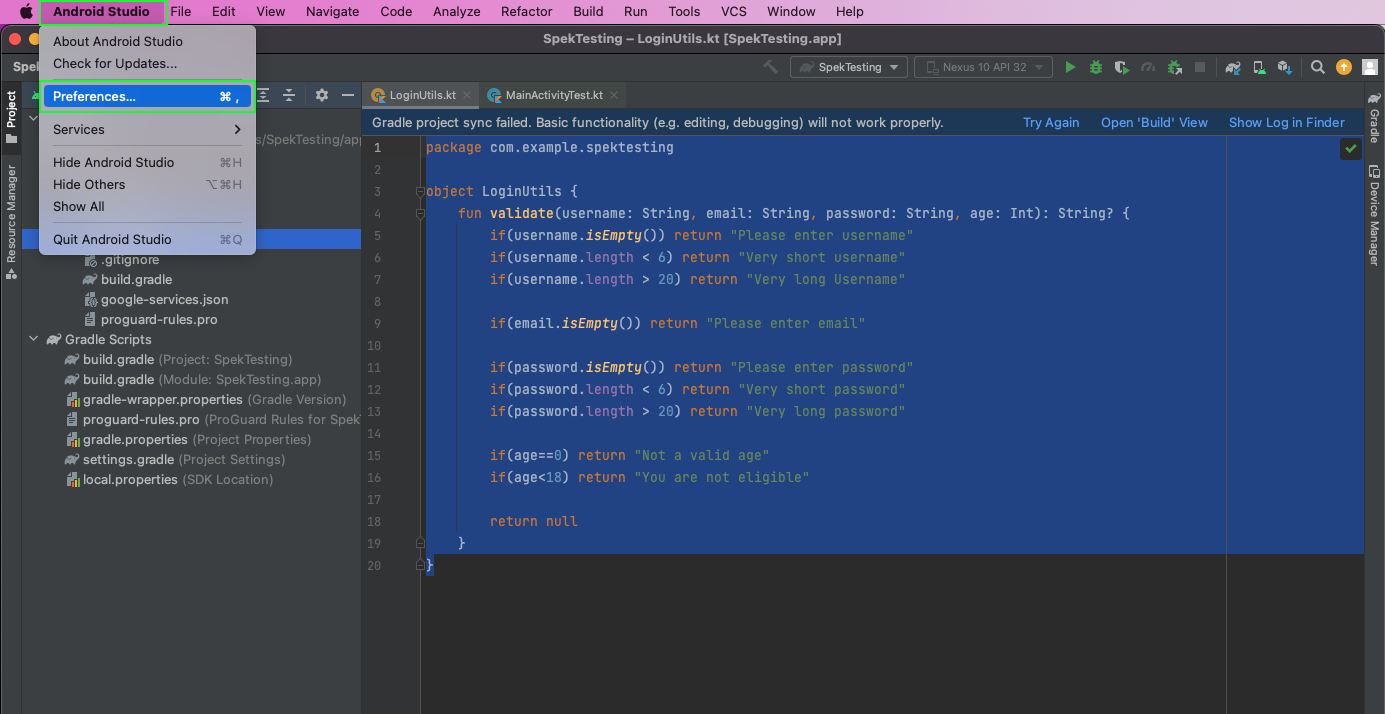
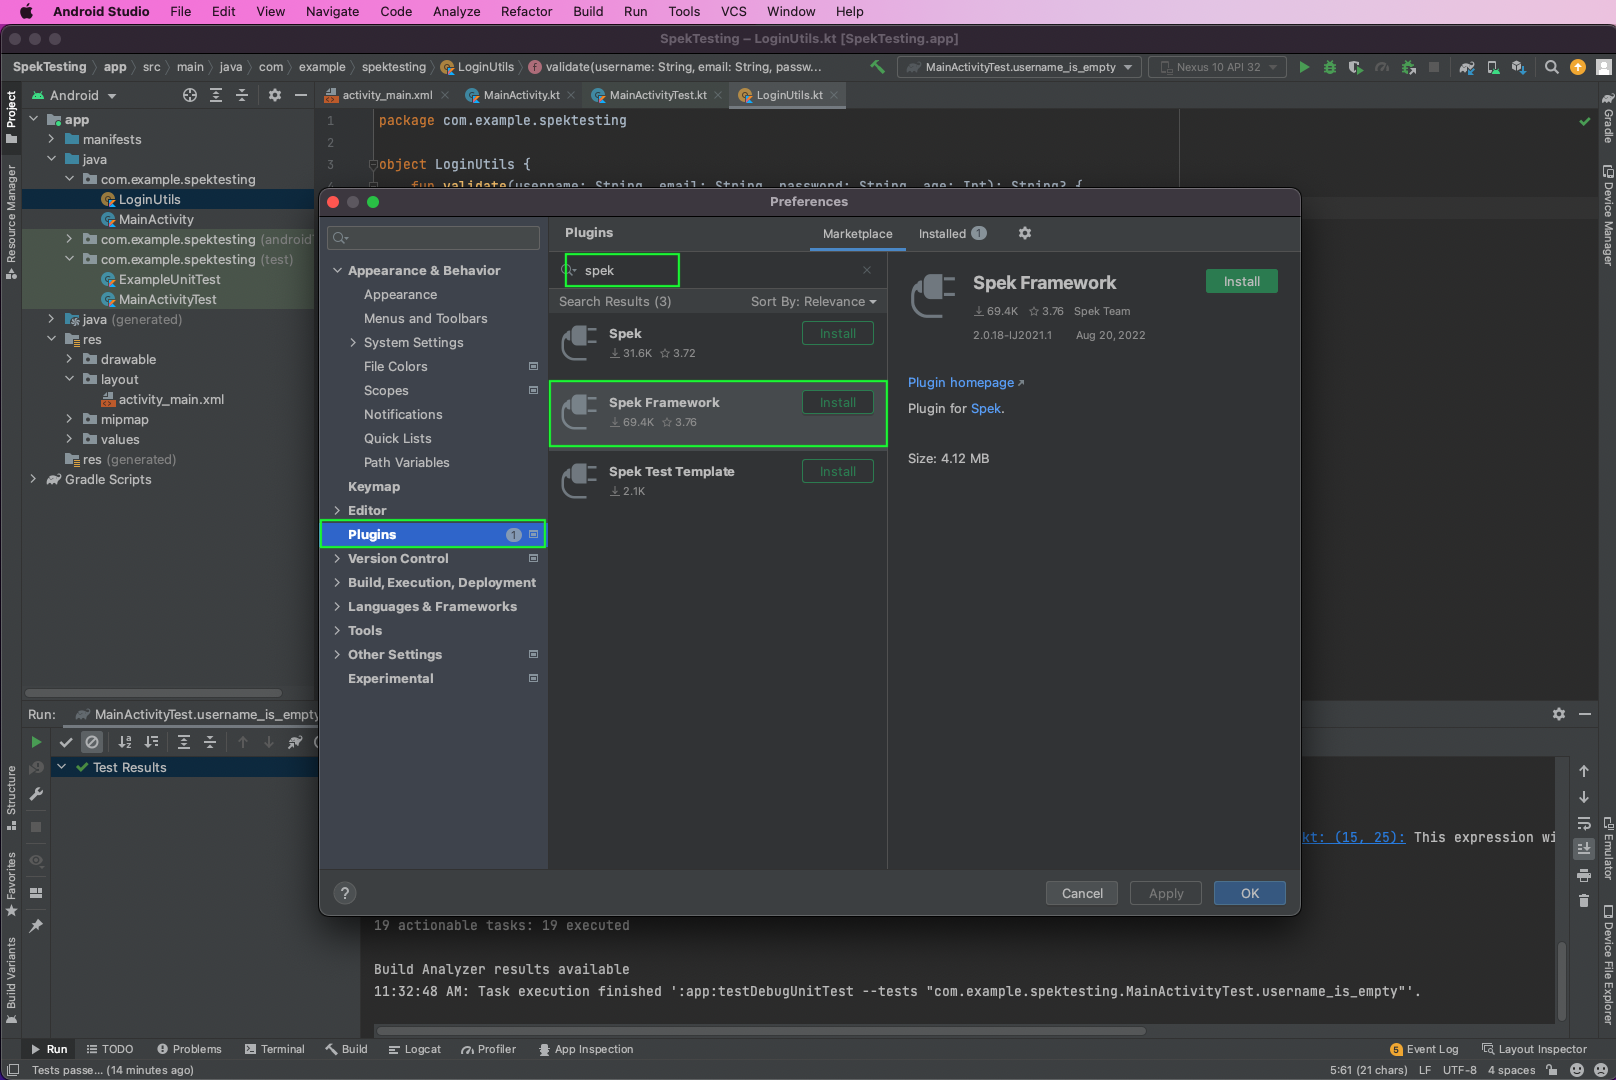
Before using Spek to write test cases in our project, we need to set it up. First, we'll add the plugin for Spek. So, click on Android Studio -> Preferences... 

Highlights the top menu "Android Studio" then highlights the "Preferences" selection within the menu

A pop-up will open. Here, click Plugins in the left sidebar. It will open all the available plugins. Type "spek" in the search bar. From the results, install the Spek Framework from the Spek Team. 

Image highlights "spek" in the search bar located right under the "Plugins" title. Image also highlights an install button for "Spek Framework"

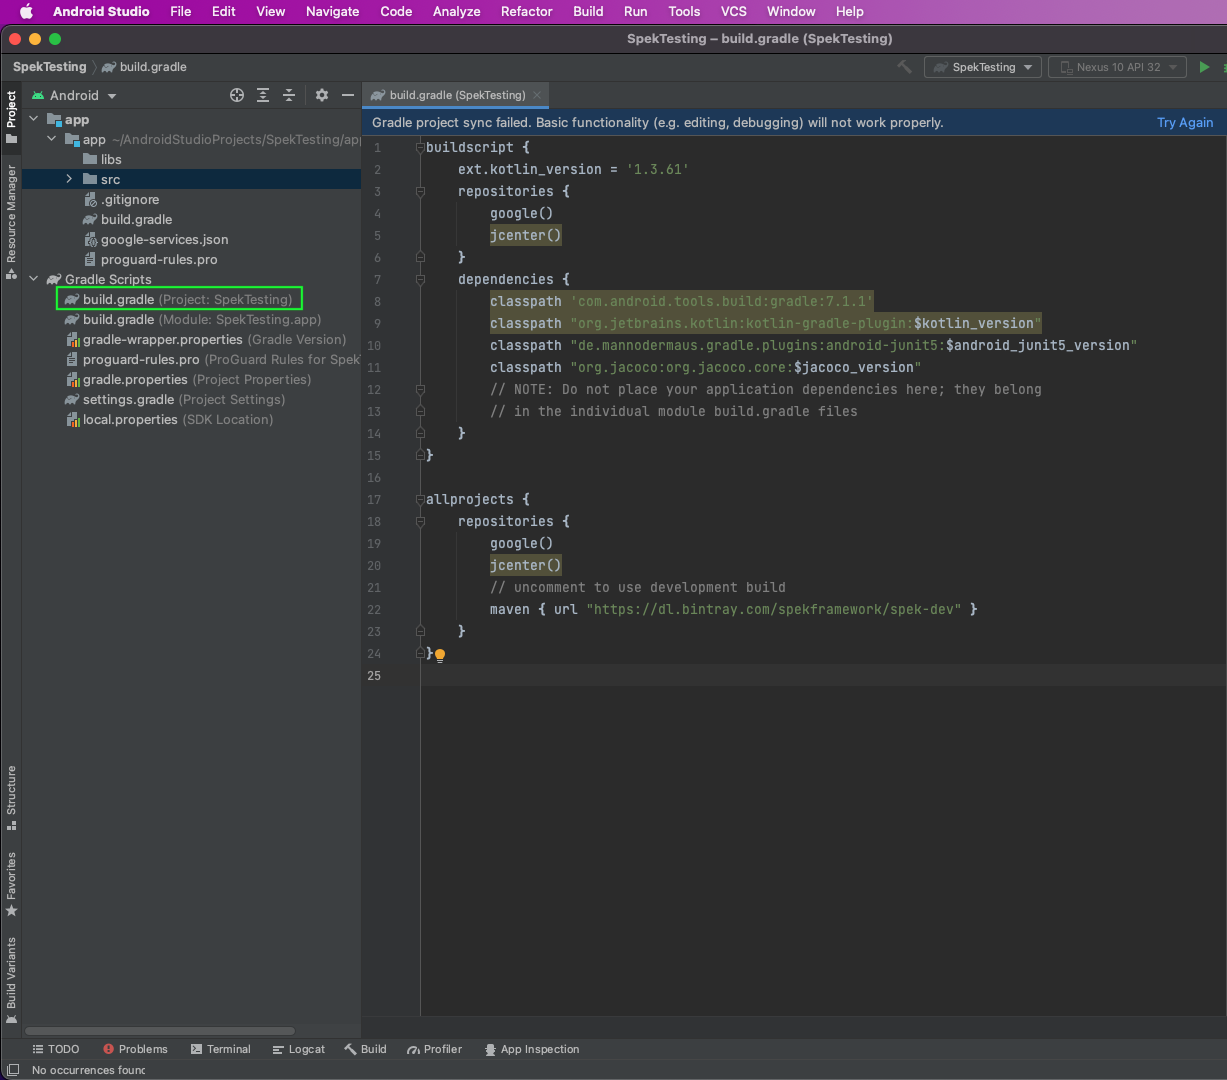
Now, we need to add dependencies in our two build.gradle files. First, open the build.gradle file for Project, and add the below statements in it. Here, we're adding the various dependencies, which include Gradle, Kotlin, JUnit, and JaCoCo. 


buildscript {
    ext.kotlin_version = '1.3.61'
    repositories {
        google()
        jcenter()
    }
    dependencies {
        classpath 'com.android.tools.build:gradle:7.1.1'
        classpath "org.jetbrains.kotlin:kotlin-gradle-plugin:$kotlin_version"
        classpath "de.mannodermaus.gradle.plugins:android-junit5:$android_junit5_version"
        classpath "org.jacoco:org.jacoco.core:$jacoco_version"
        // NOTE: Do not place your application dependencies here; they belong
        // in the individual module build.gradle files
    }
}

allprojects {
    repositories {
        google()
        jcenter()
        // uncomment to use development build
        maven { url "https://dl.bintray.com/spekframework/spek-dev" }
    }
}

Image highlights "build.gradle" under "Gradle Scripts"

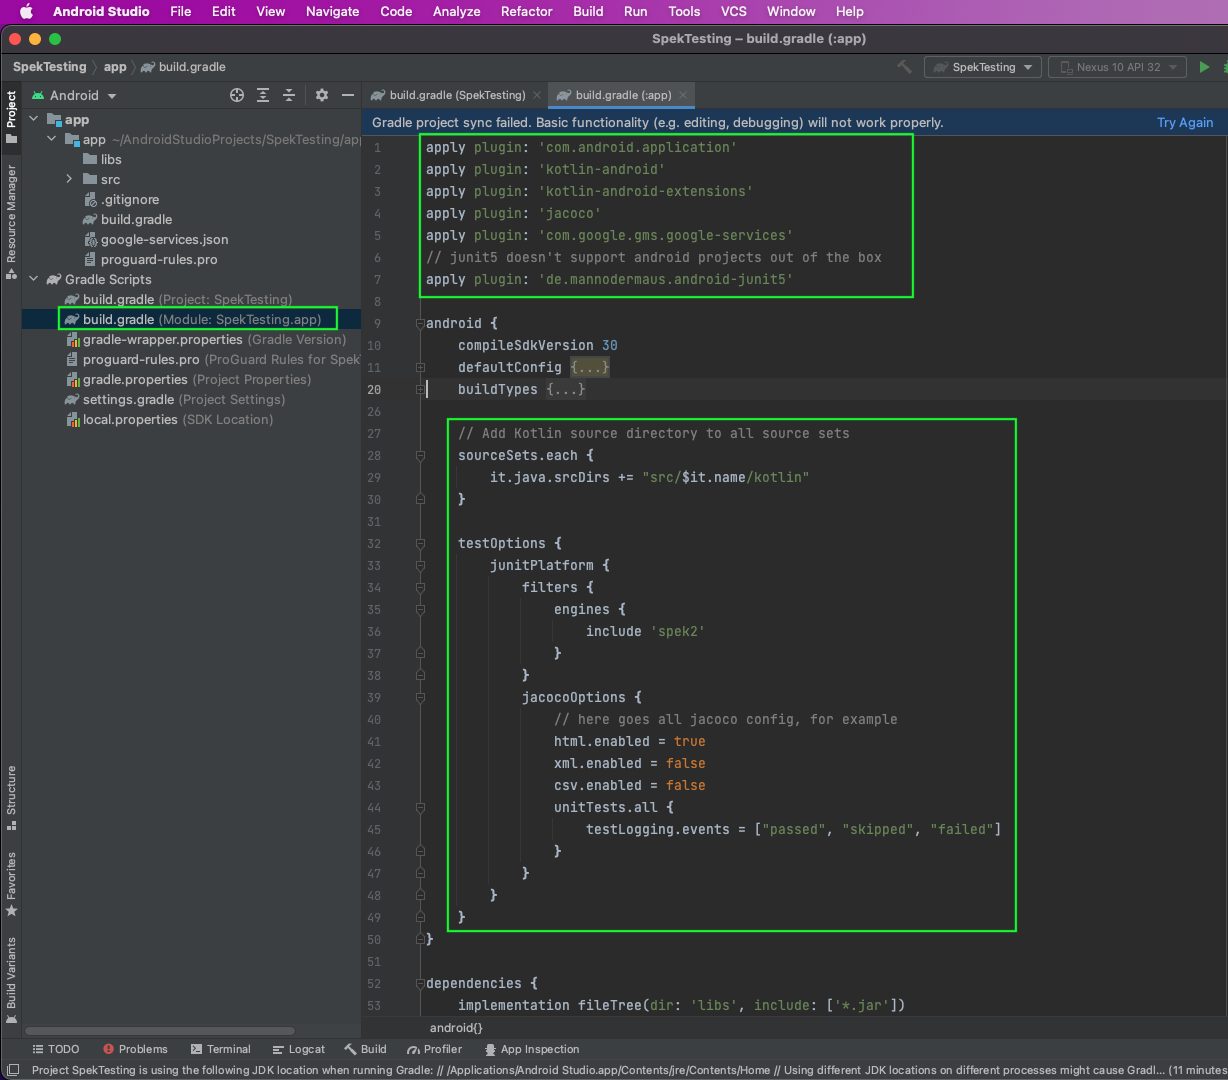
Now, in the build.gradle file for Module, we'll first add the plugins for Google Services, Kotlin, JUnit, and JaCoCo. Also, we need to add the sourceSets through which all Kotlin files will be included. And we also need to have a testOptions, in which the engine will be spek2


apply plugin: 'com.android.application'
apply plugin: 'kotlin-android'
apply plugin: 'kotlin-android-extensions'
apply plugin: 'jacoco'
apply plugin: 'com.google.gms.google-services'
// junit5 doesn't support android projects out of the box
apply plugin: 'de.mannodermaus.android-junit5'

android {
    compileSdkVersion 30
    defaultConfig {...}
    buildTypes {...}

    // Add Kotlin source directory to all source sets
    sourceSets.each {
        it.java.srcDirs += "src/$it.name/kotlin"
    }

    testOptions {
        junitPlatform {
            filters {
                engines {
                    include 'spek2'
                }
            }
            jacocoOptions {
                // here goes all jacoco config, for example
                html.enabled = true
                xml.enabled = false
                csv.enabled = false
                unitTests.all {
                    testLogging.events = ["passed", "skipped", "failed"]
                }
            }
        }
    }
}

Image highlights "build.gradle (Module: SpekTesting.app" under "Gradle Scripts". The image highlights the plugins added and highlights "test options"

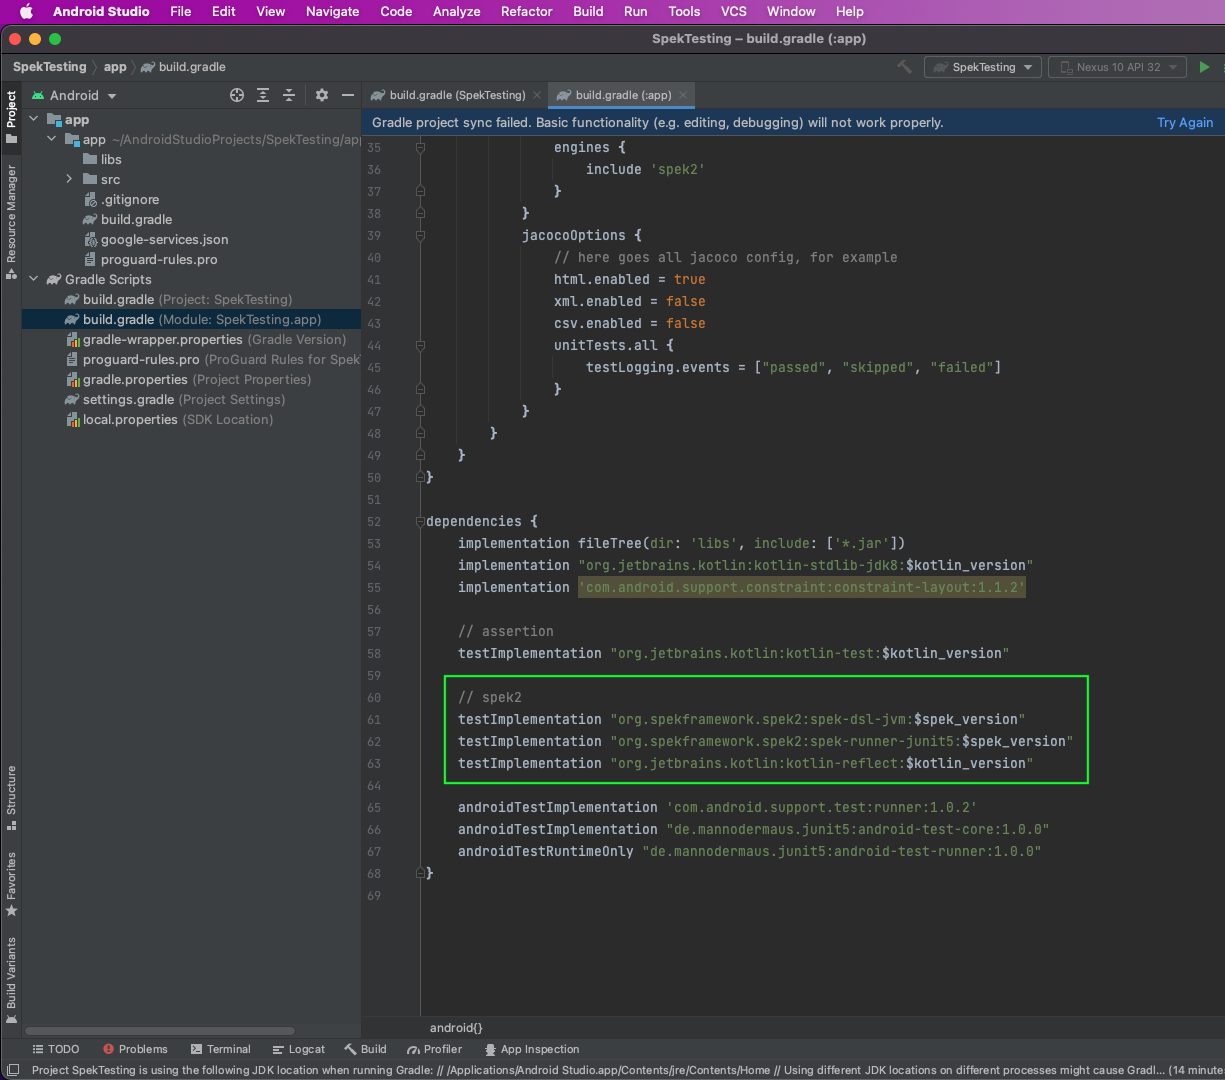
In the same build.gradle file for Module, we'll add Spek and Kotlin in dependencies. 


// spek2
testImplementation "org.spekframework.spek2:spek-dsl-jvm:$spek_version"
testImplementation "org.spekframework.spek2:spek-runner-junit5:$spek_version"
testImplementation "org.jetbrains.kotlin:kotlin-reflect:$kotlin_version"

Image highlights the code listed above this photo

Testing With Spek 

Now, we'll create the test file and start writing our test cases. Inside the test folder, right-click on com.example.spektesting. Here, click on New and then Kotlin Class/File

Image shows how to create a test file. Highlights the "New" selection after right clicking on "com.example.spektesting". The image then highlights a selection under "New" that says "Kotlin Class/File"

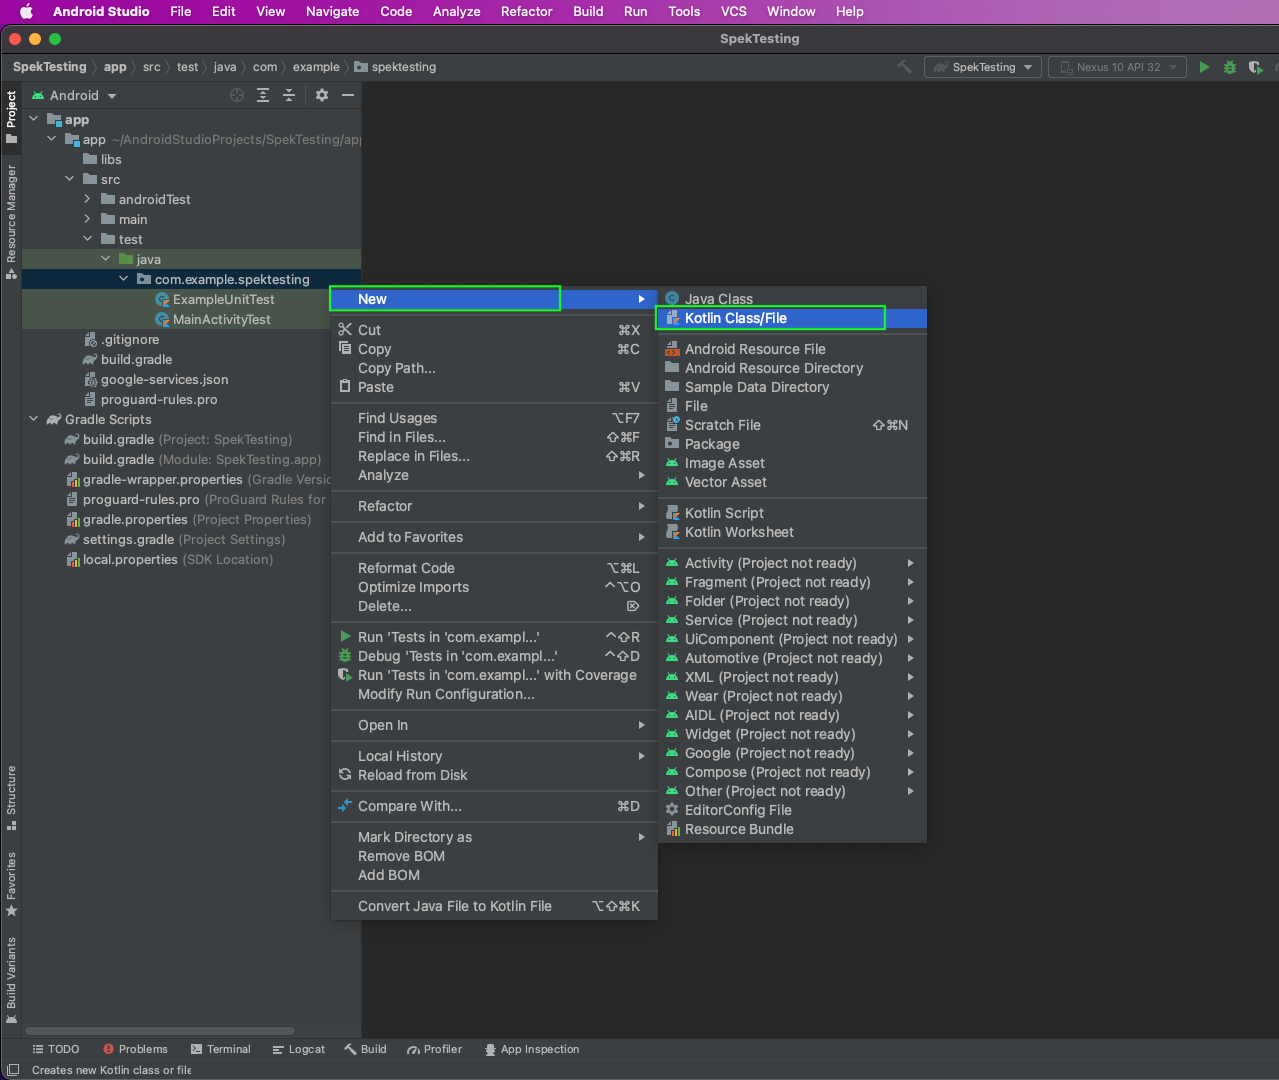
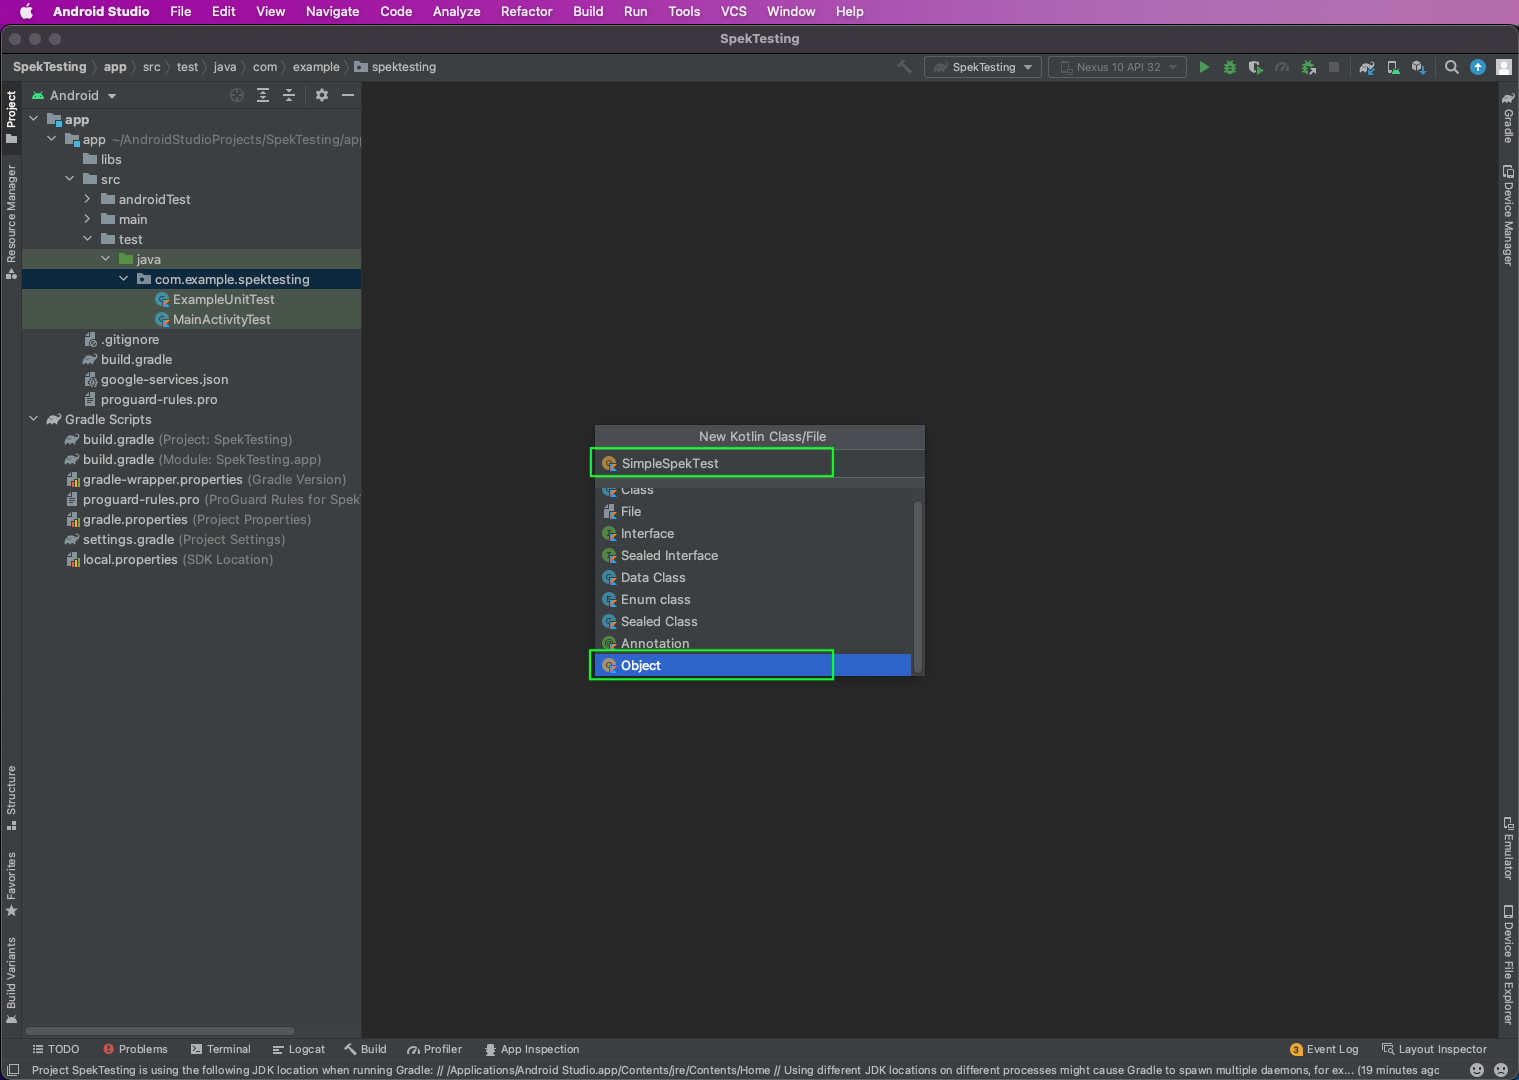
It will open a pop-up that gives the filename, which is SimpleSpekTest in our case. Also, make sure that the Object is selected. 

Shows a pop-up named "New Kotlin Class/File. The image highlights "SimpleSpekTest" and "Object"

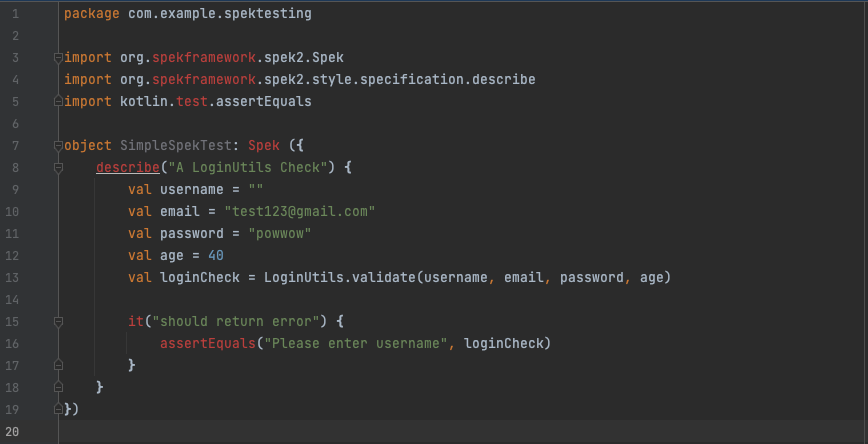
Finally, we'll write our Spek test. Here, we're using the describe and it statements, which are quite similar to JUnit tests. In the describe statement, we're calling the validate function from LoginUtils. Here, we're passing all the parameters correctly—except the username, which is an empty string.

So, the validate function we wrote earlier will throw an error. And we're checking the it function. Notice that the it function is inside the describe function. Here, we're using assertEquals() to check if we're getting the correct output from Please enter username


package com.example.spektesting

import org.spekframework.spek2.Spek
import org.spekframework.spek2.style.specification.describe
import kotlin.test.assertEquals

object SimpleSpekTest: Spek ({
    describe("A LoginUtils Check") {
        val username = ""
        val email = "[email protected]"
        val password = "powwow"
        val age = 40
        val loginCheck = LoginUtils.validate(username, email, password, age)

        it("should return error") {
            assertEquals("Please enter username", loginCheck)
        }
    }
})

Shows same code as above: the code is checking to see if it is getting the correct output

Upon running this test file, we'll get the success message. 

Another Testing Format With Spek

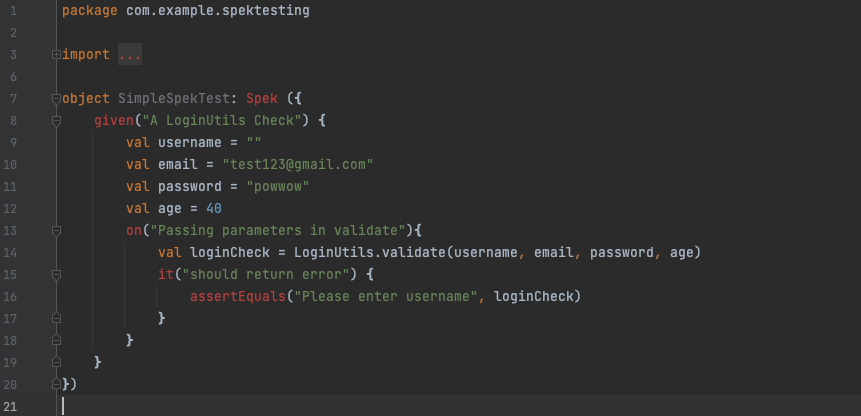
With Spek, we can test our code with different formats. Instead of using a describe-it format, we can use given, on, and it. In the given format, we'll give the initial conditions. Then, in on, we'll act. And in it, we'll do the assertion. Notice that the on function is inside the given function and the it function is inside the on function. 

We'll change our test in the SimpleSpekTest.kt file as below. 


object SimpleSpekTest: Spek ({
    given("A LoginUtils Check") {
        val username = ""
        val email = "[email protected]"
        val password = "powwow"
        val age = 40
        on("Passing parameters in validate"){
            val loginCheck = LoginUtils.validate(username, email, password, age)
            it("should return error") {
                assertEquals("Please enter username", loginCheck)
            }
        }
    }
})

Same as code listed above: shows code to change test in SimpleSpekTest.kt file

What You've Learned

In this post, you learned about the Spek framework for testing Android apps. You learned to create a simple project in Android using Kotlin. After that, we set up Spek and wrote test cases using the describe-it method. You've also learned to write test cases using the format of given-on-it.

But you've also seen the complicated setup process and the need to write test cases. If you want to avoid all of this, then try Waldo. You're only required to provide the APK or IPA file. After that, you interact with the mobile code like a real user. Waldo will automatically generate test cases and sends them back to you in your registered email.

Automated E2E tests for your mobile app

Creating tests in Waldo is as easy as using your app!
Learn more about our Automate product, or try our live testing tool Sessions today.

Reproduce, capture, and share bugs fast!

Waldo Sessions helps mobile teams reproduce bugs, while compiling detailed bug reports in real time.