


In this article, we'll show you how to implement text input components in React Native. In addition, this article will provide you with an approachable introduction to practical text inputs and how to make the best use of them in your projects.
To start, we'll describe what React Native text input components are and what makes them distinct from other technologies. Then we'll explore some classic examples of text inputs to help you grasp the differences between them. Finally, we'll give you some guidance in customizing your text inputs.
By the end of this article, you can expect to have the knowledge and experience necessary to feel confident developing complex user inputs and forms.
Note: We'll give you a brief introduction to how to create a React Native project. This is to accommodate more inexperienced developers looking to grasp the basics. However, if you already have your project or find this unnecessary, feel free to jump to the next part of the article.
Setting up React Native
Alright, first let's get you set up.
You'll use the Expo CLI Command Line utility, NodeJS runtime, and Visual Studio Code for the development environment. Setting this up requires just two commands and takes no time.
First, you need to install NodeJS on your system.
To install it, you can either go to the official NodeJS portal and download the installer or use the package manager that comes with your OS through the command line.
For example, if you use macOS, you can use homebrew and input the following command on the terminal:
Simple. Now you can proceed to install the Expo CLI.
All you have to do is use npm, the package manager that comes with NodeJS, and input the following command on the terminal:
That's it. If you don't have Visual Studio Code already installed, you can find it here.
You can find more information on the React Native developer website here.
React Native Text Input Component
As the name implies, a text input is an element that enables the input of text into an application. You might think that this much is quite evident, and you would be correct, but text inputs are one of the fundamental building blocks of user interaction for applications.
As you probably know by now, React is built on elements called components. These components are the building blocks for the UI that you create for your users, and for the most part, they represent a basic unit of interaction. And the text input is one of the core components of React.
Be it something simple like a button, an input, or something more complex like a slider, form, or even a browser, React provides these components to allow a robust and streamlined development and user experience.
Now, you probably know what a text element looks like in the various platforms that React Native handles, but what does a text component look like in React Native?
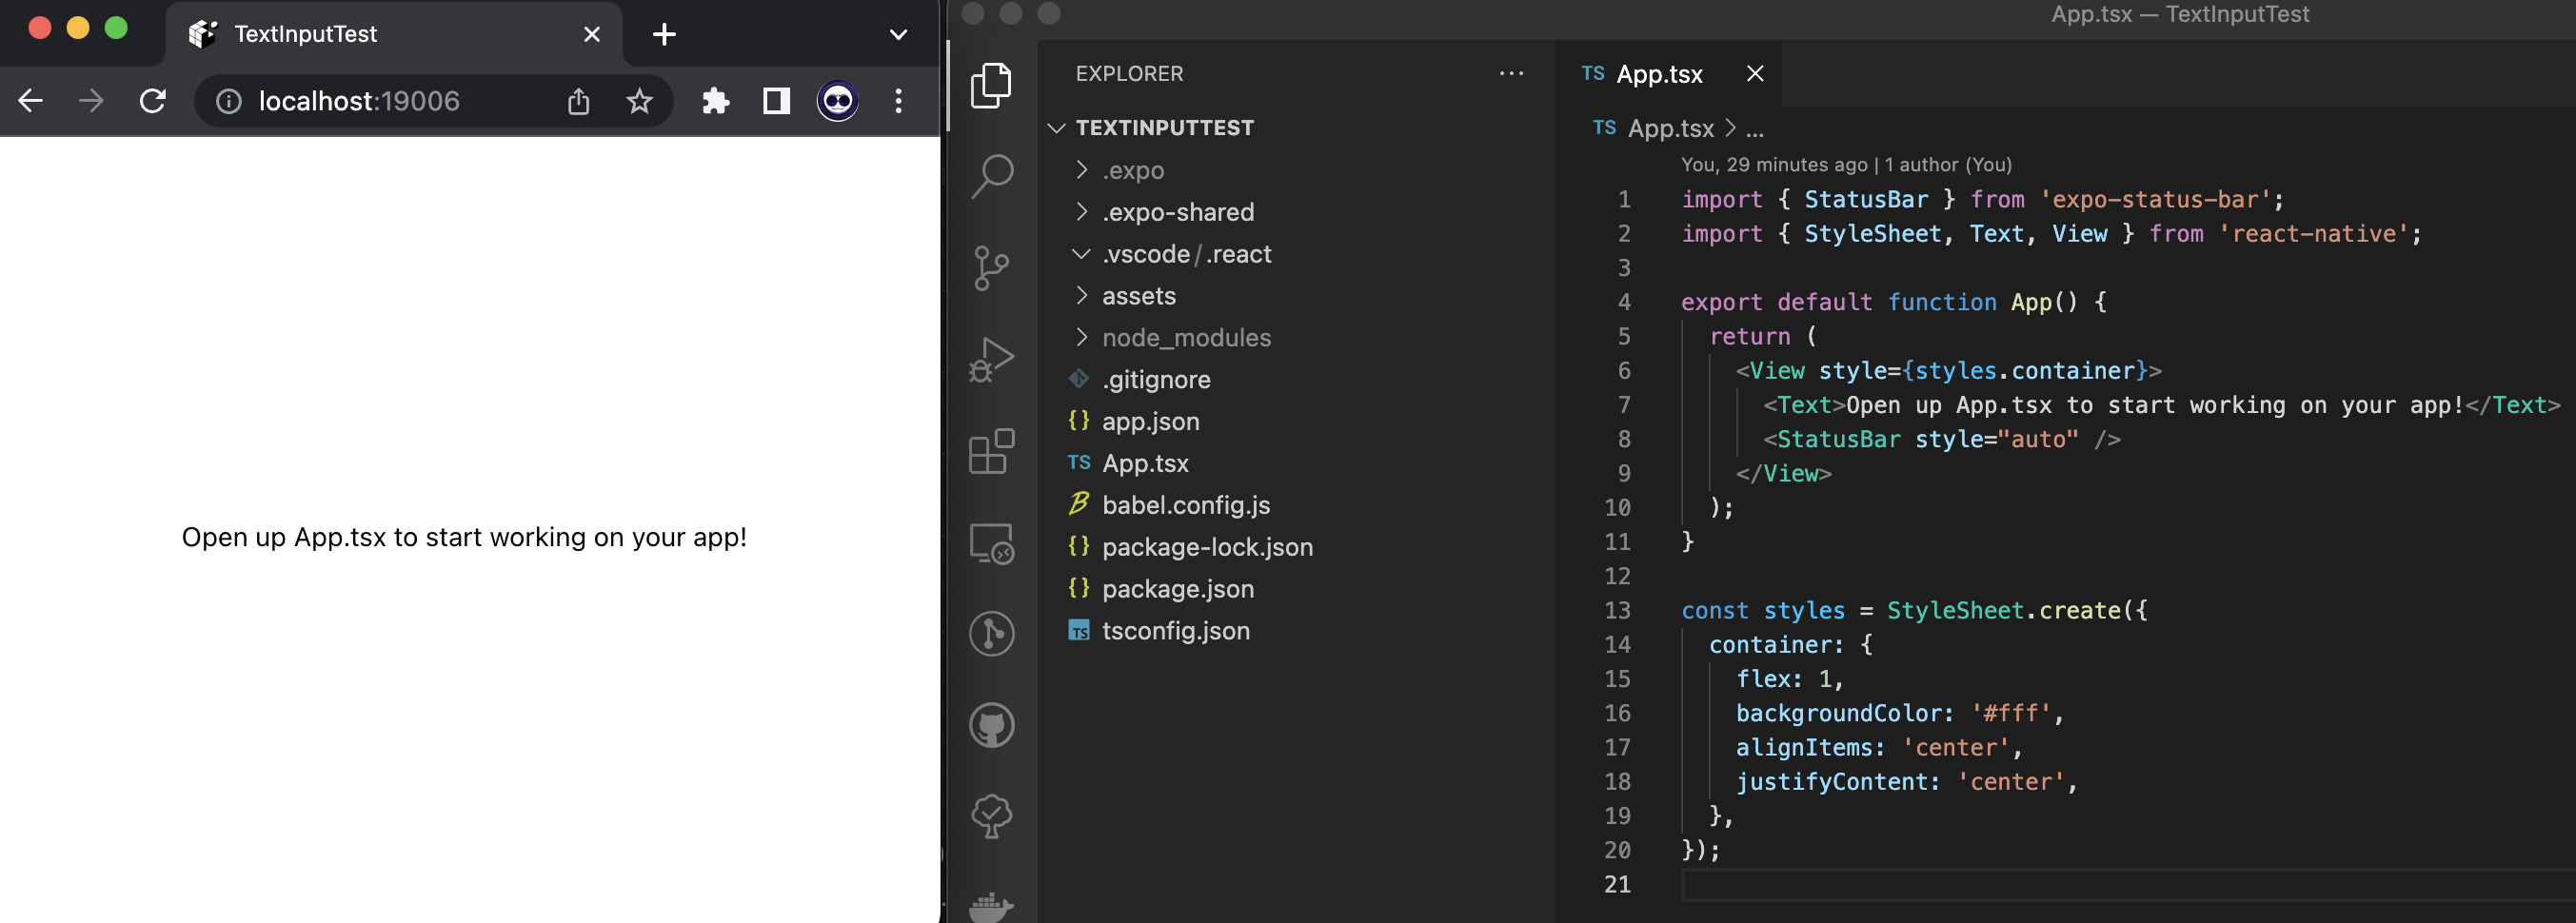
Well, it is as simple as the following:
If you took a peek at the project you just created in your setup section, you probably recognize this code. It is taken from the App.tsx file, which is the main view file. Open it up if you haven't.
You can run the code and see it in action by using the following command and selecting the platform to run your code on:
Yep, that's all it takes.
Now, how about a text input?
Much like the current example, all you have to do is create a tag and add a few basic props or attributes.
Which results in the following:
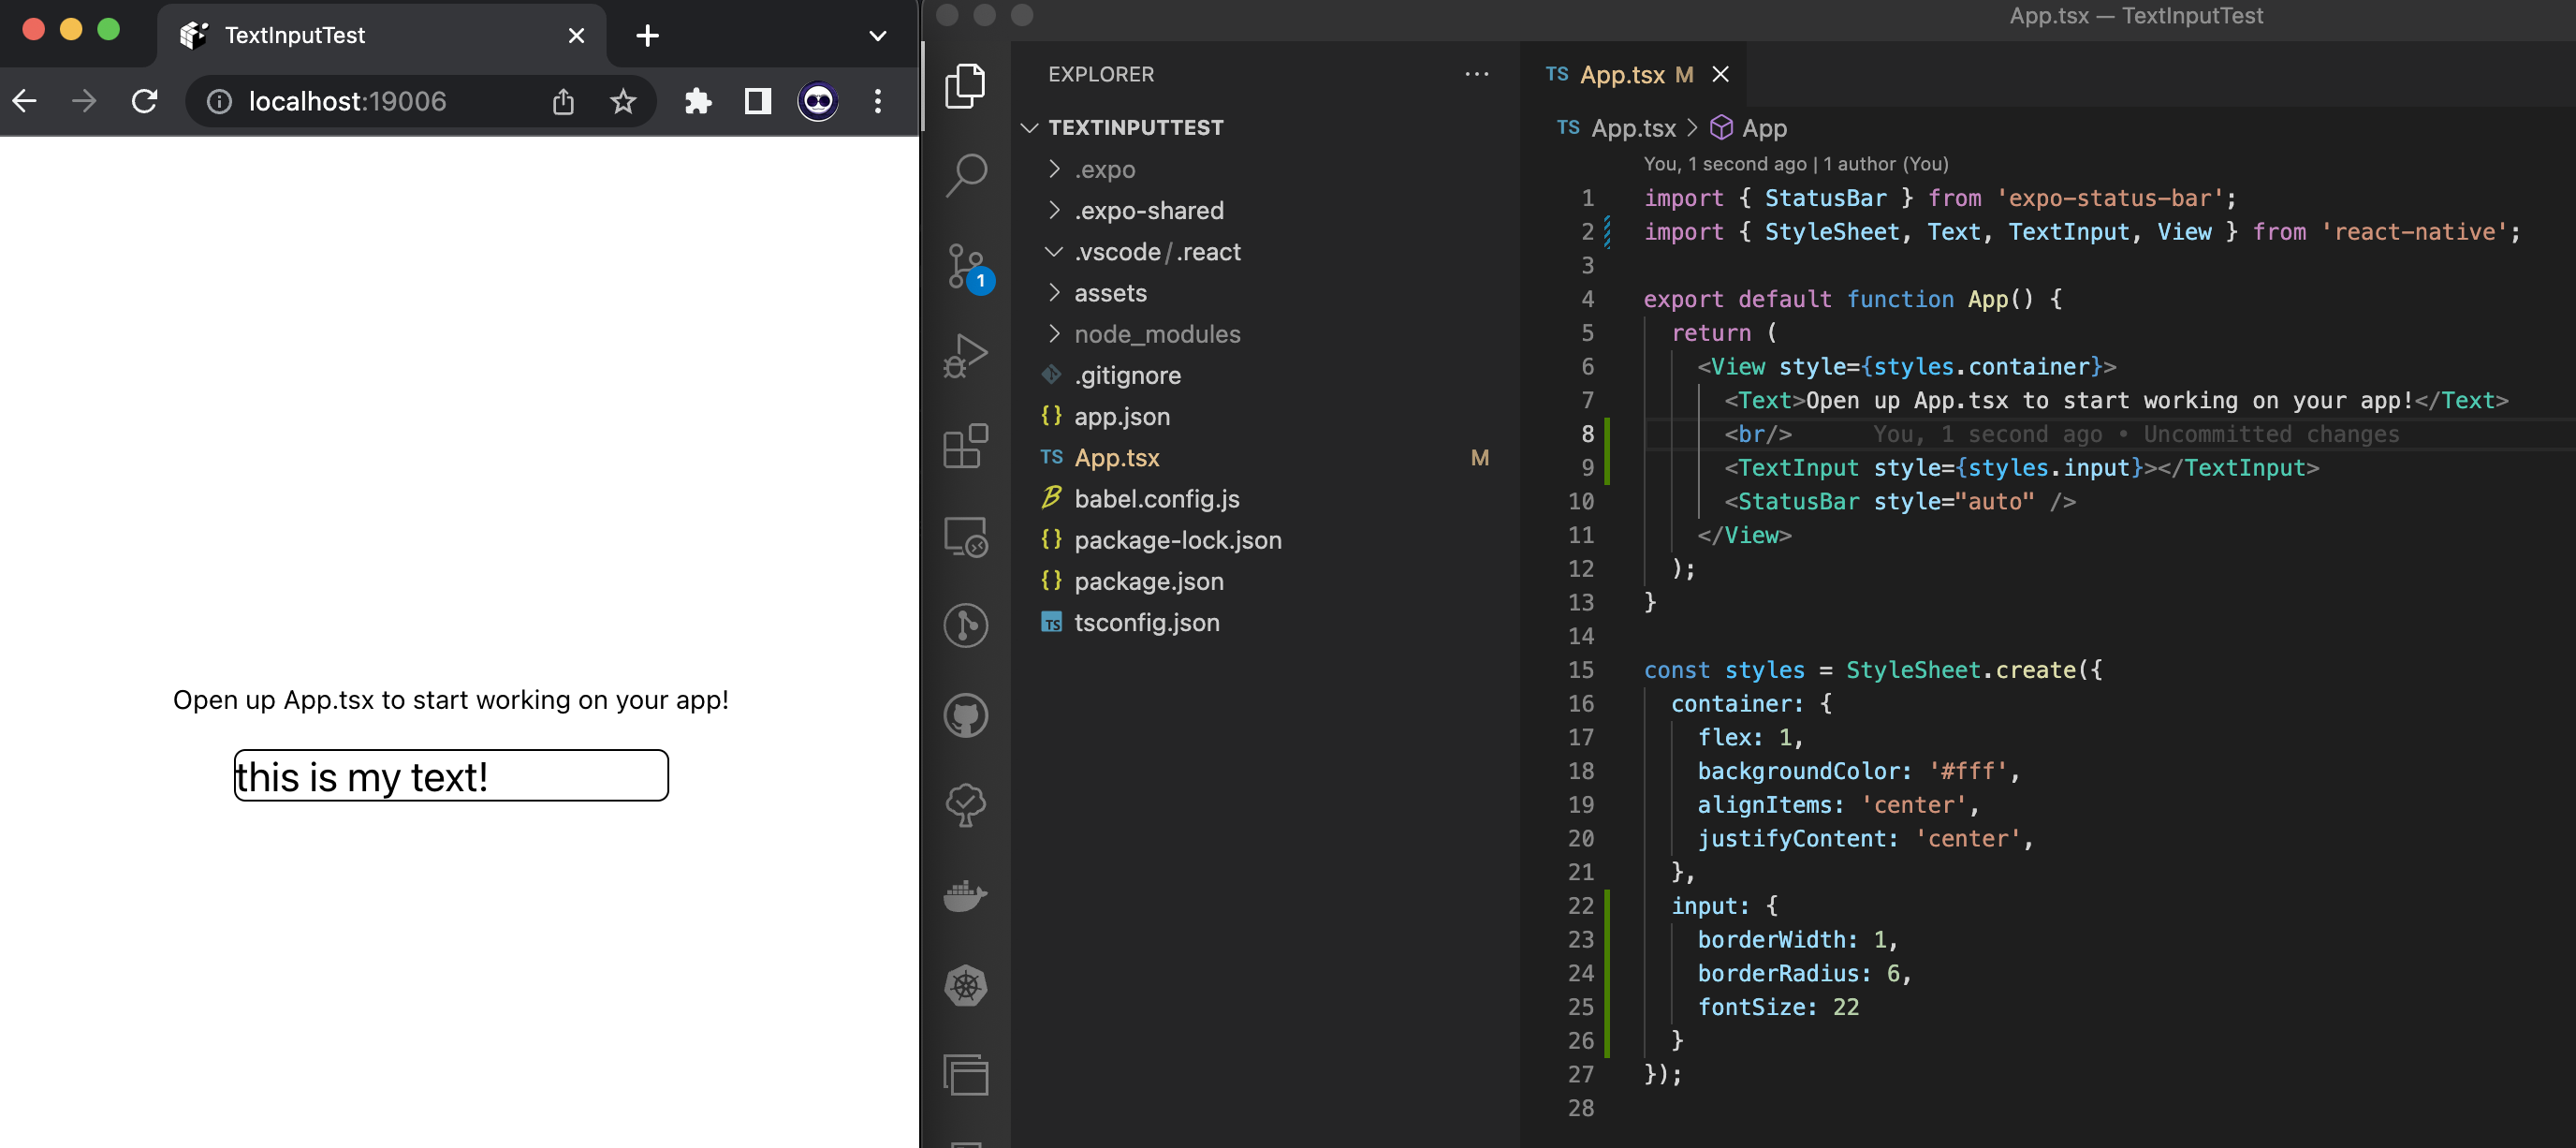
That was quite simple.
Notice that you added a style class at the bottom and passed it to your text input. This is purely to make it more visible, but it's not really necessary. We'll dive into styling and customizing components in a minute.
More Props
Some of the most important props for text inputs are 'placeholder,' 'autoCapitalize,' 'onChangeText,' 'keyboardType,' and 'maxLength'. The function of these props is mostly self-explanatory, but let's explore them anyway.
- 'placeholder' allows you to set a default placeholder for your input.
- 'autoCapitalize' sets the text to be capitalized automatically when the user inputs text.
- 'onChangeText' is the handler that will be triggered when the user inputs text. This is where you'll put your function to validate or filter your users' text.
- 'keyboardType' indicates to React what kind of input is allowed. Whether a number-only field or an email field, it helps dictate what type of keyboard will appear for the user when interacting with the input field.
- 'maxLength' limits the number of characters allowed in the input field.
There are plenty more props that allow you to have great control over the input field and to create the best experience possible for your users. Additionally, some props are only available on some platforms, like iOS or Android, so keep this in mind when setting up your views. You can find the rest of the props here.
Here's an example of a typical input with some of the props just described:
Which would look something like the following:

Excellent. Let's move on to style the text input.
Styling Text Inputs in React Native
In terms of styling, there are a great variety of options.
Much like with HTML, the mechanism to style components in React Native (and in React, for that matter) is quite simple. You will be leveraging the styles directive declared in the properties at the bottom of your code to give your component a better look and feel.
First, define the view's boundaries with the height and margin properties. Then set the text in the input view to be centered inside the view so it looks more in alignment with the rest of the page. Finally, add a background color so it will be easier for users to spot the view itself. This is particularly important for accessibility.
The result will be the following:
Looking much better.
Validating Text Inputs in React Native
Alright, so now that you have a good-looking input text, it's time to add some features. In this case you will add a feature to check the inputted text and provide the user with feedback. To achieve this, you will leverage the 'onChangeText' prop.
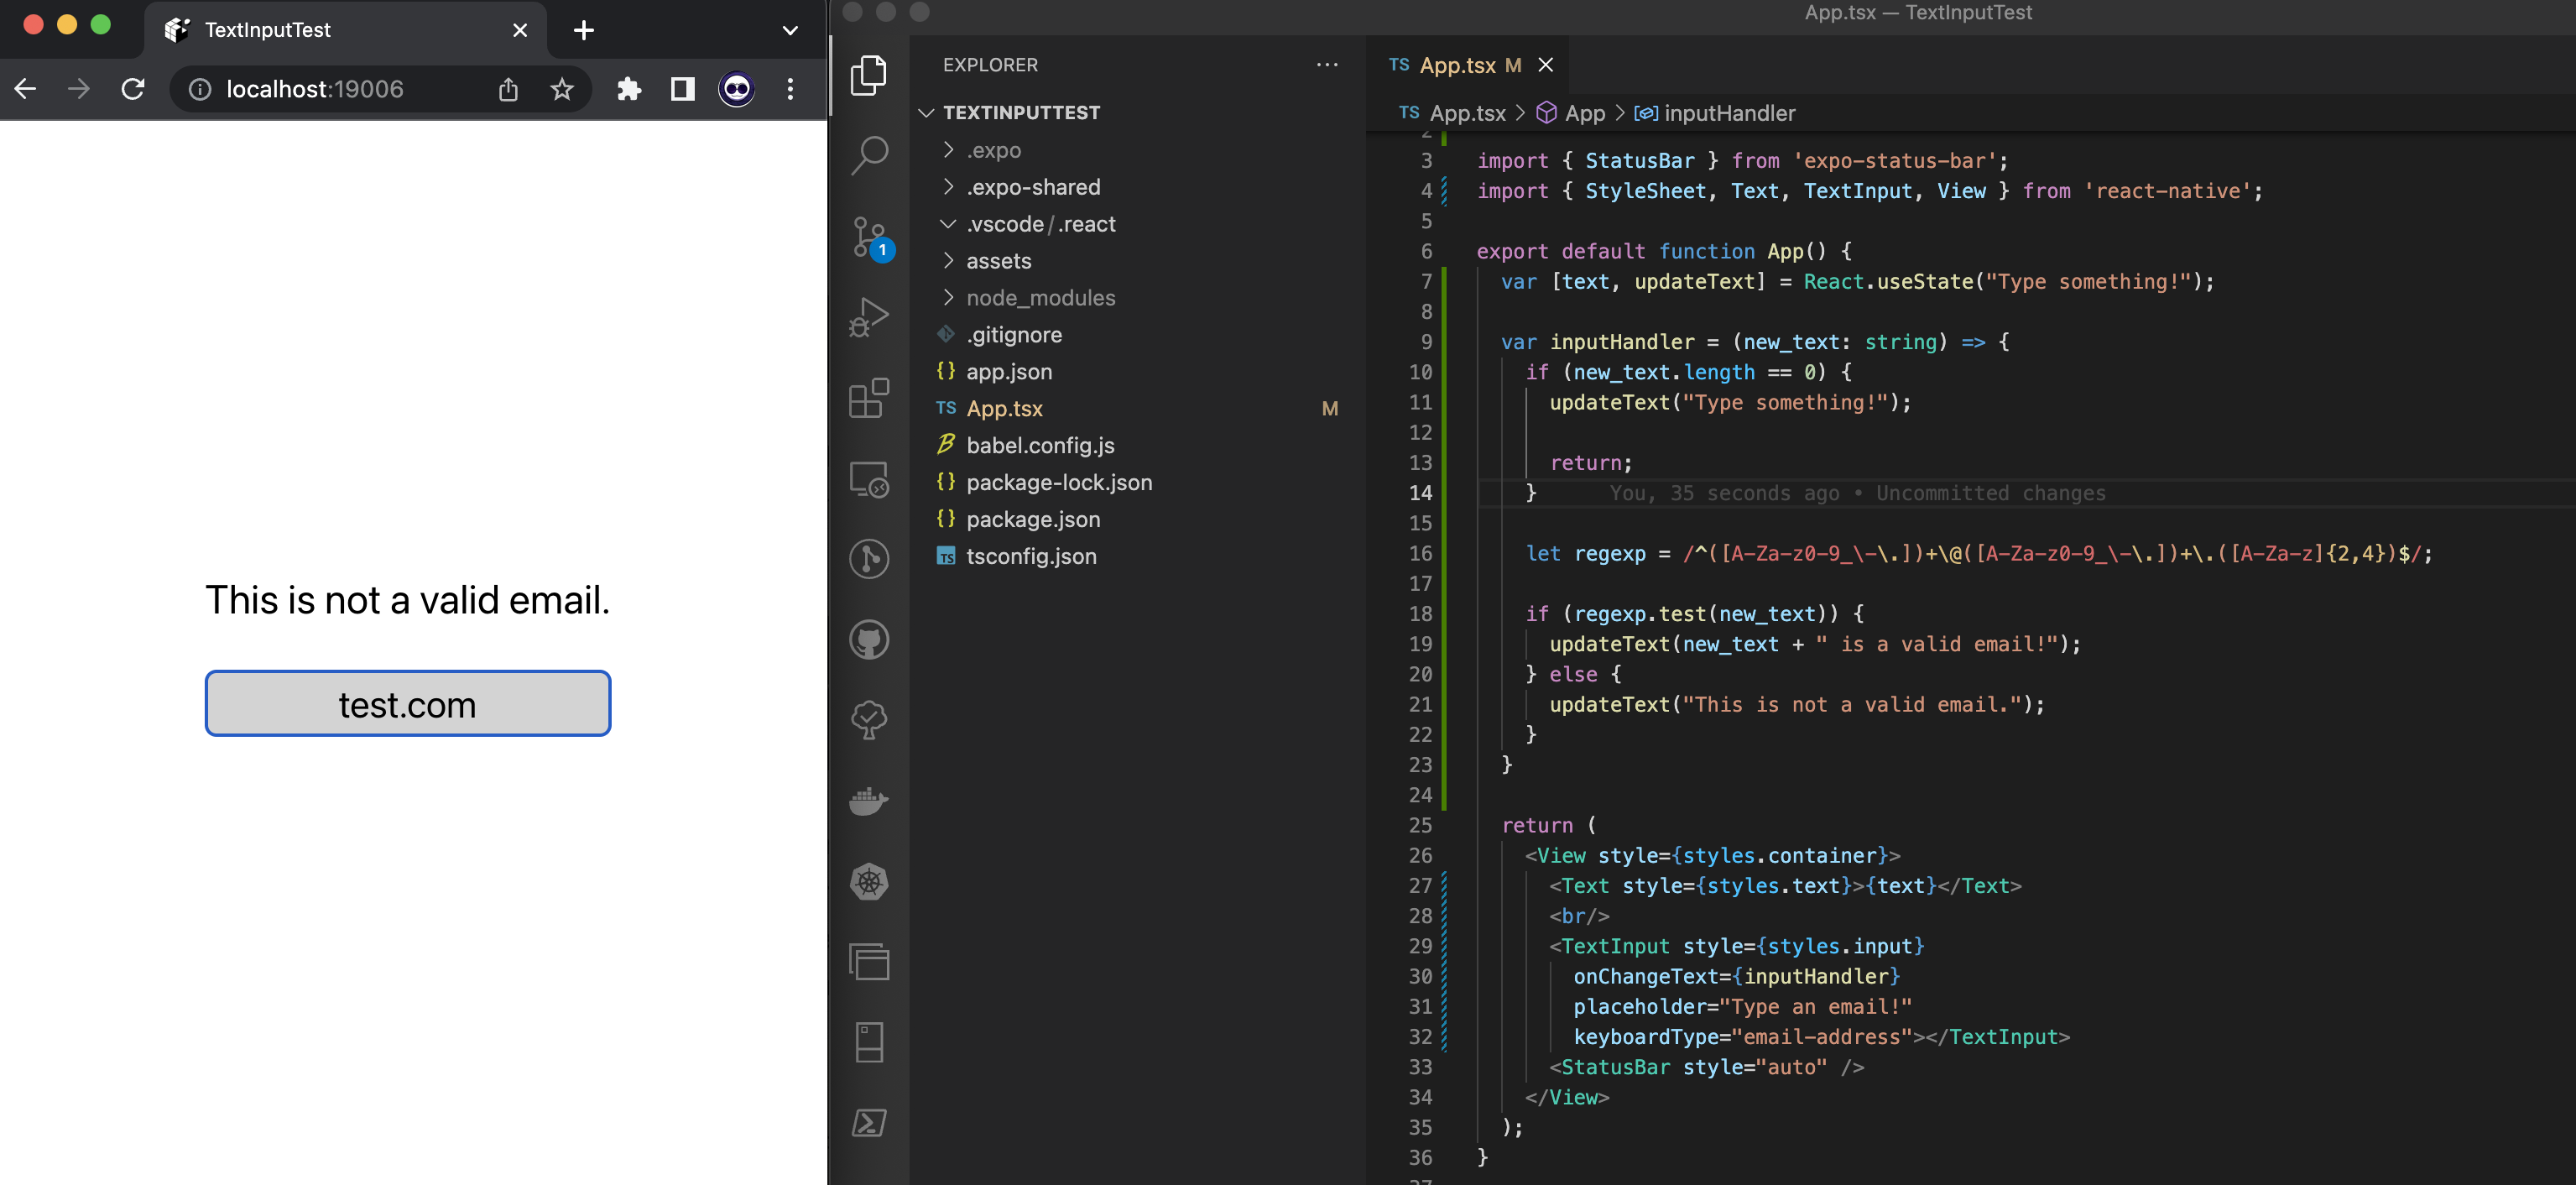
First, add a second variable to the 'useState' function. This second variable will be a function that will allow you to edit the value of the original text when the view is updated. You can get a refresher here if you don't yet understand how states work in React.
Now that you have the function, add it to the 'handleInput' handler and update the text accordingly. Feel free to add the checks and conditions that best satisfy your needs. In this case, the code checks to see that the email provided is valid. Otherwise, it indicates to the user that the value is not valid.
The final code would look something like the following:
This will be your result:
You can now modify the handler to give better feedback or even disable a button that would otherwise submit the form.
In Conclusion
Now that you have examined the text input and created a sample project to explore in React Native, you can continue exploring the many intricacies of the different platforms that implement it. Given that text input is one of the most fundamental components of the React Native platform, it's essential to grasp this element so your application offers the best user experience. However, if you want to go even further and offer the best experience, please consider exploring our code-free testing solution at Waldo. You can learn more about it here.
Automated E2E tests for your mobile app
Get true E2E testing in minutes, not months.


