


Today we'll explore how to implement a social share feature in React Native. And to achieve this, you'll create a sample project with share buttons for Facebook, Twitter, and Instagram.
You'll start by scaffolding a basic React Native project with Expo. This will serve as the grounds for you to put into practice what we'll discuss. Then we'll cover the most common implementations of basic React Native social share components. Finally, we'll customize the components and features to give you more options to fit your needs.
Now, since this is an elementary topic for React Native development and we want everyone to be able to get as much value from this article as possible, we'll start with a brief introduction about how to set up your environment for React Native development. But if you don't need an introduction, feel free to skip this section.
Starting With React Native
Alright, so first things first.
If you're just dipping your toes into React Native and don't have an environment to develop yet, here's a quick refresher to get you up to speed.
Requirements:
- Expo CLI command line utility
- NodeJS runtime
- Visual Studio Code
First, install NodeJS by going to the official NodeJS portal and downloading the installer or use the package manager within your OS.
Example (macOS):
Use homebrew on the terminal and input the following command:
Input the following command on the terminal to install Expo CLI:
Download Visual Studio Code here.
Creating a Project
Type the following command and let Expo know what kind of scaffold project you want:
Note: You can change ProjectName to your project name of choice.
Enter the following command and select the platform to get the application running:
You can find more information on the React Native developer website.
How to Add Social Sharing in React Native
Social sharing allows you to provide a convenient and intuitive mechanism to share content and actions for users on major social media platforms. This content is usually a string of text, a resource like a photo, or some other file. This allows users to interact with each other and use your application as a medium of connection.
The implementation of social sharing features can vary slightly between platforms, but they generally allow users to share text and images. This means that you can implement a somewhat general mechanism to handle the content to be shared. That is what the developers of React Native have done with the core sharing feature that comes with the framework.
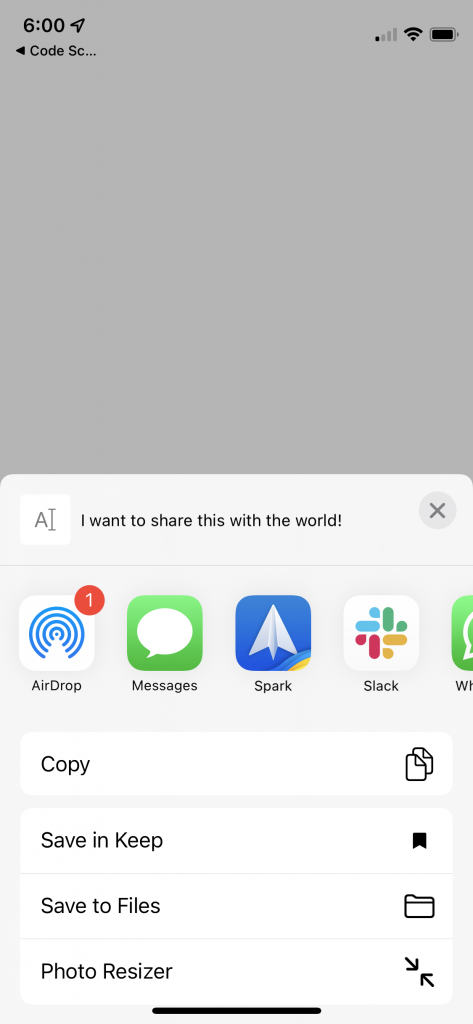
In the following code, taken from the documentation site, you can see a basic implementation of a share button:
As you can see, this code only provides a simple string of text to the share feature, "I want to share this with the world!" However, you can also provide a title and url to the share feature, although the url option is only available for iOS.
Additionally, if you run this code, you will find that there will be different options available for you to share, depending on the applications you have installed. This is because React Native uses the default share sheet available on the target platform, which only gives you the available apps on the system.
This can be good or bad, depending on your preferences.
Alternative Social Sharing Package in React Native
What if this is not sufficient for you? Let's say you want to share a photo or a PDF with other apps.
In that case, you'll need a more robust and feature-rich package to handle the share feature. One such package is the popular React-Native-Share.
Despite not being officially integrated into the React Native framework, this package is one of the most used solutions for more complex and specific social sharing needs. It was developed by some of the core React Native community members and is currently maintained by a healthy community of contributors.
All you have to do is run the following command on the terminal to install it:
Then you must change the share function slightly to meet the constructor of the new package.
And that's it.
In order to share files, all you have to do is provide the base64 encoded format of the file and make sure to set the 'url' prop to return the corresponding format.
Taping on the share button will display a share sheet containing different apps supporting the sharing feature. You can then select any app with which you want to share.
Keep in mind that depending on the file type you provide to the share feature, some applications will not display. For example, photo applications will not be shown in the share sheet as a shareable destination when sharing a PDF.
Targeting Applications
But what if you want to specify the target application of your share function? What if you want your users to be able to clearly see their options? Thankfully, this package also allows you to do that.
Going back to the previous code, let's add another function called 'onShareSingle'. The purpose of this function is to share content specifically on Instagram.
Notice how this function requires specific props that are different from the general share sheet. This is because you are targeting a particular platform and can focus on providing all the necessary properties.
Of course, there's support for many other social applications like Snapchat, WhatsApp, and more. See the documentation for a list.
One more thing that you can do with the React Native Share package is detect which applications are available. Given that some of the logic that you use could cause a crash or introduce a bug if the target application is unavailable, it's essential to check beforehand.
To do this, use the 'Share.isPackageInstalled' method and provide the package ID of the target application. This will check if the application is installed on the device and return a Boolean.
Sadly, if you're using Expo to develop your application, you won't be able to use this package as it doesn't support it yet.
In Conclusion
For the most part, packages that provide share features are quite feature-rich and robust. However, not all of them provide the features that you might be seeking, and some might have fallen out of use and been abandoned. This is why it's crucial to keep your code clean and monitor the state of the packages and libraries implemented.
Sometimes, doing this work can be tedious and time-consuming. This is especially true for a lean and agile team focused on delivering updates and features at a fast pace. That's why we recommend our zero-code solution at Waldo. Our powerful testing tools allow you to create flexible testing strategies without ever having to type a single line of code.
You can learn more here.
Automated E2E tests for your mobile app
Get true E2E testing in minutes, not months.


