Waldo sessions now support scripting! – Learn more
App Development

Making Tables in React Native: A Helpful Guide

Nabendu Biswas
Nabendu Biswas
Making Tables in React Native: A Helpful Guide
March 15, 2022
13
min read

Tables are an important part of many mobile apps. For example, you might need to display different prices of a product or make another comparison.

In this post, we're going to first create a table using FlatList. Next, we'll create a table using popular libraries: react-native-table-component and react-native-paper. Both of these are well maintained. Many React Native table libraries aren't maintained. Some of them haven't been updated in two years. That's why I chose these libraries.

To complete this task, you'll need basic knowledge of JavaScript, React, and React Native. We'll also create an APK file for testing using Waldo's no-code testing tool.

Creating a React Native Project

We'll be creating a new React Native project. In this post, we're going to use React Native CLI and the Android emulator.

Run the command below to start a new project. We're creating a new project with the name RNtables.


npx react-native init RNtables

Once installation is successful, you'll see a screen like the one below.

Starting Your React Native Project

We need to have the emulator running before starting a React Native project in Android. After that, change to the project directory, and run this command:


npx react-native start

Now, in another terminal, run this command:


npx react-native run-android

This will start the project in the Android emulator.

App Component

We're going to show different tables in different tabs. So, first remove all the earlier code from the App.js file. Next, we'll set the state for the active tab using the useState hook.

We have a SafeAreaView with styles, which shows the component TableOne, TableTwo, TableThree, or TableFour, based on the active state. By default, it shows TableOne. But if you click any other tab, it'll show that component.


import { SafeAreaView, StyleSheet, Text, View, TouchableOpacity } from 'react-native'
import React, { useState } from 'react'
import TableOne from './components/TableOne';
import TableTwo from './components/TableTwo';
import TableThree from './components/TableThree';
import TableFour from './components/TableFour';
const App = () => {
  const [active, setActive] = useState('tableOne');
  return (
    <SafeAreaView style={styles.container}>
      {active === 'tableOne' && <TableOne />}
      {active === 'tableTwo' && <TableTwo />}
      {active === 'tableThree' && <TableThree />}
      {active === 'tableFour' && <TableFour />}
      <View style={styles.tabBar}>
        <TouchableOpacity style={styles.tab} onPress={() => setActive('tableOne')}>
          <Text style={styles.tabText}>Table #1</Text>
        </TouchableOpacity>
        <TouchableOpacity style={styles.tab} onPress={() => setActive('tableTwo')}>
          <Text style={styles.tabText}>Table #2</Text>
        </TouchableOpacity>
        <TouchableOpacity style={styles.tab} onPress={() => setActive('tableThree')}>
          <Text style={styles.tabText}>Table #3</Text>
        </TouchableOpacity>
        <TouchableOpacity style={styles.tab} onPress={() => setActive('tableFour')}>
          <Text style={styles.tabText}>Table #4</Text>
        </TouchableOpacity>
      </View>
    </SafeAreaView>
  )
}

We've also added the styles for the same, after the above code in the App.js file.


const styles = StyleSheet.create({
  container: {
    flex: 1,
    backgroundColor: 'lightcyan',
  },
  tabBar: {
    flexDirection: 'row',
    borderTopColor: '#333333',
    borderTopWidth: 1,
  },
  tab: {
    height: 50,
    flex: 1,
    alignItems: 'center',
    justifyContent: 'center',
  },
  tabText: {
    color: 'darkblue',
    fontSize: 20,
    fontWeight: 'bold'
  }
})
export default App

Table Without Library

We can also create a table without any library. So, create a TableOne.js file inside a components folder in the root directory. Here, we're using FlatList to loop through an array of objects. And after that, we're styling each row.


import { FlatList, Text, View } from 'react-native'
import React from 'react'
const data = [
    {id: 1, name: 'John', email: 'john@gmail.com'},
    {id: 2, name: 'Bob', email: 'bob@gmail.com'},
    {id: 3, name: 'Mei', email: 'mei@gmail.com'},
    {id: 4, name: 'Steve', email: 'steve@gmail.com'}
]
const TableOne = () => {
    const item = ({ item }) => (
        <View style={{ flexDirection: 'row' }}>
            <View style={{ width: 50, backgroundColor: 'lightyellow'}}>
                <Text style={{ fontSize: 16, fontWeight: 'bold', textAlign: 'center'}}>{item.id}</Text>
            </View>
            <View style={{ width: 400, backgroundColor: 'lightpink'}}>
                <Text style={{ fontSize: 16, fontWeight: 'bold' , textAlign: 'center'}}>{item.name}</Text>
            </View>
            <View style={{ width: 400, backgroundColor: 'lavender'}}>
                <Text style={{ fontSize: 16, fontWeight: 'bold' , textAlign: 'center'}}>{item.email}</Text>
            </View>
        </View>
    )
    return (
        <View style={{ flex: 1, justifyContent: 'center', alignItems: 'center', marginTop: '10%'}}>
            <FlatList data={data} renderItem={item} keyExtractor={item => item.id.toString()} />
        </View>
    )
}
export default TableOne

It'll look like this on the Android emulator.

There are several drawbacks to this approach. For example, we don't have a table header. And if we need a table header, it'll look the same as other rows.

Also, when we have more data, then it won't show correctly. We've added more text in the email of one field.


import { FlatList, Text, View } from 'react-native'
import React from 'react'
const data = [
    {id: 1, name: 'John', email: 'Lorem ipsum dolor sit amet consectetur, adipisicing elit. Mollitia voluptatibus
consequuntur ex rem quidem officiis eius facere rerum? Natus enim iusto tempore doloribus distinctio
facere nihil possimus ex mollitia debitis!'},
    {id: 2, name: 'Bob', email: 'bob@gmail.com'},
    {id: 3, name: 'Mei', email: 'mei@gmail.com'},
    {id: 4, name: 'Steve', email: 'steve@gmail.com'}
]
const TableOne = () => {
    const item = ({ item }) => (
        <View style={{ flexDirection: 'row' }}>
            <View style={{ width: 50, backgroundColor: 'lightyellow'}}>
                <Text style={{ fontSize: 16, fontWeight: 'bold', textAlign: 'center'}}>{item.id}</Text>
            </View>
            <View style={{ width: 400, backgroundColor: 'lightpink'}}>
                <Text style={{ fontSize: 16, fontWeight: 'bold' , textAlign: 'center'}}>{item.name}</Text>
            </View>
            <View style={{ width: 400, backgroundColor: 'lavender'}}>
                <Text style={{ fontSize: 16, fontWeight: 'bold' , textAlign: 'center'}}>{item.email}</Text>
            </View>
        </View>
    )
    return (
        <View style={{ flex: 1, justifyContent: 'center', alignItems: 'center', marginTop: '10%'}}>
            <FlatList data={data} renderItem={item} keyExtractor={item => item.id.toString()} />
        </View>
    )
}
export default TableOne

Notice how it's breaking the app!

Table Using Library

As we've seen in the above example, there are a lot of issues in using tables without a React Native library. We'll now use the most popular and maintained library in React Native. It's called react-native-table-component.

So, in the project directory give this command.


npm i react-native-table-component

Now, create a file called TableTwo.js inside the components folder. Here, we're first importing the Table, Row, and Rows from react-native-table-component. After that, we're creating a variable called tableData. Inside it, we've got tableHead and tableData, containing our Header and four rows.

Next, we have to use the Table, with borderStyle. Now, inside it we have a Row for the Header. We also have Rows for taking the tableData.

Lastly, we have different styles for the table element. But the library itself takes care of the layout.


import React, { useState } from 'react';
import { StyleSheet, View } from 'react-native';
import { Table, Row, Rows } from 'react-native-table-component';
const tableData = {
    tableHead: ['Crypto Name', 'Value', 'Mkt Cap'],
    tableData: [
        ['Bitcoin', '$44,331', '$839,702,328,904'],
        ['Ethereum', '$3000.9', '$359,080,563,225'],
        ['Tether', '$1', '$79,470,820,738'],
        ['BNB', '$413.44', '$69,446,144,361'],
        ['USD Coin', '$1', '$53,633,260,549'],
    ],
};
const TableTwo = () => {
    const [data, setData] = useState(tableData);
    return (
        <View style={styles.container}>
            <Table borderStyle={{ borderWidth: 4, borderColor: 'teal' }}>
                <Row data={data.tableHead} style={styles.head} textStyle={styles.headText} />
                <Rows data={data.tableData} textStyle={styles.text} />
            </Table>
        </View>
    )
}
const styles = StyleSheet.create({
    container: { flex: 1, padding: 10, justifyContent: 'center', backgroundColor: '#fff' },
    head: { height: 44, backgroundColor: 'darkblue' },
    headText: { fontSize: 20, fontWeight: 'bold' , textAlign: 'center', color: 'white' },
    text: { margin: 6, fontSize: 16, fontWeight: 'bold' , textAlign: 'center' },
})
export default TableTwo

In the Android emulator, you can see this attractive table.

As in the previous example, we'll also add some more text in one of the fields.


import React, { useState } from 'react';
import { StyleSheet, View } from 'react-native';
import { Table, Row, Rows } from 'react-native-table-component';
const tableData = {
    tableHead: ['Crypto Name', 'Value', 'Mkt Cap'],
    tableData: [
        ['Bitcoin (₿) is a decentralized digital currency, without a central bank or single administrator,
that can be sent from user to user on the peer-to-peer bitcoin network without the need for intermediaries.',
'$44,331', '$839,702,328,904'],
        ['Ethereum', '$3000.9', '$359,080,563,225'],
        ['Tether', '$1', '$79,470,820,738'],
        ['BNB', '$413.44', '$69,446,144,361'],
        ['USD Coin', '$1', '$53,633,260,549'],
    ],
};
const TableTwo = () => {
    const [data, setData] = useState(tableData);
    return (
        <View style={styles.container}>
            <Table borderStyle={{ borderWidth: 4, borderColor: 'teal' }}>
                <Row data={data.tableHead} style={styles.head} textStyle={styles.headText} />
                <Rows data={data.tableData} textStyle={styles.text} />
            </Table>
        </View>
    )
}
const styles = StyleSheet.create({
    container: { flex: 1, padding: 10, justifyContent: 'center', backgroundColor: '#fff' },
    head: { height: 44, backgroundColor: 'darkblue' },
    headText: { fontSize: 20, fontWeight: 'bold' , textAlign: 'center', color: 'white' },
    text: { margin: 6, fontSize: 16, fontWeight: 'bold' , textAlign: 'center' },
})
export default TableTwo

From the emulator, you can see that the element adjusted it automatically.

Scrollable Table Using Library

Now, if the above table has more columns, they'll go out of view. To fix this, we can add ScrollView from React Native. We'll add horizontal scrolling to it. We can also achieve a vertical scrolling with ScrollView, if more rows are there. So, create a file called TableThree.js inside the components folder.

First, we'll import the required libraries and components. In the tableDataSample, we have tableHead, tableData, and widthArr. The widthArr contains the width of each column.


import React from 'react';
import { StyleSheet, View, ScrollView } from 'react-native';
import { Table, Row } from 'react-native-table-component';
const tableDataSample = {
    tableHead: [ 'Crypto Name', 'Crypto Symbol', 'Current Value', 'Movement', 'Mkt Cap', 'Description' ],
    widthArr: [140, 160, 180, 120, 220, 540 ],
    tableData: [['Bitcoin', 'BTC', '$44,331', '$2.70', '$839,702,328,904', 'Bitcoin (₿) is a decentralized
digital currency, without a central bank or single administrator'],
    ['Ethereum', 'ETH', '$3000.9', '$3.49', '$359,080,563,225', 'Ethereum is a decentralized, open-source
blockchain with smart contract functionality. '],
    ['Tether', 'USDT', '$1', '$0.03', '$79,470,820,738', 'Tether (often called by its symbol USDT) is a
cryptocurrency that is hosted on the Ethereum and Bitcoin blockchains, among others.'],
    ['BNB', 'BNB', '$413.44', '$4.68', '$69,446,144,361', 'Binance is a cryptocurrency exchange which is
the largest exchange in the world in terms of daily trading volume of cryptocurrencies'],
    ['USD Coin', 'USDC', '$1', '$0.01', '$53,633,260,549', 'USD Coin (USDC) is a digital stablecoin that
is pegged to the United States dollar. USD Coin is managed by a consortium called Centre'],
    ]
};

Next, we have a state variable of data inside the functional component. Here, after the View, we have a ScrollView with horizontal scrolling enabled.

Now, we have a table that shows the header only. After that, we have another ScrollView through which we can scroll horizontally and vertically. Here, we're mapping through the data rows and showing them all.


const TableThree = () => {
    const [data, setData] = React.useState(tableDataSample);
    return (
        <View style={styles.container}>
            <ScrollView horizontal={true}>
                <View>
                    <Table borderStyle={{ borderWidth: 1, borderColor: 'purple' }}>
                        <Row
                            data={data.tableHead}
                            widthArr={data.widthArr}
                            style={styles.head}
                            textStyle={styles.headText}
                        />
                    </Table>
                    <ScrollView>
                        <Table borderStyle={{ borderWidth: 1, borderColor: 'purple' }}>
                            {data.tableData.map((rowData, index) => (
                                <Row
                                    key={index}
                                    data={rowData}
                                    widthArr={data.widthArr}
                                    style={styles.rowSection}
                                    textStyle={styles.text}
                                />
                            ))}
                        </Table>
                    </ScrollView>
                </View>
            </ScrollView>
        </View>
    );
}

Next, we'll add simple styles for our table.


const styles = StyleSheet.create({
    container: { flex: 1, padding: 16, paddingTop: 30, backgroundColor: '#fff' },
    rowSection: { height: 60, backgroundColor: '#E7E6E1' },
    head: { height: 44, backgroundColor: 'darkblue' },
    headText: { fontSize: 20, fontWeight: 'bold' , textAlign: 'center', color: 'white' },
    text: { margin: 6, fontSize: 16, fontWeight: 'bold' , textAlign: 'center' },
});
export default TableThree

Now, you'll see a modified table in the emulator.

It's possible to scroll vertically in it to see all columns.

Next, we've added more rows in our tableData.

And now it's possible to scroll vertically also.

Simple Table Using React Native Paper

We'll now see another library to create tables. This library is called React Native Paper, and we can create simple tables using it.

So, in the project directory give this command.


npm i react-native-paper

Now, create a file called TableFour.js inside the components folder. We'll add the content you see below. Here, we're using a lot of in-built components. There aren't many styling options available. But here, we're providing background colors for the heads and rows.


import React from 'react';
import { View, StyleSheet } from 'react-native';
import { DataTable } from 'react-native-paper';
const TableFour = () => {
    return (
        <View style={styles.container}>
            <DataTable>
                <DataTable.Header style={styles.head}>
                    <DataTable.Title>Name</DataTable.Title>
                    <DataTable.Title>Email</DataTable.Title>
                    <DataTable.Title numeric>Age</DataTable.Title>
                </DataTable.Header>
                <DataTable.Row style={styles.row}>
                    <DataTable.Cell>Nabendu</DataTable.Cell>
                    <DataTable.Cell>nabendu@gmail.com</DataTable.Cell>
                    <DataTable.Cell numeric>33</DataTable.Cell>
                </DataTable.Row>
                <DataTable.Row style={styles.row}>
                    <DataTable.Cell>Shikha</DataTable.Cell>
                    <DataTable.Cell>shikha@gmail.com</DataTable.Cell>
                    <DataTable.Cell numeric>105</DataTable.Cell>
                </DataTable.Row>
                <DataTable.Row style={styles.row}>
                    <DataTable.Cell>Hriday</DataTable.Cell>
                    <DataTable.Cell>hriday@gmail.com</DataTable.Cell>
                    <DataTable.Cell numeric>23</DataTable.Cell>
                </DataTable.Row>
            </DataTable>
        </View>
    )
}
const styles = StyleSheet.create({
    container: { flex: 1, paddingTop: 100, paddingHorizontal: 30,backgroundColor: '#fff' },
    head: { height: 44, backgroundColor: 'lavender' },
    row: { height: 40, backgroundColor: 'lightyellow' },
})
export default TableFour

With this, we'll see a simple table in the emulator.

The APK

In the next section, we'll test our app through Waldo. This will require the APK file. We'll be following instructions from this official document to create the APK file.

We need to generate a signing key. For this, we'll use the keytool command. This tool is run from the JDK directory of the computer. So, we have to find it in Mac. Here, we're using the /usr/libexec/java_home command.

Note that we're using MacOS and the steps are a bit different than Windows. It's mentioned in the official doc, so if you're using Windows, you need to refer it.

After that, change to the directory and run the below keytool command with a sudo command. The sudo command is only required in Mac because we need an admin password in Mac for generating a key.


sudo keytool -genkey -v -keystore table-key.keystore -alias table-key-alias -keyalg RSA -keysize 2048 -validity 10000

It'll ask us some questions. You can give any answer. But you need to remember the password.

After that, copy the generated keystore file to the apps android/app folder. For us, it's inside the RNtables app, created earlier.

Now, in the gradle.properties file, which is inside the android folder, add the information below. You password should be the one you entered earlier.


MYAPP_UPLOAD_STORE_FILE=table-key.keystore
MYAPP_UPLOAD_KEY_ALIAS=table-key-alias
MYAPP_UPLOAD_STORE_PASSWORD=*********
MYAPP_UPLOAD_KEY_PASSWORD=***********

Now, open the build.gradle file. It's inside the android/app folder. Add the line below.


        release {
            if (project.hasProperty('MYAPP_UPLOAD_STORE_FILE')) {
                storeFile file(MYAPP_UPLOAD_STORE_FILE)
                storePassword MYAPP_UPLOAD_STORE_PASSWORD
                keyAlias MYAPP_UPLOAD_KEY_ALIAS
                keyPassword MYAPP_UPLOAD_KEY_PASSWORD
            }
        }

Finally, we need to run the command bash gradlew bundleRelease from the android folder.

If the above command is successful, we'll get this message.

Now, the APK file will generate in the android\app\build\outputs\apk\debug folder.

App Testing

Now instead of writing Jest test cases, we'll use Waldo's no-code tool. We need to upload the APK file that we've just created.

But first, we need to create a free Waldo account using a business email. Personal email accounts, such as Gmail, aren't allowed.

Next, to upload the APK file, click the Upload a new build button. After that, click the Select your .apk file button. It'll allow you to open the explorer and select the APK file. This will take two to three minutes to upload. We'll also get the verification done for the APK file.

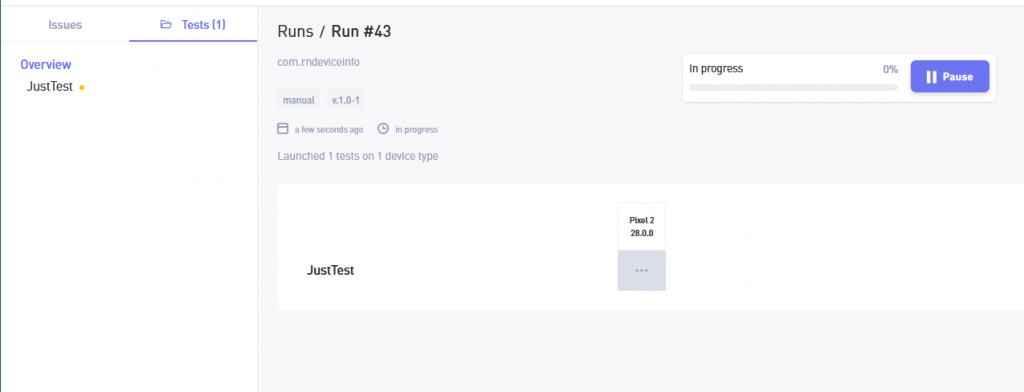
Next, click on this build to proceed with testing.

We just need to interact with our app, to test it. After interacting, click the Save test button. It'll run the automated test on your app.

Conclusion

In this post, we've gone over different ways to create tables. First, you learned to create tables without any library. After that, you learned to create tables using react-native-table-component.

You also learned to create scrollable tables using react-native-table-component. Finally, you learned to create simple tables using react-native-paper.

You also learned to create APK files in React Native, an Android project. After that, you tested the APK file using the awesome tool of Waldo.

If you're looking for an easy, no-code way to test your applications, give Waldo a try for free.

Automated E2E tests for your mobile app

Waldo provides the best-in-class runtime for all your mobile testing needs.
Get true E2E testing in minutes, not months.

Reproduce, capture, and share bugs fast!

Waldo Sessions helps mobile teams reproduce bugs, while compiling detailed bug reports in real time.