


.jpeg)
When providing feature-rich applications for your users, it's essential to ensure that your features are elegant, efficient, and compliant with the services they depend on. One such feature is Google Maps integration. In this article, we will explore how to implement a Google Maps view in Flutter.
To achieve this, we'll first create a simple Flutter app with the scaffolding feature from Visual Studio Code. Then we'll configure and implement a simple Google Maps view that you can display directly in the app.
By the end of this article, you should have a basic implementation of the Google Maps view in a functioning Flutter app running on an iPhone emulator. With this, you can then make whatever adjustments and modifications you need for real-world projects.
Note that this article is for Flutter developers. If you have little experience in Flutter and Dart, we recommend that you spend a few minutes exploring Flutter development resources. Otherwise, you might find the information here a bit challenging to follow.
All good? Alright.
.png)
Flutter Hands On
In order to properly show you how to use the Google Maps view in Flutter, it's best if you write some code now that you can use later. This way, you can more easily grasp the reasoning behind each line, and as a bonus, you'll end up with a neat project that includes the implementation.
The first step is, of course, to create a project. If you already know how to create a Flutter project, you can skip this section and jump to the API setup.
We are not going to go too in-depth in this step given that we have already demonstrated how to create a basic boilerplate project in our other Flutter articles, but here's a brief refresher.
First, go to the Flutter.dev website install section here and download the package for your operating system. In our case, we downloaded the macOS install package.
Once you have done this, extract the file and keep the extracted folder in a safe directory where it can reside for the time being. We like to keep things tidy, so we set it on the /documents/development/environments/flutter directory.
Next, open a terminal window, or bash, whatever you prefer using, and navigate to the directory where you placed the Flutter directory. Then type the following command:
Note that this command only sets your PATH variable for the current terminal window. To permanently add Flutter to your path, see Update your path.
.png)
Mobile development
Depending on whether you have XCode and Android Studio or not, you might be able to emulate applications on these devices. However, you can always run your applications on the web without installing anything else.
To ensure everything is in order, run the following command, which will tell you what other dependencies you might be missing:
Finally, you will want to have an IDE or editor to create and work with your Flutter projects, debug your code, and run your application. In our case, we will be using VS Code because it offers excellent integration for all these requirements and is fast, lightweight, and free.
All you have to do is install the VS Code app by downloading it from here, look for the official Flutter extension, and install it.
You can find an extensive guide for more information on this process here.
Now, run your code by pressing F5 and see the fruit of your labor.
Great! Let's move on.
Setting up Google Maps API
This process is pretty standard, and I will take some notes from the Google developer's website, which you can find here.
Start by going to the Google Developers Console and creating a project. You will need to do this to integrate Google Maps into your app successfully.
Click the API Project button at the top left, then click New Project. Next, name the project and click Create.
Once the project is created, click the same API Project button and select the project you just created.
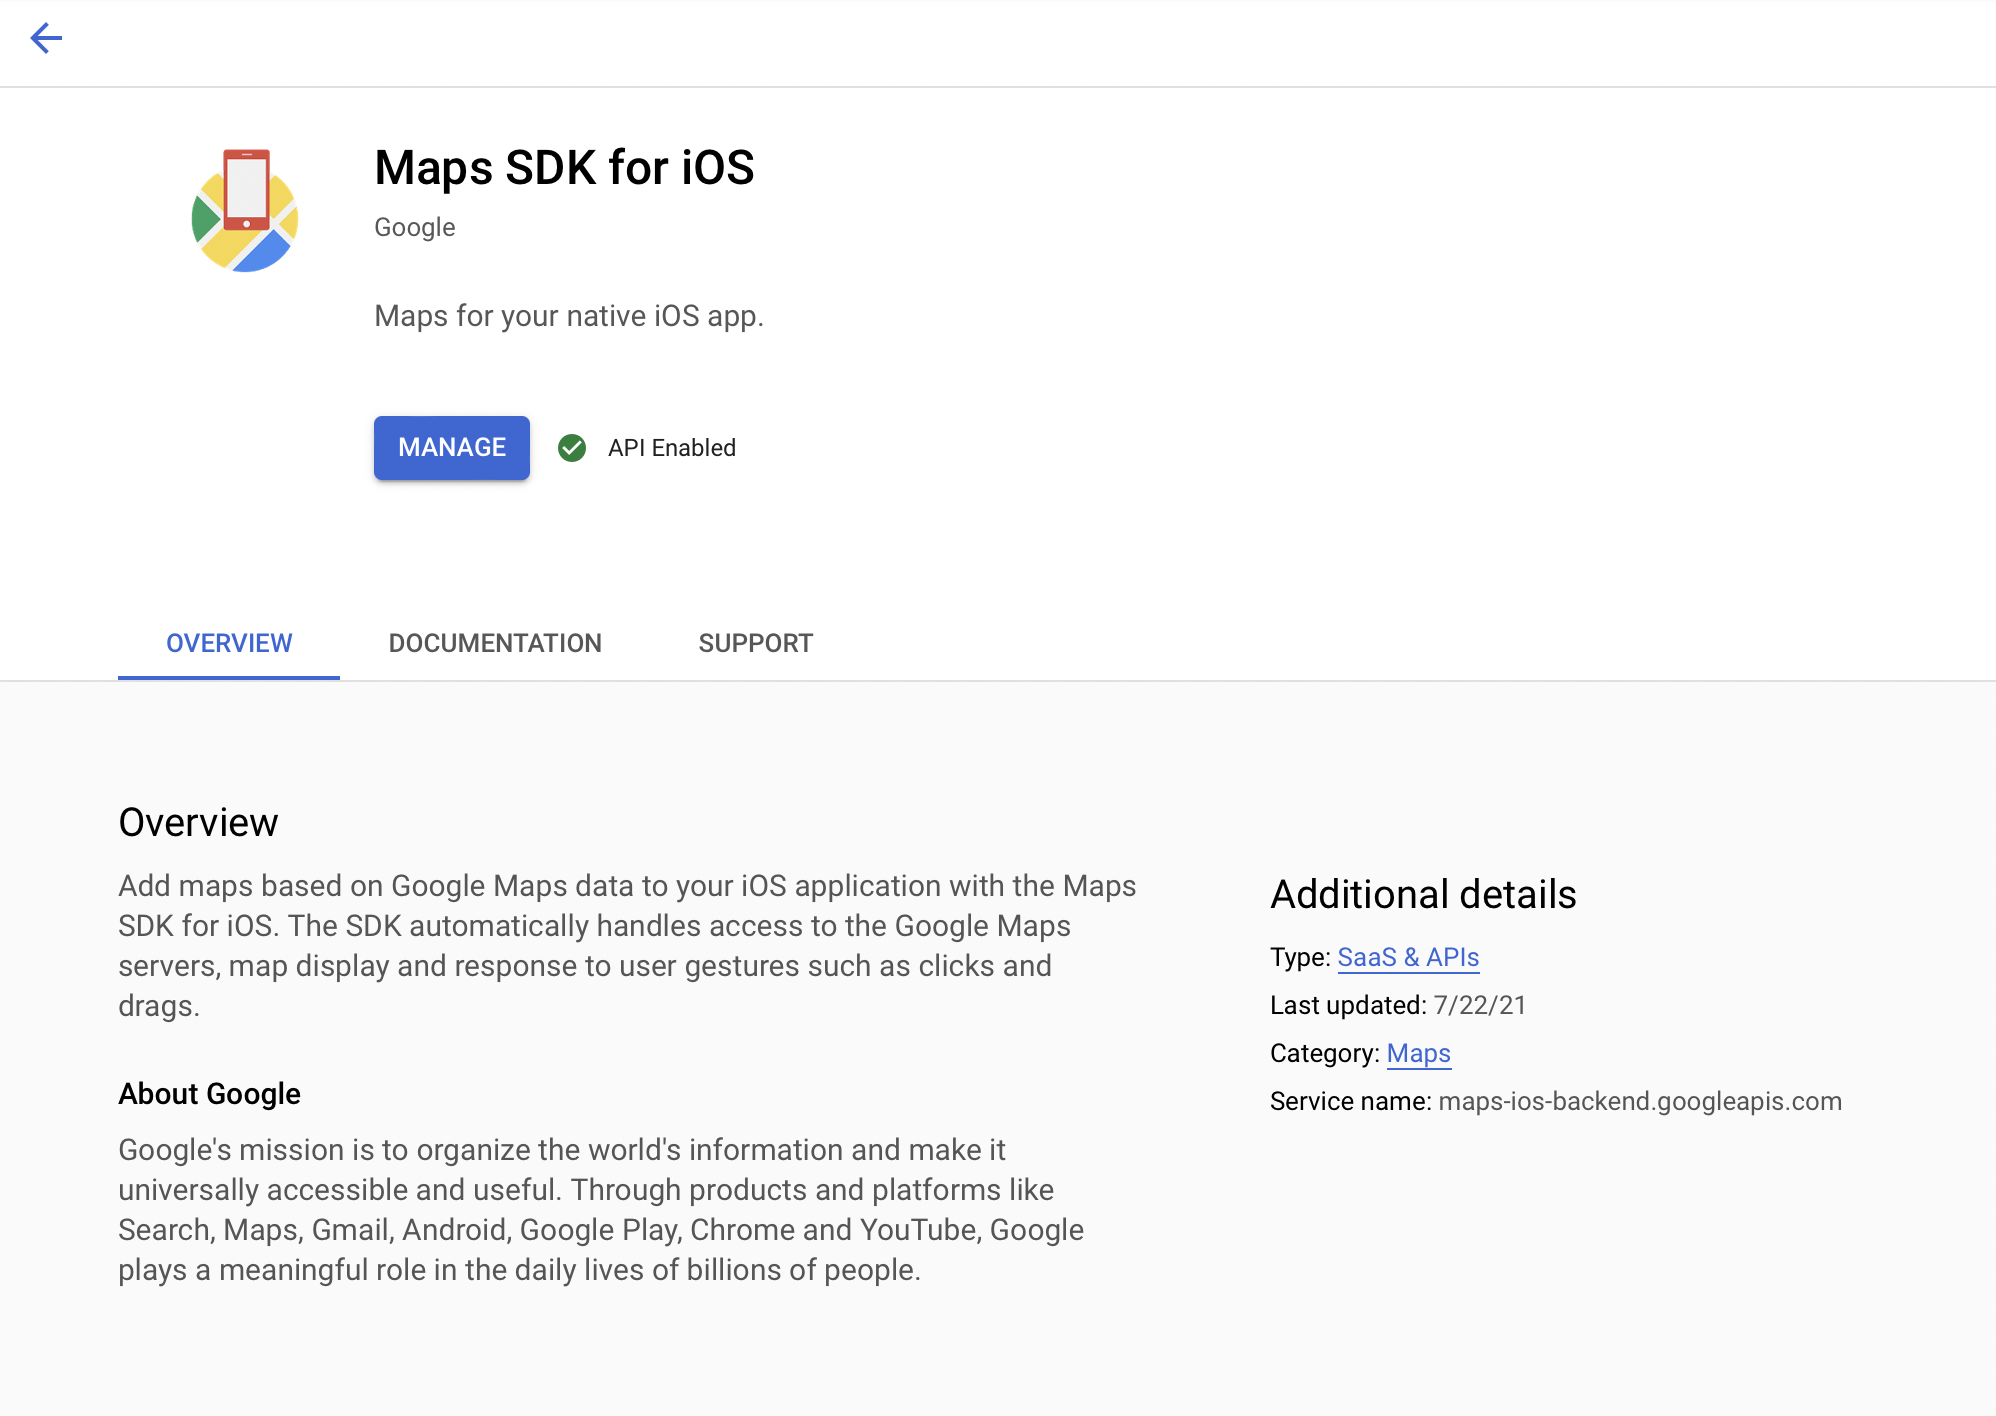
Now you have to enable the Maps API SDK for iOS/Android.
- Click the Library menu.
- Search for "Maps SDK."
- Click "Maps SDK for iOS/Android" and click "Enable."
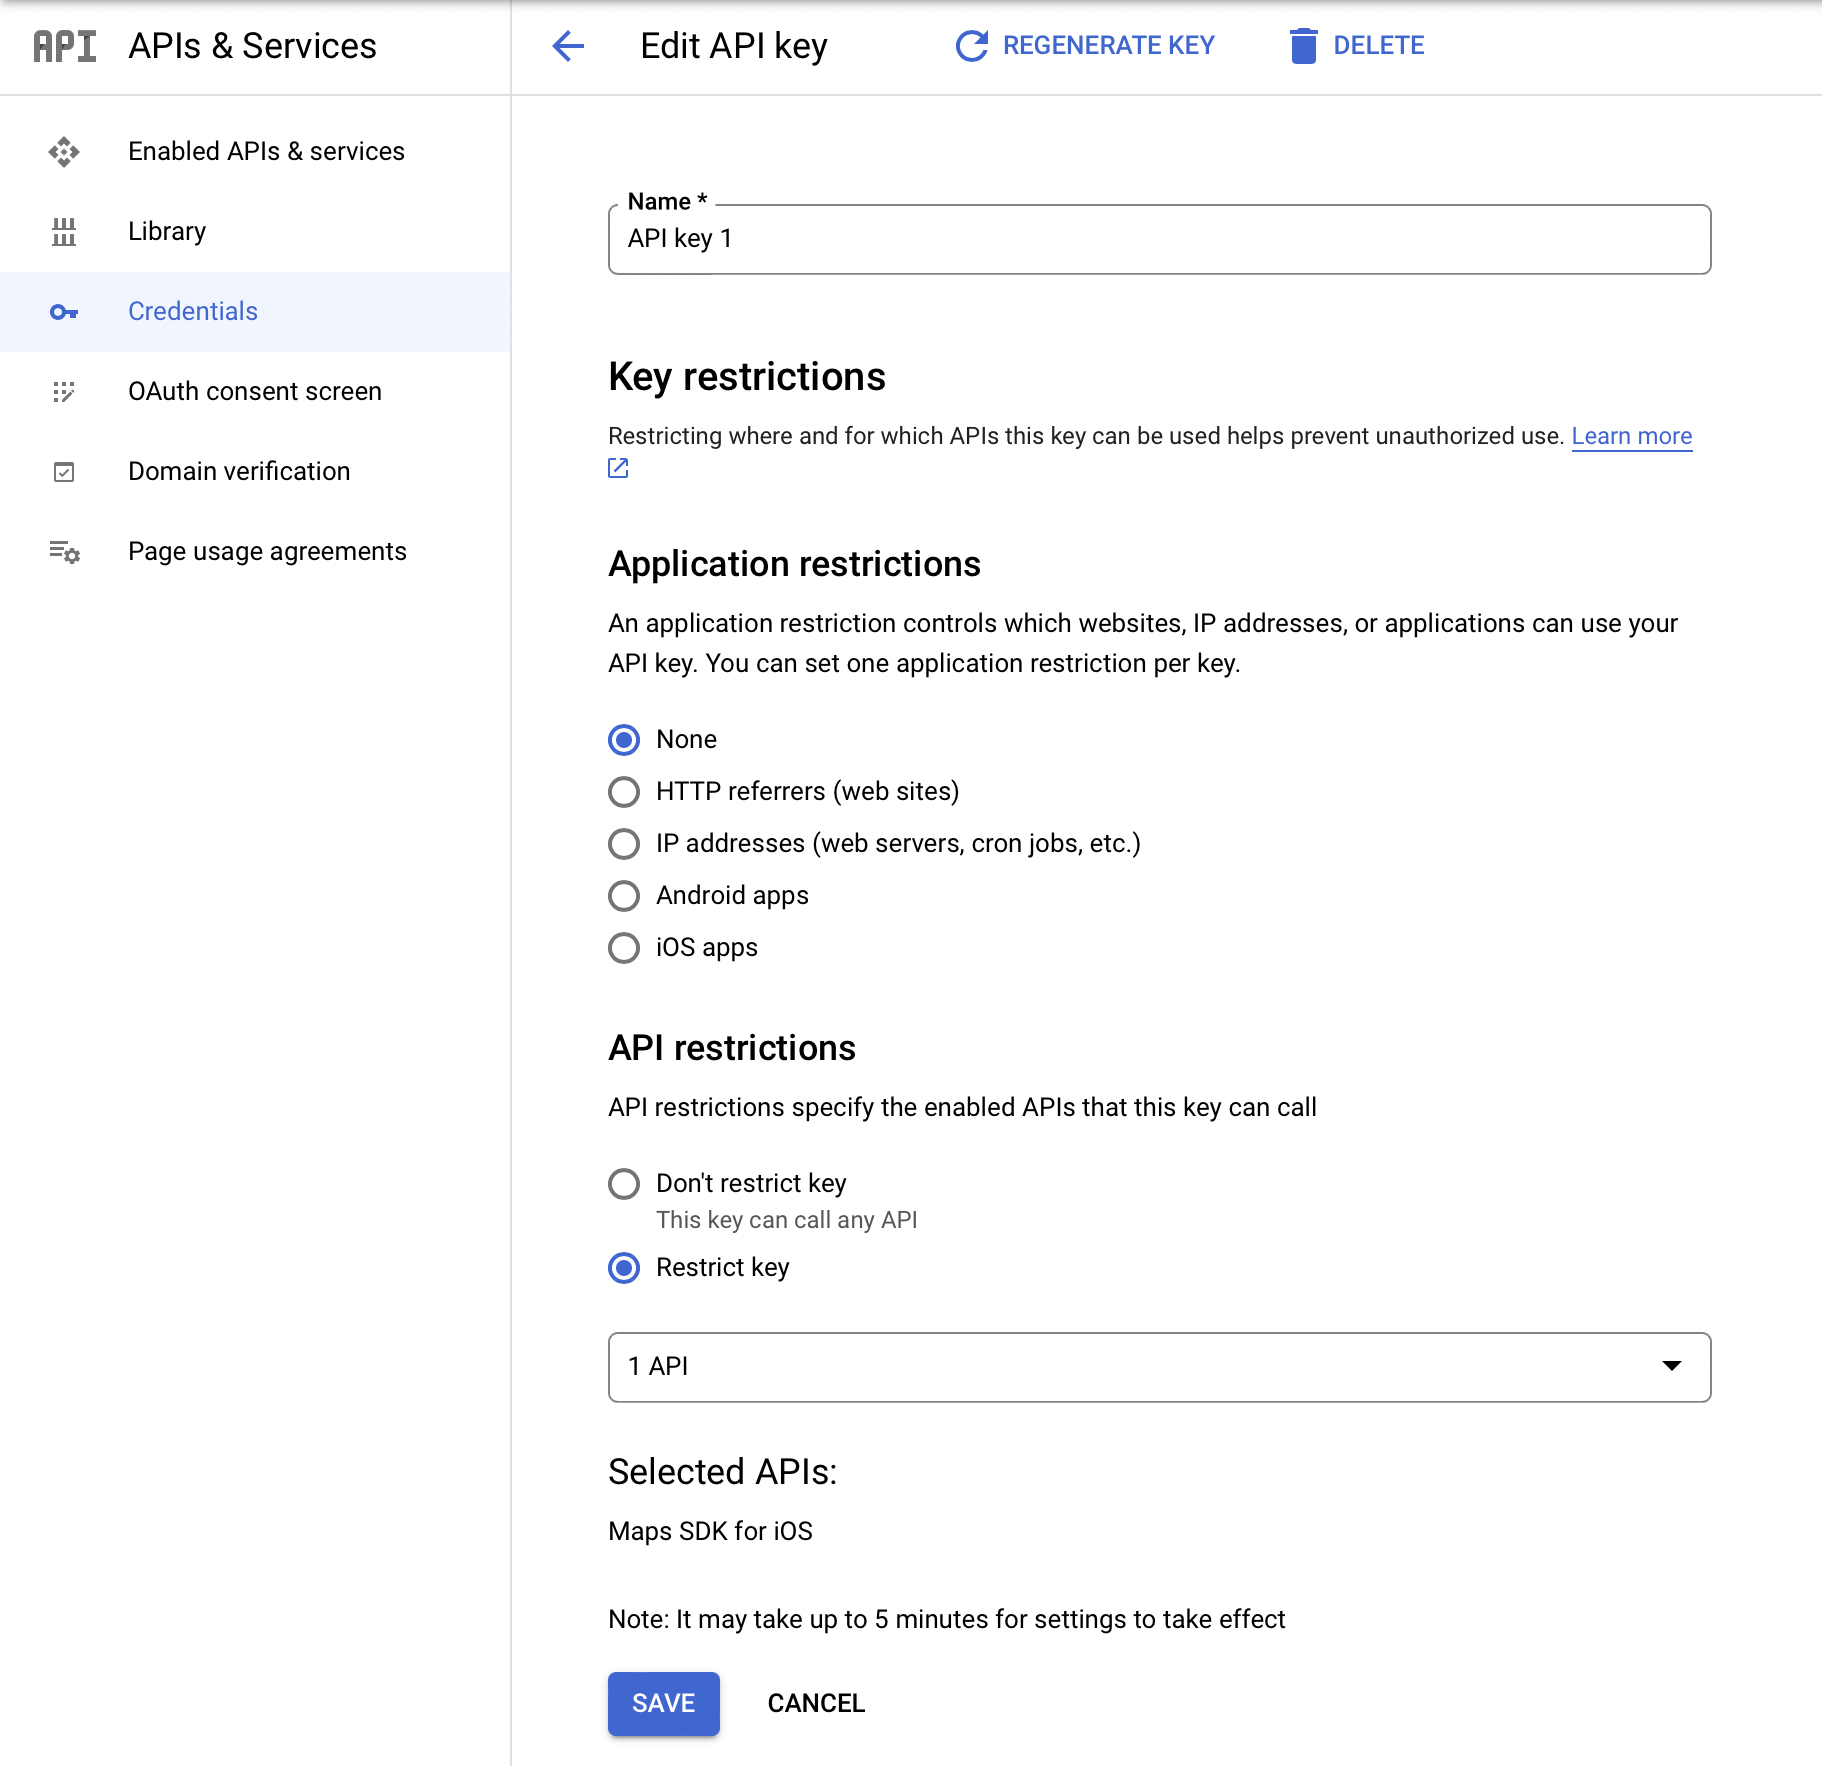
Next, generate the API keys.
- Click the Credentials menu on the left.
- Click the CREATE CREDENTIALS button.
- Select the API key option.
Now that you have the API key, don't forget to set up the appropriate restrictions to protect yourself in case the key falls into the wrong hands. This is especially important for projects with large userbases and a high quota that use Google Cloud services.
There are two types of restrictions. Application restrictions enable you to define which type of app should have access to this key (i.e., Android or iOS), and API restrictions allow you to select which services are accessible using this key.
And that's it.
Implementing a Google Maps View in a Flutter App
Alright, so to implement the Google Maps view in your Flutter app, there are a few things that you need to do.
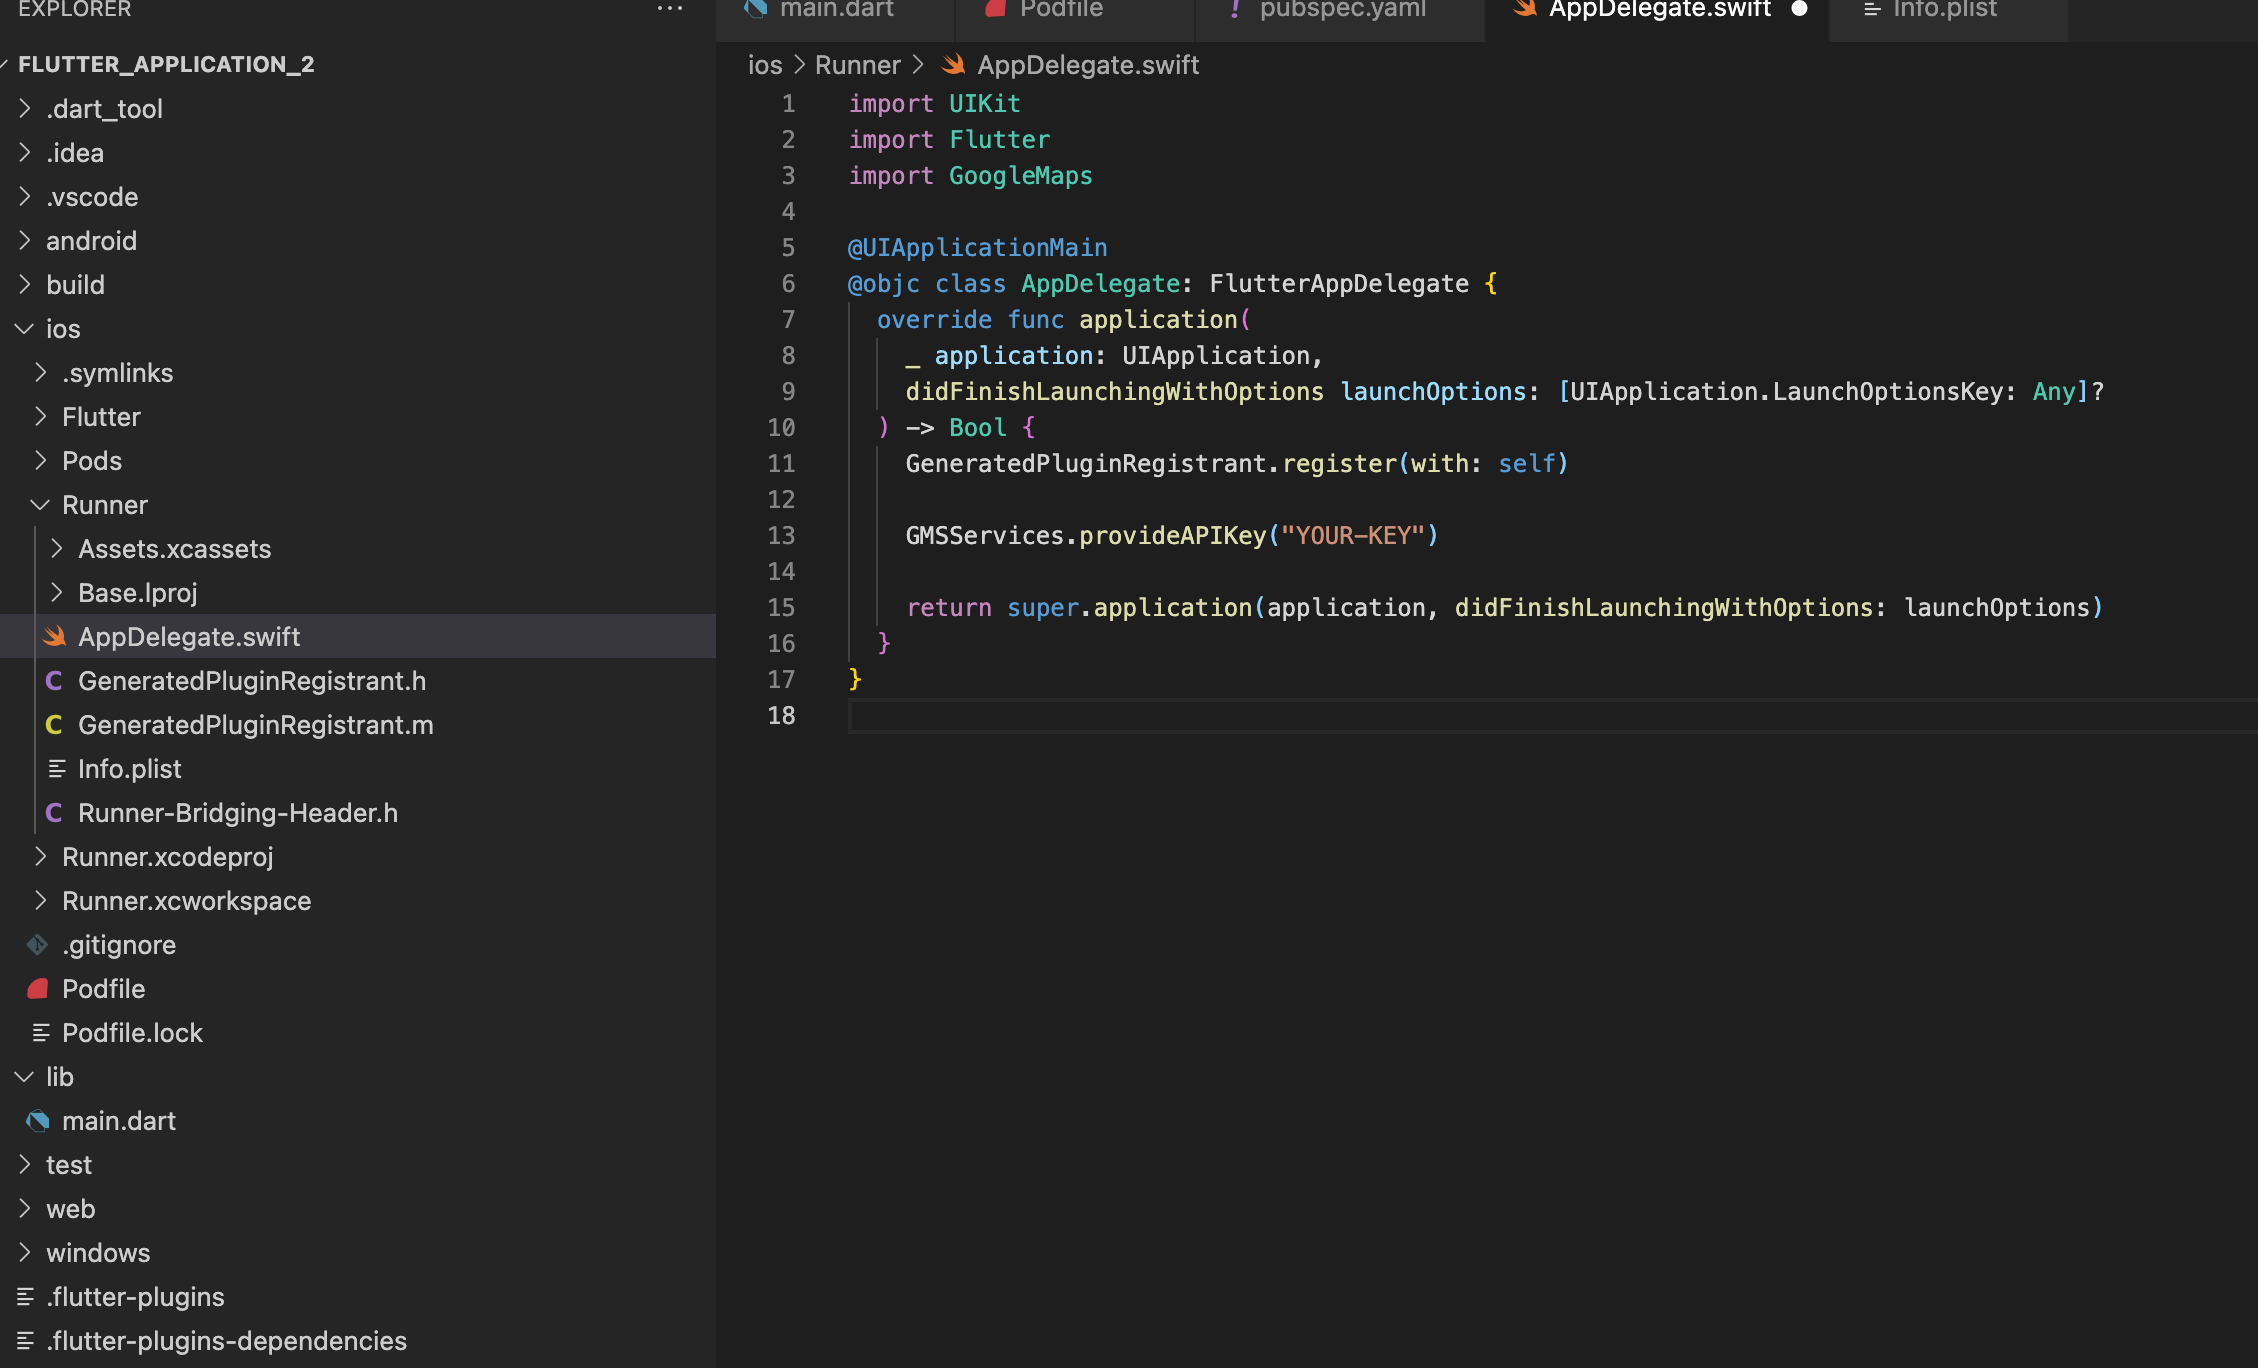
First, specify your API key in the application delegate ios/Runner/AppDelegate.swift file. Don't worry if it says that the key should be hidden.
Next, add "import GoogleMaps" at the top of this file.
Now, add the following properties to the info.plist file in the ios/ directory.
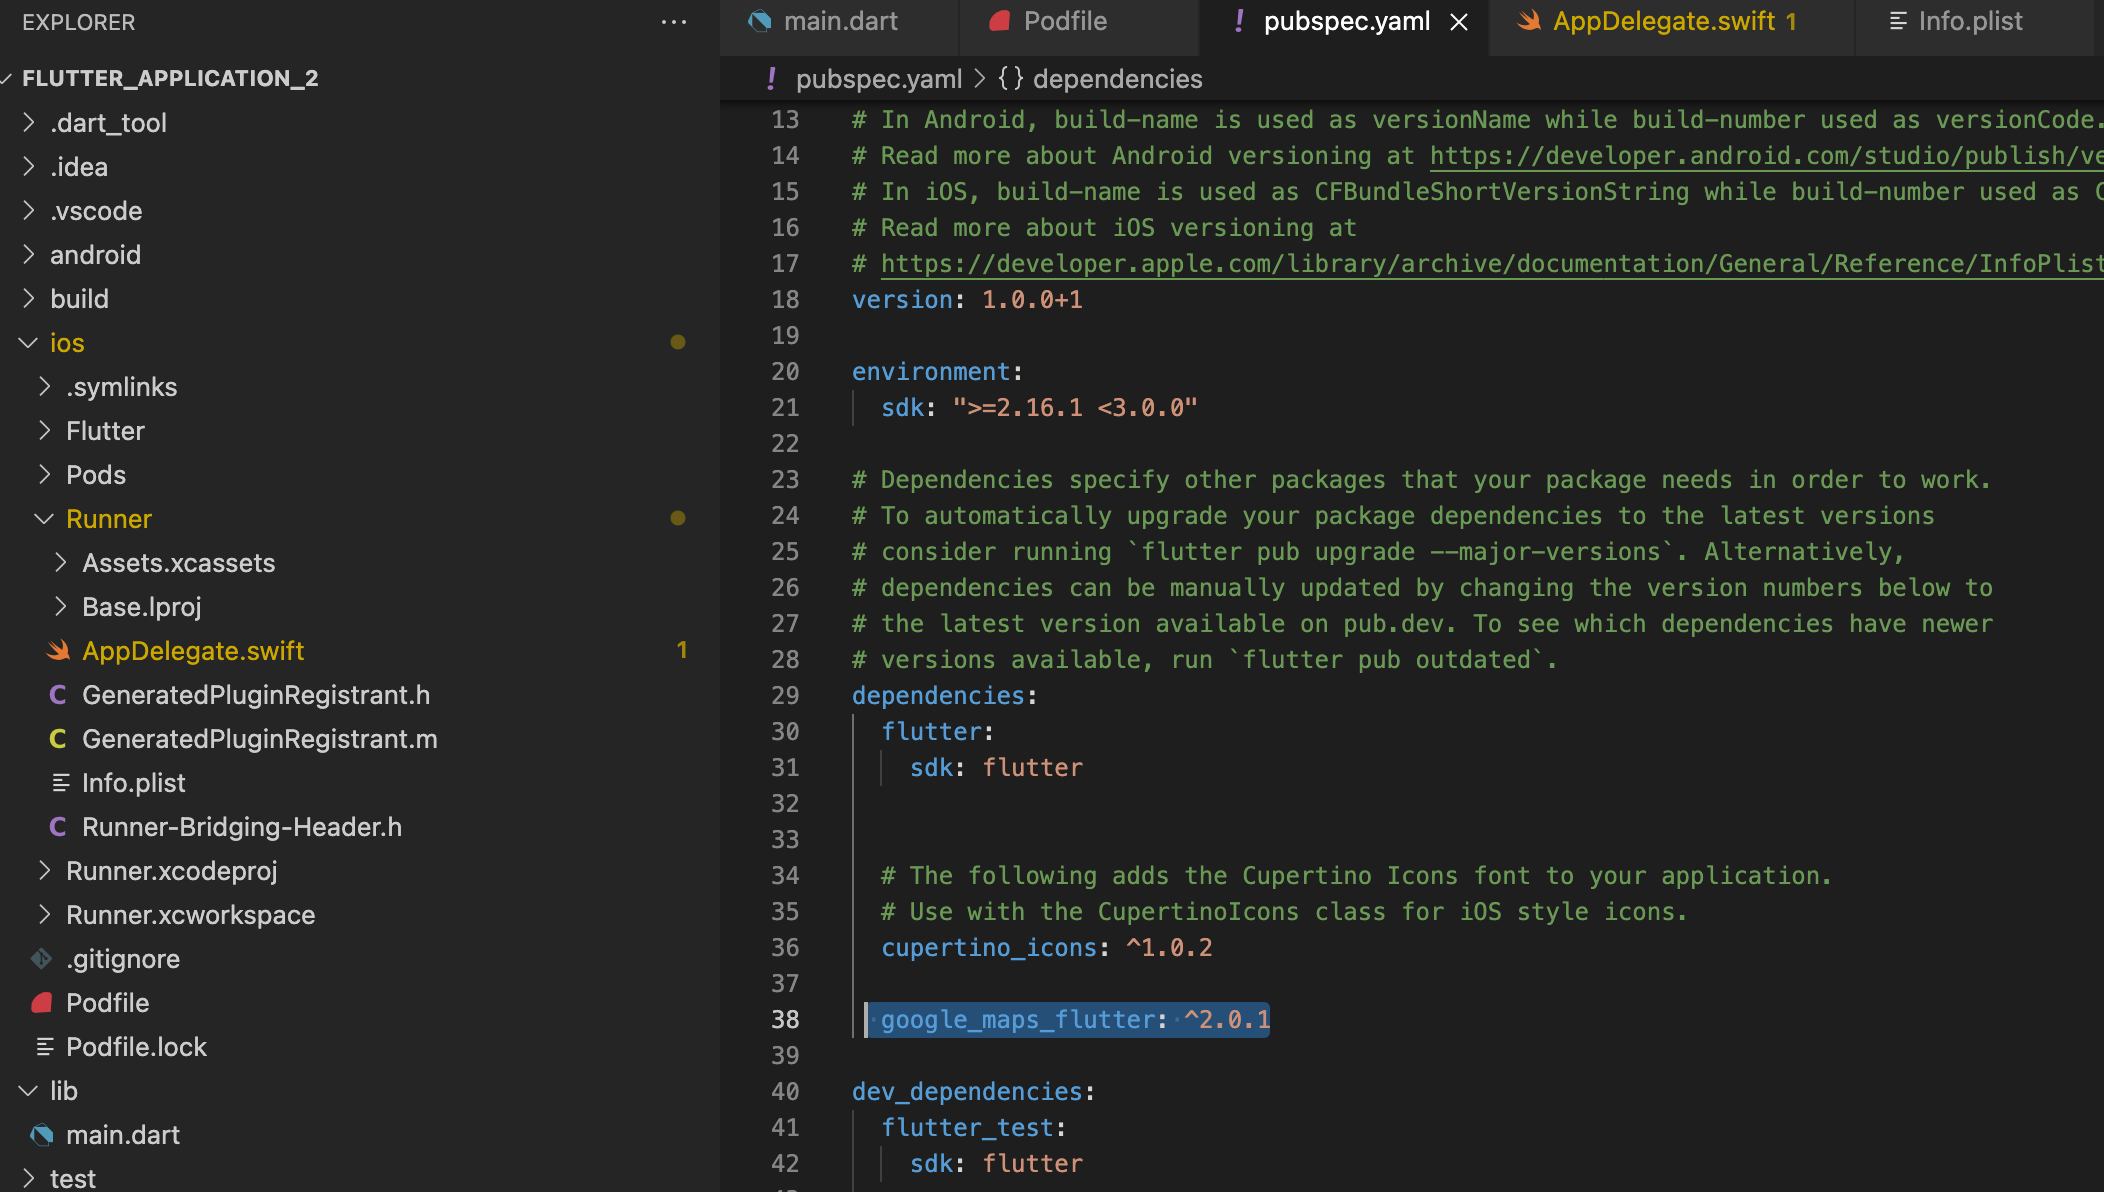
Then add the google_maps_flutter plugin to the pubspec.yaml file located in the root folder of your project.
Now you can go back to the main.dart file and add the "import 'package:google_maps_flutter/google_maps_flutter.dart';" directive at the top.
Then add the following properties to the app state class:
These properties will hold a reference to the map element and its state.
Finally, change the body of your main widget so that it includes the following:
Your code should look something what's pictured below.

If you run your code, it will result in the following:
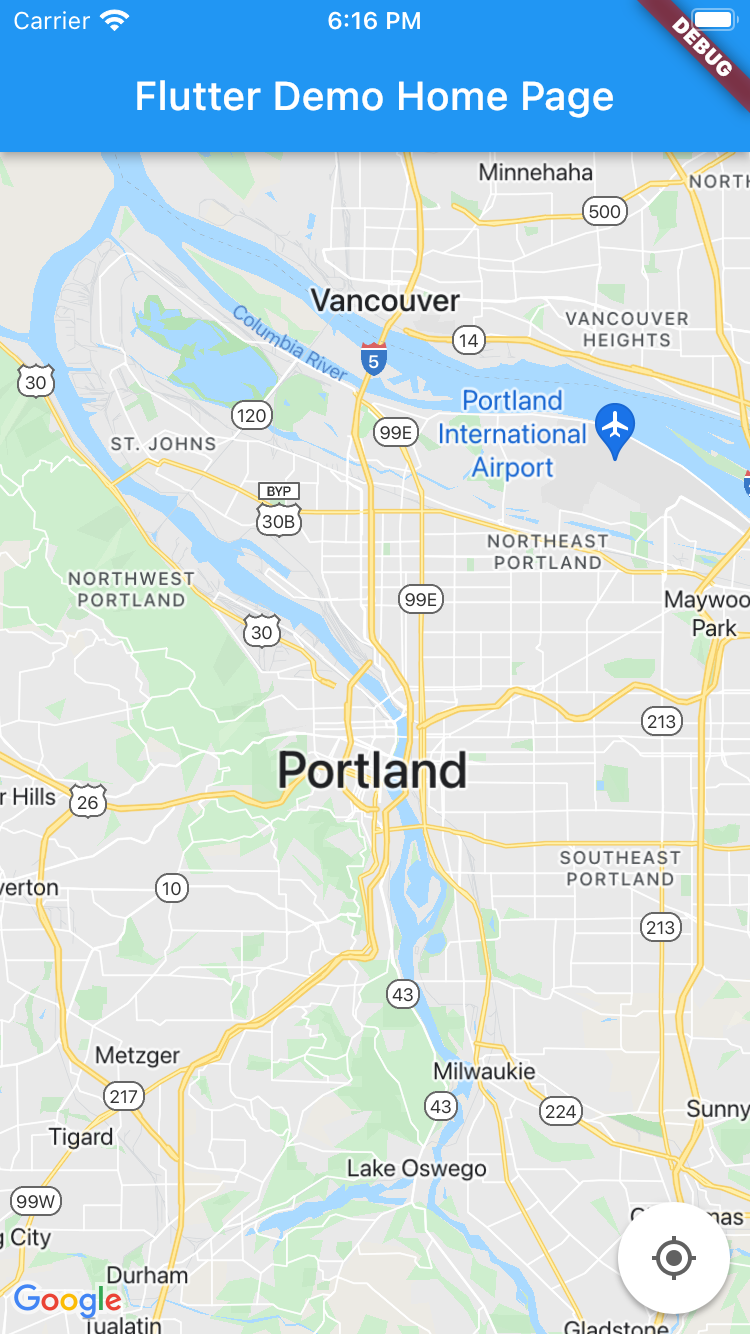
Pretty great, right?
Customizing the Google Maps View
To customize the Google Maps view, all you have to do is access the properties available in the widget builder.
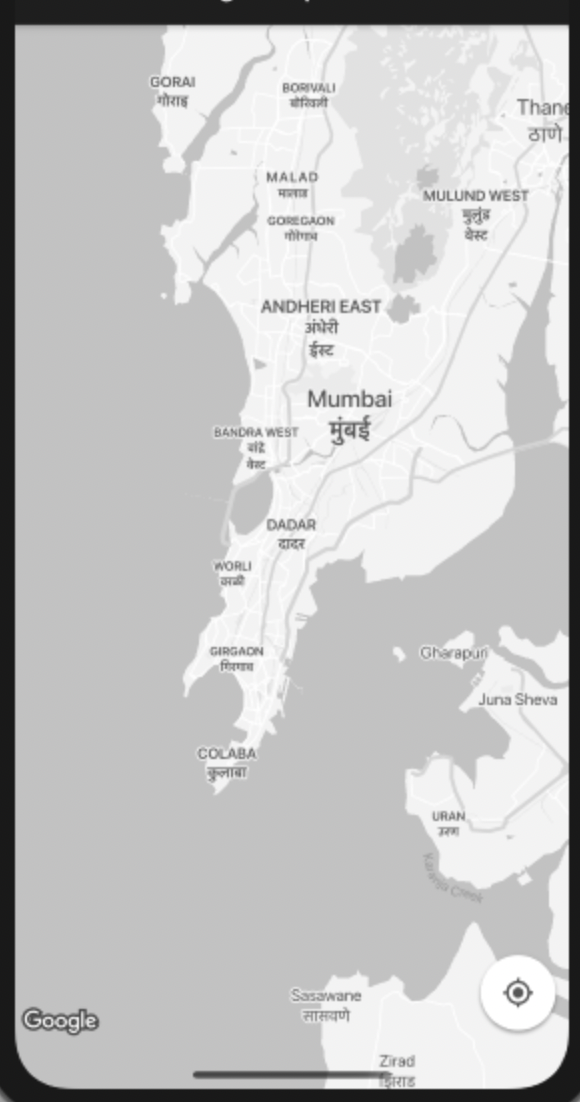
The Google Maps view widget offers the option of changing the map style, adding markers, and enabling the My Location feature, among many others. However, if you want a more global and robust way to control the way your map displays, you can add a configuration JSON file in an asset folder at the root of your project and load that file on run time. You can acquire the configuration settings from the 'mapstyle' Google website here.
Once you have a configuration you like, download the JSON file and add it to your assets folder.
Finally, to load the configurations, you must modify the onMapCreated method and make it asynchronous. Then load the file and provide it to the map controller instance.
Now you can reload the project, and voila!
Great work!
Moving On
Creating sophisticated and elegant solutions for your applications does not have to be complicated or overwhelming. However, sometimes ensuring that code is bug-free and secure can be a real hassle, especially when you are part of a small team running a big project.
That is why we recommend that you consider our behavioral replay engine at Waldo. Our solution can handle your app's dynamic screen, variations in load time, and other common flakiness issues to provide your team with real-time, reliable insights. You can check it out here
Automated E2E tests for your mobile app
Get true E2E testing in minutes, not months.


