Waldo sessions now support scripting! – Learn more
App Development

Flutter Firebase Auth: A Step-by-Step Guide

Juan Reyes
Juan Reyes
Flutter Firebase Auth: A Step-by-Step Guide
April 12, 2022
8
min read

In this article, we'll implement a robust authentication mechanism into a Flutter app with Firebase.

First, I'll explain what Firebase and Firebase Authentication are. Then we'll go through the Firebase Authentication setup process in the Firebase console. Next, we'll implement the firebase_auth Flutter plugin for integrating Firebase Authentication into your project. Finally, I'll guide you through the process of adding an authentication view with Firebase Authentication.

By the end of this article, you can expect to have a solid understanding of integrating Firebase Authentication into any project and the basics of third-party authentication solutions. Additionally, you'll have a resource to reference whenever you need to implement authentications in the future.

This article is aimed at developers with a degree of experience working with Flutter. Therefore, don't expect to find the basics of setting up a Flutter app.

If you don't have a good grasp of the technology or have not worked on it yet, please spend some time developing your skills.

Let's move on.

firebase pull quote

What Is Firebase Authentication?

Firebase is a platform for creating robust and reliable mobile and web applications. It provides tools for developers to accelerate app development with a fully managed back-end infrastructure backed by Google and used by many industry giants.

One such solution is the Firebase Authentication service. As Firebase states on its website: "Firebase Authentication aims to make building secure authentication systems easy, while improving the sign-in and onboarding experience for end users. It provides an end-to-end identity solution, supporting email and password accounts, phone auth, and Google, Twitter, Facebook, and GitHub login, and more."

This solution is a godsend for developers who want to focus on delivering fast and robust solutions to their clients since it can take months to set up your own authentication system. But it sometimes requires having a large engineering team to maintain a system with a large user base.

Configuring the Firebase Console

Alright, before we go into the code, we have to create a Firebase Application on the Firebase console website.

creating a new project

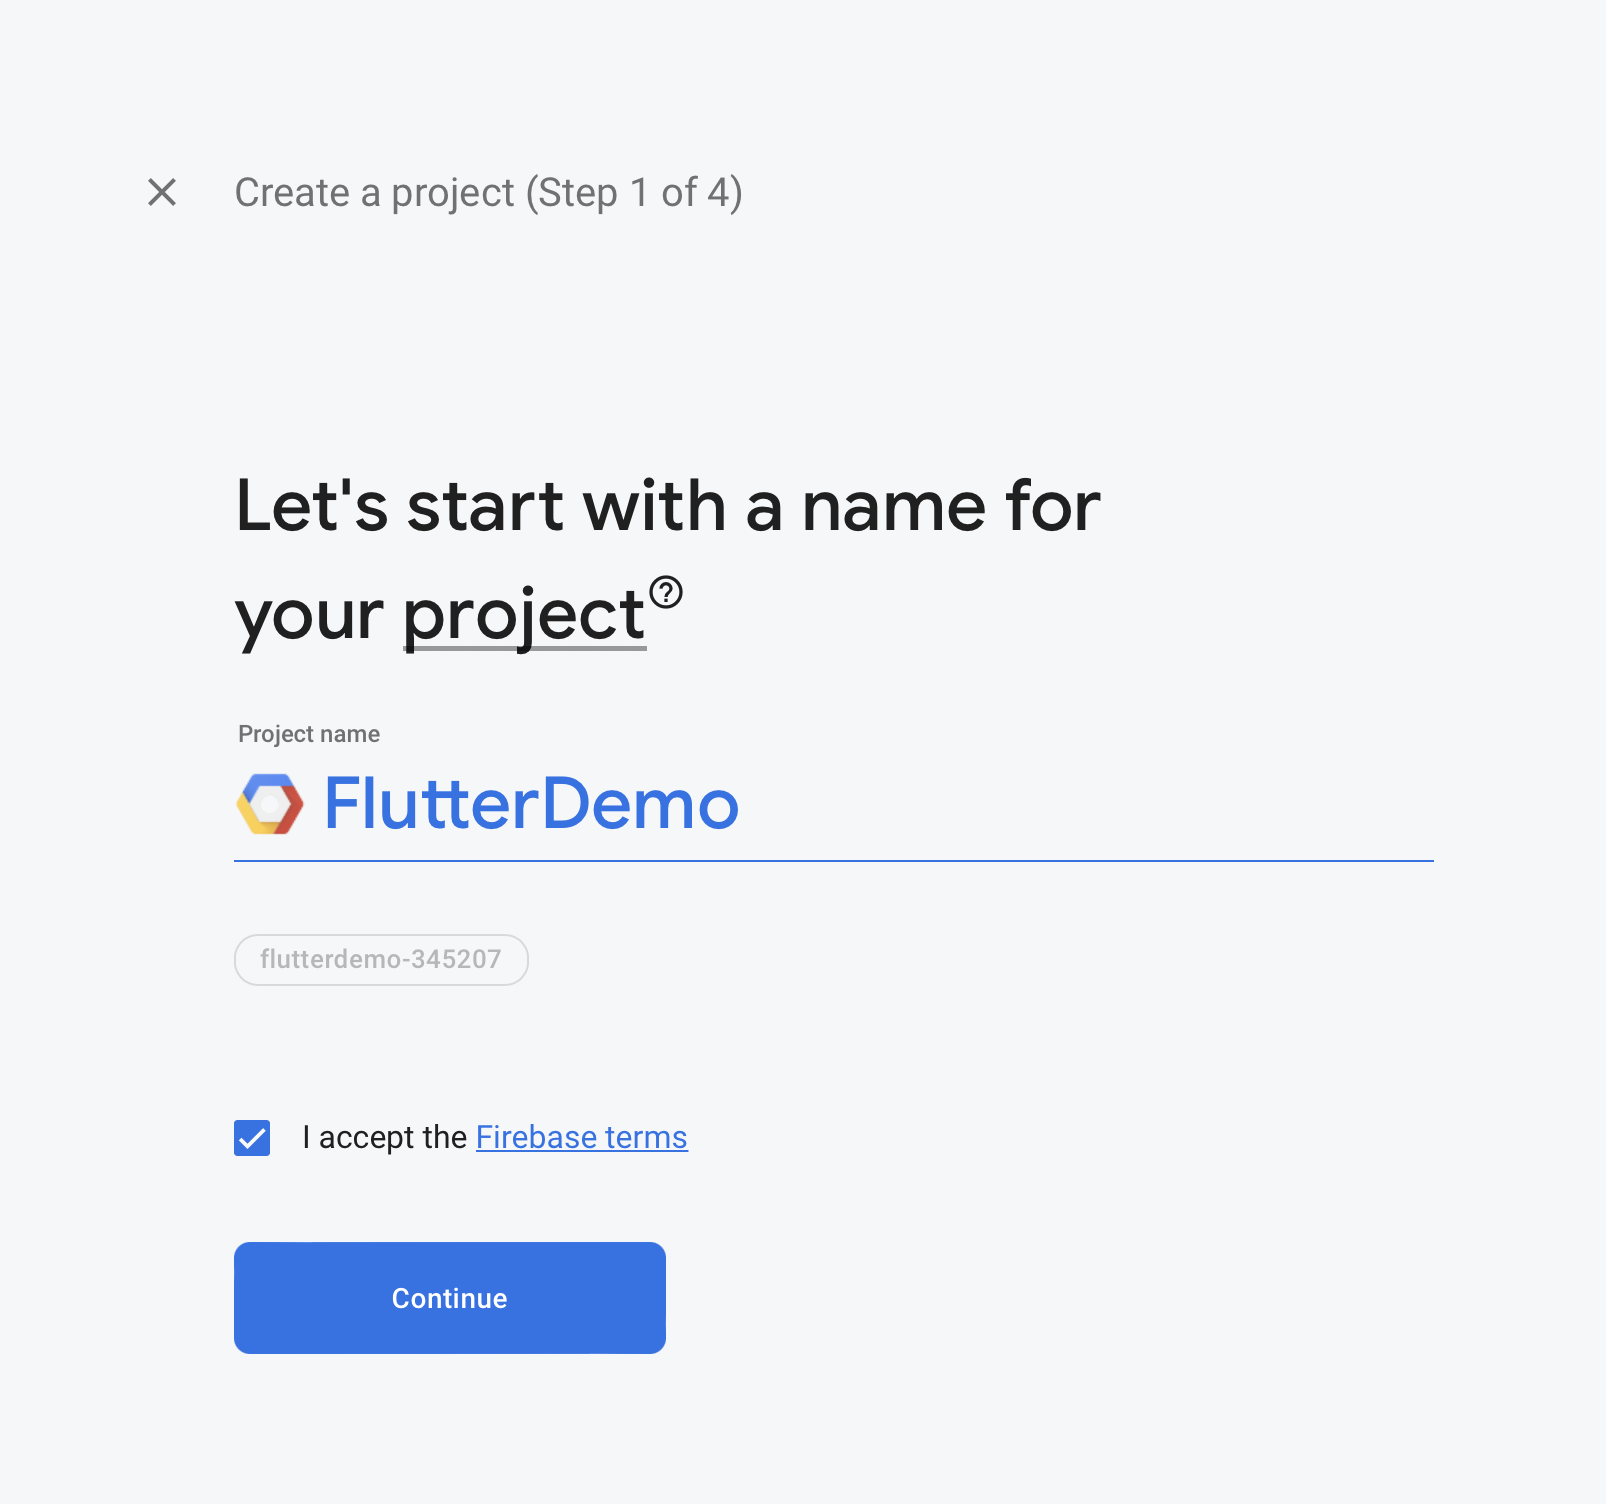
This process is pretty straightforward. All you have to do is set your project name and click next until the project is created.

project is created

Integrating Firebase in Flutter

Now that you have our application set up at the Firebase console, you can proceed to prepare a Flutter application to implement it.

You first need to make sure the firebase_core is installed in your environment before you can use any Firebase services. This plugin is responsible for connecting your application to Firebase.

You can install the plugin by running the following commands from the project root:


$ flutter pub add firebase_core
$ flutter pub add firebase_auth

After that, make sure to update the packages by running the following command:


$ flutter pub upgrade

Great.

Now, before you can use any Firebase services, FlutterFire needs to be initialized. This initialization step is asynchronous, which means you'll need to prevent any FlutterFire-related usage until the initialization is completed.

To do this, you need to install the Firebase CLI. You can do this by running the following command:


$ curl -sL https://firebase.tools | bash

Next, you need to authenticate with the Firebase console by using the following command and opening the browser with the provided link in the terminal.


$ firebase login

Then you need to make sure your shell config file contains the path to the CLI binary. In this case, we're using zsh so we can access the file with the following command:


$ nano ~/.zshrc

Now you can restart your terminal and run the following command to set up the link between the Firebase endpoint and your application:


$ flutterfire configure

This command will trigger a little setup wizard in the terminal where the CLI will authenticate with the Firebase console and then allow you to select the application you created and specify the target platform and any other additional information.

Once configured, a firebase_options.dart file will appear that contains all the options required for initialization. If you selected the application correctly, the service would have populated all the settings accordingly.

Implementing Firebase Authentication in Flutter

Moving on, let's create the views you'll need to allow the user to perform the authentication process.

First, let's create a directory under /lib called /views where we'll have our view class files. Once there, create a login.dart file and add the following code:


import 'package:firebase_auth/firebase_auth.dart';
import 'package:firebase_auth_app/views/register.dart';
import 'package:firebase_core/firebase_core.dart';
import 'package:flutter/material.dart';
import '../firebase_auth.dart';
import '../validator.dart';
import 'home.dart';
class LoginView extends StatefulWidget {
  const LoginView({Key? key}) : super(key: key);
  @override
  State<LoginView> createState() => _LoginViewState();
}
class _LoginViewState extends State<LoginView> {
  final _formKey = GlobalKey<FormState>();
  final _emailTextController = TextEditingController();
  final _passwordTextController = TextEditingController();
  Future<FirebaseApp> _initializeFirebase() async {
    FirebaseApp firebaseApp = await Firebase.initializeApp();
    User? user = FirebaseAuth.instance.currentUser;
    if (user != null) {
      Navigator.of(context).pushReplacement(
        MaterialPageRoute(
          builder: (context) => HomeView(
            user: user,
          ),
        ),
      );
    }
    return firebaseApp;
  }
  @override
  Widget build(BuildContext context) {
    return Scaffold(
      appBar: AppBar(
        title: const Text('Firebase Auth app'),
      ),
      body: FutureBuilder(
        future: _initializeFirebase(),
        builder: (context, snapshot) {
          if (snapshot.connectionState == ConnectionState.done) {
            return Padding(
                padding: const EdgeInsets.only(left: 24.0, right: 24.0),
                child: Form(
                  key: _formKey,
                  child: Column(
                    children: <Widget>[
                      TextFormField(
                        controller: _emailTextController,
                        validator: (value) =>
                            Validator.validateEmail(email: value),
                      ),
                      const SizedBox(height: 8.0),
                      TextFormField(
                        controller: _passwordTextController,
                        obscureText: true,
                        validator: (value) =>
                            Validator.validatePassword(password: value),
                      ),
                      const SizedBox(height: 20.0),
                      ElevatedButton(
                        onPressed: () async {
                          if (_formKey.currentState!.validate()) {
                            User? user =
                                await FireAuth.signInUsingEmailPassword(
                              email: _emailTextController.text,
                              password: _passwordTextController.text,
                            );
                            if (user != null) {
                              Navigator.of(context).pushReplacement(
                                MaterialPageRoute(
                                    builder: (context) => HomeView(user: user)),
                              );
                            } else {
                              print("THERE WAS AN ERROR!");
                              const AlertDialog(
                                  title: Text("There was an error!"));
                            }
                          }
                        },
                        child: const Text(
                          'Sign In',
                          style: TextStyle(color: Colors.white),
                        ),
                      ),
                      const SizedBox(height: 20.0),
                      ElevatedButton(
                        onPressed: () {
                          Navigator.of(context).push(
                            MaterialPageRoute(
                                builder: (context) => const RegisterView()),
                          );
                        },
                        child: const Text(
                          'Register',
                          style: TextStyle(color: Colors.white),
                        ),
                      ),
                    ],
                  ),
                ));
          }
          return const Center(
            child: CircularProgressIndicator(),
          );
        },
      ),
    );
  }
}

This code will add all the necessary components of a basic login form and some extra code that will handle the initialization of the Firebase service.

First, notice the _initializeFirebase async method, which will handle the Firebase.initializeApp() process. This code is needed to initialize and ready the service before we make any requests to it.

Additionally, notice that we've added a check to validate if a user has already been initialized in the application to prevent unnecessary requests to authenticate if the user is already authenticated.

Finally, notice that we've included a FireAuth class, which we've not defined yet, that handles the actual login process. Let's create that class now.

Firebase Auth

Create a file in the /lib directory called firebase_auth.dart and add the following code:


import 'package:firebase_auth/firebase_auth.dart';
class FireAuth {
  static Future<User?> registerUsingEmailPassword({
    required String name,
    required String email,
    required String password,
  }) async {
    FirebaseAuth auth = FirebaseAuth.instance;
    User? user;
    try {
      UserCredential userCredential = await auth.createUserWithEmailAndPassword(
        email: email,
        password: password,
      );
      user = userCredential.user;
      await user!.updateDisplayName(name);
      await user.reload();
      user = auth.currentUser;
    } catch (e) {
      print(e);
    }
    return user;
  }
  static Future<User?> signInUsingEmailPassword({
    required String email,
    required String password,
  }) async {
    FirebaseAuth auth = FirebaseAuth.instance;
    User? user;
    try {
      UserCredential userCredential = await auth.signInWithEmailAndPassword(
        email: email,
        password: password,
      );
      user = userCredential.user;
    } catch (e) {
      print(e);
    }
    return user;
  }
}

Here, we've defined two methods, one for login and another for registration. These methods are pretty straightforward, and you can adapt them to suit your needs. They simply make a request to the Firebase endpoint, provide the required data, and handle the result asynchronously.

Now, going back to the login view file, you might have noticed that there are references to a validation class. We have'nt created this class yet. So let's do that now.

Again, in the /lib directory, create a file called validator.dart and add the following code:


class Validator {
  static String? validateName({required String? name}) {
    if (name!.isEmpty) {
      return 'Name can\'t be empty';
    }
    return null;
  }
  static String? validateEmail({required String? email}) {
    RegExp emailRegExp = RegExp(
        r"^[a-zA-Z0-9.!#$%&'*+/=?^_`{|}~-]+@[a-zA-Z0-9](?:[a-zA-Z0-9-]{0,253}[a-zA-Z0-9])?(?:\.[a-zA-Z0-9](?:[a-zA-Z0-9-]{0,253}[a-zA-Z0-9])?)*$");
    if (email!.isEmpty) {
      return 'Email can\'t be empty';
    } else if (!emailRegExp.hasMatch(email)) {
      return 'Enter a correct email';
    }
    return null;
  }
  static String? validatePassword({required String? password}) {
    if (password!.isEmpty) {
      return 'Password can\'t be empty';
    } else if (password.length < 6) {
      return 'Enter a password with length at least 6';
    }
    return null;
  }
}

As you can see, this class contains simple validation methods to confirm that the user's inputed data is valid. Feel free to modify as needed.

Now, there are two more class view files to create. These are the register.dart and home.dart files. You can create them by adding the following code:


import 'package:firebase_auth/firebase_auth.dart';
import 'package:firebase_auth_app/views/home.dart';
import 'package:flutter/material.dart';
import '../firebase_auth.dart';
import '../validator.dart';
class RegisterView extends StatefulWidget {
  const RegisterView({Key? key}) : super(key: key);
  @override
  State<RegisterView> createState() => _RegisterViewState();
}
class _RegisterViewState extends State<RegisterView> {
  final _formKey = GlobalKey<FormState>();
  final _nameTextController = TextEditingController();
  final _emailTextController = TextEditingController();
  final _passwordTextController = TextEditingController();
  @override
  Widget build(BuildContext context) {
    return Scaffold(
        appBar: AppBar(
          title: const Text('Firebase Auth app'),
        ),
        body: Padding(
            padding: const EdgeInsets.only(left: 24.0, right: 24.0),
            child: Form(
              key: _formKey,
              child: Column(
                children: <Widget>[
                  TextFormField(
                    controller: _nameTextController,
                    validator: (value) => Validator.validateName(name: value),
                  ),
                  const SizedBox(height: 8.0),
                  TextFormField(
                    controller: _emailTextController,
                    validator: (value) => Validator.validateEmail(email: value),
                  ),
                  const SizedBox(height: 8.0),
                  TextFormField(
                    controller: _passwordTextController,
                    obscureText: true,
                    validator: (value) =>
                        Validator.validatePassword(password: value),
                  ),
                  const SizedBox(height: 20.0),
                  ElevatedButton(
                    onPressed: () async {
                      if (_formKey.currentState!.validate()) {
                        User? user = await FireAuth.registerUsingEmailPassword(
                          name: _nameTextController.text,
                          email: _emailTextController.text,
                          password: _passwordTextController.text,
                        );
                        if (user != null) {
                          Navigator.of(context).pushAndRemoveUntil(
                            MaterialPageRoute(
                              builder: (context) => HomeView(user: user),
                            ),
                            ModalRoute.withName('/'),
                          );
                        } else {
                          print("THERE WAS AN ERROR!");
                          const AlertDialog(title: Text("There was an error!"));
                        }
                      }
                    },
                    child: const Text(
                      'Sign Up',
                      style: TextStyle(color: Colors.white),
                    ),
                  ),
                ],
              ),
            )));
  }
}

If you've been seeing issues with files missing in the login class, they should disappear now.

The register class contains basically the same fields as the login class but adds the name field. The home class, which receives a user object, merely displays the user's status and name. You can adapt this code to fit your needs.

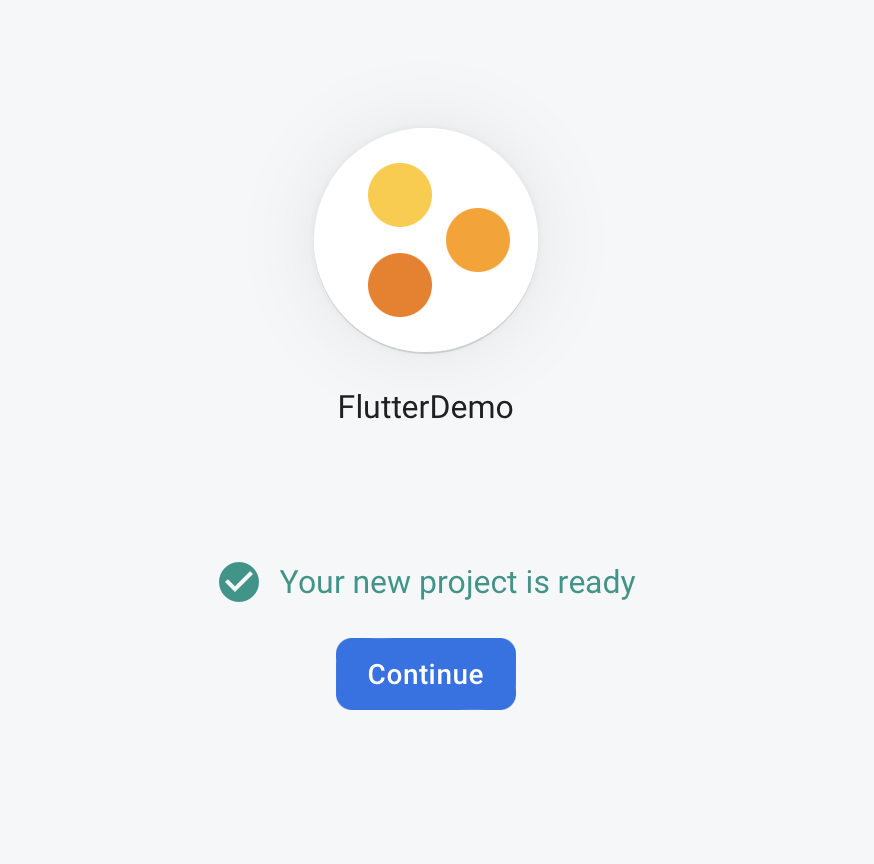
Once you've added the code to these classes, you can run the code and test the authentication process.

firebase auth app

Congratulations, you've successfully implemented a Firebase Authentication mechanism in Flutter.

firebase pull quote

Conclusion

Now that you've implemented a robust and reliable authentication mechanism in your Flutter app, it's essential to make sure you've considered all possible scenarios that could affect the user experience. Remember, the authentication mechanism is only as reliable as the integration implementation.

To avoid any unwanted headaches for your team and your users, it's essential to use solid and reliable no-code testing solutions like Waldo's view test suite. With it, you can ensure that all the views in your application respond as expected and that your users get the best experience possible. Check it out here.

Automated E2E tests for your mobile app

Waldo provides the best-in-class runtime for all your mobile testing needs.
Get true E2E testing in minutes, not months.

Reproduce, capture, and share bugs fast!

Waldo Sessions helps mobile teams reproduce bugs, while compiling detailed bug reports in real time.